
And finally, Wookie's 82 begins !
- Injected
-
- Offline
- User
-

Registered
- Posts: 1696
- Thanks: 1201
Re: And finally, Wookie's 82 begins !
09 Nov 2025 16:27
Sounds like you had just the right conditions.
I also have about a 10c temp differential in my garage during Winter, so my painting cutoff was a few weeks ago. Only issue here is it can get down to around -15C by Christmas.
I also have about a 10c temp differential in my garage during Winter, so my painting cutoff was a few weeks ago. Only issue here is it can get down to around -15C by Christmas.
1978 KZ650B2 w 1197cc Z1 engine
1977 KZ650B1 w 750cc Spectre engine
1979 KZ650C3 w 831cc Hot Rod engine
1978 KZ650C2 w 762cc DFI project
1977 KZ650C1 stock restoration project
1978 KZ650B2 modified project
1978 KZ650B2 Injected Drag 831cc
1980 Z1 Custom Frame Drag 1327cc
1981 Z50R Honda tow bike
1977 KZ650B1 w 750cc Spectre engine
1979 KZ650C3 w 831cc Hot Rod engine
1978 KZ650C2 w 762cc DFI project
1977 KZ650C1 stock restoration project
1978 KZ650B2 modified project
1978 KZ650B2 Injected Drag 831cc
1980 Z1 Custom Frame Drag 1327cc
1981 Z50R Honda tow bike
The following user(s) said Thank You: Wookie58
Please Log in or Create an account to join the conversation.
- Wookie58
-
 Topic Author
- Away
- Moderator
-

Registered
- Posts: 6479
- Thanks: 4081
Re: And finally, Wookie's 82 begins !
10 Nov 2025 00:05The de-humidifier was the "game changer" - I ended up leaving it on 24/7 until the clear was on to seal the basecoat. When it got cold and damp over night the surface of the basecoat was sticky again the next morning without it. I went with water based because I wanted to reduce my exposure to the isocyanates in 2K (can't afford an air fed mask set-up) but it is a fight this late in the year depending on the weather where you are in the (would definitely be a fight in Canada I guess)Sounds like you had just the right conditions.
I also have about a 10c temp differential in my garage during Winter, so my painting cutoff was a few weeks ago. Only issue here is it can get down to around -15C by Christmas.
1982 KZ1000 Ltd
www.kzrider.com/forum/11-projects/617631...-82-begins?start=192
kzrider.com/filebase-alias?view=download...d-fault-diagnosis&ca
www.kzrider.com/forum/11-projects/617631...-82-begins?start=192
kzrider.com/filebase-alias?view=download...d-fault-diagnosis&ca
Please Log in or Create an account to join the conversation.
- Wookie58
-
Topic Author
- Away
- Moderator
-
Registered
- Posts: 6479
- Thanks: 4081
Re: And finally, Wookie's 82 begins !
08 Dec 2025 11:09
Well since my last post it has definitely been a few weeks of "one pace forward and ten paces backwards" !!! First was the tank, as I mentioned there were several inclusions in the clearcoat which I intended to flat and buff out
 which was going well until one of the said inclusions broke loose exposing the white basecoat under the grey
 . So after more flatting I repainted the grey section of the tank followed by several coats of clear so that I could sand out any indiscretions without breaking through. Happily that went to plan and the finish is way better now than before
 ")
Next came the decals !!!!!!!!!! firstly I want to give a huge shout out to member "HowardHB" who did a fantastic job of CAD modelling my design and writing the print files (idea shamelessly plagiarised from Stereordinary and Docrot) but with a Wookie twist. Also thanks go to a work colleague's husband who printed them at his workplace. The plan was to heat and bend them to the shape of the tank which went well with no issues, then to have them chromed and overpaint the colours. This was the first hurdle, the only company that came back to me with a quote for chroming nearly knocked me off my chair !!!! £270 +VAT plus shipping (that's about $400) "oh and by the way, this is a decorative finish not intended to be used outside. It "may be OK" if you clearcoat with 2k, we can do that for an additional charge". Well as you can imagine that was never going to fly with a cheap Wookie (even if they guaranteed it would last forever) And so the trial of endurance began with painting the decals
1. Painted with textured finish black base - tried to mask the areas that are black for the chrome spray. After about 6 hours I decided that the clear tape that I had just wasn't going to work
2. Spayed the whole decals with "chrome paint" then attempted to overpaint the colours (tried car touch up paint and Humbrol modellers enamels - both dissolved the chrome and mixed into metallic black and red !!!!!!
3. After washing all the paint off again in thinners I repainted the chrome then applied 2k clear to act as a barrier to the colours - The clear dissolved the chrome and turned it a "dull grey"
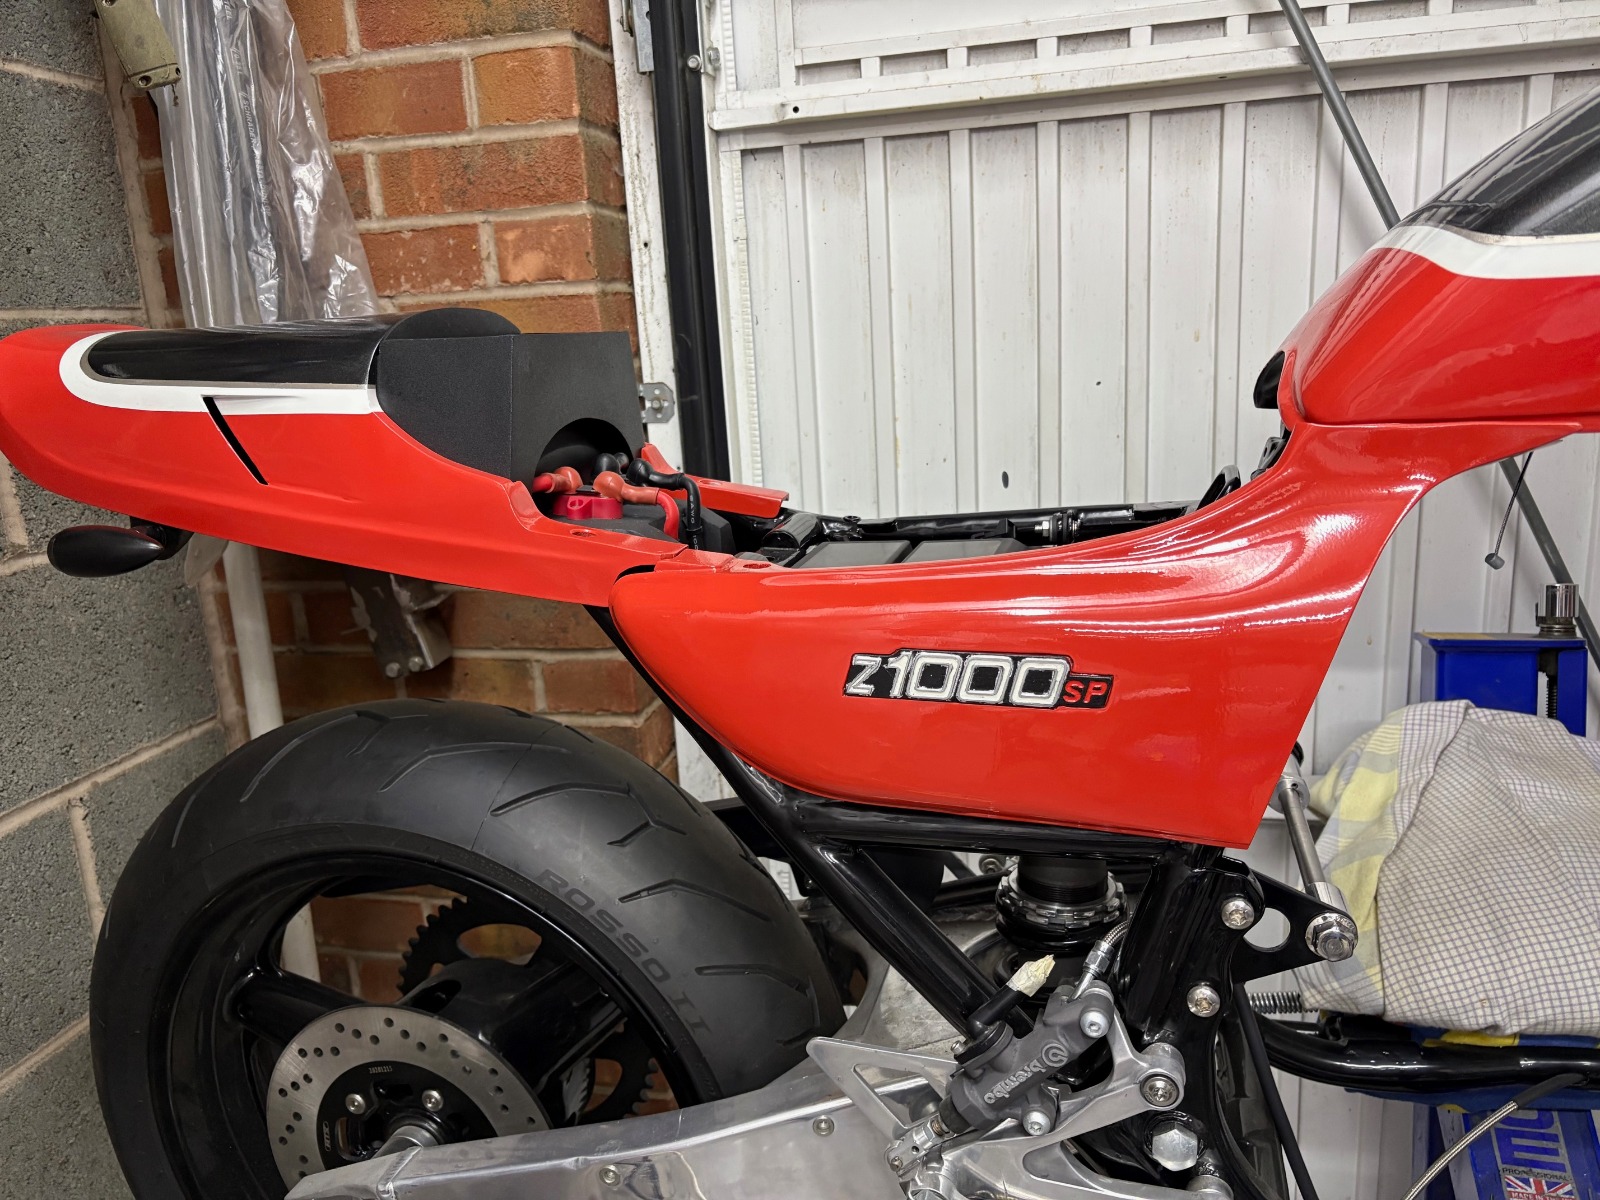
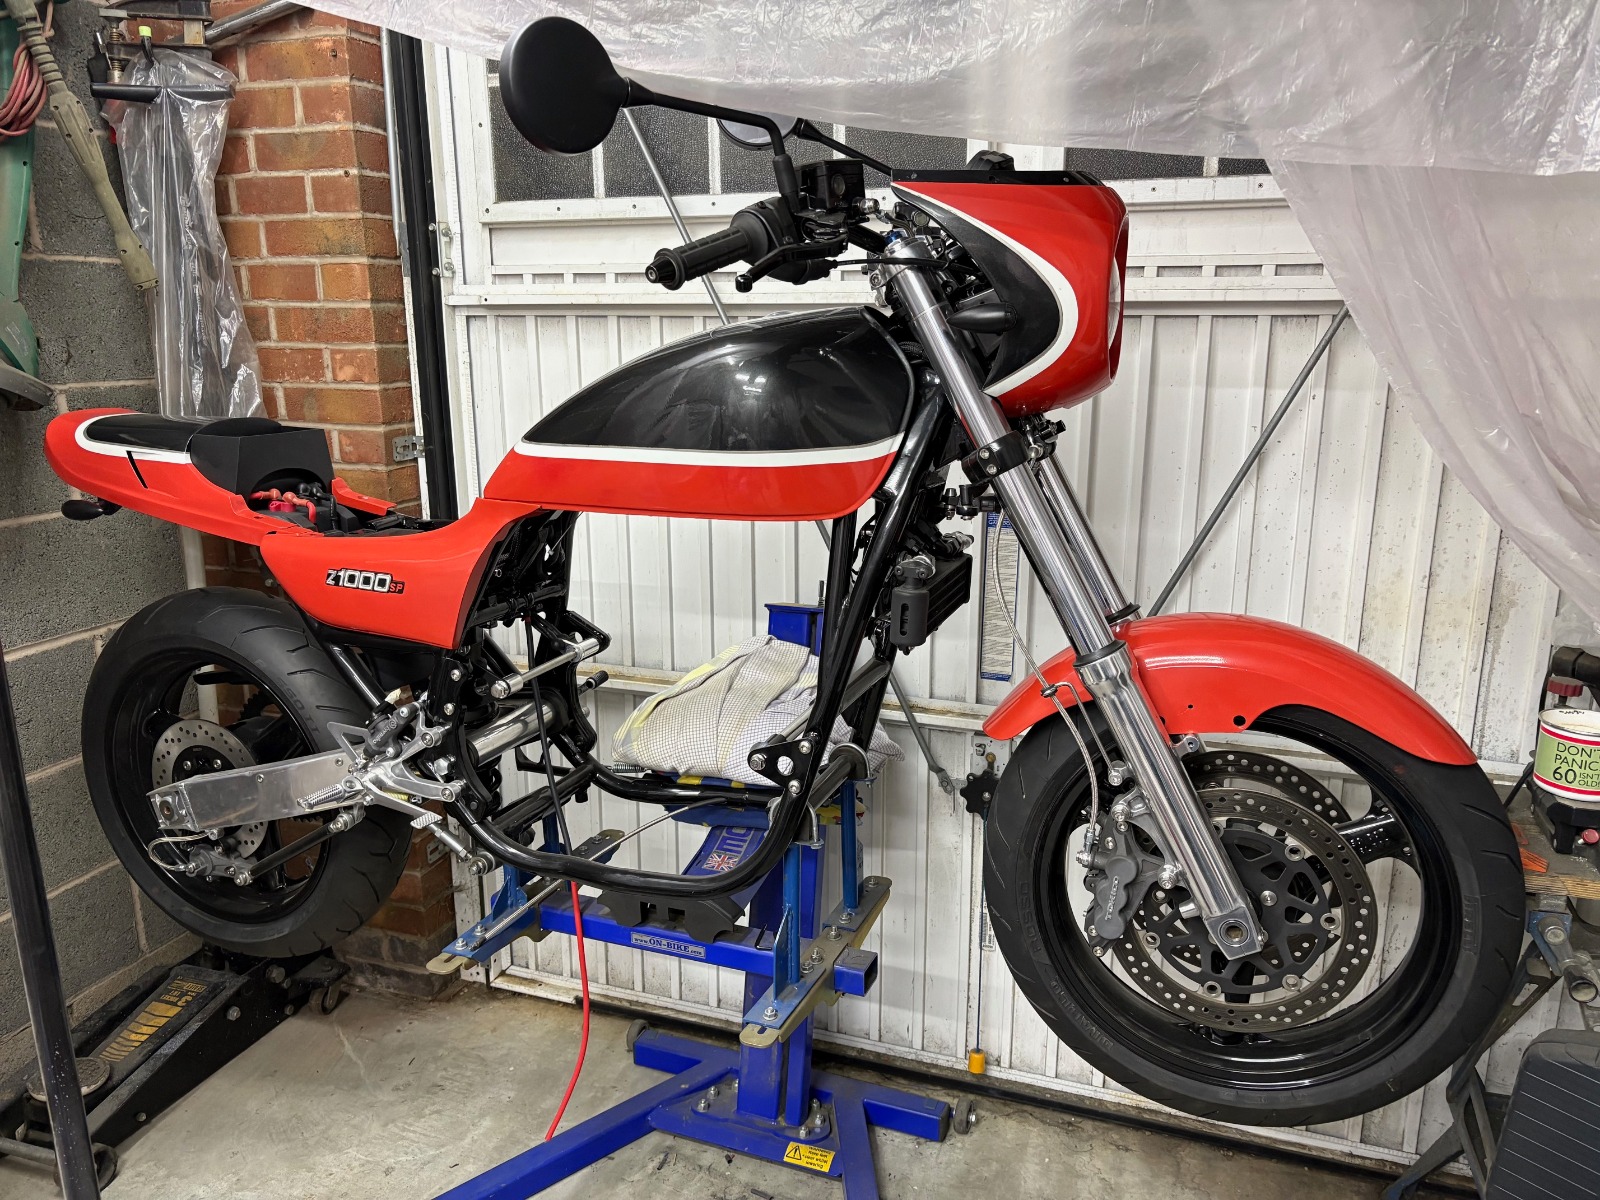
4. And so to the most recent attempt - painted all the colours, applied clearcoat and allowed to cure. Spent another 6 hours masking with some different tape then applied the chrome. I have gone back to it today as I couldn't remove the tape last night as the chrome was too soft. This is the best so far (pics below) however there has been some bleeding under the tape and some adhesive from the tape left behind (this would normally come off with some panel wipe but I don't dare go near them at the moment with that !!!! I have now brought them inside for a few days in the hope that when fully cured I will be able to "touch up" the black and white (I have emailed the manufacturer of the chrome paint for some guidance) And I guess that's that until after the holidays. I couldn't resist hanging the bodywork on the get an idea of what it will be like when finished. This has really been uplifting as I start to feel like it will get finished in a few months ready for the spring
I am sure there will be many opinions about the "SP" designation but I wanted something unique and I figured factory SP models have more power, less weight, better chassis, better brakes etc. This should tick all those boxes hopefully

Next came the decals !!!!!!!!!! firstly I want to give a huge shout out to member "HowardHB" who did a fantastic job of CAD modelling my design and writing the print files (idea shamelessly plagiarised from Stereordinary and Docrot) but with a Wookie twist. Also thanks go to a work colleague's husband who printed them at his workplace. The plan was to heat and bend them to the shape of the tank which went well with no issues, then to have them chromed and overpaint the colours. This was the first hurdle, the only company that came back to me with a quote for chroming nearly knocked me off my chair !!!! £270 +VAT plus shipping (that's about $400) "oh and by the way, this is a decorative finish not intended to be used outside. It "may be OK" if you clearcoat with 2k, we can do that for an additional charge". Well as you can imagine that was never going to fly with a cheap Wookie (even if they guaranteed it would last forever) And so the trial of endurance began with painting the decals
1. Painted with textured finish black base - tried to mask the areas that are black for the chrome spray. After about 6 hours I decided that the clear tape that I had just wasn't going to work
2. Spayed the whole decals with "chrome paint" then attempted to overpaint the colours (tried car touch up paint and Humbrol modellers enamels - both dissolved the chrome and mixed into metallic black and red !!!!!!
3. After washing all the paint off again in thinners I repainted the chrome then applied 2k clear to act as a barrier to the colours - The clear dissolved the chrome and turned it a "dull grey"
4. And so to the most recent attempt - painted all the colours, applied clearcoat and allowed to cure. Spent another 6 hours masking with some different tape then applied the chrome. I have gone back to it today as I couldn't remove the tape last night as the chrome was too soft. This is the best so far (pics below) however there has been some bleeding under the tape and some adhesive from the tape left behind (this would normally come off with some panel wipe but I don't dare go near them at the moment with that !!!! I have now brought them inside for a few days in the hope that when fully cured I will be able to "touch up" the black and white (I have emailed the manufacturer of the chrome paint for some guidance) And I guess that's that until after the holidays. I couldn't resist hanging the bodywork on the get an idea of what it will be like when finished. This has really been uplifting as I start to feel like it will get finished in a few months ready for the spring
I am sure there will be many opinions about the "SP" designation but I wanted something unique and I figured factory SP models have more power, less weight, better chassis, better brakes etc. This should tick all those boxes hopefully
1982 KZ1000 Ltd
www.kzrider.com/forum/11-projects/617631...-82-begins?start=192
kzrider.com/filebase-alias?view=download...d-fault-diagnosis&ca
www.kzrider.com/forum/11-projects/617631...-82-begins?start=192
kzrider.com/filebase-alias?view=download...d-fault-diagnosis&ca
The following user(s) said Thank You: Mcdroid, rstnick, Injected, ThatGPzGuy, MFP-Joe, sf4t7, Stereordinary, Quofan and 1 other people also said thanks.
Please Log in or Create an account to join the conversation.
- Stereordinary
-

- Offline
- User
-
Registered
- Posts: 473
- Thanks: 190
Re: And finally, Wookie's 82 begins !
08 Dec 2025 14:11
VERY cool! Looking sharp!
A breeze from the west.
‘90 Kawasaki ZR550 Zephyr (engine rebuild post-blowup in progress)
‘11 Triumph Daytona 675 SE (daily)
‘96 Triumph Trident 900 (for sale)
‘09 Triumph Street Triple R (project)
‘90 Kawasaki ZR550 Zephyr (engine rebuild post-blowup in progress)
‘11 Triumph Daytona 675 SE (daily)
‘96 Triumph Trident 900 (for sale)
‘09 Triumph Street Triple R (project)
The following user(s) said Thank You: Wookie58
Please Log in or Create an account to join the conversation.
- Wookie58
-
Topic Author
- Away
- Moderator
-
Registered
- Posts: 6479
- Thanks: 4081
Re: And finally, Wookie's 82 begins !
31 Dec 2025 13:02
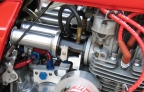
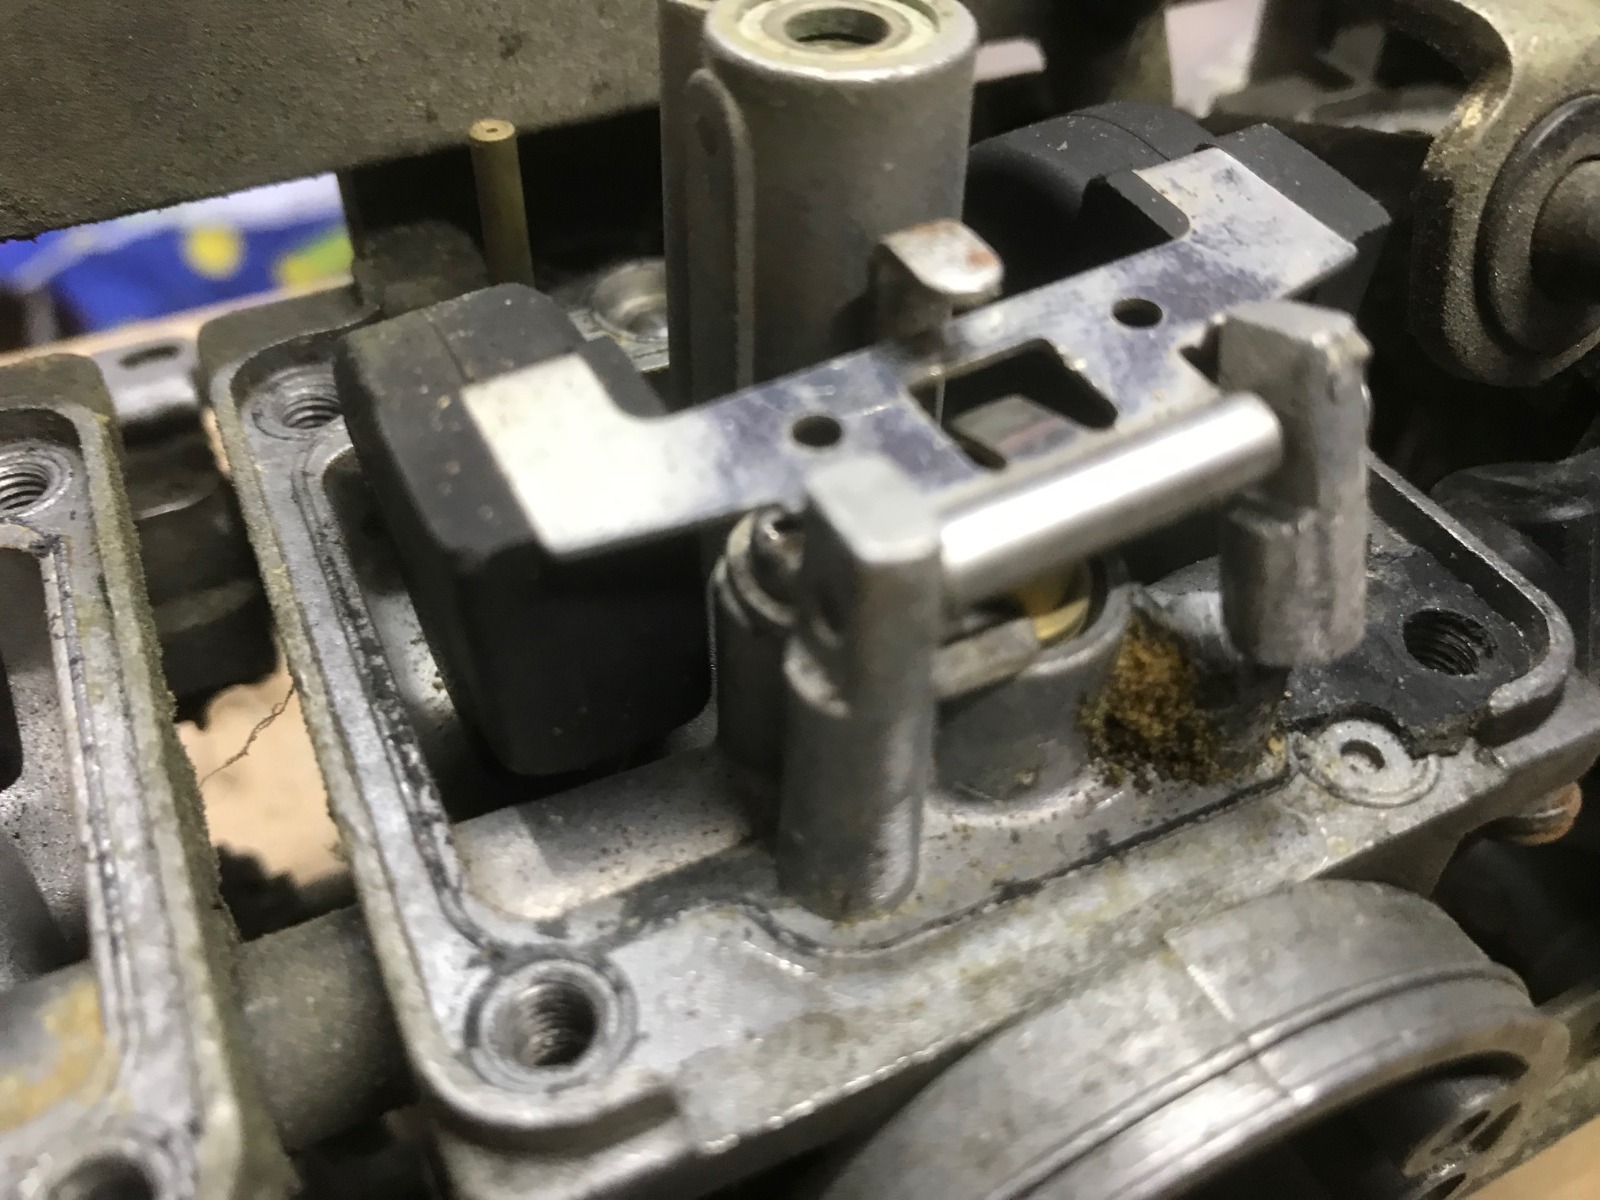
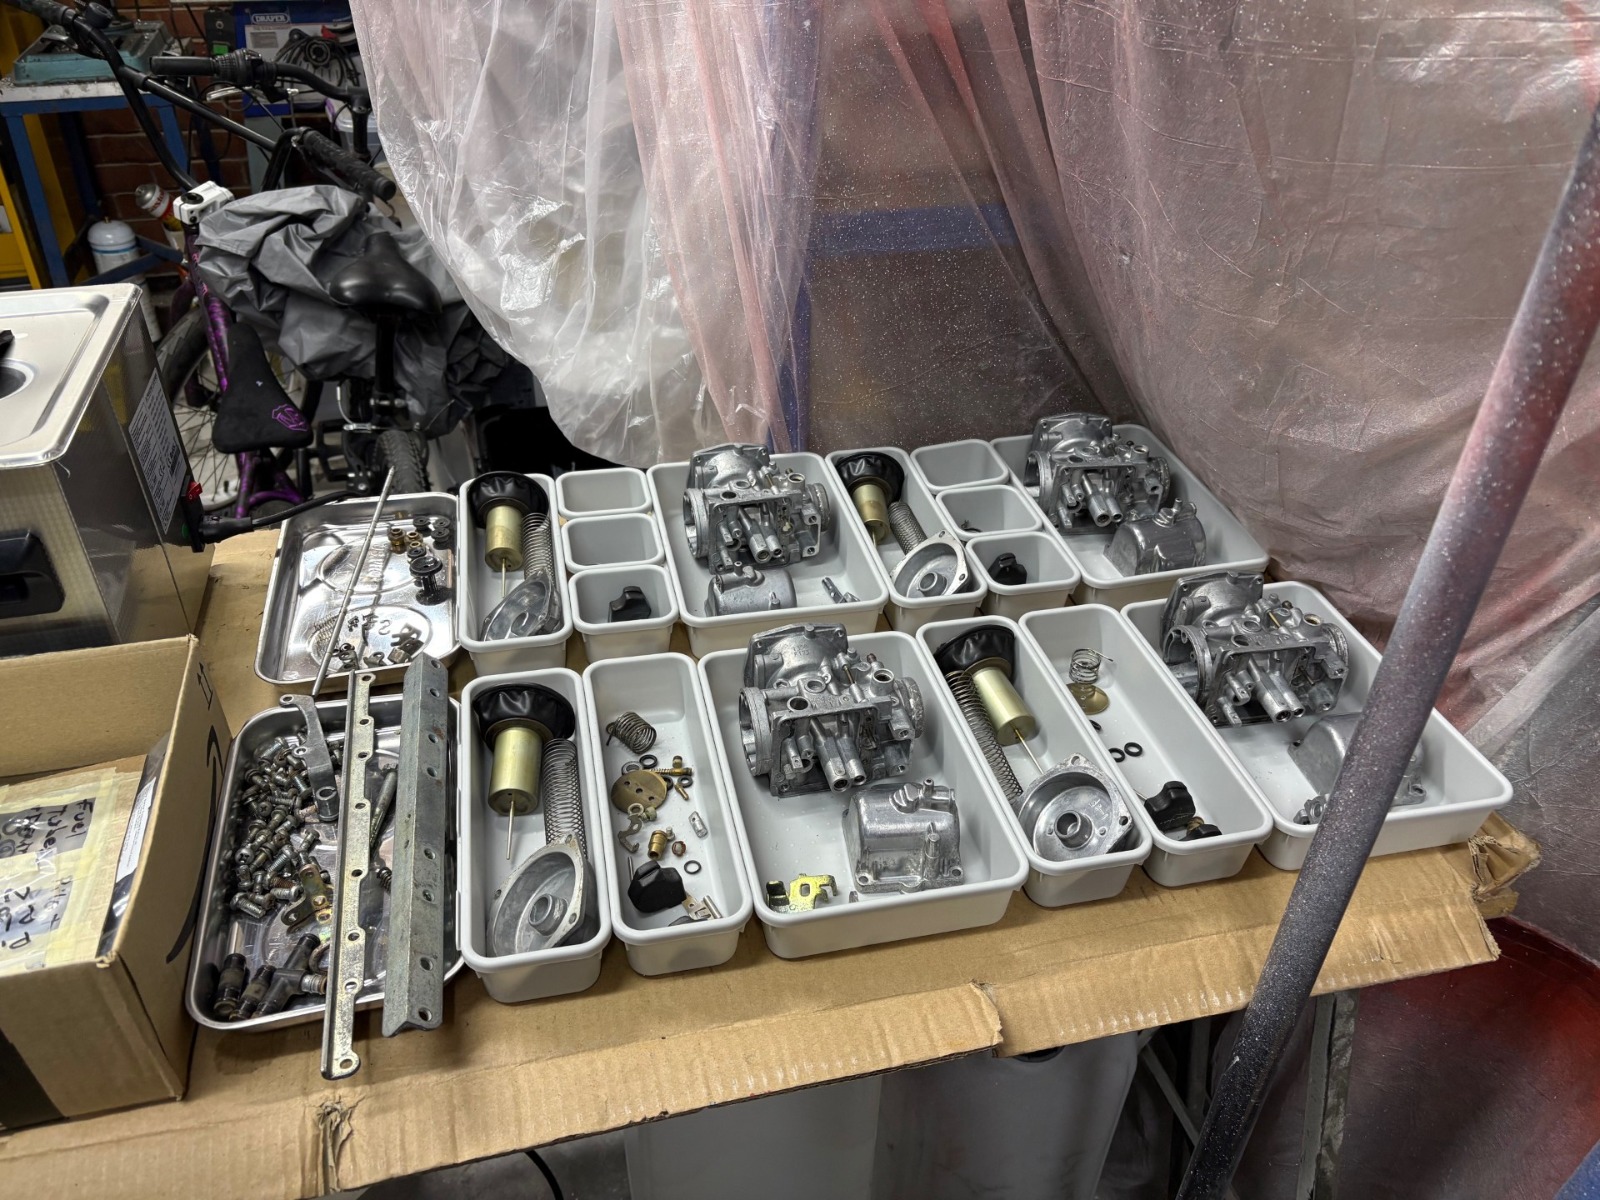
I've decided to take a little break from the decals as they are "driving me nuts" also it was too cold here to do fine detail work (1 degree today) so I have made a start on the carbs. This project really is "the gift that keeps giving" !!! disassembly was quite straightforward until I pulled the float bowl on #3 and found a broken float tower
 and also I had to drill one of the butterfly screws out of #4 throttle flap (no amount of heat and lube would free it so I'm guessing somebody was over enthusiastic when they "staked" it. I think I can repair the tower but hopefully when Carlos gets back to Spain from the US at the weekend he will have a #2 or #3 body and a #4 throttle shaft that are serviceable in the scrap set of carbs from his Ltd project. In the meantime there is plenty of cleaning, plating and polishing to keep me out of trouble
1982 KZ1000 Ltd
www.kzrider.com/forum/11-projects/617631...-82-begins?start=192
kzrider.com/filebase-alias?view=download...d-fault-diagnosis&ca
www.kzrider.com/forum/11-projects/617631...-82-begins?start=192
kzrider.com/filebase-alias?view=download...d-fault-diagnosis&ca
Please Log in or Create an account to join the conversation.
- gd4now
-
- Offline
- User
-
Registered
- Denco where did you go?
- Posts: 1691
- Thanks: 683
Re: And finally, Wookie's 82 begins !
31 Dec 2025 13:54
Regarding the float tower repair you may find these links of interest.
kzrider.com/forum/forum-index/21-tools/6...ggy-weld-carb-repair
www.kzrider.com/forum/3-carburetor/61446...-post-repair?start=0
www.muggyweld.com/knowledge-center/#pot-metal
kzrider.com/forum/forum-index/21-tools/6...ggy-weld-carb-repair
www.kzrider.com/forum/3-carburetor/61446...-post-repair?start=0
www.muggyweld.com/knowledge-center/#pot-metal
1977 KZ650 B1
Pods and Denco header
OLD KAW OWNERS SMILE ALOT
Pods and Denco header
OLD KAW OWNERS SMILE ALOT
The following user(s) said Thank You: Wookie58
Please Log in or Create an account to join the conversation.
- Nessism
-

- Offline
- Sustaining Member
-

Registered
- Posts: 8115
- Thanks: 3495
Re: And finally, Wookie's 82 begins !
31 Dec 2025 14:20
BS carb bodies are aluminum. VM's are zinc, sometimes denoted "pot metal".
There is a guy in the US that laser welds broken float posts, so it is doable. Not cheap, though. I'd be looking for a new carb body for this one.
There is a guy in the US that laser welds broken float posts, so it is doable. Not cheap, though. I'd be looking for a new carb body for this one.
Ed
Carb O-ring Kits : www.kzrider.com/forum/14-vendor-forum/62...rburetor-o-ring-kits
www.kzrider.com/forum/faq-wiki/618026-new-owner-things-to-know
1981 KZ750E2
www.kzrider.com/forum/11-projects/604901...z750e-project-thread
Carb O-ring Kits : www.kzrider.com/forum/14-vendor-forum/62...rburetor-o-ring-kits
www.kzrider.com/forum/faq-wiki/618026-new-owner-things-to-know
1981 KZ750E2
www.kzrider.com/forum/11-projects/604901...z750e-project-thread
The following user(s) said Thank You: Wookie58
Please Log in or Create an account to join the conversation.
- Wookie58
-
Topic Author
- Away
- Moderator
-
Registered
- Posts: 6479
- Thanks: 4081
Re: And finally, Wookie's 82 begins !
31 Dec 2025 15:45Hopefully Carlos will come through for meBS carb bodies are aluminum. VM's are zinc, sometimes denoted "pot metal".
There is a guy in the US that laser welds broken float posts, so it is doable. Not cheap, though. I'd be looking for a new carb body for this one.
1982 KZ1000 Ltd
www.kzrider.com/forum/11-projects/617631...-82-begins?start=192
kzrider.com/filebase-alias?view=download...d-fault-diagnosis&ca
www.kzrider.com/forum/11-projects/617631...-82-begins?start=192
kzrider.com/filebase-alias?view=download...d-fault-diagnosis&ca
Please Log in or Create an account to join the conversation.
- Nessism
-
- Offline
- Sustaining Member
-
Registered
- Posts: 8115
- Thanks: 3495
Re: And finally, Wookie's 82 begins !
31 Dec 2025 17:49
BTW, the photo showing the broken post, also shows the tang on the float angled down sharply. This indicates a problem. Maybe the person did that because the post was jacked?
Angling the tang down a little is okay, but just a little. If you get high fuel level when setup this way, something else is wrong.
Angling the tang down a little is okay, but just a little. If you get high fuel level when setup this way, something else is wrong.
Ed
Carb O-ring Kits : www.kzrider.com/forum/14-vendor-forum/62...rburetor-o-ring-kits
www.kzrider.com/forum/faq-wiki/618026-new-owner-things-to-know
1981 KZ750E2
www.kzrider.com/forum/11-projects/604901...z750e-project-thread
Carb O-ring Kits : www.kzrider.com/forum/14-vendor-forum/62...rburetor-o-ring-kits
www.kzrider.com/forum/faq-wiki/618026-new-owner-things-to-know
1981 KZ750E2
www.kzrider.com/forum/11-projects/604901...z750e-project-thread
The following user(s) said Thank You: sf4t7, SWest, Wookie58
Please Log in or Create an account to join the conversation.
- Quofan
-
- Offline
- User
-
Registered
- Posts: 15
- Thanks: 14
Re: And finally, Wookie's 82 begins !
01 Jan 2026 17:32
Guy, with regards to the badges, have you thought of maybe having them enamelled, by a badge company maybe?
Please Log in or Create an account to join the conversation.
- Wookie58
-
Topic Author
- Away
- Moderator
-
Registered
- Posts: 6479
- Thanks: 4081
Re: And finally, Wookie's 82 begins !
02 Jan 2026 02:29Thanks buddy, the issue with enamelling is (as I understand it) it involves heat to "flow" the enamel. These are 3D printed in a plastic that starts to melt at 60 Degree's, the biggest issue has been the chrome paint that "doesn't play well with others". However having spoken to the manufacturer it appears that "full cure" takes 1 to 2 weeks (not the 24hrs it says on the can) I have found that leaving it for a week on the window sill above a radiator has made it much more forgiving to work with. It would have been much easier to do if they were "plastic chromed" but the price I was quoted was ridiculous, still I think we are getting there nowGuy, with regards to the badges, have you thought of maybe having them enamelled, by a badge company maybe?
1982 KZ1000 Ltd
www.kzrider.com/forum/11-projects/617631...-82-begins?start=192
kzrider.com/filebase-alias?view=download...d-fault-diagnosis&ca
www.kzrider.com/forum/11-projects/617631...-82-begins?start=192
kzrider.com/filebase-alias?view=download...d-fault-diagnosis&ca
The following user(s) said Thank You: Quofan
Please Log in or Create an account to join the conversation.
- Quofan
-
- Offline
- User
-
Registered
- Posts: 15
- Thanks: 14
Re: And finally, Wookie's 82 begins !
02 Jan 2026 05:23
Ah yes, that would be a problem being plastic
 . I'd assumed they were metal. Hopefully leaving them for a few weeks will allow the silver to cure sufficiently.
There is, of course, cold enamelling which is basically resin with a pigment.
There is, of course, cold enamelling which is basically resin with a pigment.
The following user(s) said Thank You: Wookie58
Please Log in or Create an account to join the conversation.
Moderators: Street Fighter LTD