
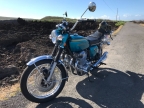
1973 Z1 Maui
- slmjim+Z1BEBE
-

- Away
- User
-

Registered
- Enjoy Life! IT HAS AN EXPIRATION DATE!
- Posts: 1464
- Thanks: 963
Re: 1973 Z1 Maui
16 Aug 2021 07:44
MauiZ1 wrote:
"The front hub was a treat. Kawasaki does not leave access to the back of the outer races so you have to break out a sharp edged hard tool (screwdriver) to pound on the spacer with. Then, after the spacer is out you have to clean up the mess."
If the hub is separated from the rim, it's much gentler to use a press. Hammering can cause the soft metal of the spacer to mushroom, effectively shortening it. We looked in the parts manual & there is no length spec'd for the spacer for reference.
About the head nuts:
Manufacturing tolerances caused the studs to bottom in the short nuts in rare cases. The taller nuts solved that.
If you still have the head gaskets you removed, an estimate of clearance can be had by temoprarily assembling the top end using a new base gasket and the old head gaskets, then just snugging the head with regular hex nuts. Measure the height of the exposed studs with a good caliper, then measure the depth of the nuts. Don't forget there will be the copper washers under the nuts if you don't use them for evaluation during this process. That should result in a reasonable estimation of how close the nuts would be to bottoming. If too close, studs can be shortened a few thou by grinding without significantly compromising the number of engaged threads. It won't take much. Wer've only had to trim one stud among the 64 we'vedealt with on earlier Z1's & short nuts. A giveaway that a nut is bottoming on a stud while being torqued (we use a dial wrench) is that torque will spike very suddenly when bottoming occurrs. We've heard of doubling up on the copper washers to prevent bottoming but don't support that solution.
When we reserructed The Wounded Z, we had to reuse the short nuts, as they are very difficult to find at anything like a reasonable price in decent condition. We had to have them rechromed because they were too badly rusted to be acceptable. They installed fine on the original studs, with an average of .025" or so to spare.
Good Ridin'
slmjim & Z1BEBE
A biker looks at your engine and chrome.
A Rider looks at your odometer and tags.
1973 ('72 builds) Z1 x2
1974 Z1-A x2
1975 Z1-B x2
1993 CB 750 Nighthawk x2
2009 ST1300A
www.kawasaki-z-classik.com
A Forum tightly focused on all things Z1 and Z2.
A Rider looks at your odometer and tags.
1973 ('72 builds) Z1 x2
1974 Z1-A x2
1975 Z1-B x2
1993 CB 750 Nighthawk x2
2009 ST1300A
www.kawasaki-z-classik.com
A Forum tightly focused on all things Z1 and Z2.
Please Log in or Create an account to join the conversation.
- hardrockminer
-

- Offline
- Sustaining Member
-

Registered
- Posts: 3127
- Thanks: 1234
Re: 1973 Z1 Maui
16 Aug 2021 16:29 - 16 Aug 2021 16:31
Did you mention earlier that the head was decked?
One possible solution is to use the taller top hats on the inner head studs where they can't be seen and use short ones on the outside where they are visible.
One possible solution is to use the taller top hats on the inner head studs where they can't be seen and use short ones on the outside where they are visible.
I have several restored bikes along with a 2006 Goldwing with a sidecar.
Last edit: 16 Aug 2021 16:31 by hardrockminer.
The following user(s) said Thank You: slmjim+Z1BEBE
Please Log in or Create an account to join the conversation.
- MauiZ1
-
 Topic Author
- Offline
- User
-
Registered
- Posts: 235
- Thanks: 25
Re: 1973 Z1 Maui
17 Aug 2021 08:21
I'm going to do Slimjim's method of measuring the stud standout using my old head gasket to see how it looks, then I'll make a decision. If it's just a matter of shaving the end of the studs that seems like the thing to do to preserve the look.
I removed the exhaust studs yesterday, happily it went well. Two were bent already, one just needed a little heat.
I removed the exhaust studs yesterday, happily it went well. Two were bent already, one just needed a little heat.
Please Log in or Create an account to join the conversation.
- MauiZ1
-
Topic Author
- Offline
- User
-
Registered
- Posts: 235
- Thanks: 25
Re: 1973 Z1 Maui
17 Aug 2021 14:36
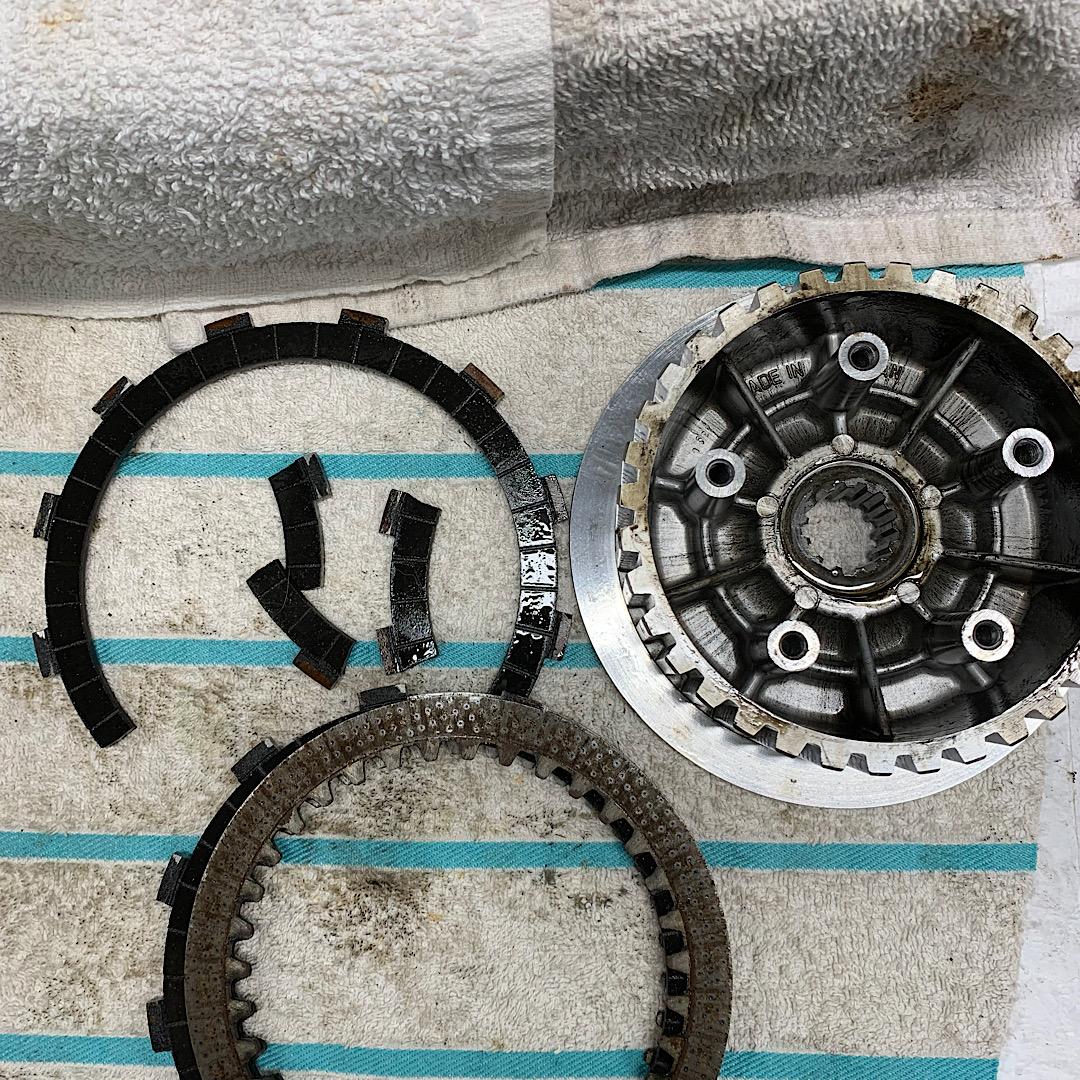
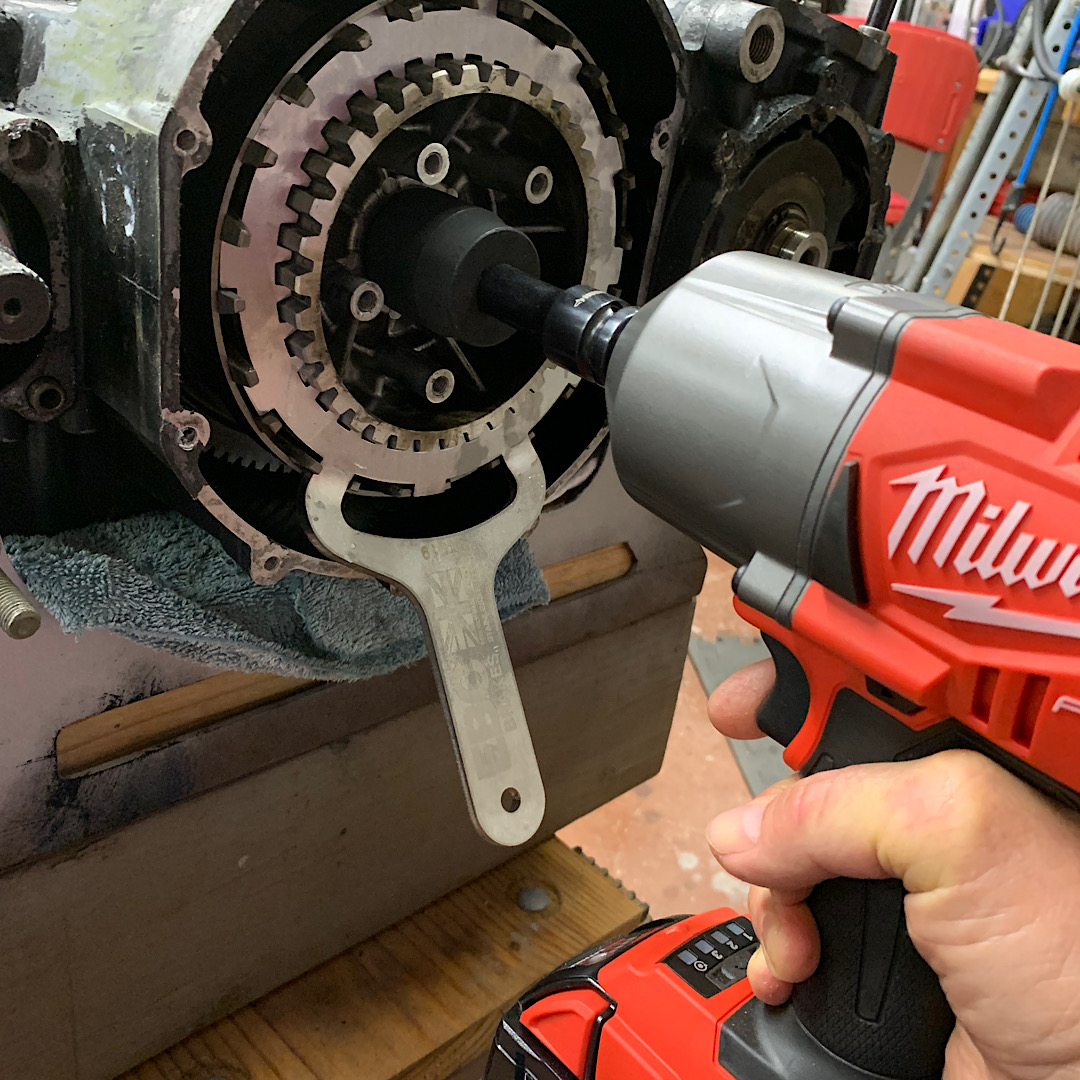
So today I finished removing the clutch after receiving the holding tool and buying a 30mm socket. I still had a few plates in it which gave me a surprise. First the tool. It is an EBC product that fit nicely but did not really go down over the basket due to the straight handle. I decided to bend it which worked perfectly. A few blips with the impact gun and off it came. It turned it over on the bench and out fell some pieces of clutch plate.
When I bought the bike I didn’t think I should actually ride it and I’m glad I didn’t. I’m not sure what would happen if I ran it with a disintegrated clutch plate.
Stock clutch pack and springs is what is going back in, it had heavy springs for some reason.
When I bought the bike I didn’t think I should actually ride it and I’m glad I didn’t. I’m not sure what would happen if I ran it with a disintegrated clutch plate.
Stock clutch pack and springs is what is going back in, it had heavy springs for some reason.
Please Log in or Create an account to join the conversation.
- hardrockminer
-
- Offline
- Sustaining Member
-
Registered
- Posts: 3127
- Thanks: 1234
Re: 1973 Z1 Maui
18 Aug 2021 05:07
The 650 I'm currently working on had two broken friction plates. The engine had been "totally rebuilt" by the PO, who was a ticket diesel mechanic.
I have several restored bikes along with a 2006 Goldwing with a sidecar.
Please Log in or Create an account to join the conversation.
- slmjim+Z1BEBE
-
- Away
- User
-
Registered
- Enjoy Life! IT HAS AN EXPIRATION DATE!
- Posts: 1464
- Thanks: 963
Re: 1973 Z1 Maui
18 Aug 2021 05:46That';s a very good point. We missed that completely.hardrockminer post=853911Did you mention earlier that the head was decked?
One possible solution is to use the taller top hats on the inner head studs where they can't be seen and use short ones on the outside where they are visible.

Decking the head would make it more likely for studs bottom in the short nuts.
Good Ridin'
slmjim & Z1BEBE
A biker looks at your engine and chrome.
A Rider looks at your odometer and tags.
1973 ('72 builds) Z1 x2
1974 Z1-A x2
1975 Z1-B x2
1993 CB 750 Nighthawk x2
2009 ST1300A
www.kawasaki-z-classik.com
A Forum tightly focused on all things Z1 and Z2.
A Rider looks at your odometer and tags.
1973 ('72 builds) Z1 x2
1974 Z1-A x2
1975 Z1-B x2
1993 CB 750 Nighthawk x2
2009 ST1300A
www.kawasaki-z-classik.com
A Forum tightly focused on all things Z1 and Z2.
Please Log in or Create an account to join the conversation.
- MauiZ1
-
Topic Author
- Offline
- User
-
Registered
- Posts: 235
- Thanks: 25
Re: 1973 Z1 Maui
18 Aug 2021 13:23
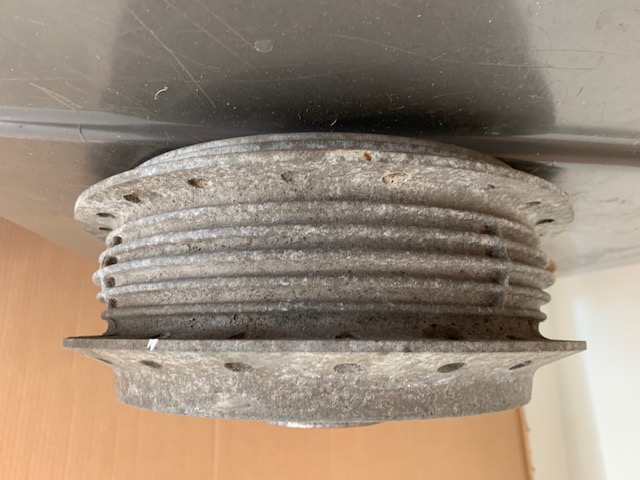
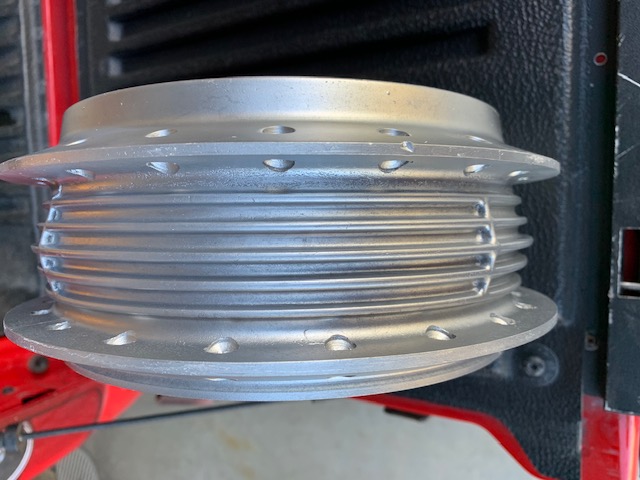
Spent some quality time cleaning up the heavily painted rear hub. It took most of the afternoon but it's coming along. The task now is to get it clean enough for a little clear coat to slow down corrosion. I'm finding that the texture in the surface hides a lot of black residue. I'm going to try the pressure washer and then the ultrasonic with a weak Dawn dish soap solution. Can't use Simple Green, it will cause the alloy to darken. Cleaning and polishing is really the big time element for this kind of project. I included a photo of the polished bright stuff from my K3 750 project of a few years ago.
Please Log in or Create an account to join the conversation.
- MauiZ1
-
Topic Author
- Offline
- User
-
Registered
- Posts: 235
- Thanks: 25
Please Log in or Create an account to join the conversation.
- hardrockminer
-
- Offline
- Sustaining Member
-
Registered
- Posts: 3127
- Thanks: 1234
Re: 1973 Z1 Maui
19 Aug 2021 04:49
It's too bad there is no one doing aqua or vapour blast on the islands. It makes all that cleaning so much easier.
I have several restored bikes along with a 2006 Goldwing with a sidecar.
Please Log in or Create an account to join the conversation.
- Rick H.
-

- Offline
- User
-
Registered
- Posts: 840
- Thanks: 241
Re: 1973 Z1 Maui
19 Aug 2021 06:20 - 19 Aug 2021 06:23
That's just what I was thinking HRM. Before and after on a hub/drum Mikaw donated. It took a lot of time but turned out really nice I thought.
Rick H.
Rick H.
Rick H.
1977 Kawasaki KZ-1000A1
1977 Kawasaki KZ-1000A1
Last edit: 19 Aug 2021 06:23 by Rick H..
The following user(s) said Thank You: Mikaw
Please Log in or Create an account to join the conversation.
- MauiZ1
-
Topic Author
- Offline
- User
-
Registered
- Posts: 235
- Thanks: 25
Re: 1973 Z1 Maui
19 Aug 2021 08:03
Yes, if I had the floor space and was interested in something like a side gig, I'd do it. I'm 70 and getting used to being mostly retired, I'm not trying to get busier.
My combination of abrasives and such get me there, it's just a bit of a chore, it does, however, get me a lot of "stand" time on the watch nanny!!
My combination of abrasives and such get me there, it's just a bit of a chore, it does, however, get me a lot of "stand" time on the watch nanny!!
Please Log in or Create an account to join the conversation.
- DOHC
-
- Offline
- Sustaining Member
-
Registered
- Those Doe-Hawks really go!
- Posts: 1271
- Thanks: 600
Re: 1973 Z1 Maui
19 Aug 2021 09:40I have used Extreme Simple Green which is designed to be safe for aluminum. I used it in an ultrasonic cleaner on my carburetors and aluminum parts and it did not cause any discoloration....then the ultrasonic with a weak Dawn dish soap solution. Can't use Simple Green, it will cause the alloy to darken...
simplegreen.com/industrial/products/extr...n-cleaner/?locale=en
'78 Z1-R in blue
, '78 Z1-R in black,
'78 Z1-R in pieces
My dad's '74 Z1
'00 ZRX1100
My dad's '74 Z1
'00 ZRX1100
Please Log in or Create an account to join the conversation.
Moderators: Street Fighter LTD