
KZ750H Restoration
- calum
-
 Topic Author
- Offline
- User
-

Registered
- Posts: 1144
- Thanks: 415
Re: KZ750H Restoration
12 Apr 2020 14:02
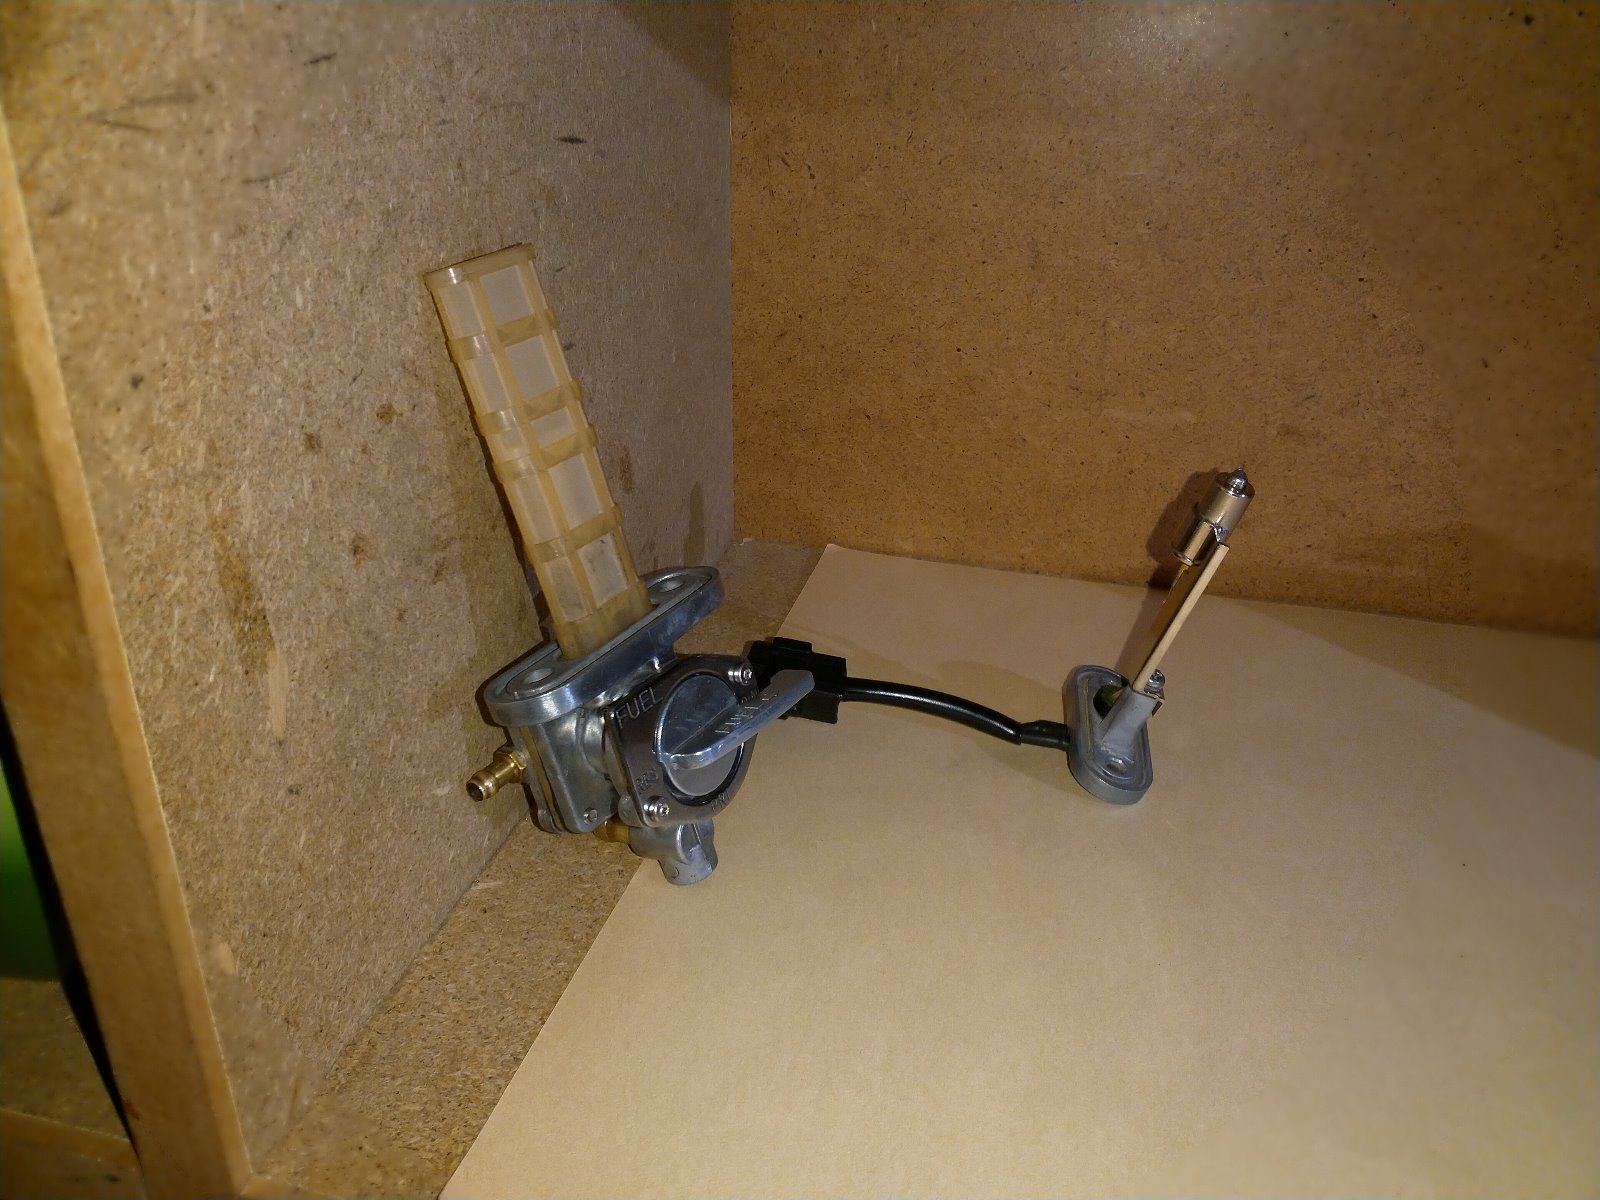
So, just repaired the wiring on the fuel sensor - all good.
Thanks again loudhvx, if you hadn't told me what was going on I probably wouldn't have waited long enough for the light to go on.
Thanks again loudhvx, if you hadn't told me what was going on I probably wouldn't have waited long enough for the light to go on.
KZ1000 Restomod (
www.kzrider.com/forum/11-projects/614517-1977-kz1000-restomod
)
1977 KZ1000A1 ( www.kzrider.com/forum/11-projects/616901...-spare-parts-project )
1980 KZ750H ( kzrider.com/forum/11-projects/612054-kz750h-restoration )
2000 BMW F650GS
1977 KZ1000A1 ( www.kzrider.com/forum/11-projects/616901...-spare-parts-project )
1980 KZ750H ( kzrider.com/forum/11-projects/612054-kz750h-restoration )
2000 BMW F650GS
The following user(s) said Thank You: loudhvx
Please Log in or Create an account to join the conversation.
- calum
-
Topic Author
- Offline
- User
-
Registered
- Posts: 1144
- Thanks: 415
Re: KZ750H Restoration
12 Apr 2020 14:34 - 12 Apr 2020 15:10
All ready and waiting for me to finish painting the tank...
EDIT: looks like the vacuum pipe fitting is on the wrong side (according to the parts diagrams - it was on the same side as in my photo when I got the bike), something to do tomorrow I guess.
EDIT: looks like the vacuum pipe fitting is on the wrong side (according to the parts diagrams - it was on the same side as in my photo when I got the bike), something to do tomorrow I guess.
KZ1000 Restomod (
www.kzrider.com/forum/11-projects/614517-1977-kz1000-restomod
)
1977 KZ1000A1 ( www.kzrider.com/forum/11-projects/616901...-spare-parts-project )
1980 KZ750H ( kzrider.com/forum/11-projects/612054-kz750h-restoration )
2000 BMW F650GS
1977 KZ1000A1 ( www.kzrider.com/forum/11-projects/616901...-spare-parts-project )
1980 KZ750H ( kzrider.com/forum/11-projects/612054-kz750h-restoration )
2000 BMW F650GS
Last edit: 12 Apr 2020 15:10 by calum.
Please Log in or Create an account to join the conversation.
- Skidmark
-
- Offline
- User
-
Registered
- Posts: 1087
- Thanks: 312
Re: KZ750H Restoration
12 Apr 2020 16:31
Your petcock came out a lot nicer than mine did, I still have to work on cleaning my low fuel switch a bit better, but now I know how to test it!
Retired gearhead
'81 KZ-750 E2
'87 Suzuki Savage 650 Street Tracker (lost in the shop fire)
'81 KZ-750 E2
'87 Suzuki Savage 650 Street Tracker (lost in the shop fire)
Please Log in or Create an account to join the conversation.
- calum
-
Topic Author
- Offline
- User
-
Registered
- Posts: 1144
- Thanks: 415
Re: KZ750H Restoration
12 Apr 2020 16:50
Mine were in a *lot* better condition when I started out ")
By the way, the original o-rings for the tap are so much better than the one in the rebuild kit. Really smooth and easy to turn - let's just hope nothing leaks!
By the way, the original o-rings for the tap are so much better than the one in the rebuild kit. Really smooth and easy to turn - let's just hope nothing leaks!
KZ1000 Restomod (
www.kzrider.com/forum/11-projects/614517-1977-kz1000-restomod
)
1977 KZ1000A1 ( www.kzrider.com/forum/11-projects/616901...-spare-parts-project )
1980 KZ750H ( kzrider.com/forum/11-projects/612054-kz750h-restoration )
2000 BMW F650GS
1977 KZ1000A1 ( www.kzrider.com/forum/11-projects/616901...-spare-parts-project )
1980 KZ750H ( kzrider.com/forum/11-projects/612054-kz750h-restoration )
2000 BMW F650GS
Please Log in or Create an account to join the conversation.
- DoctoRot
-
- Offline
- Sustaining Member
-

Registered
- Oh, the usual... I bowl, I drive around...
- Posts: 2621
- Thanks: 784
Re: KZ750H Restoration
13 Apr 2020 20:03 - 13 Apr 2020 20:03calum wrote: Cockpit done
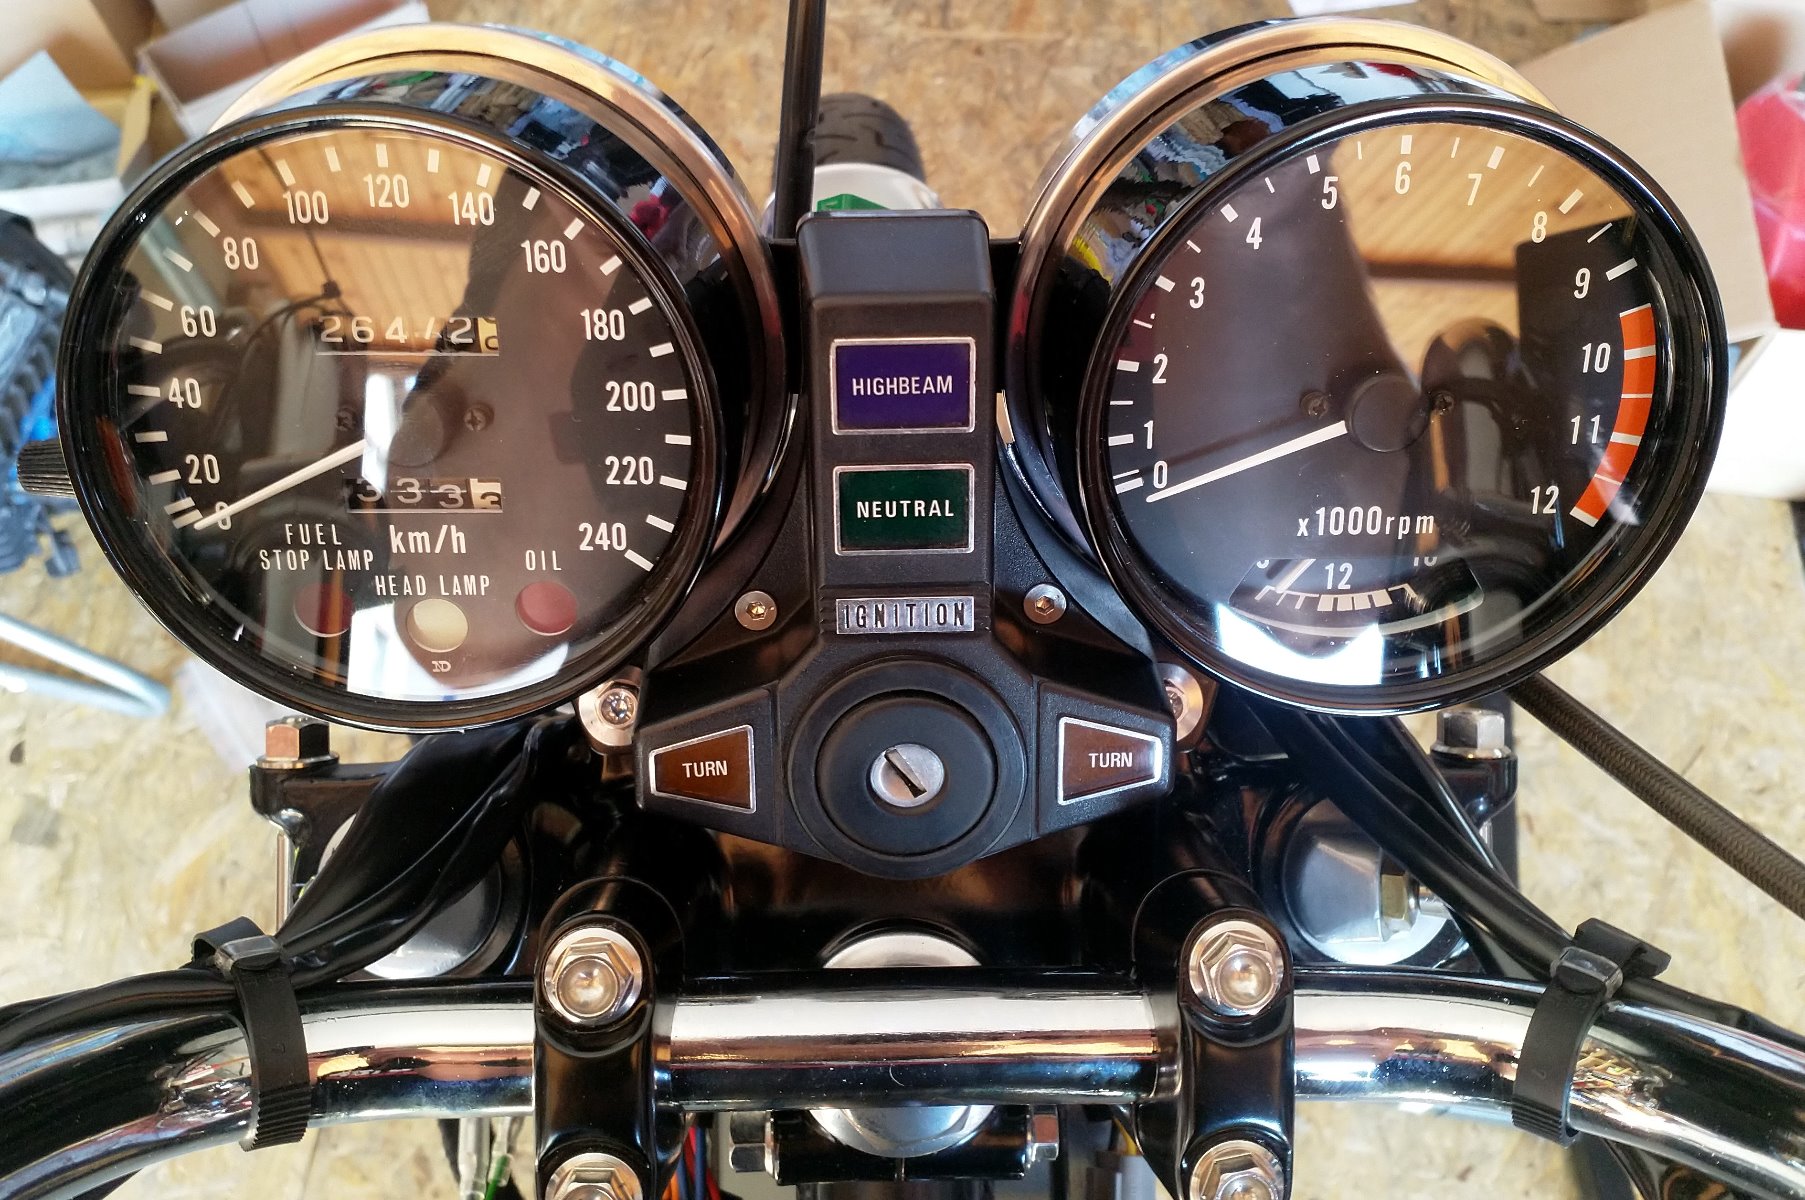
setting standards for a resto right there. nice work.
Last edit: 13 Apr 2020 20:03 by DoctoRot.
The following user(s) said Thank You: calum
Please Log in or Create an account to join the conversation.
- 650ed
-

- Offline
- User
-
Registered
- Posts: 15334
- Thanks: 2831
Re: KZ750H Restoration
13 Apr 2020 20:29
Looks better than new!!! Very nice!!! Ed
1977 KZ650-C1 Original Owner - Stock (with additional invisible FIAMM horn)
The following user(s) said Thank You: calum
Please Log in or Create an account to join the conversation.
- calum
-
Topic Author
- Offline
- User
-
Registered
- Posts: 1144
- Thanks: 415
Re: KZ750H Restoration
14 Apr 2020 05:01 - 14 Apr 2020 05:01
Thanks guys
Just went to put the new OEM base gasket on (11060-1348). It just disintegrated trying to get it over the four corner studs. It was really tight and although I tried to put even pressure on from all sides it just split. Before I threw it in the trash I bent it in a few places and it seemed really brittle.
Is this normal? I'm thinking I'll cut the tabs off the corner holes on the next one, don't want to risk waiting even longer to get the engine back together.
KZ1000 Restomod (
www.kzrider.com/forum/11-projects/614517-1977-kz1000-restomod
)
1977 KZ1000A1 ( www.kzrider.com/forum/11-projects/616901...-spare-parts-project )
1980 KZ750H ( kzrider.com/forum/11-projects/612054-kz750h-restoration )
2000 BMW F650GS
1977 KZ1000A1 ( www.kzrider.com/forum/11-projects/616901...-spare-parts-project )
1980 KZ750H ( kzrider.com/forum/11-projects/612054-kz750h-restoration )
2000 BMW F650GS
Last edit: 14 Apr 2020 05:01 by calum.
Please Log in or Create an account to join the conversation.
- DoctoRot
-
- Offline
- Sustaining Member
-
Registered
- Oh, the usual... I bowl, I drive around...
- Posts: 2621
- Thanks: 784
Re: KZ750H Restoration
15 Apr 2020 23:12
thats the problem with buying NOS gaskets. I have had similar experiences. they should be semi-pliable if you are going to use them, brittle gaskets fail. not all NOS gaskets are brittle but if its 40 years old....
The following user(s) said Thank You: calum
Please Log in or Create an account to join the conversation.
- calum
-
Topic Author
- Offline
- User
-
Registered
- Posts: 1144
- Thanks: 415
Re: KZ750H Restoration
19 Apr 2020 17:41
Thanks Vic, I went for the metal gasket second time around (11060-1726). Think I'll stick with them in the future, the surfaces are pretty good on the crankcase and block so shouldn't have any leaks (fingers crossed).
Got the top end back together today (replaced the stud that was too long). Had a choice of head gaskets as I got all three pretty cheap. Went with the oldest one as I will definitely be pulling the head next winter. Will try the MLS one next year.

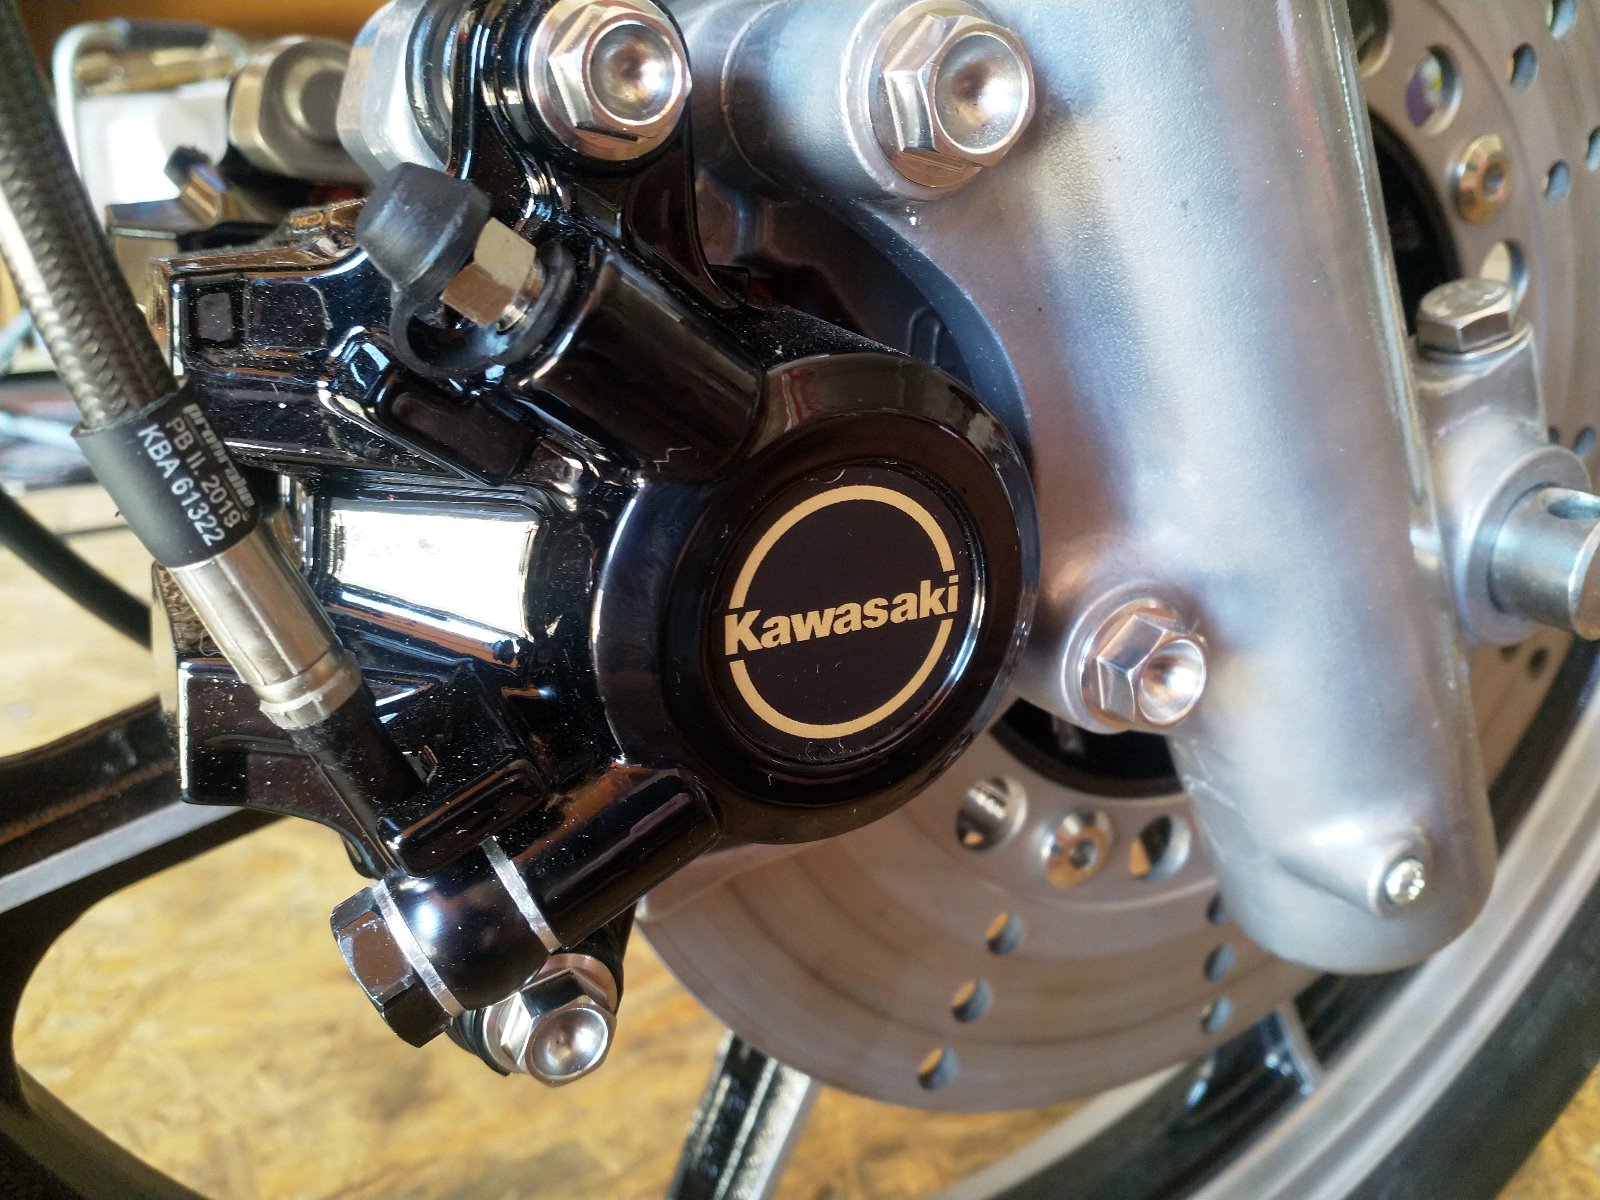
Got some stickers on ebay for the brake callipers. Look pretty decent (need to do some dusting though).
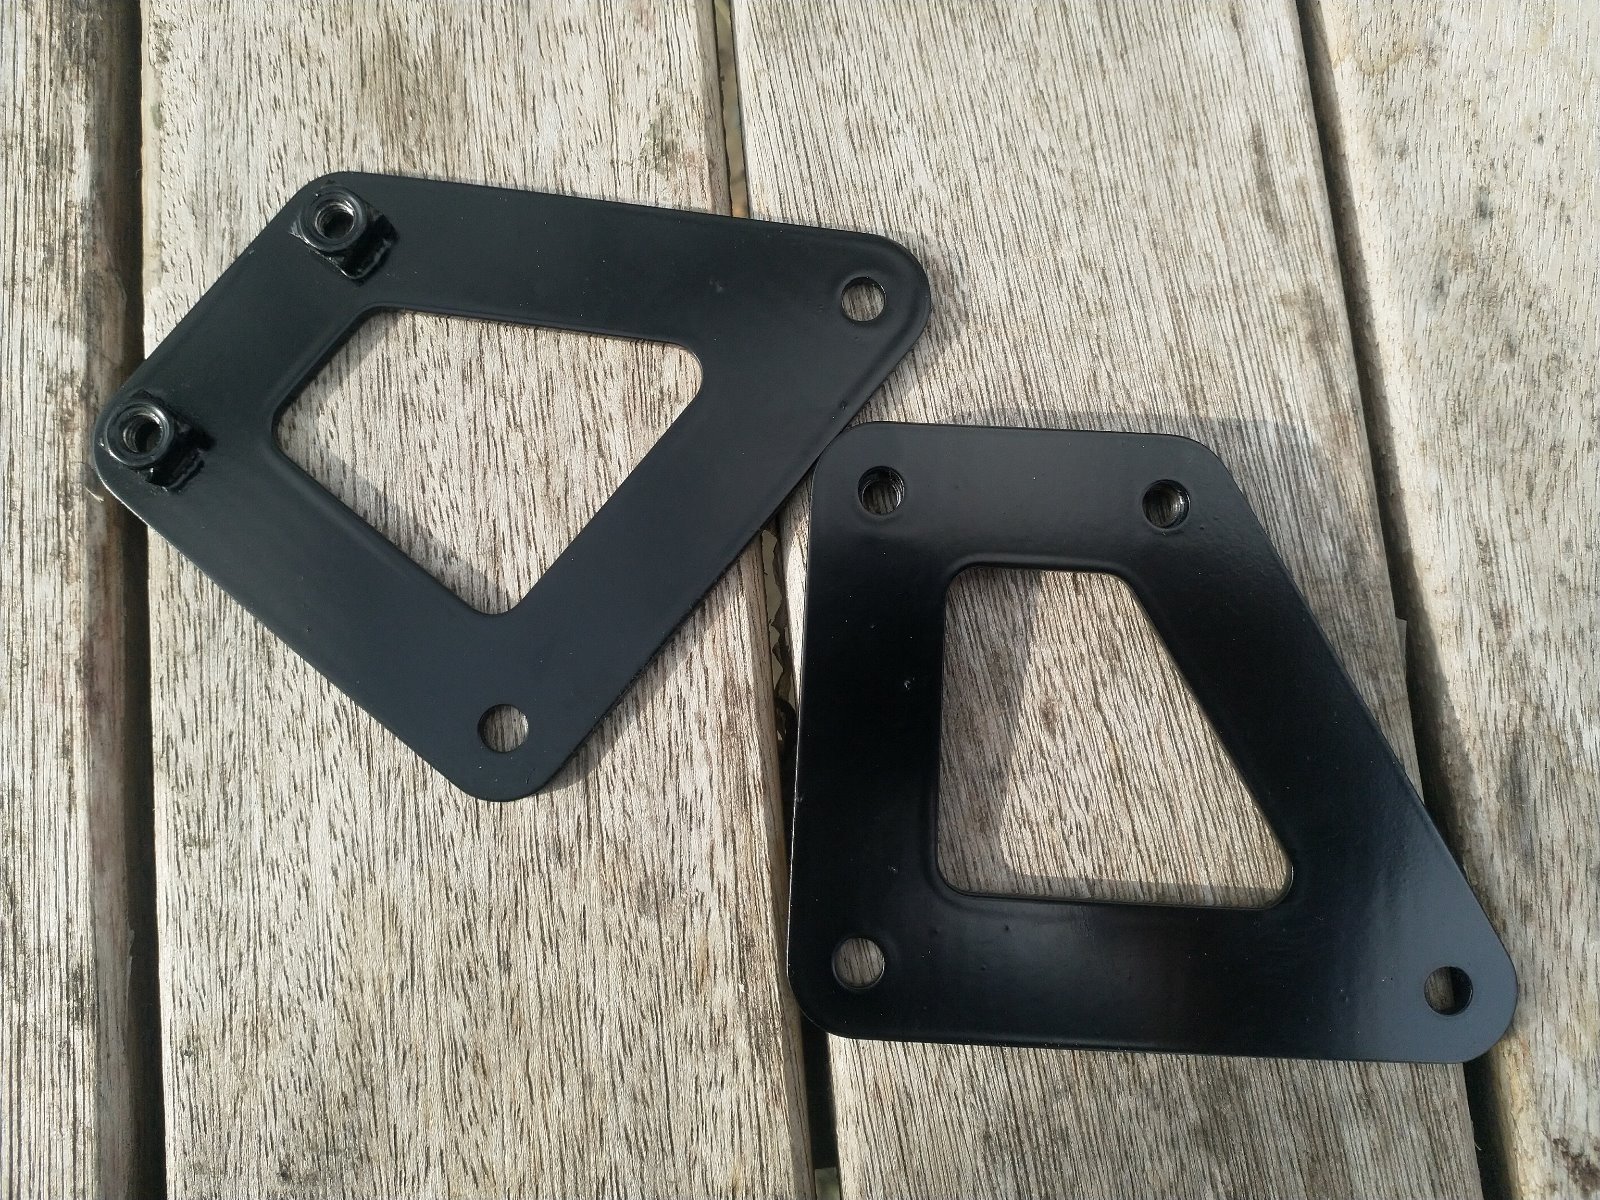
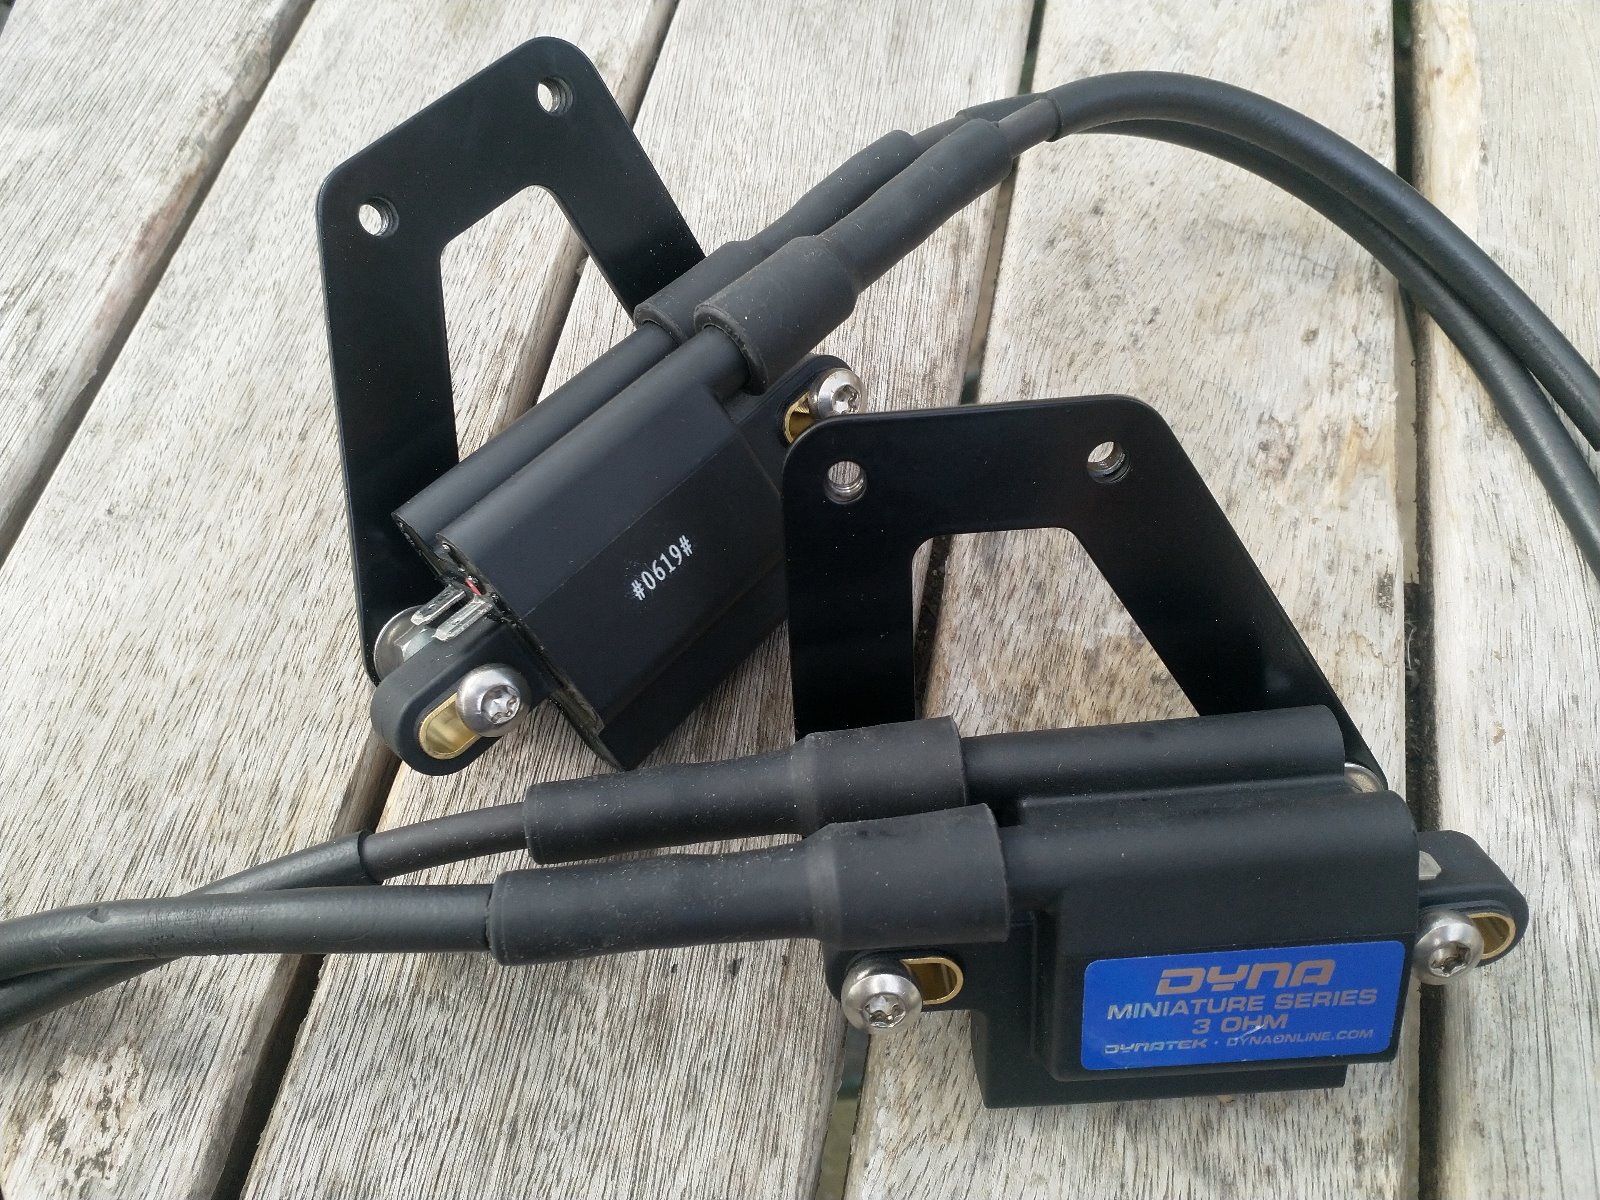
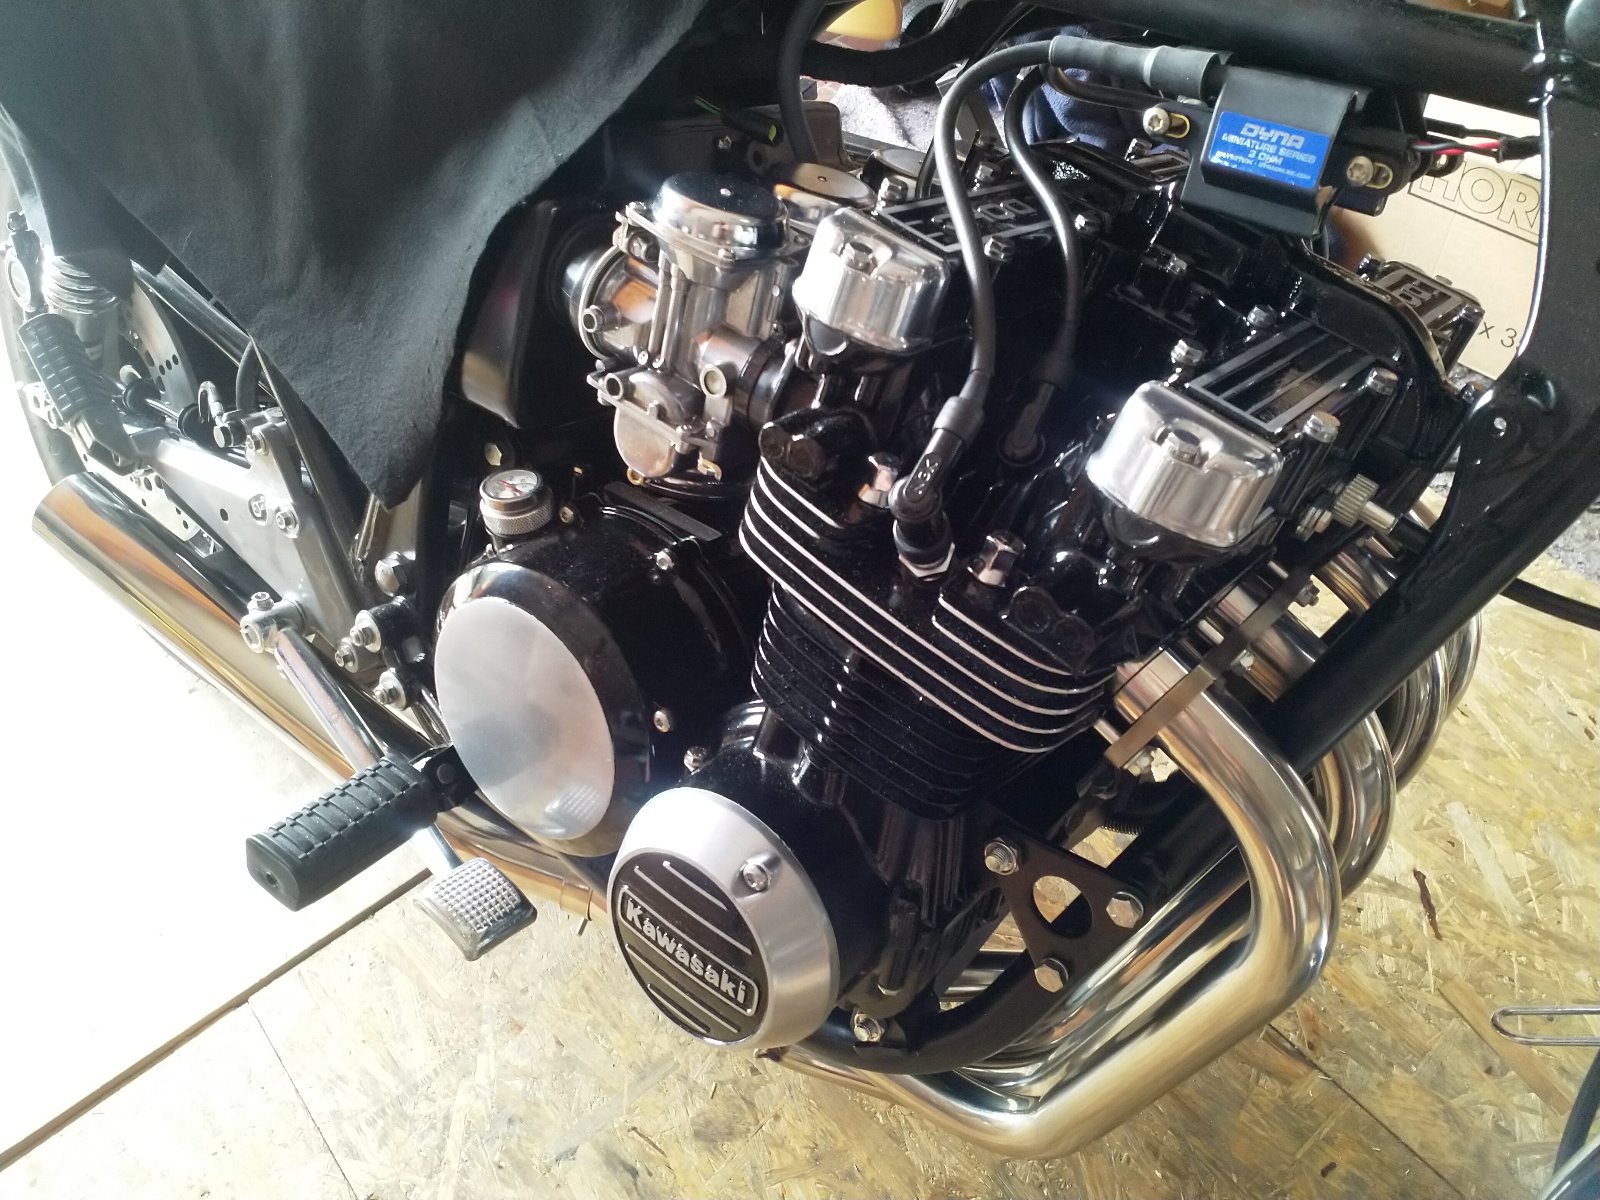
Finally got the new coil brackets painted as well. Will put them on tomorrow and get the exhaust back on as well.
Got the top end back together today (replaced the stud that was too long). Had a choice of head gaskets as I got all three pretty cheap. Went with the oldest one as I will definitely be pulling the head next winter. Will try the MLS one next year.
Got some stickers on ebay for the brake callipers. Look pretty decent (need to do some dusting though).
Finally got the new coil brackets painted as well. Will put them on tomorrow and get the exhaust back on as well.
KZ1000 Restomod (
www.kzrider.com/forum/11-projects/614517-1977-kz1000-restomod
)
1977 KZ1000A1 ( www.kzrider.com/forum/11-projects/616901...-spare-parts-project )
1980 KZ750H ( kzrider.com/forum/11-projects/612054-kz750h-restoration )
2000 BMW F650GS
1977 KZ1000A1 ( www.kzrider.com/forum/11-projects/616901...-spare-parts-project )
1980 KZ750H ( kzrider.com/forum/11-projects/612054-kz750h-restoration )
2000 BMW F650GS
Please Log in or Create an account to join the conversation.
- calum
-
Topic Author
- Offline
- User
-
Registered
- Posts: 1144
- Thanks: 415
Re: KZ750H Restoration
20 Apr 2020 11:45
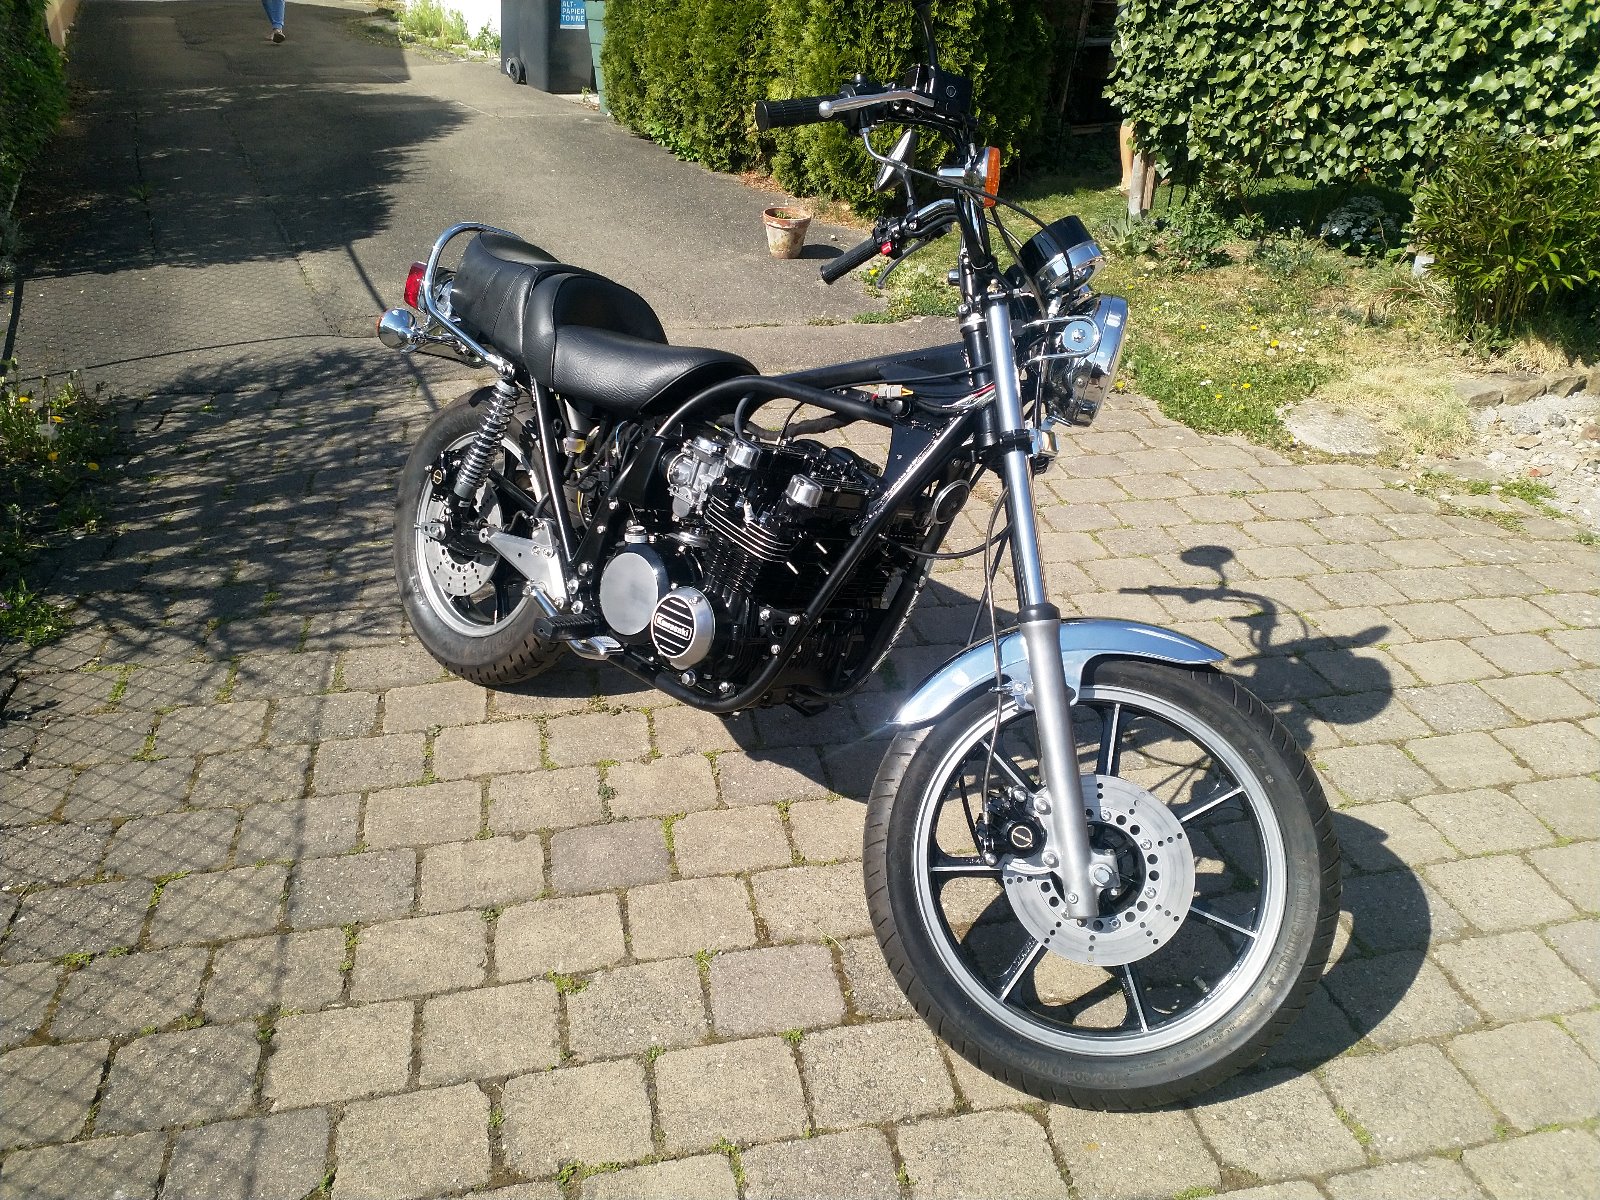
Got the coils and exhaust back on. I guess it's time to get to work on the tank
KZ1000 Restomod (
www.kzrider.com/forum/11-projects/614517-1977-kz1000-restomod
)
1977 KZ1000A1 ( www.kzrider.com/forum/11-projects/616901...-spare-parts-project )
1980 KZ750H ( kzrider.com/forum/11-projects/612054-kz750h-restoration )
2000 BMW F650GS
1977 KZ1000A1 ( www.kzrider.com/forum/11-projects/616901...-spare-parts-project )
1980 KZ750H ( kzrider.com/forum/11-projects/612054-kz750h-restoration )
2000 BMW F650GS
Please Log in or Create an account to join the conversation.
- Skidmark
-
- Offline
- User
-
Registered
- Posts: 1087
- Thanks: 312
Re: KZ750H Restoration
20 Apr 2020 12:39
Nice... I hope your tank is in better shape than mine!
Retired gearhead
'81 KZ-750 E2
'87 Suzuki Savage 650 Street Tracker (lost in the shop fire)
'81 KZ-750 E2
'87 Suzuki Savage 650 Street Tracker (lost in the shop fire)
Please Log in or Create an account to join the conversation.
- calum
-
Topic Author
- Offline
- User
-
Registered
- Posts: 1144
- Thanks: 415
Re: KZ750H Restoration
20 Apr 2020 13:41
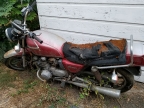
Thanks. There's a bit of surface rust as I was a bit careless putting it in storage (should have sprayed some wd-40 in there). Should only need a quick soak though. The major is getting the dents sorted.
Some of the old filler even survived the sandblastng. I just filled it again last summer, primed it and have let the new bog settle. Now I just need to do a bit of touch up work.

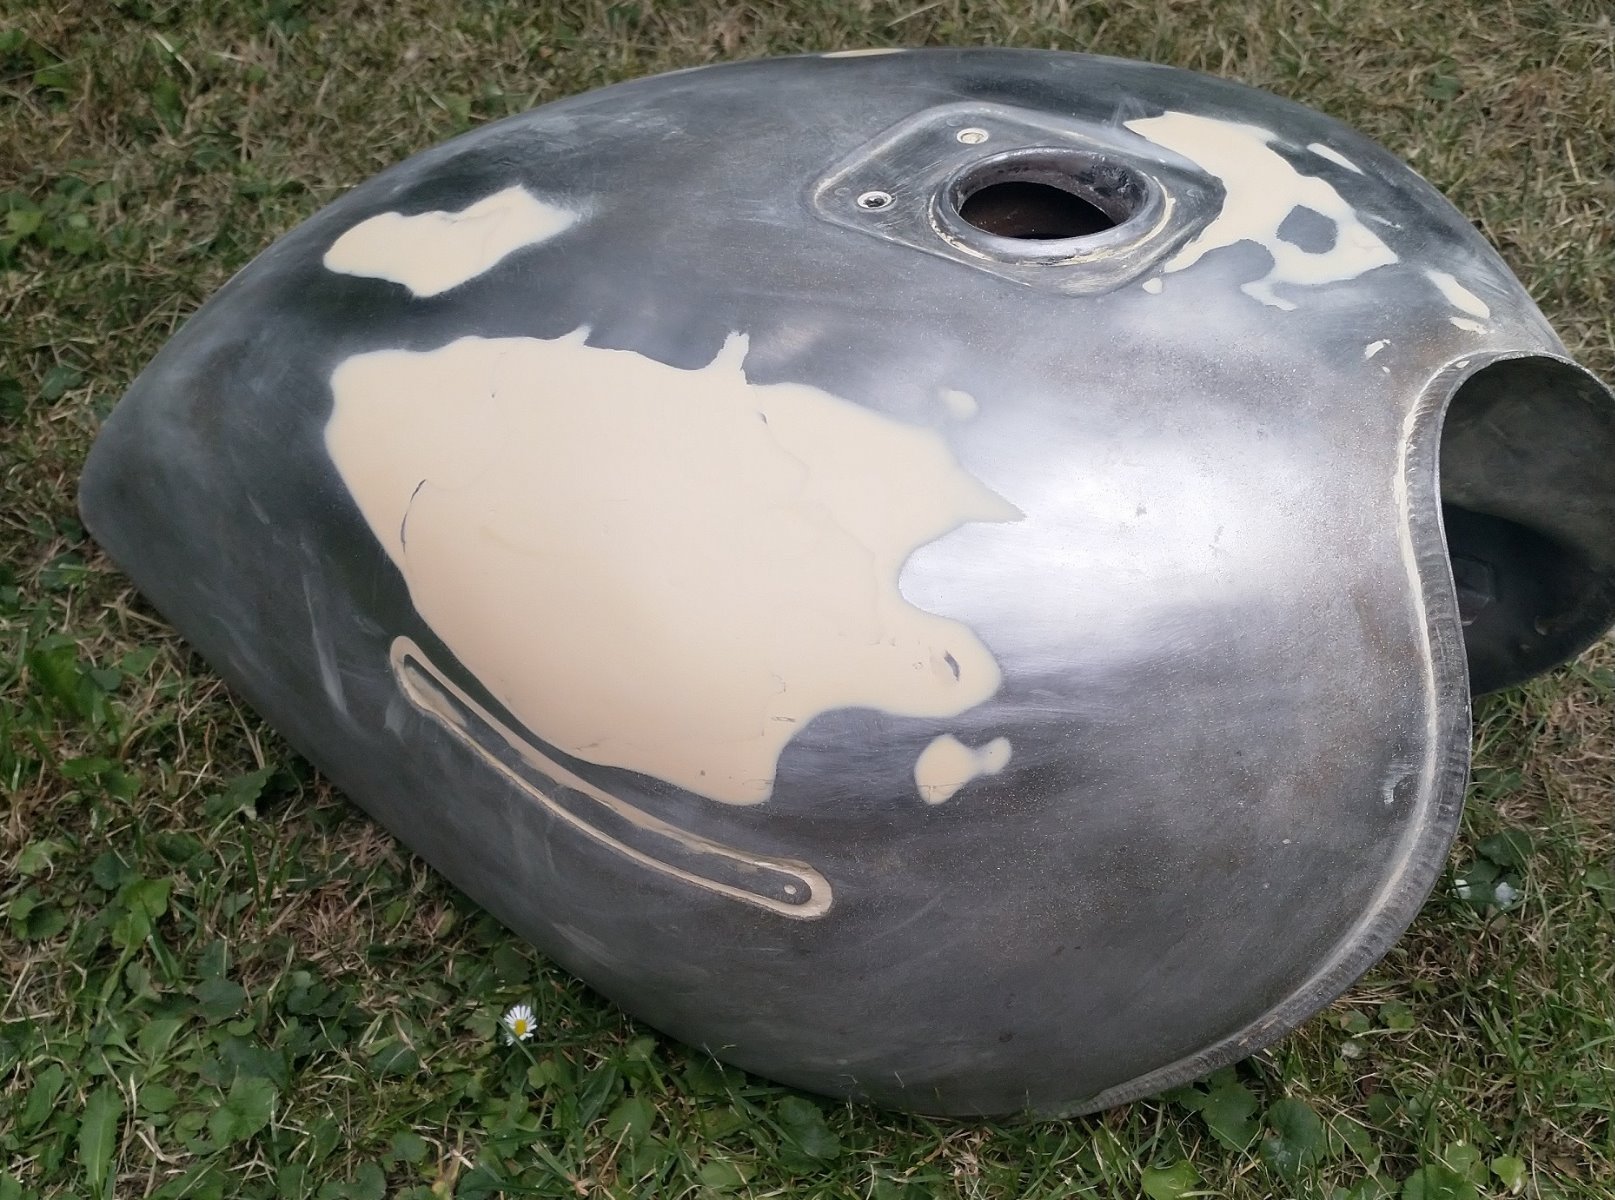
Some of the old filler even survived the sandblastng. I just filled it again last summer, primed it and have let the new bog settle. Now I just need to do a bit of touch up work.
KZ1000 Restomod (
www.kzrider.com/forum/11-projects/614517-1977-kz1000-restomod
)
1977 KZ1000A1 ( www.kzrider.com/forum/11-projects/616901...-spare-parts-project )
1980 KZ750H ( kzrider.com/forum/11-projects/612054-kz750h-restoration )
2000 BMW F650GS
1977 KZ1000A1 ( www.kzrider.com/forum/11-projects/616901...-spare-parts-project )
1980 KZ750H ( kzrider.com/forum/11-projects/612054-kz750h-restoration )
2000 BMW F650GS
Please Log in or Create an account to join the conversation.
Moderators: Street Fighter LTD