
1981 KZ1000 J-to-K build
- Shdwdrgn
-
 Topic Author
- Offline
- User
-

Registered
- Posts: 614
- Thanks: 24
Re: 1981 KZ1000 J-to-K build
18 Jun 2016 19:35
This morning I gave one of the engine parts a test... I poured gasoline over it, then let it sit and dry for a few minutes, before washing it off in the sink. The paint felt kind of tacky at first, but after about half an hour it was hard again and resisted fingernail scratches. This is definitely promising, I think it'll hold up pretty good as long as I remember to wash off any spills.
Didn't get any more time with the bike today though. I *had* to work on the truck. One of the actuators failed and I wasn't getting any air blowing out of the dash vents. As hot as it's been already, I really needed my AC working again. Took all afternoon under the dash, but I got the part replaced and it's all working again. Tomorrow I'll get back on the engine, hopefully get some of the case painted. I may have to wait until evening to do the painting though, it's supposed to be almost 100 degrees tomorrow.
Didn't get any more time with the bike today though. I *had* to work on the truck. One of the actuators failed and I wasn't getting any air blowing out of the dash vents. As hot as it's been already, I really needed my AC working again. Took all afternoon under the dash, but I got the part replaced and it's all working again. Tomorrow I'll get back on the engine, hopefully get some of the case painted. I may have to wait until evening to do the painting though, it's supposed to be almost 100 degrees tomorrow.
1981 KZ1000-JK1
She's a beautiful mess, and I've made her all mine
She's a beautiful mess, and I've made her all mine
Please Log in or Create an account to join the conversation.
- SWest
-

- Offline
- Sustaining Member
-

Registered
- 10 22 2014
- Posts: 23733
- Thanks: 3016
Re: 1981 KZ1000 J-to-K build
18 Jun 2016 19:50
Summer's here. Gonna be 115 tomorrow and 118 monday. 108-110 from there on. :dry:
Steve
Steve
Z1b1000 1975 Z1b
kzrider.com/forum/11-projects/598262-kz-...-will-it-live#672882
kzrider.com/forum/2-engine/597654-poser?start=240#704229
kzrider.com/forum/11-projects/598262-kz-...-will-it-live#672882
kzrider.com/forum/2-engine/597654-poser?start=240#704229
Please Log in or Create an account to join the conversation.
- Shdwdrgn
-
Topic Author
- Offline
- User
-
Registered
- Posts: 614
- Thanks: 24
Re: 1981 KZ1000 J-to-K build
18 Jun 2016 20:11
Wherever you are at, you can keep it! Our weather can't make up its mind... 93 today, 100 tomorrow, 87 on Monday, 98 on Tuesday. And not a drop of rain.
1981 KZ1000-JK1
She's a beautiful mess, and I've made her all mine
She's a beautiful mess, and I've made her all mine
Please Log in or Create an account to join the conversation.
- SWest
-
- Offline
- Sustaining Member
-
Registered
- 10 22 2014
- Posts: 23733
- Thanks: 3016
Re: 1981 KZ1000 J-to-K build
18 Jun 2016 20:15
It's the price we pay to be able to ride most of the year.
Steve
Steve
Z1b1000 1975 Z1b
kzrider.com/forum/11-projects/598262-kz-...-will-it-live#672882
kzrider.com/forum/2-engine/597654-poser?start=240#704229
kzrider.com/forum/11-projects/598262-kz-...-will-it-live#672882
kzrider.com/forum/2-engine/597654-poser?start=240#704229
Please Log in or Create an account to join the conversation.
- wrenchmonkey
-
- Offline
- User
-
Registered
- Posts: 568
- Thanks: 75
Re: 1981 KZ1000 J-to-K build
19 Jun 2016 01:19Shdwdrgn wrote: ...Tomorrow I'll get back on the engine, hopefully get some of the case painted. I may have to wait until evening to do the painting though, it's supposed to be almost 100 degrees tomorrow.
Yeah, I used to paint at night always when the heat hits the triple digits, Makes for happier painting and I think happier me not sweating all over the fresh paint
")
I'm stoked to see your progress and have been following along because I have an '82 CSR waiting patiently for it's time under the knife. I'm really enjoying your creative process; it gives me hope I can pull something outta my hat with my 1000.
Like to see some pics of the paint tests you're talking about. ..
Please Log in or Create an account to join the conversation.
- Shdwdrgn
-
Topic Author
- Offline
- User
-
Registered
- Posts: 614
- Thanks: 24
Re: 1981 KZ1000 J-to-K build
19 Jun 2016 15:28 - 19 Jun 2016 15:31
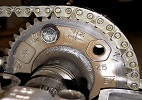
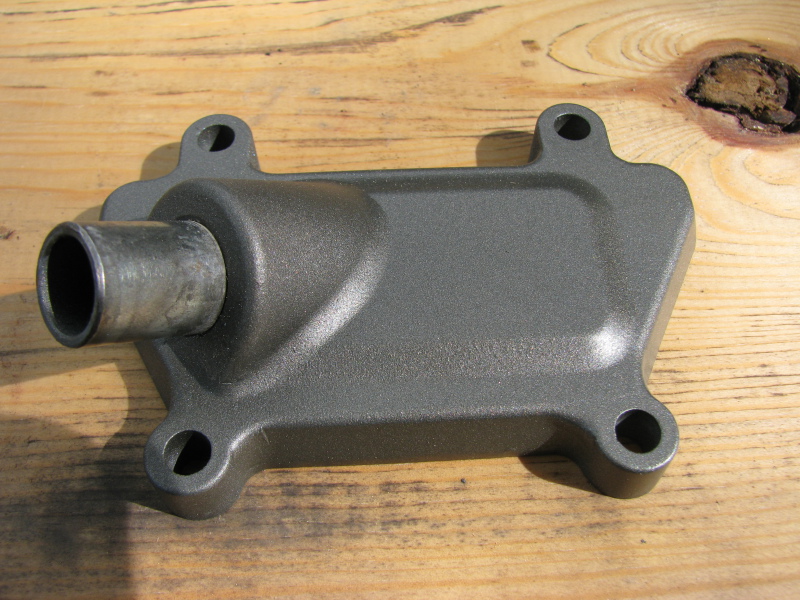
Pics... ok. So the following is what my test part looks like today. The right side up to the bolt holes has the gasoline poured over it. Of course this is a day later, but I would say within half an hour the paint was hard again. Even in the close-up shot, I really can't tell any difference in how it looks.
The paint tests are a lot harder to show. I'm painting an old sign without any primer, just a couple coats of the burnt orange, so coverage is actually really good with this paint. My actual pieces will of course be done over a base of primer, but in one sample area it looked like a black undercoat showed through -- however it may have just been a reaction between two different brands of paint so I'm not going to count on that.
The red arrow shows the VHT burnt copper by itself. The blue arrow shows a spot I did yesterday with clearcoat over the top.
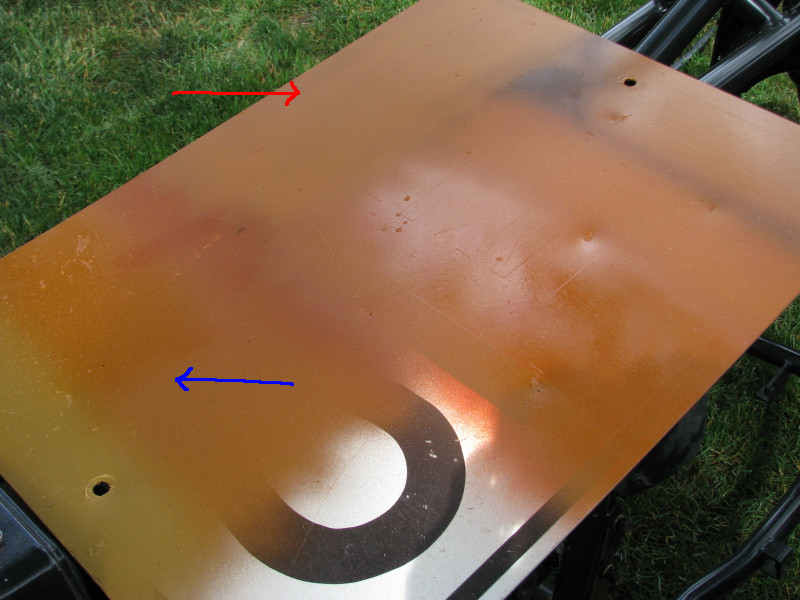
Here, the vertical stripe on the bottom right is the same area pointed to by the red arrow above, however it has been dusted with some duplicolor silver metal flake, then clearcoated. The stripe on the bottom left is just the burnt orange and clearcoat. Unfortunately I couldn't get a good shot showing how the metal flake sparkles in the sun because the extra light just washes out the photo, but I wanted to use this picture because it is a *very* good representation of the actual finished color of this paint.
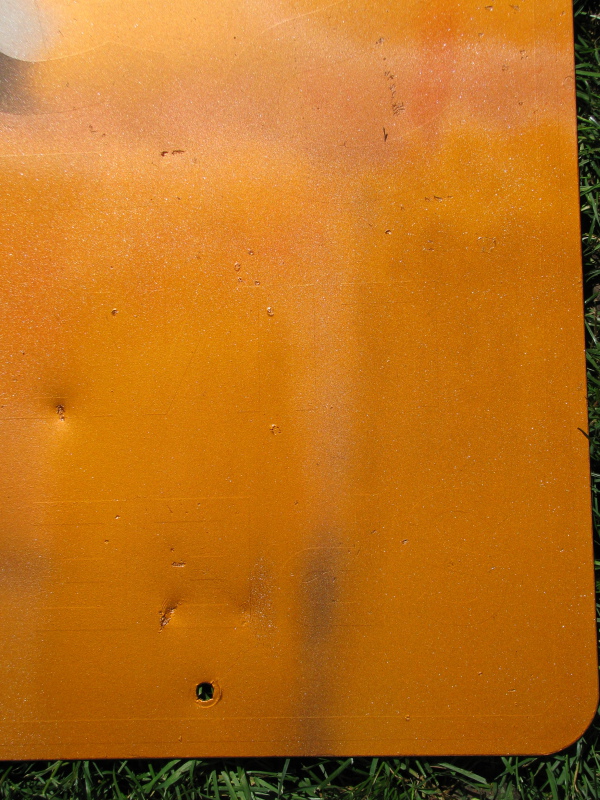
While the metal flake adds a really nice sparkle, you have to be careful applying it or you end up with a dusty look when viewing the piece head-on. I'm torn about using it because when it's done right it looks great, but it is oh-so-easy to do one dusting too many and ruin the look. The metal flake was meant to go underneath the duplicolor metal cast paints which are transparent and allow the sparkle to show through. They also make a metal flake in a burnt copper, but it is way too red (that's the red band you see between the red and blue arrow sections above). Has anyone found a metal flake suspended in a clearcoat that might work for this?
If you want to see more pics of the paint tests, check my page here. I probably won't get any better shots until I have some finished pieces to show. And it's going to take a LOT of time to finish my pieces. These paints require all coats to be finished within one hour, or you have to wait seven days for the paint to cure before applying any more layers. Which means I need to lay down my primer and black base, wait seven days and then mask off the black so I can apply the copper color, wait another seven days before doing any finish work, pulling the tape, and clearcoating the whole piece... So a minimum of three weeks for the fenders and side panels (if I don't make any mistakes), and the tank may end up at four weeks. Guess I better get busy knocking the chrome off the fenders so I can start getting down the base colors.
The paint tests are a lot harder to show. I'm painting an old sign without any primer, just a couple coats of the burnt orange, so coverage is actually really good with this paint. My actual pieces will of course be done over a base of primer, but in one sample area it looked like a black undercoat showed through -- however it may have just been a reaction between two different brands of paint so I'm not going to count on that.
The red arrow shows the VHT burnt copper by itself. The blue arrow shows a spot I did yesterday with clearcoat over the top.
Here, the vertical stripe on the bottom right is the same area pointed to by the red arrow above, however it has been dusted with some duplicolor silver metal flake, then clearcoated. The stripe on the bottom left is just the burnt orange and clearcoat. Unfortunately I couldn't get a good shot showing how the metal flake sparkles in the sun because the extra light just washes out the photo, but I wanted to use this picture because it is a *very* good representation of the actual finished color of this paint.
While the metal flake adds a really nice sparkle, you have to be careful applying it or you end up with a dusty look when viewing the piece head-on. I'm torn about using it because when it's done right it looks great, but it is oh-so-easy to do one dusting too many and ruin the look. The metal flake was meant to go underneath the duplicolor metal cast paints which are transparent and allow the sparkle to show through. They also make a metal flake in a burnt copper, but it is way too red (that's the red band you see between the red and blue arrow sections above). Has anyone found a metal flake suspended in a clearcoat that might work for this?
If you want to see more pics of the paint tests, check my page here. I probably won't get any better shots until I have some finished pieces to show. And it's going to take a LOT of time to finish my pieces. These paints require all coats to be finished within one hour, or you have to wait seven days for the paint to cure before applying any more layers. Which means I need to lay down my primer and black base, wait seven days and then mask off the black so I can apply the copper color, wait another seven days before doing any finish work, pulling the tape, and clearcoating the whole piece... So a minimum of three weeks for the fenders and side panels (if I don't make any mistakes), and the tank may end up at four weeks. Guess I better get busy knocking the chrome off the fenders so I can start getting down the base colors.
1981 KZ1000-JK1
She's a beautiful mess, and I've made her all mine
She's a beautiful mess, and I've made her all mine
Last edit: 19 Jun 2016 15:31 by Shdwdrgn.
Please Log in or Create an account to join the conversation.
- Shdwdrgn
-
Topic Author
- Offline
- User
-
Registered
- Posts: 614
- Thanks: 24
Re: 1981 KZ1000 J-to-K build
19 Jun 2016 19:42
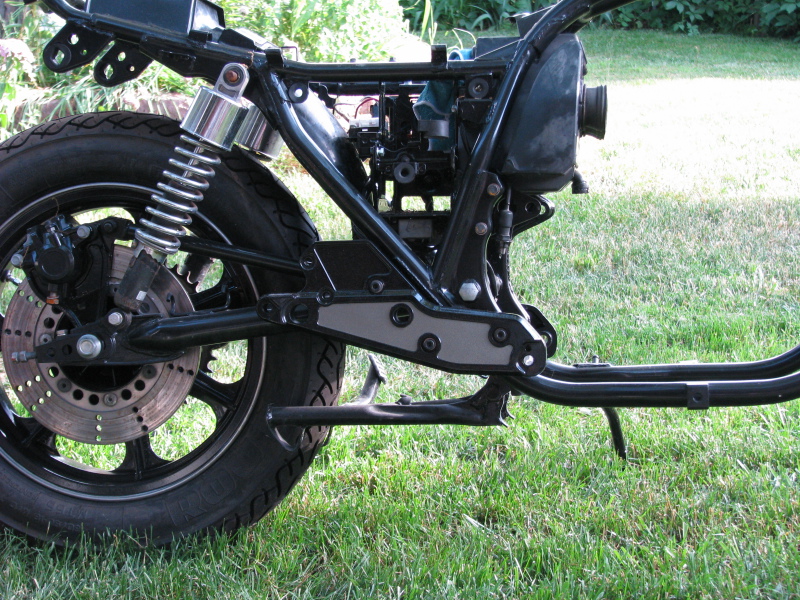
One more shot today before it got dark out... Here's the right side foot peg plate. The cast-iron color looks fairly nondescript here, but it does look good in the light. I'm thinking for that sticker location if I really want to do small scales, I'll have to break out the airbrush to get the fine detail. I just can't keep the spray from a can confined enough around the template to actually make the scales come out nicely.
1981 KZ1000-JK1
She's a beautiful mess, and I've made her all mine
She's a beautiful mess, and I've made her all mine
Please Log in or Create an account to join the conversation.
- Shdwdrgn
-
Topic Author
- Offline
- User
-
Registered
- Posts: 614
- Thanks: 24
Re: 1981 KZ1000 J-to-K build
23 Jun 2016 19:34
Well it was a very long day home from work, but I accomplished what I wanted -- the bottom case and jugs are painted! I'll give them a couple days before I start baking them, and there will likely be some wet-sanding afterwards as there were some spots I saw that got a dry dusting in the paint. The only large piece left to do is that piece which holds the cams and valves, and that looks like it's going to be a nightmare to get cleaned up. I think what I'm going to do is finish up the crank case, get everything assembled in it and probably get it hung up on the bike, then I'll come back to the cams. That way I don't have quite so many bolts lying loose in the garage, and with that much of the engine in place, I can get a serious start on the wiring harness.
I also managed to do the speedo case today. Taped off both sides of the glass, blasted the chrome, then got both halves painted in gloss black. By tomorrow I should be able to peel back the tape so I can see if I screwed up and accidentally blasted any of the glass, and I'll give the paint about a week before I try reassembling to clock (and then I'll get started on the tach). So for you folks following along, I noticed the face of the speedo is slightly warped -- any suggestions on how to get it to lay back flat again before I reassemble the unit?
Sorry, no pics yet. I really did bust ass to get everything done today, probably gonna be paying for it all night.
1981 KZ1000-JK1
She's a beautiful mess, and I've made her all mine
She's a beautiful mess, and I've made her all mine
Please Log in or Create an account to join the conversation.
- 531blackbanshee
-
- Offline
- Vendor
-
Vendors
- Posts: 7442
- Thanks: 796
Re: 1981 KZ1000 J-to-K build
24 Jun 2016 06:39
that warped gauge face is a rough one.stacking different layers of cardboard to align with the wave and pressing is my first thought.
got a big book you can stick it in and sit on ?
?
typically you want to remove tape just after the paint flashes when the paint is still pliable so you don't tear the edges of the paint .
makin some good progress keep us posted,
leon
got a big book you can stick it in and sit on
?typically you want to remove tape just after the paint flashes when the paint is still pliable so you don't tear the edges of the paint .
makin some good progress keep us posted,
leon
skiatook,oklahoma 1980 z1r,1978 kz 1000 z1r x 3,
1976 kz 900 x 3
i make what i can,and save the rest!
billybiltit.blogspot.com/
www.kzrider.com/forum/5-chassis/325862-triple-tree-custom-work
kzrider.com/forum/5-chassis/294594-frame-bracing?limitstart=0
1976 kz 900 x 3
i make what i can,and save the rest!
billybiltit.blogspot.com/
www.kzrider.com/forum/5-chassis/325862-triple-tree-custom-work
kzrider.com/forum/5-chassis/294594-frame-bracing?limitstart=0
Please Log in or Create an account to join the conversation.
- Shdwdrgn
-
Topic Author
- Offline
- User
-
Registered
- Posts: 614
- Thanks: 24
Re: 1981 KZ1000 J-to-K build
24 Jun 2016 07:19
My concern is there's a number of threads about people who broke the pin while trying to remove the needle, so I really don't want to take a chance with fully disassembling it. There's just a single warp near the top of the face, but I'm wondering if it presses back down flat when the unit is put back together? I don't remember seeing a warp when I took it apart. Guess I'll be able to play with it in a few days and see.
For this particular piece, I'm not too concerned about the paint sticking to the tape. There's some kind of rubber or felt piece between the glass and the metal, and I tried to take care with my painting and only shoot straight down over the top of the face (just in case the tape didn't cover clear to the edge of the glass), so ideally there should not be any overlap in paint between the tape and the metal.
For this particular piece, I'm not too concerned about the paint sticking to the tape. There's some kind of rubber or felt piece between the glass and the metal, and I tried to take care with my painting and only shoot straight down over the top of the face (just in case the tape didn't cover clear to the edge of the glass), so ideally there should not be any overlap in paint between the tape and the metal.
1981 KZ1000-JK1
She's a beautiful mess, and I've made her all mine
She's a beautiful mess, and I've made her all mine
Please Log in or Create an account to join the conversation.
- wrenchmonkey
-
- Offline
- User
-
Registered
- Posts: 568
- Thanks: 75
Re: 1981 KZ1000 J-to-K build
24 Jun 2016 07:33
I'm digging the colors Shadow! The foot peg mount looks great too. Looks like what the manufacturer would have done in my opinion, so that's a good sign you are on-track
Can you post a pic of the dial face? I am having a hard time understanding the warp?
It's been a few minutes since I worked on KZombie's original gauges so I forget but I wanna say that the dial face didn't come directly into contact with the inside of the glass or casing, so I'm thinking pressing it back together may not solve the problem... 'course I'm often wrong :dry:
I did discover that the replacement gauges I got were loose feeling inside the cases and found the rubber mount pad (like a foam rubber pad stuck to the metal bracket that each gauge bolts to) had worn out a bit and while the nuts were tight to hold the gauges, they still had some slop. To solve that, I removed the two nuts, locks and flat washers and then added just one more flat washer with a bigger hole (like what would fit say a 6mm bolt or so) and then reassembled. This bigger flat washer pressed down around the metal tube offset when the washers and nut were reinstalled and squished the gauge back just a hair more and removed the wobbly feeling.
Looking forward to your continued success!")
Can you post a pic of the dial face? I am having a hard time understanding the warp?
It's been a few minutes since I worked on KZombie's original gauges so I forget but I wanna say that the dial face didn't come directly into contact with the inside of the glass or casing, so I'm thinking pressing it back together may not solve the problem... 'course I'm often wrong :dry:
I did discover that the replacement gauges I got were loose feeling inside the cases and found the rubber mount pad (like a foam rubber pad stuck to the metal bracket that each gauge bolts to) had worn out a bit and while the nuts were tight to hold the gauges, they still had some slop. To solve that, I removed the two nuts, locks and flat washers and then added just one more flat washer with a bigger hole (like what would fit say a 6mm bolt or so) and then reassembled. This bigger flat washer pressed down around the metal tube offset when the washers and nut were reinstalled and squished the gauge back just a hair more and removed the wobbly feeling.
Looking forward to your continued success!
Please Log in or Create an account to join the conversation.
- SWest
-
- Offline
- Sustaining Member
-
Registered
- 10 22 2014
- Posts: 23733
- Thanks: 3016
Re: 1981 KZ1000 J-to-K build
24 Jun 2016 08:09
Class work. In painting anything be it house trim or bikes/cars, I found it best to remove the tape as soon as the paint is applied. If let sit the paint would "wick" past the edges and the paint would tend to peel unless I used a razor edge to cut a line.
Steve
Steve
Z1b1000 1975 Z1b
kzrider.com/forum/11-projects/598262-kz-...-will-it-live#672882
kzrider.com/forum/2-engine/597654-poser?start=240#704229
kzrider.com/forum/11-projects/598262-kz-...-will-it-live#672882
kzrider.com/forum/2-engine/597654-poser?start=240#704229
Please Log in or Create an account to join the conversation.
Moderators: Street Fighter LTD