
1981 KZ1000 J-to-K build
- Shdwdrgn
-
 Topic Author
- Offline
- User
-

Registered
- Posts: 614
- Thanks: 24
Re: 1981 KZ1000 J-to-K build
04 Jul 2014 22:42
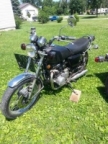
It looks like I'm out of funds for this year.  I was really hoping to get the bike on the road this Summer, but my roof started leaking last Winter and I couldn't get anything covered by either insurance or a home equity loan, so I had to kill my savings to get the job done. Over nine grand got me a completely re-shingled roof including 13 sheets of plywood replaced, and the new gutters should be installed next week. Obviously which so much plywood replaced, I couldn't have put this off any longer, so its a relief that I have a new roof, but still a bummer that I won't be riding this year. Maybe if I'm lucky I can come up with some cash to get the frame powder-coated so I can still assemble some of the smaller stuff. We'll see how it goes...
I was really hoping to get the bike on the road this Summer, but my roof started leaking last Winter and I couldn't get anything covered by either insurance or a home equity loan, so I had to kill my savings to get the job done. Over nine grand got me a completely re-shingled roof including 13 sheets of plywood replaced, and the new gutters should be installed next week. Obviously which so much plywood replaced, I couldn't have put this off any longer, so its a relief that I have a new roof, but still a bummer that I won't be riding this year. Maybe if I'm lucky I can come up with some cash to get the frame powder-coated so I can still assemble some of the smaller stuff. We'll see how it goes...
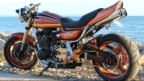
1981 KZ1000-JK1
She's a beautiful mess, and I've made her all mine
She's a beautiful mess, and I've made her all mine
Please Log in or Create an account to join the conversation.
- Wosmo
-
- Offline
- User
-
Registered
- Posts: 26
- Thanks: 0
Re: 1981 KZ1000 J-to-K build
04 Jul 2014 23:11
:S Life's happens while we're busy making other plans, eh? Sorry to hear about funding issues, glad to hear you got your roof fixed. Believe me when I say I feel your pain brother!
Building a happy home, one bike at a time...
Please Log in or Create an account to join the conversation.
- Shdwdrgn
-
Topic Author
- Offline
- User
-
Registered
- Posts: 614
- Thanks: 24
Re: 1981 KZ1000 J-to-K build
06 Jul 2014 18:37
Of course I say I can't do anything on the bike, then turn right around and finally get a weekend to figure out the little soda blaster. So I managed to get the carb bodies and several pieces cleaned up and painted. I think I have all of the brackets done except for the throttle cable bracket (it was under some other things on the workbench and I missed it). The paint should be pretty well cured by next weekend so I can start reassembling the various throttle linkages. I'll probably replace the rubber boots on the choke, so I can put the whole rack of carbs back together until those are here. And I'll need to wash everything -- there's still soda grit everywhere inside the carbs (despite having taped up the holes, I thought).
Had to make a last-minute change in paint. The local auto store didn't have any flat-black engine paint. Guess they changed their stock since the last time I looked, but this may be for the better. Some folks have told me that ts hard to clean flat colors, but I really wanted to do the two-tone black scheme. Well I found a color called "black pearl" which is a low-gloss black with a very fine metal flake in it. It ends up being a very light shade towards gunmetal black, and the flakes make it stand out just enough from the gloss black of the frame that there will be a distinct difference. The only issue is that they don't make this color for the exhaust pipes, so I will need to decide if I'm going to go with flat black (in which case I'll have three different tones of black), or a gloss black (which would blend the pipes in with the frame). I have a long ways to go before that's an issue though. For mow I'll be happy to get the carbs done and off the workbench, and finally feel like I've made some progress on this project...
Had to make a last-minute change in paint. The local auto store didn't have any flat-black engine paint. Guess they changed their stock since the last time I looked, but this may be for the better. Some folks have told me that ts hard to clean flat colors, but I really wanted to do the two-tone black scheme. Well I found a color called "black pearl" which is a low-gloss black with a very fine metal flake in it. It ends up being a very light shade towards gunmetal black, and the flakes make it stand out just enough from the gloss black of the frame that there will be a distinct difference. The only issue is that they don't make this color for the exhaust pipes, so I will need to decide if I'm going to go with flat black (in which case I'll have three different tones of black), or a gloss black (which would blend the pipes in with the frame). I have a long ways to go before that's an issue though. For mow I'll be happy to get the carbs done and off the workbench, and finally feel like I've made some progress on this project...
1981 KZ1000-JK1
She's a beautiful mess, and I've made her all mine
She's a beautiful mess, and I've made her all mine
Please Log in or Create an account to join the conversation.
- Shdwdrgn
-
Topic Author
- Offline
- User
-
Registered
- Posts: 614
- Thanks: 24
Re: 1981 KZ1000 J-to-K build
26 Oct 2014 16:23
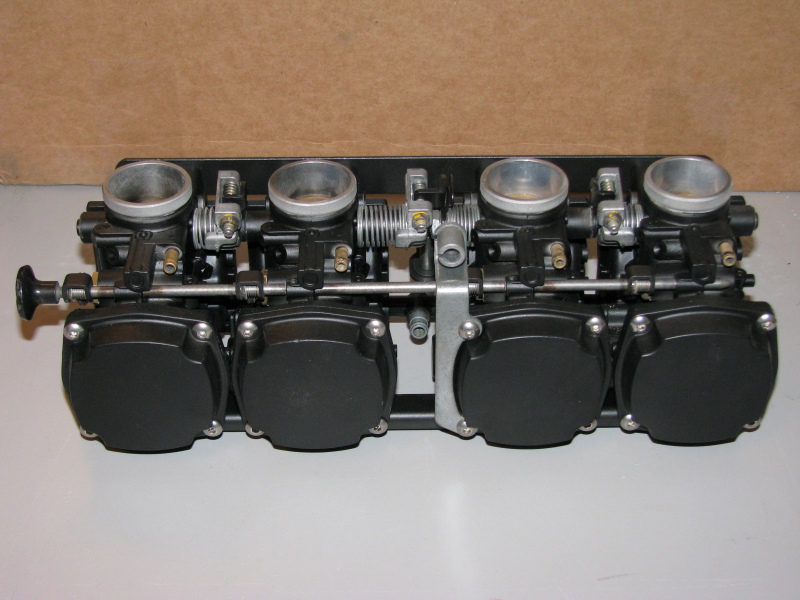
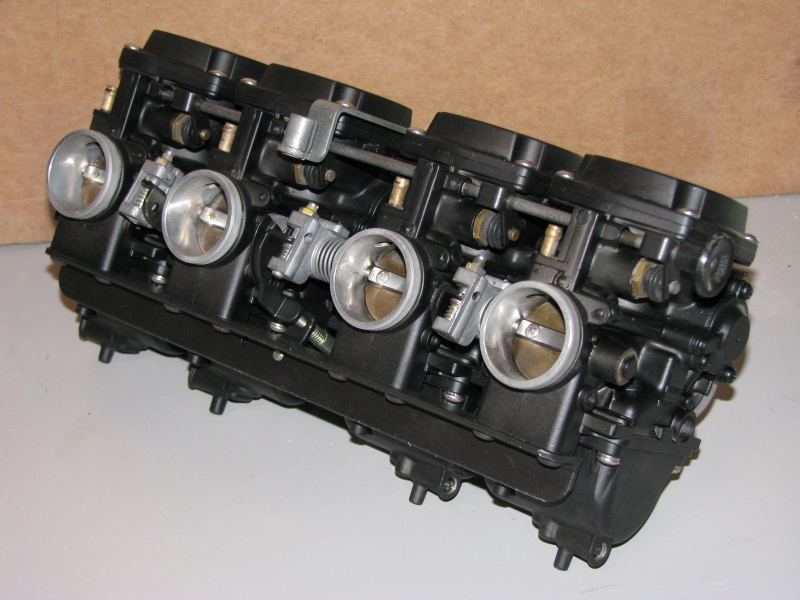
Apparently I didn't update this thread before... The original paint on the carbs turned out to be a disaster, peeling off in places as soon as it dried. I made the mistake of not cleaning off the soda residue before painting, so it just didn't stick properly. Ah well, live and learn!
A couple weeks ago I started stripping the paint, and this time I used some fine sand (it's called medium, but it's only about .50mm). That left a very nice finish on the carbs that gave me confidence would stick. Today I finally got a chance to get back at it again, and finished up all the blasting and painting. Going by recommendations from various people, I picked up a couple big cans of non-chlorinated brake cleaner to hose down the carbs after I finished with the sand, leaving them nice and clean for the paint.
This time I was able to find the flat-black that I originally hoped for. I was also not too happy about how heavy the original paint went on. Today was only 74 degrees, and the cooler weather makes it easier to hold the spray can back a lot further, giving me much better control to lightly cover the carbs. I finished all four carbs with a single can of paint (plus some to spare) compared to last time when I barely finished with two full cans. I think the lighter coat will help the paint stick better as well?
So I'm finished just in time for Winter. I'll let the paint dry for the next week, then pull the carbs back apart so I can wash them out good in the sink and make sure to get any last bits of sand out of the passages, and if everything looks good then I can finally reassemble them and let the paint cure all Winter before they ever see any gas. Also once the carbs are out of the way, I can really clear off my workbench and make room for tearing down the engine over the Winter. That will give me plenty of time to clean everything up and get the crank welded, so when it warms up again I may be ready to paint the block.
1981 KZ1000-JK1
She's a beautiful mess, and I've made her all mine
She's a beautiful mess, and I've made her all mine
Please Log in or Create an account to join the conversation.
- SWest
-

- Offline
- Sustaining Member
-

Registered
- 10 22 2014
- Posts: 23733
- Thanks: 3016
Re: 1981 KZ1000 J-to-K build
26 Oct 2014 16:58
New fork tubes if those are damaged. No coatings. Asking for trouble.
Z1b1000 1975 Z1b
kzrider.com/forum/11-projects/598262-kz-...-will-it-live#672882
kzrider.com/forum/2-engine/597654-poser?start=240#704229
kzrider.com/forum/11-projects/598262-kz-...-will-it-live#672882
kzrider.com/forum/2-engine/597654-poser?start=240#704229
Please Log in or Create an account to join the conversation.
- Shdwdrgn
-
Topic Author
- Offline
- User
-
Registered
- Posts: 614
- Thanks: 24
Re: 1981 KZ1000 J-to-K build
26 Oct 2014 17:20Wrong thread?swest wrote: New fork tubes if those are damaged. No coatings. Asking for trouble.
1981 KZ1000-JK1
She's a beautiful mess, and I've made her all mine
She's a beautiful mess, and I've made her all mine
Please Log in or Create an account to join the conversation.
- SWest
-
- Offline
- Sustaining Member
-
Registered
- 10 22 2014
- Posts: 23733
- Thanks: 3016
Re: 1981 KZ1000 J-to-K build
26 Oct 2014 17:41
The slide cutaway may be different or the nossels are larger or smaller. Check the numbers. jetsrus has a lot of info. A lot of it has to do with emissions.
Z1b1000 1975 Z1b
kzrider.com/forum/11-projects/598262-kz-...-will-it-live#672882
kzrider.com/forum/2-engine/597654-poser?start=240#704229
kzrider.com/forum/11-projects/598262-kz-...-will-it-live#672882
kzrider.com/forum/2-engine/597654-poser?start=240#704229
Please Log in or Create an account to join the conversation.
- Shdwdrgn
-
Topic Author
- Offline
- User
-
Registered
- Posts: 614
- Thanks: 24
Re: 1981 KZ1000 J-to-K build
21 Nov 2014 12:01
I need to get some new pictures to post... The paint of the carbs seems to have worked great. Rubbing my fingers around the edges, the paint is not flaking off like last time. We might have some decent weather this weekend for me to try putting the carbs back together again, so we'll see how that goes.
The other thing I apparently never mentioned was that I picked up a 650 ducktail a couple months ago. Started cutting into it and working out how I need to do brackets, and I'll have to strip down the seat, modify the pan to fit the tail, then do my own custom vinyl. So much work left to do, and I never seem to have any free time.
The other thing I apparently never mentioned was that I picked up a 650 ducktail a couple months ago. Started cutting into it and working out how I need to do brackets, and I'll have to strip down the seat, modify the pan to fit the tail, then do my own custom vinyl. So much work left to do, and I never seem to have any free time.
1981 KZ1000-JK1
She's a beautiful mess, and I've made her all mine
She's a beautiful mess, and I've made her all mine
Please Log in or Create an account to join the conversation.
- Shdwdrgn
-
Topic Author
- Offline
- User
-
Registered
- Posts: 614
- Thanks: 24
Re: 1981 KZ1000 J-to-K build
22 Jan 2015 19:55
We finally got a break in all this cold weather, and I had a chance to finish re-assembling the carbs this weekend. I ended up pulling apart the other set for the chokes, since the rubber boots were disintegrating off this set, but everything went together nice and smooth. With any luck, I even put all the parts in the right place! ")
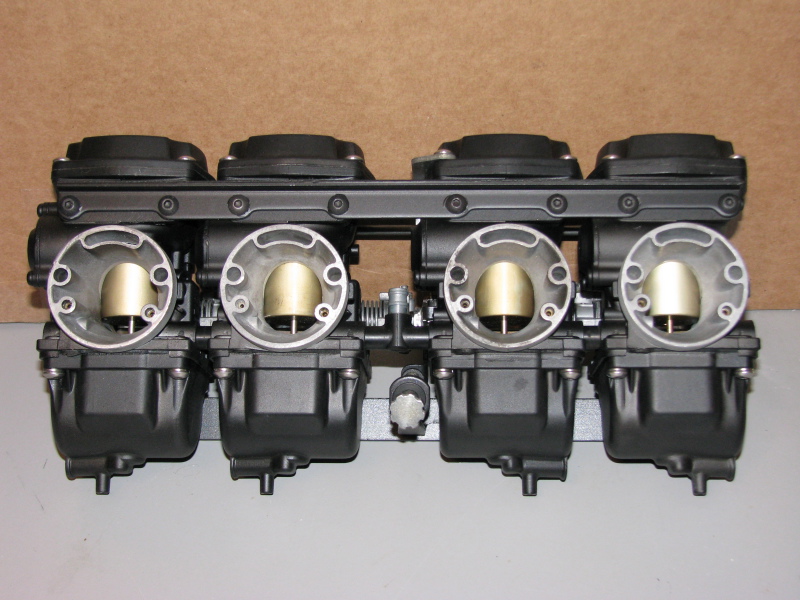
Now we'll just have to see if the paint stays stuck once gas is applied... Once Spring hits I think I'll go ahead and paint the throttle cable bracket as well. I thought it was going to look good being left bare, but now that everything is together I believe it needs to be blacked out.
So the next step is getting my workbench completely cleaned off again to give myself plenty of room to work. Then I can start tearing down the engine and getting pieces cleaned up as the weather permits. It will probably be awhile before I get to it though, I have some other projects going on right now. The stereo in my truck is nearly dead, so I decided to build a carPC to replace it. Got most of the hardware except for the conversion harness, I just need to get the software all working and then build a box to hold everything. So much to do, if only I didn't have to waste my days at *work* :laugh:
1981 KZ1000-JK1
She's a beautiful mess, and I've made her all mine
She's a beautiful mess, and I've made her all mine
Please Log in or Create an account to join the conversation.
- Arnold
-
- Offline
- User
-
Registered
- Posts: 397
- Thanks: 14
Re: 1981 KZ1000 J-to-K build
27 Jan 2015 13:33
Wow...those carbs came out really well ! :woohoo:
Nice work !
Nice work !
Check out my project at:
kzrider.com/forum/11-projects/550823-ret...100-82-goes-z1-clone
kzrider.com/forum/11-projects/550823-ret...100-82-goes-z1-clone
Please Log in or Create an account to join the conversation.
- Shdwdrgn
-
Topic Author
- Offline
- User
-
Registered
- Posts: 614
- Thanks: 24
Re: 1981 KZ1000 J-to-K build
10 Jun 2015 21:23
Oh this is going soooo much slower than I anticipated. But I keep plucking at it, a little at a time. I took today off work specifically to work on the bike. The new air compressor makes it feasible to do my own sand blasting, but it's still really slow going.
Last weekend I started working on the swing-arm. Today I focused on getting it all cleaned up so I could primer it. The bits of road tar were a real pain because the sand just bounces off of it. A little scraping, a little wire brushing, a LOT of sand, and I finally got everything cleaned up. Last night I did a bunch of searching for suggestions on rattle-can paint that would be suitable for the frame pieces. I ended up getting a can of rustoleum high-performance enamel, which is supposed to be some of the toughest spray paint available. For the primer, I stuck with the rustoleum self-etching. I previously used this for the wheels on my truck -- no prep other than a soapy wash, then half hour for the primer to set, and another hour for the paint to set before slapping the wheels back on the truck. Despite the rush, it's held up for the past 5 years with very few rock chips, and that was nothing more than your basic cheap gloss-black spray paint. I'm hoping with the sand-blasting and proper cleaning before putting down the primer, this enamel will hold up even better.
So I put down a light coat of primer, then three heavier coats. The weather was questionable this morning when I started, and I was afraid it would rain, but it finally cleared up and was getting hot by the time the primer was sprayed. Only problem is that it was still tacky this evening (I assume from the number of coats), so I rigged up a place to leave it hanging in front of the workbench over the next week. I'm hoping to have a few pieces prepped by the time we get some hot dry weather, so I can paint without the humidity. I think next I'll work on the rear brake and the support bar, then try to tackle the frame. I'm dreading doing the frame because it's going to take days to get it stripped, but once that is done the rest will seem easy.
So the frame is going to be gloss black, and the engine + pipes will be flat black. I've been debating this week if I want to do the wheels in gloss or flat? Maybe I'll take the middle ground and do them in satin. I guess the nice thing about doing my own painting is that I can test each and see what works.
1981 KZ1000-JK1
She's a beautiful mess, and I've made her all mine
She's a beautiful mess, and I've made her all mine
Please Log in or Create an account to join the conversation.
- ed spangler
-
- Offline
- User
-
Registered
- Tennessee Z
- Posts: 512
- Thanks: 29
Re: 1981 KZ1000 J-to-K build
11 Jun 2015 03:57
This is a fantastic looking build :woohoo: and you are doing great, if I may offer my .02 on painting the carb's, most folks I know who have attempted to paint the carbs even with meticulous prep, have been unhappy after a while, because the gas usually causes the paint to peel or chip.
Perhaps you have a new approach to doing this ,but that's what I have heard over the years. just my .02! and Again very nice work!
I am definitely following this build.
Regards
Ed
Perhaps you have a new approach to doing this ,but that's what I have heard over the years. just my .02! and Again very nice work!
I am definitely following this build.
Regards
Ed
Have 1975 Kawasaki Z1-B & 2003 Harley Davidson Heritage Softail Classic
Had Hondas, Harleys and many ,many Z Series Kaws both Std. & LTD's
Had Hondas, Harleys and many ,many Z Series Kaws both Std. & LTD's
Please Log in or Create an account to join the conversation.
Moderators: Street Fighter LTD