Z1000R and Z1000J - Lots of pics, and Gun-Kote oven baked paint.
- timebomb33
-
- Offline
- User
-

Registered
- Posts: 4284
- Thanks: 10
Re: Z1000R and Z1000J - Lots of pics, and Gun-Kote oven baked paint.
10 Mar 2009 19:24
hey i wouldn't be to worried about the wheele not being centered harley softtails depending on tire sizes can be anywhere from 5/8" to 1 1/2" out of line and apperantly they seem to work just fine.
1973 z1 2-1974z1-a,2-1975z1-b dragbikes1015cc+1393cc, 1977kz1000,1978kz1000,1981kz1000j, 1997 zx-11, 2000 z12r,1428turbo nitrous pro-mod and a shit load of parts thats all for now leader sask.,CANADA
I THINK MY POWERBAND BROKE
I THINK MY POWERBAND BROKE
Please Log in or Create an account to join the conversation.
- RoyNor
-
 Topic Author
- Offline
- User
-

Registered
- Posts: 359
- Thanks: 1
Re: Z1000R and Z1000J - Lots of pics, and Gun-Kote oven baked paint.
11 Mar 2009 07:06
HansNor:
Send me an private message so we can exchange telephone numbers, so we can find out when you can visit me. :laugh:
timebomb33:
Thanks for info!
That only confirms the thoughts that some of us users here have.
FOOT PEGS.
I have started on the mountings for the foot pegs, and I will use the original Busa pegs, and also have foot pegs for passenger.
Also I have the Busa rear master cylinder, so everything fits at once as soon I have made the adapter.
Its not that important really with the passenger foot peg, but I also need some kind of mounting for the Kerker muffler, and then the mounting need to be a certain size anyway.
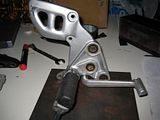
This is what a Busa peg looks like.
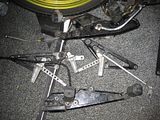
Wonder if there are something here to scavenge.
No.
Those Raask footpegs are for the GPZ1100- 83m--->
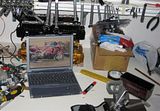
Need to check a picture of a Busa, to see what it looks like original.
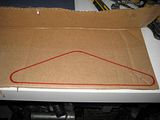
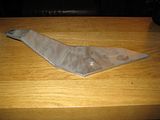
Making an cardboard template.
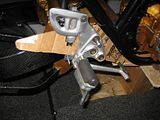
Something like this, it needs to be the right angle and its millimeter precision.
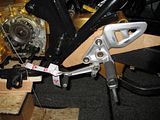
I am not sure if I should cut away some of the metal on the Busa part. That "fence" thing...
Also make the adapter more "light".
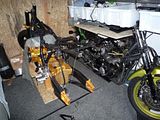
Think it looks almost right...Not 100% sure about this, if this is the final solution about the pegs...
Send me an private message so we can exchange telephone numbers, so we can find out when you can visit me. :laugh:
timebomb33:
Thanks for info!
That only confirms the thoughts that some of us users here have.
FOOT PEGS.
I have started on the mountings for the foot pegs, and I will use the original Busa pegs, and also have foot pegs for passenger.
Also I have the Busa rear master cylinder, so everything fits at once as soon I have made the adapter.
Its not that important really with the passenger foot peg, but I also need some kind of mounting for the Kerker muffler, and then the mounting need to be a certain size anyway.

This is what a Busa peg looks like.

Wonder if there are something here to scavenge.
No.
Those Raask footpegs are for the GPZ1100- 83m--->

Need to check a picture of a Busa, to see what it looks like original.

Making an cardboard template.

Something like this, it needs to be the right angle and its millimeter precision.

I am not sure if I should cut away some of the metal on the Busa part. That "fence" thing...
Also make the adapter more "light".

Think it looks almost right...Not 100% sure about this, if this is the final solution about the pegs...

Please Log in or Create an account to join the conversation.
- RoyNor
-
 Topic Author
- Offline
- User
-

Registered
- Posts: 359
- Thanks: 1
Re: Z1000R and Z1000J - Lots of pics, and Gun-Kote oven baked paint.
15 Mar 2009 11:37
CARBON / ALUMINUM
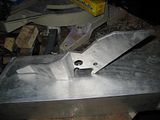
So, I visited the local junkyard and managed to find some aluminum plates, 1mm thickness.
The plan now is to reinforce the alu with carbon, thats something that is used in aircrafts and other lightweight/strong ratio things.
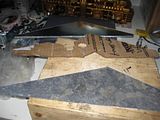
I have made 5 alu pieces after the template, the next now is to make them fit, so I need to make some angles on them.
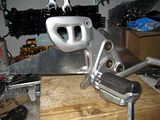
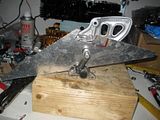
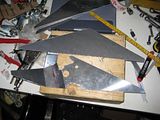
In order to make it fit without touching the swingarm, and make space for the brake cylinder I need to do a little effort in angling here.
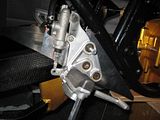
I have chopped off the "fence" thingy, it looked not that nice in my configuration. :lol:
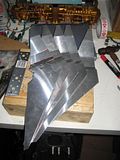
Next now is to make 4 more, total of 5.
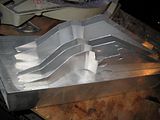
Here they are, degreased and ready for carbon laminating.
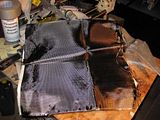
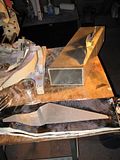
Layer by layer with carbon and aluplate.
Lots of epoxy on both the aluplate and carbon cloth.
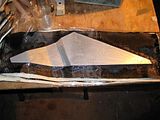
Its total 4 layers with carbon.
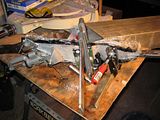
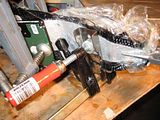
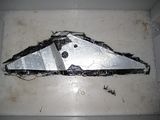
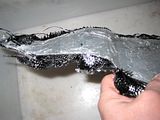
So now its the fine adjust and adapting left.
I am not sure if I will paint it, or use carbon on the sides.
Its a very rigid and stiff construction now, and very light weight.
So, I visited the local junkyard and managed to find some aluminum plates, 1mm thickness.
The plan now is to reinforce the alu with carbon, thats something that is used in aircrafts and other lightweight/strong ratio things.

I have made 5 alu pieces after the template, the next now is to make them fit, so I need to make some angles on them.


In order to make it fit without touching the swingarm, and make space for the brake cylinder I need to do a little effort in angling here.

I have chopped off the "fence" thingy, it looked not that nice in my configuration. :lol:

Next now is to make 4 more, total of 5.

Here they are, degreased and ready for carbon laminating.


Layer by layer with carbon and aluplate.
Lots of epoxy on both the aluplate and carbon cloth.

Its total 4 layers with carbon.


So now its the fine adjust and adapting left.
I am not sure if I will paint it, or use carbon on the sides.
Its a very rigid and stiff construction now, and very light weight.
Please Log in or Create an account to join the conversation.
- mark1122
-
- Offline
- User
-

Registered
- Keep twisting it
- Posts: 5359
- Thanks: 109
Re: Z1000R and Z1000J - Lots of pics, and Gun-Kote oven baked paint.
15 Mar 2009 13:33
WOW! You don’t fool around. that’s cool. I’m trying to mod my zx6 fender for my kz right now. I’ve never worked with glass before. i can appreciate how much talent you have my man. Nice work.
76 KZ, frame gusset work,1200CC.Ported by Larry Cavanaugh, 1.5mm.over intakes, Carron Pipe, ZRX12 rear end, and seat,96zx9 front end.
01 CBR600F4i Track bike.
Cobourg, Ont. Can.
~ ~ ~_@
~ ~ _- \,
~ (k) / (z)
01 CBR600F4i Track bike.
Cobourg, Ont. Can.
~ ~ ~_@
~ ~ _- \,
~ (k) / (z)
Please Log in or Create an account to join the conversation.
- RoyNor
-
 Topic Author
- Offline
- User
-

Registered
- Posts: 359
- Thanks: 1
Re: Z1000R and Z1000J - Lots of pics, and Gun-Kote oven baked paint.
16 Mar 2009 14:07
Thanks Mark. 
I will start on the fender as well soon, I dont know yet what it will look like. hmm.
I will start on the fender as well soon, I dont know yet what it will look like. hmm.
Please Log in or Create an account to join the conversation.
- Bad Kaw
-
- Offline
- User
-

Registered
- Flying Squirell
- Posts: 1750
- Thanks: 13
Re: Z1000R and Z1000J - Lots of pics, and Gun-Kote oven baked paint.
16 Mar 2009 22:59
Great stuff!
Keep it comin'!
-KR
Keep it comin'!
-KR
78 Kawasaki Z1R
81 Kawasaki KZ1000J (mods)
82 Kawasaki ELR Clone (1000 J)
82 Kawasaki KZ750R1/GPz750 ELR-ed
70 Kawasaki KV75
83 Honda CB1100F (few mods)
79 Suzuki GS1000 (rolling frame / project / junk)
84 Suzuki GS1150ES (modified project)
83 Yamaha XJ900R (project / junk)
81 Kawasaki KZ1000J (mods)
82 Kawasaki ELR Clone (1000 J)
82 Kawasaki KZ750R1/GPz750 ELR-ed
70 Kawasaki KV75
83 Honda CB1100F (few mods)
79 Suzuki GS1000 (rolling frame / project / junk)
84 Suzuki GS1150ES (modified project)
83 Yamaha XJ900R (project / junk)
Please Log in or Create an account to join the conversation.
- RoyNor
-
 Topic Author
- Offline
- User
-

Registered
- Posts: 359
- Thanks: 1
Re: Z1000R and Z1000J - Lots of pics, and Gun-Kote oven baked paint.
26 Mar 2009 12:22
A DIARY OF A MAD MAN
(according some H**** driver I met :laugh: )
Just to clarify it once again, this is a H**** driver:
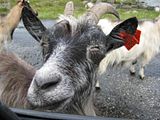
So, after after we done that, we can focus on the important KAWASAKI stuff.
Got some parts from Z1 Enterprises.
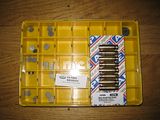
So, then I Gun-Koted the Busa pegs.
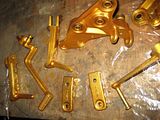
Here are the adapters for pegs.
I will cover them in something nice. :woohoo:
Then I made some carbon stuff, this is the ears that will support the front light.
Its a total of 10 layers with carbon, and I can assure that its rigid and solid.
Starting with lots of resin.
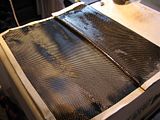
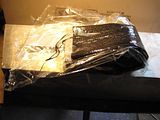
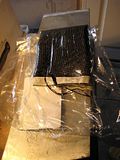
Then I have a socket with a little bigger diameter than the forks.
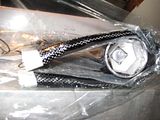
There are 4 layers with glad pack to prevent the carbon to hardenen togeher.
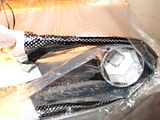
Clamping it, squeezing the resin and carbon.
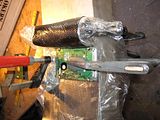
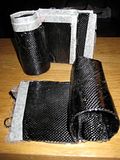
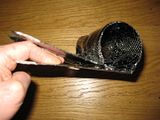
So, now its sanding and some 2 component clearcoat/varnish on the carbonstuff that is left to do...
Just to clarify it once again, this is a H**** driver:


So, after after we done that, we can focus on the important KAWASAKI stuff.
Got some parts from Z1 Enterprises.

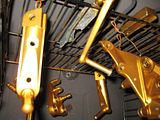
So, then I Gun-Koted the Busa pegs.


Here are the adapters for pegs.


I will cover them in something nice. :woohoo:
Then I made some carbon stuff, this is the ears that will support the front light.
Its a total of 10 layers with carbon, and I can assure that its rigid and solid.
Starting with lots of resin.


Then I have a socket with a little bigger diameter than the forks.

There are 4 layers with glad pack to prevent the carbon to hardenen togeher.

Clamping it, squeezing the resin and carbon.


So, now its sanding and some 2 component clearcoat/varnish on the carbonstuff that is left to do...
Please Log in or Create an account to join the conversation.
- 531blackbanshee
-
- Offline
- Vendor
-

Vendors
- Posts: 7444
- Thanks: 796
Re: Z1000R and Z1000J - Lots of pics, and Gun-Kote oven baked paint.
27 Mar 2009 17:29
keep up the good work roy!i can't wait to see the finished items all mounted up.
leon holmes
leon holmes
skiatook,oklahoma 1980 z1r,1978 kz 1000 z1r x 3,
1976 kz 900 x 3
i make what i can,and save the rest!
billybiltit.blogspot.com/
www.kzrider.com/forum/5-chassis/325862-triple-tree-custom-work
kzrider.com/forum/5-chassis/294594-frame-bracing?limitstart=0
1976 kz 900 x 3
i make what i can,and save the rest!
billybiltit.blogspot.com/
www.kzrider.com/forum/5-chassis/325862-triple-tree-custom-work
kzrider.com/forum/5-chassis/294594-frame-bracing?limitstart=0
Please Log in or Create an account to join the conversation.
- Bad Kaw
-

- Offline
- User
-

Registered
- Flying Squirell
- Posts: 1750
- Thanks: 13
Re: Z1000R and Z1000J - Lots of pics, and Gun-Kote oven baked paint.
29 Mar 2009 12:22
Oh!!!!! MORE!!!!!
Man, this is great!
-KR
Man, this is great!
-KR
78 Kawasaki Z1R
81 Kawasaki KZ1000J (mods)
82 Kawasaki ELR Clone (1000 J)
82 Kawasaki KZ750R1/GPz750 ELR-ed
70 Kawasaki KV75
83 Honda CB1100F (few mods)
79 Suzuki GS1000 (rolling frame / project / junk)
84 Suzuki GS1150ES (modified project)
83 Yamaha XJ900R (project / junk)
81 Kawasaki KZ1000J (mods)
82 Kawasaki ELR Clone (1000 J)
82 Kawasaki KZ750R1/GPz750 ELR-ed
70 Kawasaki KV75
83 Honda CB1100F (few mods)
79 Suzuki GS1000 (rolling frame / project / junk)
84 Suzuki GS1150ES (modified project)
83 Yamaha XJ900R (project / junk)
Please Log in or Create an account to join the conversation.
- irishwill
-
- Offline
- User
-

Registered
- Posts: 597
- Thanks: 6
Re: Z1000R and Z1000J - Lots of pics, and Gun-Kote oven baked paint.
29 Mar 2009 12:35
killer thread ....your work is apreciated!!!
Please Log in or Create an account to join the conversation.
- bill_wilcox100
-
- Offline
- User
-

Registered
- Posts: 1115
- Thanks: 5
Re: Z1000R and Z1000J - Lots of pics, and Gun-Kote oven baked paint.
29 Mar 2009 13:09
Good stuff! Keep it up.
Best of success!
Best of success!
1977 KZ650-B1 (Stock)
Upgrades:
- Dyna S Electronic Ignition (DS2-2)
- Dyna 3 Ohm Coils (DC1-1)
- Coil Repowering Mod
- Progressive Springs Front & Rear
- Saddlemen Seat Cover
- New Metallic Red Re-Paint & Repro Badges.
Montreal, Canada
Upgrades:
- Dyna S Electronic Ignition (DS2-2)
- Dyna 3 Ohm Coils (DC1-1)
- Coil Repowering Mod
- Progressive Springs Front & Rear
- Saddlemen Seat Cover
- New Metallic Red Re-Paint & Repro Badges.
Montreal, Canada
Please Log in or Create an account to join the conversation.
- mox369
-
- Offline
- User
-

Registered
- Posts: 44
- Thanks: 0
Re: Z1000R and Z1000J - Lots of pics, and Gun-Kote oven baked paint.
31 Mar 2009 13:42
wow, just read through all 22 pages of the thread and am inspired! I cant wait to see this thing done and put together.
83 KZ 1100 Shaft Drive
Please Log in or Create an account to join the conversation.
Moderators: Street Fighter LTD


