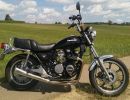
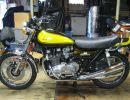
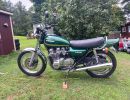
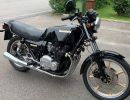
KZR's Bikes of the Month for 2024
KZombie

  • SWest
  • Offline
  • Sustaining Member
  • 10 22 2014
More
12 May 2016 07:25 #725920 by SWest
Replied by SWest on topic KZombie
There should be threads in the rotor for a large bolt. Do you see it? Get a ball at the HDWR store.
Steve
The following user(s) said Thank You: wrenchmonkey

Please Log in or Create an account to join the conversation.

More
12 May 2016 10:49 #725955 by JENKFITLIFE02
Replied by JENKFITLIFE02 on topic KZombie
You wanna sell that backrest let me know!

Please Log in or Create an account to join the conversation.

  • wrenchmonkey
  • Topic Author
  • Offline
  • User
More
14 May 2016 18:02 #726429 by wrenchmonkey
Replied by wrenchmonkey on topic KZombie
You can't always get what you want but if you try, sometimes, you get what you need.

That's pretty much the reality of KZombie's restoration. I wanted to tear down the engine this week and replace all the seals and after some considerable effort, I was able to strip the engine down to the point of splitting the upper and lower case halves so as to finally access the crank seals at both ends. However, I got the engine down to that point and upon close-up inspection of the seals I find they are all still pliable and seemingly doing their jobs. About the only seal which I still question even a little is the inner-most shifter shaft seal which looks like it's a bit worn. So much ruminating later and looking at the case halves all nicely glued together and dry; I backed out of my plans to split the engine just so I could replace two seals that don't seem to need it. Will I regret this decision? Maybe but then, the whole engine is a big question mark yet. Other than having the cylinder head rebuilt due to some stuck/bent valves, I have no idea it will even run. So I rationalized the heck out of it and came up with this:
I want to replace the seals but I need to first see if they'll leak upon actually having the engine run.
Gavel slam. Decision made.
So I pressed-on with the prep for paint this weekend and left the dismantled engine on the bench to chide and smirk at me as I prepped the wheels and the sundry other parts for the new pearl black metallic paint they were going to receive.
Here's the pictures to prove it.
First step was to mask off the wheel spokes:

I am cheap so I masked-off one spoke and then carefully sliced-off the excess and re-applied it to the next spoke.
Then it was onto the nicely polished rims:

I applied short lengths of masking tape around the wheel's perimeter and then came back with a razor knife to neatly slice-off the excess, following the inner radius of the polished face in the same manner as I did the spokes.
Finally, there was the enTIRE portion to mask-off from the paint over spray:

This of course was easy and quick, save for the center hubs which I had to mask off roughly and then again with the razor knife; slice off the excess. This keeps the hubs clean for their new bearings and seals as well as the caliper mounting surfaces.

With the major time consuming job of masking off the wheels finished in two evenings, Saturday morning rolled around and to my dismay a big ol' Texas sized storm rolled through overnight and kinda' dashed my plans to clean-up the remaining parts for paint outside in the breeze on my drill press. So I slurped my coffee and just had at it in the garage like all the members do up north. B)

By noon, I had all the random engine mounting brackets, brake torque arm and triple tree pieces etc cleaned and primed:

I had to pretty much turn every workbench and spare tool into parts hangers for the priming and painting to come but it was easy and I just enjoy this part of the restoration. So it was onto the first stage of paint - the Harley Black Pearl Metallic went on easy as you please and covered well considering. The first stage of a two stage paint is very ... erm ... thin is probably the best descriptor. It goes on very easy but thin, so you have to apply several coats and keep in mind that you're dealing with a metallic so the paint pattern has to be cross-hatched in order to prevent so-called "tiger striping" in the paint. Still with mostly small surfaces it was easy.
Here's a close-up of a wheel. Can you just barely see pearl?


Here's another piece; the headlamp ear:

You can see that it's kind of shiny but closer to satin than gloss. Again the pearl metallic is not readily visible.

Then came the clear coat which is the second phase of a two stage paint system. If you ever wondered how they can sell a 2k paint in a "rattle can". Well, wonder no more. Their dirty secret is now revealed:


Basically, shake the can, remove a sorta nozzle looking attachment in the cap and then press it into the bottom of the can which looks like the top without a nozzle present - just a sorta nipple and when you press the attachment into the base it releases the catalyst into the clean inside. Then just shake another couple of minutes and begin shooting stage two. Easy right?
I discovered that the first stage and second stage cans did not have that uber cool adjustable nozzle with the rotary dial on top. Only the adjustable spray patter to set your paint "fan" vertical or horizontal etc.
Anyway, it ended up taking a total of 3 cans of base and another 2 cans of clean to complete the black portions of KZombie.

Have you ever seen a black, pearl, metallic paint? Come out of a rattle can? After clear coating? Aren't you just itchin' to slap me and say "show me the damn pictures already!" ? :laugh:
It actually took me several tries to capture the effect. It's very subtle but I finally got a couple. Only close-up showed it:


Wow! This pops! :woohoo:


The wheels are wee bit more subtle. Almost looking stock. (This is after I unmasked them...)


The upper clamp of the triple tree shows it most like what it appears in person.

So, by now it was 4pm and just out there in the driveway, my KZ550 was calling my name. It still hadn't rained even while looking threatening enough to so I hopped on the bike and went for a mad scramble around the neighborhood. Throwing caution to the wind; no helmet, in shorts and T-shirt. Just scooted around for a few minutes to give the bike a good warm-up and then came back home and parked it in the garage next to the curing paint. I figured I may as well make the KZ550 my bake oven :lol:

About an hour later, I started unmasking all the newly painted parts including the wheels as shown above.
So, a very gratifying day in the garage.
I have to clean up in there tomorrow because the fall-out of the first stage paint amounts to a pretty dusty floor. Finally, now, I can start to think about reassembly! ;)

Please Log in or Create an account to join the conversation.

  • SWest
  • Offline
  • Sustaining Member
  • 10 22 2014
More
14 May 2016 18:41 #726443 by SWest
Replied by SWest on topic KZombie
What was the humidity while you were doing this?
Steve

Please Log in or Create an account to join the conversation.

  • SWest
  • Offline
  • Sustaining Member
  • 10 22 2014
More
14 May 2016 18:41 #726444 by SWest
Replied by SWest on topic KZombie
What was the humidity while you were doing this?
Steve

Please Log in or Create an account to join the conversation.

  • wrenchmonkey
  • Topic Author
  • Offline
  • User
More
14 May 2016 18:51 #726446 by wrenchmonkey
Replied by wrenchmonkey on topic KZombie
Hey Steve :)

The humidity was on the edge. I was concerned initially but the day broke out into partly cloudy and breezy conditions and so I decided to go with it. Still, after about an hour and half, I could touch the clear coat and it was not tacky. So it'll be okay.

Please Log in or Create an account to join the conversation.

  • SWest
  • Offline
  • Sustaining Member
  • 10 22 2014
More
14 May 2016 19:02 #726449 by SWest
Replied by SWest on topic KZombie
I think that's what happened to my tank. Did it in the shed with the A/C on but as soon as I opened the door, the tank turned cloudy.
I waited a couple weeks, sanded it ans repainted it. Looked great but 6 months later it started cracking. This time I took it down to the primer. Good for about a year but it's cracking again. I'm working on my other tank. It will be a bone dry day when I do it. B)
Steve

Please Log in or Create an account to join the conversation.

  • wrenchmonkey
  • Topic Author
  • Offline
  • User
More
14 May 2016 19:59 #726463 by wrenchmonkey
Replied by wrenchmonkey on topic KZombie
I'm ok with the results. It's dry & hard. Never got cloudy in the clear coat

Please Log in or Create an account to join the conversation.

  • wrenchmonkey
  • Topic Author
  • Offline
  • User
More
14 May 2016 20:05 - 14 May 2016 23:12 #726465 by wrenchmonkey
Replied by wrenchmonkey on topic KZombie

Here's a pic a few minutes ago.
Attachments:
Last edit: 14 May 2016 23:12 by wrenchmonkey. Reason: Add picture

Please Log in or Create an account to join the conversation.

More
15 May 2016 08:12 #726523 by Irish-Kawi
Replied by Irish-Kawi on topic KZombie
Looking really really good Wrench, laid out some nice paint and that color I think will really pop with contrast to the rest of the bike... can't wait to see it bolted together or at least staged!!!!

Nice job man keep it up! :evil:

Brett

All the gear all the time!

1985 Kawasaki GPz 750 (ZX750-A3) 15,000 original miles www.kzrider.com/forum/11-projects/601230...z750-refresh-project

Father - Husband - Bourbonr - Rider

Please Log in or Create an account to join the conversation.

  • wrenchmonkey
  • Topic Author
  • Offline
  • User
More
15 May 2016 19:11 #726664 by wrenchmonkey
Replied by wrenchmonkey on topic KZombie
Hey Brett :)

Thanks again man. I'm still enjoying the process and getting giddy as a child about it finally going back together. Speaking of which, today I hopped into the garage all happy I was going to finally start assembly of the ol' KZombie.
But first, I had to spend an hour rolling everything out of the garage and sweeping-up the dusty mess left from painting yesterday. Paint fall-out is super fine, like gypsum dust and sticks to everything.

So I finally got the frame set back up to begin making it roller. Pulled out the new steering stem bearings and seals and that went pretty easy. Probably spent more time smearing grease into the rollers than anything:


Whoo Hoo! Now I can finally assemble the front end! So I went and pulled the newly rebuilt forks off the shelf, got all the nicely polished and painted parts set up on the bench and then went to get the fork oil... Where's my fork oil? Are you freakin' kidding me? I forgot to get the dang fork oil... AGAIN! :angry:
No problem. I can handle this minor set back. I'll work on the rear wheel instead. Get to half a roller at least. So I put the forks and all their associate bits away safely and reloaded the workbench with the rear wheel, the new bearing set and all the cleaned or painted parts for this. I have to admit the rear wheel on KZombie is a handful but I had both my manuals ready on the pages for reference and once I got it straight in my brain as to the assembly order of the axle, bearings, seals, spacers. I cut open the new bearings bag and laid them out. 2 bearings for the front wheel? Check! 3 bearings for the rear wheel? Check! I placed the big bearing on the hub and the two smallest bearings by the front wheel for later assembly and that left two medium bearings for the inner rear wheel.
Of course I had managed to almost take two steps forward and so in typical KZombie fashion, I had to take one giant leap backward... I placed the first of two bearings into the rear wheel hub and this happened:


Um? Houston? We have a problem... The 2 smaller bearings for the rear wheel were too small ! :huh:
So I pulled the original bearings out of the baggie I had put them in some weeks back and commenced to teasing my brain into thinking maybe, just maybe I could make these old things work. After all, they have less than 20k miles on them. So I bathed the first one in some WD40 to clean out all the old grease. It looked good! Then I rolled it in my hands. Not so bueno :( Sounded like there were rice crispies mixed in with the ball bearings. No amount of cleaning would remove that crunchy sound while rolling the bearing in my super oily hand. Sadly, I know what the cause of this is - rusted balls. Old age. - The bearings not me! The same thing happened with both the upper and lower steering stem bearings. The races were great but moisture attacked the balls themselves and they rusted and pitted and would randomly crunch through rotation.
Thus endeth the lesson on making a frame into a roller in one day.
Later, I hopped online and checked where I got the wheel bearing set from. weBay seller. So I contacted them through the auction site and fingers crossed that I can replace, exchange, refund since these bearings are useless to me.
Dejected, I spent the rest of the afternoon cleaning up parts that will hopefully, some day, be needed to install on this reluctant bike.
Attachments:

Please Log in or Create an account to join the conversation.

  • Tirefire Pat
  • Offline
  • User
  • (2) 1980 kz1000 b-ltd,,h2-750 triple,sold.kz 550 ,
More
16 May 2016 17:56 #726867 by Tirefire Pat
Replied by Tirefire Pat on topic KZombie
Great looking paint jobs wm,,my favorit's part of the read was the genius move using the sliced off tape for the next part of the rim..Haaa,tightness at its best,,i see your bearings are on the way,cool

Please Log in or Create an account to join the conversation.

Powered by Kunena Forum

If you like KZR Please consider making a donation. Thank you.

KZRider is free, but not without cost.

Please consider chipping in a few bucks to help cover the cost of running the KZR servers.