
Search Results (Searched for: gs swing arm)
Replied by Setton on topic Possible headstock bearings issue?
01 Jun 2017 11:21
I just got back from a local Kawi dealer and they were able to order some new tapered bearings and races, and it wasn't terribly expensive.
Soon I'll be putting this saga behind me... I probably should look into rear wheel and swing arm bearings, but I'm not having any issues out of those so I'll leave it alone for this month. I have a very limited monthly budget.
Soon I'll be putting this saga behind me... I probably should look into rear wheel and swing arm bearings, but I'm not having any issues out of those so I'll leave it alone for this month. I have a very limited monthly budget.
 echelon
Hello all ")
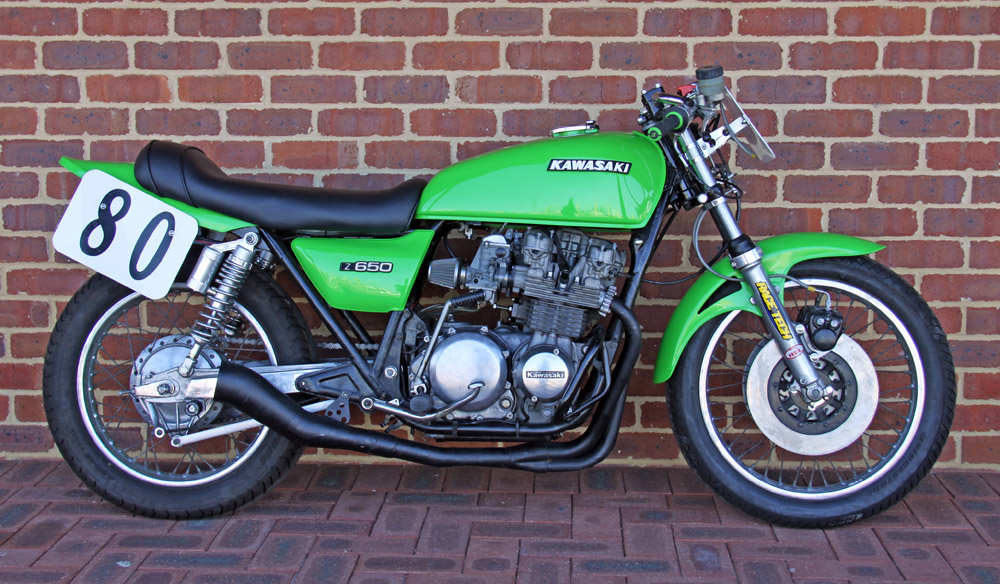
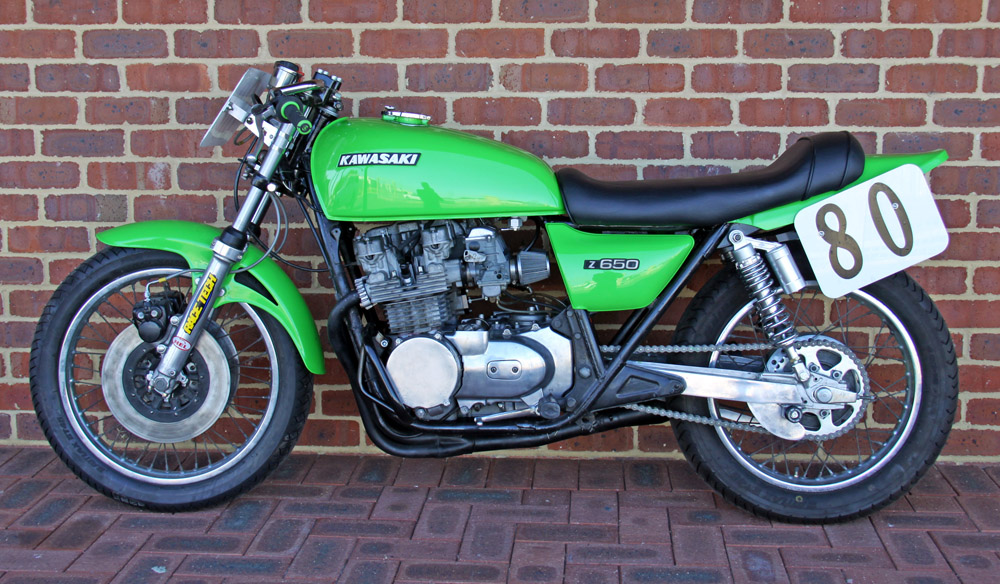
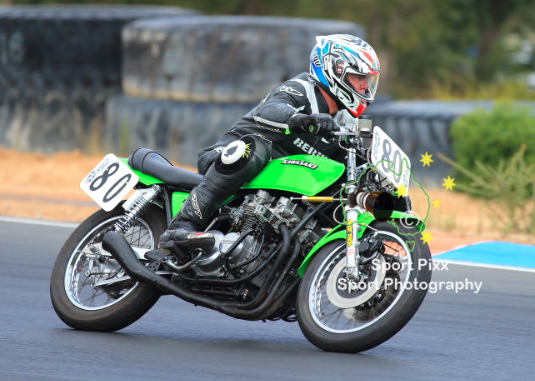
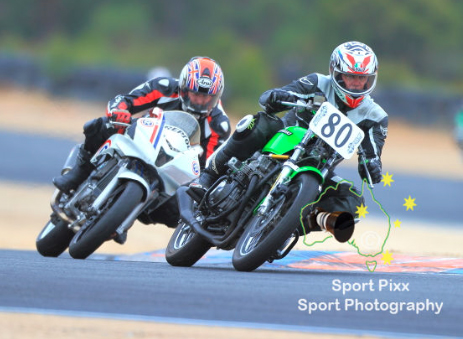
I get a lot of value from this forum, ideas and such, so I thought I'd post up my bike. I bought this as a 12 years in the shed non runner. Most of the work I've done myself, except for the rebore and engine internals. A lot has been done on the cheap!
I race in a historic class, "Period 5 Formula 750" Our class is very gentlemanly, but fast and competitive also. We are not allowed mods that were not available after December 1982, so have to be careful about modifications we make.
My main goal was to lighten her (over 30kgs, 65lbs), she had to be quickish, but due to the nature of my class more importantly reliable.
A short list of changes: 700cc Wiseco kit, GS1100E swingarm, dual discs, racetech emulators and springs, a lot of small things.
Future changes? I have a KZ750 head and cams on the way. Hopefully it will be a worthwhile change, with no piston clearance issues. I'd also like some Keihin CR29s if the future budget permits. Perhaps rearsets, but I have long legs and they are already in the way
Replied by BohicaBob on topic 180 rear tire
31 May 2017 17:49
Been there, done that. That is, upgrade my '73 Z1-900 to wider wheels/tires: 17" Excel rims, SS spokes nipples, Avon radial tires, GS1100 swingarm to fit wider rear wheel and tire (166mm wide Avon radial), Works Performance shocks, Race Tech front fork springs w/emulators, braced frame and aftermarket engine bolt kit, offset countershaft sprocket, offset rear sprocket, etc. I knew it would not be an expensive endeavor, but in this iteration of my old Z1 (there have been earlier handling improvements on this beast), I wanted to see how the handling would change with my already braced frame with aftermarket engine bolt kit and the suspension upgrades accompanying the 17" wheels and radial tires.
Did I like the chagnes. You bet! The handling is better as is the braking, and the bike sits lower which suits my 29" better. I
Did I like the chagnes. You bet! The handling is better as is the braking, and the bike sits lower which suits my 29" better. I
Replied by HeavenlyMachines on topic An attempt to paint my GPZ 750 Tank
23 May 2017 19:45 - 23 May 2017 19:46
Yes basically it seems that I have 3 choices
1) 2 pack paint => most durable and glossy, toxic and better left to the professionals
2) Acrylic Lacquer => Great glossy finish, easy/quick to apply and buff, but prone to gasoline
3) Enamel => Not so glossy and takes forever to cure, But with some durability and resistance to gasoline
As I use the bike for riding and not so much show/concourse I think I'm going with option 3. I've used Duplicolor Engine Enamel with some success for my GPZ900R and they indeed are durable (used them for engine,swing arms and wheels)
gpzninja.blogspot.com.au/2016/11/gpz900r-restoration.html
Single clubfoot swingarm was created by kawsakiman
11 May 2017 21:35
Ok, I heard somewhere you can modify a clubfoot swingarm to accept bearings so you can use shocks.
A rigid with my back will not work.
Was I wrong or do anyone in this vast knowledge base we call kzrider know if this can be done ?
A rigid with my back will not work.
Was I wrong or do anyone in this vast knowledge base we call kzrider know if this can be done ?
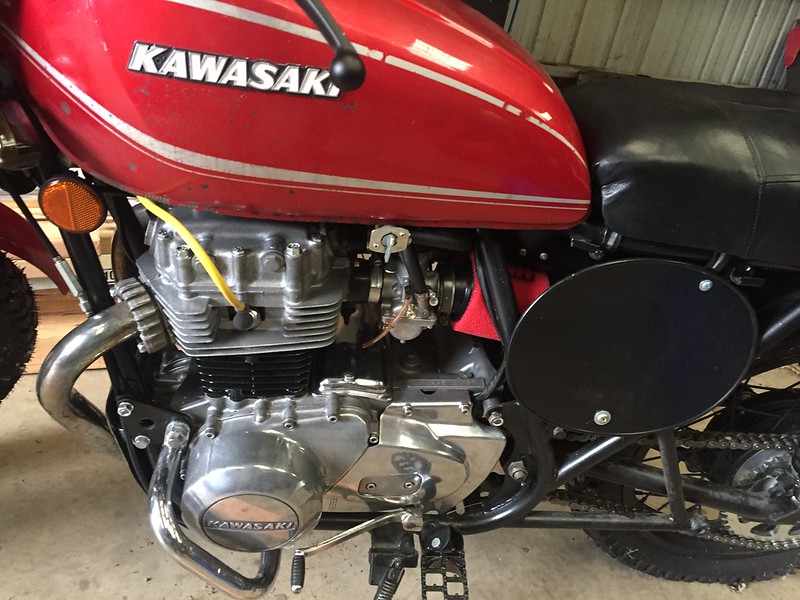
I repaired the wiring loom and rebuilt the carbs before firiring it up and riding around the block a couple of times. After that i stripped the bike down to its frame and started reassembling it, repairing or replacing parts when i thought they needed it,The bikes not a resto just cleaned up.with a couple of custom touches.
The main things done so far....
Repaired the wiring
rebuilt the carbs
cleaned up the wheels and swing arm with new bearings and paint
Custom chain guard and modified front guard
stripped and rebuilt brakes s
new disks, pads and Braided lines
Full service of engine
I Still need to
Finish the paint
rebuild forks (waiting fork new stanchions and seals to arrive )
Fiinish exhaust
tune
ride
other stuff
It runs! And it started right up as soon as I pushed the start button ( well the second time, after I gave it a few seconds to let some fuel get to the carbs ) and it idled great. It was pretty warm yesterday, I had to take the chokes off in just a few seconds so that is a good sign. Between that and based on the jetting I'm using with the VM30s on my 76 I think the stock jetting on the VM28s will be pretty close. Though this one has had a little porting work done to the heads so it may flow a little better.

VM28 carbs, throttle cable and Uni filters were installed. Carbs synced and throttle cable adjusted. Had one small hiccup with the petcock, it leaked a little, but that was simply because the bolts holding it on had not been tightened - rookie mistake. Tightened them up and everything appears to be working fine - didn't spot any leaks at all. Then I put in fresh plugs and put a few squirts of oil into the cylinders. I kicked it over a few times before trying to start it to get some oil moving and make sure everything rotated okay.
Before I take her on her maiden voyage and start tuning the carbs I need to do a few things. I have the clutch adjusted for lever feel but I need to pull out the manual and make sure I have it adjusted properly. All the motor mount bolts need tightened to spec, everything is just finger tight now. The swingarm needs greased and torqued. The front and rear axles need torqued to spec and cotter pins added. And I need to check all the fork and triple tree and shock fasteners to make sure they're correct too. And for some reason my turn signals stopped working so at some point I'll have to track down a loose connection somewhere I'm sure.
It is pretty loud with just the open headers. I believe I have a pair of cheap emgo slip on mufflers sitting around somewhere, I will probably put them on for the time being until I start working on the new exhaust.
Replied by Tyrell Corp on topic Widening the KZ frame...
01 May 2017 04:44
D) Narrow the swing arm.
Seems like tail wagging the dog here. Surely easier ways around it?
I know for the GPz z1000 J R etc chain drives there are arms that will accommodate fat tyres with basic machining and twin shock mounts fitted, IIIRC FZR or GSXR 600 ? ZRX 1100 are also quite a popular fit.
Seems like tail wagging the dog here. Surely easier ways around it?
I know for the GPz z1000 J R etc chain drives there are arms that will accommodate fat tyres with basic machining and twin shock mounts fitted, IIIRC FZR or GSXR 600 ? ZRX 1100 are also quite a popular fit.
oh and just realised this is in the wrong section. Can a moderator please move it to the chassis section? thanks
Hey guys so I need some input please.
I have to widen my frame at the pivot point to accept a wider swingarm. It's about 45mm wider total. So I need 22.5mm (or about 7/8") either side if I keep things central.
The frame doesn't have enough metal to remove that much without weakening the pivot points. It's a shaft drive so the pivot points are also threaded to hold the pivot pin/bolts that hold the swingarm. Here are some pics so you can see what I'm referring to. The whole issue is complicated by the fact that 3 tubes join at this point of the frame and there is like a folded gusset over the inside and outside of the joint. What do you think would be the best way to widen the frame?
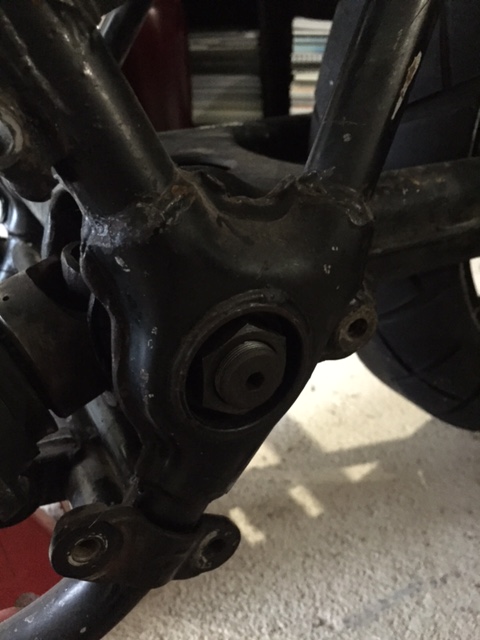
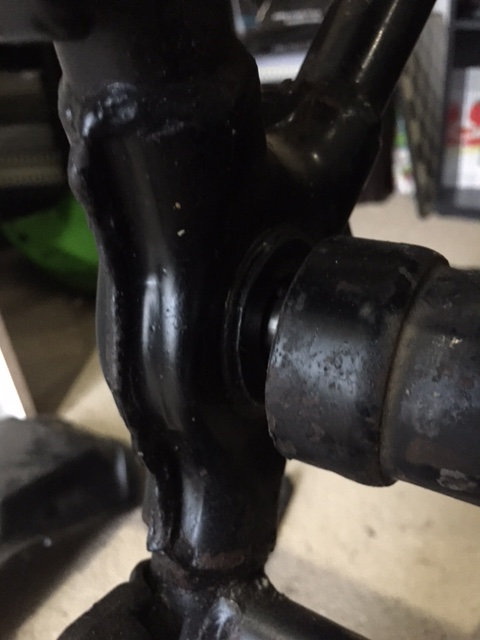
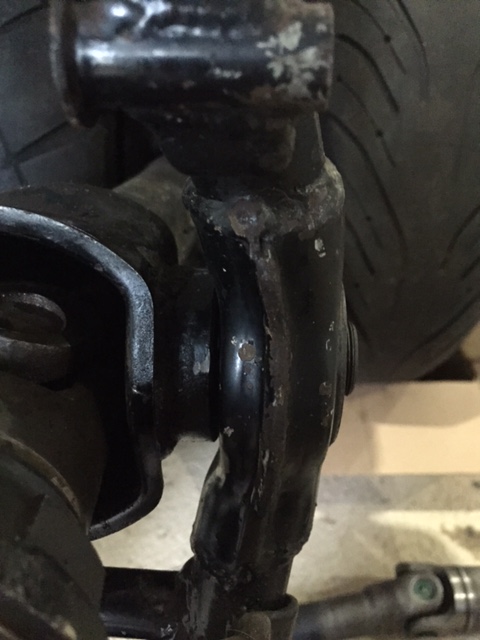
a) Cut the cross supports and stretch the frame at the pivot point, then weld in new cross supports and bracing? This may misalign the threaded pivot points from being perfectly parrallel.
b) Add material to the outside of the pivot points which will allow me to remove the required amount from the inside of the pivot point Downside is the added material won't be directly under the tubular sections that join at this location, but rather "next to them"
c) Cut out the entire pivot point and insert completely new section that can be laser cut from thick steel plating, with locating points that go into the tubular steel before welding it together. Then thread the new steel plating for the pivot bolts. (let me know if I need to draw something to explain this better)
Hey guys so I need some input please.
I have to widen my frame at the pivot point to accept a wider swingarm. It's about 45mm wider total. So I need 22.5mm (or about 7/8") either side if I keep things central.
The frame doesn't have enough metal to remove that much without weakening the pivot points. It's a shaft drive so the pivot points are also threaded to hold the pivot pin/bolts that hold the swingarm. Here are some pics so you can see what I'm referring to. The whole issue is complicated by the fact that 3 tubes join at this point of the frame and there is like a folded gusset over the inside and outside of the joint. What do you think would be the best way to widen the frame?
a) Cut the cross supports and stretch the frame at the pivot point, then weld in new cross supports and bracing? This may misalign the threaded pivot points from being perfectly parrallel.
b) Add material to the outside of the pivot points which will allow me to remove the required amount from the inside of the pivot point Downside is the added material won't be directly under the tubular sections that join at this location, but rather "next to them"
c) Cut out the entire pivot point and insert completely new section that can be laser cut from thick steel plating, with locating points that go into the tubular steel before welding it together. Then thread the new steel plating for the pivot bolts. (let me know if I need to draw something to explain this better)
Back at it again here and going to drive this across the finish line. I've decided I'm going to move the petcock location back a half inch since I have to redo the tank anyway. Fixed a headlight wiring issue, wired in the high beam indicator light and I believe that wraps up the wiring. After riding it late last season, the shock seals must have given out and the rear shock puked oil all over the garage floor. I've just finished replacing it with a ZR7s rear shock. Had to narrow the top shock mount bushing by 2mm and add two washers and a longer bolt on the lower mount. As this shock is 1/2 longer, I'm going to have to flip the chain adjustment bushings and move the axle towards the top of the swingarm or I can't use the center stand. The wheel and tire now set just a bit lower than the bottom of the center stand. Which brings up a question:
What is the best way to rotate the chain adjusters on an 83 to 85 GPz 750? I have to pound the bloody hell out of the to get them to budge. Pounding on things rubs my fur the wrong way. Yes I've loosened clamping bolts at the rear of the swingarm. What a massive PITA. Can't believe racing teams put up with this crap.
What is the best way to rotate the chain adjusters on an 83 to 85 GPz 750? I have to pound the bloody hell out of the to get them to budge. Pounding on things rubs my fur the wrong way. Yes I've loosened clamping bolts at the rear of the swingarm. What a massive PITA. Can't believe racing teams put up with this crap.
Displaying 781 - 790 out of 7255 results.