
Rebuild of KZ1000J engine
- Dr. Gamma
-

- Offline
- Sustaining Member
-

Registered
- Posts: 1231
- Thanks: 706
Re: Rebuild of KZ1000J engine
03 Aug 2022 11:08
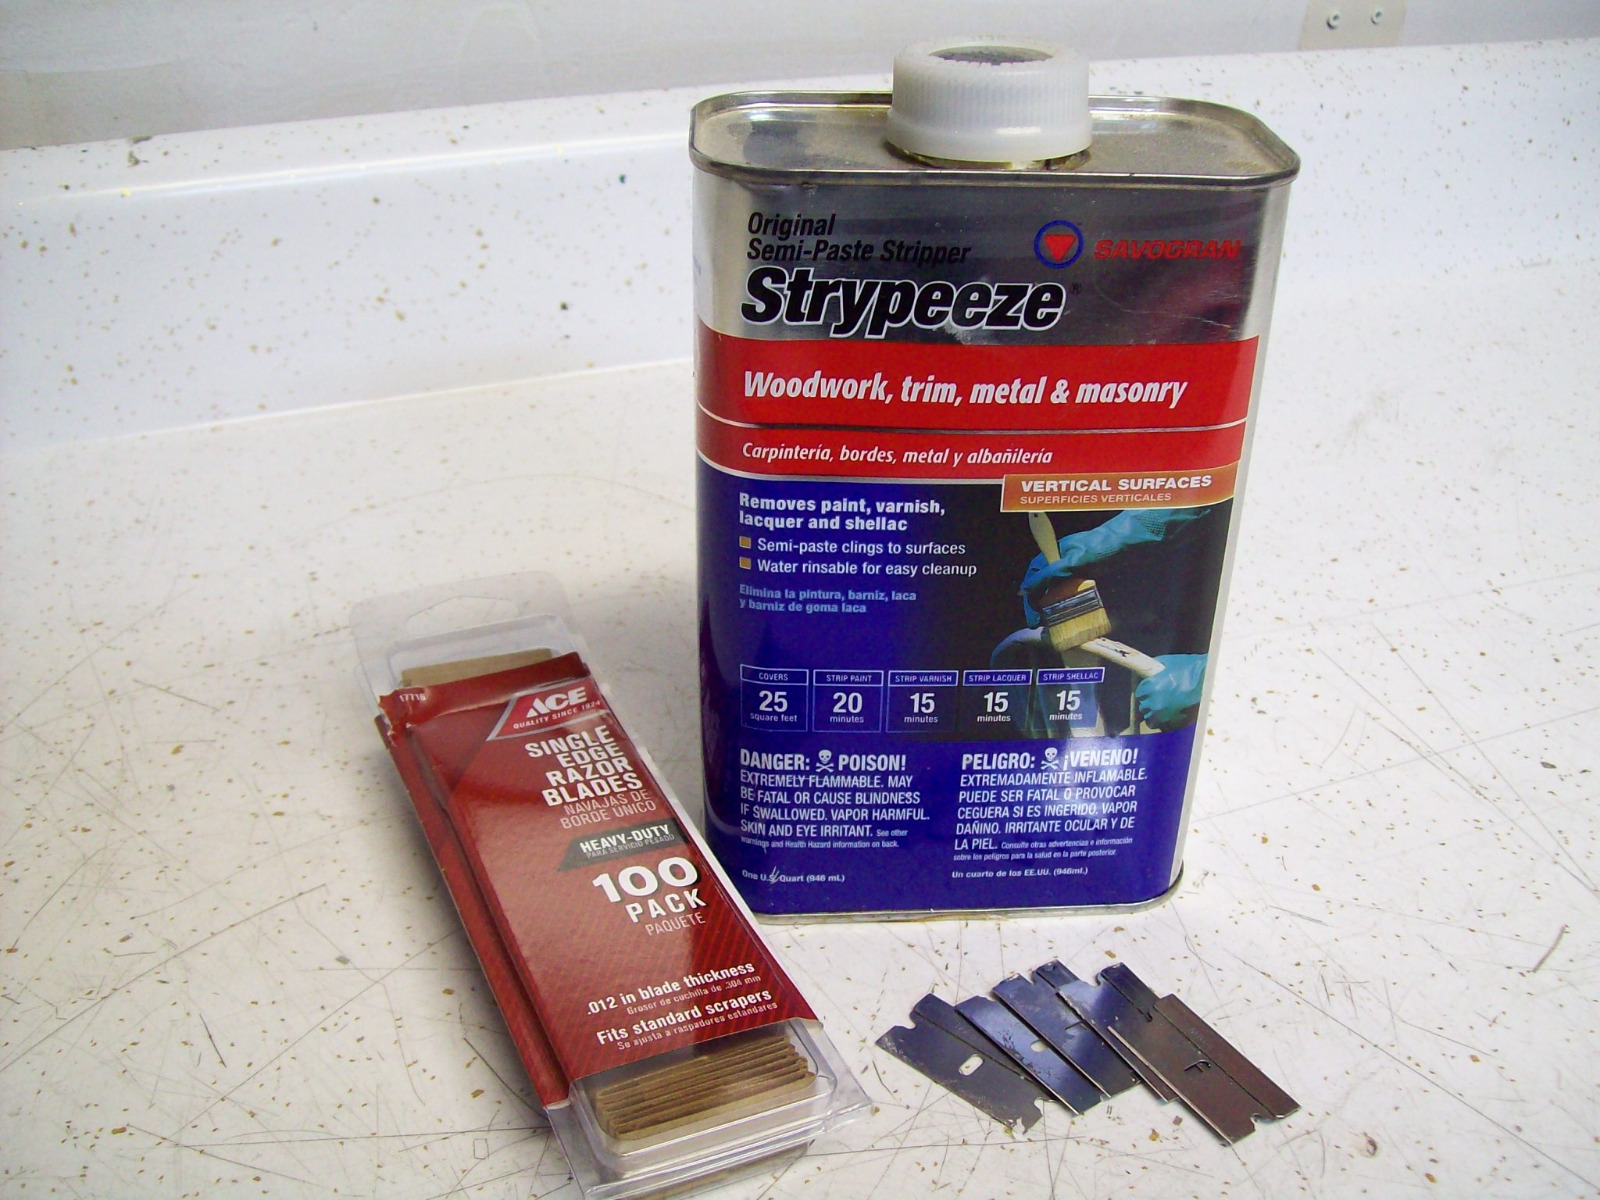
Best thing I have found to remove gasket material without hurting or gouging the gasket surface is a good strong paint remover and razor blades!!! Brush this stuff on the gasket wait a few minutes then start scrapping with the razor blade. I sometimes brush on a 2nd and 3rd coat of paint remover before I start scrapping. You have better control with the brush on stripper than you do with the spray on strippers. All those fancy "gasket removers" are nothing more than paint stripper in a fancy can!!! Most strippers will eat the black paint right off your cases. So make sure you do not get it on your painted parts of your cases. Make sure the paint stripper you buy contains METHYLENE CHLORIDE. Thats the good stuff!!!! The bigger the skull and crossbones emblems on the can are the better the stripper seems to work.
The good stuff!!!!
The good stuff!!!!
1972 H2 750 Cafe Racer built in 1974.
1976 KH400 Production Road Racer.
1979 Kz1000 MK. II Old AMA/WERA Superbike.
1986 RG500G 2 stroke terror.
1986 GSXR750RG The one with the clutch that rattles!
Up in the hills near Prescott, Az.
1976 KH400 Production Road Racer.
1979 Kz1000 MK. II Old AMA/WERA Superbike.
1986 RG500G 2 stroke terror.
1986 GSXR750RG The one with the clutch that rattles!
Up in the hills near Prescott, Az.
The following user(s) said Thank You: Jonas_Z1000j, Wookie58
Please Log in or Create an account to join the conversation.
- Wookie58
-

- Offline
- Moderator
-

Registered
- Posts: 6372
- Thanks: 4016
Re: Rebuild of KZ1000J engine
03 Aug 2022 11:18You might want to consider one of these, for under $10 with the blades from Amazon I find it easier to control the blade with a decent handle on itBest thing I have found to remove gasket material without hurting or gouging the gasket surface is a good strong paint remover and razor blades!!! Brush this stuff on the gasket wait a few minutes then start scrapping with the razor blade. I sometimes brush on a 2nd and 3rd coat of paint remover before I start scrapping. You have better control with the brush on stripper than you do with the spray on strippers. All those fancy "gasket removers" are nothing more than paint stripper in a fancy can!!! Most strippers will eat the black paint right off your cases. So make sure you do not get it on your painted parts of your cases. Make sure the paint stripper you buy contains METHYLENE CHLORIDE. Thats the good stuff!!!! The bigger the skull and crossbones emblems on the can are the better the stripper seems to work.The good stuff!!!!
1982 KZ1000 Ltd
www.kzrider.com/forum/11-projects/617631...-82-begins?start=192
kzrider.com/filebase-alias?view=download...d-fault-diagnosis&ca
www.kzrider.com/forum/11-projects/617631...-82-begins?start=192
kzrider.com/filebase-alias?view=download...d-fault-diagnosis&ca
The following user(s) said Thank You: Jonas_Z1000j
Please Log in or Create an account to join the conversation.
- ghostdive
-
- Offline
- User
-

Registered
- Posts: 391
- Thanks: 120
Re: Rebuild of KZ1000J engine
03 Aug 2022 11:35
I find that gaskets come off more quickly and cleanly with a chisel or some other thicker sharp blade.
1982 KZ750 Spectre - 6 speed swap, BS34s, 18" rear wheel
2001 ZX-6R
2001 ZX-6R
Please Log in or Create an account to join the conversation.
- Jonas_Z1000j
-
 Topic Author
- Offline
- User
-
Registered
- Posts: 94
- Thanks: 31
Re: Rebuild of KZ1000J engine
04 Aug 2022 11:27 - 04 Aug 2022 11:30
I agree on the chisel part. Have used it before and I find it effective now. I spray gasket remover on, wait, then use the chisel, then spray some more and so on. for some tricky areas I complement that with a scraper similar to what Wookie posted. I think the best thing with the chisel is that you can keep it parallel (or almost) with the surface you are cleaning, minimizing risk of cutting into the surface.
EDIT: I bought plastic scrapers after reading some advice somewhere, that was a complete joke.
I did an initial check up on the crankshaft. Side play is good and it feels solid doing the knocktest on the rods!
Ordered a new camchain + guides and some gaskets today, so hopefully I can get the crank case back togheter next week!
Z1000 J2 -82 not so running restoration object anymore
Z900RS -21 Green/Yellow
Z900RS -21 Green/Yellow
Last edit: 04 Aug 2022 11:30 by Jonas_Z1000j.
Please Log in or Create an account to join the conversation.
- Jonas_Z1000j
-
Topic Author
- Offline
- User
-
Registered
- Posts: 94
- Thanks: 31
Re: Rebuild of KZ1000J engine
15 Sep 2022 11:33
Hello again! started working in August and suddenly its mid September

I have been removing gaskets and power washing parts.
Went to the local bike guru with the head and cylinder. He will grind the valve seats and possibly change a couple of guides (he didnt think he would need to after a quick check).
I have ordered viton seals, the 18 mm o-rings for crankcase and oilpump (found they where not included in the gasket kit!).
Cylinder will be bored 0,5 mm, ordered a piston kit from the UK (IMD-pistons, googled them and they seem to have quality stuff). Pistons is currently in the Swedish customs, being examined it seems
 .
.
I will try Dr.Gammas paint stripper trick on the cylinder-crankcase gasket. thats the only one I have left, completely insane to get off.
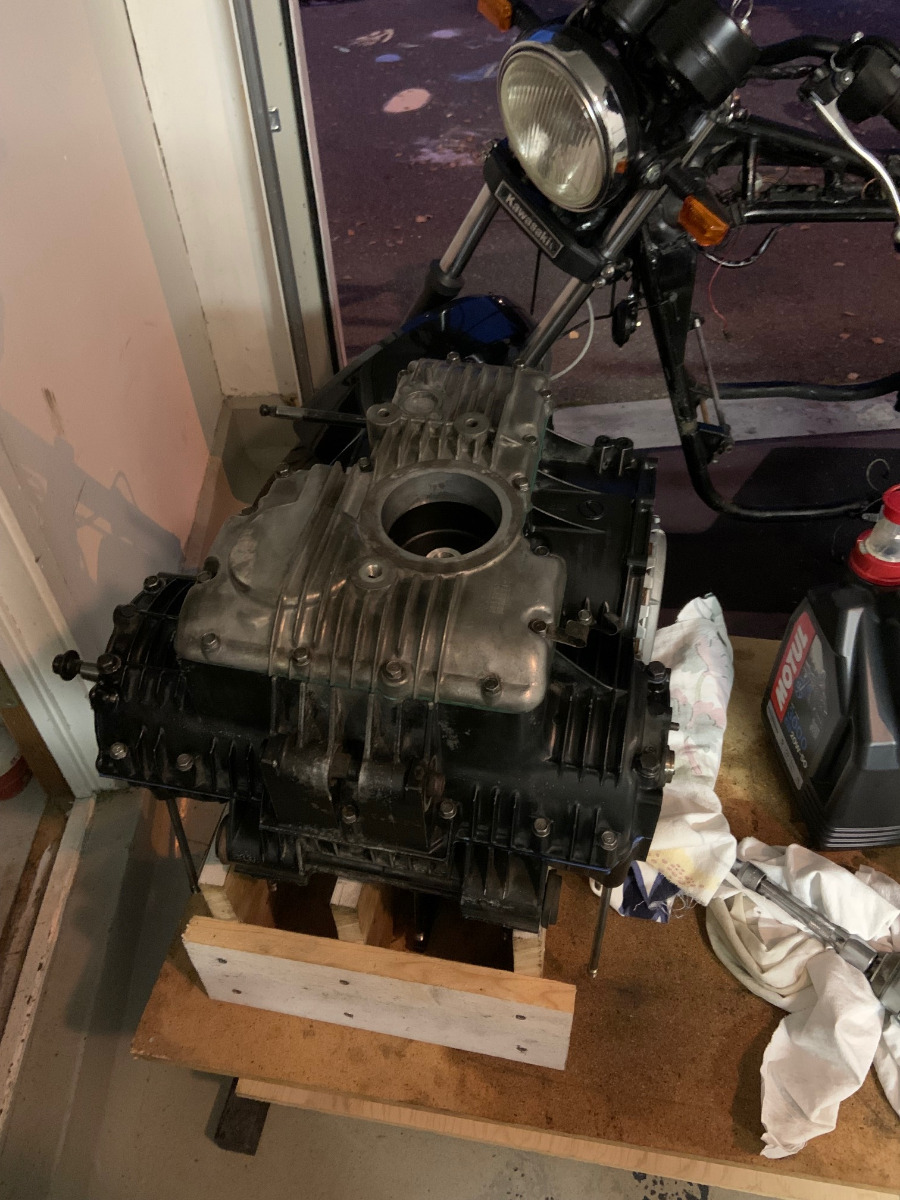
Have cleaned and oiled and started preparing for putting case back together (waiting for the 0-rings):
Is Permatex Ultra Blue good enough between the case halves? It says in the service manual to use sparingly, anyone have a picture or something to show how little?
It seems one can adjust the crank a little left/right before torquing down (the axial clearence on the 5th bearing is fine), anything to look for when doing that? the gears or how close the connecting rods is to the case? Maybe just center the play?
thanks!
I have been removing gaskets and power washing parts.
Went to the local bike guru with the head and cylinder. He will grind the valve seats and possibly change a couple of guides (he didnt think he would need to after a quick check).
I have ordered viton seals, the 18 mm o-rings for crankcase and oilpump (found they where not included in the gasket kit!).
Cylinder will be bored 0,5 mm, ordered a piston kit from the UK (IMD-pistons, googled them and they seem to have quality stuff). Pistons is currently in the Swedish customs, being examined it seems
I will try Dr.Gammas paint stripper trick on the cylinder-crankcase gasket. thats the only one I have left, completely insane to get off.
Have cleaned and oiled and started preparing for putting case back together (waiting for the 0-rings):
Is Permatex Ultra Blue good enough between the case halves? It says in the service manual to use sparingly, anyone have a picture or something to show how little?
It seems one can adjust the crank a little left/right before torquing down (the axial clearence on the 5th bearing is fine), anything to look for when doing that? the gears or how close the connecting rods is to the case? Maybe just center the play?
thanks!
Z1000 J2 -82 not so running restoration object anymore
Z900RS -21 Green/Yellow
Z900RS -21 Green/Yellow
Please Log in or Create an account to join the conversation.
- Mikaw
-
- Offline
- Sustaining Member
-
Registered
- Posts: 4825
- Thanks: 1852
Re: Rebuild of KZ1000J engine
15 Sep 2022 18:57 - 15 Sep 2022 19:01
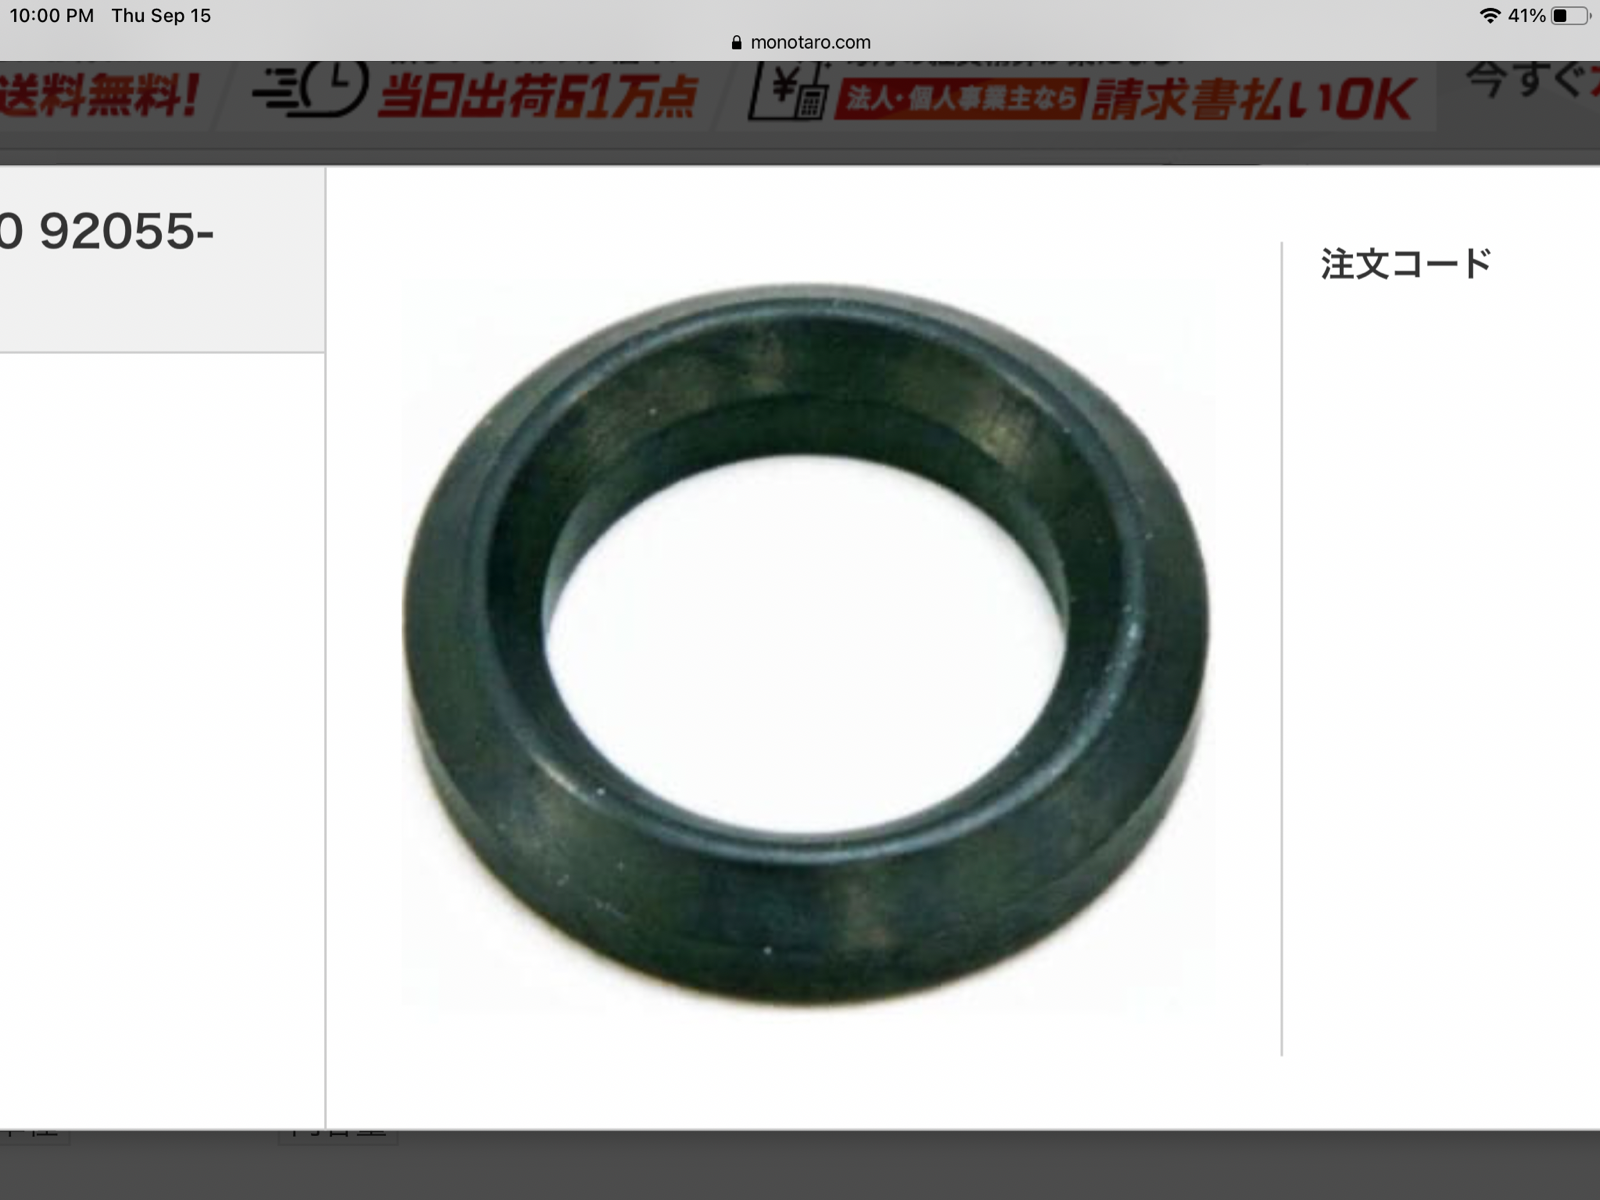
I’m not 100% sure on the J but on the Kz big fours the oil pump O-Ring that goes in between the upper and lower case is somewhat of a triangle profile with the pointed side down toward the lower case. Up in the position your showing your cases. Experts hopefully with confirm.
1976 KZ 900 A4
kzrider.com/forum/11-projects/613548-1976-kz-900-a4
1976 KZ 900 B1 LTD
1978 KZ 1000 B2 LTD
1980 KZ 750 E1
Kowledge Speaks, But Wisdom Listens.
Jimi Hendrix.
1976 KZ 900 B1 LTD
1978 KZ 1000 B2 LTD
1980 KZ 750 E1
Kowledge Speaks, But Wisdom Listens.
Jimi Hendrix.
Last edit: 15 Sep 2022 19:01 by Mikaw.
The following user(s) said Thank You: Jonas_Z1000j
Please Log in or Create an account to join the conversation.
- Jonas_Z1000j
-
Topic Author
- Offline
- User
-
Registered
- Posts: 94
- Thanks: 31
Re: Rebuild of KZ1000J engine
16 Sep 2022 03:12
I found the reference number (92055-048) on the cmsnl.com webside, and they point to the same o-ring that you show, so I ordered 2 of those. I cant really see that shape on the ones installed now, but maybe they are badly compressed? feels important to get this right though.
Z1000 J2 -82 not so running restoration object anymore
Z900RS -21 Green/Yellow
Z900RS -21 Green/Yellow
The following user(s) said Thank You: Mikaw
Please Log in or Create an account to join the conversation.
- Jonas_Z1000j
-
Topic Author
- Offline
- User
-
Registered
- Posts: 94
- Thanks: 31
Re: Rebuild of KZ1000J engine
25 Sep 2022 11:01
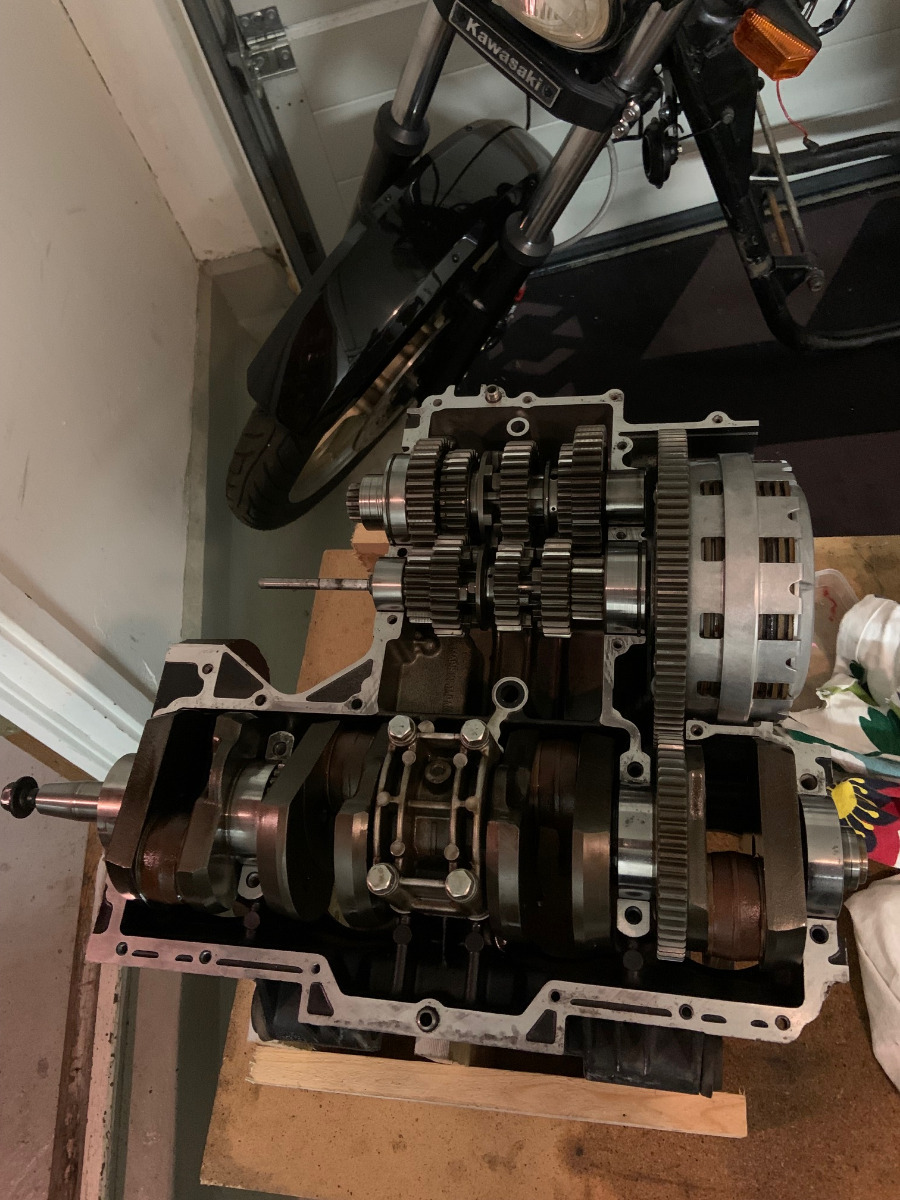
I can confirm that the o-ring Mikaw showed also applies to the J-engines. The triangle part on my old ones was so compressed is was hard to determine before hand, but side by side it was obvious.
Engine halves back together with the new Moore camchain in place:
Next up is cleaning and spray some paint on it.
I smeared some Loctite 5922 gasket sealant on the engine side of the oil pan gasket, then greased the side facing the pan. I hope thats a perfect mix for sealing and removability
 Ill report back in due time.
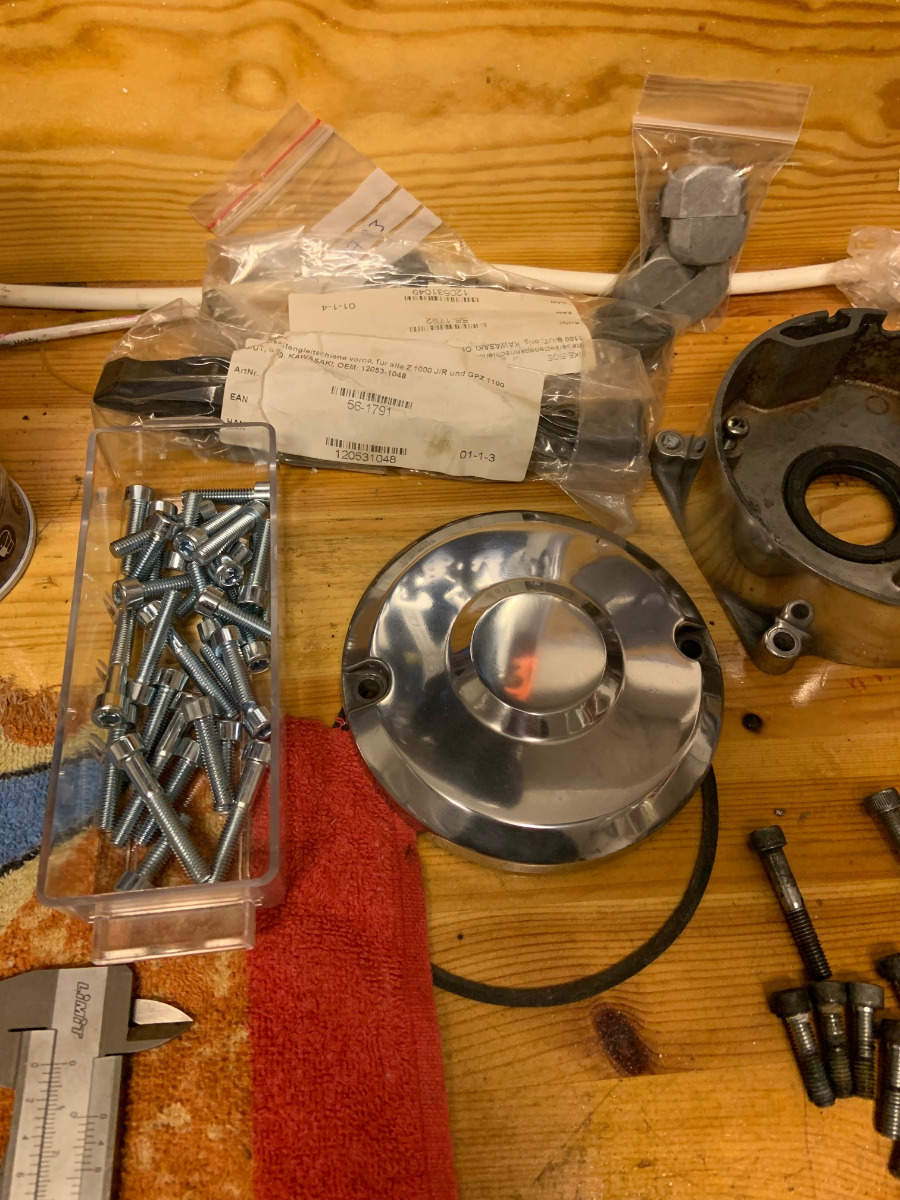
Last weekend I started experimenting on polishing the covers. The alternator and ignition covers where in pretty bad shape with lots of stone shots and blaster. Started with 400-800-1000 wet then polishing compound on the drill. I was surprised by the result in a good way, but I think I will give it another round as it gets a bit addicting
 The rear covers should be easy as they are in much better shape.
Next to the cover is some allen bolts I picked up today at the local hardware store. Approx 5 USD for all cover bolts! I find it really strange that every kit you see on ebay and such has stainless bolts!? I guess those threads wont survive another 40-50 years?
Its not even close yet, but when the time comes to start it up again. How do you prime the oil system?
Engine halves back together with the new Moore camchain in place:
Next up is cleaning and spray some paint on it.
I smeared some Loctite 5922 gasket sealant on the engine side of the oil pan gasket, then greased the side facing the pan. I hope thats a perfect mix for sealing and removability
Last weekend I started experimenting on polishing the covers. The alternator and ignition covers where in pretty bad shape with lots of stone shots and blaster. Started with 400-800-1000 wet then polishing compound on the drill. I was surprised by the result in a good way, but I think I will give it another round as it gets a bit addicting
Next to the cover is some allen bolts I picked up today at the local hardware store. Approx 5 USD for all cover bolts! I find it really strange that every kit you see on ebay and such has stainless bolts!? I guess those threads wont survive another 40-50 years?
Its not even close yet, but when the time comes to start it up again. How do you prime the oil system?
Z1000 J2 -82 not so running restoration object anymore
Z900RS -21 Green/Yellow
Z900RS -21 Green/Yellow
Please Log in or Create an account to join the conversation.
- blipco
-

- Offline
- User
-
Registered
- 2002 KZ1000P
- Posts: 556
- Thanks: 212
Re: Rebuild of KZ1000J engine
25 Sep 2022 11:50
I use these for scraping gaskets. They are as sharp as a razor and you can snap them to make them thinner. They also last longer than you think before they get dull. I did an entire four cylinder head with just one two inch knife snapped in half.
And it is impossible to knick the aluminum.
www.lowes.com/pd/QLT-by-Marshalltown-3-P...AvD_BwE&gclsrc=aw.ds
And it is impossible to knick the aluminum.
www.lowes.com/pd/QLT-by-Marshalltown-3-P...AvD_BwE&gclsrc=aw.ds
"Swim against the current, even a dead fish can go with the flow"-somebody (I forget Who)
Please Log in or Create an account to join the conversation.
- Jonas_Z1000j
-
Topic Author
- Offline
- User
-
Registered
- Posts: 94
- Thanks: 31
Re: Rebuild of KZ1000J engine
05 Oct 2022 10:52
Engine cleaned with scotch brite then paint prepp and painted with a basic engine enamel paint (that was recommended by the company doing the cylinder):
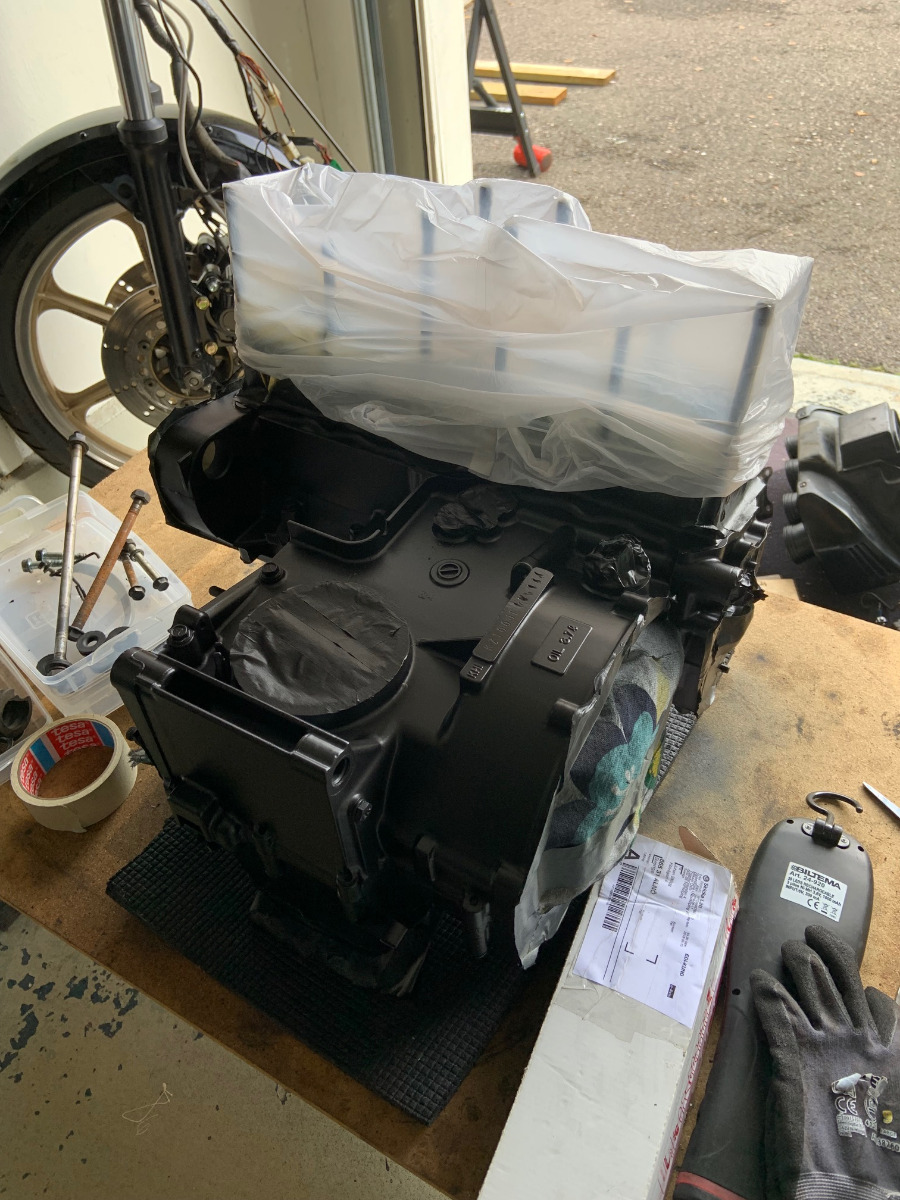
I then turned attention to the frame that was stripped down for powder coating:
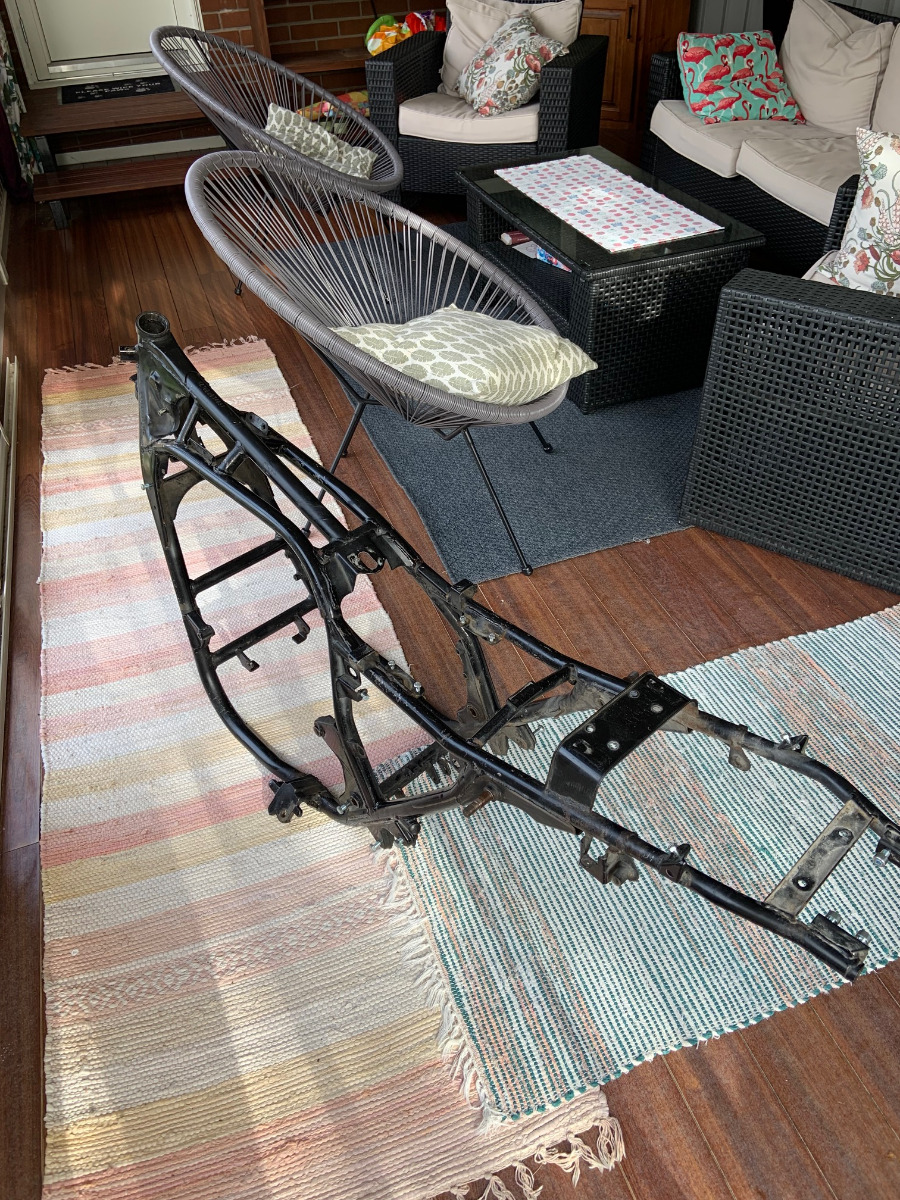
Is there any mandatory frame braces that would be smart to weld in place now? Looks to me that the J frame has extra braces and reinforcements already that previous iterations lacked? One brace I have seen though from pictures is an extra bar in the lower corner of the rear triangle.
Also found that the center stand is a bit twisted. Need to figure out how to bend it back before the coating. I will give it a try in the vise tomorrow, afraid my entire work bench will come flying at me.
If an admin is reading this, maybe this thread should be moved to Projects?
I then turned attention to the frame that was stripped down for powder coating:
Is there any mandatory frame braces that would be smart to weld in place now? Looks to me that the J frame has extra braces and reinforcements already that previous iterations lacked? One brace I have seen though from pictures is an extra bar in the lower corner of the rear triangle.
Also found that the center stand is a bit twisted. Need to figure out how to bend it back before the coating. I will give it a try in the vise tomorrow, afraid my entire work bench will come flying at me.
If an admin is reading this, maybe this thread should be moved to Projects?
Z1000 J2 -82 not so running restoration object anymore
Z900RS -21 Green/Yellow
Z900RS -21 Green/Yellow
Please Log in or Create an account to join the conversation.
- Wookie58
-
- Offline
- Moderator
-
Registered
- Posts: 6372
- Thanks: 4016
Re: Rebuild of KZ1000J engine
05 Oct 2022 11:08 - 05 Oct 2022 11:14
Looking real nice, good work. The "P" appears to have braces between the side rails and the cross tube at the bottom (I will be adding these to mine once the motor is out)
1982 KZ1000 Ltd
www.kzrider.com/forum/11-projects/617631...-82-begins?start=192
kzrider.com/filebase-alias?view=download...d-fault-diagnosis&ca
www.kzrider.com/forum/11-projects/617631...-82-begins?start=192
kzrider.com/filebase-alias?view=download...d-fault-diagnosis&ca
Last edit: 05 Oct 2022 11:14 by Wookie58.
The following user(s) said Thank You: Jonas_Z1000j
Please Log in or Create an account to join the conversation.
- Jonas_Z1000j
-
Topic Author
- Offline
- User
-
Registered
- Posts: 94
- Thanks: 31
Re: Rebuild of KZ1000J engine
05 Oct 2022 12:08 - 05 Oct 2022 12:08
Aha, never seen those. Do you have a picture of a P frame with them installed?
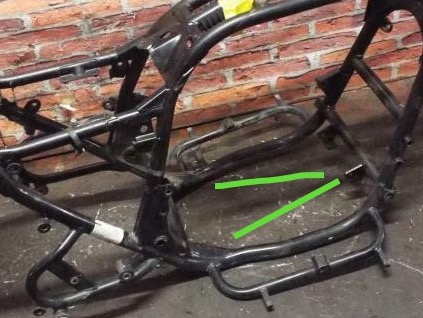
Here is a picture from bikeside.de where an extra reinforcement in the rear triangle is visable:
www.bikeside.de/mediafiles/Bilder/newclassicbikes_24.jpg
I wonder if it works with the original battery size and box however, maybe f you put them in low?
/Jonas
Here is a picture from bikeside.de where an extra reinforcement in the rear triangle is visable:
www.bikeside.de/mediafiles/Bilder/newclassicbikes_24.jpg
I wonder if it works with the original battery size and box however, maybe f you put them in low?
/Jonas
Z1000 J2 -82 not so running restoration object anymore
Z900RS -21 Green/Yellow
Z900RS -21 Green/Yellow
Last edit: 05 Oct 2022 12:08 by Jonas_Z1000j.
Please Log in or Create an account to join the conversation.
Moderators: Street Fighter LTD