
Rebuild of KZ1000J engine
- Wookie58
-

- Offline
- Moderator
-

Registered
- Posts: 6506
- Thanks: 4097
Re: Rebuild of KZ1000J engine
05 Oct 2022 12:44They are installed in this picture (corners would normally be square) these braces are factory on the "P" from early 80'sAha, never seen those. Do you have a picture of a P frame with them installed?
1982 KZ1000 Ltd
www.kzrider.com/forum/11-projects/617631...-82-begins?start=192
kzrider.com/forum/faq-wiki/616810-electr...-fault-finding-guide
www.kzrider.com/forum/11-projects/617631...-82-begins?start=192
kzrider.com/forum/faq-wiki/616810-electr...-fault-finding-guide
Please Log in or Create an account to join the conversation.
- Jonas_Z1000j
-
 Topic Author
- Offline
- User
-

Registered
- Posts: 94
- Thanks: 31
Re: Rebuild of KZ1000J engine
05 Oct 2022 13:42
ah, of course. Thats a good spot, should be invicible also once assembled. I will look into it! thanks for the advice!
Z1000 J2 -82 not so running restoration object anymore
Z900RS -21 Green/Yellow
Z900RS -21 Green/Yellow
Please Log in or Create an account to join the conversation.
- Street Fighter LTD
-
- Offline
- Moderator
-
Registered
- TURBO, Its Better to be Blown than Injected
- Posts: 5119
- Thanks: 2306
Re: Rebuild of KZ1000J engine
05 Oct 2022 14:25
Moved to Projects
DD
DD
Original owner 78 1000 LTD
Mr Turbo Race Kit, MTC 1075 Turbo pistons by PitStop Performance , Falicon Ultra Lite Super Crank, APE everything. Les Holt @ PDM's Billet Goodies . Frame by Chuck Kurzawa @ Logghe Chassis . Deep sump 5qt oil pan. RIP Bill Hahn
The following user(s) said Thank You: Jonas_Z1000j
Please Log in or Create an account to join the conversation.
- Jonas_Z1000j
-
Topic Author
- Offline
- User
-
Registered
- Posts: 94
- Thanks: 31
Re: Rebuild of KZ1000J engine
08 Oct 2022 10:33 - 08 Oct 2022 10:33
Today I have had a great Kawasaki-day, to my familys joy. Riding Kawasaki, washing Kawasaki and welding Kawasaki
 I still dont know what this will cost me, but im happy unaware for now.
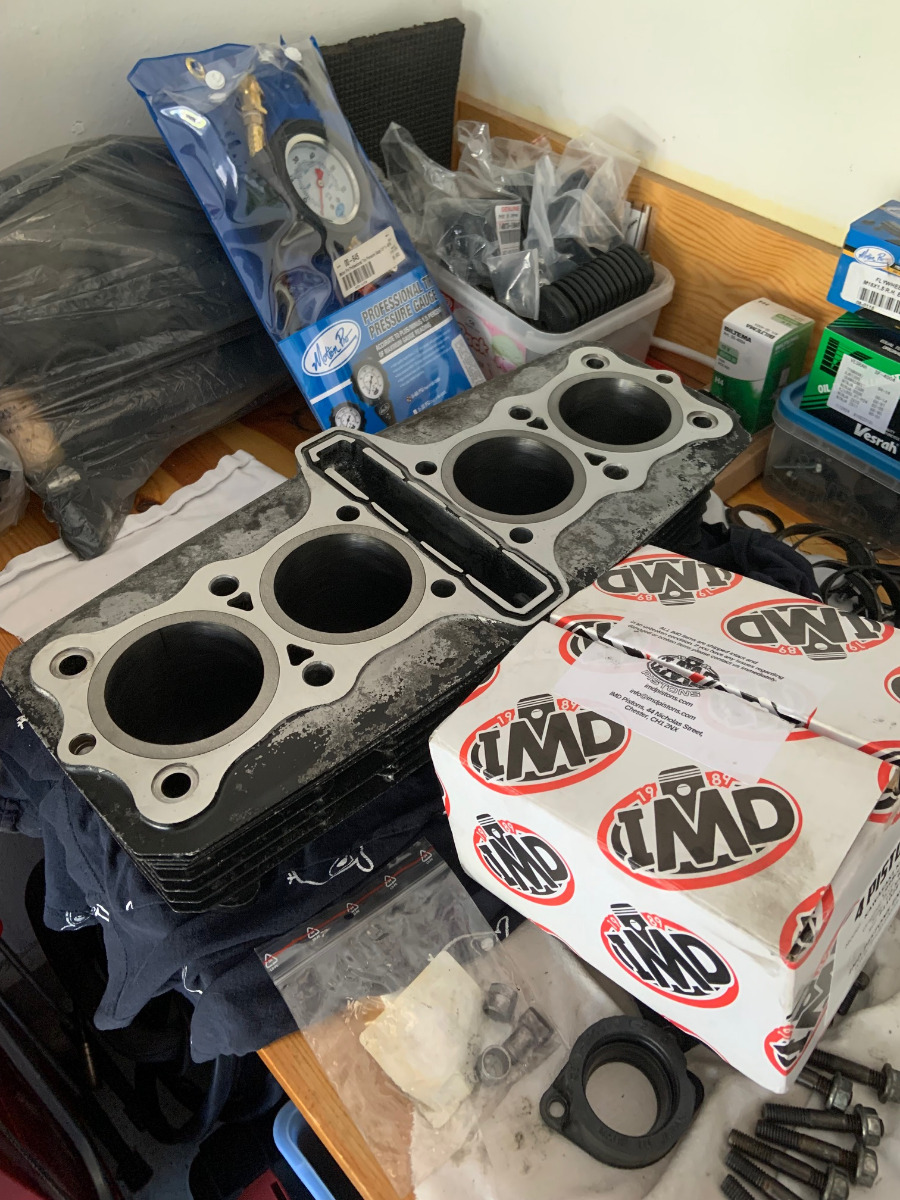
Got my cylinder back yesterday, +0,5 mm and a little milled to get it sealing properly. Sanding and painting is next:
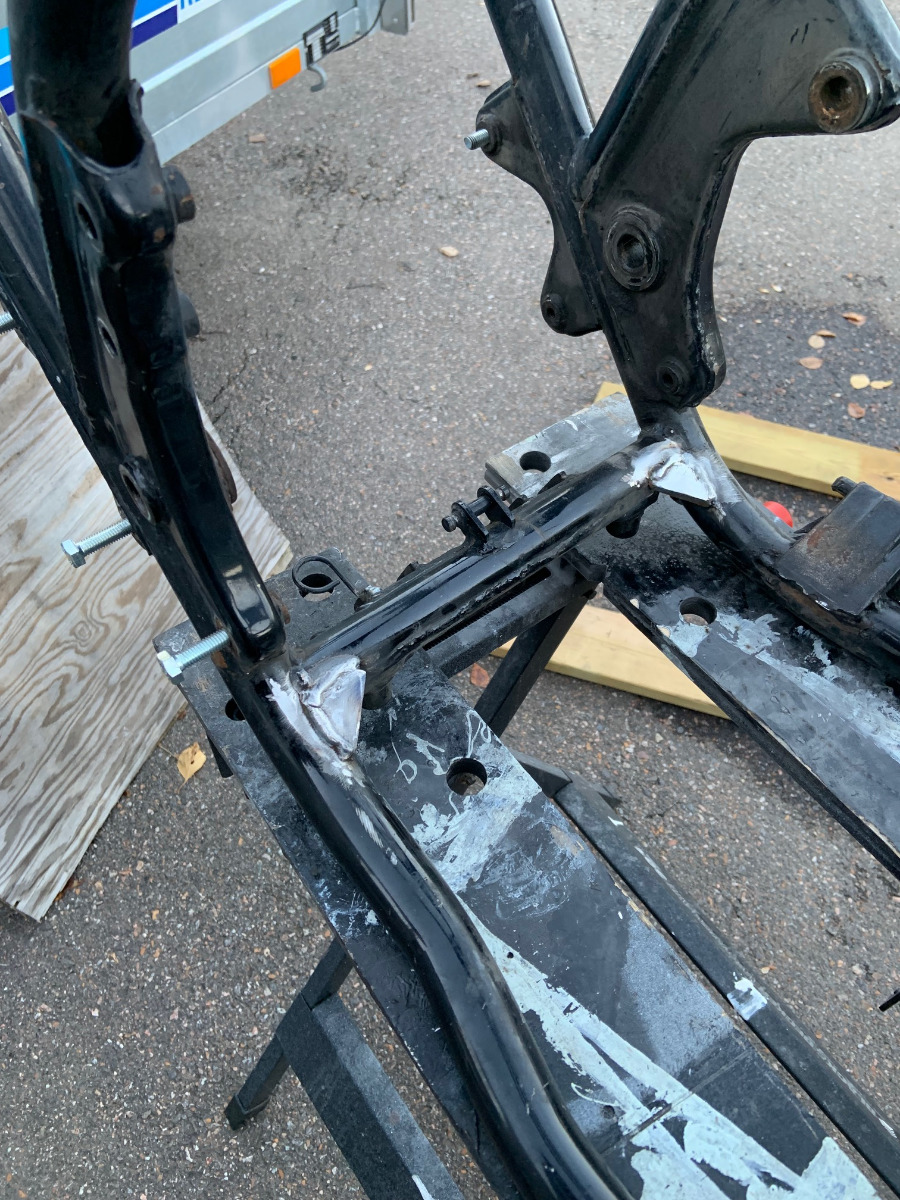
Then I added extra braces as Wookie kindly pointed out, Police Interceptor style (sounds really cool )!
Unfortunately it was 10 years since I last welded something, very well. I have heard that powder coating is really thick

I will leave it together with the stands, battery case and engine mounts etc on Monday.
About powder coating, will it cover most imperfections on the frame or should you prepare the most visable parts with sanding before?
Another thing that came to my mind. The engine dampers, they are expensive... put in new ones or not?
Got my cylinder back yesterday, +0,5 mm and a little milled to get it sealing properly. Sanding and painting is next:
Then I added extra braces as Wookie kindly pointed out, Police Interceptor style (sounds really cool )!
Unfortunately it was 10 years since I last welded something, very well. I have heard that powder coating is really thick
I will leave it together with the stands, battery case and engine mounts etc on Monday.
About powder coating, will it cover most imperfections on the frame or should you prepare the most visable parts with sanding before?
Another thing that came to my mind. The engine dampers, they are expensive... put in new ones or not?
Z1000 J2 -82 not so running restoration object anymore
Z900RS -21 Green/Yellow
Z900RS -21 Green/Yellow
Last edit: 08 Oct 2022 10:33 by Jonas_Z1000j.
The following user(s) said Thank You: Wookie58
Please Log in or Create an account to join the conversation.
- Wookie58
-
- Offline
- Moderator
-
Registered
- Posts: 6506
- Thanks: 4097
Re: Rebuild of KZ1000J engine
08 Oct 2022 10:42
Powder coating will cover more than paint but ultimately " the better the prep, the better the finish"

1982 KZ1000 Ltd
www.kzrider.com/forum/11-projects/617631...-82-begins?start=192
kzrider.com/forum/faq-wiki/616810-electr...-fault-finding-guide
www.kzrider.com/forum/11-projects/617631...-82-begins?start=192
kzrider.com/forum/faq-wiki/616810-electr...-fault-finding-guide
Please Log in or Create an account to join the conversation.
- blackozvet
-
- Offline
- User
-
Registered
- Posts: 193
- Thanks: 79
Re: Rebuild of KZ1000J engine
09 Oct 2022 23:07
The thickness of the powdercoating depends on who is doing it.
If its important best to just discuss it with the powdercoater first.
Some coaters can put it on fairly thin and make it look like paint.
If its important best to just discuss it with the powdercoater first.
Some coaters can put it on fairly thin and make it look like paint.
1973 Z1 900 Kawasaki
Please Log in or Create an account to join the conversation.
- Skidmark
-
- Offline
- User
-
Registered
- Posts: 1087
- Thanks: 312
Re: Rebuild of KZ1000J engine
10 Oct 2022 08:04
Average powder coat thickness is .003" to .006", and varies by how the powder is applied. If hand sprayed, it will be dependent on the operator's technique. Thickness can be controlled better by automated equipment, but that is better suited to flat surfaces and not complex round tube structures (like frames). Prep is your best bet to get a good looking finish as the coating will follow and show all contours. I thought some of the areas on my frame were good enough only to be disappointed with my prep after I got it back.
Retired gearhead
'81 KZ-750 E2
'87 Suzuki Savage 650 Street Tracker (lost in the shop fire)
'81 KZ-750 E2
'87 Suzuki Savage 650 Street Tracker (lost in the shop fire)
Please Log in or Create an account to join the conversation.
- Jonas_Z1000j
-
Topic Author
- Offline
- User
-
Registered
- Posts: 94
- Thanks: 31
Re: Rebuild of KZ1000J engine
23 Oct 2022 10:02 - 23 Oct 2022 10:04
Still waiting for my frame from the powder coater I have been polishing covers and as in any DIY restorers career, I have tested electogalvanizing at home (not sure its the correct term).
But I must admit, for fasteners with some light rust on them, it actually works quite nicely.
From a Swedish motor magazine I have followed this procedure:
1. Clean them good, finish with brass wheel
2. Put them over night in citric acid bath (keep it room tempered or more). The acid removes rust and the old coating, giving them a matt dark grey finish.
3. Some more brass wheel if needed, then soak in solvent. dry.
4. Put them in vinegar/salt/suger bath and hook them up to a zinc anode with a current of approx 0,015 A per cm2.
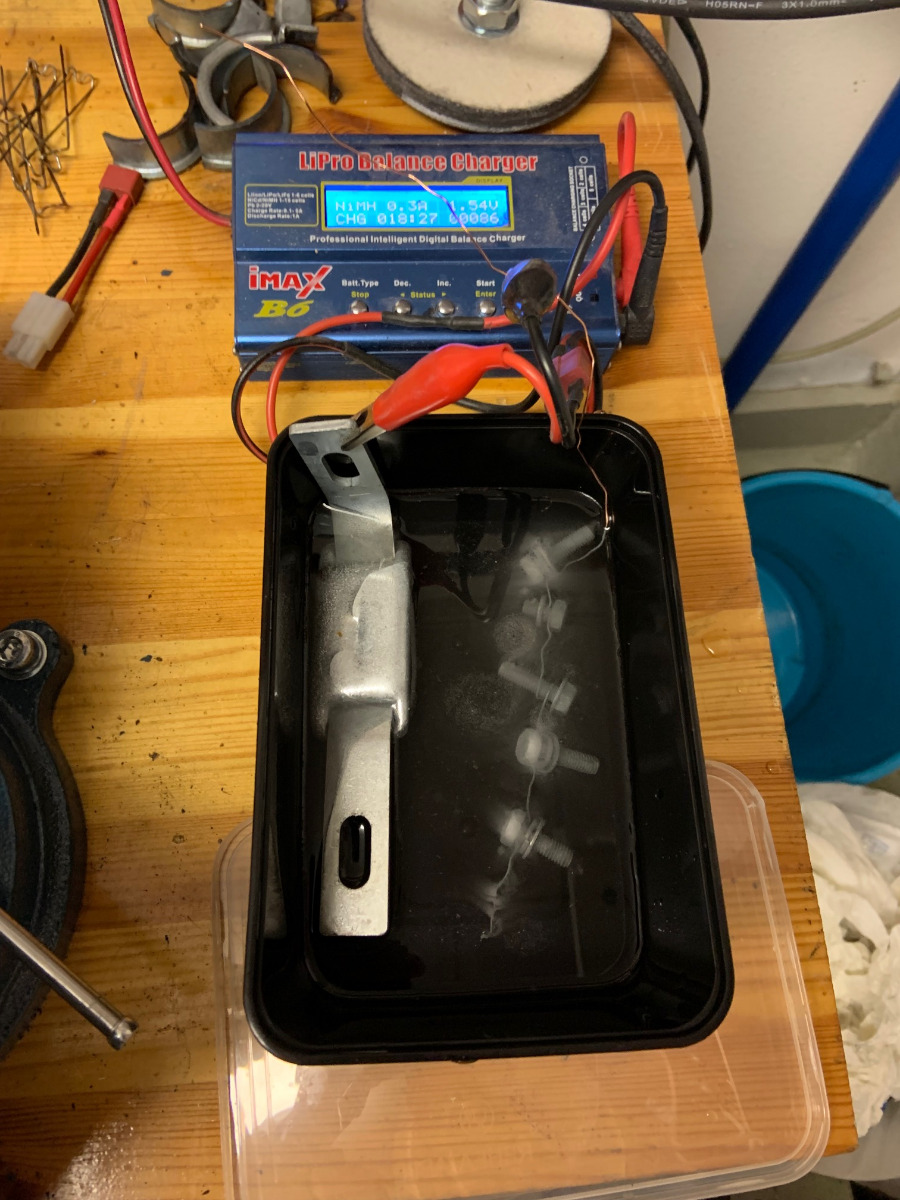
Unfortunately no before pics, but half of these where in bad condition, under the battery tray etc. the others had some light rust on them.
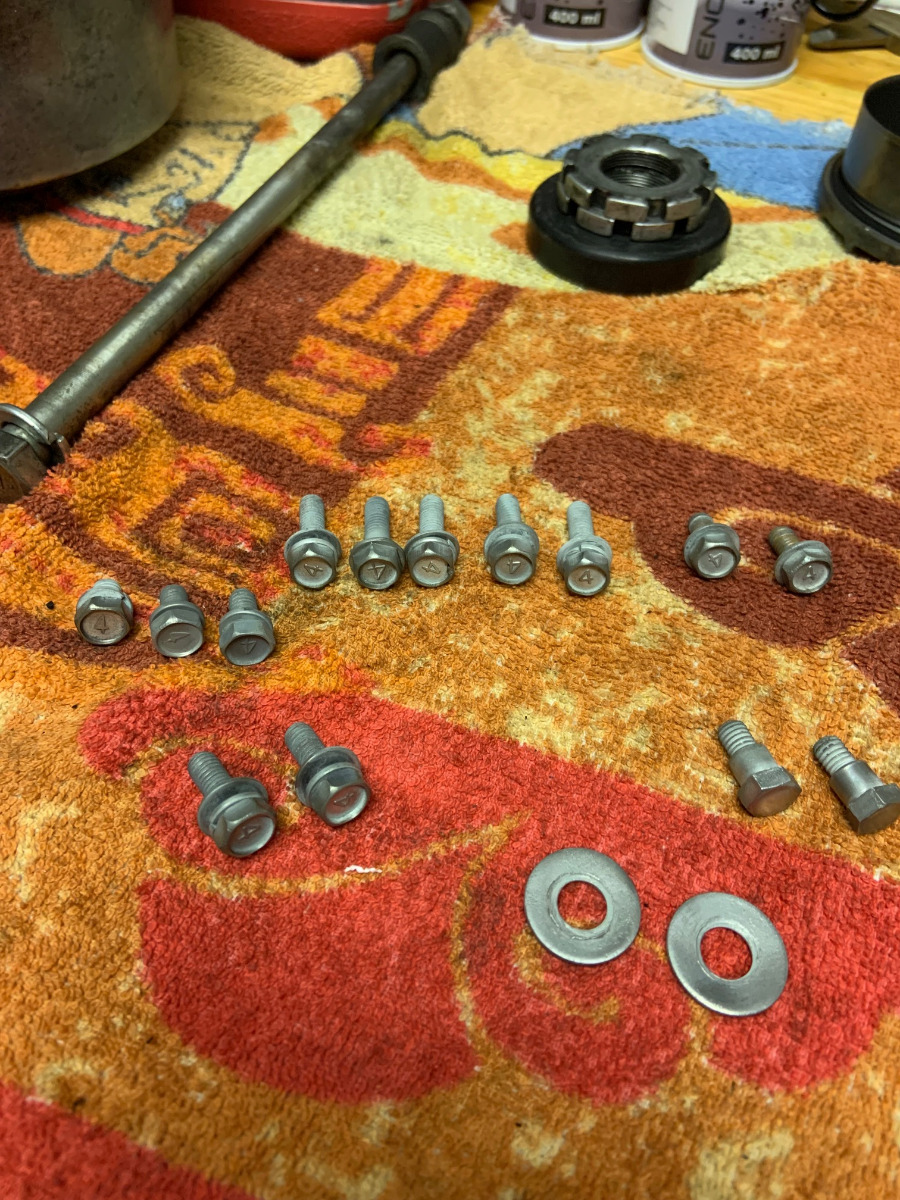
The process leaves a matt finish that one can polish up with the brass wheel. See the 2 big washers for example.
I think its quite cool! Hopefully most m6 and m8 that does not support critical things can be restored this way, then I can just source NOS items where original is missing or in really bad condition.
Anyone has any experience with this?
But I must admit, for fasteners with some light rust on them, it actually works quite nicely.
From a Swedish motor magazine I have followed this procedure:
1. Clean them good, finish with brass wheel
2. Put them over night in citric acid bath (keep it room tempered or more). The acid removes rust and the old coating, giving them a matt dark grey finish.
3. Some more brass wheel if needed, then soak in solvent. dry.
4. Put them in vinegar/salt/suger bath and hook them up to a zinc anode with a current of approx 0,015 A per cm2.
Unfortunately no before pics, but half of these where in bad condition, under the battery tray etc. the others had some light rust on them.
The process leaves a matt finish that one can polish up with the brass wheel. See the 2 big washers for example.
I think its quite cool! Hopefully most m6 and m8 that does not support critical things can be restored this way, then I can just source NOS items where original is missing or in really bad condition.
Anyone has any experience with this?
Z1000 J2 -82 not so running restoration object anymore
Z900RS -21 Green/Yellow
Z900RS -21 Green/Yellow
Last edit: 23 Oct 2022 10:04 by Jonas_Z1000j.
Please Log in or Create an account to join the conversation.
- Jonas_Z1000j
-
Topic Author
- Offline
- User
-
Registered
- Posts: 94
- Thanks: 31
Re: Rebuild of KZ1000J engine
01 Nov 2022 04:59
I got the frame back from the powder coater today, wohoo! very happy with results.
Color is semi gloss:
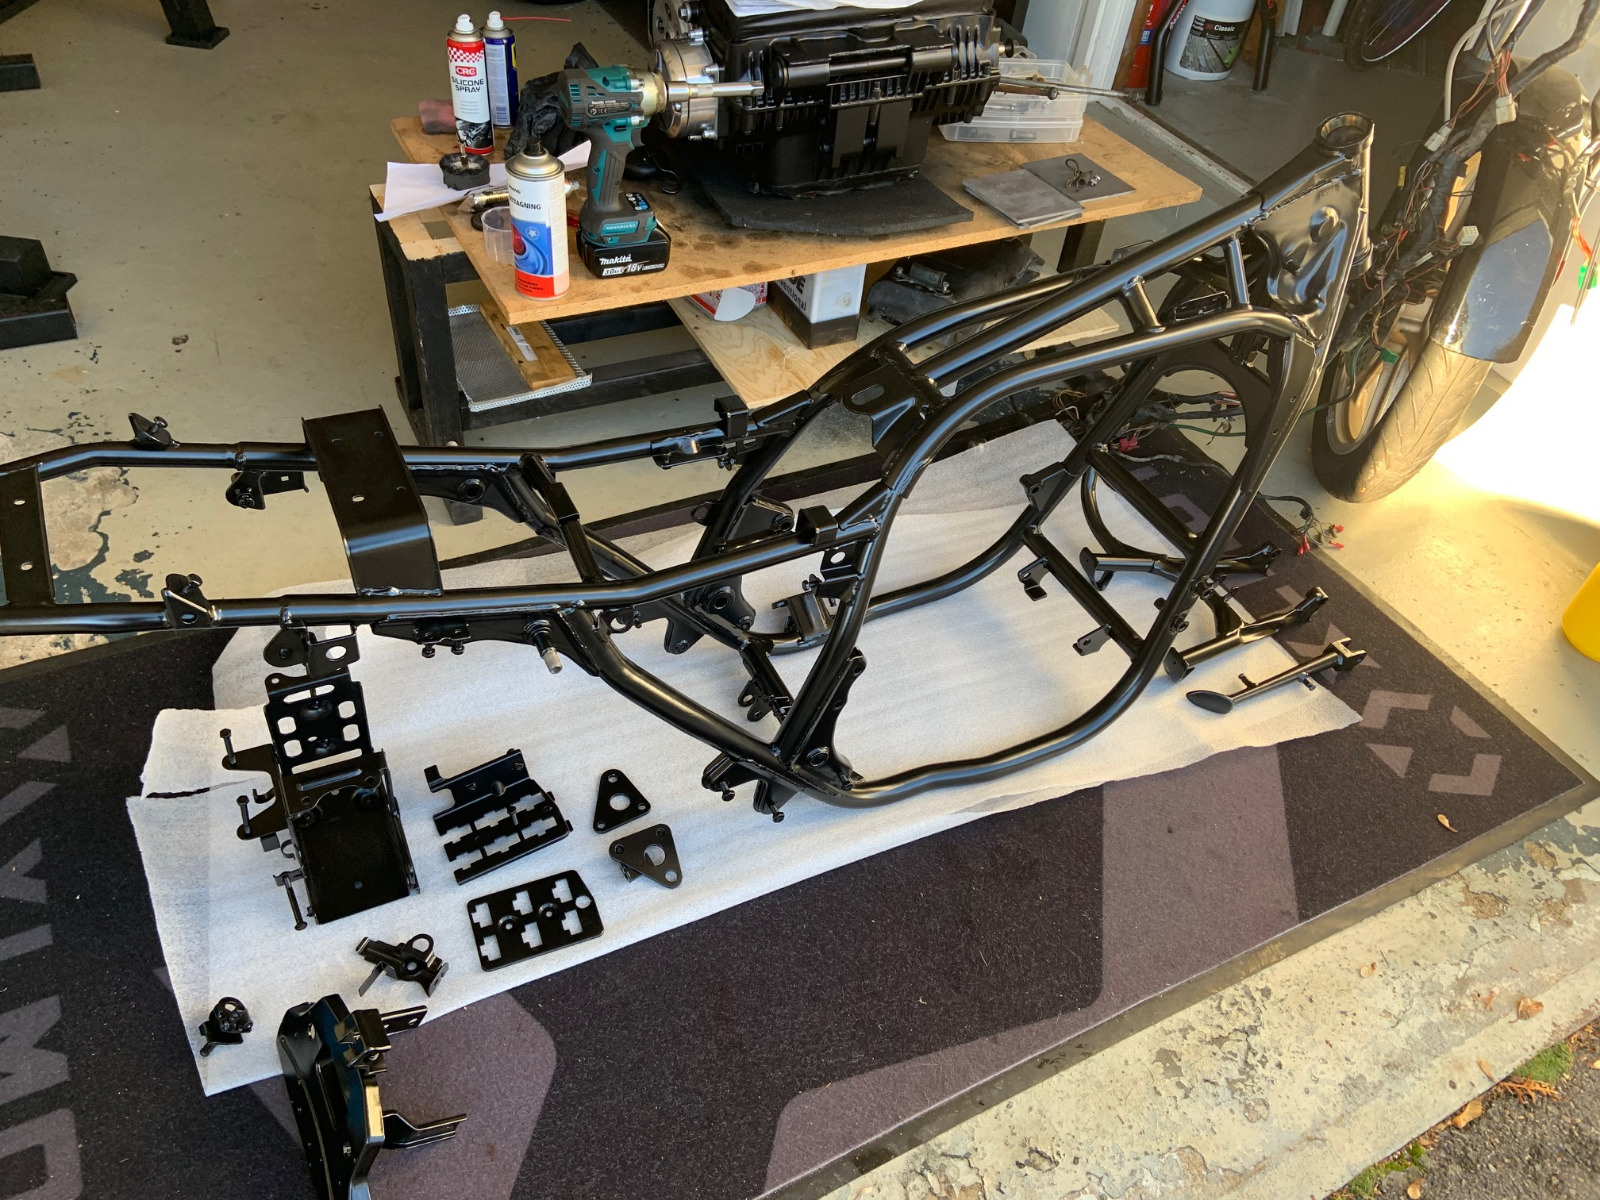
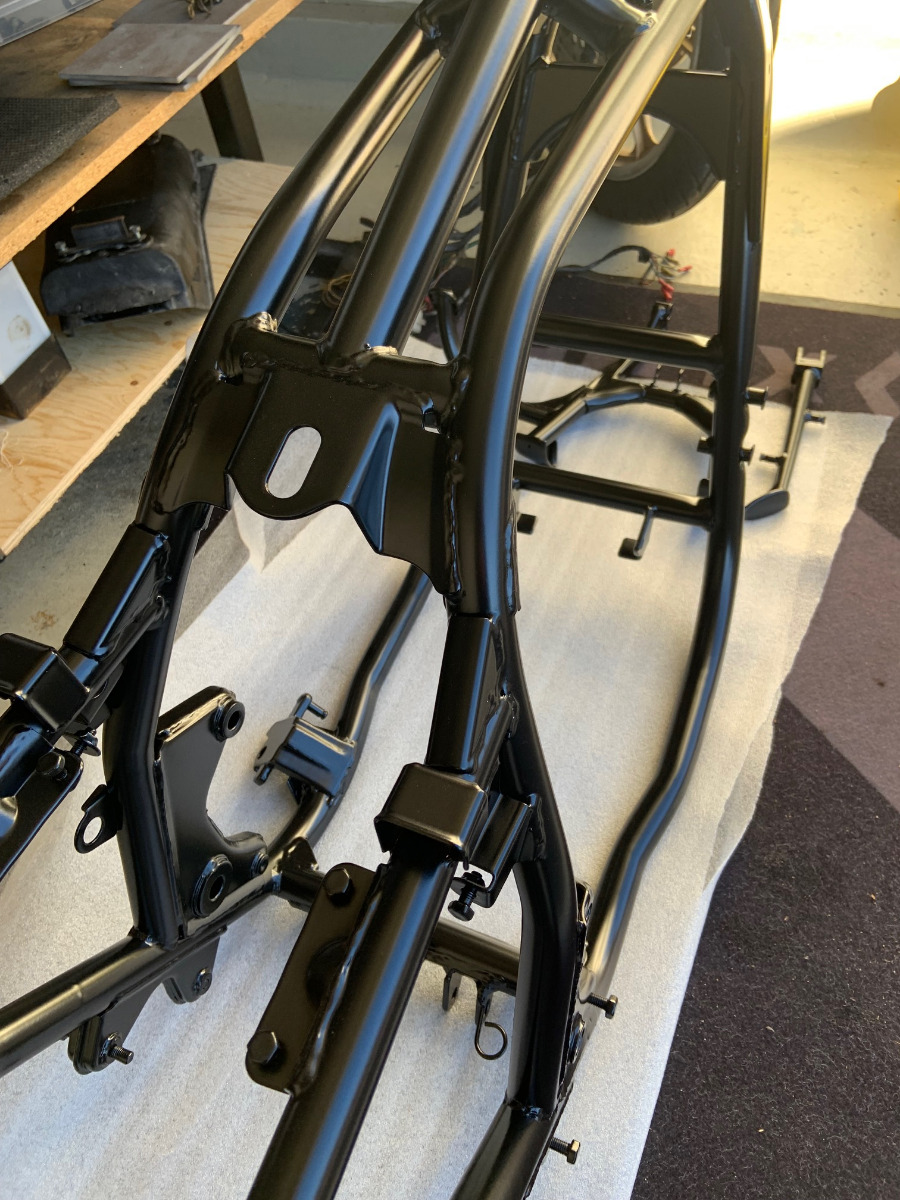
What do you think?
The thick paint covers most imperfections. I cleaned the more visable welds before I handed it in, and that is something I can recommend, as the debris really pops out otherwise.
Other than that I also sourced a new left side panel with all mounts intact as well as the seat lock. Also a NOS handle cover is on the way.
Color is semi gloss:
What do you think?
The thick paint covers most imperfections. I cleaned the more visable welds before I handed it in, and that is something I can recommend, as the debris really pops out otherwise.
Other than that I also sourced a new left side panel with all mounts intact as well as the seat lock. Also a NOS handle cover is on the way.
Z1000 J2 -82 not so running restoration object anymore
Z900RS -21 Green/Yellow
Z900RS -21 Green/Yellow
Please Log in or Create an account to join the conversation.
- Wookie58
-
- Offline
- Moderator
-
Registered
- Posts: 6506
- Thanks: 4097
Re: Rebuild of KZ1000J engine
01 Nov 2022 05:12
Looks good, just need to "pop it back together" now
1982 KZ1000 Ltd
www.kzrider.com/forum/11-projects/617631...-82-begins?start=192
kzrider.com/forum/faq-wiki/616810-electr...-fault-finding-guide
www.kzrider.com/forum/11-projects/617631...-82-begins?start=192
kzrider.com/forum/faq-wiki/616810-electr...-fault-finding-guide
Please Log in or Create an account to join the conversation.
- Jonas_Z1000j
-
Topic Author
- Offline
- User
-
Registered
- Posts: 94
- Thanks: 31
Re: Rebuild of KZ1000J engine
02 Nov 2022 00:20 - 02 Nov 2022 00:24
Yep
 Im struggling with myself though, what level to put this project on. Im trying to remind myself that this was intended as an cam chain replacement project
 and that the bike "should be in good working order with no visable rust".
For exampel, a fastener that before looked good, like OK condition 40 years old, now looks really old compared to the engine and frame. Especially the chrome ones that cant be refinished easily.
I am working on a cart from cmsnl of som NOS fasteners for the more visable ones to start with. It should be easy to replace later on, if I want to bump up the finish.
Edit. An an advice if you are leaving the frame for powder coating, dont let the fasteners protrude past the hole, It took a couple of hours for me to remove them because some had such thick layer of paint on them.
Z1000 J2 -82 not so running restoration object anymore
Z900RS -21 Green/Yellow
Z900RS -21 Green/Yellow
Last edit: 02 Nov 2022 00:24 by Jonas_Z1000j.
The following user(s) said Thank You: Wookie58
Please Log in or Create an account to join the conversation.
- hardrockminer
-

- Offline
- Sustaining Member
-

Registered
- Posts: 3138
- Thanks: 1236
Re: Rebuild of KZ1000J engine
02 Nov 2022 12:18
You can get a complete set of screws from this source. They also sell all the hex head nuts and bolts but not in a kit. Pick up some Vessel JIS screwdrivers as well. They are impact drivers.
www.japanmotonuts.com/
www.japanmotonuts.com/
I have several restored bikes along with a 2006 Goldwing with a sidecar.
The following user(s) said Thank You: Jonas_Z1000j
Please Log in or Create an account to join the conversation.
Moderators: Street Fighter LTD