
Rebuild of KZ1000J engine
- howardhb
-

- Offline
- Sustaining Member
-

Registered
- God, I trust
- Posts: 473
- Thanks: 510
Re: Rebuild of KZ1000J engine
04 Mar 2023 21:43 - 05 Mar 2023 00:07
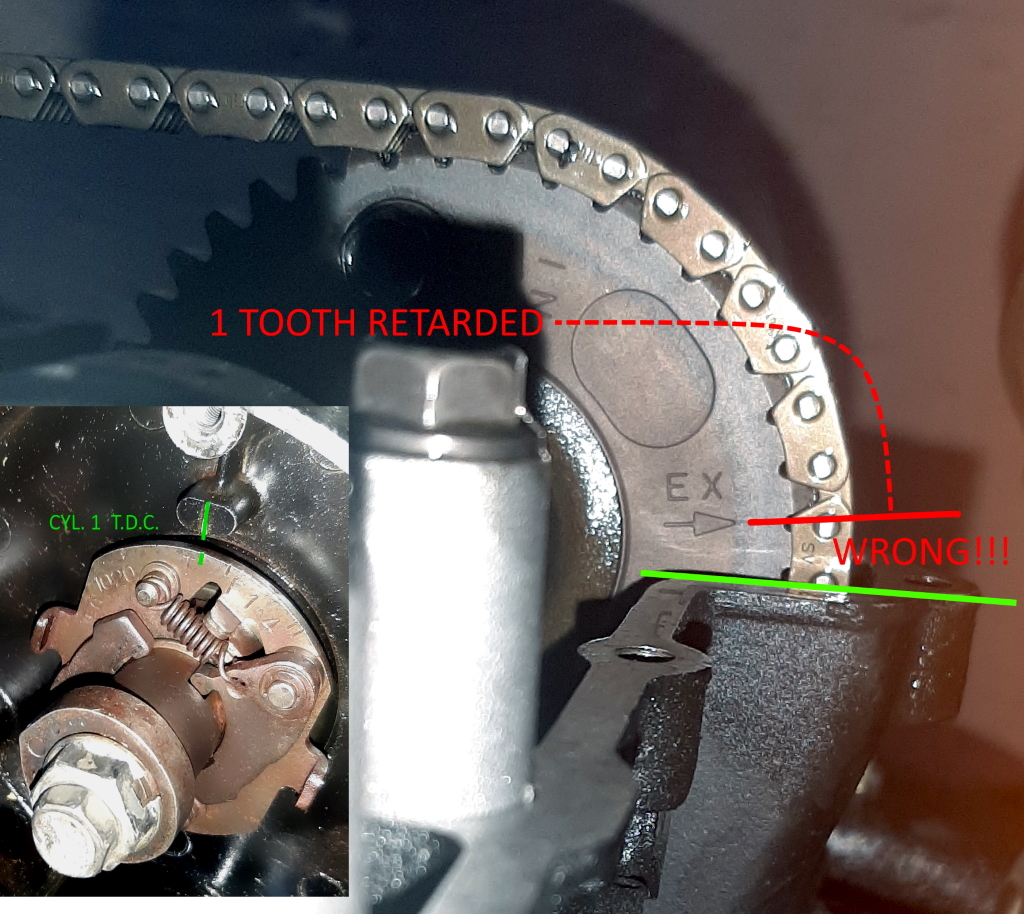
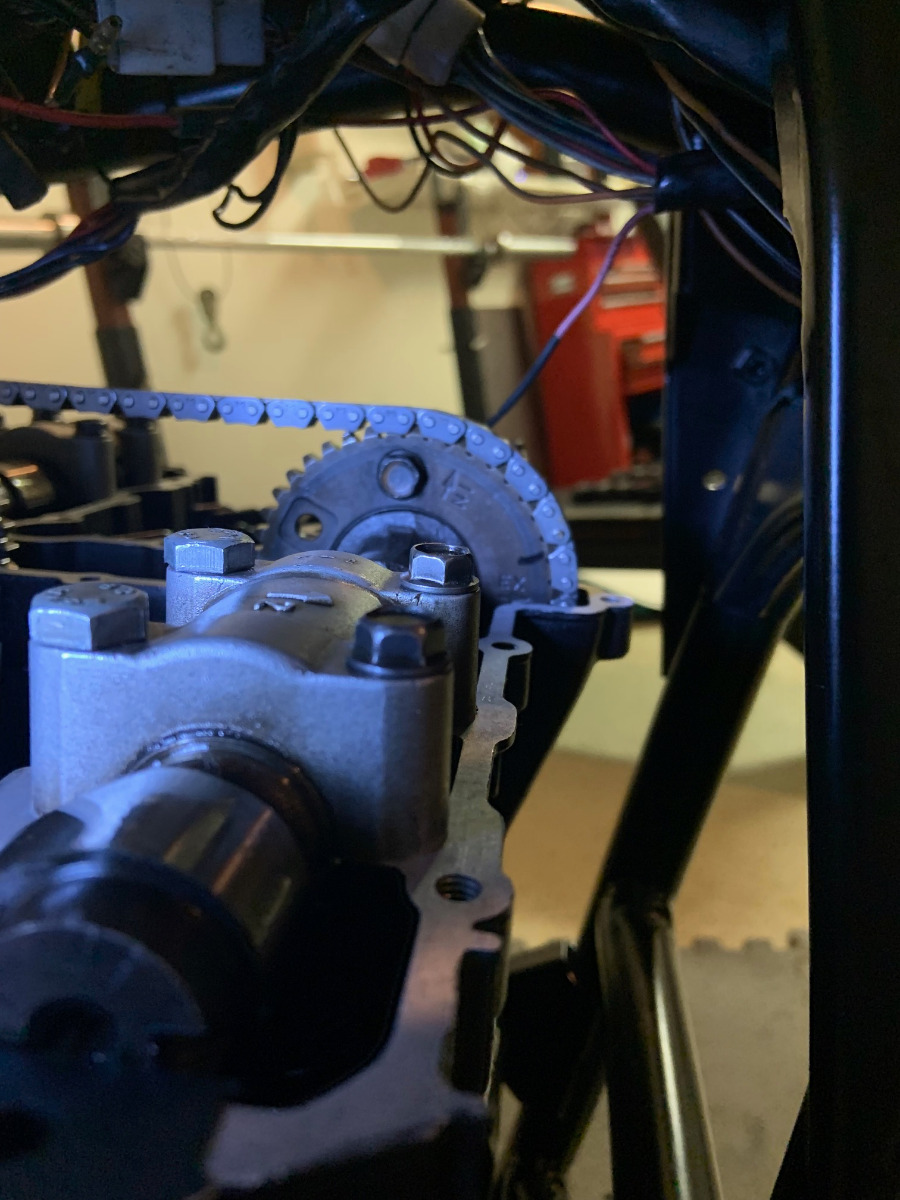
It is not possible to adjust without removing cam caps on at least one camshaft. Also, be sure that the "T" mark on the timing advancer is exactly lined up with the mark on the housing.
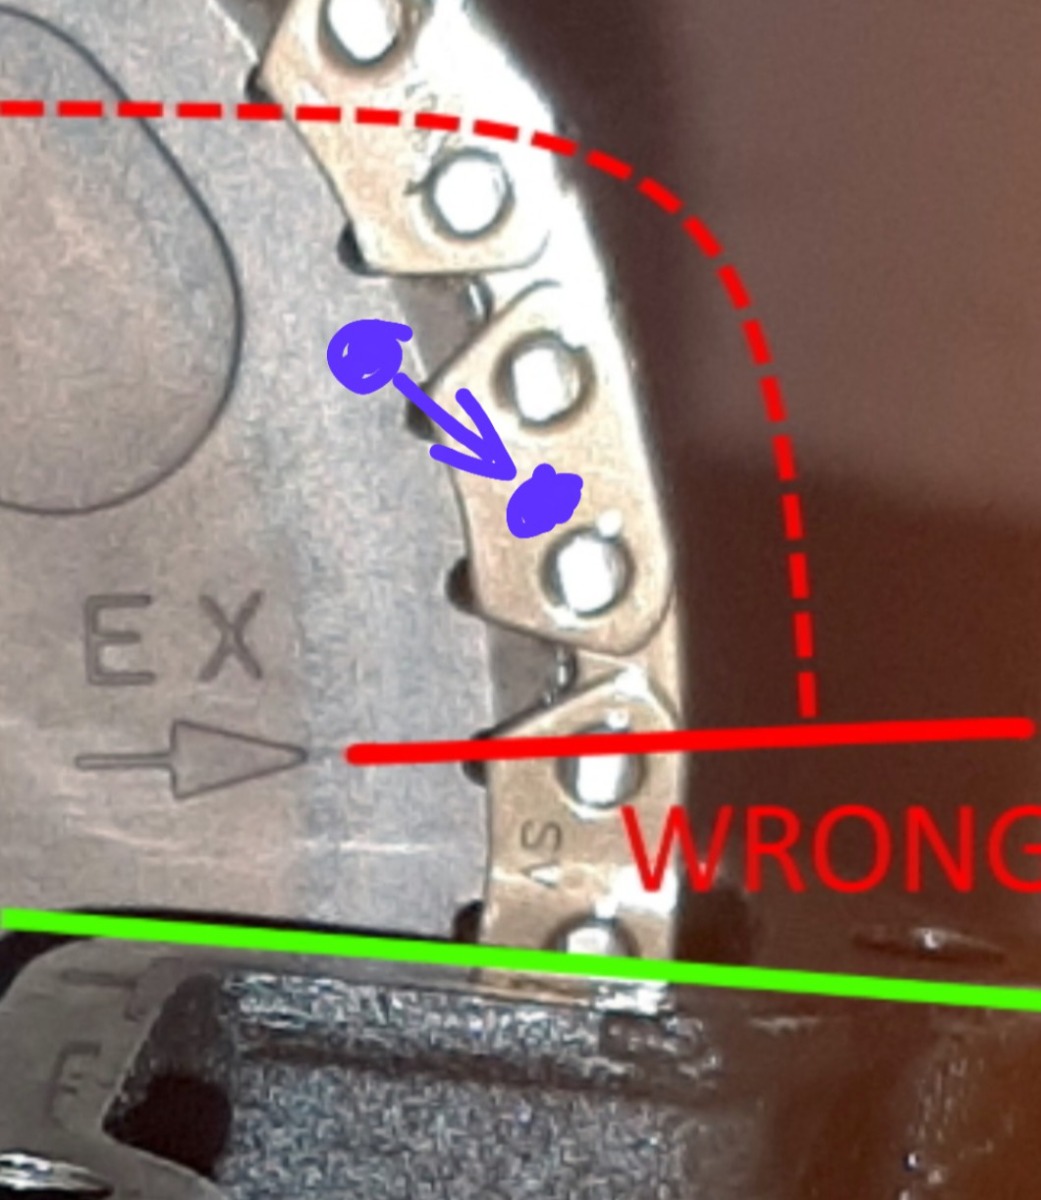
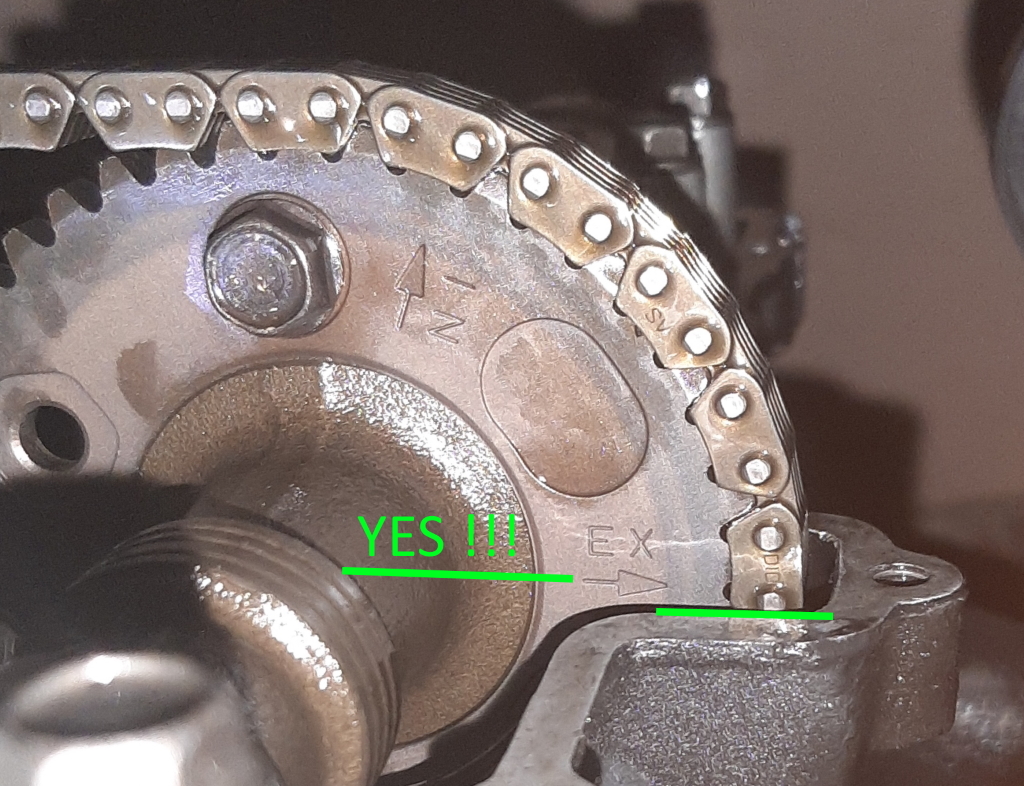
I was faced with exactly your situation... one tooth retarded...
Before loostening the cam caps, I marked one tooth on the sprocket (that was between two chain link plates) with a dot of paint, then marked the chain plate with a paint dot, where that marked tooth "should" be, in order to advance by one tooth. I then removed the cam caps and lifted the camshaft up just enough to get chain slack to put the two "dots" together.
Remember that, when doing this, the chain tensioner cap/spring MUST be removed. (Be sure the chain stays perfectly egaged with the intake cam sprocket)
Also, only turn the crank-shaft "clock-wise", using the 17mm hex on the advancer mechsnism.
H.
'81 GPz 550 D1
'81 GPz 1100 B1 ELR "Tribute" www.kzrider.com/forum/11-projects/617040...-elr-tribute?start=0
'82 Yamaha YB100 Fizzie
'79 Suzuki GT200 X5 TWO STROKE TWIN - SMOKER!
'81 GPz 1100 B1 ELR "Tribute" www.kzrider.com/forum/11-projects/617040...-elr-tribute?start=0
'82 Yamaha YB100 Fizzie
'79 Suzuki GT200 X5 TWO STROKE TWIN - SMOKER!
Last edit: 05 Mar 2023 00:07 by howardhb.
The following user(s) said Thank You: Jonas_Z1000j
Please Log in or Create an account to join the conversation.
- Jonas_Z1000j
-
 Topic Author
- Offline
- User
-

Registered
- Posts: 94
- Thanks: 31
Re: Rebuild of KZ1000J engine
05 Mar 2023 09:12
Got it!
Curious to see what the tensioner wedge measurement will be with the new chain and guides

Curious to see what the tensioner wedge measurement will be with the new chain and guides
Z1000 J2 -82 not so running restoration object anymore
Z900RS -21 Green/Yellow
Z900RS -21 Green/Yellow
Please Log in or Create an account to join the conversation.
- Mikaw
-
- Offline
- Sustaining Member
-
Registered
- Posts: 4825
- Thanks: 1852
Re: Rebuild of KZ1000J engine
05 Mar 2023 09:21
Everything looks extremely dry. Did you use assembly lube on the camshafts?
1976 KZ 900 A4
kzrider.com/forum/11-projects/613548-1976-kz-900-a4
1976 KZ 900 B1 LTD
1978 KZ 1000 B2 LTD
1980 KZ 750 E1
Kowledge Speaks, But Wisdom Listens.
Jimi Hendrix.
1976 KZ 900 B1 LTD
1978 KZ 1000 B2 LTD
1980 KZ 750 E1
Kowledge Speaks, But Wisdom Listens.
Jimi Hendrix.
The following user(s) said Thank You: daveo
Please Log in or Create an account to join the conversation.
- Jonas_Z1000j
-
Topic Author
- Offline
- User
-
Registered
- Posts: 94
- Thanks: 31
Re: Rebuild of KZ1000J engine
05 Mar 2023 09:28
No, I squirted oil on the cam lobes and oiled the bearings before I torqued them down. I intend to oil the chain and sprockets as well before I put the cover on. Is this to little? I have not changed any of the bearings?
Z1000 J2 -82 not so running restoration object anymore
Z900RS -21 Green/Yellow
Z900RS -21 Green/Yellow
Please Log in or Create an account to join the conversation.
- scubaanders
-
- Offline
- Sustaining Member
-
Registered
- Posts: 555
- Thanks: 238
Re: Rebuild of KZ1000J engine
05 Mar 2023 09:34
Now it looks mighty fine Jonas, but be generous with assembly lube or oil, not just a little wad.
Ge kammarna en rejäl skvätt med olja, för det tar tid innan oljepumpen har tryckt upp olja till toppen när du haft isär motorn. För kammarna är lagrade direkt i toppen och kör du ner lagrena är toppen körd.
Brgds Anders
Ge kammarna en rejäl skvätt med olja, för det tar tid innan oljepumpen har tryckt upp olja till toppen när du haft isär motorn. För kammarna är lagrade direkt i toppen och kör du ner lagrena är toppen körd.
Brgds Anders
Gpz750R1 1982
Gpz750A1 1983
Gpz1100A2 1984
FZ750 1985
Gpz900R -91
Gpz750A1 1983
Gpz1100A2 1984
FZ750 1985
Gpz900R -91
The following user(s) said Thank You: Jonas_Z1000j
Please Log in or Create an account to join the conversation.
- Jonas_Z1000j
-
Topic Author
- Offline
- User
-
Registered
- Posts: 94
- Thanks: 31
Re: Rebuild of KZ1000J engine
07 Mar 2023 11:11
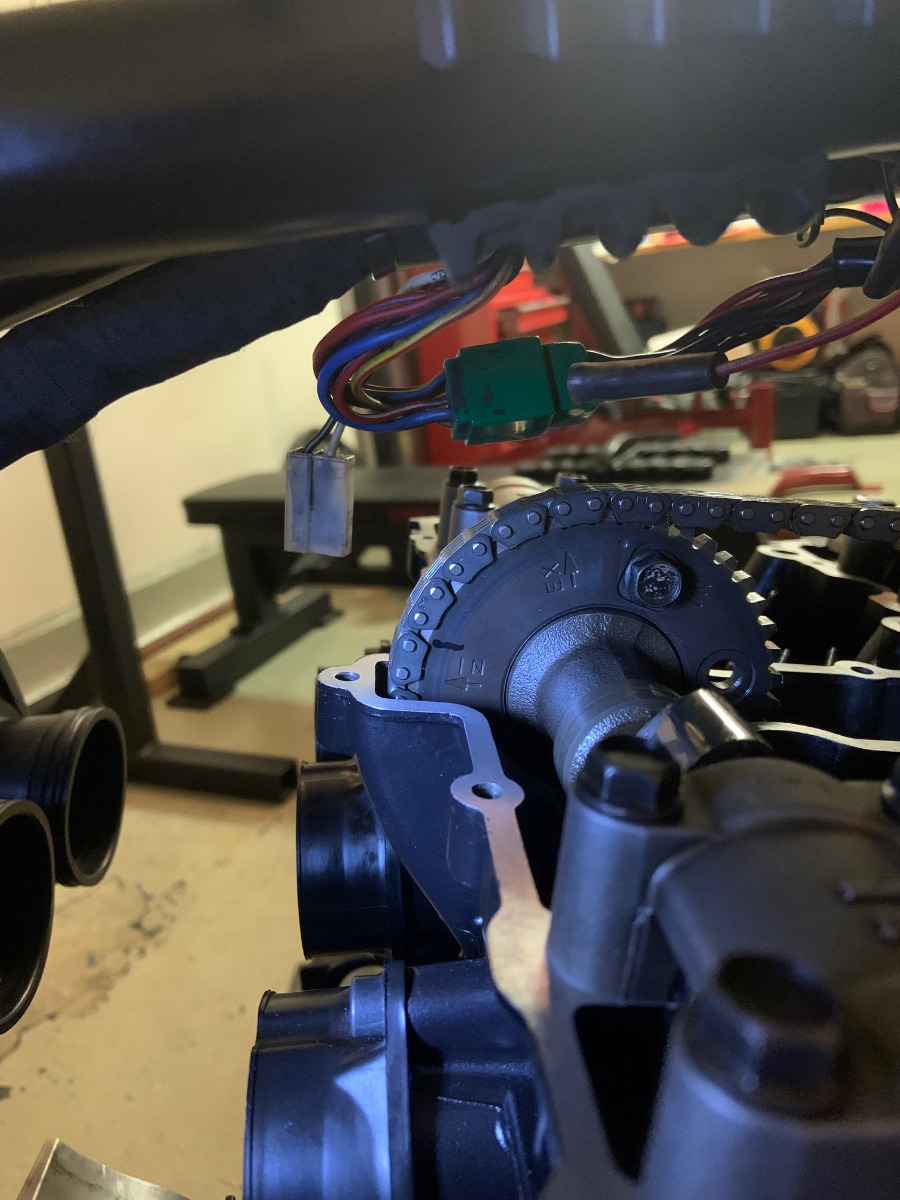
I oiled everything good then installed the cover and the wedge cap. Turned it around a couple of times and took the wedge measurement: 6,5 mm. Before the overhaul, it was 3 mm and I could put some pressure on it and it went flush... Also, the spring in the tensioner is new. Hopefully the cam drive will be smooth as can be on these old beasts. I will put the manual tensioner on the shelf for now.
A not so fun update. For the third time in a row now I have gotten debris into the polishing wheel and or the wet sand leaving the clutch cover scratchy. Today it was -7 and I was outside using water sparingly. I will put polishing on hold for now and wait for spring...
A not so fun update. For the third time in a row now I have gotten debris into the polishing wheel and or the wet sand leaving the clutch cover scratchy. Today it was -7 and I was outside using water sparingly. I will put polishing on hold for now and wait for spring...
Z1000 J2 -82 not so running restoration object anymore
Z900RS -21 Green/Yellow
Z900RS -21 Green/Yellow
Please Log in or Create an account to join the conversation.
- Jonas_Z1000j
-
Topic Author
- Offline
- User
-
Registered
- Posts: 94
- Thanks: 31
Re: Rebuild of KZ1000J engine
17 Apr 2023 12:16
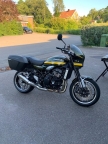
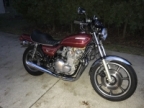
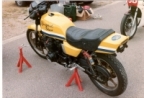
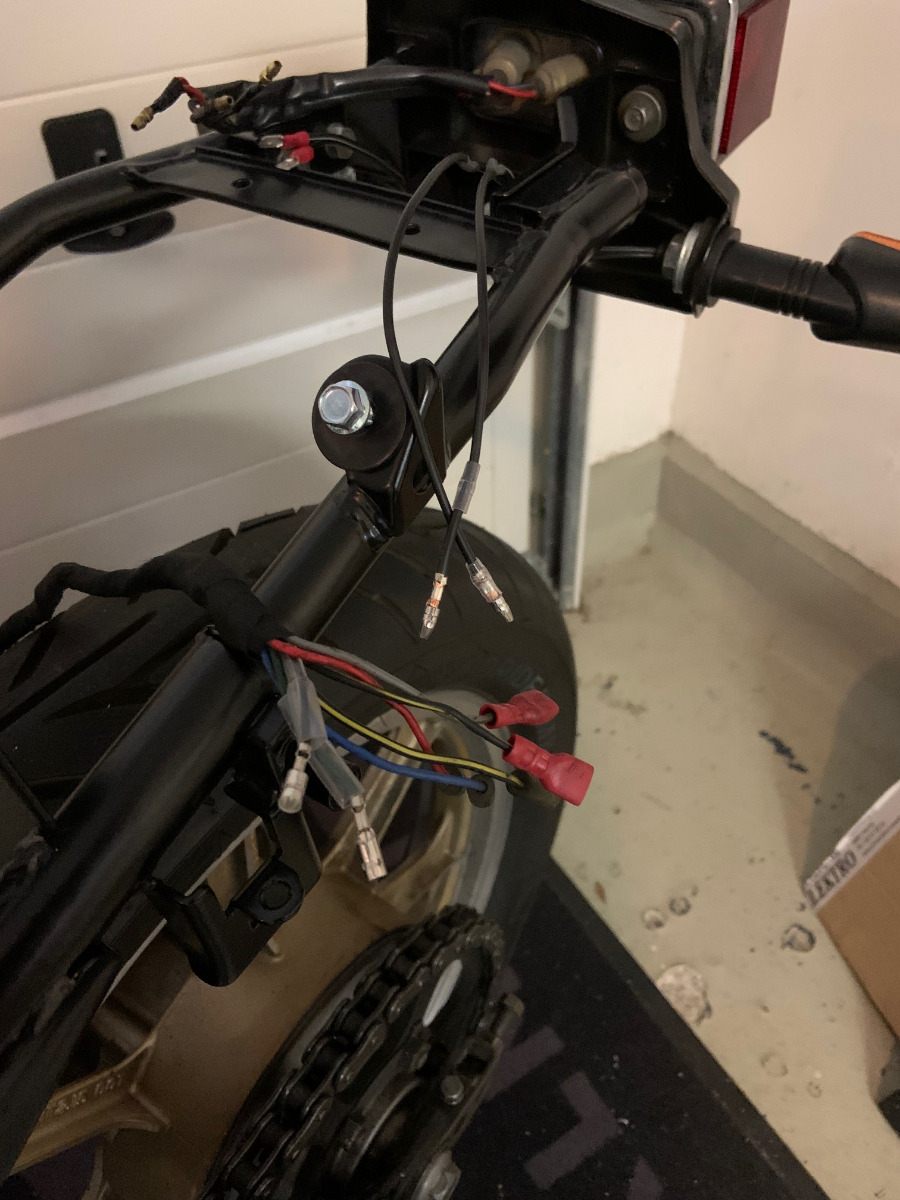
Spring is finally here and its nice to work with the bike and have the garage doors open again! I have been polishing covers, cleaned fasteners etc. I bought a bench grinder with a brass wheel, regret I didnt do that from the start, very easy cleaning of parts. I also bought some japanese style connectors and have replaced some non original with those:

I am waiting for some bits and pieces like the starter o-ring, a new clutch cable and the front sprocket bolt (was going round). Ah, I also ordered the 20 mm washer between the oil filter and the spring, that one probably went out with an oil filter change 30 years ago. After that I can install the exhaust. My aim now is to be able to start it up in early may. If it runs nice, I will celebrate by ordering Öhlins shocks for it and leave the tank/fenders for a new coat. I have decided to go original black with the gold stripes

I am waiting for some bits and pieces like the starter o-ring, a new clutch cable and the front sprocket bolt (was going round). Ah, I also ordered the 20 mm washer between the oil filter and the spring, that one probably went out with an oil filter change 30 years ago. After that I can install the exhaust. My aim now is to be able to start it up in early may. If it runs nice, I will celebrate by ordering Öhlins shocks for it and leave the tank/fenders for a new coat. I have decided to go original black with the gold stripes
Z1000 J2 -82 not so running restoration object anymore
Z900RS -21 Green/Yellow
Z900RS -21 Green/Yellow
The following user(s) said Thank You: willemZ900, howardhb, Kelly E
Please Log in or Create an account to join the conversation.
- willemZ900
-

- Offline
- User
-
Registered
- Z1B 4 ever
- Posts: 198
- Thanks: 59
The following user(s) said Thank You: Jonas_Z1000j
Please Log in or Create an account to join the conversation.
- Wookie58
-

- Offline
- Moderator
-

Registered
- Posts: 6372
- Thanks: 4016
Re: Rebuild of KZ1000J engine
17 Apr 2023 15:37
Looking really good Jonas
1982 KZ1000 Ltd
www.kzrider.com/forum/11-projects/617631...-82-begins?start=192
kzrider.com/filebase-alias?view=download...d-fault-diagnosis&ca
www.kzrider.com/forum/11-projects/617631...-82-begins?start=192
kzrider.com/filebase-alias?view=download...d-fault-diagnosis&ca
The following user(s) said Thank You: Jonas_Z1000j
Please Log in or Create an account to join the conversation.
- daveo
-
- Offline
- Premium Member
-

Registered
- Posts: 3142
- Thanks: 885
Re: Rebuild of KZ1000J engine
17 Apr 2023 19:10
Nice indeed!
This year the brake calipers on my 82 1100-J required attention. I hadn't been giving the brakes much thought, just replacing worn pads as needed, and I did rebuild the front and rear master cylinders not that long ago.
Fortunately I noticed a front caliper was leaking a little fluid, and thought about the last time I serviced the calipers which was many-many years ago.
Well, I really can't believe the difference how smoothly the brakes feel and work now that that project is finished.
Wondering how recent the brake system on your beautiful bike was gone through? Appears the brake lines were replaced-upgraded.
.
1982 KZ1100-A2 (1170cc sleeper 🫣)
The following user(s) said Thank You: Jonas_Z1000j
Please Log in or Create an account to join the conversation.
- Jonas_Z1000j
-
Topic Author
- Offline
- User
-
Registered
- Posts: 94
- Thanks: 31
Re: Rebuild of KZ1000J engine
18 Apr 2023 08:43 - 18 Apr 2023 08:43
Thanks a lot!
The brakes where in terrible condition when I bought the bike, so one of the first items I refurbished was the calipers and upgraded to braided lines. The front calipers got new everything, the rear was in better condition and got a new seal, pads and dust caps. The difference was huge!
I have not done the master cylinders though, thats one of the few jobs remaining now. Maybe next winter?
Z1000 J2 -82 not so running restoration object anymore
Z900RS -21 Green/Yellow
Z900RS -21 Green/Yellow
Last edit: 18 Apr 2023 08:43 by Jonas_Z1000j.
Please Log in or Create an account to join the conversation.
- Jonas_Z1000j
-
Topic Author
- Offline
- User
-
Registered
- Posts: 94
- Thanks: 31
Re: Rebuild of KZ1000J engine
29 May 2023 05:13 - 29 May 2023 05:15
Hi guys,
Well I have some good news and a really bad one as well.
After working some with the carb and balancing the floats I installed the last parts and started the bike. Went fine. Did one heat cycle, then retorqued the head. Took it for a drive. The rattling deaccel noice that was the instigator of my refurbishment is gone, so that is really good news!
But... I noticed now that the engine leaks oil, guess where? yes, around the cam chain o-ring.
I did another heat cycle and torqued it again, but still leaking!
I used OEM-style Versrah fiber gasket with o-ring for the head, installed it dry. Both head and cylinder was flatted by shops and completely clean, so I really did not expect this.
Do I have any options here other then removing the head again? How is it removing a head that has just been running for like 15-20 minutes? Do you think the gaskets will come off easy?
Is there any tricks to not damage the base gasket?
very frustrated now, especially as the engine ran better then ever...
thanks
Z1000 J2 -82 not so running restoration object anymore
Z900RS -21 Green/Yellow
Z900RS -21 Green/Yellow
Last edit: 29 May 2023 05:15 by Jonas_Z1000j.
Please Log in or Create an account to join the conversation.
Moderators: Street Fighter LTD