
KZ650 cafe-racer
- gazzz
-
 Topic Author
- Offline
- Sustaining Member
-

Registered
- Posts: 563
- Thanks: 319
Re: KZ650 cafe-racer
15 Apr 2020 12:28
Just some other modified and polished parts...
In my mind the image of cafe-racer (so to say its template) always has gaiters (boots) on front fork. So no wonder that every my cafe-racer has gaiters on front fork. And I also prefer gaiters with fewer but of larger diameter ribs. For Kawasaki KZ650 project I chose same Kijima gaiters I used for Honda CB815.
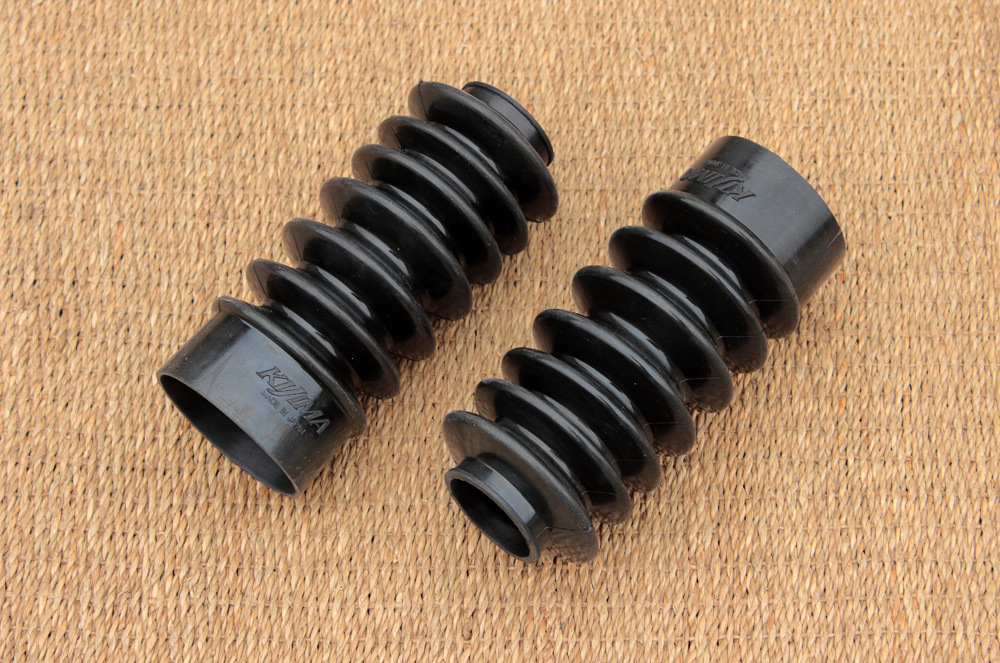
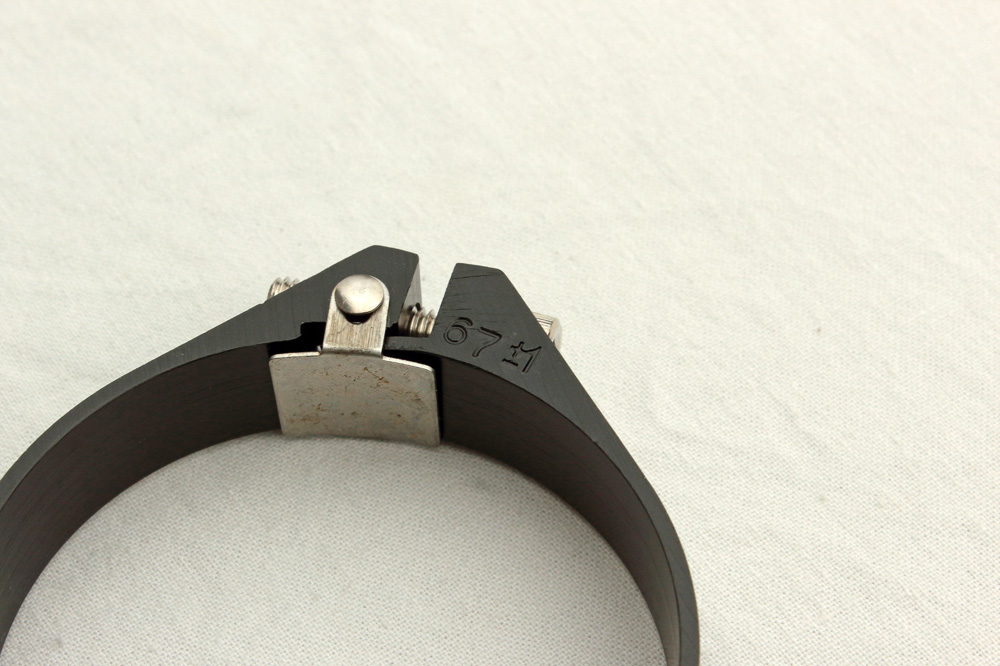
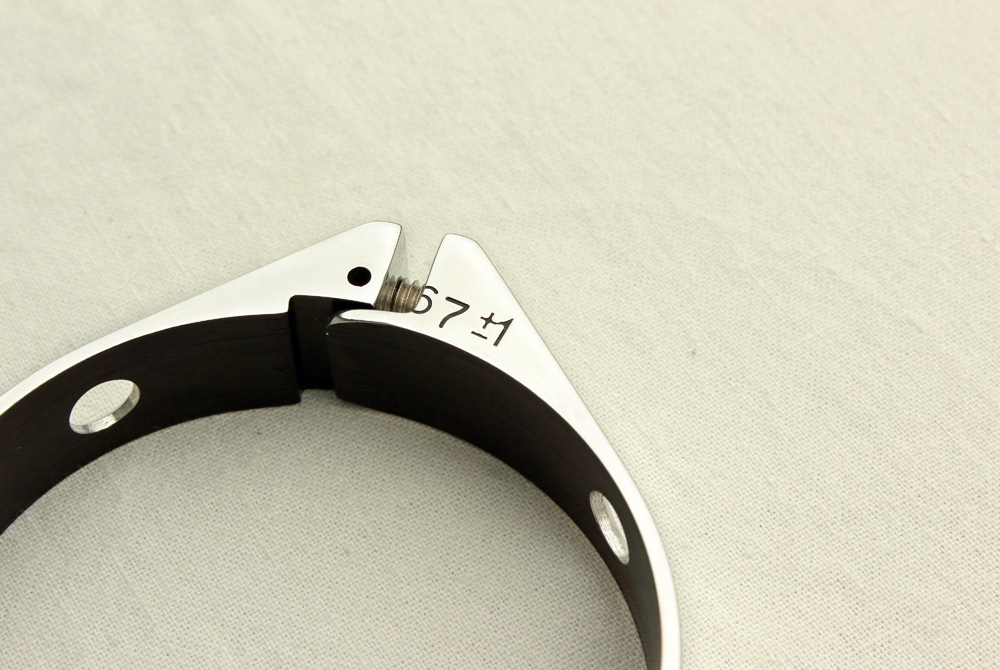
I also bought P2M aluminum clamps (anodized in black) to fix gaiters lower ends on outer fork tubes. I used clamps of this manufacturer before and found them to be very nicely made. The most suitable size among assortment of P2M clamps was 67 +/- 1mm which was approximately for 1mm larger than desirable, but I supposed this issue could be fixed.
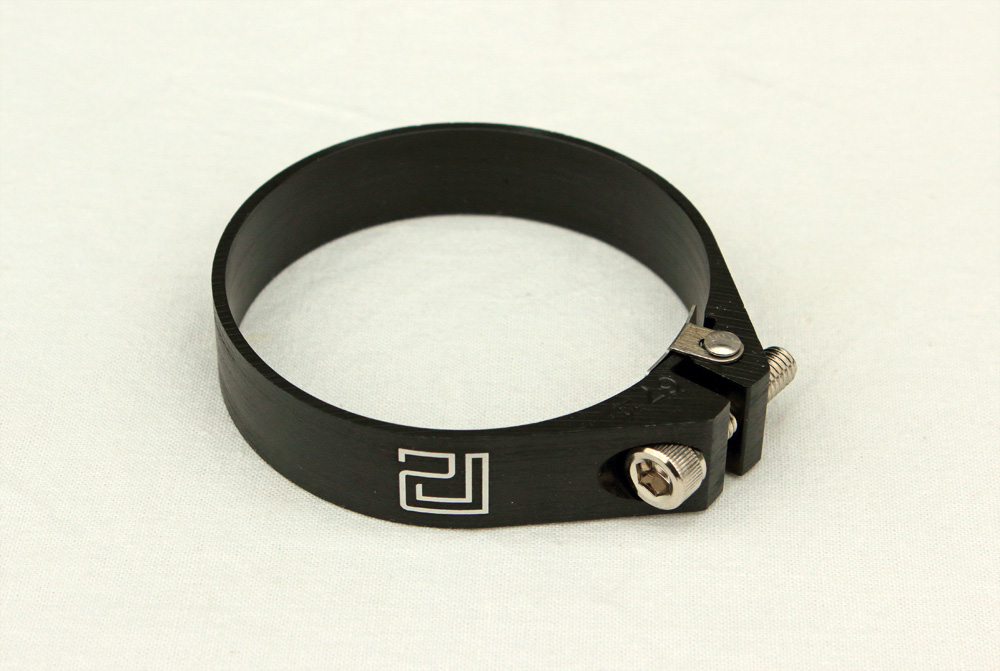
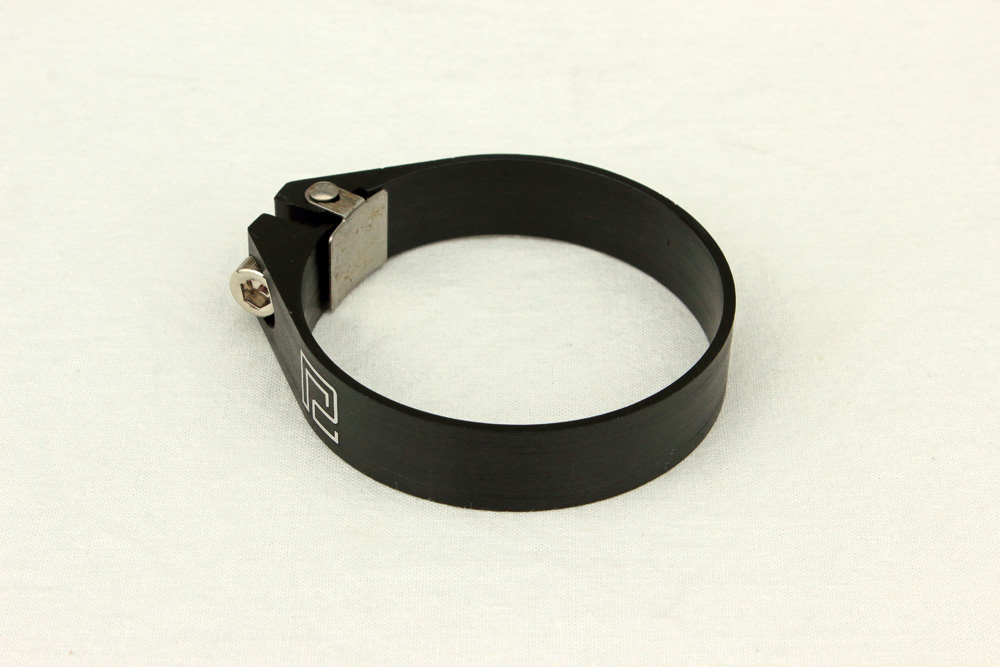
However, when I fit clamp to gaiter it was obvious for me that I need polished clamps to fit polished fork. Thus, I sandpapered anodized layer from clamps (inner side I left untouched) and by the way I grinded both ends of clamps so they will fix gaiters on fork outer tubes tight. The idea to drill holes in clamps was so obvious and solid that one could bruise a toe by tripping over it. The only question was: how many of holes and of what diameter? After simple measuring and calculations I decided that nine 7mm holes would do. Sure, I didn’t forget to countersunk holes’ outer edges.
I think clamps looks much better now.
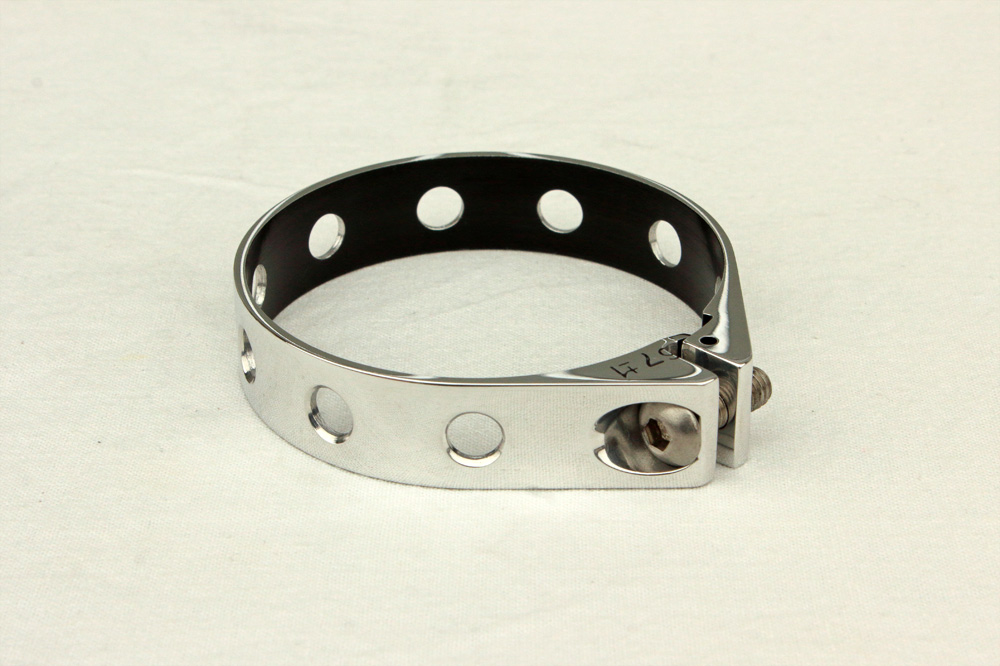
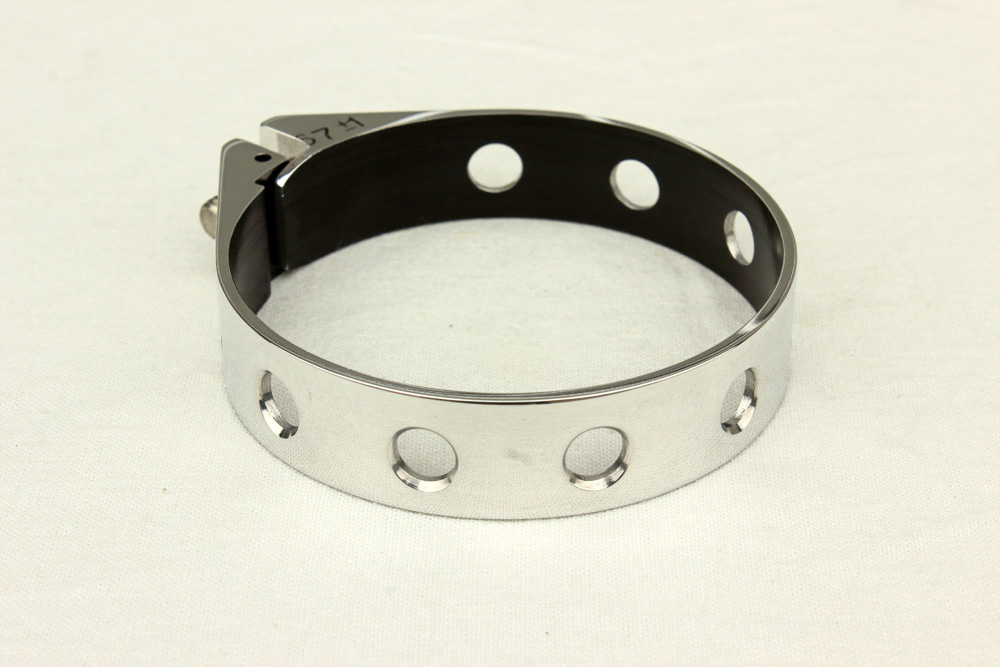
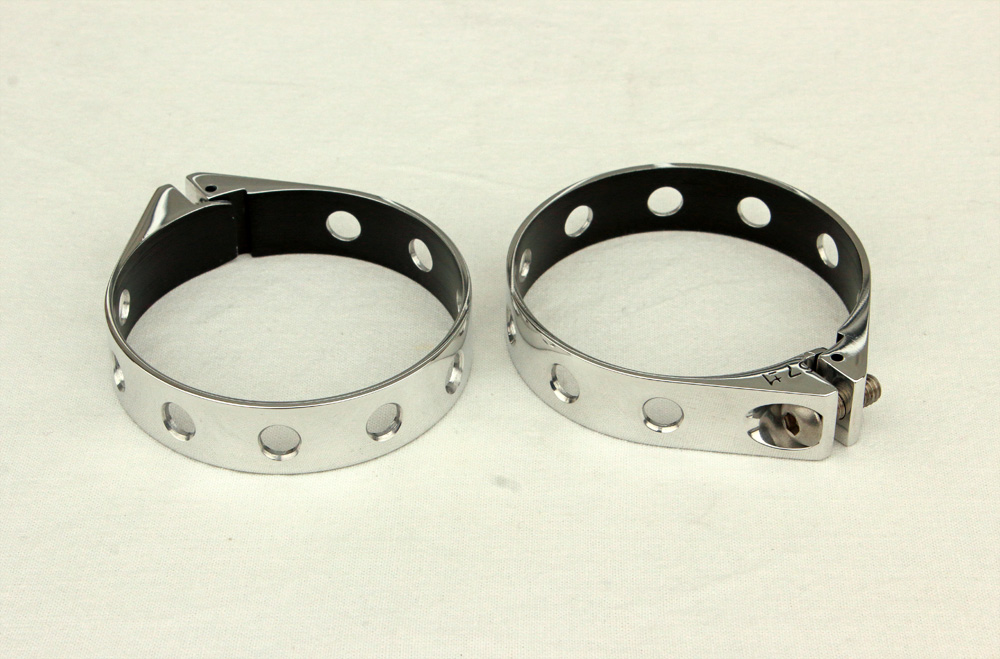
Ends of clamps before and after grinding:
In my mind the image of cafe-racer (so to say its template) always has gaiters (boots) on front fork. So no wonder that every my cafe-racer has gaiters on front fork. And I also prefer gaiters with fewer but of larger diameter ribs. For Kawasaki KZ650 project I chose same Kijima gaiters I used for Honda CB815.
I also bought P2M aluminum clamps (anodized in black) to fix gaiters lower ends on outer fork tubes. I used clamps of this manufacturer before and found them to be very nicely made. The most suitable size among assortment of P2M clamps was 67 +/- 1mm which was approximately for 1mm larger than desirable, but I supposed this issue could be fixed.
However, when I fit clamp to gaiter it was obvious for me that I need polished clamps to fit polished fork. Thus, I sandpapered anodized layer from clamps (inner side I left untouched) and by the way I grinded both ends of clamps so they will fix gaiters on fork outer tubes tight. The idea to drill holes in clamps was so obvious and solid that one could bruise a toe by tripping over it. The only question was: how many of holes and of what diameter? After simple measuring and calculations I decided that nine 7mm holes would do. Sure, I didn’t forget to countersunk holes’ outer edges.
I think clamps looks much better now.
Ends of clamps before and after grinding:
Kawasaki KZ650 cafe-racer: in progress
Kawasaki Zephyr 750 (810ccm, 4in4, spoked wheels)
Honda CB815 "Eight Fifteen" cafe-racer
Yamaha XJ "Eight Ball" cafe-racer
www.gazzz-garage.com
Kawasaki Zephyr 750 (810ccm, 4in4, spoked wheels)
Honda CB815 "Eight Fifteen" cafe-racer
Yamaha XJ "Eight Ball" cafe-racer
www.gazzz-garage.com
The following user(s) said Thank You: bluej58
Please Log in or Create an account to join the conversation.
- gazzz
-
Topic Author
- Offline
- Sustaining Member
-
Registered
- Posts: 563
- Thanks: 319
Re: KZ650 cafe-racer
15 Apr 2020 12:37
And here are headlight brackets. Initially they looked like this:
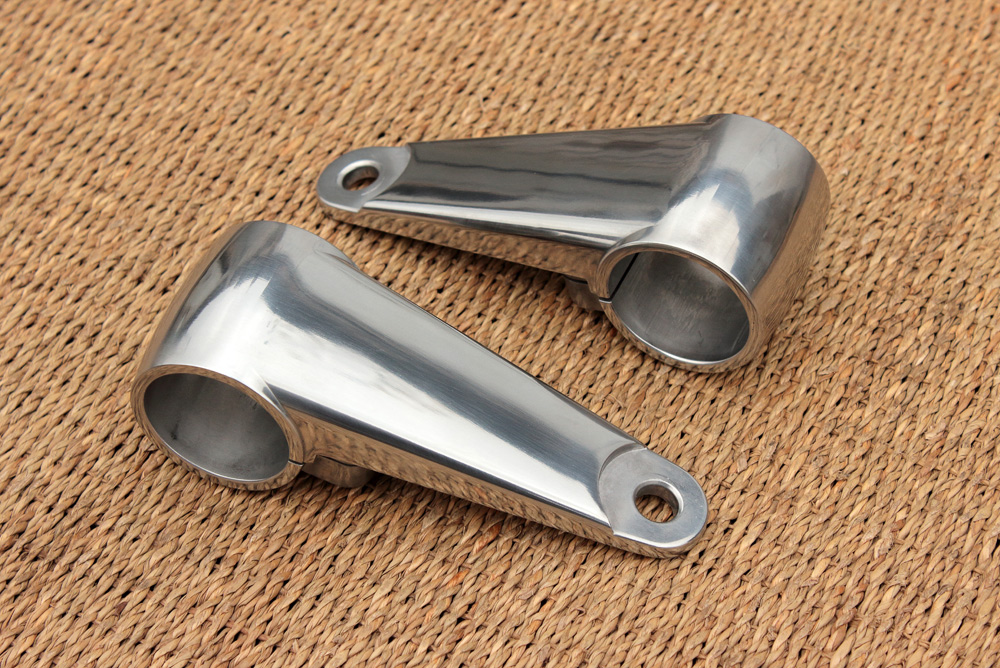
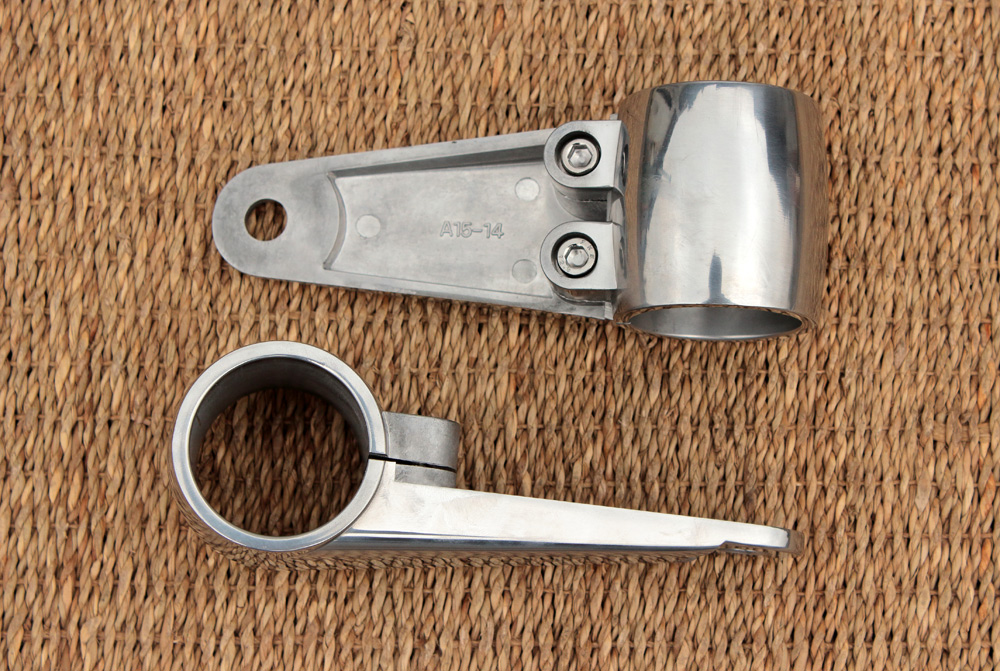
I added to them a bit of my touch by drilling holes and applying additional polishing. Sounds simple, but it was quite s lot of work . However, it made a hell of difference.

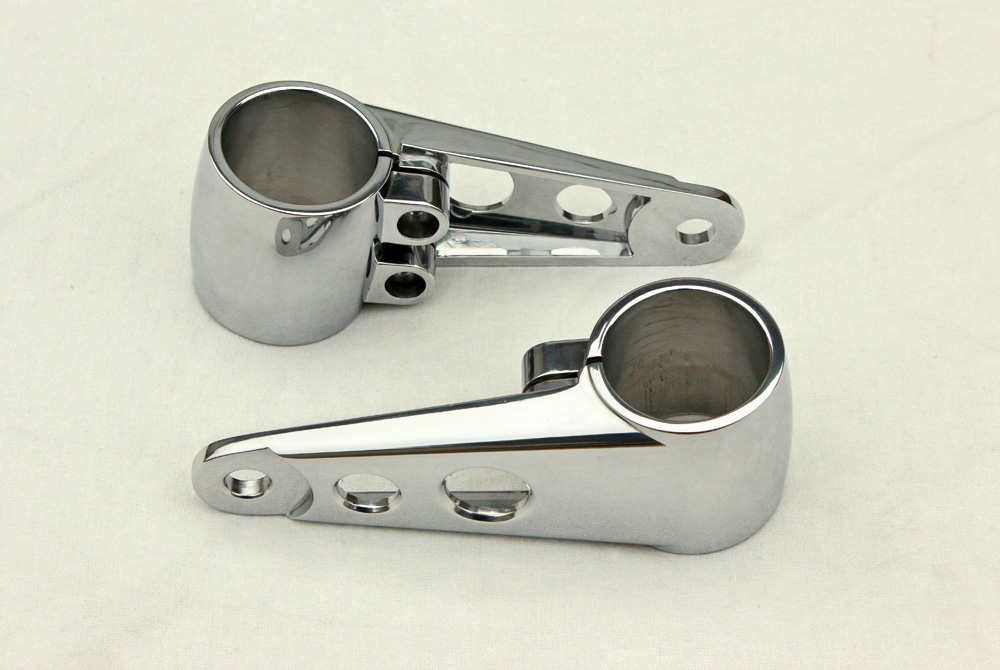
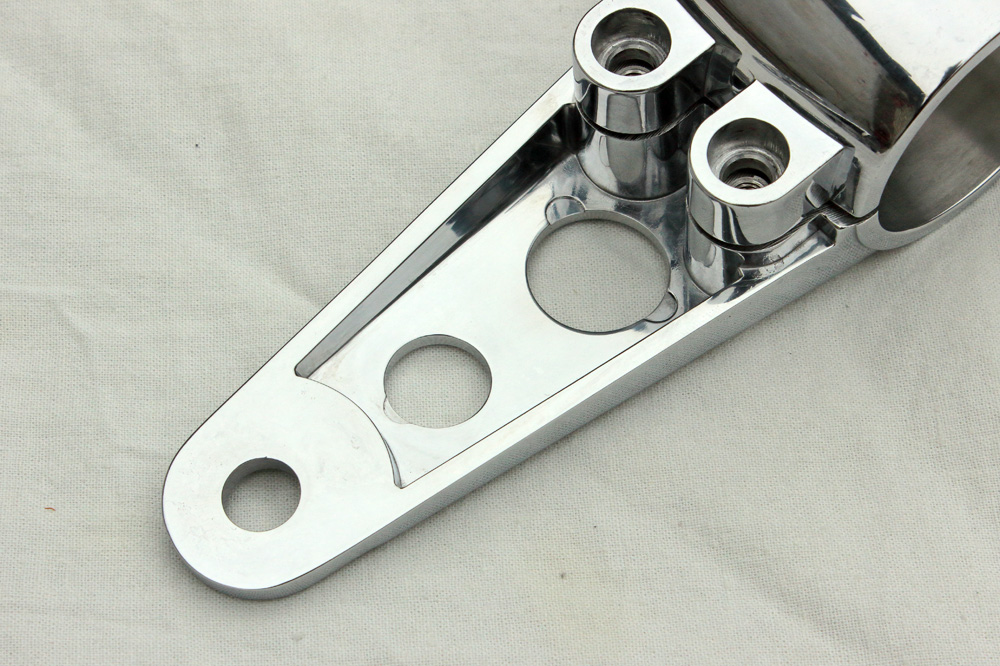
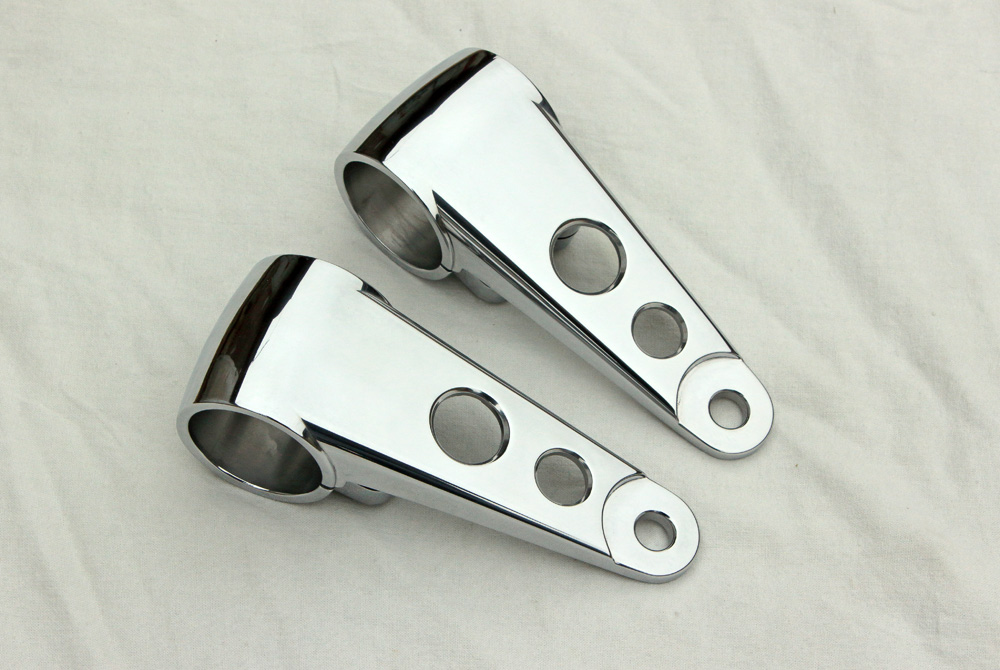
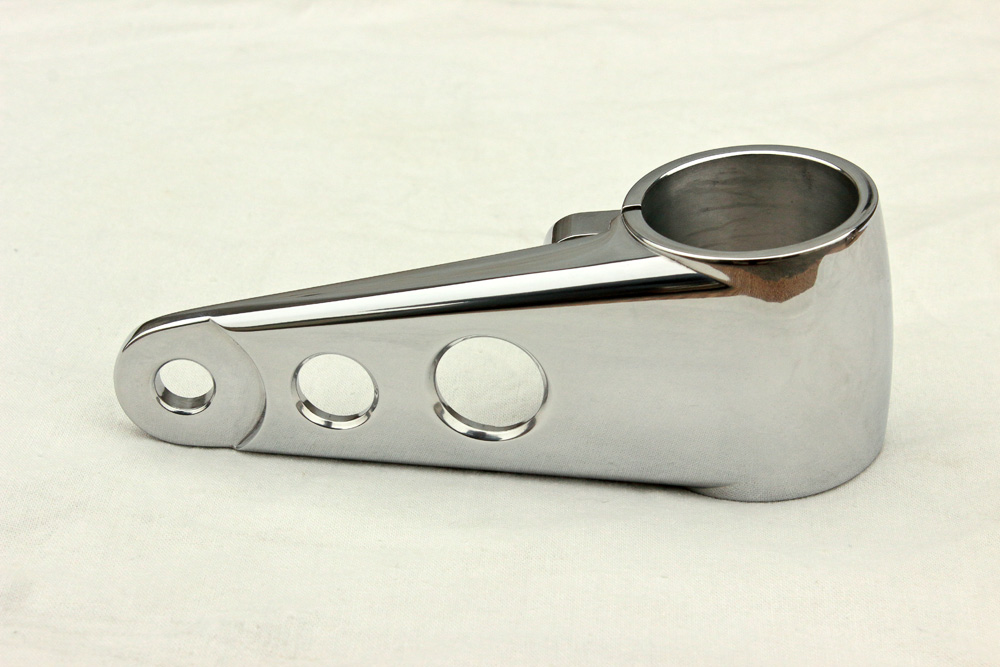

I added to them a bit of my touch by drilling holes and applying additional polishing. Sounds simple, but it was quite s lot of work . However, it made a hell of difference.
Kawasaki KZ650 cafe-racer: in progress
Kawasaki Zephyr 750 (810ccm, 4in4, spoked wheels)
Honda CB815 "Eight Fifteen" cafe-racer
Yamaha XJ "Eight Ball" cafe-racer
www.gazzz-garage.com
Kawasaki Zephyr 750 (810ccm, 4in4, spoked wheels)
Honda CB815 "Eight Fifteen" cafe-racer
Yamaha XJ "Eight Ball" cafe-racer
www.gazzz-garage.com
The following user(s) said Thank You: bluej58
Please Log in or Create an account to join the conversation.
- bluej58
-
- Offline
- Sustaining Member
-
Registered
- The chrome don't get you home
- Posts: 2474
- Thanks: 507
Re: KZ650 cafe-racer
15 Apr 2020 13:55
That's wild man, Great job Gazzz, those headlight ears are something else!
78 KZ1000 A2A
The following user(s) said Thank You: gazzz
Please Log in or Create an account to join the conversation.
- gazzz
-
Topic Author
- Offline
- Sustaining Member
-
Registered
- Posts: 563
- Thanks: 319
Re: KZ650 cafe-racer
26 Apr 2020 09:05
Time to make some parts from the scratch.
For intro I couldn’t, but quote myself:
If you tap “cafe racer” in google or another web search engine’ search line, you may find a lot of pictures of subject bikes without any kind of chain guard. But in my opinion chain guard is very important part of a motorcycle.
I can even put up with riding fenderless motorcycle in rain, but couldn’t afford idea of chain lubricant on my bottom, and all over my back. And whatever ultimate cafe-racer you build, chain guard is not such a loss in design, and gain in weight to make a bike without it. So chain guard is present in all my projects.
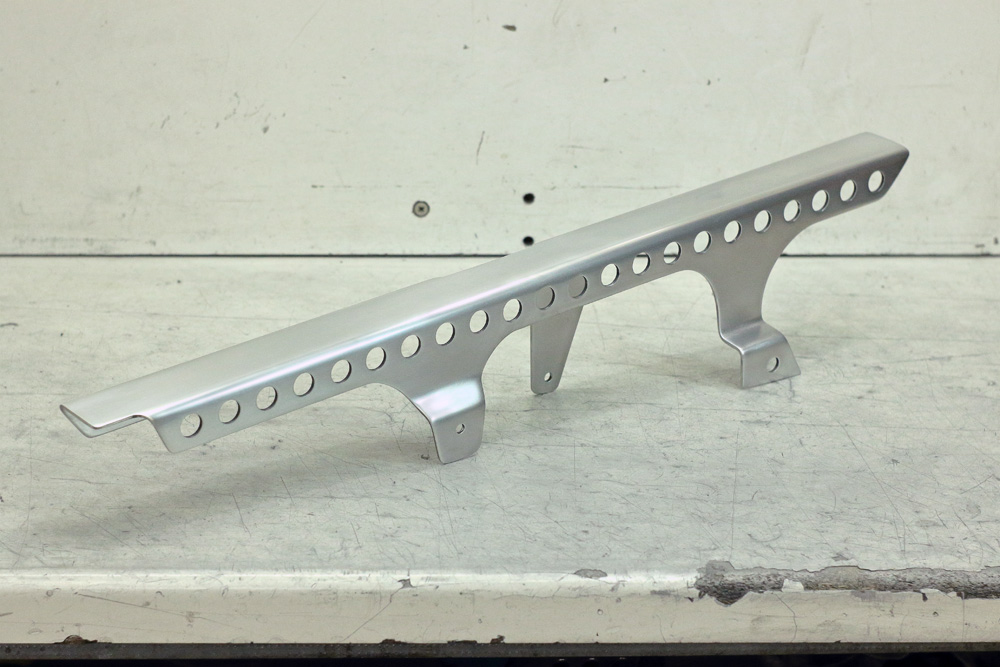
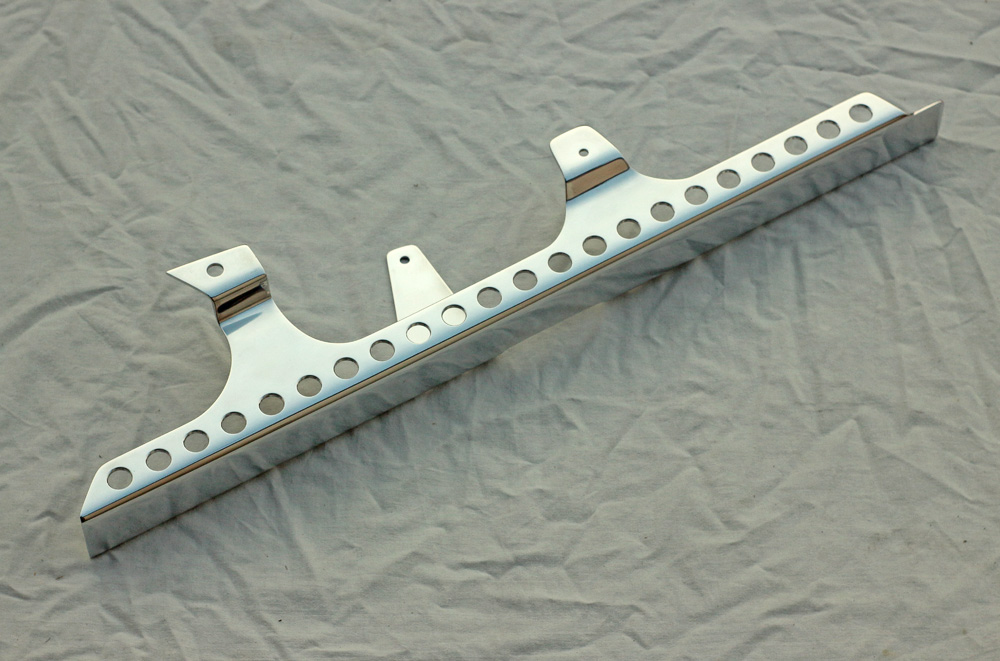
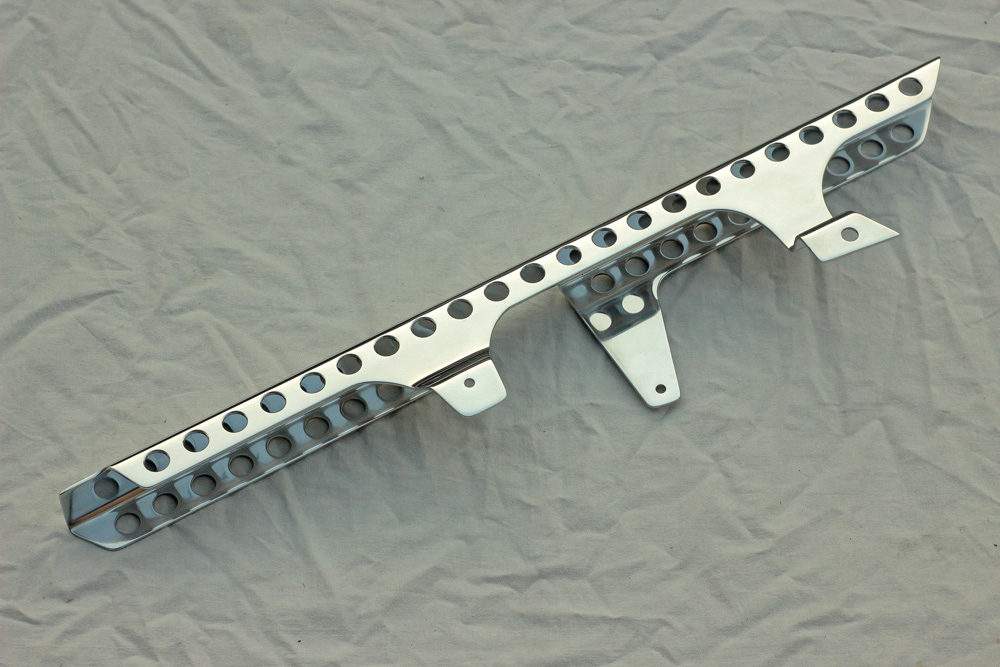
That’s a quote from my post about Honda CB815 chain guard and for Kawasaki KZ650 cafe-racer I thought out chain guard of similar design. Thus, I suppose I already could call it Gazzz Garage traditional design. And as with CB815 chain guard I started from bending 3mm aluminum sheet into U-shaped profile.

Then I made some marking, cutting as well as additional bending. Result began to resemble chain guard.

Once all dimensions, openings and cut-outs were determined and made…
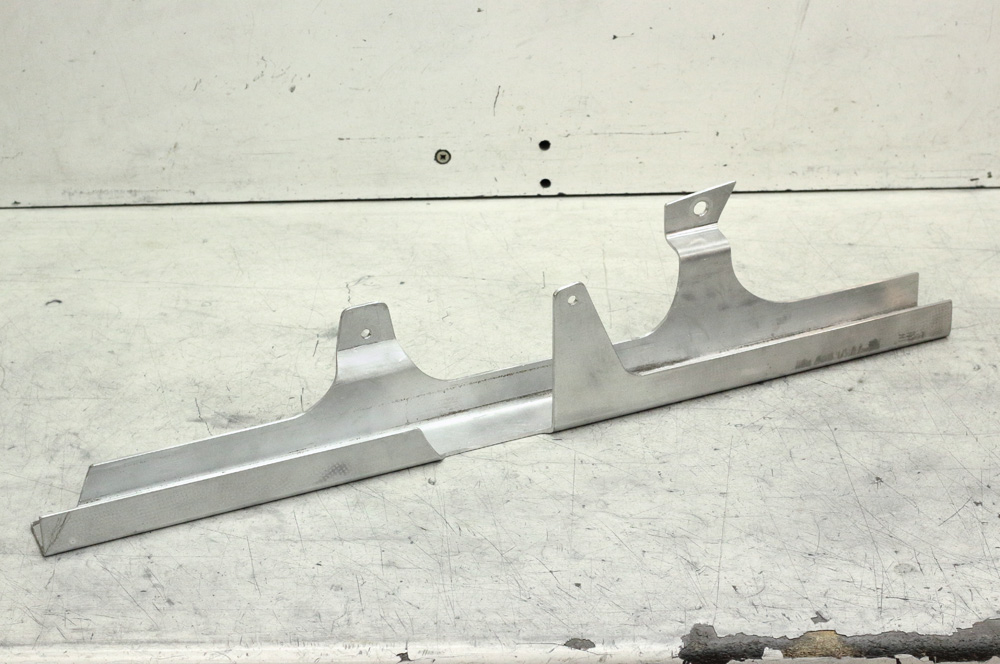
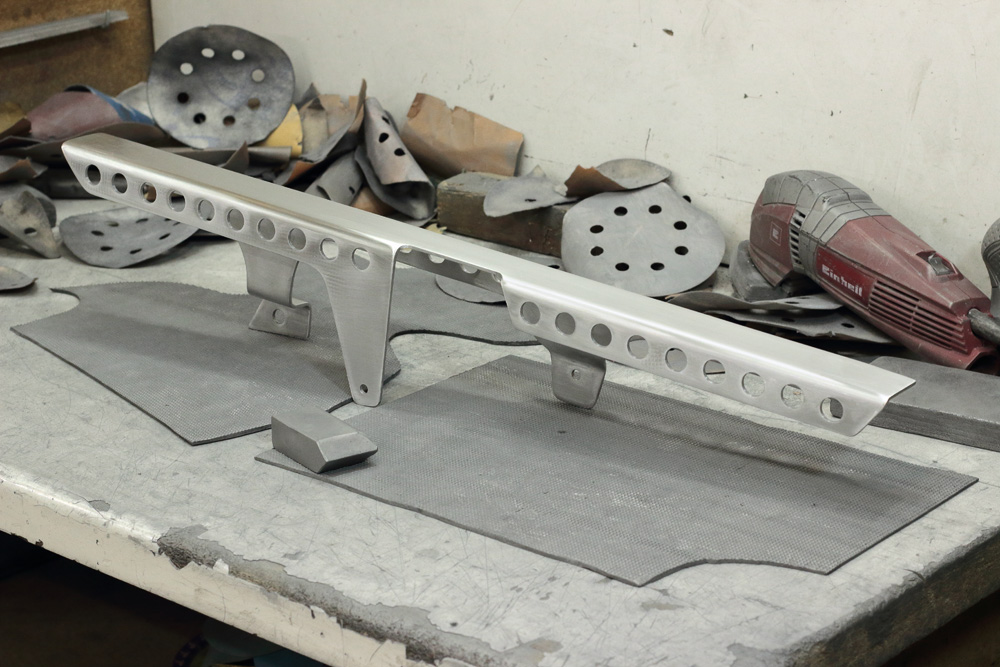
… I switched to new task: holes drilling.
According to my design there would be 41 holes of 14mm diameter: 22 on “face” side and 19 on back, places in straight rows. It’s a bit tricky task, as centering drill bit works poorly with soft aluminum alloy and there is no chance to put part in vices. So it was all good-old-step-by-step drilling. I started with 3mm drill bit and moved up to 13mm drill bit with step in 1mm. From time to time I made measurements and aligned row where it was necessary. To get nice looking round holes I used 13.5mm and 13.8mm drill bits before 14mm drill bit. After drilling was done I made first sandpapering approach. With nowadays Coronavirus restrictions it’s became quite a task to buy proper sandpaper and raw materials. I have a box with some supplies of sandpaper I considered to be not completely worn, and here came a moment to get those sandpaper from the box…
The aluminum of which I made this chain guard is likely to be 3003 alloy. I was curious about if it possible to make drilling process easier so I made some drilling experiments (different RPMs) with same material and found out that step drill bit works OK for 3030 aluminum on 500RPM with constant oiling. However it does not solve question of aligning (as marking is made not by CNC but man) and it bear another menace: it’s easy to overdrill with it, so it’s better to put some stopper on step next to required.
For intro I couldn’t, but quote myself:
If you tap “cafe racer” in google or another web search engine’ search line, you may find a lot of pictures of subject bikes without any kind of chain guard. But in my opinion chain guard is very important part of a motorcycle.
I can even put up with riding fenderless motorcycle in rain, but couldn’t afford idea of chain lubricant on my bottom, and all over my back. And whatever ultimate cafe-racer you build, chain guard is not such a loss in design, and gain in weight to make a bike without it. So chain guard is present in all my projects.
That’s a quote from my post about Honda CB815 chain guard and for Kawasaki KZ650 cafe-racer I thought out chain guard of similar design. Thus, I suppose I already could call it Gazzz Garage traditional design. And as with CB815 chain guard I started from bending 3mm aluminum sheet into U-shaped profile.
Then I made some marking, cutting as well as additional bending. Result began to resemble chain guard.
Once all dimensions, openings and cut-outs were determined and made…
… I switched to new task: holes drilling.
According to my design there would be 41 holes of 14mm diameter: 22 on “face” side and 19 on back, places in straight rows. It’s a bit tricky task, as centering drill bit works poorly with soft aluminum alloy and there is no chance to put part in vices. So it was all good-old-step-by-step drilling. I started with 3mm drill bit and moved up to 13mm drill bit with step in 1mm. From time to time I made measurements and aligned row where it was necessary. To get nice looking round holes I used 13.5mm and 13.8mm drill bits before 14mm drill bit. After drilling was done I made first sandpapering approach. With nowadays Coronavirus restrictions it’s became quite a task to buy proper sandpaper and raw materials. I have a box with some supplies of sandpaper I considered to be not completely worn, and here came a moment to get those sandpaper from the box…
The aluminum of which I made this chain guard is likely to be 3003 alloy. I was curious about if it possible to make drilling process easier so I made some drilling experiments (different RPMs) with same material and found out that step drill bit works OK for 3030 aluminum on 500RPM with constant oiling. However it does not solve question of aligning (as marking is made not by CNC but man) and it bear another menace: it’s easy to overdrill with it, so it’s better to put some stopper on step next to required.
Kawasaki KZ650 cafe-racer: in progress
Kawasaki Zephyr 750 (810ccm, 4in4, spoked wheels)
Honda CB815 "Eight Fifteen" cafe-racer
Yamaha XJ "Eight Ball" cafe-racer
www.gazzz-garage.com
Kawasaki Zephyr 750 (810ccm, 4in4, spoked wheels)
Honda CB815 "Eight Fifteen" cafe-racer
Yamaha XJ "Eight Ball" cafe-racer
www.gazzz-garage.com
Please Log in or Create an account to join the conversation.
- gazzz
-
Topic Author
- Offline
- Sustaining Member
-
Registered
- Posts: 563
- Thanks: 319
Re: KZ650 cafe-racer
26 Apr 2020 09:09
All gaps were checked previously, but I checked them once more with fully compressed shocks. For this purpose I installed only one shock with spring removed.
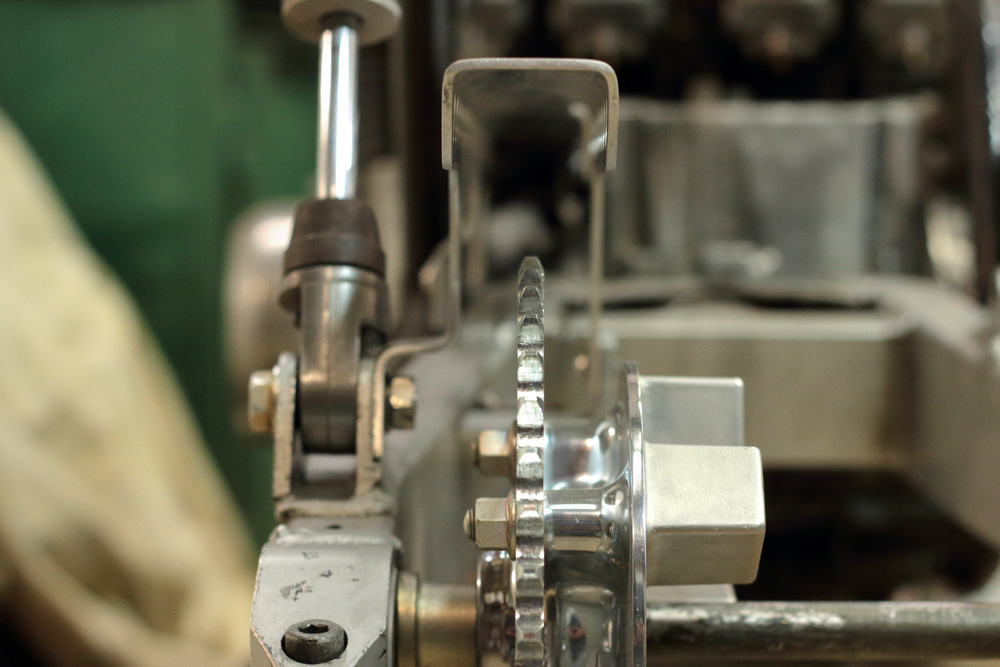
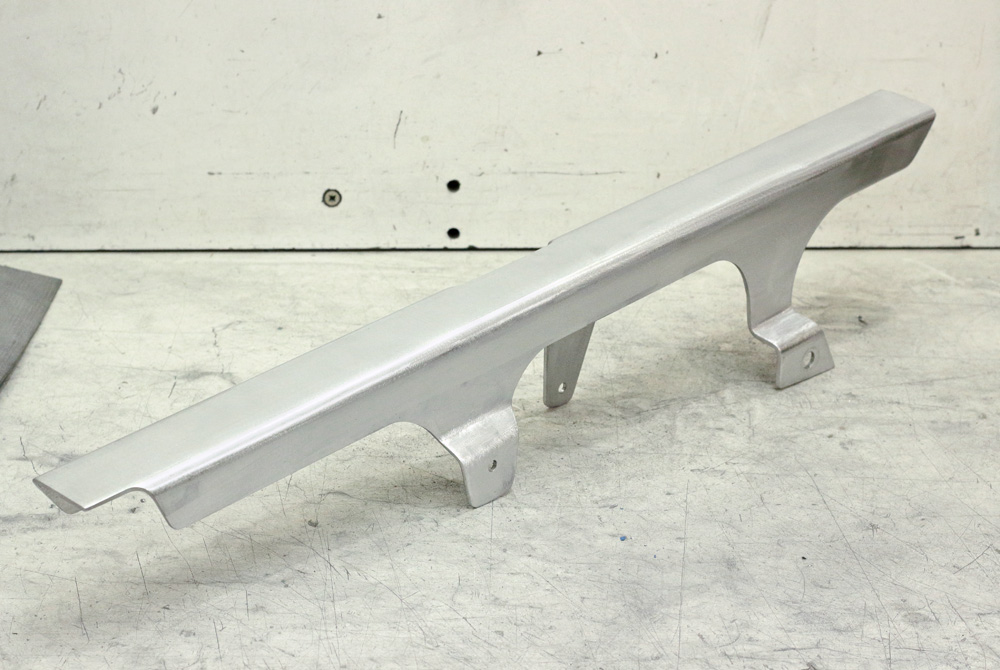
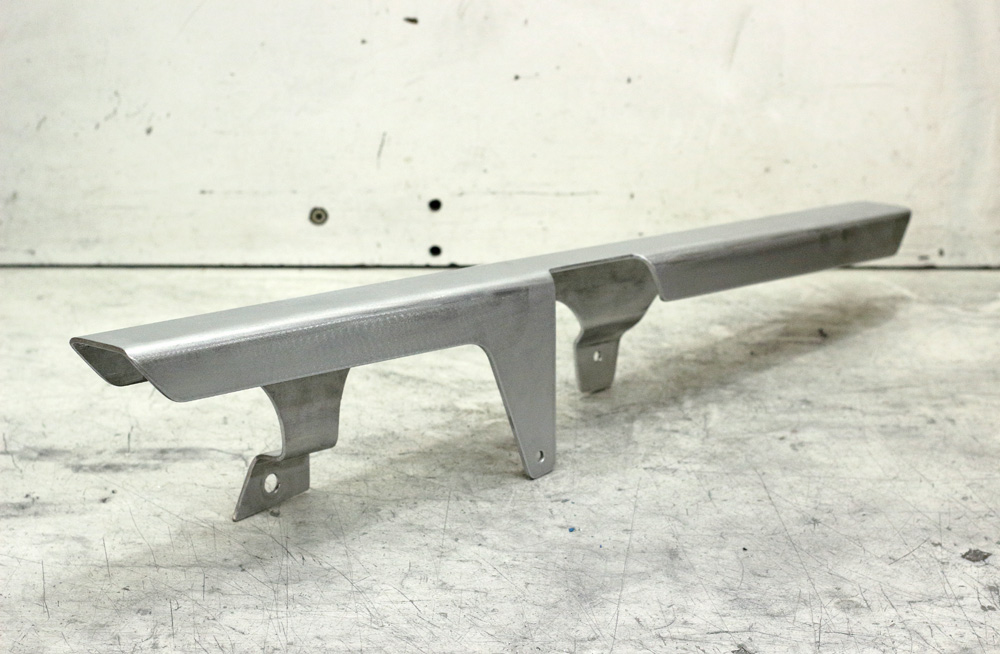
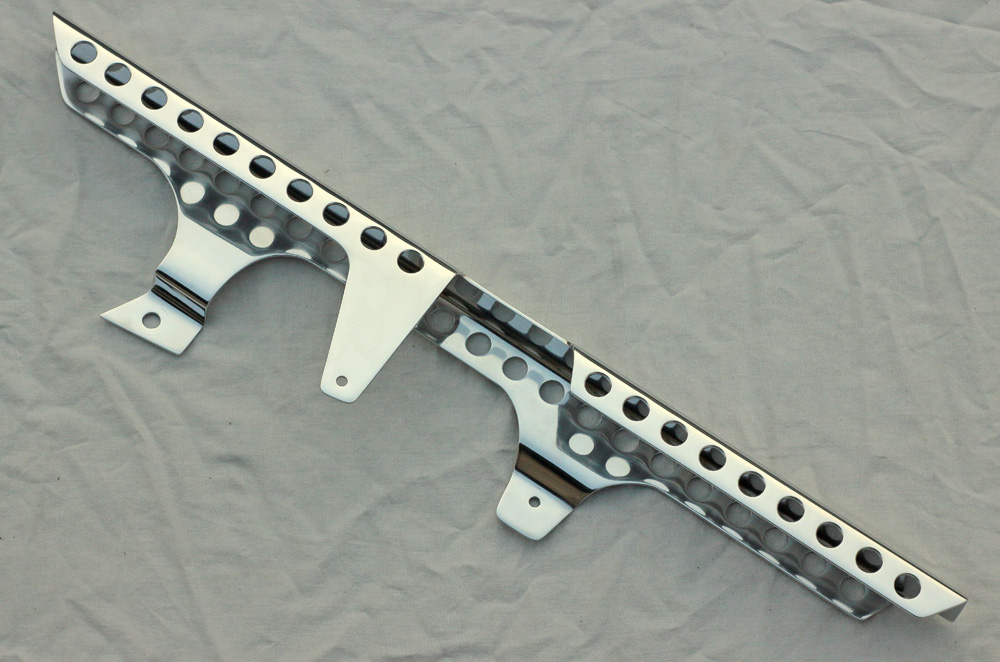
Then I proceeded to further sandpapering, first polishing and final sandpapering. That’s how it looked before polishing :
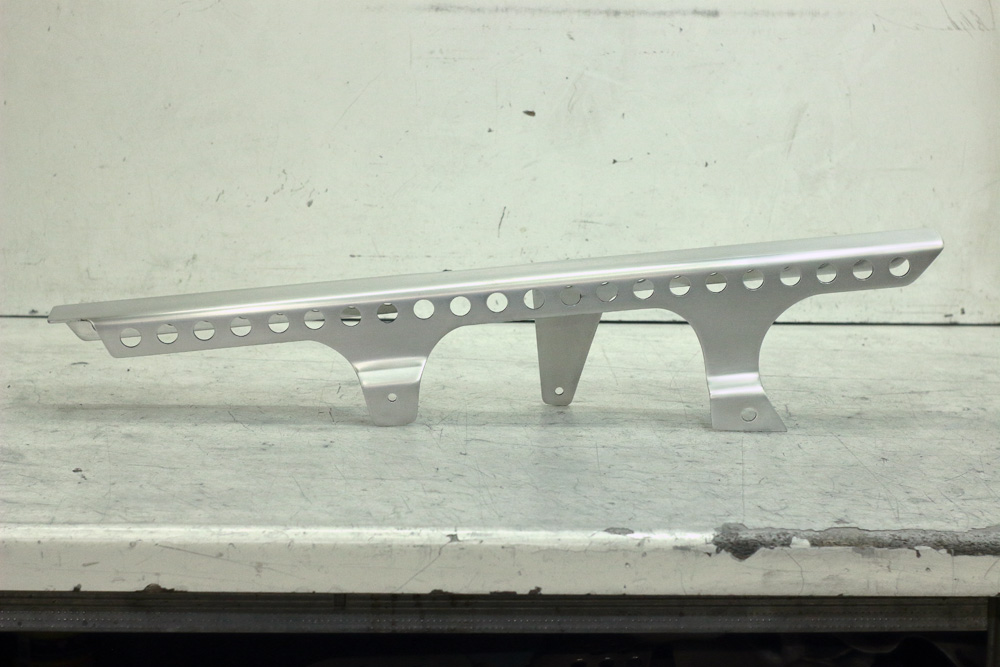
Then I proceeded to further sandpapering, first polishing and final sandpapering. That’s how it looked before polishing :
Kawasaki KZ650 cafe-racer: in progress
Kawasaki Zephyr 750 (810ccm, 4in4, spoked wheels)
Honda CB815 "Eight Fifteen" cafe-racer
Yamaha XJ "Eight Ball" cafe-racer
www.gazzz-garage.com
Kawasaki Zephyr 750 (810ccm, 4in4, spoked wheels)
Honda CB815 "Eight Fifteen" cafe-racer
Yamaha XJ "Eight Ball" cafe-racer
www.gazzz-garage.com
The following user(s) said Thank You: Scirocco
Please Log in or Create an account to join the conversation.
- 750 R1
-
- Offline
- User
-

Registered
- Posts: 1150
- Thanks: 389
The following user(s) said Thank You: gazzz
Please Log in or Create an account to join the conversation.
- gazzz
-
Topic Author
- Offline
- Sustaining Member
-
Registered
- Posts: 563
- Thanks: 319
Re: KZ650 cafe-racer
27 Apr 2020 11:56
Thank you, guys!
Kawasaki KZ650 cafe-racer: in progress
Kawasaki Zephyr 750 (810ccm, 4in4, spoked wheels)
Honda CB815 "Eight Fifteen" cafe-racer
Yamaha XJ "Eight Ball" cafe-racer
www.gazzz-garage.com
Kawasaki Zephyr 750 (810ccm, 4in4, spoked wheels)
Honda CB815 "Eight Fifteen" cafe-racer
Yamaha XJ "Eight Ball" cafe-racer
www.gazzz-garage.com
Please Log in or Create an account to join the conversation.
- gazzz
-
Topic Author
- Offline
- Sustaining Member
-
Registered
- Posts: 563
- Thanks: 319
Re: KZ650 cafe-racer
27 Apr 2020 11:57
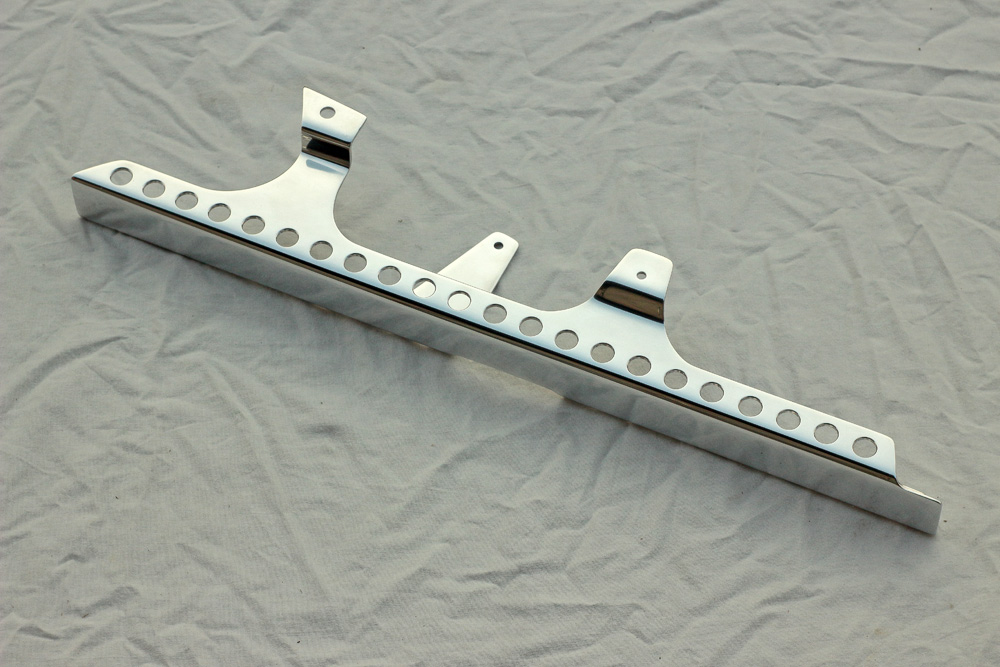
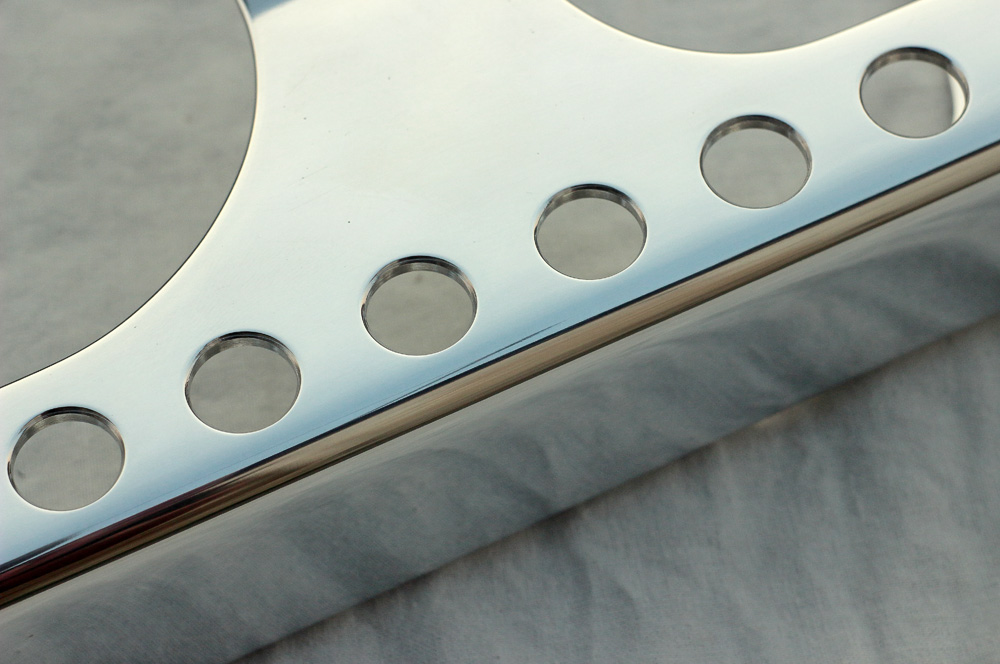
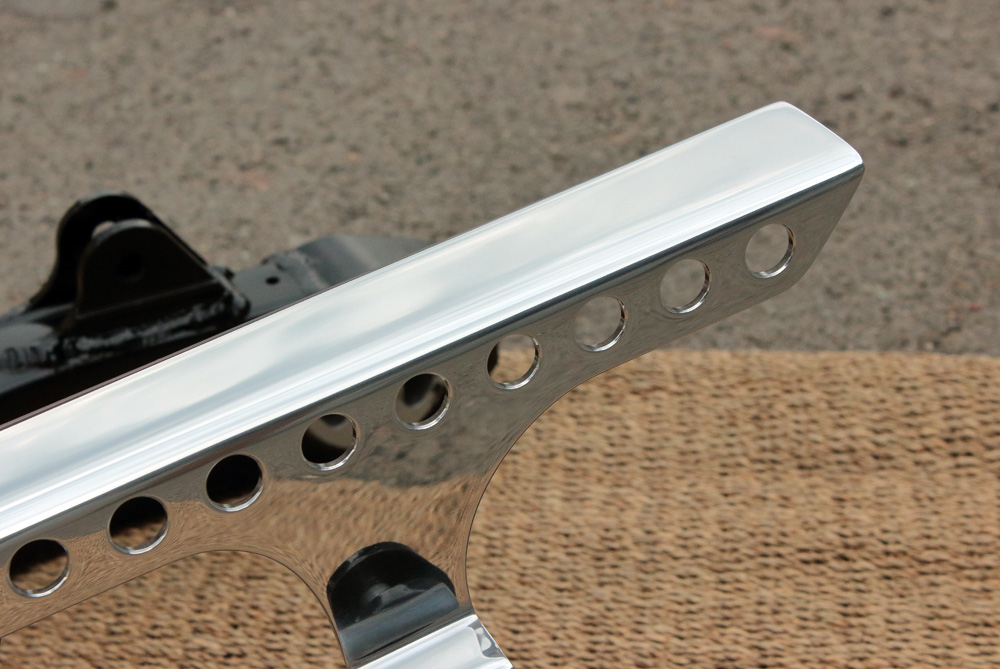
I polished chain guard with my usual approach: polishing-sanding-polishing. I was not picky on the internal side; its destiny is to be covered in chain lube and grease anyway. Result looked very nice.
Kawasaki KZ650 cafe-racer: in progress
Kawasaki Zephyr 750 (810ccm, 4in4, spoked wheels)
Honda CB815 "Eight Fifteen" cafe-racer
Yamaha XJ "Eight Ball" cafe-racer
www.gazzz-garage.com
Kawasaki Zephyr 750 (810ccm, 4in4, spoked wheels)
Honda CB815 "Eight Fifteen" cafe-racer
Yamaha XJ "Eight Ball" cafe-racer
www.gazzz-garage.com
Please Log in or Create an account to join the conversation.
- gazzz
-
Topic Author
- Offline
- Sustaining Member
-
Registered
- Posts: 563
- Thanks: 319
Re: KZ650 cafe-racer
27 Apr 2020 11:59
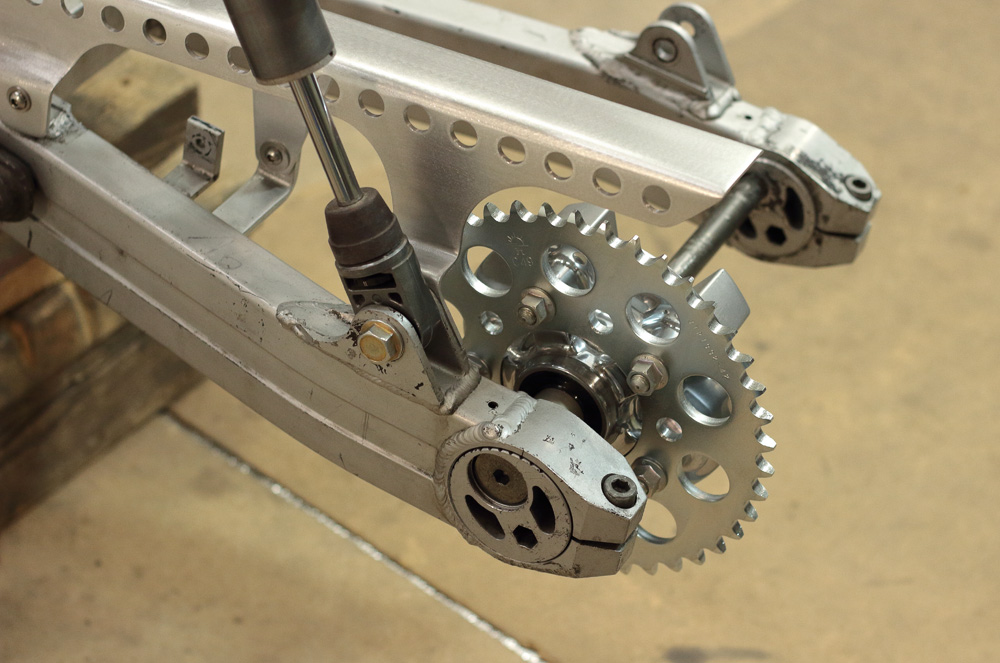
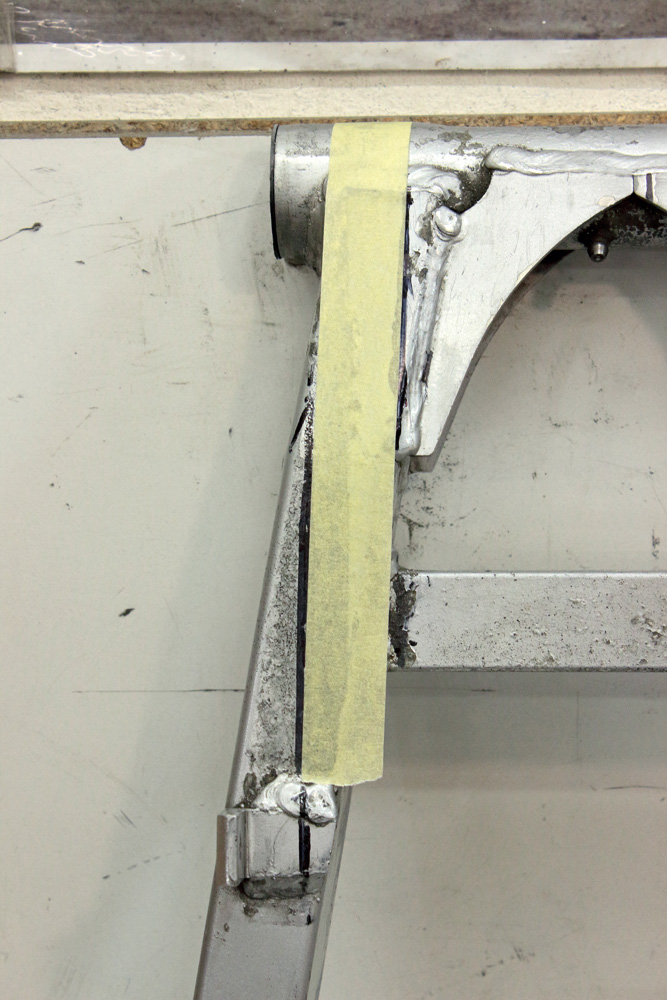
From previous part of story about chain guard attentive reader (or rather attentive picture looker) might notice that chain guard inner mount was already attached to new mount bracket. This mount is longer than original and placed farther from swingarm axle. The reason of such modification is that Kawasaki KZ650 sprockets lay in plane that close to longitudinal axis of motorcycle than plane of Zephyr 550 sprockets. Let me demonstrate this by placing a strip of paper tape on Zephyr 550 swingarm:
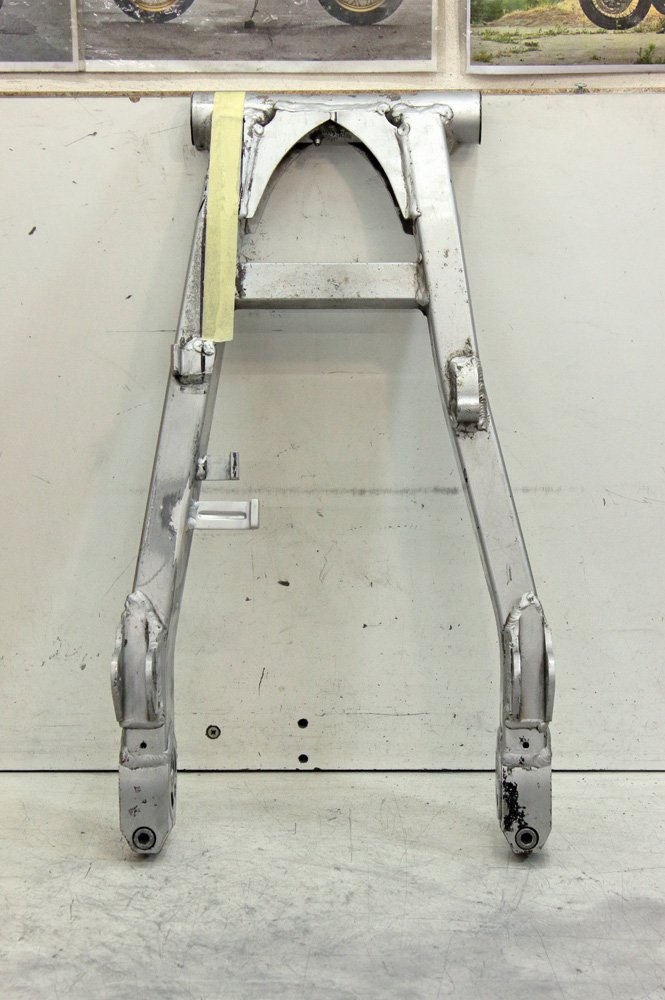
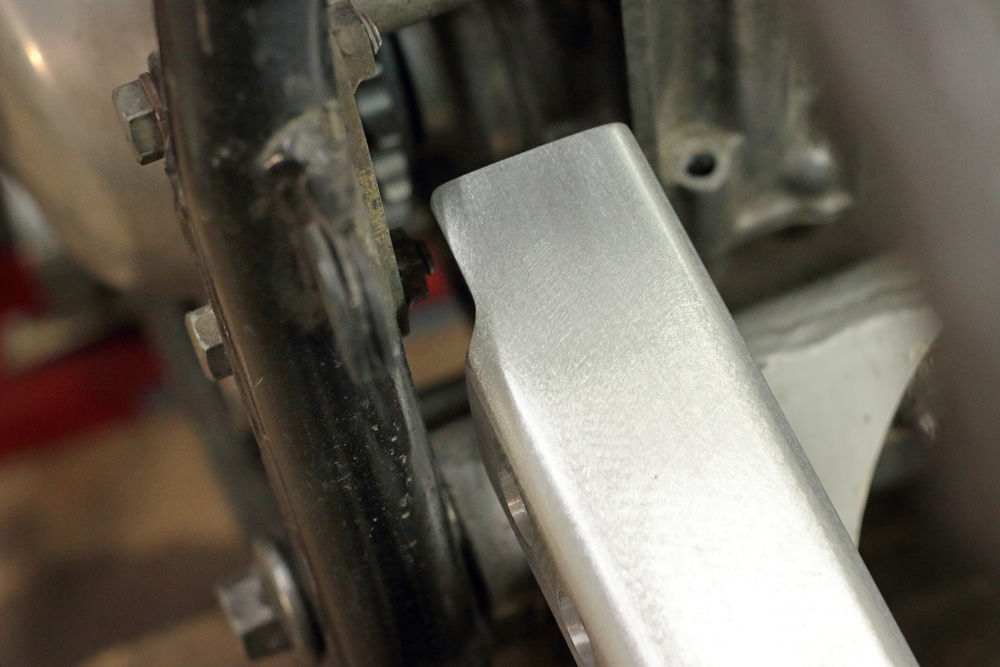
This strip of paper tape has width that is slightly larger than width of trace which 525 chain leaves on rubber chain slider, and its position is verified by laser tool. So we may say that it marks optimal position of chain slider for KZ650.
Now let’s put original Zephyr 550 chain guard (used, so we clearly could see the trace of Zephyr 550 drive chain) on the swingarm. And as we could clearly see, potential KZ650 chain’ trace is shifted to right (or to center of swingarm) comparing to trace of 550 drive chain.
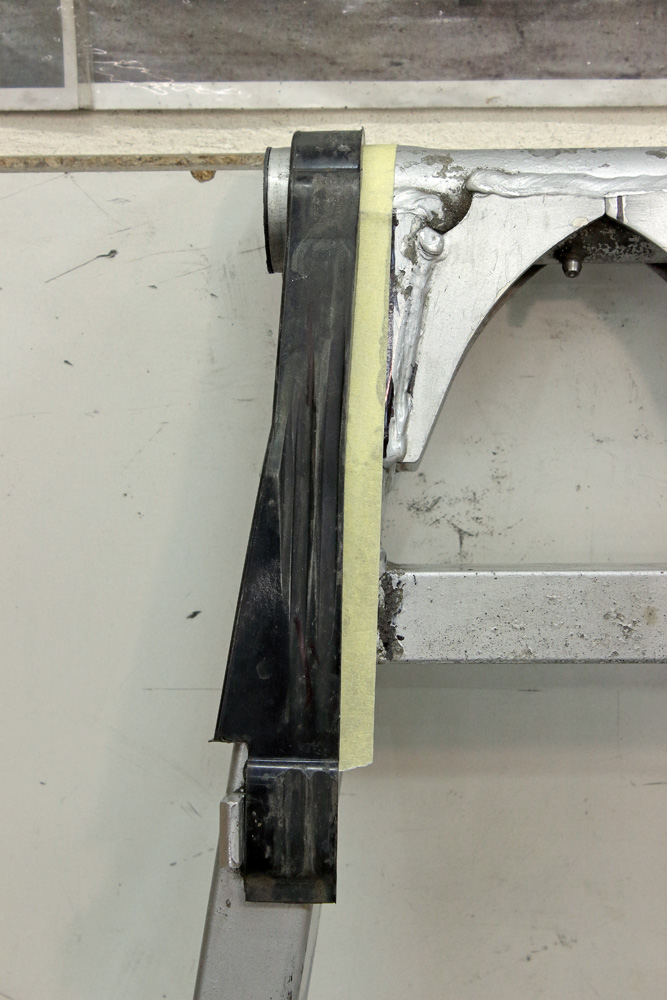
On practice it means two things:
This strip of paper tape has width that is slightly larger than width of trace which 525 chain leaves on rubber chain slider, and its position is verified by laser tool. So we may say that it marks optimal position of chain slider for KZ650.
Now let’s put original Zephyr 550 chain guard (used, so we clearly could see the trace of Zephyr 550 drive chain) on the swingarm. And as we could clearly see, potential KZ650 chain’ trace is shifted to right (or to center of swingarm) comparing to trace of 550 drive chain.
On practice it means two things:
- Zephyr 550 chain slider does not cover all operating width of KZ650 chain. It’s likely wouldn’t be an issue, as long as drive chain is properly tightened. However it’s slightly inaccurate, so I will think about possible solutions for this issue;
- KZ650′ chain would be too close to inner mount of chain guard.
Kawasaki KZ650 cafe-racer: in progress
Kawasaki Zephyr 750 (810ccm, 4in4, spoked wheels)
Honda CB815 "Eight Fifteen" cafe-racer
Yamaha XJ "Eight Ball" cafe-racer
www.gazzz-garage.com
Kawasaki Zephyr 750 (810ccm, 4in4, spoked wheels)
Honda CB815 "Eight Fifteen" cafe-racer
Yamaha XJ "Eight Ball" cafe-racer
www.gazzz-garage.com
Please Log in or Create an account to join the conversation.
- gazzz
-
Topic Author
- Offline
- Sustaining Member
-
Registered
- Posts: 563
- Thanks: 319
Re: KZ650 cafe-racer
27 Apr 2020 12:00
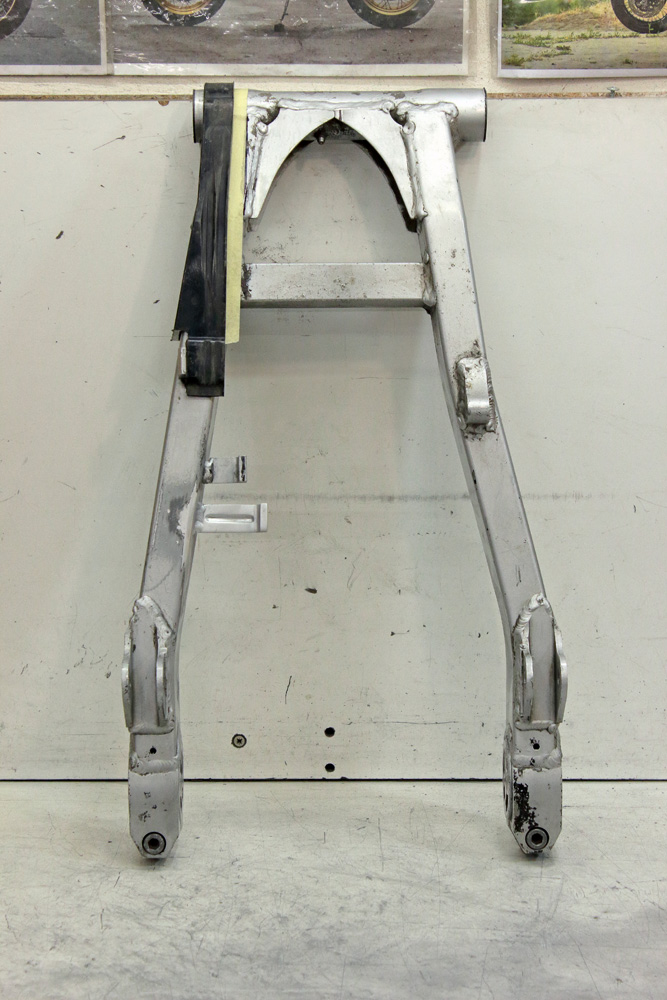
I solved an issue with inner chain guard mount simply by manufacturing new aluminum bracket. I made it of 6mm soft aluminum plate. Such alloy of aluminum might be bent without issues; however its’ softness is not the best characteristic when it comes to rigidity of construction. However, it’s well known, that soft alloys of aluminum might be strengthened by forging, or simply said, by hammering. To make whole business more OEM-looking I made improvised stamp and hammered groove from the welding seam up to bent. This groove completely solved issue of bracket stiffness.
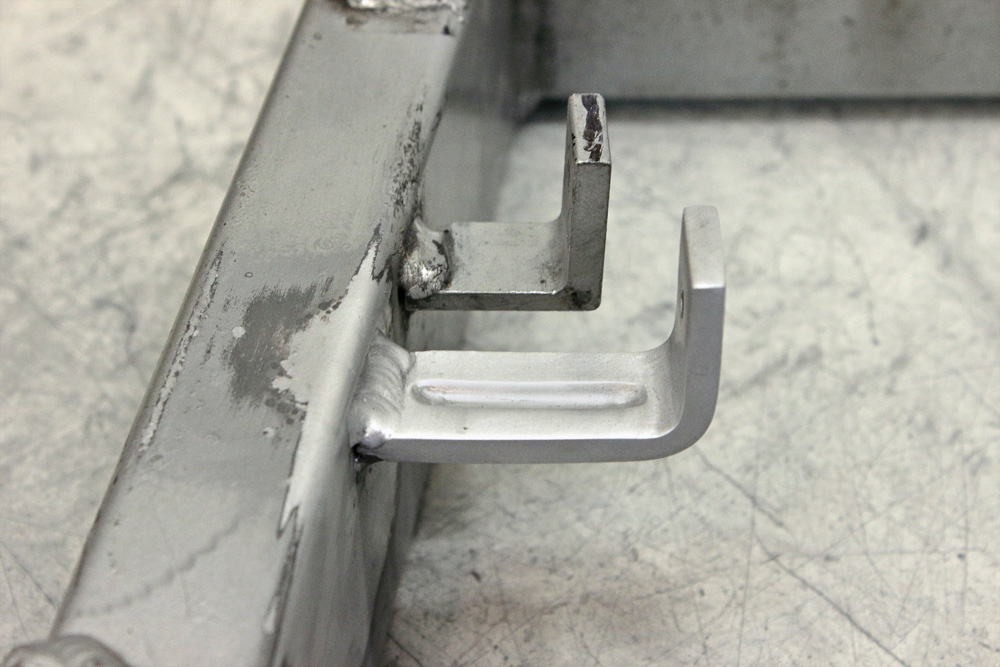
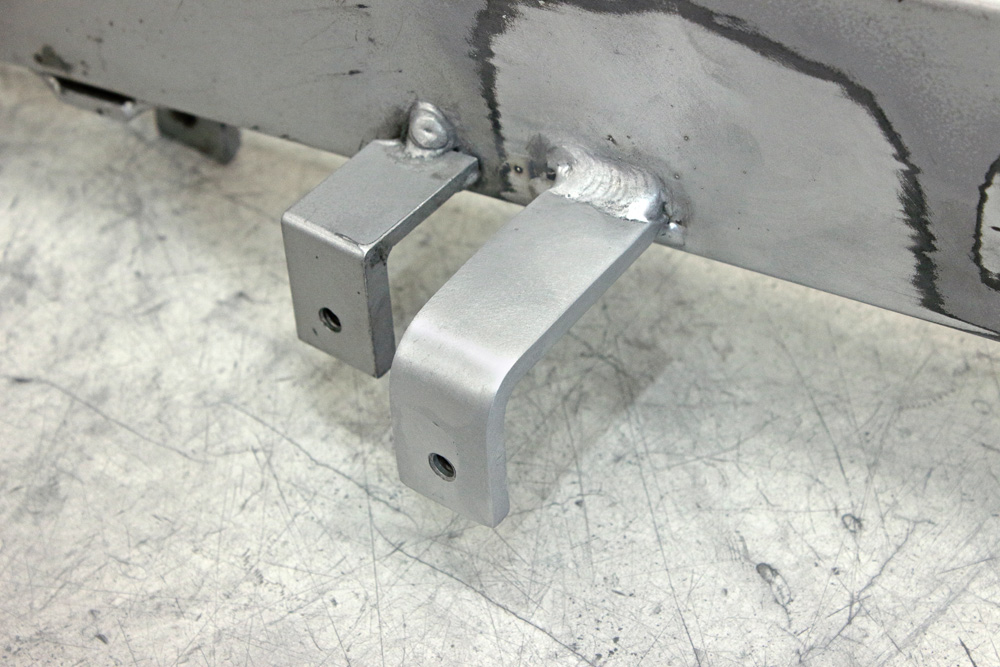
I had no use for old mount, so I cut it off and grinded place where it was welded.
I had no use for old mount, so I cut it off and grinded place where it was welded.
Kawasaki KZ650 cafe-racer: in progress
Kawasaki Zephyr 750 (810ccm, 4in4, spoked wheels)
Honda CB815 "Eight Fifteen" cafe-racer
Yamaha XJ "Eight Ball" cafe-racer
www.gazzz-garage.com
Kawasaki Zephyr 750 (810ccm, 4in4, spoked wheels)
Honda CB815 "Eight Fifteen" cafe-racer
Yamaha XJ "Eight Ball" cafe-racer
www.gazzz-garage.com
Please Log in or Create an account to join the conversation.
- gazzz
-
Topic Author
- Offline
- Sustaining Member
-
Registered
- Posts: 563
- Thanks: 319
Re: KZ650 cafe-racer
27 Apr 2020 12:01
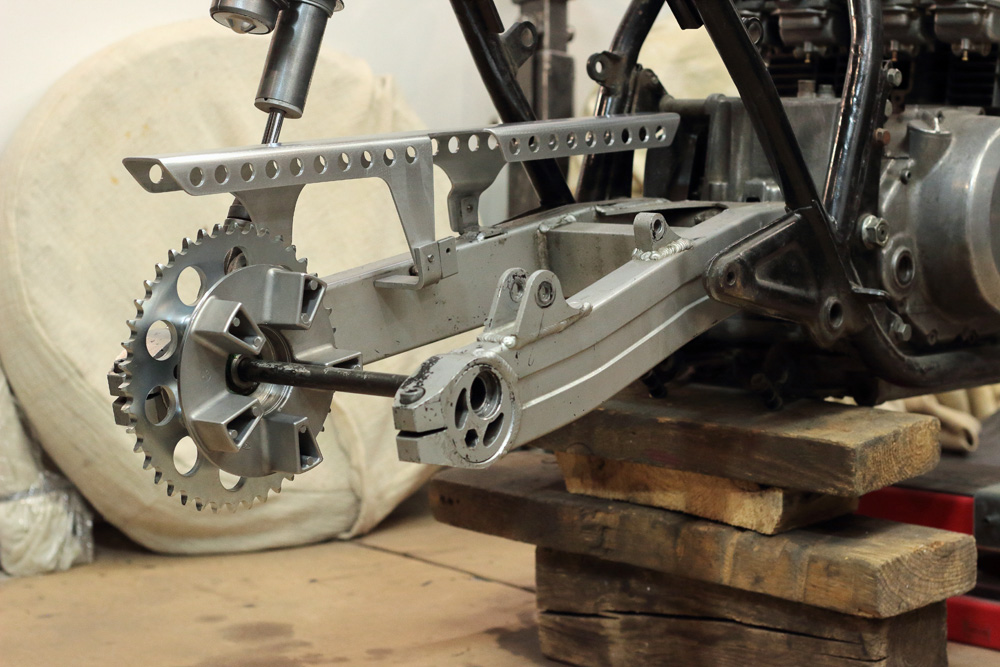
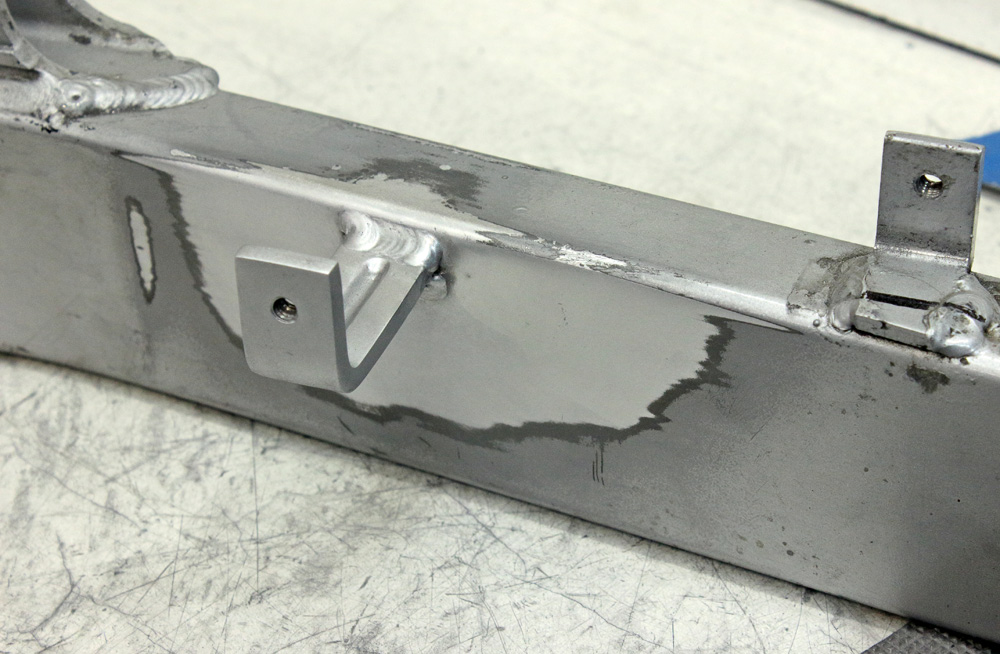
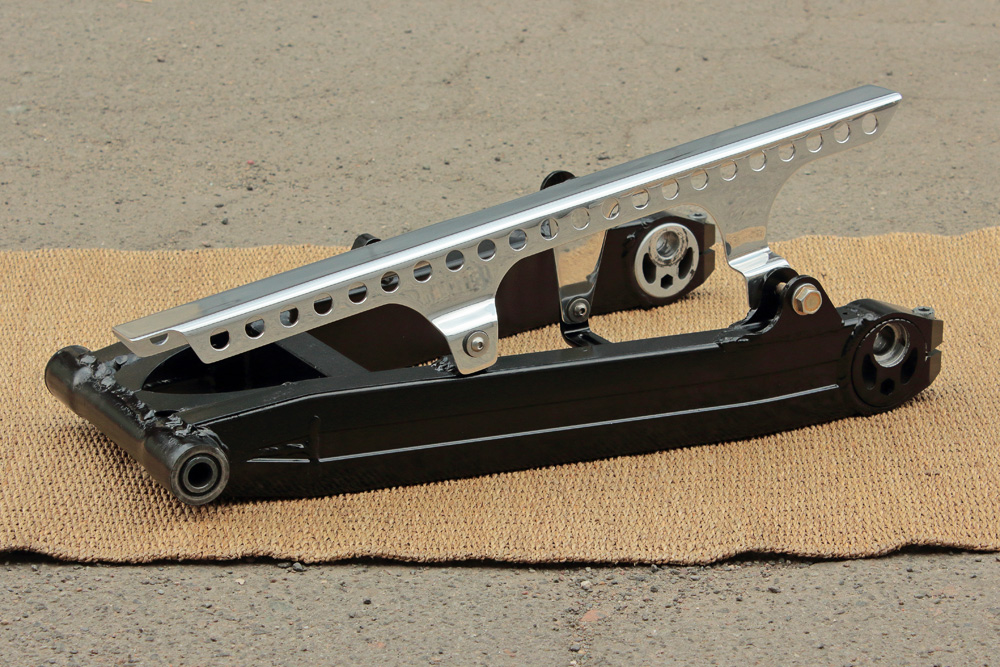
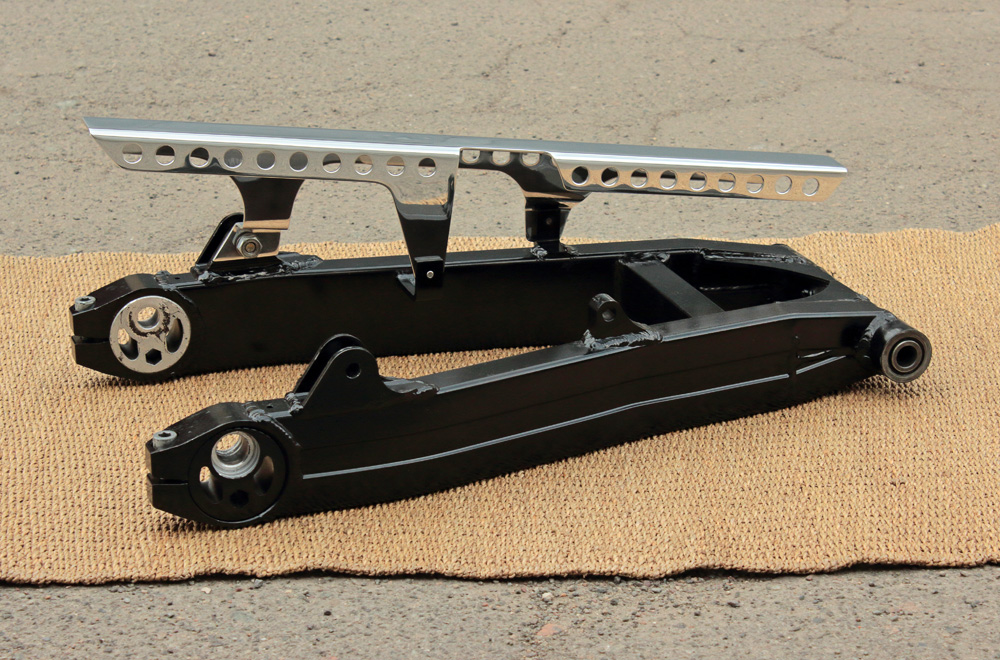
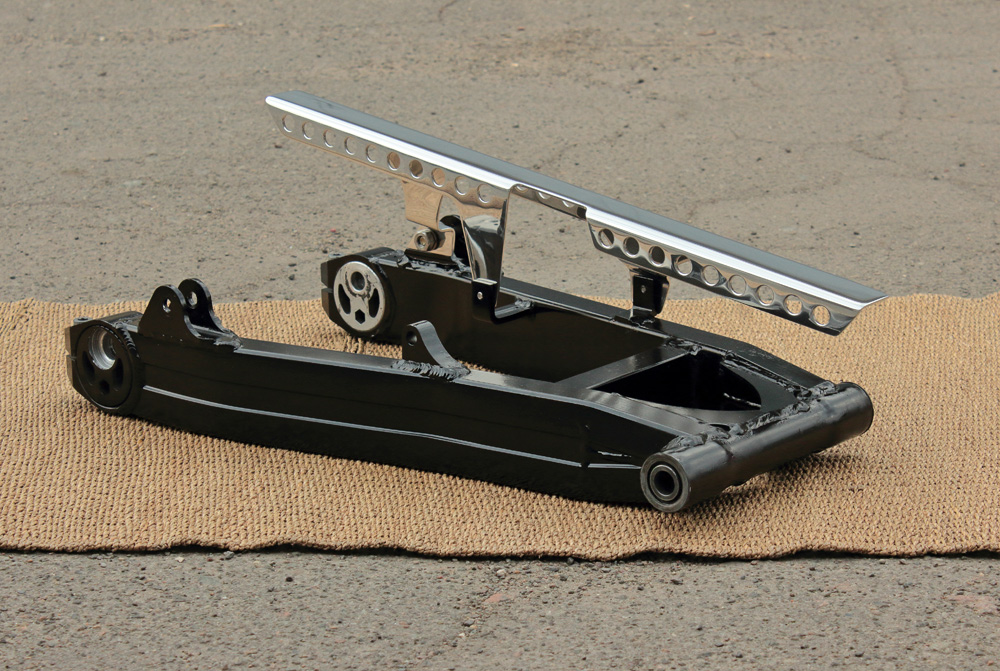
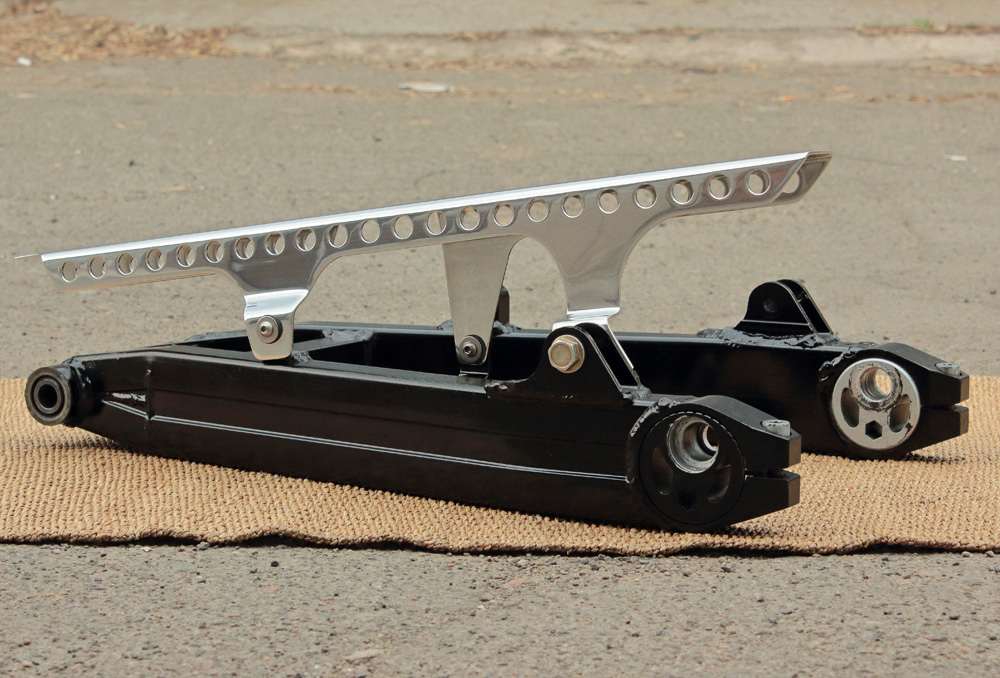
According to my plan, the swingram would be painted in black. But even now, when I seemingly finished with its modification, it would be unadvisable to glass blast it and paint it, so to cease my curiosity about its future look I painted swingarm with rattle can. I did it with swingarm as it was: not bothering with its sanding, just removed some flakes of old paint and cleaned the grease. So don’t take photos below as a final result, it’s nothing but modeling. And I should admit, that combination of polished aluminum of chain guard and black of swingarm made contraption slightly Star Wars’ looking. I already like it.
Kawasaki KZ650 cafe-racer: in progress
Kawasaki Zephyr 750 (810ccm, 4in4, spoked wheels)
Honda CB815 "Eight Fifteen" cafe-racer
Yamaha XJ "Eight Ball" cafe-racer
www.gazzz-garage.com
Kawasaki Zephyr 750 (810ccm, 4in4, spoked wheels)
Honda CB815 "Eight Fifteen" cafe-racer
Yamaha XJ "Eight Ball" cafe-racer
www.gazzz-garage.com
Please Log in or Create an account to join the conversation.
- gazzz
-
Topic Author
- Offline
- Sustaining Member
-
Registered
- Posts: 563
- Thanks: 319
Re: KZ650 cafe-racer
30 Apr 2020 12:02 - 30 Apr 2020 12:03
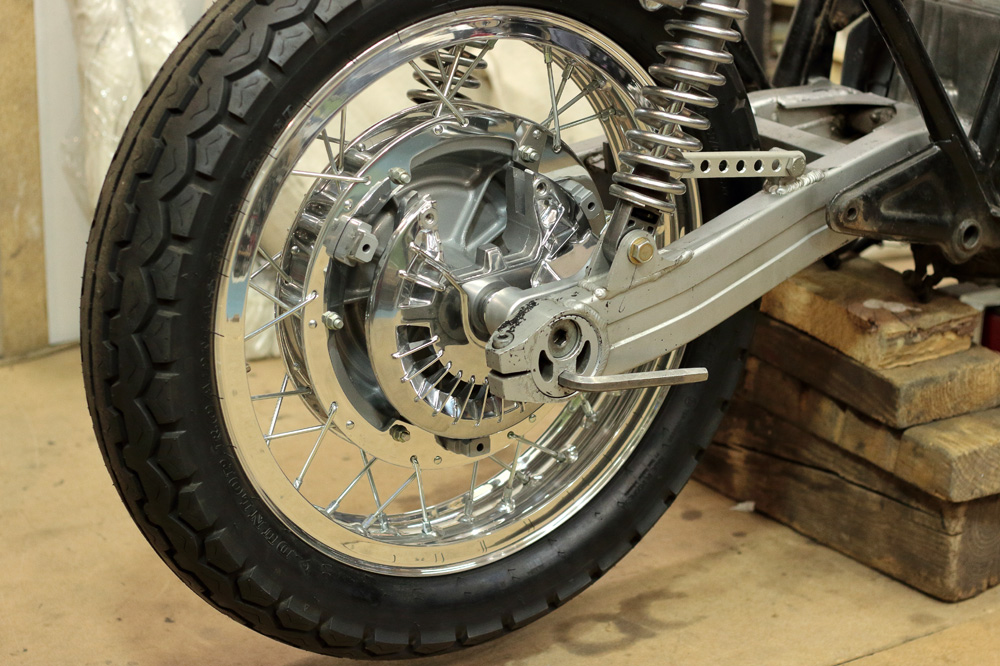
Usually rear brake caliper’ torque rod is strictly utilitarian looking thing. To make it of steel was also the simplest option, especially taking into account the fact that there is a 6mm offset between torque rod mount on swingarm and brake caliper holder. So KZ650 project might have quite ordinary brake torque rod if I wasn’t working on it simultaneously with working on the chain guard.
Idea of torque rode as some kind of “counterpart” to chain guard was pretty obvious to me. First were measurements.
They were closely followed by pencil sketch. I used to do such sketches (or simpler ones) beforehand to drawings that I make on computer.
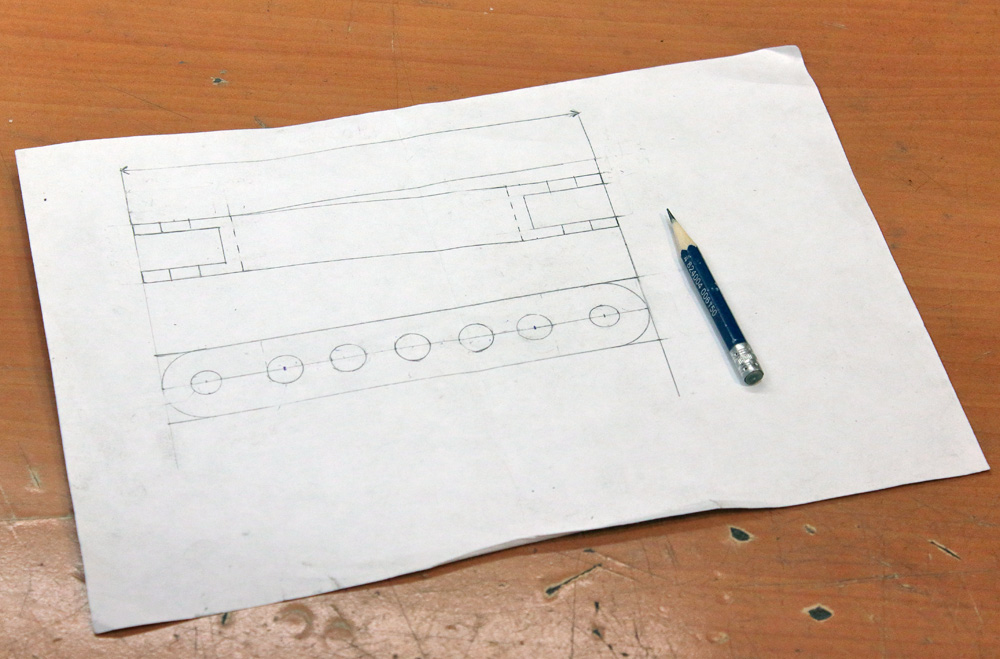
That’s what I’ve got as an output:
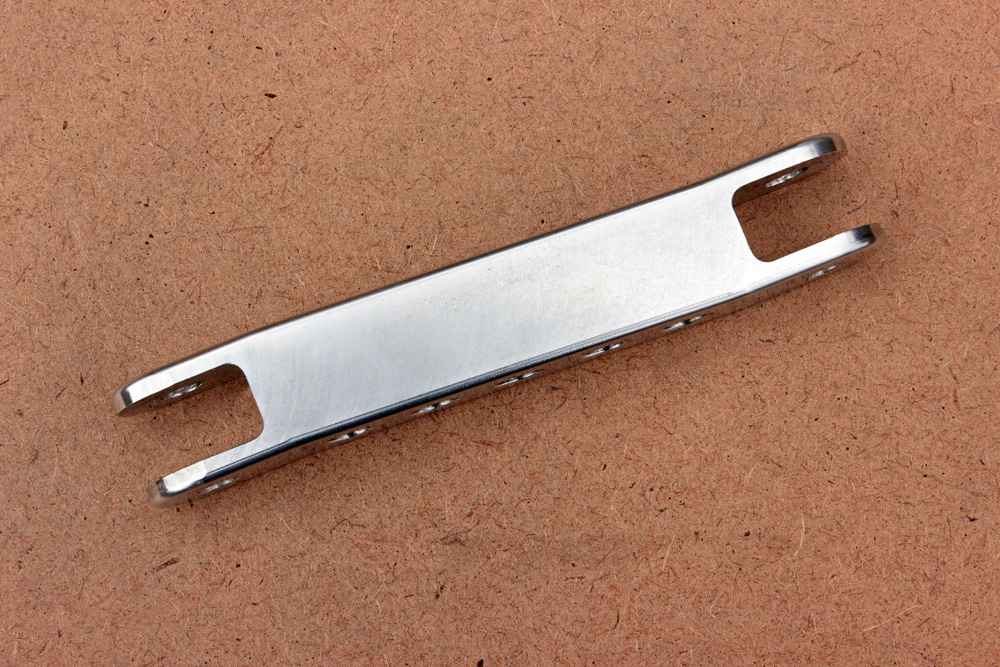
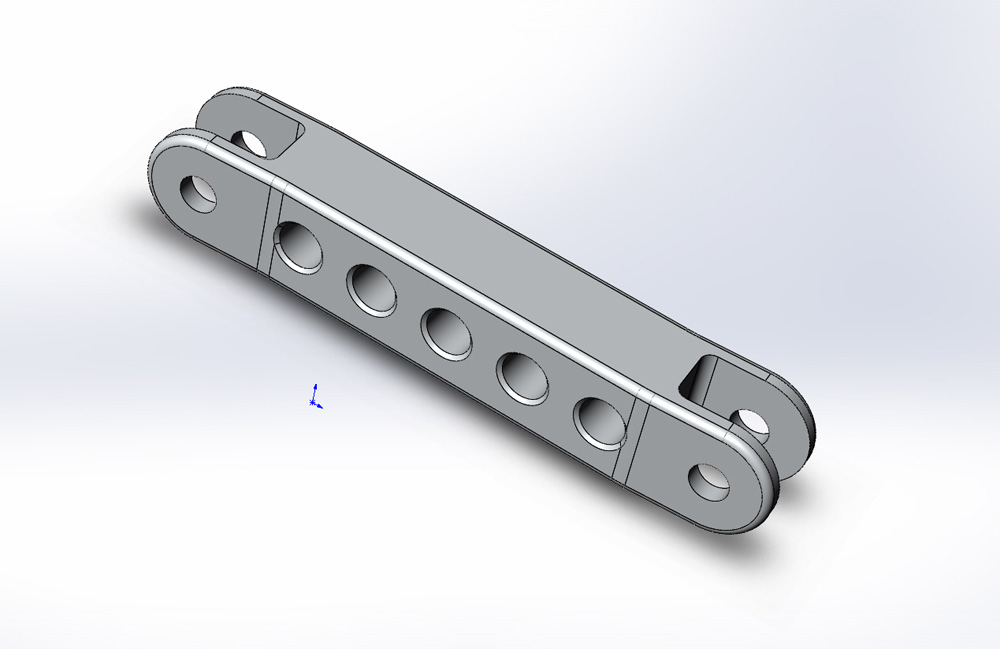
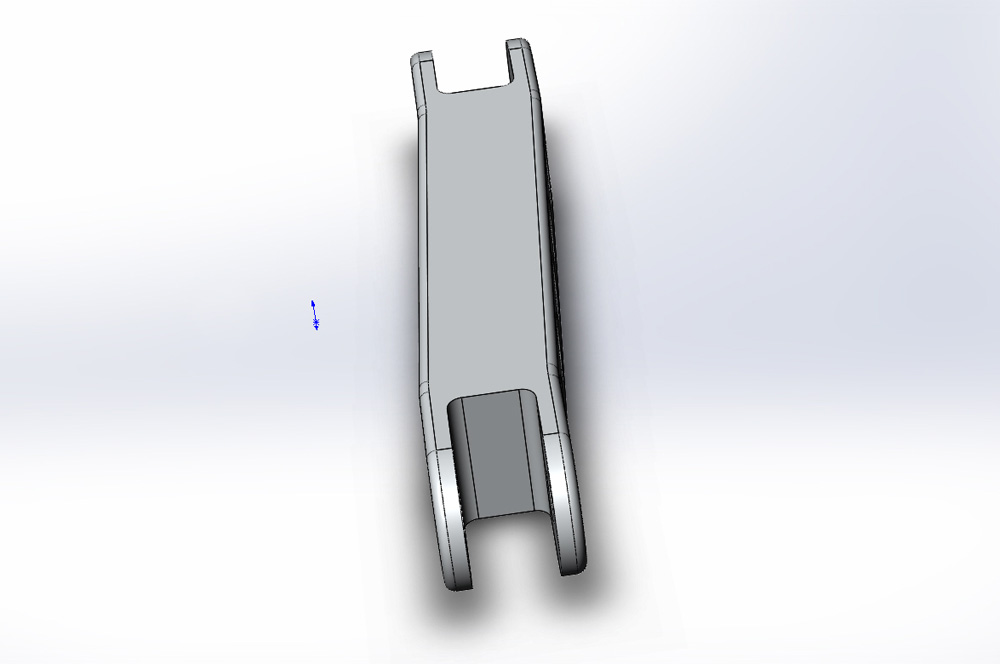
Then I produced 3D drawings and brought them to CNC shop along with plate of 2024 aircraft grade aluminum.
Idea of torque rode as some kind of “counterpart” to chain guard was pretty obvious to me. First were measurements.
They were closely followed by pencil sketch. I used to do such sketches (or simpler ones) beforehand to drawings that I make on computer.
That’s what I’ve got as an output:
Then I produced 3D drawings and brought them to CNC shop along with plate of 2024 aircraft grade aluminum.
Kawasaki KZ650 cafe-racer: in progress
Kawasaki Zephyr 750 (810ccm, 4in4, spoked wheels)
Honda CB815 "Eight Fifteen" cafe-racer
Yamaha XJ "Eight Ball" cafe-racer
www.gazzz-garage.com
Kawasaki Zephyr 750 (810ccm, 4in4, spoked wheels)
Honda CB815 "Eight Fifteen" cafe-racer
Yamaha XJ "Eight Ball" cafe-racer
www.gazzz-garage.com
Last edit: 30 Apr 2020 12:03 by gazzz.
Please Log in or Create an account to join the conversation.
Moderators: Street Fighter LTD