
KZ650 cafe-racer
- gazzz
-
 Topic Author
- Offline
- Sustaining Member
-

Registered
- Posts: 563
- Thanks: 319
Re: KZ650 cafe-racer
25 Feb 2020 12:46
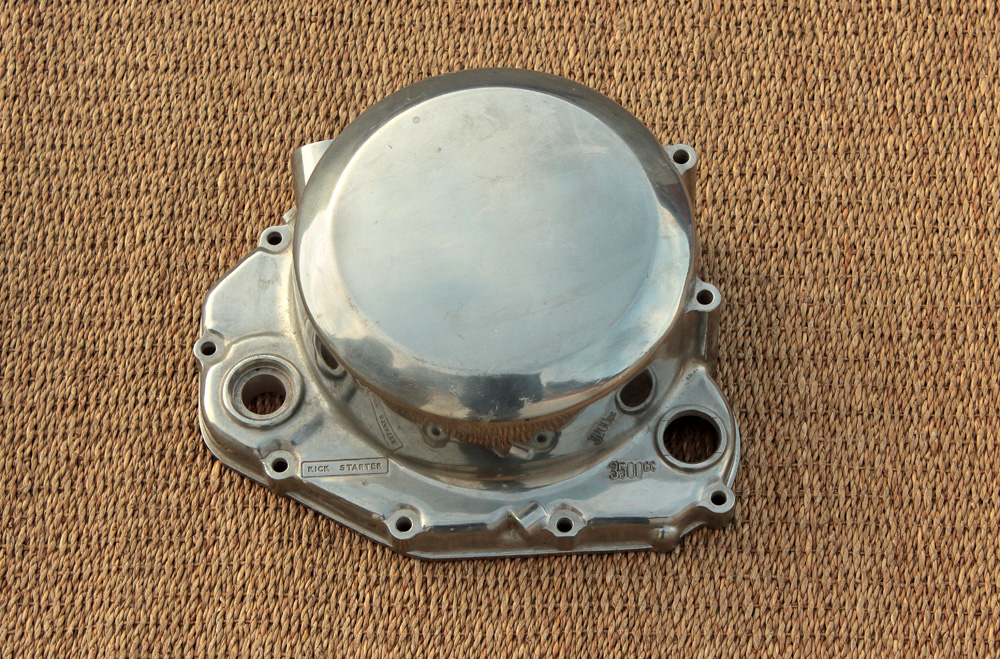
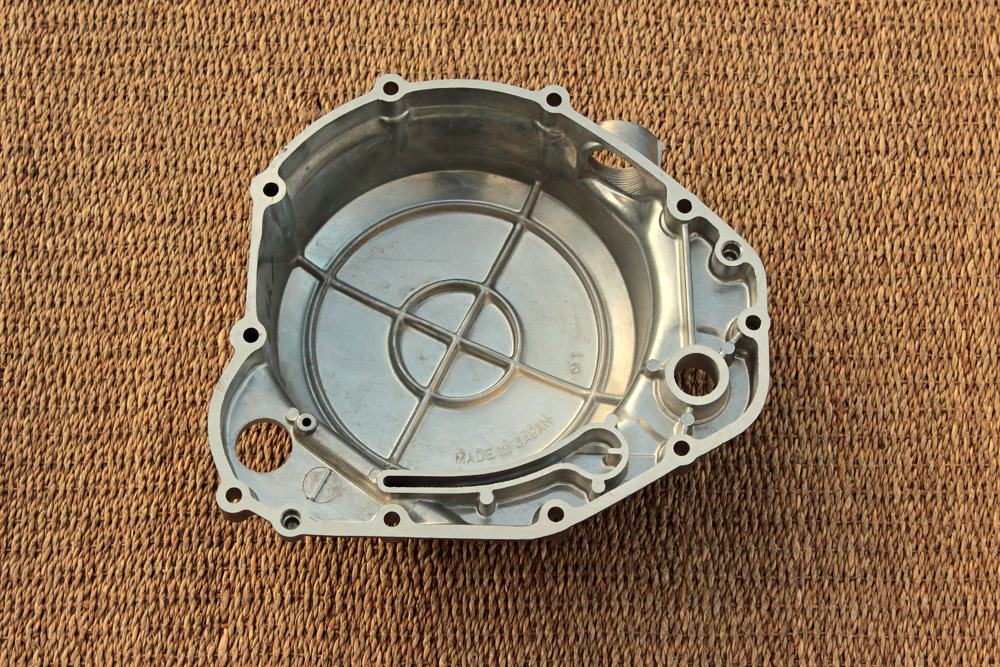
It’s NOSclutch cover for Kawasaki KZ650. There are two reasons why I bought it. First is: polishing is not a problem for me, but it’s always simpler to work with new aluminum than with pitted old one. Second reason is it was a bargain! Couldn’t pass by.
Kawasaki KZ650 cafe-racer: in progress
Kawasaki Zephyr 750 (810ccm, 4in4, spoked wheels)
Honda CB815 "Eight Fifteen" cafe-racer
Yamaha XJ "Eight Ball" cafe-racer
www.gazzz-garage.com
Kawasaki Zephyr 750 (810ccm, 4in4, spoked wheels)
Honda CB815 "Eight Fifteen" cafe-racer
Yamaha XJ "Eight Ball" cafe-racer
www.gazzz-garage.com
Please Log in or Create an account to join the conversation.
- gazzz
-
Topic Author
- Offline
- Sustaining Member
-
Registered
- Posts: 563
- Thanks: 319
Re: KZ650 cafe-racer
26 Feb 2020 05:12
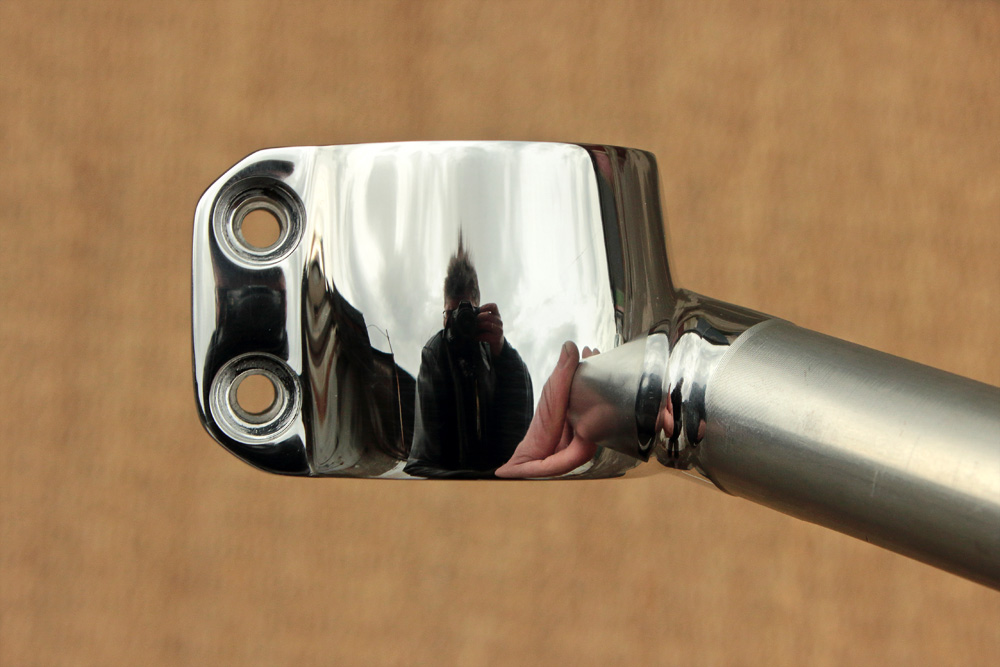
Clip-ons for this project came from two stroke sportbike Yamaha TZR250 (3MA as far as I could judge). They are made of single pieces of aluminum and look to be anodized. Dunno what they cost for Yamaha in manufacturing (as it would include casting, machining and looks like some handy work), but such approach definitely impresses.
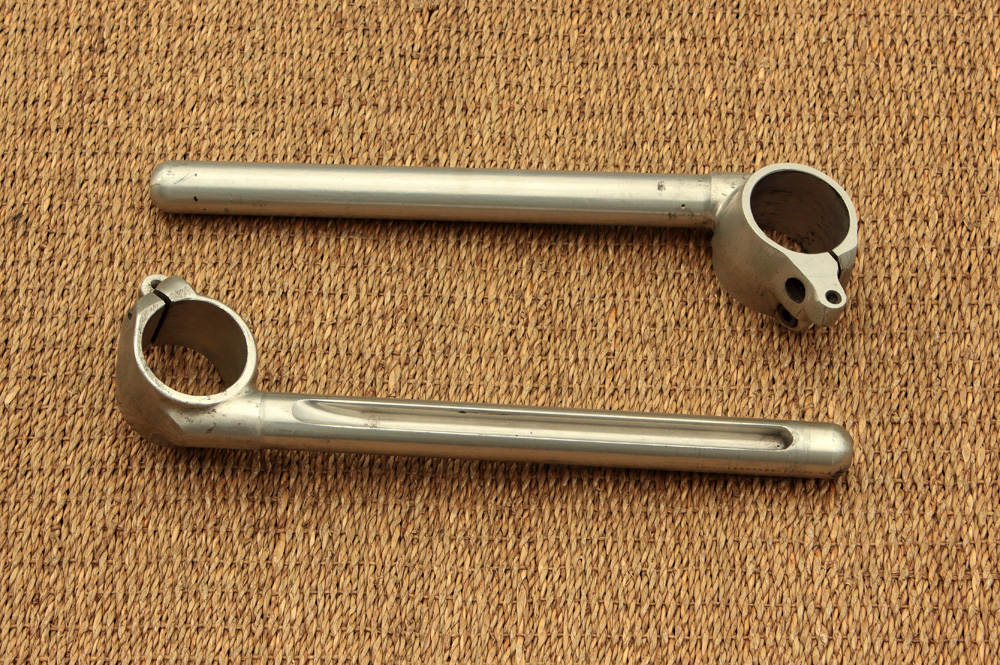
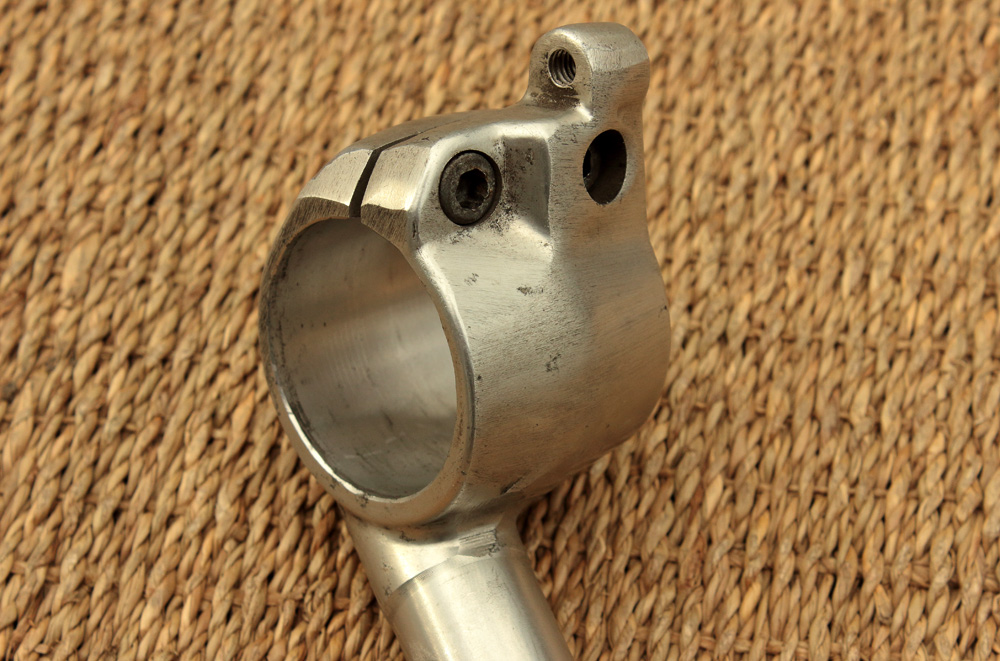
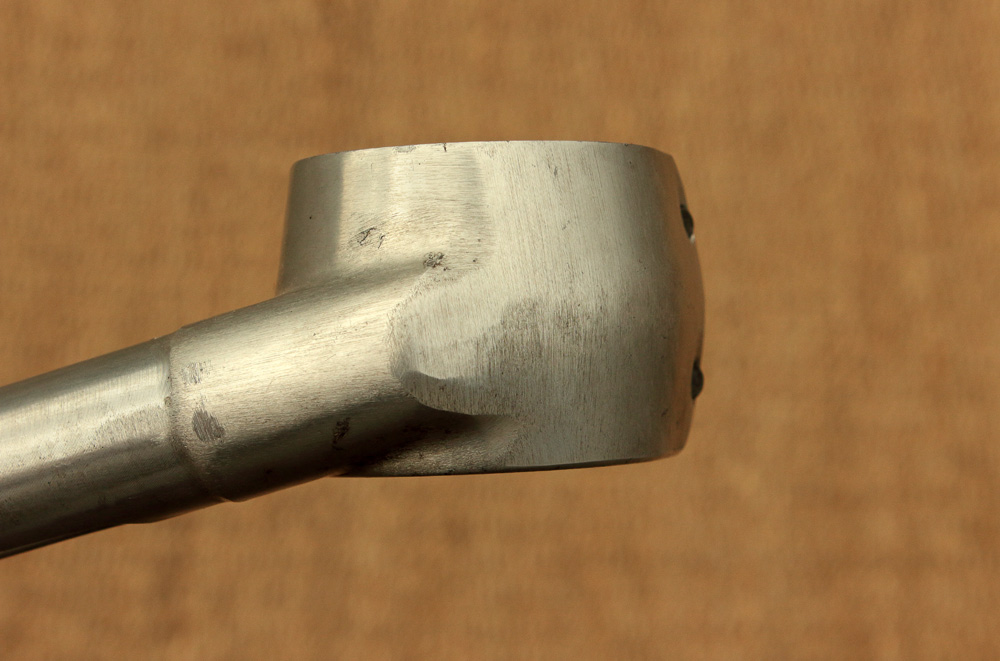
However, these clip-ons need some final touch to be not just good, but perfect. For one thing I don’t need some protrusions that were made to fit original Yamaha top yoke. For another thing their original finish (grinding) doesn’t impress that much.
I also do not know of which alloy of aluminum these clip-ons were made, but it definitely is very good one: working with them was a pleasure. Let’s see what came from little final touch of mine.
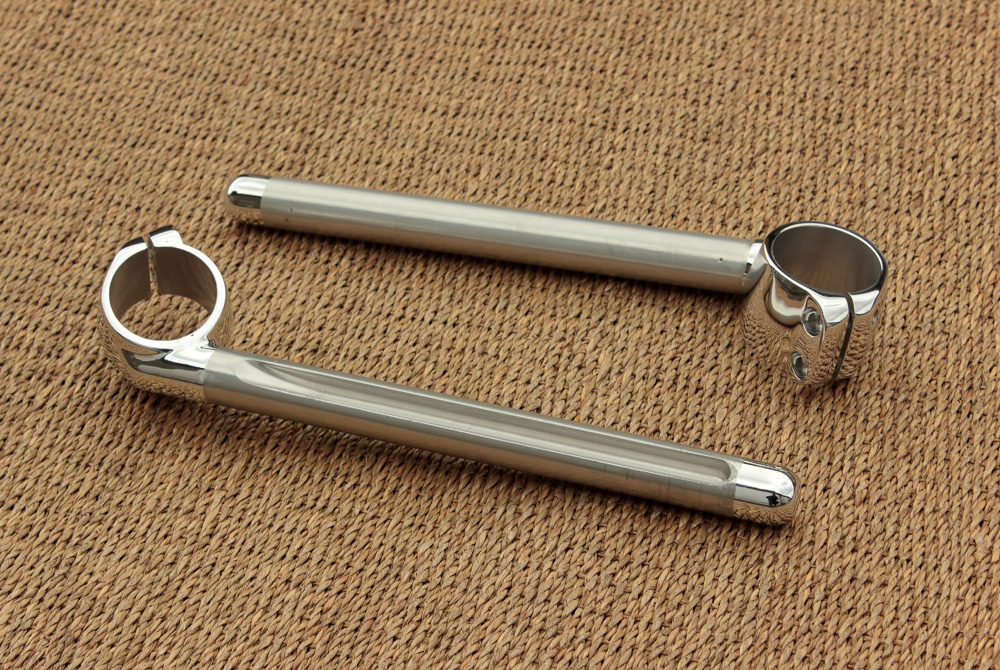
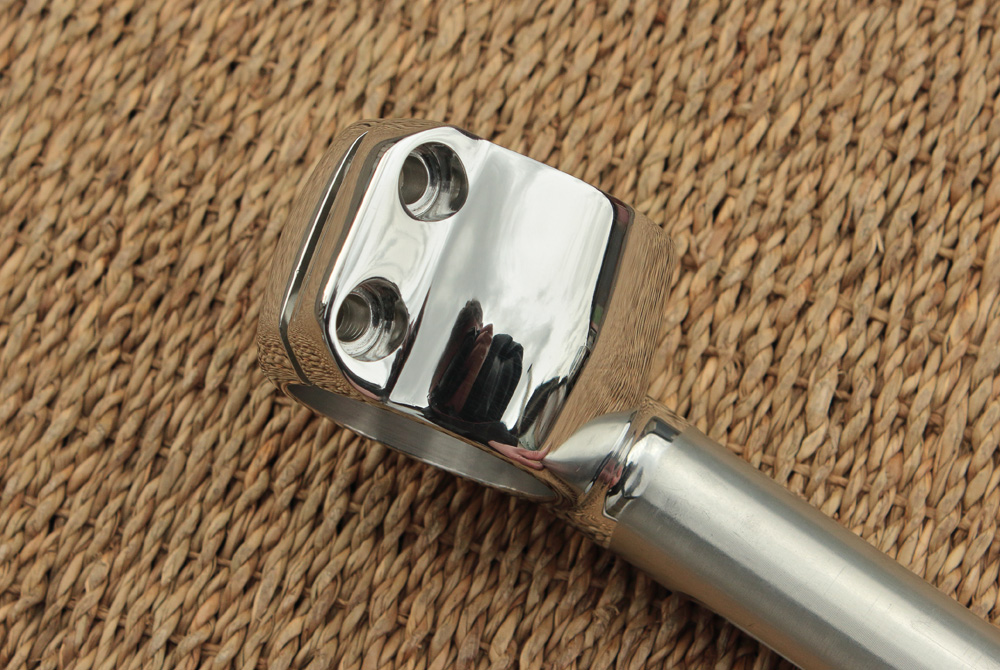

As you may see, I left handles untouched as anodized aluminum is might be more resistant to friction of throttle grip. However I polished handles ends, as they would be visible (If I don’t’ decide to modify them to fit end bar mirrors).
And sure, here is a couple of additional photos:
However, these clip-ons need some final touch to be not just good, but perfect. For one thing I don’t need some protrusions that were made to fit original Yamaha top yoke. For another thing their original finish (grinding) doesn’t impress that much.
I also do not know of which alloy of aluminum these clip-ons were made, but it definitely is very good one: working with them was a pleasure. Let’s see what came from little final touch of mine.
As you may see, I left handles untouched as anodized aluminum is might be more resistant to friction of throttle grip. However I polished handles ends, as they would be visible (If I don’t’ decide to modify them to fit end bar mirrors).
And sure, here is a couple of additional photos:
Kawasaki KZ650 cafe-racer: in progress
Kawasaki Zephyr 750 (810ccm, 4in4, spoked wheels)
Honda CB815 "Eight Fifteen" cafe-racer
Yamaha XJ "Eight Ball" cafe-racer
www.gazzz-garage.com
Kawasaki Zephyr 750 (810ccm, 4in4, spoked wheels)
Honda CB815 "Eight Fifteen" cafe-racer
Yamaha XJ "Eight Ball" cafe-racer
www.gazzz-garage.com
Please Log in or Create an account to join the conversation.
- gazzz
-
Topic Author
- Offline
- Sustaining Member
-
Registered
- Posts: 563
- Thanks: 319
Re: KZ650 cafe-racer
26 Feb 2020 05:22
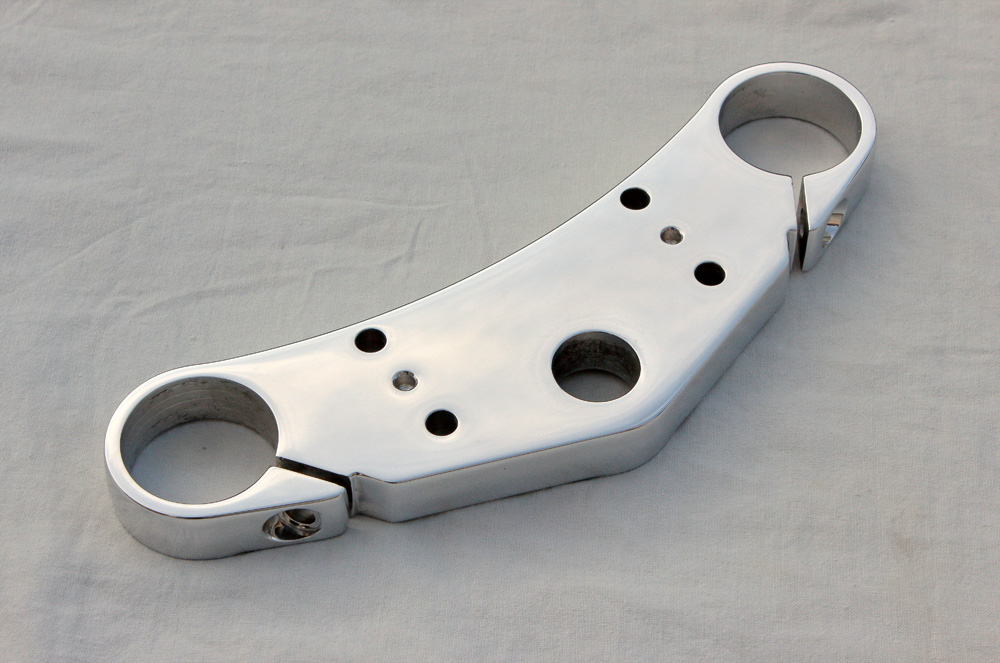
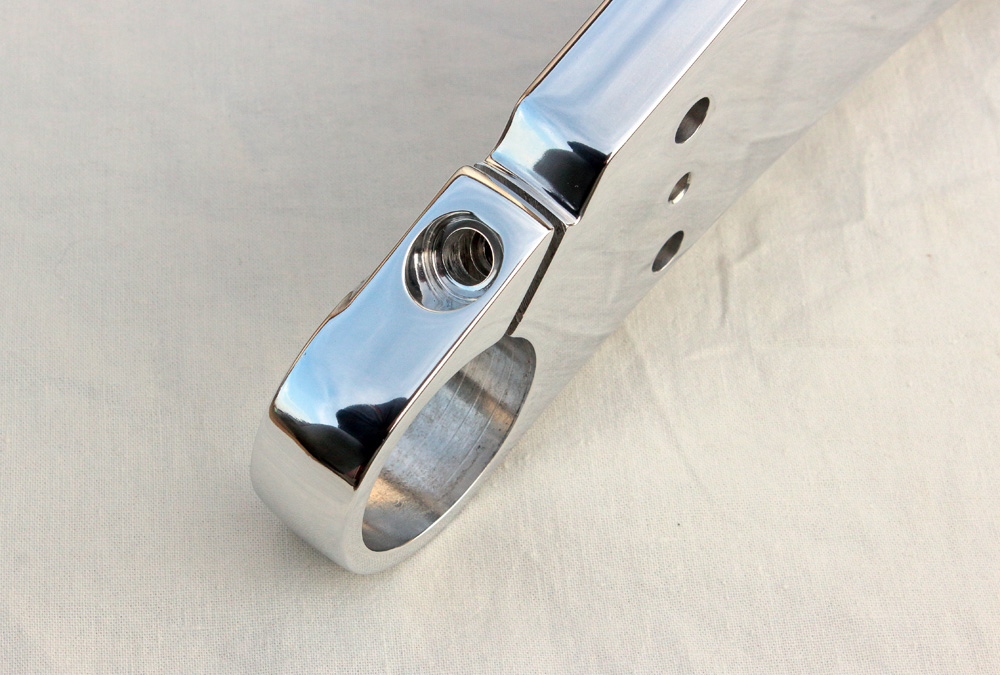
Continue to tidy up front end. This part is about top yoke and speedometer mount. As I already wrote, I use 41mm fully adjustable Kawasaki ZX6R front fork. However, I fit it to Kawasaki KZ650 frame through Kawasaki ZR7 lower yoke in combination with Kawasaki Zephyr 750 upper yokes, as (in my opinion) they have more appropriate fork offset than original ZX6R fork triples.
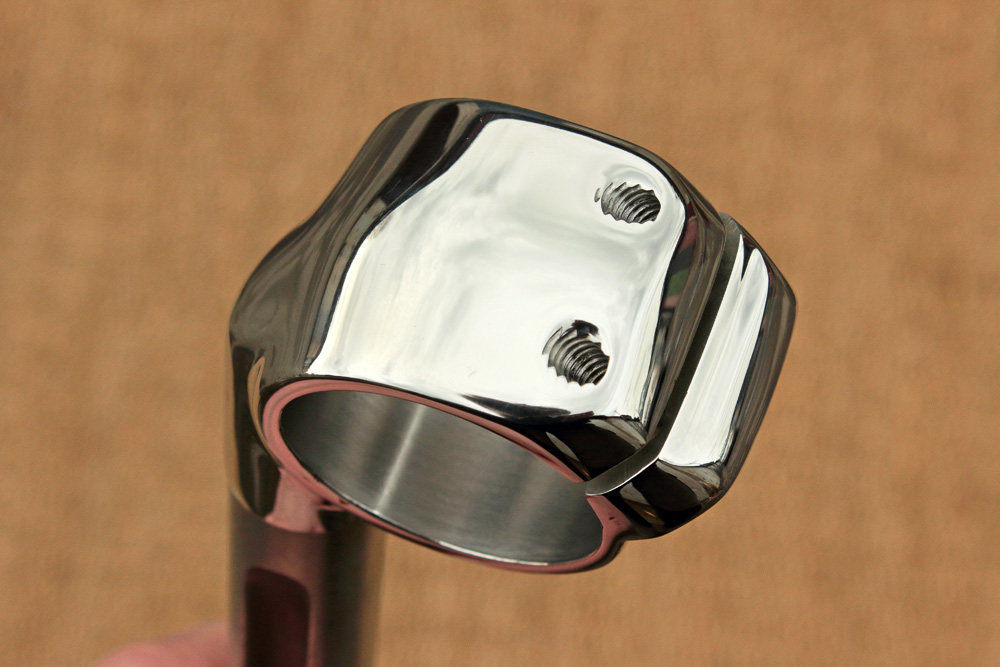
I consider that Zephyr 750 top yoke is compatible with ZR7 lower yoke and steering stem, and its suitable for cafe-racer build, as it has flat upper surface without “built-in” handlebar mounts.
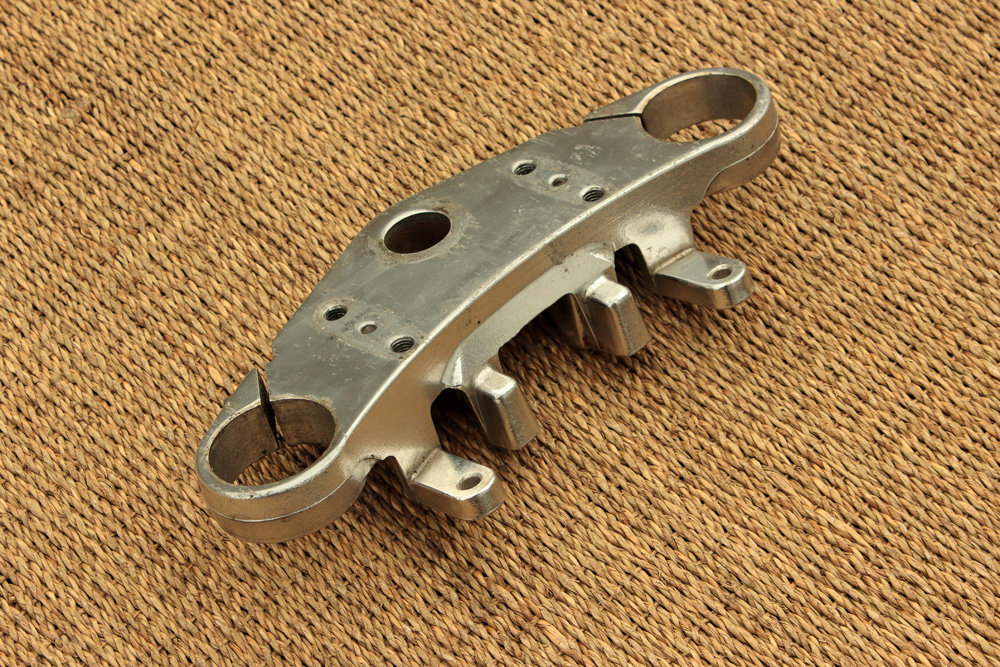
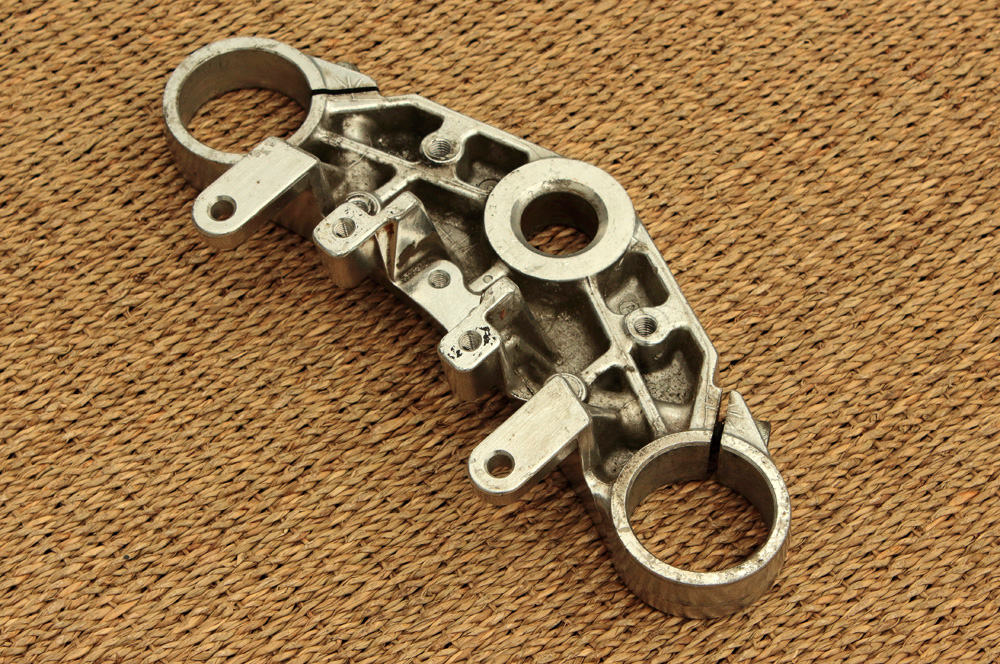
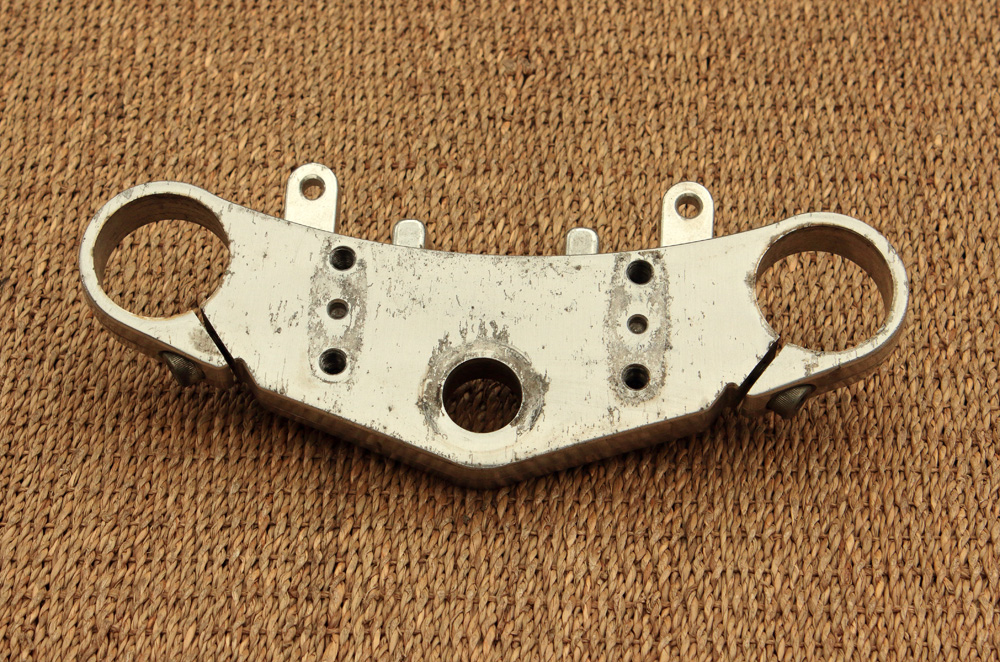
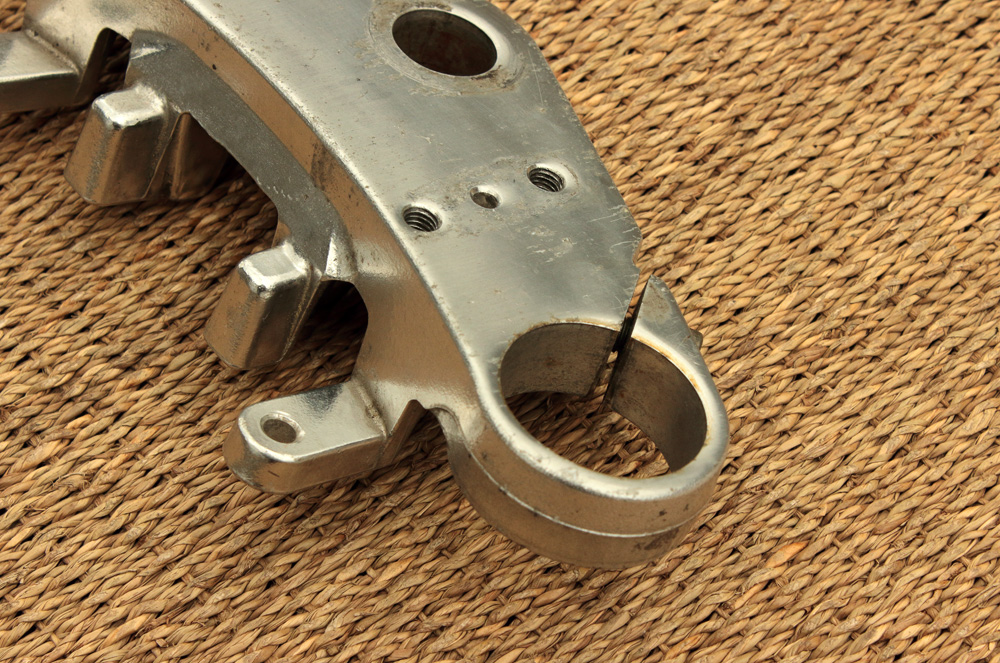
All its protrusions could be easily removed without losing ability to mount Motogadget Motoscope Mini speedometer. In the course of protrusions removing I cut out excess metal in places of casting mould joints, and I also removed traces form pretty raw factory grinding. Yoke looked much better and more classic after that.
As I said, Zephyr 750 top yoke with all brackets removed still has mounting points which might be used to mount speedometer. I made simple 3mm aluminum plate, and voila, my Motoscope Mini is on its place:
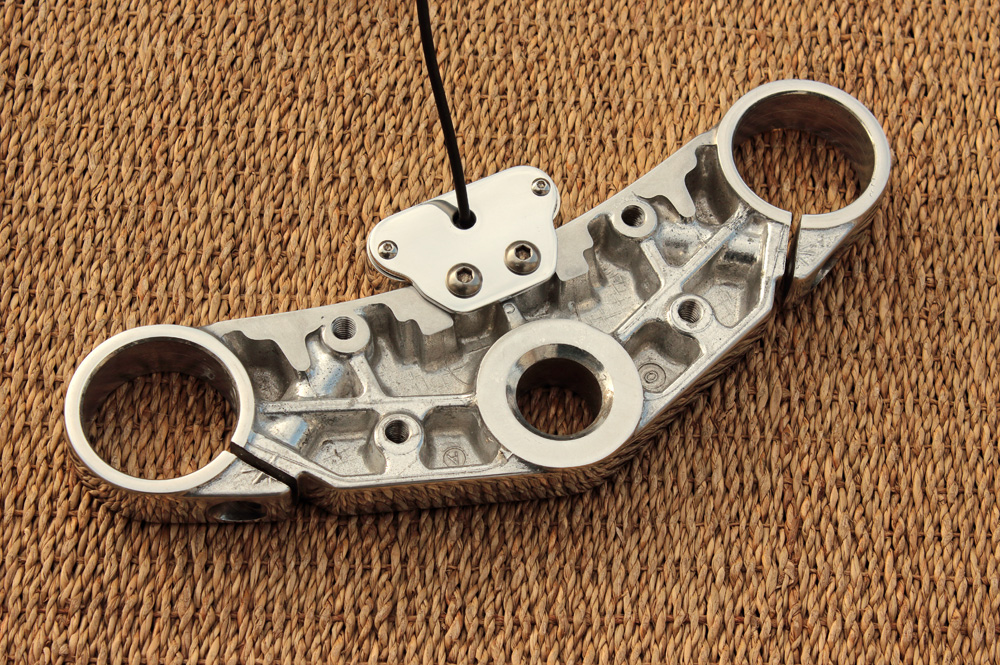
However, as you may see, there are four threaded through-holes and two non-threaded non-through-holes in top yoke (handlebar bracket mounting points). They might be considered as “flaws”, though I am about to turn them in yet another feature of my project...
I consider that Zephyr 750 top yoke is compatible with ZR7 lower yoke and steering stem, and its suitable for cafe-racer build, as it has flat upper surface without “built-in” handlebar mounts.
All its protrusions could be easily removed without losing ability to mount Motogadget Motoscope Mini speedometer. In the course of protrusions removing I cut out excess metal in places of casting mould joints, and I also removed traces form pretty raw factory grinding. Yoke looked much better and more classic after that.
As I said, Zephyr 750 top yoke with all brackets removed still has mounting points which might be used to mount speedometer. I made simple 3mm aluminum plate, and voila, my Motoscope Mini is on its place:
However, as you may see, there are four threaded through-holes and two non-threaded non-through-holes in top yoke (handlebar bracket mounting points). They might be considered as “flaws”, though I am about to turn them in yet another feature of my project...
Kawasaki KZ650 cafe-racer: in progress
Kawasaki Zephyr 750 (810ccm, 4in4, spoked wheels)
Honda CB815 "Eight Fifteen" cafe-racer
Yamaha XJ "Eight Ball" cafe-racer
www.gazzz-garage.com
Kawasaki Zephyr 750 (810ccm, 4in4, spoked wheels)
Honda CB815 "Eight Fifteen" cafe-racer
Yamaha XJ "Eight Ball" cafe-racer
www.gazzz-garage.com
Please Log in or Create an account to join the conversation.
- gazzz
-
Topic Author
- Offline
- Sustaining Member
-
Registered
- Posts: 563
- Thanks: 319
Re: KZ650 cafe-racer
29 Feb 2020 08:40
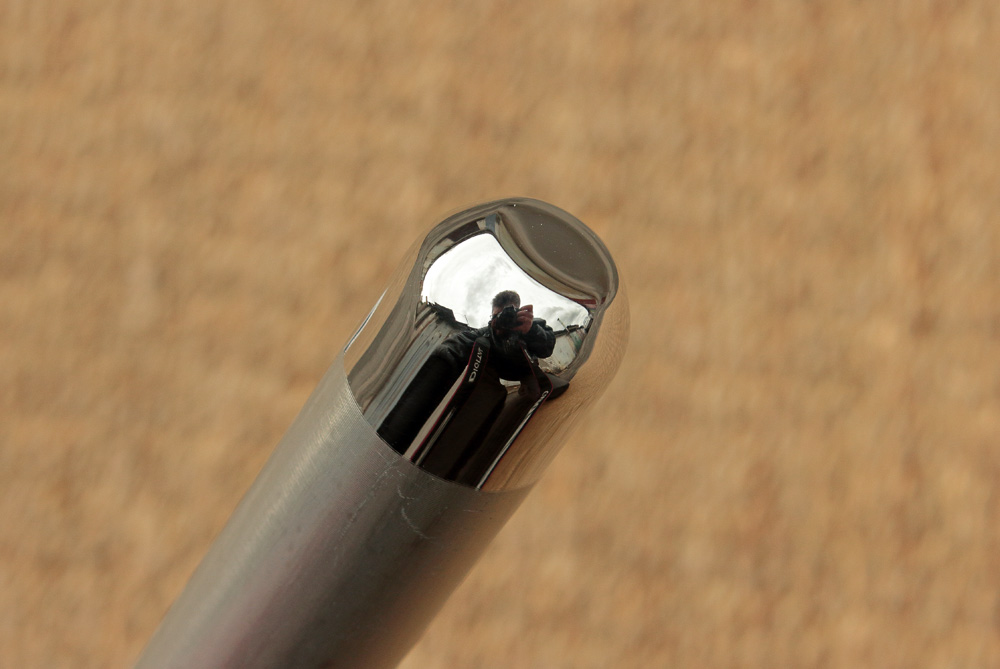
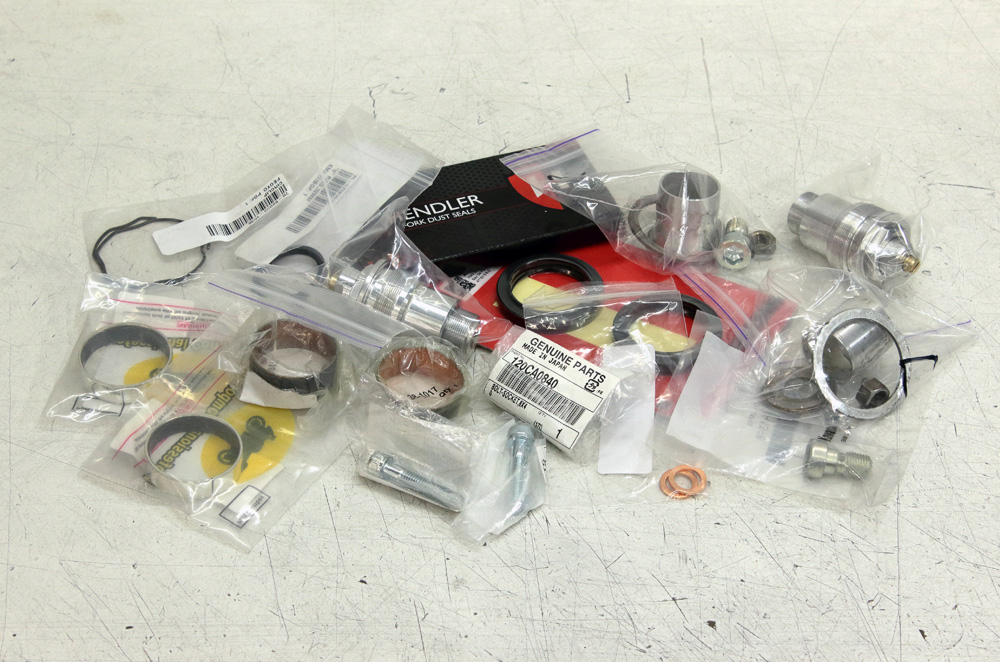
Here is the batch of parts for fork repacking: mostly new in mix with those original parts that needn’t be replaced.
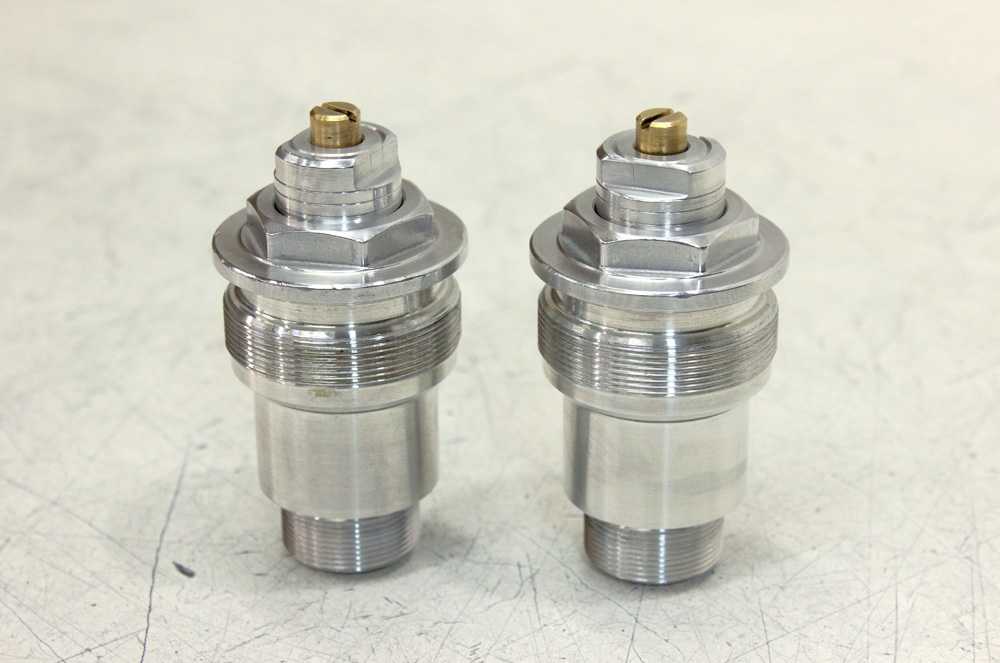
I also refreshed look of upper plugs and slightly modified them. It seems that this very fork have never been disassembled before, but it turned out that lock nut of upper plug in one of fork legs had already stuck. Plug has very narrow ledge for 17mm wrench and when I tried to unscrew that stuck nut, the wrench slipped and slightly damaged ledge. So I grinded ledges on both plugs to fit 14mm wrench (which is common) and I also made ledges wider to avoid issue with wrench slipping in future.
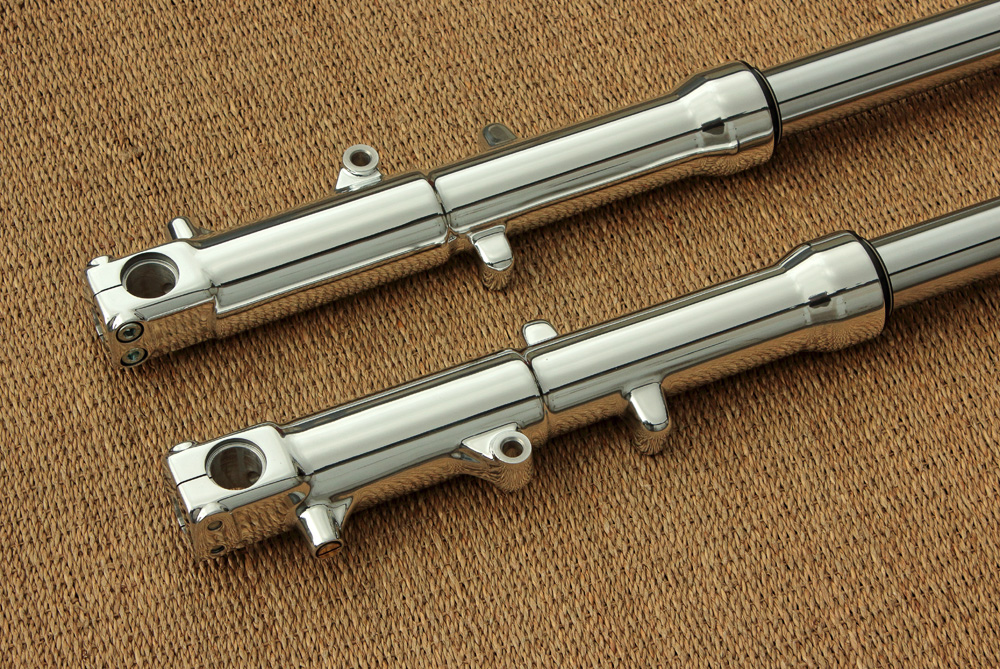
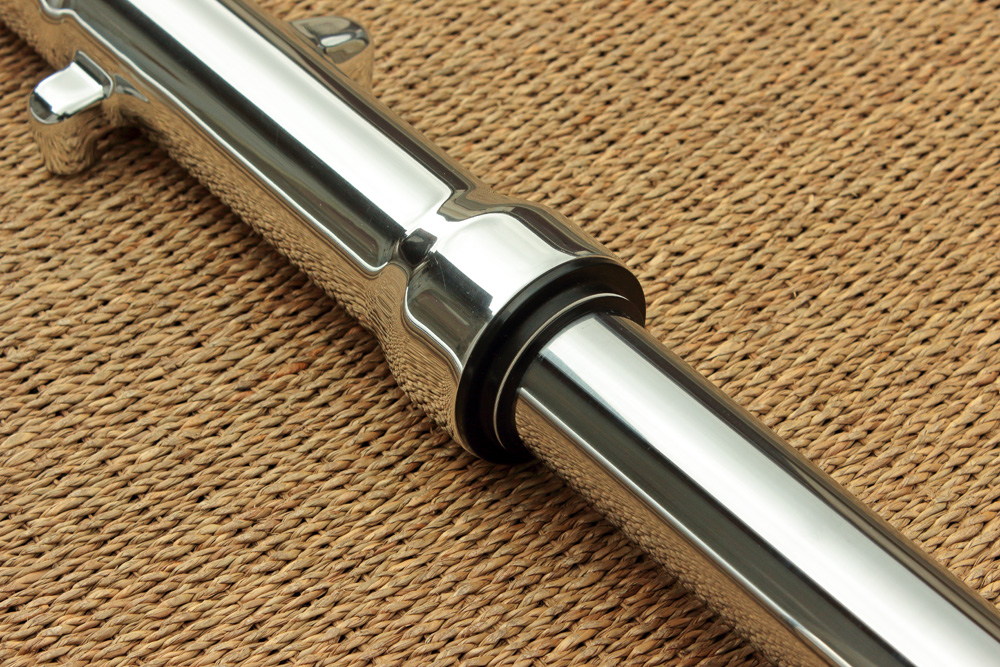
There is nothing special in assembling this fork, except it's outer tubes are highly polished, and a fact that I had to fabricate two "special tools" instead one needed for none-adjustable fork.

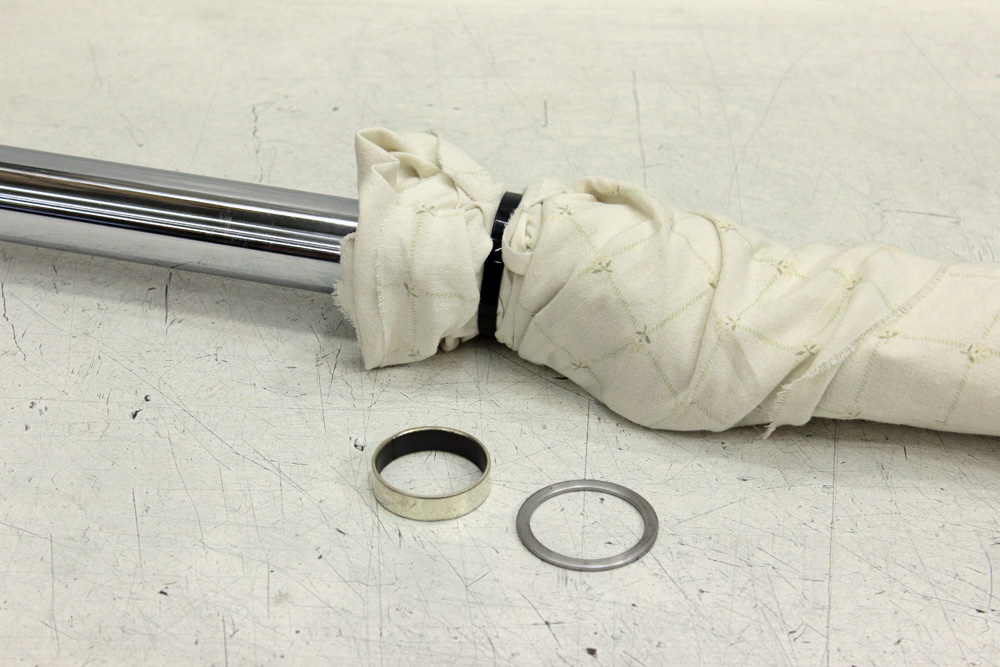
To avoid any issues with polished aluminum I assembled fork with outer tubes wrapped in rugs, which in their turn were fixed to rubes with reusable plastic ties. it worked like a charm and further assembling went without problems.
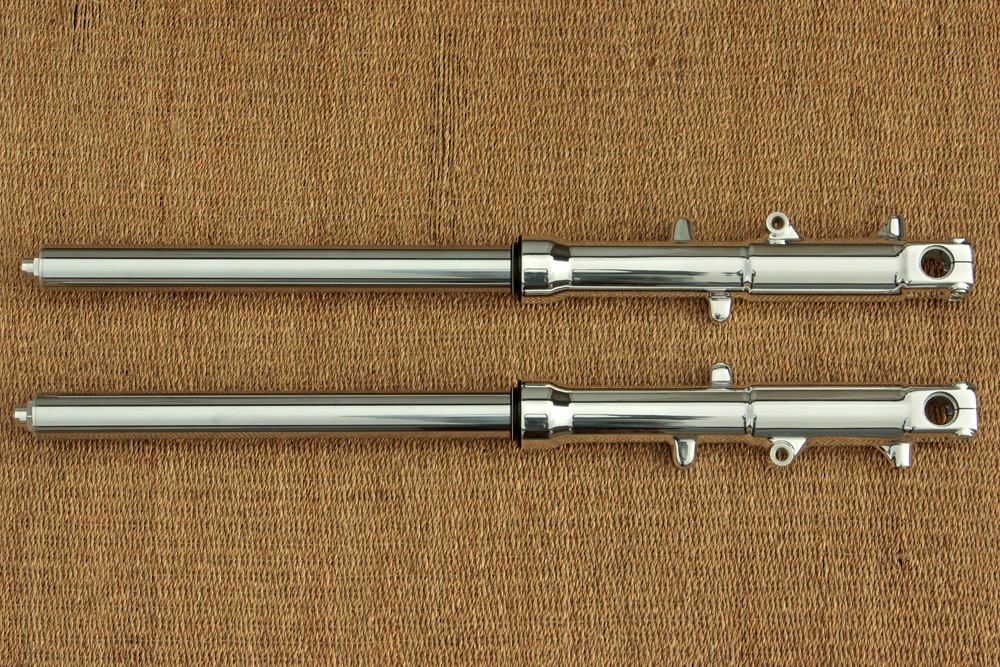
Assembled fork looked great and now it definitely much less resembles front fork from sport bike...

I also refreshed look of upper plugs and slightly modified them. It seems that this very fork have never been disassembled before, but it turned out that lock nut of upper plug in one of fork legs had already stuck. Plug has very narrow ledge for 17mm wrench and when I tried to unscrew that stuck nut, the wrench slipped and slightly damaged ledge. So I grinded ledges on both plugs to fit 14mm wrench (which is common) and I also made ledges wider to avoid issue with wrench slipping in future.
There is nothing special in assembling this fork, except it's outer tubes are highly polished, and a fact that I had to fabricate two "special tools" instead one needed for none-adjustable fork.
To avoid any issues with polished aluminum I assembled fork with outer tubes wrapped in rugs, which in their turn were fixed to rubes with reusable plastic ties. it worked like a charm and further assembling went without problems.
Assembled fork looked great and now it definitely much less resembles front fork from sport bike...
Kawasaki KZ650 cafe-racer: in progress
Kawasaki Zephyr 750 (810ccm, 4in4, spoked wheels)
Honda CB815 "Eight Fifteen" cafe-racer
Yamaha XJ "Eight Ball" cafe-racer
www.gazzz-garage.com
Kawasaki Zephyr 750 (810ccm, 4in4, spoked wheels)
Honda CB815 "Eight Fifteen" cafe-racer
Yamaha XJ "Eight Ball" cafe-racer
www.gazzz-garage.com
Please Log in or Create an account to join the conversation.
- bluej58
-
- Offline
- Sustaining Member
-
Registered
- The chrome don't get you home
- Posts: 2474
- Thanks: 507
Re: KZ650 cafe-racer
29 Feb 2020 12:07
Your polished parts look great!
Do you coat them with a protective product to keep them shiny?
Do you coat them with a protective product to keep them shiny?
78 KZ1000 A2A
The following user(s) said Thank You: gazzz
Please Log in or Create an account to join the conversation.
- gazzz
-
Topic Author
- Offline
- Sustaining Member
-
Registered
- Posts: 563
- Thanks: 319
Re: KZ650 cafe-racer
29 Feb 2020 14:11
Yes, I use protective polish, or as it said on a bottle: "sealing polish". Unfortunately I know not clear coat (varnish) that would last on polished aluminium, thus I prefer to keep polished parts uncoated, as even dull aluminum looks better than chipped and spotted clear coat.
Kawasaki KZ650 cafe-racer: in progress
Kawasaki Zephyr 750 (810ccm, 4in4, spoked wheels)
Honda CB815 "Eight Fifteen" cafe-racer
Yamaha XJ "Eight Ball" cafe-racer
www.gazzz-garage.com
Kawasaki Zephyr 750 (810ccm, 4in4, spoked wheels)
Honda CB815 "Eight Fifteen" cafe-racer
Yamaha XJ "Eight Ball" cafe-racer
www.gazzz-garage.com
The following user(s) said Thank You: bluej58, Scirocco
Please Log in or Create an account to join the conversation.
- 650ed
-

- Offline
- User
-

Registered
- Posts: 15334
- Thanks: 2831
Re: KZ650 cafe-racer
29 Feb 2020 14:51gazzz wrote: Yes, I use protective polish, or as it said on a bottle: "sealing polish". Unfortunately I know not clear coat (varnish) that would last on polished aluminium, thus I prefer to keep polished parts uncoated, as even dull aluminum looks better than chipped and spotted clear coat.
Exactly! Plus, once aluminum has been polished keeping it looking good is relatively easy. Ed
1977 KZ650-C1 Original Owner - Stock (with additional invisible FIAMM horn)
The following user(s) said Thank You: gazzz
Please Log in or Create an account to join the conversation.
- Forrest
-
- Offline
- Sustaining Member
-
Registered
- The Mad Duck
- Posts: 786
- Thanks: 191
Re: KZ650 cafe-racer
02 Mar 2020 11:28
Great work Gazzz! Once your project is assembled, you will need sunglasses even at night! ")
KZ RIDER RELAY FLAG CARRIER #55
1977 KZ650B Ready & Fit to Roll Anywhere!
1974 F7 175 -first bike and still own, full resto soon!
2002 ZRX1200R -Red the faster color
2011 Concours 14 -Now a Snarling Wolf in Sheep's Clothing!
1977 KZ650B Ready & Fit to Roll Anywhere!
1974 F7 175 -first bike and still own, full resto soon!
2002 ZRX1200R -Red the faster color
2011 Concours 14 -Now a Snarling Wolf in Sheep's Clothing!
The following user(s) said Thank You: gazzz
Please Log in or Create an account to join the conversation.
- gazzz
-
Topic Author
- Offline
- Sustaining Member
-
Registered
- Posts: 563
- Thanks: 319
Re: KZ650 cafe-racer
03 Mar 2020 14:03
Thanks!
Yep!
I hope it doesn't go that far :laugh:
Plus, once aluminum has been polished keeping it looking good is relatively easy. Ed
Yep!
Once your project is assembled, you will need sunglasses even at night!
I hope it doesn't go that far :laugh:
Kawasaki KZ650 cafe-racer: in progress
Kawasaki Zephyr 750 (810ccm, 4in4, spoked wheels)
Honda CB815 "Eight Fifteen" cafe-racer
Yamaha XJ "Eight Ball" cafe-racer
www.gazzz-garage.com
Kawasaki Zephyr 750 (810ccm, 4in4, spoked wheels)
Honda CB815 "Eight Fifteen" cafe-racer
Yamaha XJ "Eight Ball" cafe-racer
www.gazzz-garage.com
Please Log in or Create an account to join the conversation.
- gazzz
-
Topic Author
- Offline
- Sustaining Member
-
Registered
- Posts: 563
- Thanks: 319
Re: KZ650 cafe-racer
03 Mar 2020 14:09
And here is a post about piece of non polished aluminum:)
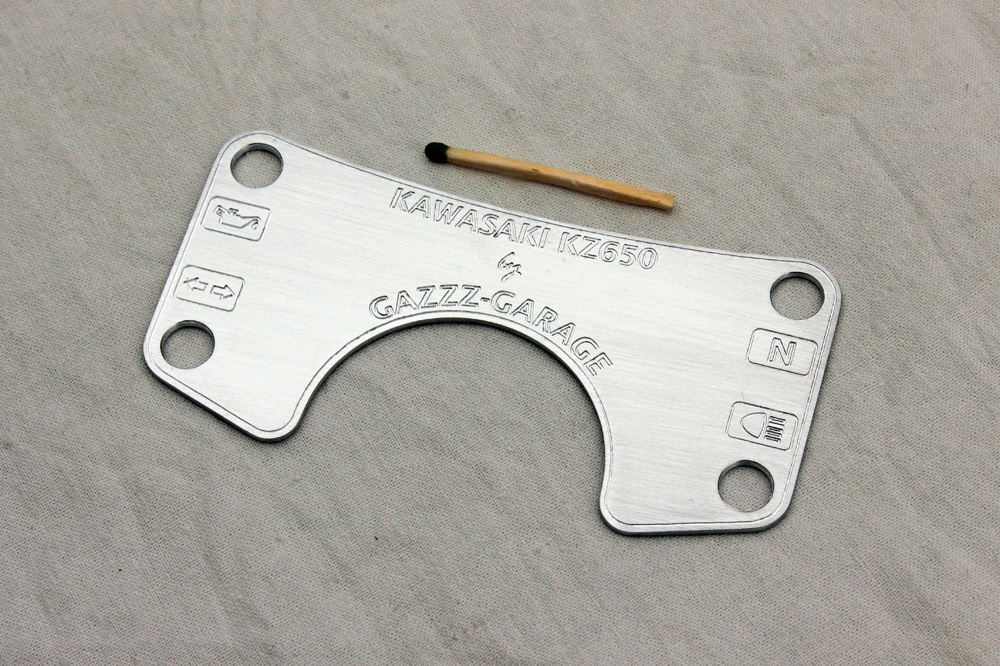
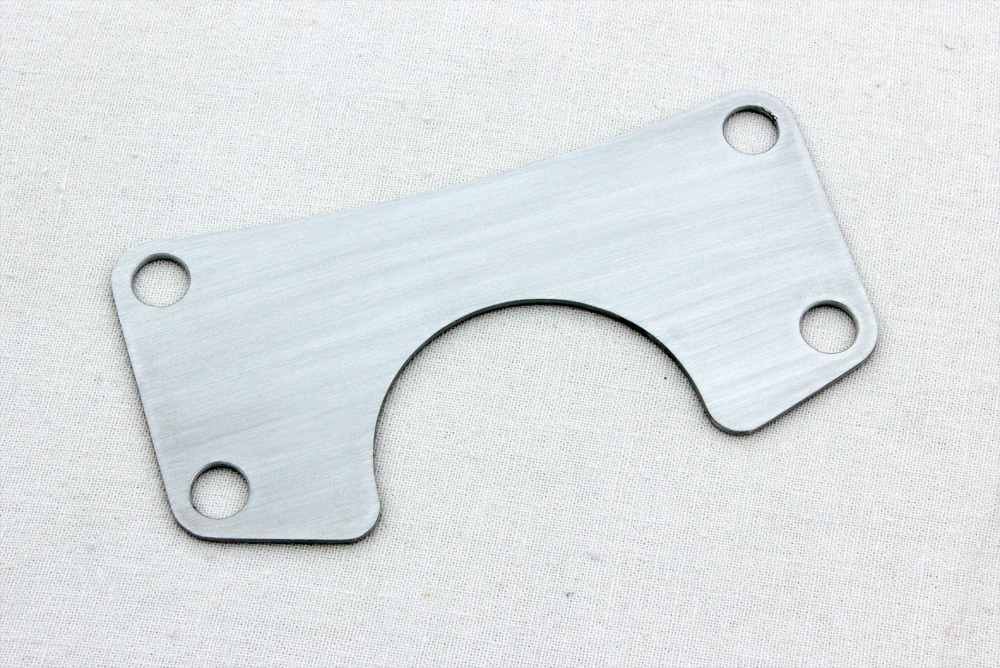
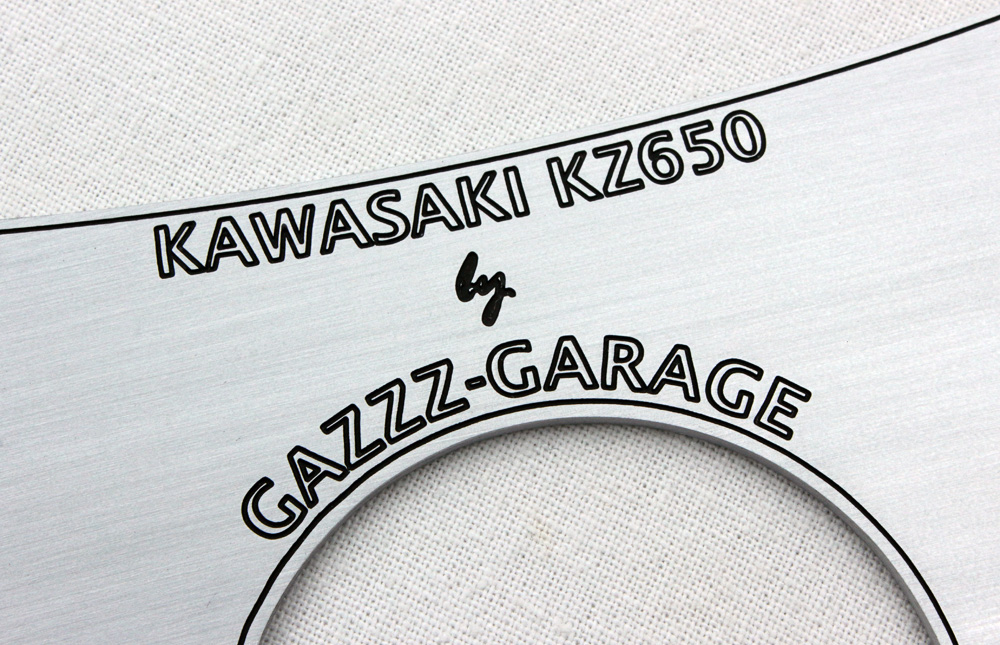
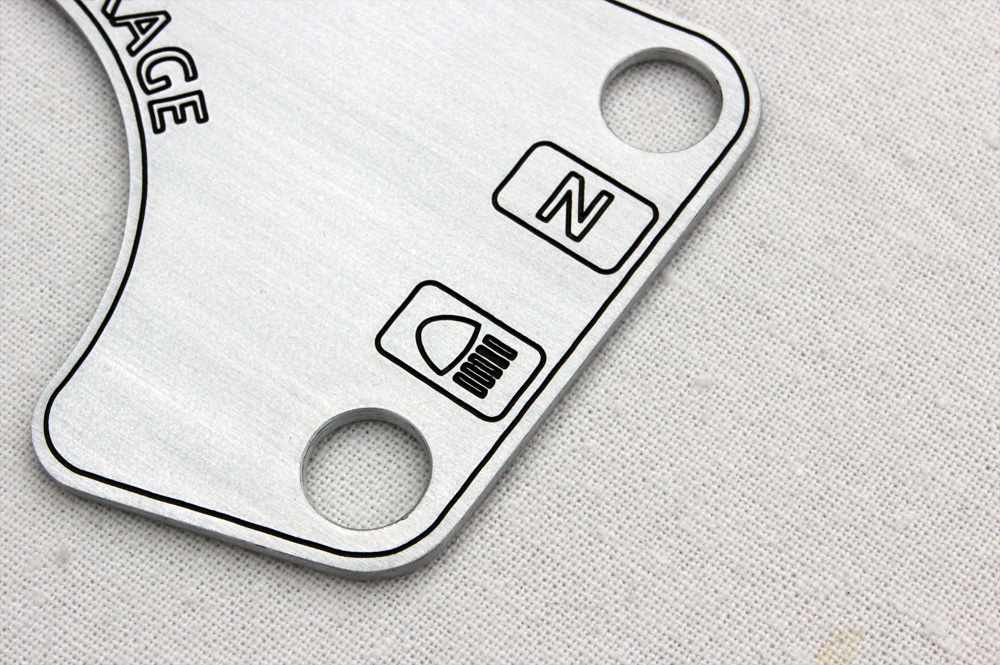
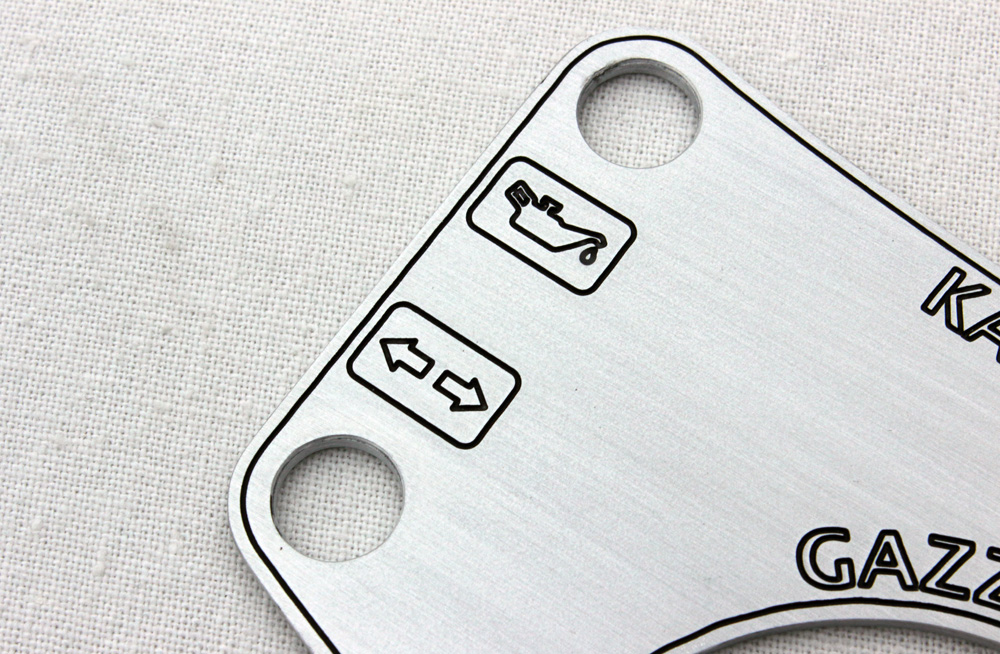
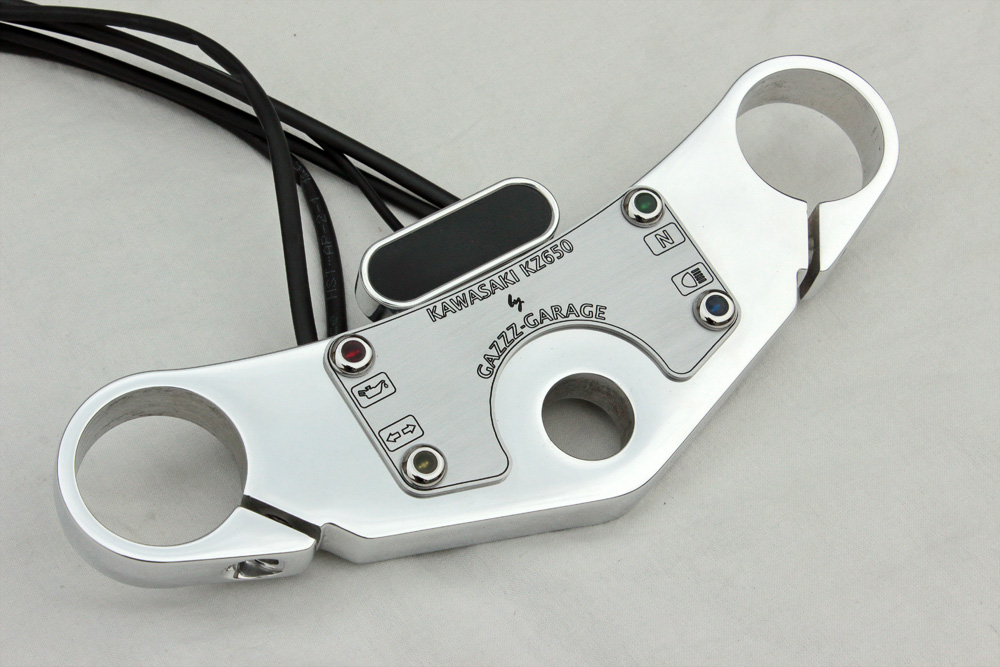
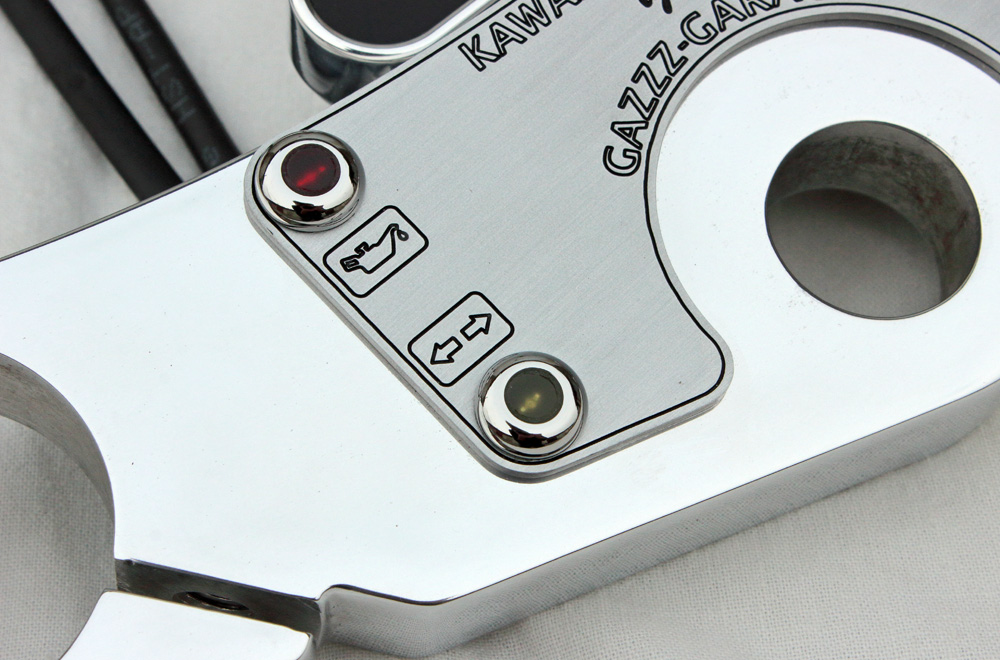
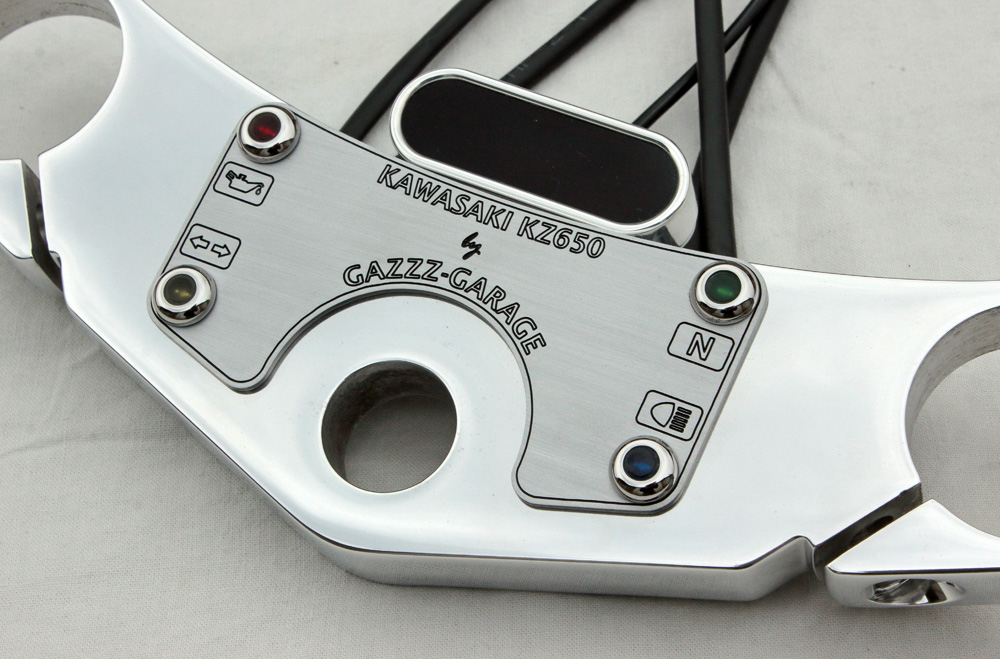
I have tachometer and speedometer for dashboard, but they have no the following indicator lamps: for oil pressure, neutral, turn lights and high beam. Some of my constant readers might remember how I solved this question in Kawasaki Zephyr 750 cafe-roadster project: I installed custom made LED indicators right in holes for handlebar mount. And as a top yoke for our Kawasaki ZK650 cafe-racer came from Zephyr 750, it’d be obvious that I was thinking about similar usage of holes for handlebar mounting. However, cause I like to make thing better. this time it would be “extended edition”: I designed the plate that covers all unwished-for holes on top yoke and indicated the meaning of each lamp. I made electronic drawing of this plate and gave it together with aluminum plate to one friend of mine, who has homemade CNC milling machine right… in his apartment. Some engine and other motorcycle parts may be found there as well. This CNC milling machine of his is not something fancy and professional, but it definitely does the work for which it was designed.
Here is result of its work, just removed from under the milling cutter.

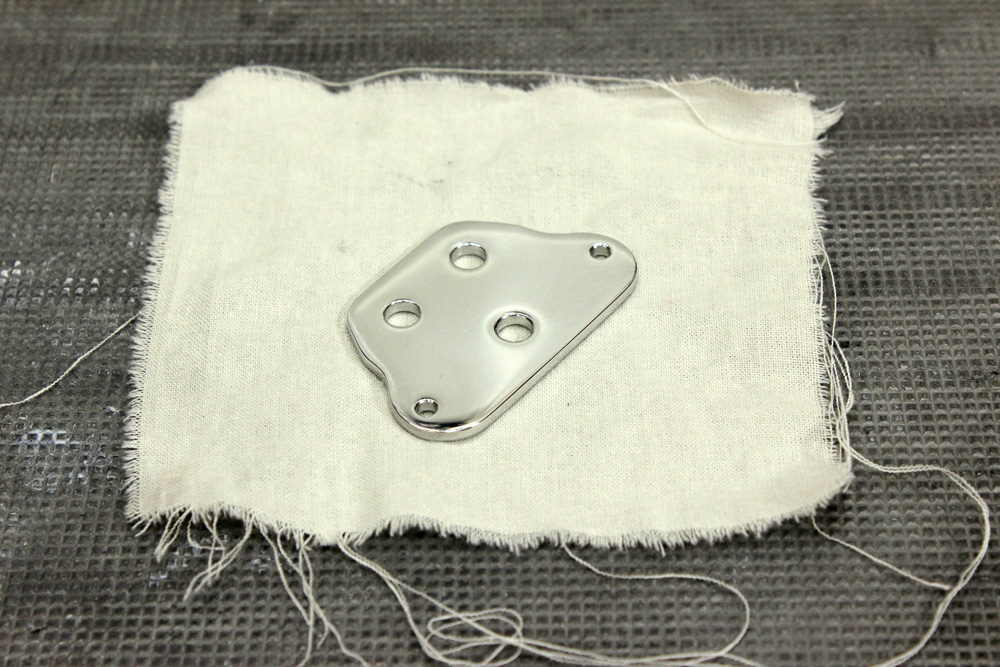
And here how it looked after I grinded edges and put some “brush” effect on it. Just to show the dimensions of part I put match next to it.
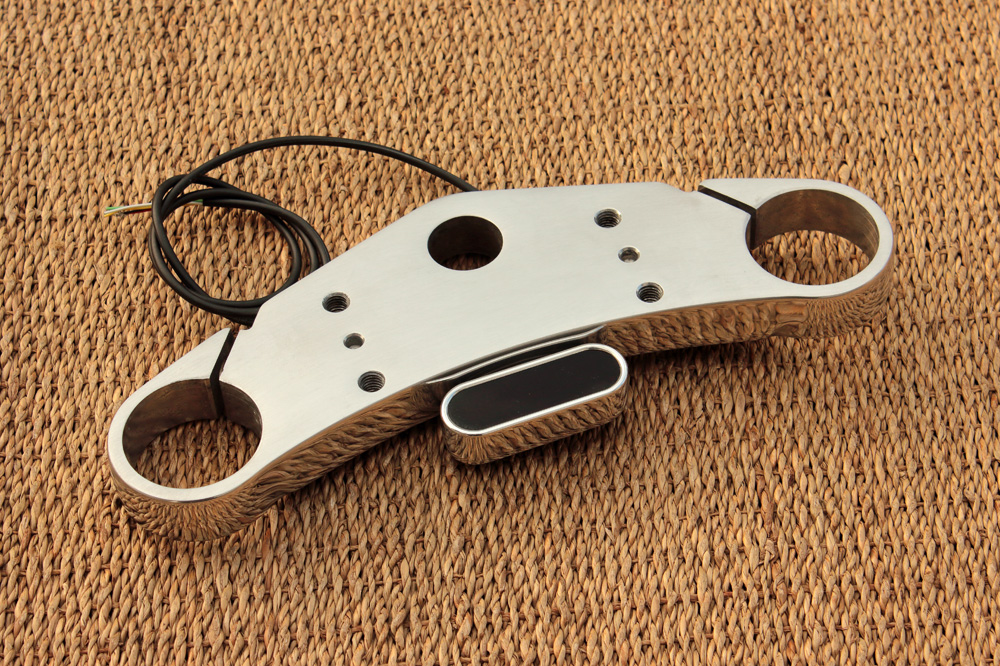
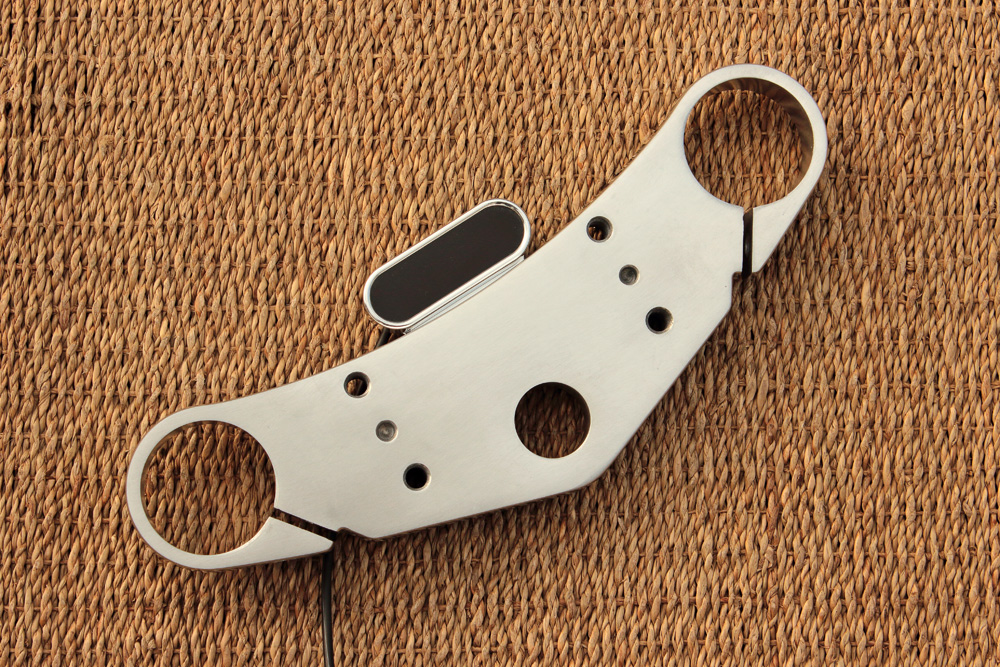
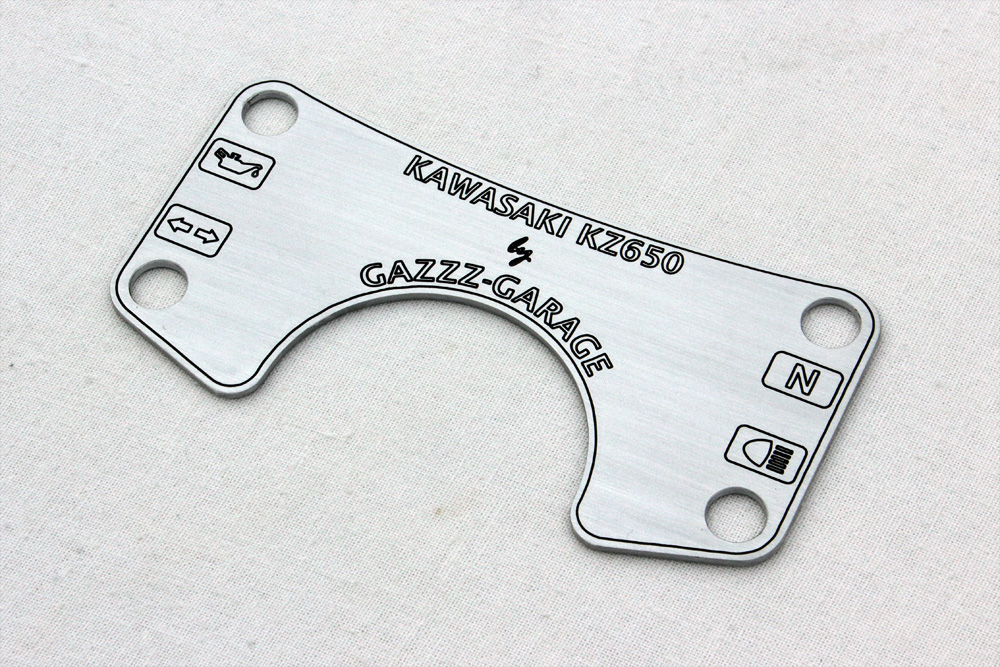
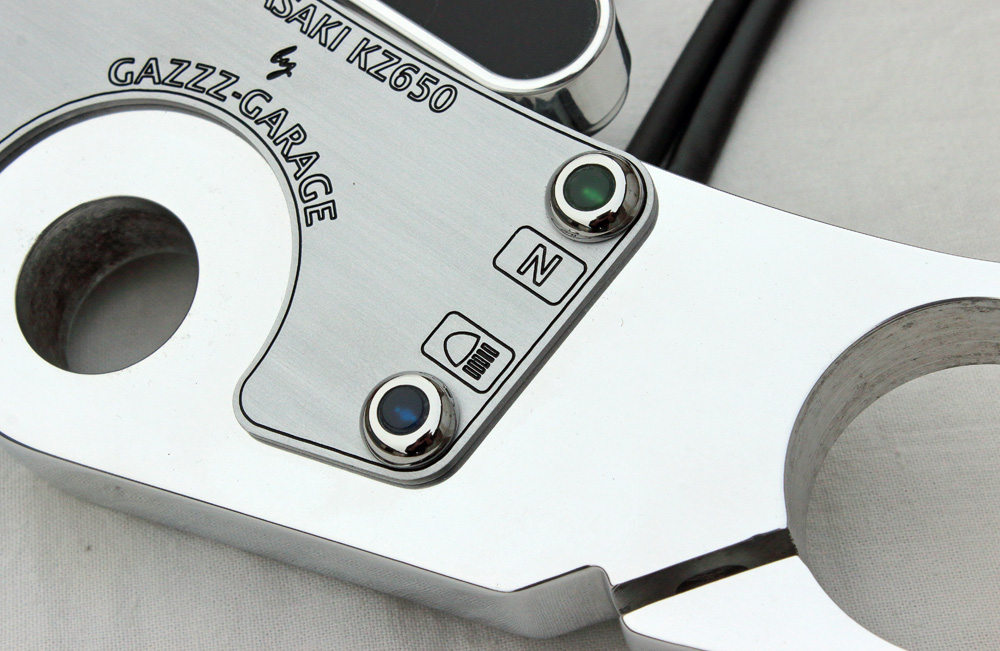
And here is plate for top yoke, ready to be installed. I filled all groves with black paint, then I “brushed” it with 600 grit sandpaper. After this plate was covered with two-component mat varnish. May be I should “brush” aluminum with 400 grit sandpaper to make the effect more explicit under the mat varnish, however this very plate looks great anyway.
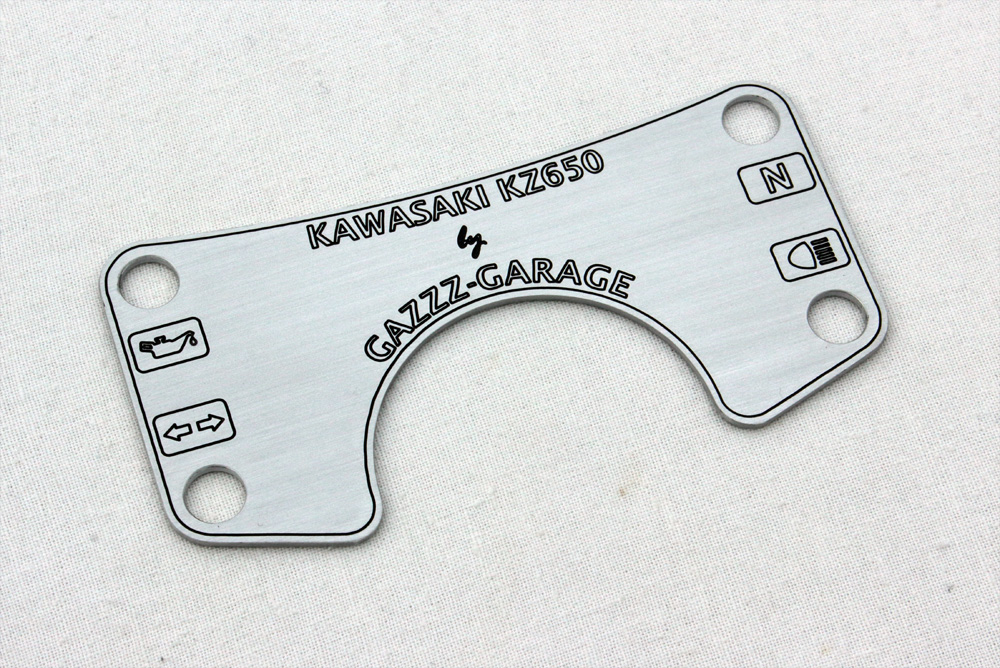
And yep, back side is treat as good as front one, even if it wouldn’t be visible once plate is installed.
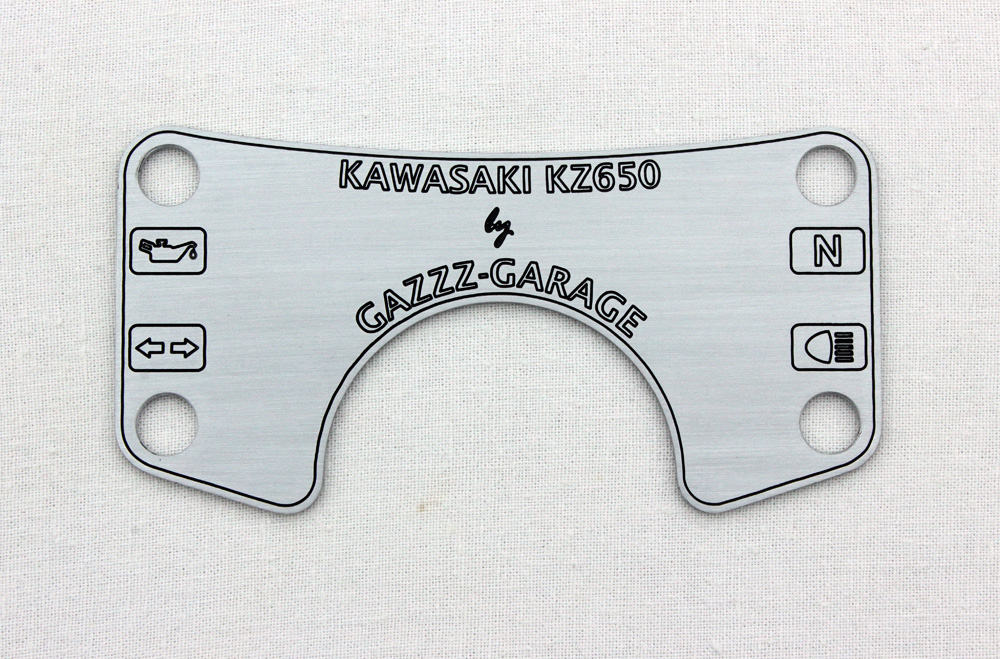
Some closer photos:
I have tachometer and speedometer for dashboard, but they have no the following indicator lamps: for oil pressure, neutral, turn lights and high beam. Some of my constant readers might remember how I solved this question in Kawasaki Zephyr 750 cafe-roadster project: I installed custom made LED indicators right in holes for handlebar mount. And as a top yoke for our Kawasaki ZK650 cafe-racer came from Zephyr 750, it’d be obvious that I was thinking about similar usage of holes for handlebar mounting. However, cause I like to make thing better. this time it would be “extended edition”: I designed the plate that covers all unwished-for holes on top yoke and indicated the meaning of each lamp. I made electronic drawing of this plate and gave it together with aluminum plate to one friend of mine, who has homemade CNC milling machine right… in his apartment. Some engine and other motorcycle parts may be found there as well. This CNC milling machine of his is not something fancy and professional, but it definitely does the work for which it was designed.
Here is result of its work, just removed from under the milling cutter.
And here how it looked after I grinded edges and put some “brush” effect on it. Just to show the dimensions of part I put match next to it.
And here is plate for top yoke, ready to be installed. I filled all groves with black paint, then I “brushed” it with 600 grit sandpaper. After this plate was covered with two-component mat varnish. May be I should “brush” aluminum with 400 grit sandpaper to make the effect more explicit under the mat varnish, however this very plate looks great anyway.
And yep, back side is treat as good as front one, even if it wouldn’t be visible once plate is installed.
Some closer photos:
Kawasaki KZ650 cafe-racer: in progress
Kawasaki Zephyr 750 (810ccm, 4in4, spoked wheels)
Honda CB815 "Eight Fifteen" cafe-racer
Yamaha XJ "Eight Ball" cafe-racer
www.gazzz-garage.com
Kawasaki Zephyr 750 (810ccm, 4in4, spoked wheels)
Honda CB815 "Eight Fifteen" cafe-racer
Yamaha XJ "Eight Ball" cafe-racer
www.gazzz-garage.com
The following user(s) said Thank You: Scirocco
Please Log in or Create an account to join the conversation.
- gazzz
-
Topic Author
- Offline
- Sustaining Member
-
Registered
- Posts: 563
- Thanks: 319
Re: KZ650 cafe-racer
11 Mar 2020 12:53
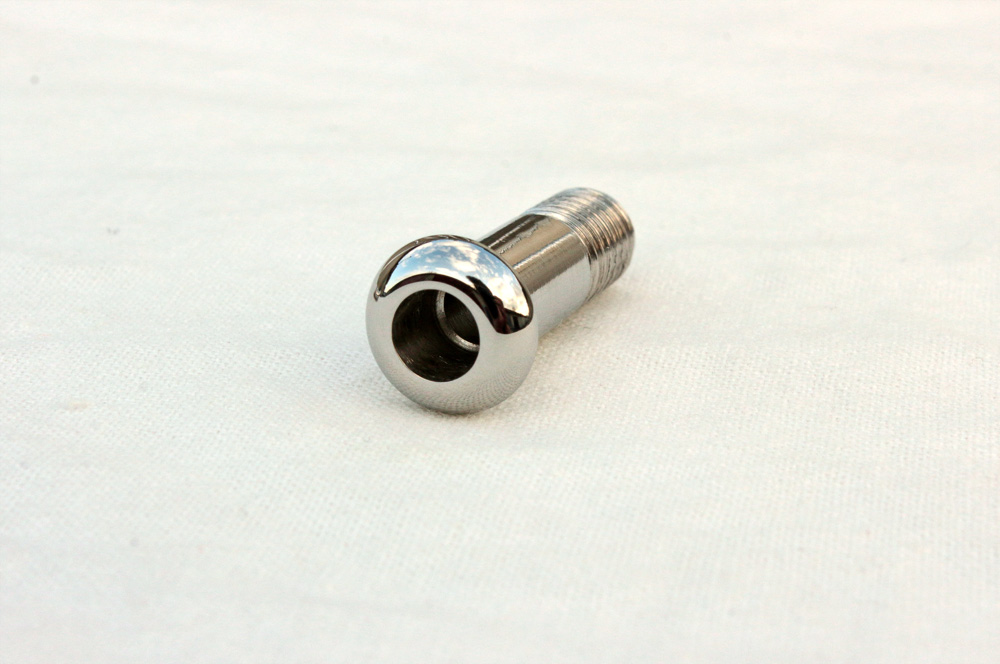
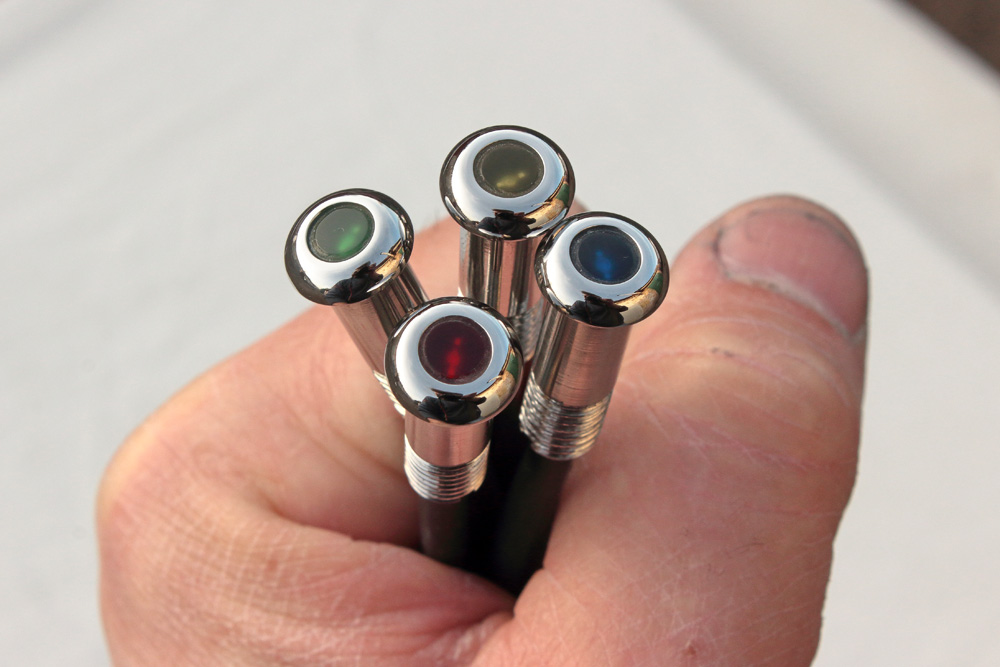
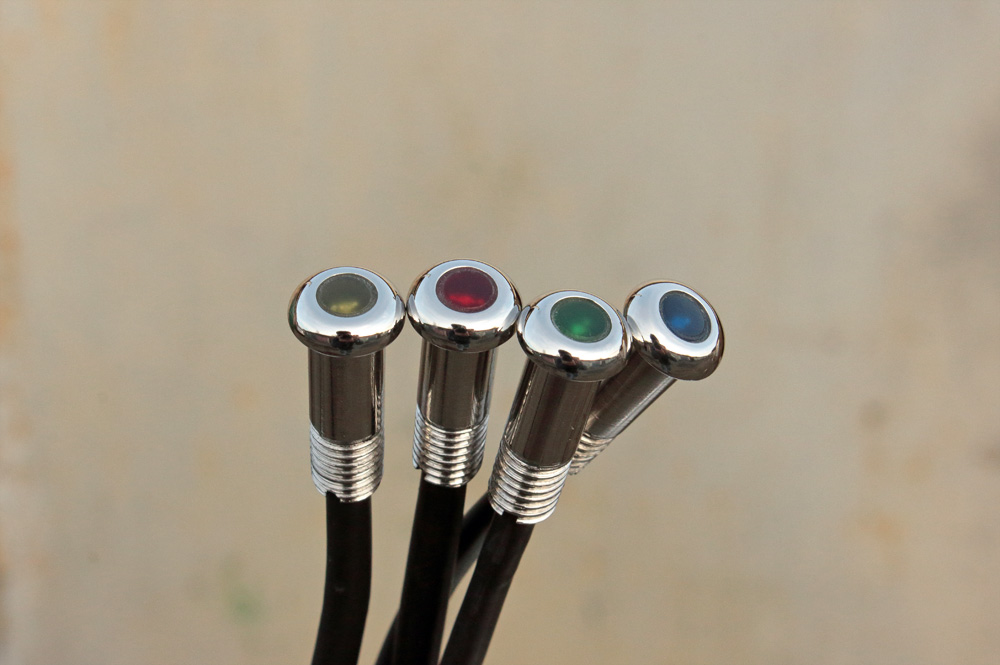
This post is about indicators. I started from making housings. I made some drawings and gave them along with stainless steel rod of suitable diameter to turner. After I received result I had to do some sandpapering and polishing. Here is final result: four housings for four indicators.
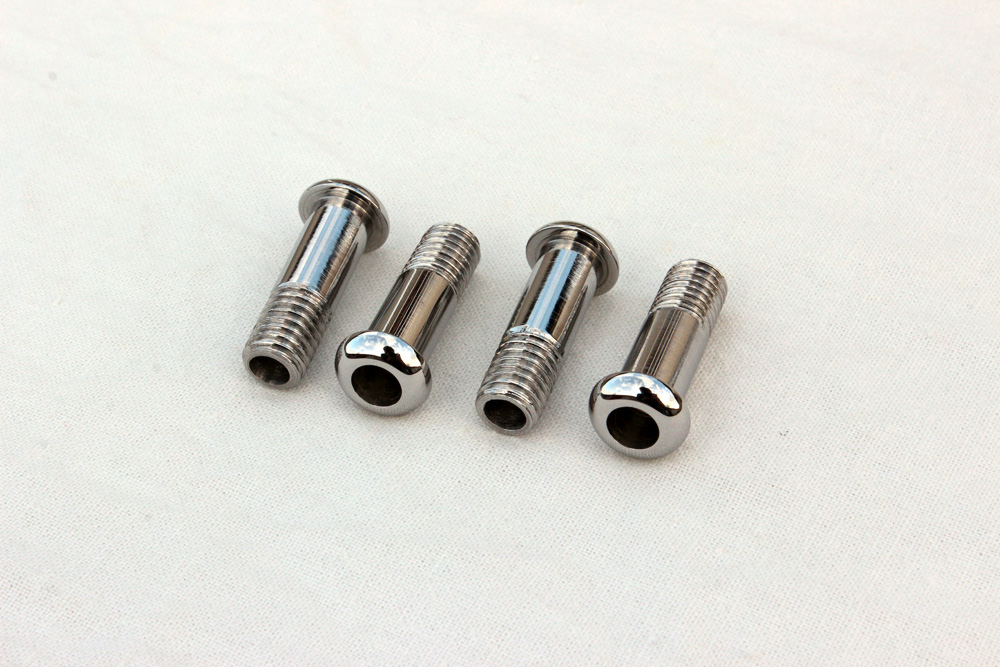
According to my plan each of them has hole cut- through, this hole has diameter of 6mm in upper part of “bolt” and 5mm in lower.
The thing is 5mm LEDs has 6mm flange. Thus LEDS might be put into the bolt, but they couldn’t be dragged through. I chose 5mm LEDs with diffused lenses:
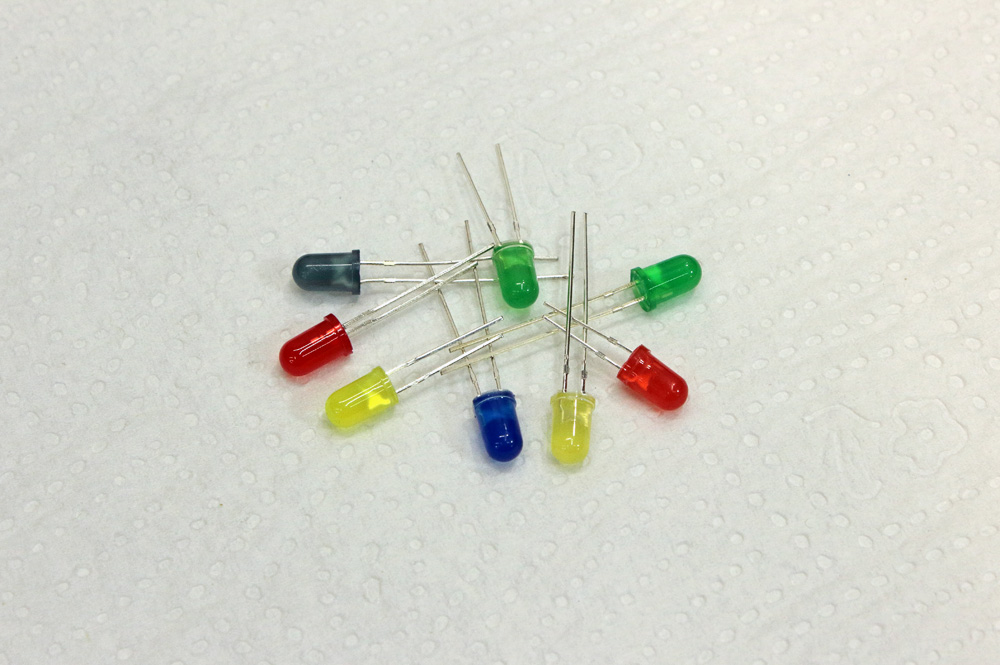
Let’s add some resistors to them.
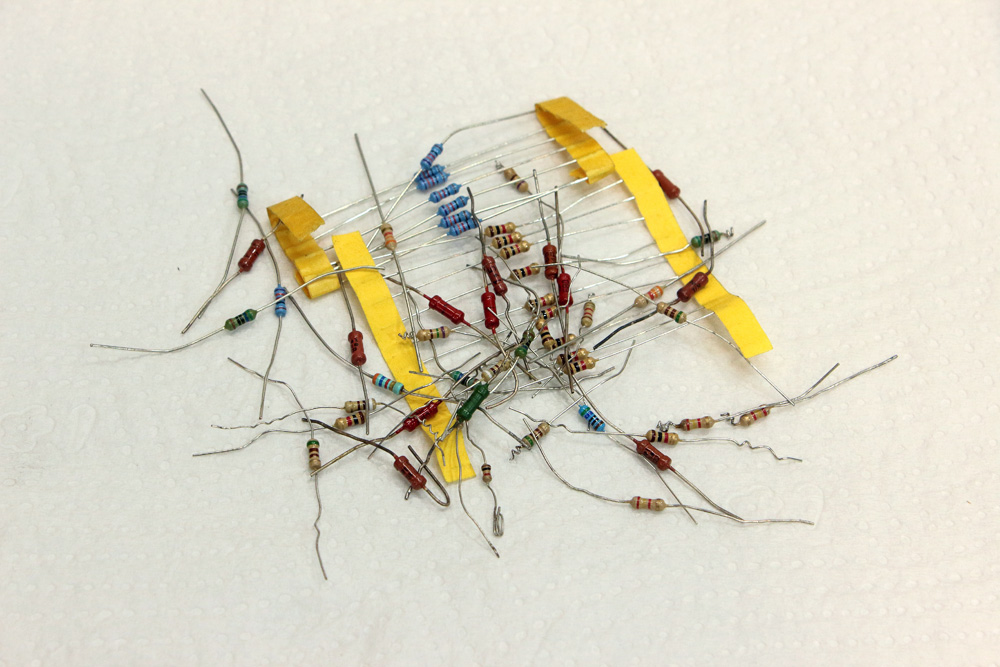
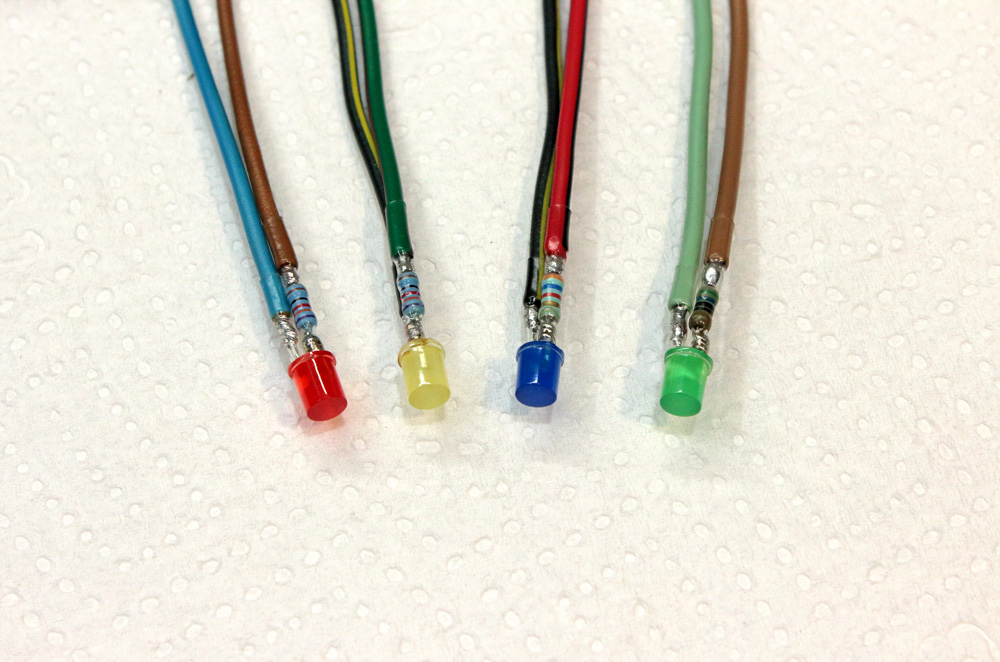
Resistors are essential for the work of LEDs. LED of this kind will work for a long time if only current wouldn’t exceed 20mA. And resistor regulates current. There is no need in rocket science to calculate the value of resistor which will regulate current to suitable parameters. All we need is Ohm’s law which states that I=V/R. With possible peak in 14.5V in motorcycle electrical system, 2.5V of LED consuming and 20mA of suitable current we easily could calculate that “safe” resistor will have value of 600 Ohm. On practice, however, we’ll find out that yellow, green, blue and red LEDs even from same batch would have different brightness, being connected through identical resistors to same source of voltage. The dullest would be green, yellow and red would be brighter than green, while blue would burn your eyes. So after some experiments I chose resistor of 590 Ohm value for green LED, 790 Ohm for yellow and red, and (drums!!!) 3400 Ohm for blue LED.
I also grinded lenses of LEDs and made their ends flat, then I polished them. This operation made LEDs less bright but more suitable for my design. Next question was wires. Here is my very personal opinion on wiring question: always use wires of colours which fit wiring of motorcycle you are working on. If Kawasaki Zephyr 750 wiring “use” black/yellow wire for ground, so will I, and so on, and so forth. And if I am about to include in wiring feature that wasn’t there before, I will use the wire of colour that couldn’t already be found in wiring. This is the only way to avoid mess.
I am definitely not the best with soldering iron, but at least I try to solder components securely and accurately. Here is result of my work, places of soldering and resistors already packed into transparent heat-shrink tubing.
Second tubing went through the indicator housing.
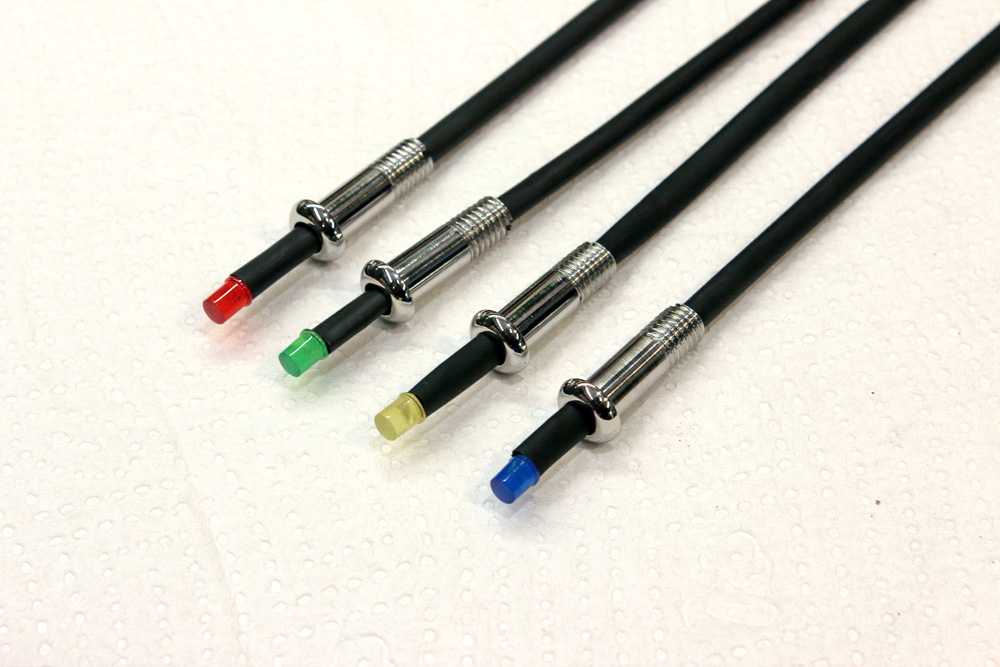
I fixed LEDs and tubing in housing with transparent epoxy. This will make indicators weather protected.
According to my plan each of them has hole cut- through, this hole has diameter of 6mm in upper part of “bolt” and 5mm in lower.
The thing is 5mm LEDs has 6mm flange. Thus LEDS might be put into the bolt, but they couldn’t be dragged through. I chose 5mm LEDs with diffused lenses:
Let’s add some resistors to them.
Resistors are essential for the work of LEDs. LED of this kind will work for a long time if only current wouldn’t exceed 20mA. And resistor regulates current. There is no need in rocket science to calculate the value of resistor which will regulate current to suitable parameters. All we need is Ohm’s law which states that I=V/R. With possible peak in 14.5V in motorcycle electrical system, 2.5V of LED consuming and 20mA of suitable current we easily could calculate that “safe” resistor will have value of 600 Ohm. On practice, however, we’ll find out that yellow, green, blue and red LEDs even from same batch would have different brightness, being connected through identical resistors to same source of voltage. The dullest would be green, yellow and red would be brighter than green, while blue would burn your eyes. So after some experiments I chose resistor of 590 Ohm value for green LED, 790 Ohm for yellow and red, and (drums!!!) 3400 Ohm for blue LED.
I also grinded lenses of LEDs and made their ends flat, then I polished them. This operation made LEDs less bright but more suitable for my design. Next question was wires. Here is my very personal opinion on wiring question: always use wires of colours which fit wiring of motorcycle you are working on. If Kawasaki Zephyr 750 wiring “use” black/yellow wire for ground, so will I, and so on, and so forth. And if I am about to include in wiring feature that wasn’t there before, I will use the wire of colour that couldn’t already be found in wiring. This is the only way to avoid mess.
I am definitely not the best with soldering iron, but at least I try to solder components securely and accurately. Here is result of my work, places of soldering and resistors already packed into transparent heat-shrink tubing.
Second tubing went through the indicator housing.
I fixed LEDs and tubing in housing with transparent epoxy. This will make indicators weather protected.
Kawasaki KZ650 cafe-racer: in progress
Kawasaki Zephyr 750 (810ccm, 4in4, spoked wheels)
Honda CB815 "Eight Fifteen" cafe-racer
Yamaha XJ "Eight Ball" cafe-racer
www.gazzz-garage.com
Kawasaki Zephyr 750 (810ccm, 4in4, spoked wheels)
Honda CB815 "Eight Fifteen" cafe-racer
Yamaha XJ "Eight Ball" cafe-racer
www.gazzz-garage.com
The following user(s) said Thank You: Scirocco
Please Log in or Create an account to join the conversation.
- gazzz
-
Topic Author
- Offline
- Sustaining Member
-
Registered
- Posts: 563
- Thanks: 319
Re: KZ650 cafe-racer
11 Mar 2020 12:57 - 11 Mar 2020 12:57
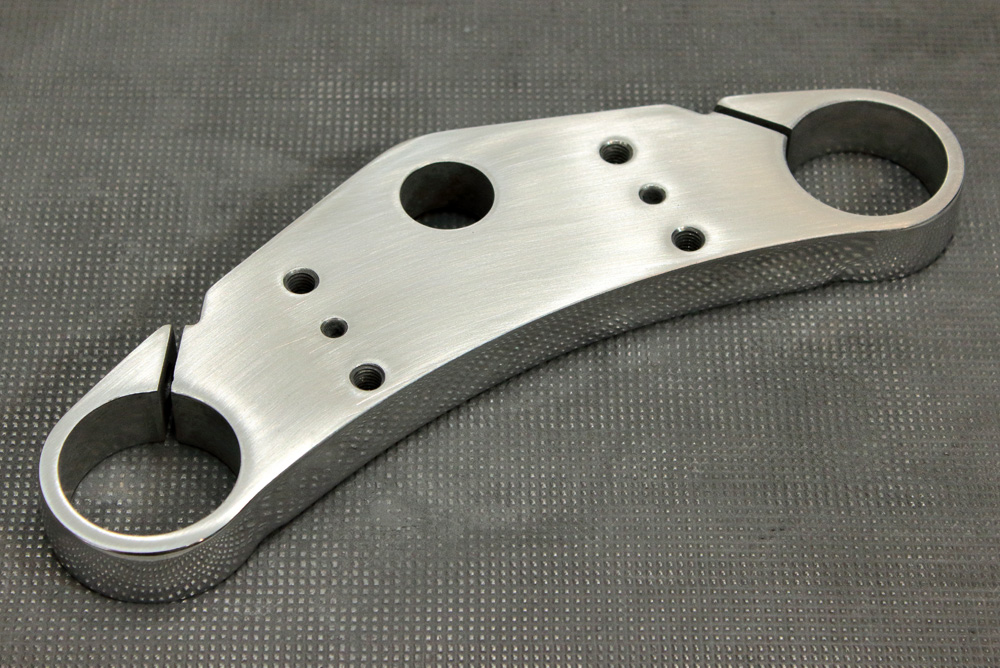
All components for dashboard were ready, but I had to polish top yoke before assembling . The surface of part isn’t complicated and its top is flat, so what might be simpler you might ask? However, the longer I do polishing, the more I became sure in only one thing: every case is individual. Result depends on alloy and if it is cast part, it depends on how it was cast (pores, unevenness of alloy). Thus, sometimes small part could take more time than a much bigger one (if you are interested in more or less perfect result of course). This top yoke gave me quite a headache, but after some time I found right approach and got very nice result. Here it is:
Assembling was alike to final strokes of artist’ brush: he makes them and picture suddenly became whole and finished, alive, there is nothing to add, nothing to remove. Light was changing when I was photoshooting result of my wok, so as it often happens with me in such cases, I shot too many photos.
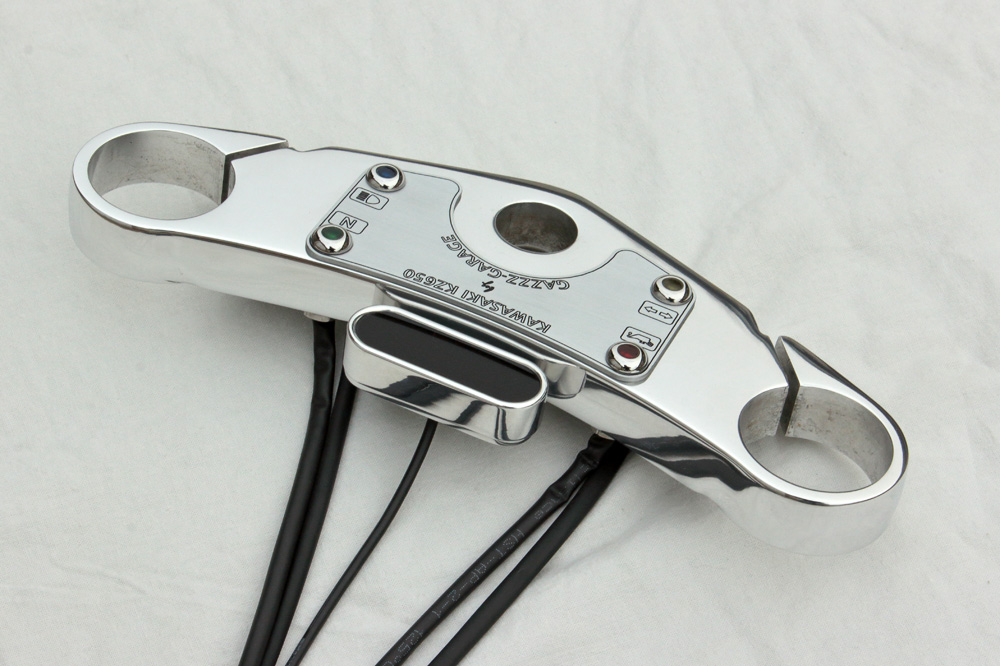
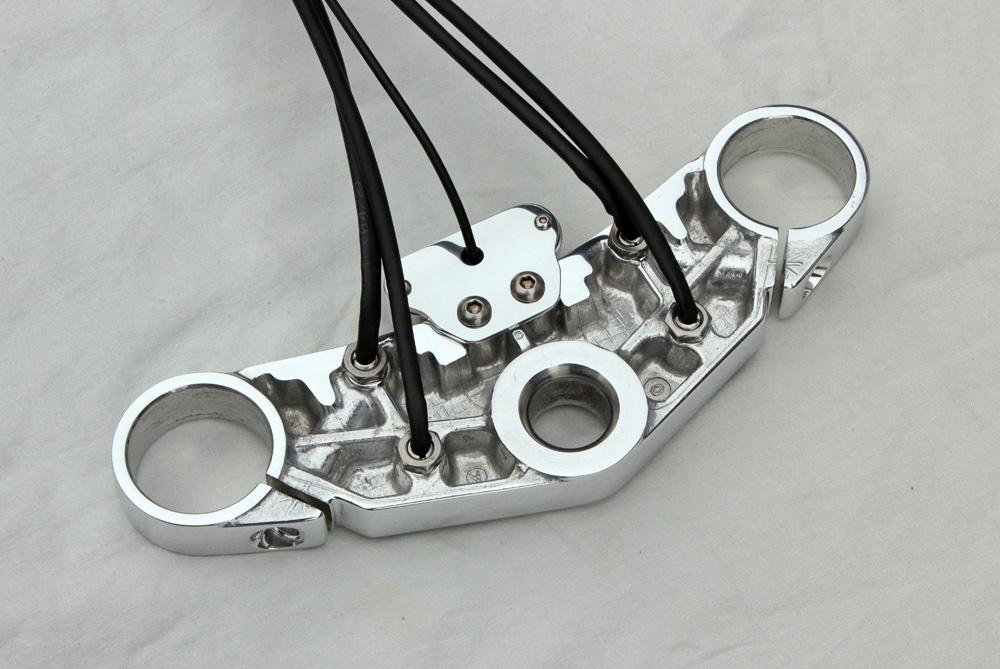
Assembling was alike to final strokes of artist’ brush: he makes them and picture suddenly became whole and finished, alive, there is nothing to add, nothing to remove. Light was changing when I was photoshooting result of my wok, so as it often happens with me in such cases, I shot too many photos.
Kawasaki KZ650 cafe-racer: in progress
Kawasaki Zephyr 750 (810ccm, 4in4, spoked wheels)
Honda CB815 "Eight Fifteen" cafe-racer
Yamaha XJ "Eight Ball" cafe-racer
www.gazzz-garage.com
Kawasaki Zephyr 750 (810ccm, 4in4, spoked wheels)
Honda CB815 "Eight Fifteen" cafe-racer
Yamaha XJ "Eight Ball" cafe-racer
www.gazzz-garage.com
Last edit: 11 Mar 2020 12:57 by gazzz.
The following user(s) said Thank You: Scirocco
Please Log in or Create an account to join the conversation.
Moderators: Street Fighter LTD