
Saving a '81 KZ750-E
- Nessism
-

- Offline
- Sustaining Member
-

Registered
- Posts: 8064
- Thanks: 3451
Re: Saving a '81 KZ750-E
16 Jun 2020 16:58
I use paint stripper to soften gaskets too, but have never found it overly easy. And yes, I use the strong stripper stuff.
Regarding those cases they look like a prime candidate for media blasting. Mask everything best you can but there aren't any truly blind passages in the cases so there isn't a whole lot of worry about getting some dust inside. Just be sure to scrub and clean really well when done with soap and water.
Regarding those cases they look like a prime candidate for media blasting. Mask everything best you can but there aren't any truly blind passages in the cases so there isn't a whole lot of worry about getting some dust inside. Just be sure to scrub and clean really well when done with soap and water.
Ed
Carb O-ring Kits : www.kzrider.com/forum/14-vendor-forum/62...rburetor-o-ring-kits
www.kzrider.com/forum/faq-wiki/618026-new-owner-things-to-know
1981 KZ750E2
www.kzrider.com/forum/11-projects/604901...z750e-project-thread
Carb O-ring Kits : www.kzrider.com/forum/14-vendor-forum/62...rburetor-o-ring-kits
www.kzrider.com/forum/faq-wiki/618026-new-owner-things-to-know
1981 KZ750E2
www.kzrider.com/forum/11-projects/604901...z750e-project-thread
Please Log in or Create an account to join the conversation.
- Skidmark
-
 Topic Author
- Offline
- User
-

Registered
- Posts: 1087
- Thanks: 312
Re: Saving a '81 KZ750-E
18 Jun 2020 14:19
While reading the factory shop manual it says the lower rod ends will be identified by a weight mark, in the form of a capital "I", to make sure the rod ends are assembled in the same position as they were in. My rods do not have any stampings or markings on that machined surface. Luckily, there is only one way to reassemble the lower bearing caps. If they are put on wrong, the side machined surfaces do not line up, leaving a step. I was happy to find this, as I had disassembled the rods before looking for markings! Lucky beats good, every day of the week... Most of my bearings are now in transit with an expected delivery date. The two lower rod bearings coming from the UK have shipped, but I have no tracking information. We will see how long it takes to get here.
Now that the case cleaning process has started, the blast cabinet decided to act up. The nozzle on the gun is a consumable item and wears away during use (over a long period of time, depending on media type). The nozzle was too worn, so another has been ordered and that will ship out tomorrow. I still have a lot to do before I am ready to blast, but the machine won't be ready until mid to late next week now.
The wiring harness still needs to be cleaned up (dirt wise) some more before it is ready to go back in. I stalled out after doing some of the rewiring on the bar controls, so those need to be finished, too. The new gps speedo has an antenna that I have to find a spot for. Since it needs to be in clear view of the sky, right now the top of the front fender is the leading candidate. All of the ignition parts were working when it was parked 28 years ago. I may get some new coils when I get close to finishing the electrical. I am missing the battery hold down bracket or strap, so I have to source or make something to replace that part.
Several items are waiting until after the motor is back in the frame. The shift linkage needs to be cut to length and fitted. Also the steering damper mounts have to be fabricated. The chain clearance through the swing arm brace needs to be check carefully. It will be close, but I can't tell if I have enough room until the motor is in and the sprockets and chain are installed. The rear shocks do not have any bushings in them (came on a parts bike I bought), and are an unknown brand. They may not be the correct length for this bike. I would love to put new rear shocks on this bike, but that is a later decision. The front forks have a small amount of seeping from standing unused for so long, and who knows how they were treated since they were not on the original bike when I got them. So I have all new seals and orings coming for them. I also have a factory shop manual (just for the forks, brakes, and front wheel), and of course there is a special tool required to disassemble them. They are available online, but around $120. I may try to make my own when I get to that point, but the front end will be coming back apart before this bike is ridden for the first time. The steering stops need to be fine tuned (which requires grinding through the powder coat). Turns out I left too much material now that I have rolled it around off the stand.
That's the end of my rambling for now. I have been sitting at my shop desk writing this, while staring at the bike. Just doing a mental run down on what still needs to be done.
Retired gearhead
'81 KZ-750 E2
'87 Suzuki Savage 650 Street Tracker (lost in the shop fire)
'81 KZ-750 E2
'87 Suzuki Savage 650 Street Tracker (lost in the shop fire)
Please Log in or Create an account to join the conversation.
- calum
-

- Offline
- User
-
Registered
- Posts: 1144
- Thanks: 415
Re: Saving a '81 KZ750-E
19 Jun 2020 01:56
Just some info for when you do those forks:
I had a nightmare with one of the forks on my Hornet last week. It's a 2012, but the 2008 had the same fork damper setup and from the looks of it yours are the same as well.
The damper is held in place with an M8 socket cap bolt. Normally, you need to hold the damper to loosen the bolt (the damper holding tool may have been the tool you referred to, or maybe it was the tool to compress the spring and remove the top cap - see the photo below). Most of the time you can get away with just compressing the forks to put pressure on the damper and loosening the bolt. Then you can remove it completely when the top cap is off and the spring, oil etc. are out.
Every now and then (seems to be a pretty common problem) the screw will just spin even if you hold the damper. The problem is, that the screw is actually screwed into a valve in the bottom of the damper. The valve can sometimes spin in the damper and if it does there is no way to hold it. I'm not sure why this happens (except that it is an idiotic design) but once it starts spinning there is really nothing for it except a drill. Next problem is then drilling a bolt that can spin in both directions :S I ended up staking the screw to the bottom of the fork leg. Aterwards I had to file down the deformed aluminium on the fork leg so I could put the axle back in.
You don't really need to remove the damper to separate the forks and replace the seals - you just need to be careful that you keep everything straight when pulling the forks apart so you don't bend the damper rod. If you do decide to remove the dampers, I would recommend unscrewing the socket cap screws at least two turns so you know the loc-tite has been broken. If the fork is still fully assembled you should see the head of the bolt start to rise up a bit. Just don't screw them all the way out unless you want the top cap (and damper rod) to be shot across the shop when you undo it")
I didn't bother putting loc-tite on the screws when reassembling. I don't think it is really necessary with the torque specs and the fact that they have nowhere to go. Worst case: a bit of oil starts seeping out by the axle. Not ideal but no worse than the consequences of a leaky seal.
Here are my tools for getting the top cap off:
I had a nightmare with one of the forks on my Hornet last week. It's a 2012, but the 2008 had the same fork damper setup and from the looks of it yours are the same as well.
The damper is held in place with an M8 socket cap bolt. Normally, you need to hold the damper to loosen the bolt (the damper holding tool may have been the tool you referred to, or maybe it was the tool to compress the spring and remove the top cap - see the photo below). Most of the time you can get away with just compressing the forks to put pressure on the damper and loosening the bolt. Then you can remove it completely when the top cap is off and the spring, oil etc. are out.
Every now and then (seems to be a pretty common problem) the screw will just spin even if you hold the damper. The problem is, that the screw is actually screwed into a valve in the bottom of the damper. The valve can sometimes spin in the damper and if it does there is no way to hold it. I'm not sure why this happens (except that it is an idiotic design) but once it starts spinning there is really nothing for it except a drill. Next problem is then drilling a bolt that can spin in both directions :S I ended up staking the screw to the bottom of the fork leg. Aterwards I had to file down the deformed aluminium on the fork leg so I could put the axle back in.
You don't really need to remove the damper to separate the forks and replace the seals - you just need to be careful that you keep everything straight when pulling the forks apart so you don't bend the damper rod. If you do decide to remove the dampers, I would recommend unscrewing the socket cap screws at least two turns so you know the loc-tite has been broken. If the fork is still fully assembled you should see the head of the bolt start to rise up a bit. Just don't screw them all the way out unless you want the top cap (and damper rod) to be shot across the shop when you undo it
I didn't bother putting loc-tite on the screws when reassembling. I don't think it is really necessary with the torque specs and the fact that they have nowhere to go. Worst case: a bit of oil starts seeping out by the axle. Not ideal but no worse than the consequences of a leaky seal.
Here are my tools for getting the top cap off:
KZ1000 Restomod (
www.kzrider.com/forum/11-projects/614517-1977-kz1000-restomod
)
1977 KZ1000A1 ( www.kzrider.com/forum/11-projects/616901...-spare-parts-project )
1980 KZ750H ( kzrider.com/forum/11-projects/612054-kz750h-restoration )
2000 BMW F650GS
1977 KZ1000A1 ( www.kzrider.com/forum/11-projects/616901...-spare-parts-project )
1980 KZ750H ( kzrider.com/forum/11-projects/612054-kz750h-restoration )
2000 BMW F650GS
Please Log in or Create an account to join the conversation.
- Skidmark
-
Topic Author
- Offline
- User
-
Registered
- Posts: 1087
- Thanks: 312
Re: Saving a '81 KZ750-E
19 Jun 2020 09:46 - 19 Jun 2020 09:47
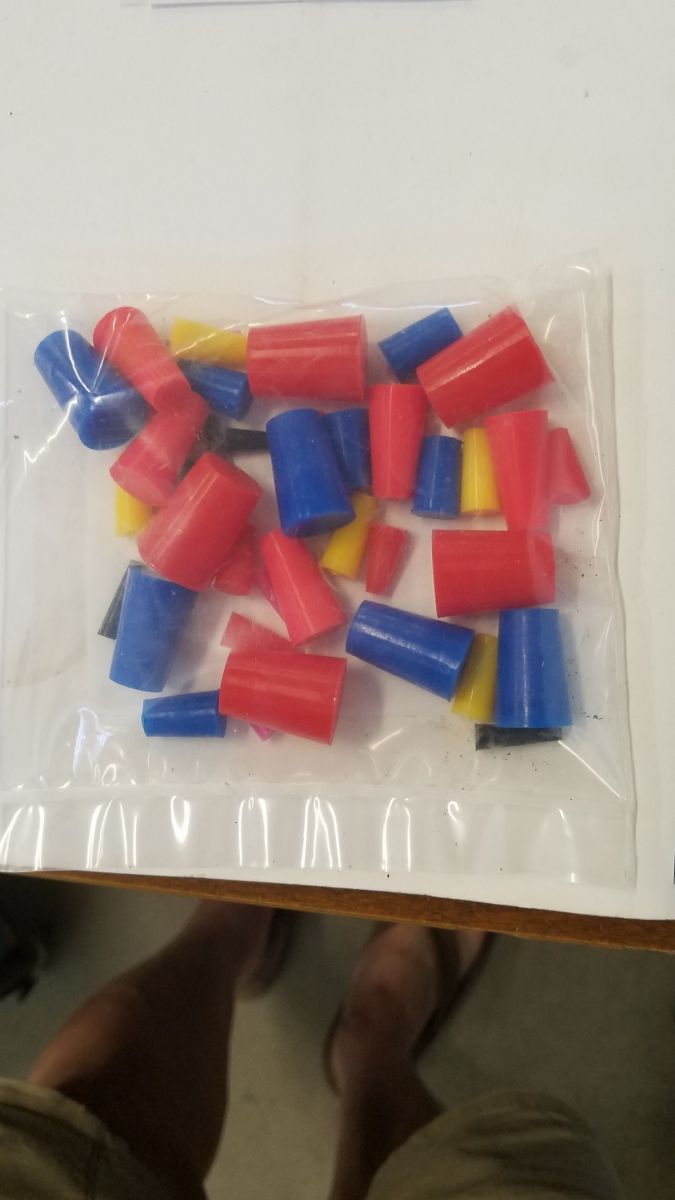
This is the Fork Rod Holder - special tool for disassembly. It is listed on Partzilla for $107.

Retired gearhead
'81 KZ-750 E2
'87 Suzuki Savage 650 Street Tracker (lost in the shop fire)
'81 KZ-750 E2
'87 Suzuki Savage 650 Street Tracker (lost in the shop fire)
Last edit: 19 Jun 2020 09:47 by Skidmark.
Please Log in or Create an account to join the conversation.
- calum
-
- Offline
- User
-
Registered
- Posts: 1144
- Thanks: 415
Re: Saving a '81 KZ750-E
19 Jun 2020 10:34
No eBay APP ID and/or Cert ID defined in Kunena configurationNo eBay APP ID and/or Cert ID defined in Kunena configurationYeah, that's to hold the damper rod. I've never needed it as the pressure from compressing the forks has always been enough. If the damper valve starts turning inside the damper then this won't help you either. I wish I'd taken a photo so I could explain this better but I was too busy swearing
If you do want to completely dismantle the forks I would suggest first trying to loosen the screws while compressing the forks. Make sure they are properly loose but still have enough thread engagement to hold the damper rod against the force of the spring. If you can't get them loose then order/make the tool. You will almost certainly get one of them apart which would aid you in tool-making. All it really is just a piece of pipe with some cut-outs - exactly as it looks in the photo.
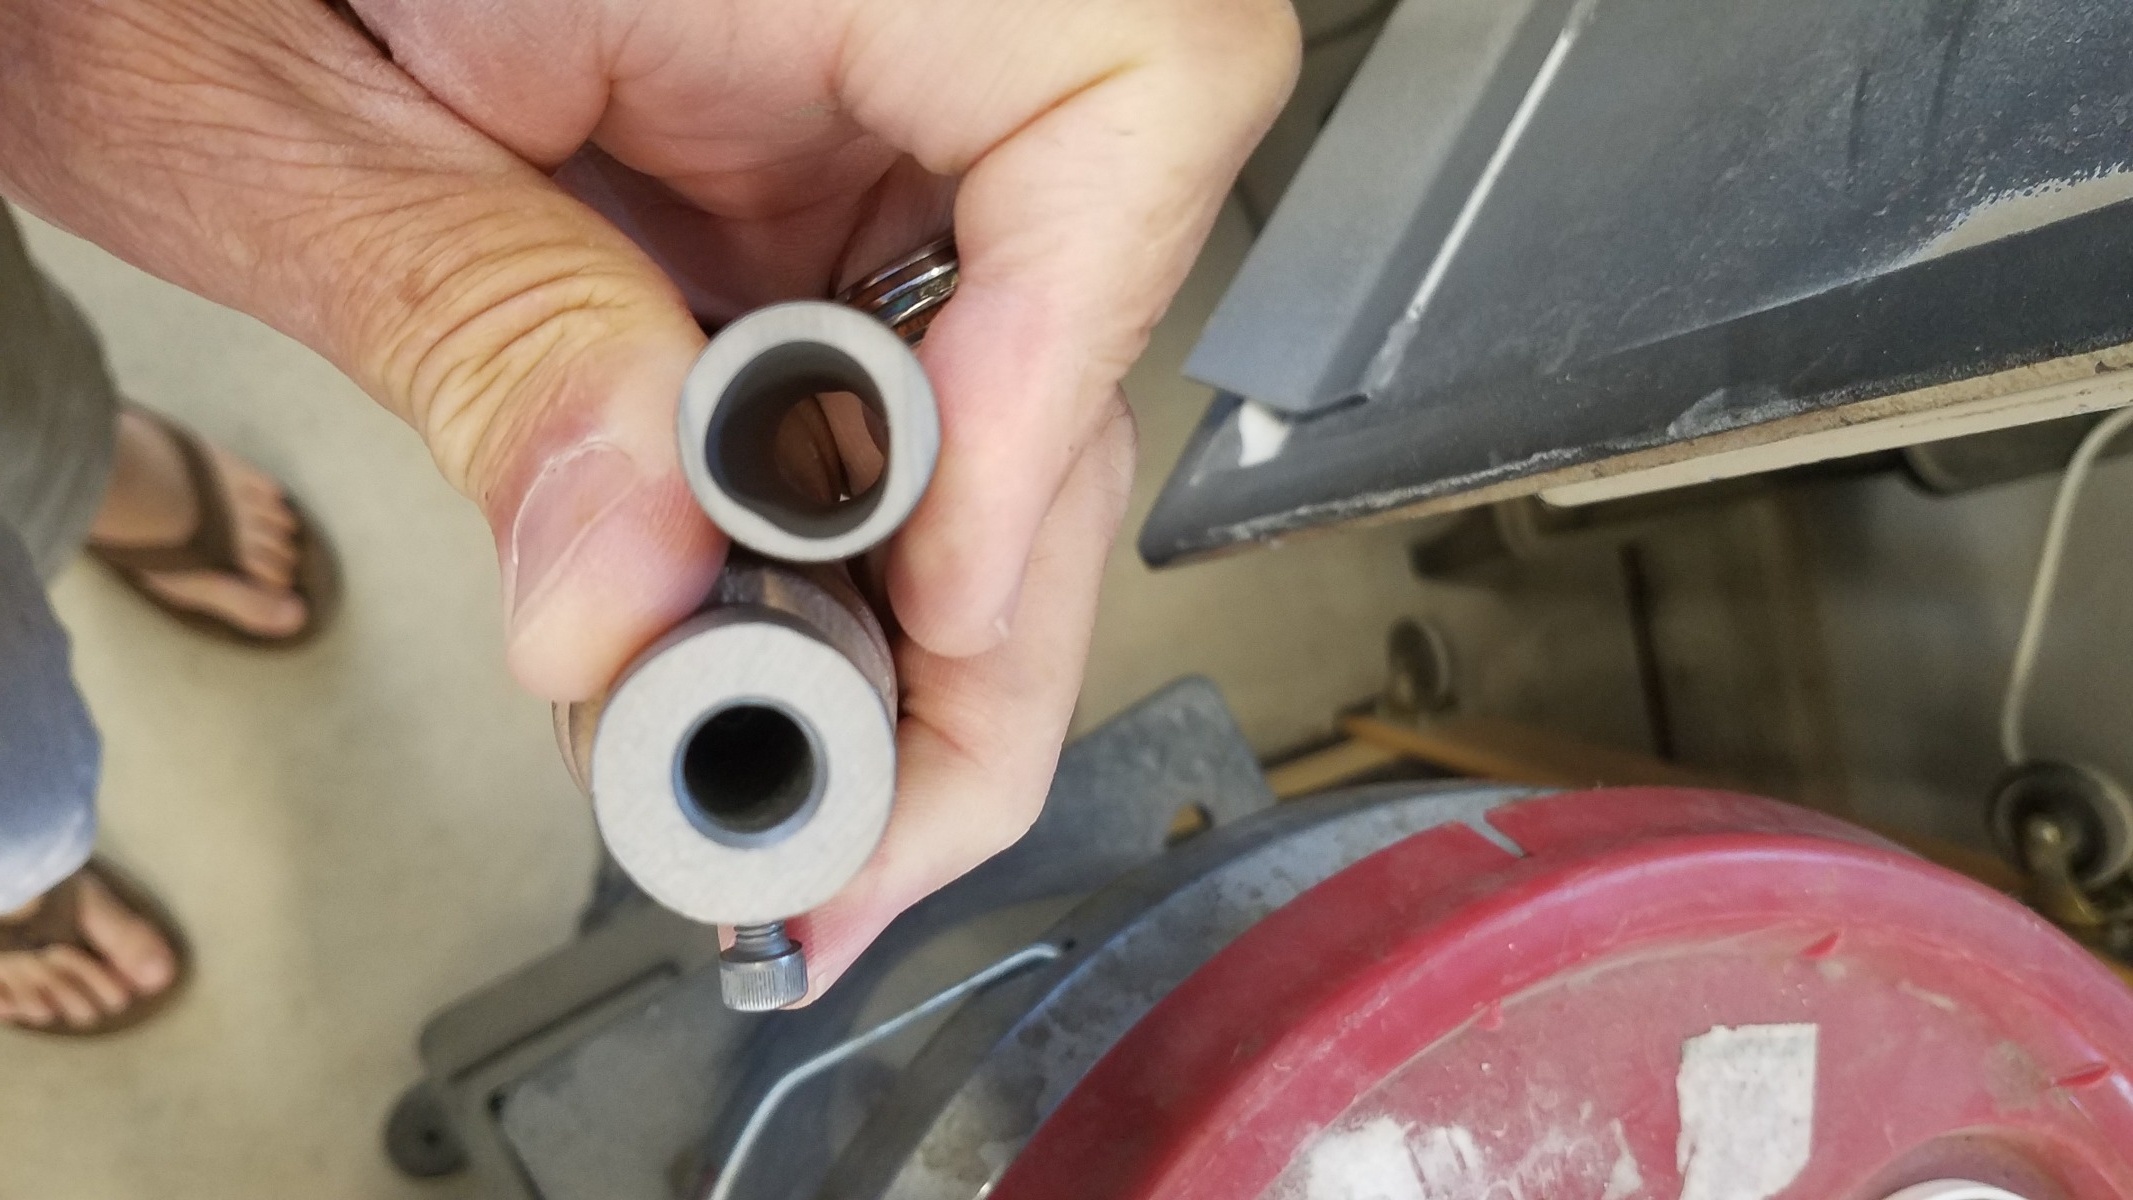
The tools that I posted (whatever I could find at the hardware store drilled, tapped or cut as needed) are for removing the top cap. The manual may show this being done with something like this :
Then it's a one-person job. Otherwise you may need a helper to slide the plate in under the top cap locking nut while you push down on the spacer/spring. The "proper" version of my tools look like this:
If you do want to completely dismantle the forks I would suggest first trying to loosen the screws while compressing the forks. Make sure they are properly loose but still have enough thread engagement to hold the damper rod against the force of the spring. If you can't get them loose then order/make the tool. You will almost certainly get one of them apart which would aid you in tool-making. All it really is just a piece of pipe with some cut-outs - exactly as it looks in the photo.
The tools that I posted (whatever I could find at the hardware store drilled, tapped or cut as needed) are for removing the top cap. The manual may show this being done with something like this :
Then it's a one-person job. Otherwise you may need a helper to slide the plate in under the top cap locking nut while you push down on the spacer/spring. The "proper" version of my tools look like this:
KZ1000 Restomod (
www.kzrider.com/forum/11-projects/614517-1977-kz1000-restomod
)
1977 KZ1000A1 ( www.kzrider.com/forum/11-projects/616901...-spare-parts-project )
1980 KZ750H ( kzrider.com/forum/11-projects/612054-kz750h-restoration )
2000 BMW F650GS
1977 KZ1000A1 ( www.kzrider.com/forum/11-projects/616901...-spare-parts-project )
1980 KZ750H ( kzrider.com/forum/11-projects/612054-kz750h-restoration )
2000 BMW F650GS
Please Log in or Create an account to join the conversation.
- Skidmark
-
Topic Author
- Offline
- User
-
Registered
- Posts: 1087
- Thanks: 312
Re: Saving a '81 KZ750-E
21 Jun 2020 14:22
Between the oil pan and the lower case half, there are three "oil passage o rings" that are actually flat sided. A question for the learned on here - are these still available anywhere, and if not, has anyone used round cross section o rings as replacements for this? Neither the crankcase or oil pan section of Partzilla shows these three o rings. Bummer the shop manual doesn't list part numbers... it would help in the search.
Retired gearhead
'81 KZ-750 E2
'87 Suzuki Savage 650 Street Tracker (lost in the shop fire)
'81 KZ-750 E2
'87 Suzuki Savage 650 Street Tracker (lost in the shop fire)
Please Log in or Create an account to join the conversation.
- calum
-
- Offline
- User
-
Registered
- Posts: 1144
- Thanks: 415
Re: Saving a '81 KZ750-E
21 Jun 2020 14:37 - 21 Jun 2020 14:40
Part number 9205-5077
Available on CMS, should be available at partzilla as well. The ones on mine came in a gasket kit.
Parts diagram: www.cmsnl.com/kawasaki-kz750h1-1980-usa-.../partslist/9187.html
EDIT: Available on partzilla.com: www.partzilla.com/catalog/kawasaki/motor...il-pan-81-82-kz750-e
Available on CMS, should be available at partzilla as well. The ones on mine came in a gasket kit.
Parts diagram: www.cmsnl.com/kawasaki-kz750h1-1980-usa-.../partslist/9187.html
EDIT: Available on partzilla.com: www.partzilla.com/catalog/kawasaki/motor...il-pan-81-82-kz750-e
KZ1000 Restomod (
www.kzrider.com/forum/11-projects/614517-1977-kz1000-restomod
)
1977 KZ1000A1 ( www.kzrider.com/forum/11-projects/616901...-spare-parts-project )
1980 KZ750H ( kzrider.com/forum/11-projects/612054-kz750h-restoration )
2000 BMW F650GS
1977 KZ1000A1 ( www.kzrider.com/forum/11-projects/616901...-spare-parts-project )
1980 KZ750H ( kzrider.com/forum/11-projects/612054-kz750h-restoration )
2000 BMW F650GS
Last edit: 21 Jun 2020 14:40 by calum.
The following user(s) said Thank You: Skidmark
Please Log in or Create an account to join the conversation.
- Skidmark
-
Topic Author
- Offline
- User
-
Registered
- Posts: 1087
- Thanks: 312
Re: Saving a '81 KZ750-E
21 Jun 2020 17:20
I didn't see the "oil pan" after "breather cover", because I wasn't looking in the "B's"... :whistle: I thought it would be under the crankcase or oil pan. Thanks....
Retired gearhead
'81 KZ-750 E2
'87 Suzuki Savage 650 Street Tracker (lost in the shop fire)
'81 KZ-750 E2
'87 Suzuki Savage 650 Street Tracker (lost in the shop fire)
Please Log in or Create an account to join the conversation.
- Skidmark
-
Topic Author
- Offline
- User
-
Registered
- Posts: 1087
- Thanks: 312
Re: Saving a '81 KZ750-E
23 Jun 2020 11:18
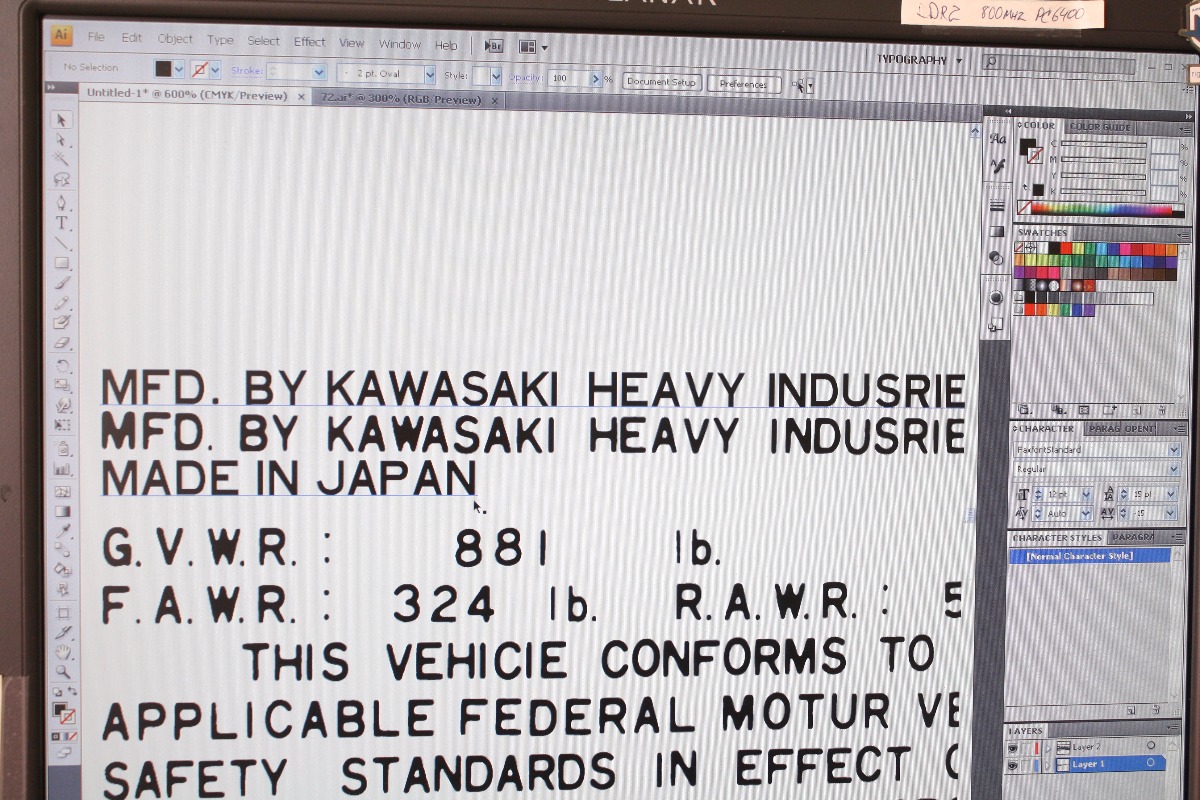
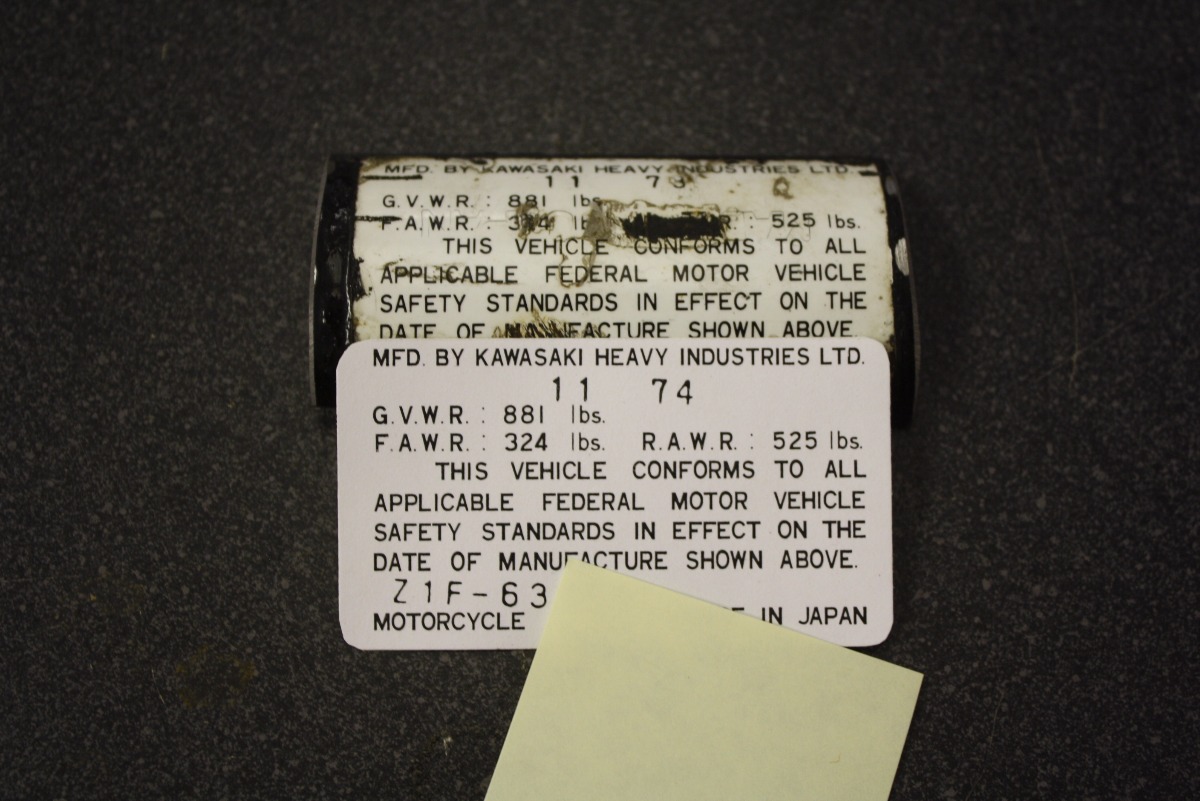
Since I had my frame powder coated, and I am not doing a factory restoration, the original VIN sticker was destroyed. It already had damage so trying to remove it and reuse it didn't sound like a viable option. I have a friend with a graphics business so I contacted him to see what he could do for reproducing the sticker.
The factory sticker
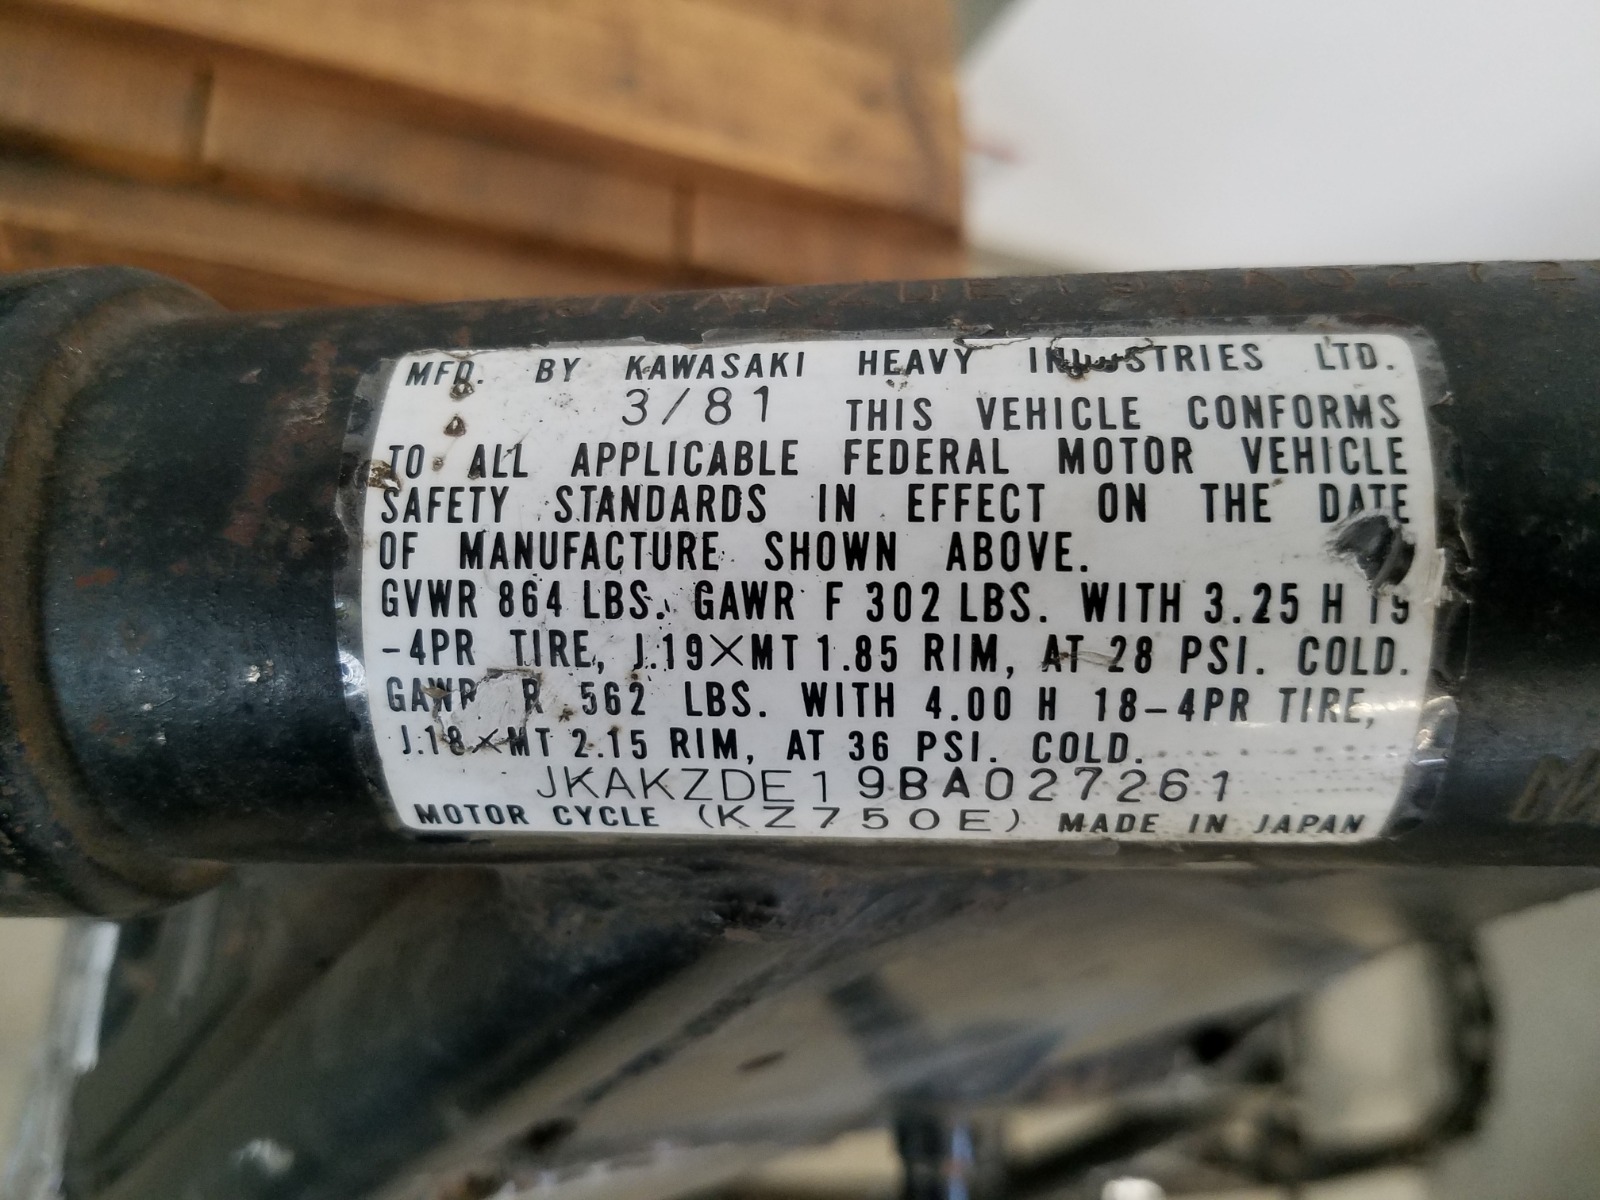
The new sticker
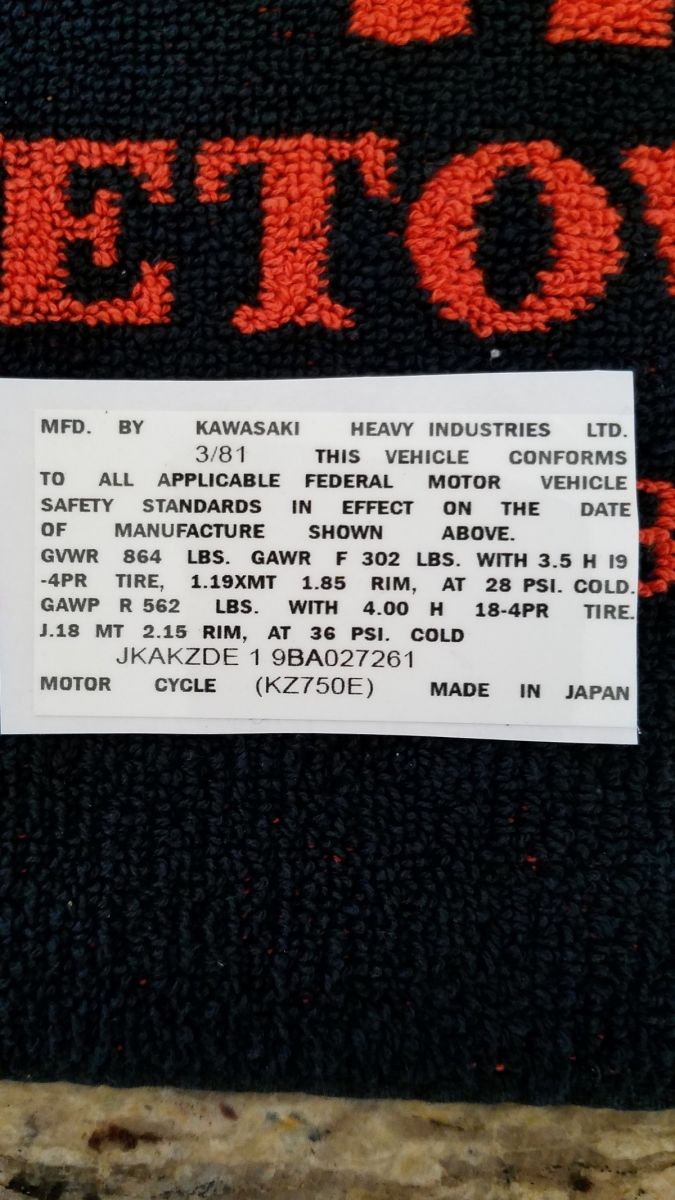
The new sticker was reproduced using only a photo, and the dimensions for size. Again, not a factory restoration quality level, but I thought he did a pretty good job matching the different fonts.
The factory sticker
The new sticker
The new sticker was reproduced using only a photo, and the dimensions for size. Again, not a factory restoration quality level, but I thought he did a pretty good job matching the different fonts.
Retired gearhead
'81 KZ-750 E2
'87 Suzuki Savage 650 Street Tracker (lost in the shop fire)
'81 KZ-750 E2
'87 Suzuki Savage 650 Street Tracker (lost in the shop fire)
Please Log in or Create an account to join the conversation.
- Mikaw
-
- Offline
- Sustaining Member
-
Registered
- Posts: 4825
- Thanks: 1852
Re: Saving a '81 KZ750-E
23 Jun 2020 11:26
I’ve had a couple reproduced. Excellent quality.
Rick Brett
kawaparts@aol.com
Rick Brett
kawaparts@aol.com
1976 KZ 900 A4
kzrider.com/forum/11-projects/613548-1976-kz-900-a4
1976 KZ 900 B1 LTD
1978 KZ 1000 B2 LTD
1980 KZ 750 E1
Kowledge Speaks, But Wisdom Listens.
Jimi Hendrix.
1976 KZ 900 B1 LTD
1978 KZ 1000 B2 LTD
1980 KZ 750 E1
Kowledge Speaks, But Wisdom Listens.
Jimi Hendrix.
Please Log in or Create an account to join the conversation.
- Skidmark
-
Topic Author
- Offline
- User
-
Registered
- Posts: 1087
- Thanks: 312
Re: Saving a '81 KZ750-E
23 Jun 2020 13:12
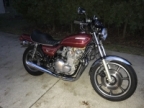
I got the urethane masking plugs, and the nozzle for my bead blast cabinet showed up as well. Back in business!! I guess the nozzle was pretty worn out...
Retired gearhead
'81 KZ-750 E2
'87 Suzuki Savage 650 Street Tracker (lost in the shop fire)
'81 KZ-750 E2
'87 Suzuki Savage 650 Street Tracker (lost in the shop fire)
Please Log in or Create an account to join the conversation.
- Scirocco
-

- Offline
- Premium Member
-

Registered
- Never change a running system
- Posts: 4397
- Thanks: 2260
Re: Saving a '81 KZ750-E
23 Jun 2020 13:35
I don´t know if Rick Brett (kawaparts@aol.com) and member Kidkawie are the same person.
For me Kidkawie made the best reproduction steering head VIN sticker!!!
kzrider.com/forum/5-chassis/600192-repro...cker?start=12#770527
For me Kidkawie made the best reproduction steering head VIN sticker!!!
kzrider.com/forum/5-chassis/600192-repro...cker?start=12#770527
My 1975 Z 1 B 900 Project
www.kzrider.com/forum/11-projects/605133...ears-deep-sleep-mode
www.kzrider.com/forum/11-projects/605133...ears-deep-sleep-mode
Please Log in or Create an account to join the conversation.
Moderators: Street Fighter LTD