
A Newbies Adventures in Maintenanceland!
- PLUMMEN
-
- Offline
- User
-

Registered
- Posts: 7986
- Thanks: 104
Re: A Newbies Adventures in Maintenanceland!
24 Nov 2009 05:34
that is where your rings stopped,i wouldnt sweat it too much or youll end up boring it instead of honing it. :laugh: a chisel point sharpie pen works good for filling in the letters! :laugh:
Still recovering,some days are better than others.
Please Log in or Create an account to join the conversation.
- 9am53
-
 Topic Author
- Offline
- User
-
Registered
- homebrew, and some bbq
- Posts: 1787
- Thanks: 3
Re: A Newbies Adventures in Maintenanceland!
24 Nov 2009 06:29
OK, I am done with the honing then. I am going to set my ring gaps tonight, 0.003-0.004" per inch of cylinder diameter right? My bore is 2.73", so my gaps should be 0.008-0.01 inches. This is for the top 2 rings with the rings in the bottom of the cylinder where there is the least amount of wear right? Regarding the oil rings, what is the gap for them?
I have read in various manuals and on here and other forums that I can use a hose clamp as a ring compressor, my question is how long do I compress the rings before I install them? I also have read that I can make a jig out of wood that will support the middle pistons upright while I put the block over them. This sounds like a decent idea, but how do you do this without damaging the base gasket?
I was thinking I would spray the bottom of the base gasket with sealant and lay it down, then put the block on and torque the head down to seat the gasket to the top case. Then I would remove the head and block and put the pistons on the rods and use the wood to help ease them into the cylinders. Would the wooden jig not then sit ontop ot the base gasket and damage it?
'84 GPz900r
'71 CB350
s289.photobucket.com/albums/ll231/9am53/
'71 CB350
s289.photobucket.com/albums/ll231/9am53/
Please Log in or Create an account to join the conversation.
- rstnick
-

- Offline
- Premium Member
-

Registered
- Posts: 4611
- Thanks: 524
Re: A Newbies Adventures in Maintenanceland!
24 Nov 2009 13:48
Nice work on the tail.
I like a nice tail.
I believe that top black ring is supposed to stay.
I just read about that recently somewhere else.
I like a nice tail.
I believe that top black ring is supposed to stay.
I just read about that recently somewhere else.
Rob
CANADA
Need a key for your Kawasaki? PM me
1978 KZ650 C2, 130K kms, Delkevic ex, EI, CVK32, PMC easy clutch, ATK fork brace, steering damper, braced swingarm, ZRX shocks, 18" Z1R front wheel.
2000 ZRX1100
2011 Ninja 250R - Wife's
2005 z750s
1978 KZ1000 project
1983 KZ1000R2 Project
CANADA
Need a key for your Kawasaki? PM me
1978 KZ650 C2, 130K kms, Delkevic ex, EI, CVK32, PMC easy clutch, ATK fork brace, steering damper, braced swingarm, ZRX shocks, 18" Z1R front wheel.
2000 ZRX1100
2011 Ninja 250R - Wife's
2005 z750s
1978 KZ1000 project
1983 KZ1000R2 Project
Please Log in or Create an account to join the conversation.
- keith1
-

- Offline
- User
-
Registered
- Posts: 1655
- Thanks: 3
Re: A Newbies Adventures in Maintenanceland!
24 Nov 2009 17:35
9am53 wrote:
i used the wooden jig method..i had a guy at work make the jigs to spec as per the manual...they wont kill the base gasket....the only problem i encountered was that the legs on the wooden pcs seemed to be about an inch short....i had a second set of hands that built more than one small block chevy and we got it done....it wasnt a real bitch, but took longer than i thought it would....if it were me, i would nt go through your method.....just make sure cases are clean at gasket area ....i bought my jugs machined....you could probably flip yours upside down and make sure there is no warpage with a straightedge
or something similar....if the case tops are clean and the jugs are straight, gasket should not leak....mine didnt...just make sure if you replace the studs, you put the 3bond around the rear 4 after they are in.....
OK, I am done with the honing then. I am going to set my ring gaps tonight, 0.003-0.004" per inch of cylinder diameter right? My bore is 2.73", so my gaps should be 0.008-0.01 inches. This is for the top 2 rings with the rings in the bottom of the cylinder where there is the least amount of wear right? Regarding the oil rings, what is the gap for them?
I have read in various manuals and on here and other forums that I can use a hose clamp as a ring compressor, my question is how long do I compress the rings before I install them? I also have read that I can make a jig out of wood that will support the middle pistons upright while I put the block over them. This sounds like a decent idea, but how do you do this without damaging the base gasket?
I was thinking I would spray the bottom of the base gasket with sealant and lay it down, then put the block on and torque the head down to seat the gasket to the top case. Then I would remove the head and block and put the pistons on the rods and use the wood to help ease them into the cylinders. Would the wooden jig not then sit ontop ot the base gasket and damage it?
i used the wooden jig method..i had a guy at work make the jigs to spec as per the manual...they wont kill the base gasket....the only problem i encountered was that the legs on the wooden pcs seemed to be about an inch short....i had a second set of hands that built more than one small block chevy and we got it done....it wasnt a real bitch, but took longer than i thought it would....if it were me, i would nt go through your method.....just make sure cases are clean at gasket area ....i bought my jugs machined....you could probably flip yours upside down and make sure there is no warpage with a straightedge
or something similar....if the case tops are clean and the jugs are straight, gasket should not leak....mine didnt...just make sure if you replace the studs, you put the 3bond around the rear 4 after they are in.....
Please Log in or Create an account to join the conversation.
- 9am53
-
Topic Author
- Offline
- User
-
Registered
- homebrew, and some bbq
- Posts: 1787
- Thanks: 3
Re: A Newbies Adventures in Maintenanceland!
24 Nov 2009 17:38
I got out my shop manual and checked the actual ring gaps, it was 0.02 to 0.04 mm, all my rings were in spec, no filing needed. The oil rings were a bit on the large side, but this is likely to make extra room for the "concertina" ring. I started stripping the paint from my plastic stuff, and found that gasket remover worked really well at removing the paint and primer. I am down to basically plastic and a bit of primer here and there that I am going to sand off later. Next is stripping that tail and the tank!
Does anybody know what I should do regarding my above mentioned questions with the base gasket and wooden jigs etc.? I need to know before I move on. Thanks for all the feedback and help!
Does anybody know what I should do regarding my above mentioned questions with the base gasket and wooden jigs etc.? I need to know before I move on. Thanks for all the feedback and help!
'84 GPz900r
'71 CB350
s289.photobucket.com/albums/ll231/9am53/
'71 CB350
s289.photobucket.com/albums/ll231/9am53/
Please Log in or Create an account to join the conversation.
- 9am53
-
Topic Author
- Offline
- User
-
Registered
- homebrew, and some bbq
- Posts: 1787
- Thanks: 3
Re: A Newbies Adventures in Maintenanceland!
24 Nov 2009 17:44
keith1 wrote:
Cool, thanks Keith. In my 550 manual it explains the jig method, but there are no legs mentioned, just basically a 3/4" thick 2 prong fork to go around the conrod...you are saying that you would have made the jig taller? as in 1" or what? I have never had a bike that didn't leak like a sieve, so I am taking every precaution this time to make sure I don't have a leak, so I will be using some permatex on the base gasket even if it doesn't need it. thx
9am53 wrote:OK, I am done with the honing then. I am going to set my ring gaps tonight, 0.003-0.004" per inch of cylinder diameter right? My bore is 2.73", so my gaps should be 0.008-0.01 inches. This is for the top 2 rings with the rings in the bottom of the cylinder where there is the least amount of wear right? Regarding the oil rings, what is the gap for them?
I have read in various manuals and on here and other forums that I can use a hose clamp as a ring compressor, my question is how long do I compress the rings before I install them? I also have read that I can make a jig out of wood that will support the middle pistons upright while I put the block over them. This sounds like a decent idea, but how do you do this without damaging the base gasket?
I was thinking I would spray the bottom of the base gasket with sealant and lay it down, then put the block on and torque the head down to seat the gasket to the top case. Then I would remove the head and block and put the pistons on the rods and use the wood to help ease them into the cylinders. Would the wooden jig not then sit ontop ot the base gasket and damage it?
i used the wooden jig method..i had a guy at work make the jigs to spec as per the manual...they wont kill the base gasket....the only problem i encountered was that the legs on the wooden pcs seemed to be about an inch short....i had a second set of hands that built more than one small block chevy and we got it done....it wasnt a real bitch, but took longer than i thought it would....if it were me, i would nt go through your method.....just make sure cases are clean at gasket area ....i bought my jugs machined....you could probably flip yours upside down and make sure there is no warpage with a straightedge
or something similar....if the case tops are clean and the jugs are straight, gasket should not leak....mine didnt...just make sure if you replace the studs, you put the 3bond around the rear 4 after they are in.....
Cool, thanks Keith. In my 550 manual it explains the jig method, but there are no legs mentioned, just basically a 3/4" thick 2 prong fork to go around the conrod...you are saying that you would have made the jig taller? as in 1" or what? I have never had a bike that didn't leak like a sieve, so I am taking every precaution this time to make sure I don't have a leak, so I will be using some permatex on the base gasket even if it doesn't need it. thx
'84 GPz900r
'71 CB350
s289.photobucket.com/albums/ll231/9am53/
'71 CB350
s289.photobucket.com/albums/ll231/9am53/
Please Log in or Create an account to join the conversation.
- keith1
-
- Offline
- User
-
Registered
- Posts: 1655
- Thanks: 3
Re: A Newbies Adventures in Maintenanceland!
24 Nov 2009 17:50
9am53 wrote:
on my 1000, the prongs could have been longer......
keith1 wrote:9am53 wrote:OK, I am done with the honing then. I am going to set my ring gaps tonight, 0.003-0.004" per inch of cylinder diameter right? My bore is 2.73", so my gaps should be 0.008-0.01 inches. This is for the top 2 rings with the rings in the bottom of the cylinder where there is the least amount of wear right? Regarding the oil rings, what is the gap for them?
I have read in various manuals and on here and other forums that I can use a hose clamp as a ring compressor, my question is how long do I compress the rings before I install them? I also have read that I can make a jig out of wood that will support the middle pistons upright while I put the block over them. This sounds like a decent idea, but how do you do this without damaging the base gasket?
I was thinking I would spray the bottom of the base gasket with sealant and lay it down, then put the block on and torque the head down to seat the gasket to the top case. Then I would remove the head and block and put the pistons on the rods and use the wood to help ease them into the cylinders. Would the wooden jig not then sit ontop ot the base gasket and damage it?
i used the wooden jig method..i had a guy at work make the jigs to spec as per the manual...they wont kill the base gasket....the only problem i encountered was that the legs on the wooden pcs seemed to be about an inch short....i had a second set of hands that built more than one small block chevy and we got it done....it wasnt a real bitch, but took longer than i thought it would....if it were me, i would nt go through your method.....just make sure cases are clean at gasket area ....i bought my jugs machined....you could probably flip yours upside down and make sure there is no warpage with a straightedge
or something similar....if the case tops are clean and the jugs are straight, gasket should not leak....mine didnt...just make sure if you replace the studs, you put the 3bond around the rear 4 after they are in.....
Cool, thanks Keith. In my 550 manual it explains the jig method, but there are no legs mentioned, just basically a 3/4" thick 2 prong fork to go around the conrod...you are saying that you would have made the jig taller? as in 1" or what? I have never had a bike that didn't leak like a sieve, so I am taking every precaution this time to make sure I don't have a leak, so I will be using some permatex on the base gasket even if it doesn't need it. thx
on my 1000, the prongs could have been longer......
Please Log in or Create an account to join the conversation.
- keith1
-
- Offline
- User
-
Registered
- Posts: 1655
- Thanks: 3
Re: A Newbies Adventures in Maintenanceland!
24 Nov 2009 18:04
9am53 wrote:
i was warned about base gasket leaks, but never had a problem.....if everything is clean and straight, you should be good and remember there are o rings that slide over the sleeves and get squished between the cases and the jugs.....make sure you replace them.....
keith1 wrote:9am53 wrote:OK, I am done with the honing then. I am going to set my ring gaps tonight, 0.003-0.004" per inch of cylinder diameter right? My bore is 2.73", so my gaps should be 0.008-0.01 inches. This is for the top 2 rings with the rings in the bottom of the cylinder where there is the least amount of wear right? Regarding the oil rings, what is the gap for them?
I have read in various manuals and on here and other forums that I can use a hose clamp as a ring compressor, my question is how long do I compress the rings before I install them? I also have read that I can make a jig out of wood that will support the middle pistons upright while I put the block over them. This sounds like a decent idea, but how do you do this without damaging the base gasket?
I was thinking I would spray the bottom of the base gasket with sealant and lay it down, then put the block on and torque the head down to seat the gasket to the top case. Then I would remove the head and block and put the pistons on the rods and use the wood to help ease them into the cylinders. Would the wooden jig not then sit ontop ot the base gasket and damage it?
i used the wooden jig method..i had a guy at work make the jigs to spec as per the manual...they wont kill the base gasket....the only problem i encountered was that the legs on the wooden pcs seemed to be about an inch short....i had a second set of hands that built more than one small block chevy and we got it done....it wasnt a real bitch, but took longer than i thought it would....if it were me, i would nt go through your method.....just make sure cases are clean at gasket area ....i bought my jugs machined....you could probably flip yours upside down and make sure there is no warpage with a straightedge
or something similar....if the case tops are clean and the jugs are straight, gasket should not leak....mine didnt...just make sure if you replace the studs, you put the 3bond around the rear 4 after they are in.....
Cool, thanks Keith. In my 550 manual it explains the jig method, but there are no legs mentioned, just basically a 3/4" thick 2 prong fork to go around the conrod...you are saying that you would have made the jig taller? as in 1" or what? I have never had a bike that didn't leak like a sieve, so I am taking every precaution this time to make sure I don't have a leak, so I will be using some permatex on the base gasket even if it doesn't need it. thx
i was warned about base gasket leaks, but never had a problem.....if everything is clean and straight, you should be good and remember there are o rings that slide over the sleeves and get squished between the cases and the jugs.....make sure you replace them.....
Please Log in or Create an account to join the conversation.
- PLUMMEN
-
- Offline
- User
-
Registered
- Posts: 7986
- Thanks: 104
Re: A Newbies Adventures in Maintenanceland!
24 Nov 2009 19:40
9am53 wrote: ")
coppercoat your base gasket and drop it on,thereshould be enough chamfer in bottem of stock bore to squeeze rings with your fingers to get em to go.be carefull not to force the cylinder on thereI got out my shop manual and checked the actual ring gaps, it was 0.02 to 0.04 mm, all my rings were in spec, no filing needed. The oil rings were a bit on the large side, but this is likely to make extra room for the "concertina" ring. I started stripping the paint from my plastic stuff, and found that gasket remover worked really well at removing the paint and primer. I am down to basically plastic and a bit of primer here and there that I am going to sand off later. Next is stripping that tail and the tank!
Does anybody know what I should do regarding my above mentioned questions with the base gasket and wooden jigs etc.? I need to know before I move on. Thanks for all the feedback and help!
Still recovering,some days are better than others.
Please Log in or Create an account to join the conversation.
- 9am53
-
Topic Author
- Offline
- User
-
Registered
- homebrew, and some bbq
- Posts: 1787
- Thanks: 3
Re: A Newbies Adventures in Maintenanceland!
25 Nov 2009 04:19
PLUMMEN wrote:
So you are saying not to use the wooden jig? I thought you neded to keep the pistons in place to help put them into the bores. Would using a hose clamp to squeeze the rings for 5 minutes help in putting them in as well?
9am53 wrote:coppercoat your base gasket and drop it on,thereshould be enough chamfer in bottem of stock bore to squeeze rings with your fingers to get em to go.be carefull not to force the cylinder on thereI got out my shop manual and checked the actual ring gaps, it was 0.02 to 0.04 mm, all my rings were in spec, no filing needed. The oil rings were a bit on the large side, but this is likely to make extra room for the "concertina" ring. I started stripping the paint from my plastic stuff, and found that gasket remover worked really well at removing the paint and primer. I am down to basically plastic and a bit of primer here and there that I am going to sand off later. Next is stripping that tail and the tank!
Does anybody know what I should do regarding my above mentioned questions with the base gasket and wooden jigs etc.? I need to know before I move on. Thanks for all the feedback and help!
So you are saying not to use the wooden jig? I thought you neded to keep the pistons in place to help put them into the bores. Would using a hose clamp to squeeze the rings for 5 minutes help in putting them in as well?
'84 GPz900r
'71 CB350
s289.photobucket.com/albums/ll231/9am53/
'71 CB350
s289.photobucket.com/albums/ll231/9am53/
Please Log in or Create an account to join the conversation.
- PLUMMEN
-
- Offline
- User
-
Registered
- Posts: 7986
- Thanks: 104
Re: A Newbies Adventures in Maintenanceland!
25 Nov 2009 07:33
im a relic,i dont normally use any kind of clamps. :laugh:
Still recovering,some days are better than others.
Please Log in or Create an account to join the conversation.
- 9am53
-
Topic Author
- Offline
- User
-
Registered
- homebrew, and some bbq
- Posts: 1787
- Thanks: 3
Re: A Newbies Adventures in Maintenanceland!
28 Nov 2009 15:51 - 28 Nov 2009 15:53
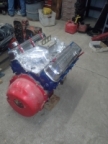
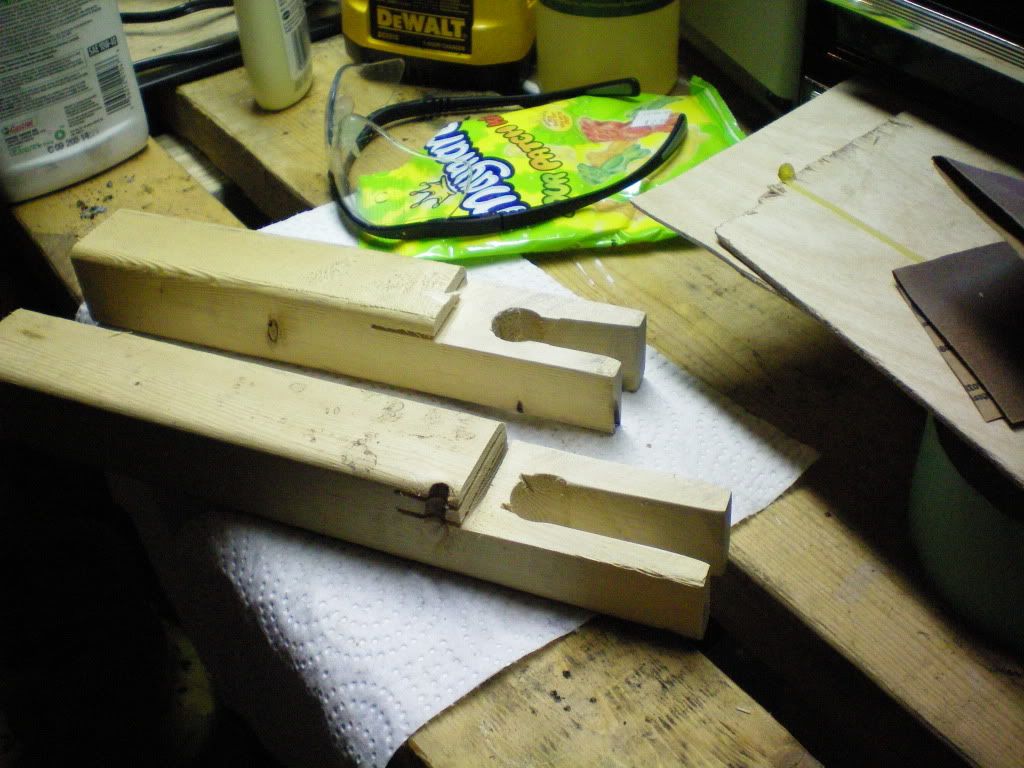
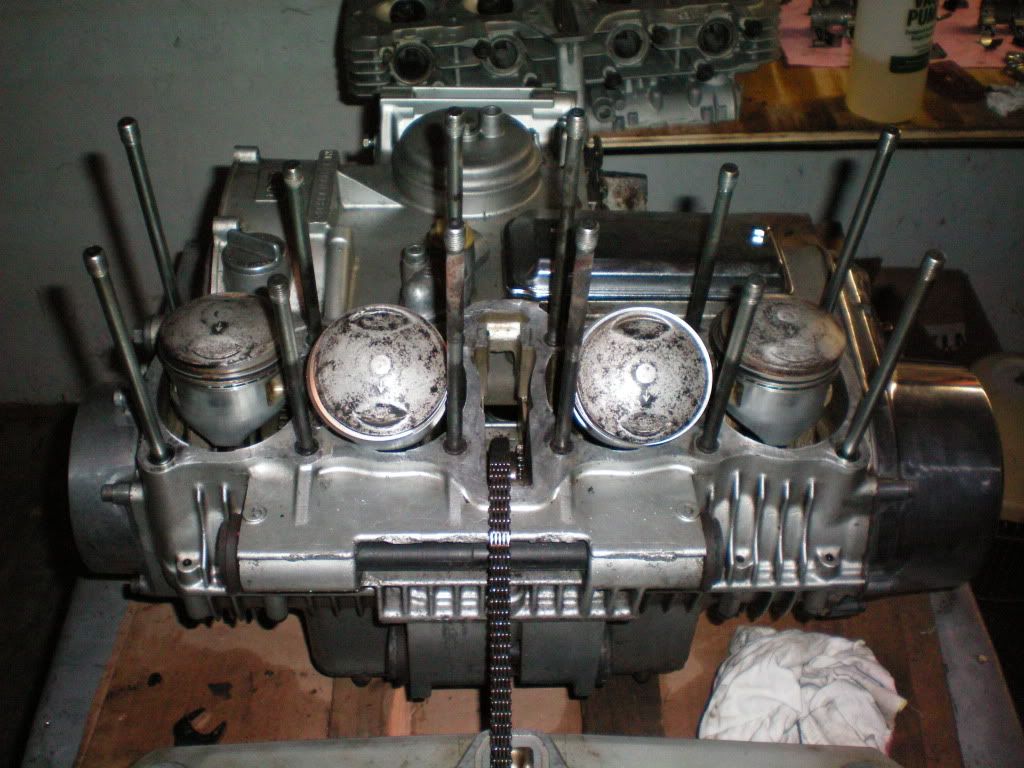
The other day I intended to put my block back on the bike, but I forgot it at home 'cause I'm a tard. I did manage to make some of those forks that my 550 manual describes to help put the pistons in:
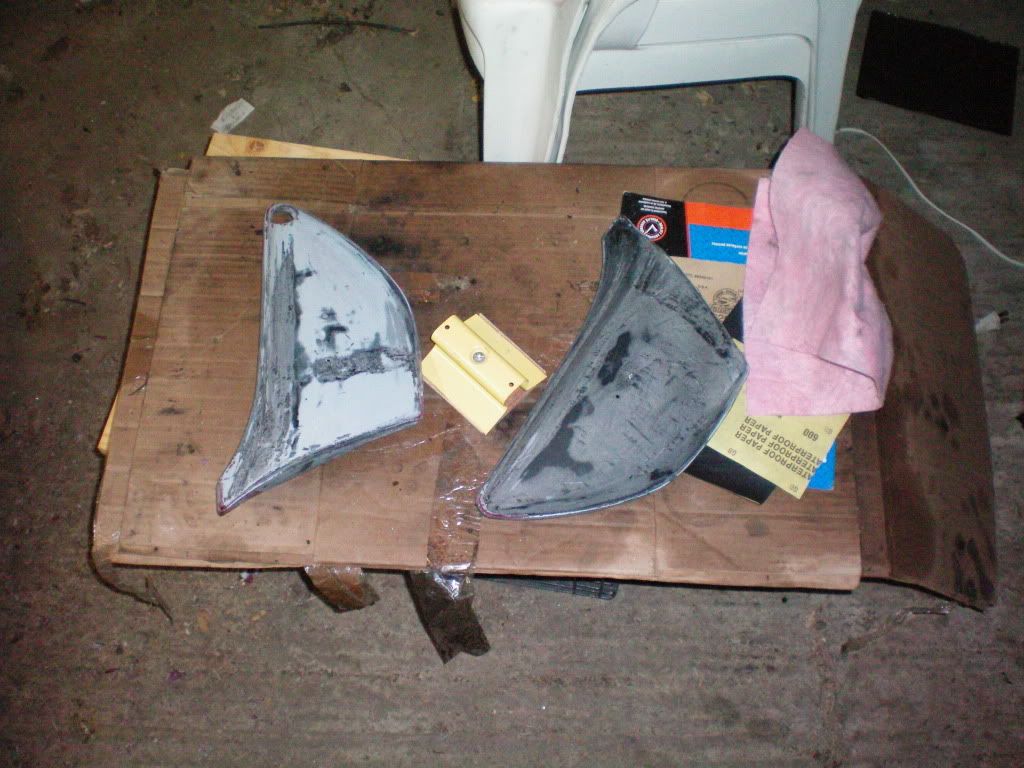
They seem to do a good job of keeping the pistons straight up. After this I got to work on prepping my sidecovers for paint. As I think I mentioned earlier I used gasket remover to take the old paint off and it worked really well. After scraping all the paint off I set to sanding. Here I am in the middle of sanding.
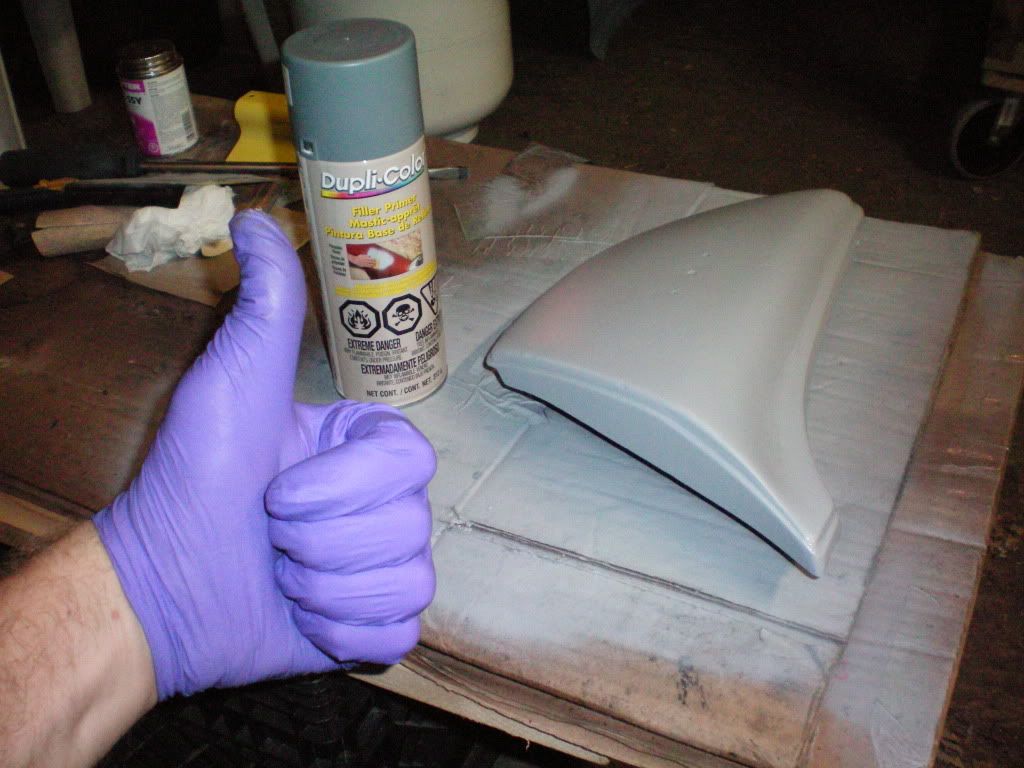
After I sanded that down with 220 grit to bare plastic, I smoothed it down with 400 grit. I then hit it with some adhesion promoter and put 6 light coats of filler primer:
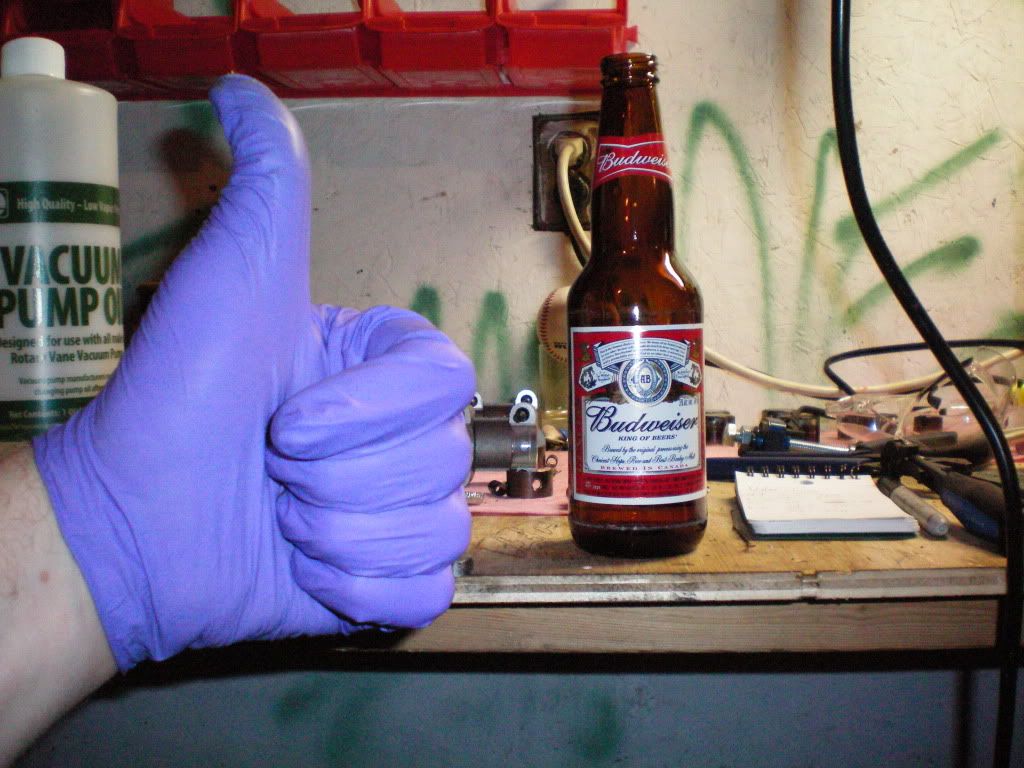
After sniffing the paint fumes I decided to drink a few wobbly pops:
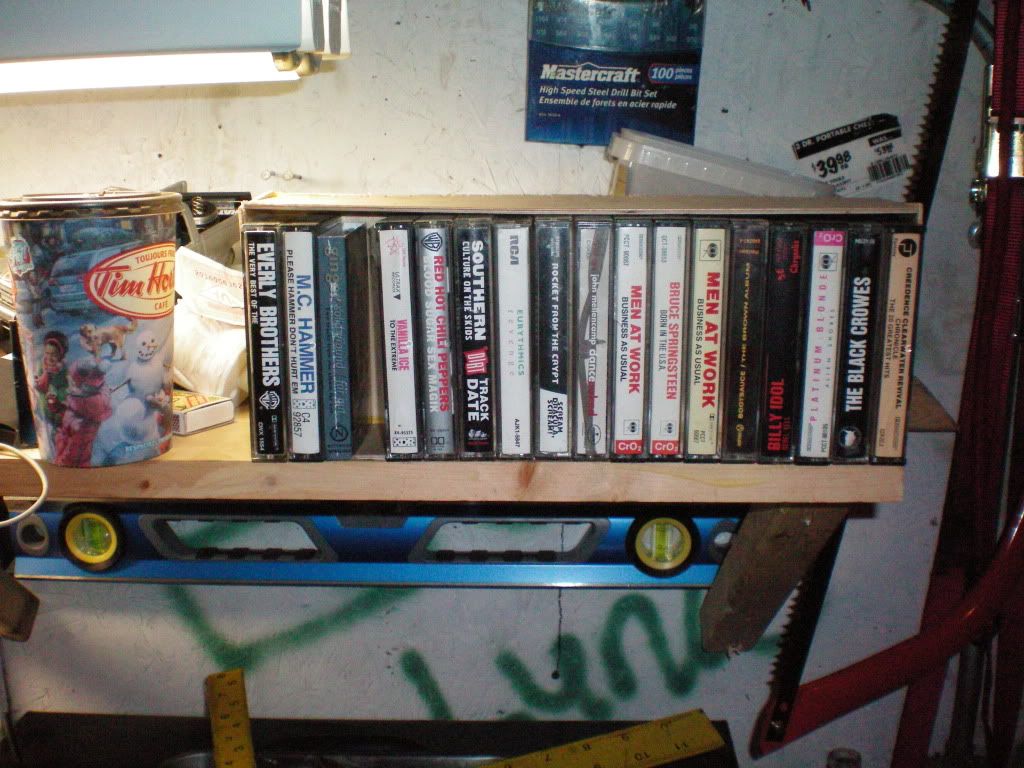
This distracted me and I decided to build a box for my wicked cool cassette collection:
Before I left I did notice something. I looked at my base gasket and compared it to the surface it will be mating to on the crankcase. There is that little oil galley at the stud in this picture:
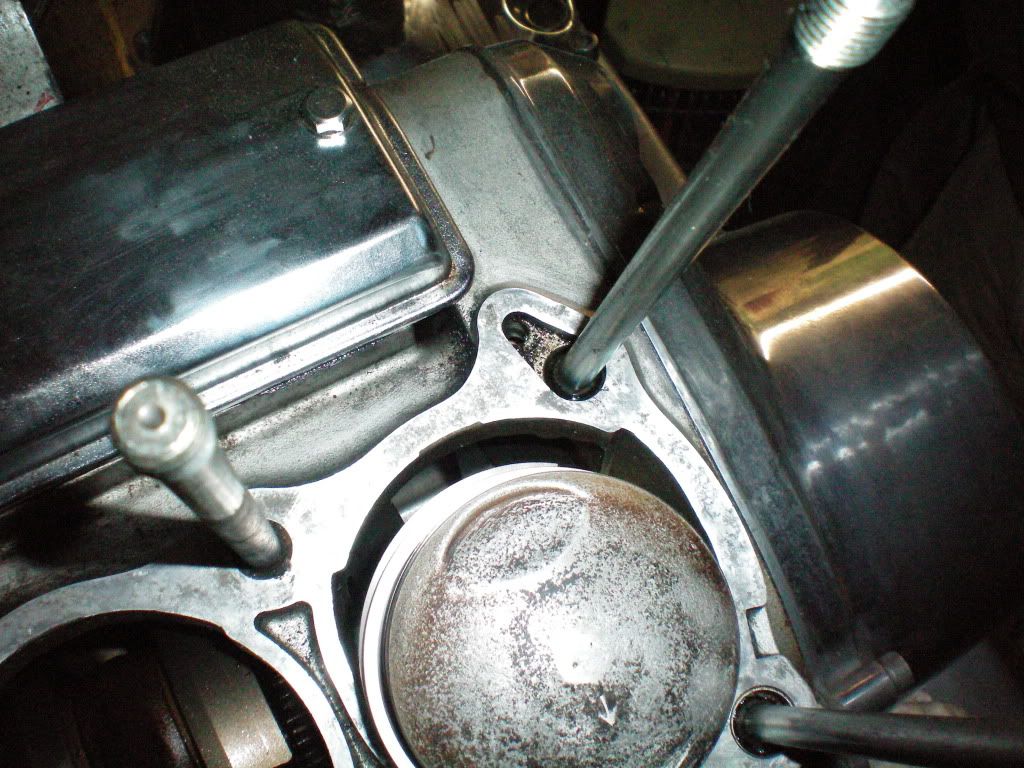
The gasket doesn't have this cutout, it just has a hole for the stud, is this ok, or do I need to cut that little notch out?
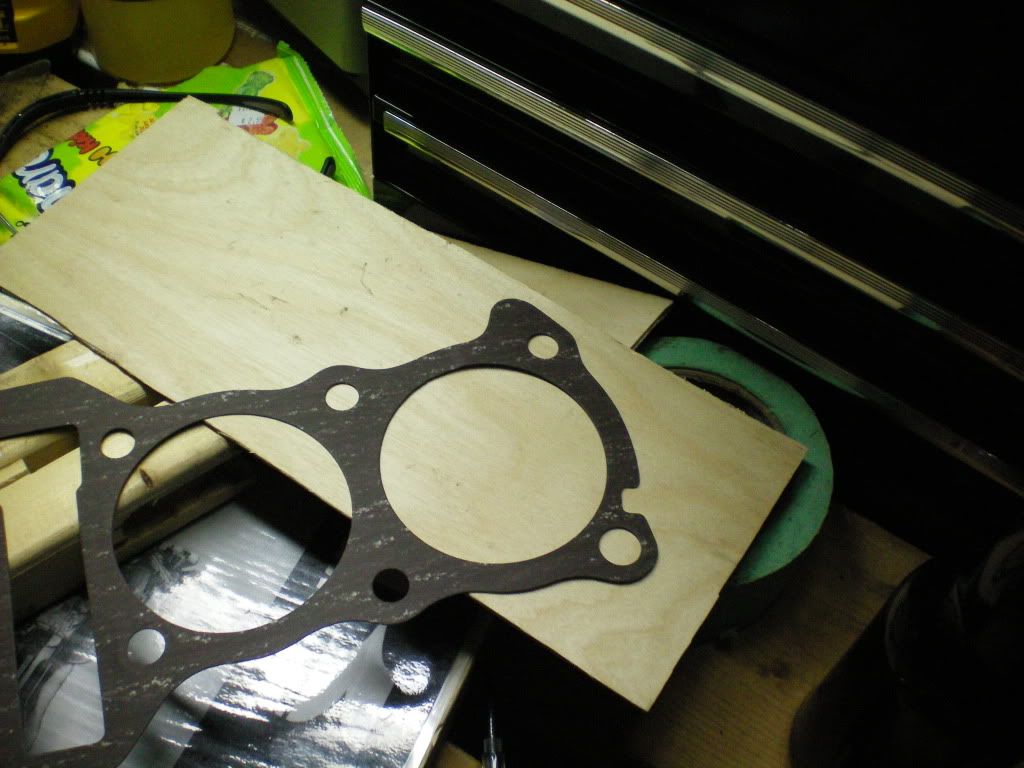
One other thing, is there a top or bottom to the gasket? one side is more brownish than the other, but other than the colour they look identical. thanks. Tomorrow will basically be my first day of putting things back together, so my first day to mess things up!
They seem to do a good job of keeping the pistons straight up. After this I got to work on prepping my sidecovers for paint. As I think I mentioned earlier I used gasket remover to take the old paint off and it worked really well. After scraping all the paint off I set to sanding. Here I am in the middle of sanding.
After I sanded that down with 220 grit to bare plastic, I smoothed it down with 400 grit. I then hit it with some adhesion promoter and put 6 light coats of filler primer:
After sniffing the paint fumes I decided to drink a few wobbly pops:
This distracted me and I decided to build a box for my wicked cool cassette collection:
Before I left I did notice something. I looked at my base gasket and compared it to the surface it will be mating to on the crankcase. There is that little oil galley at the stud in this picture:
The gasket doesn't have this cutout, it just has a hole for the stud, is this ok, or do I need to cut that little notch out?
One other thing, is there a top or bottom to the gasket? one side is more brownish than the other, but other than the colour they look identical. thanks. Tomorrow will basically be my first day of putting things back together, so my first day to mess things up!
'84 GPz900r
'71 CB350
s289.photobucket.com/albums/ll231/9am53/
'71 CB350
s289.photobucket.com/albums/ll231/9am53/
Last edit: 28 Nov 2009 15:53 by 9am53.
Please Log in or Create an account to join the conversation.
Moderators: Street Fighter LTD