
Search Results (Searched for: gs swing arm)
04 636 swingarm on 86 Police was created by Zilla
01 Mar 2021 09:22
Hey all, I came across a 04 636 swing arm, I mocked it up just to see what all I would need to do, I know I got to find a local machine shop to fix pivot bushing I have an idea of what to tell them from pics I’ve found here, but I ain’t sure on my back brake caliper will be cause the shock lugs need to be there ( didn’t want the mono shock). My back master cylinder isn’t gonna work either, need some direction from more experience ppl. I’ll try and put pics in.
Replied by slayer61 on topic Mrs. slayer's GPz1100 refresh & upgrade
09 Feb 2021 07:23 - 09 Feb 2021 07:24
Small update... the Suzuki swingarm is firmly mounted to the GPz for the first time. Wheel bearings have arrived to accommodate the larger Suzuki axle. The wheel has been disassembled and I'm headed to the fabricator's shop Saturday morning to make up spacers for inside & outside the wheel & get the wheel centered in the swingarm.
![20210207_123419[1].jpg](/forum/attachment/144144)
![20210207_123435[1].jpg](/forum/attachment/144145)
And I started bleeding the front brakes... a tedious process with stone age tools & a completely empty system.
Onwards!
And I started bleeding the front brakes... a tedious process with stone age tools & a completely empty system.
Onwards!
Drewgraham89 wrote: I would be fine with 18x3.5 I will probably be going with "sun" wheels. So from what I am gathering is any 40 spoke rim would work? Or does it have to be drilled in a certain fashion to be laced to the hub? Any idea on a spoke length? Tire size for a 18x3.5 on a stock swing arm? This is a cafe build getting an R1 front end assembly with a spoked rim. I have yet to purchase the rim and stem adapter so if someone has a good combination front rear that would be beneficial.
Ideally rims are drilled for the application. its possible to find rims that are drilled close enough that they can work but its not preferred. Additionally rims that are over something like 2.5"W are "deep draw" and require shorter spokes. Sun Rims are Buchanan's in house brand. Might as well call them and get it drilled correctly. A 140/70/18 is a popular choice for resto mods and will fit a 3.5"Rim. Any wider and you will end up with too much tire (for a 18" rim). Not sure if that will clear the stock 650 swingarm, however it clears a KZ1000 which has the same stock tire sizes as a 650.
There are many geometry changes occurring when you swap for that R1 front end. you need to check rake and trail numbers at the bare minimum. You can then use the front tire height to adjust to where you need to be. Many modern fork swaps are too short and the triple trees have too little fork offset to be effective without modifications. I am not familiar with R1 geometry so do your research - there is a lot more at play here than simply swapping forks.
I will say the weakest link link these bikes is the shocks and then the swing arm. without improving those as well any potential gains to suspension performance will be minimal. Its like skipping leg day at the gym, lol. Personally I would rather have a custom pair of shocks and emulators/springs in the stock forks than a USD front end and stock rear end. however if you are after the look than that is something else.
I’d say your best bet is to call Buchanan. There are different spoke patterns. Which would require differs spoke length. I don’t think the hub matters as long as it’s for the same number spokes, its the spoke pattern the rim is set up for. The hole direction needs to be correct on the rim to match the spoke pattern. Then that pattern will dictate the spoke length. Way beyond what I know. Do yourself a favor and call the experts before you buy. [hr]EDIT, sorry I just noticed you had a drum rear, this option won’t work. There is also the option of finding a rear R1 wheel and swapping out the bearings or axle with custome spacers so the R1 wheel would fit your swing arm
1981 Kawasaki KZ1000 frame....can I use 1977 tank/side covers/tail piece? was created by MotorCityMN
27 Jan 2021 08:45 MotorCityMN
Hello all,
First post. Greetings from the Motor City.
AS I am a huge Mad Max / Road Warrior fan and grew up with Kawaski Kz's (I'm 53), I'm going to build a RestoMod KZ1000. I am in process of purchasing a 1981 KZ1000, that has allready had new rear swingarm setup. My question is: is there much of a frame difference between the 1981 and 1977-78 Kawasakis? I'm also looking at buying a 1977 parts bike with good tank/rear tail fin/side panels, and I'd like to install on the 1981 frame.....can anyone give me any feedback as to whether they will attach ok?
Restoring a 1976 Z900 A4 was created by dancragin
20 Jan 2021 12:20
dancragin
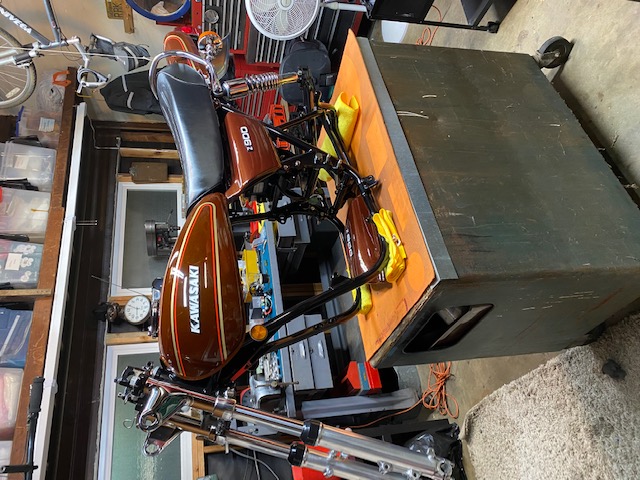
Thought you folks might be interested. In my younger days I restored lots of interesting bikes. A H2R racebike, Seeley Suzuki TR750, Rickman KZ 900, Suzuki Rotary and a Rokon Ranger to name a few. Getting married and raising a family ended that.
Recently one of my clients gave me a 1976 KZ900 that was completely worn out , but completely original. My goal was to do a complete frame up restoration but improve on anything I could to make the bike better. The motor was completely rebuilt with all the good stuff, crank welded and all the items related to the cam control updated,, better clutch actuator and such. I upgrad
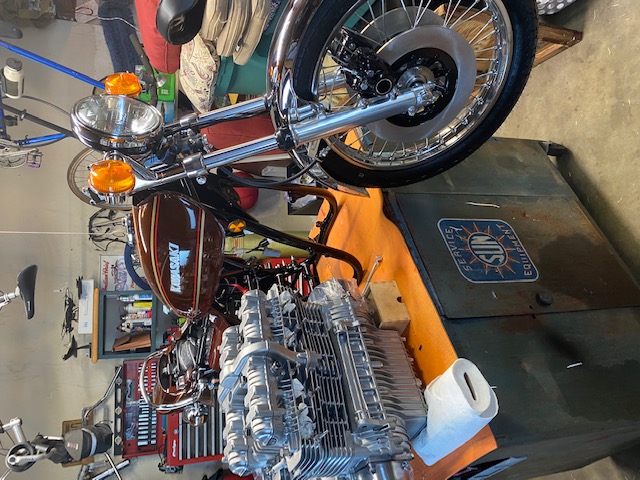
 ed to Dyna ignition and coils.
The front forks were rebuilt with all new parts and Racetech emulators, tapered steering head bearings, swing arm needle bearings and stock looking ICON adjustable shocks.
Wheels were redone and new bearing installed, upgraded new style period type tires. Z900 dual disc conversion. I used the shorter turn signal stems and slightly lower period type handle bars.
I have to complete 4 pipe system, stock airbox and restored stock carburetors.
Its a work in process and keeping me sane through this covid mess. Here are a few pictures. If any one finds this interesting,
I can keep reporting on the progress.
Recently one of my clients gave me a 1976 KZ900 that was completely worn out , but completely original. My goal was to do a complete frame up restoration but improve on anything I could to make the bike better. The motor was completely rebuilt with all the good stuff, crank welded and all the items related to the cam control updated,, better clutch actuator and such. I upgrad
The front forks were rebuilt with all new parts and Racetech emulators, tapered steering head bearings, swing arm needle bearings and stock looking ICON adjustable shocks.
Wheels were redone and new bearing installed, upgraded new style period type tires. Z900 dual disc conversion. I used the shorter turn signal stems and slightly lower period type handle bars.
I have to complete 4 pipe system, stock airbox and restored stock carburetors.
Its a work in process and keeping me sane through this covid mess. Here are a few pictures. If any one finds this interesting,
I can keep reporting on the progress.
Replied by slayer61 on topic Mrs. slayer's GPz1100 refresh & upgrade
18 Jan 2021 08:18
So the majority of the front end components have arrived & dry fitted for the first time. Pretty excited that the wheel & brakes from an '84 bolted right up to her '81. Small issue with the speedo drive, but I'm sure evilbay has what I need. 
![20210115_145701[1].jpg](/forum/attachment/143408) The fender stands a little tall of the 18" front wheel, but she's not opposed to it. I offered to drop it down a little, but she likes it as is... for now.
The fender stands a little tall of the 18" front wheel, but she's not opposed to it. I offered to drop it down a little, but she likes it as is... for now.
![20210115_145652[1].jpg](/forum/attachment/143409)
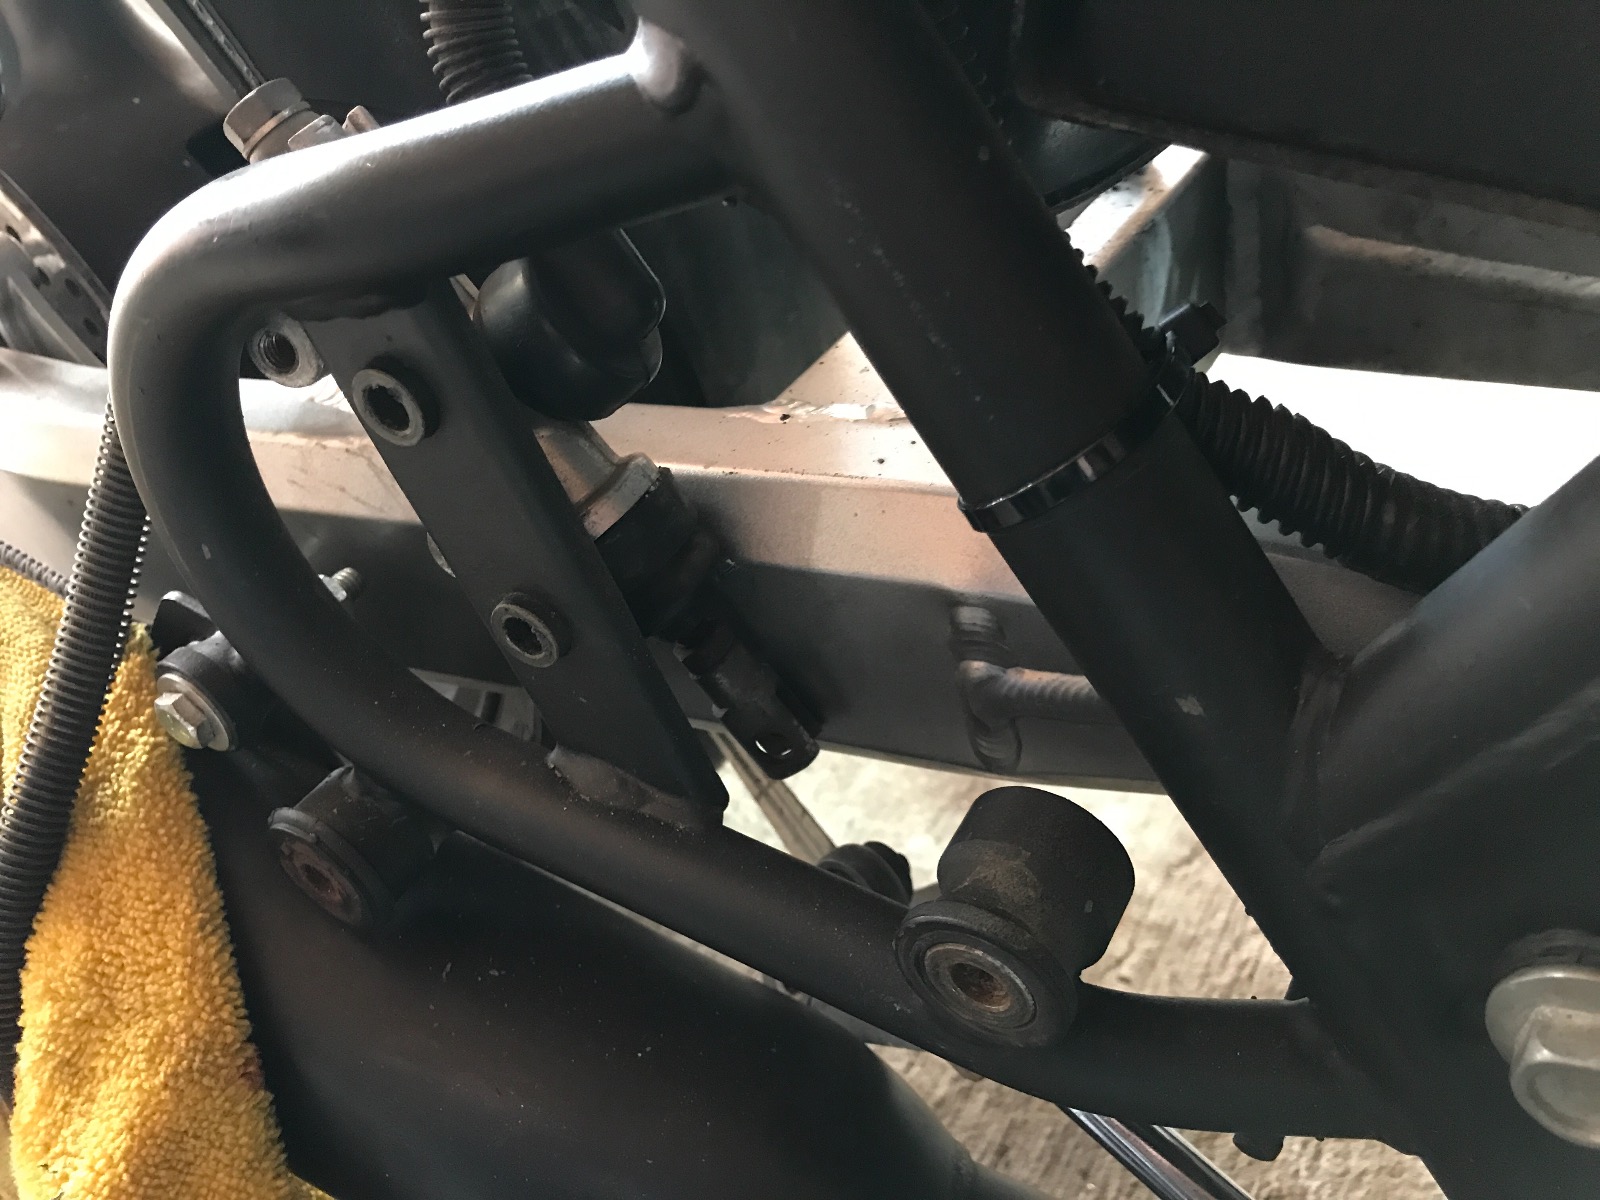
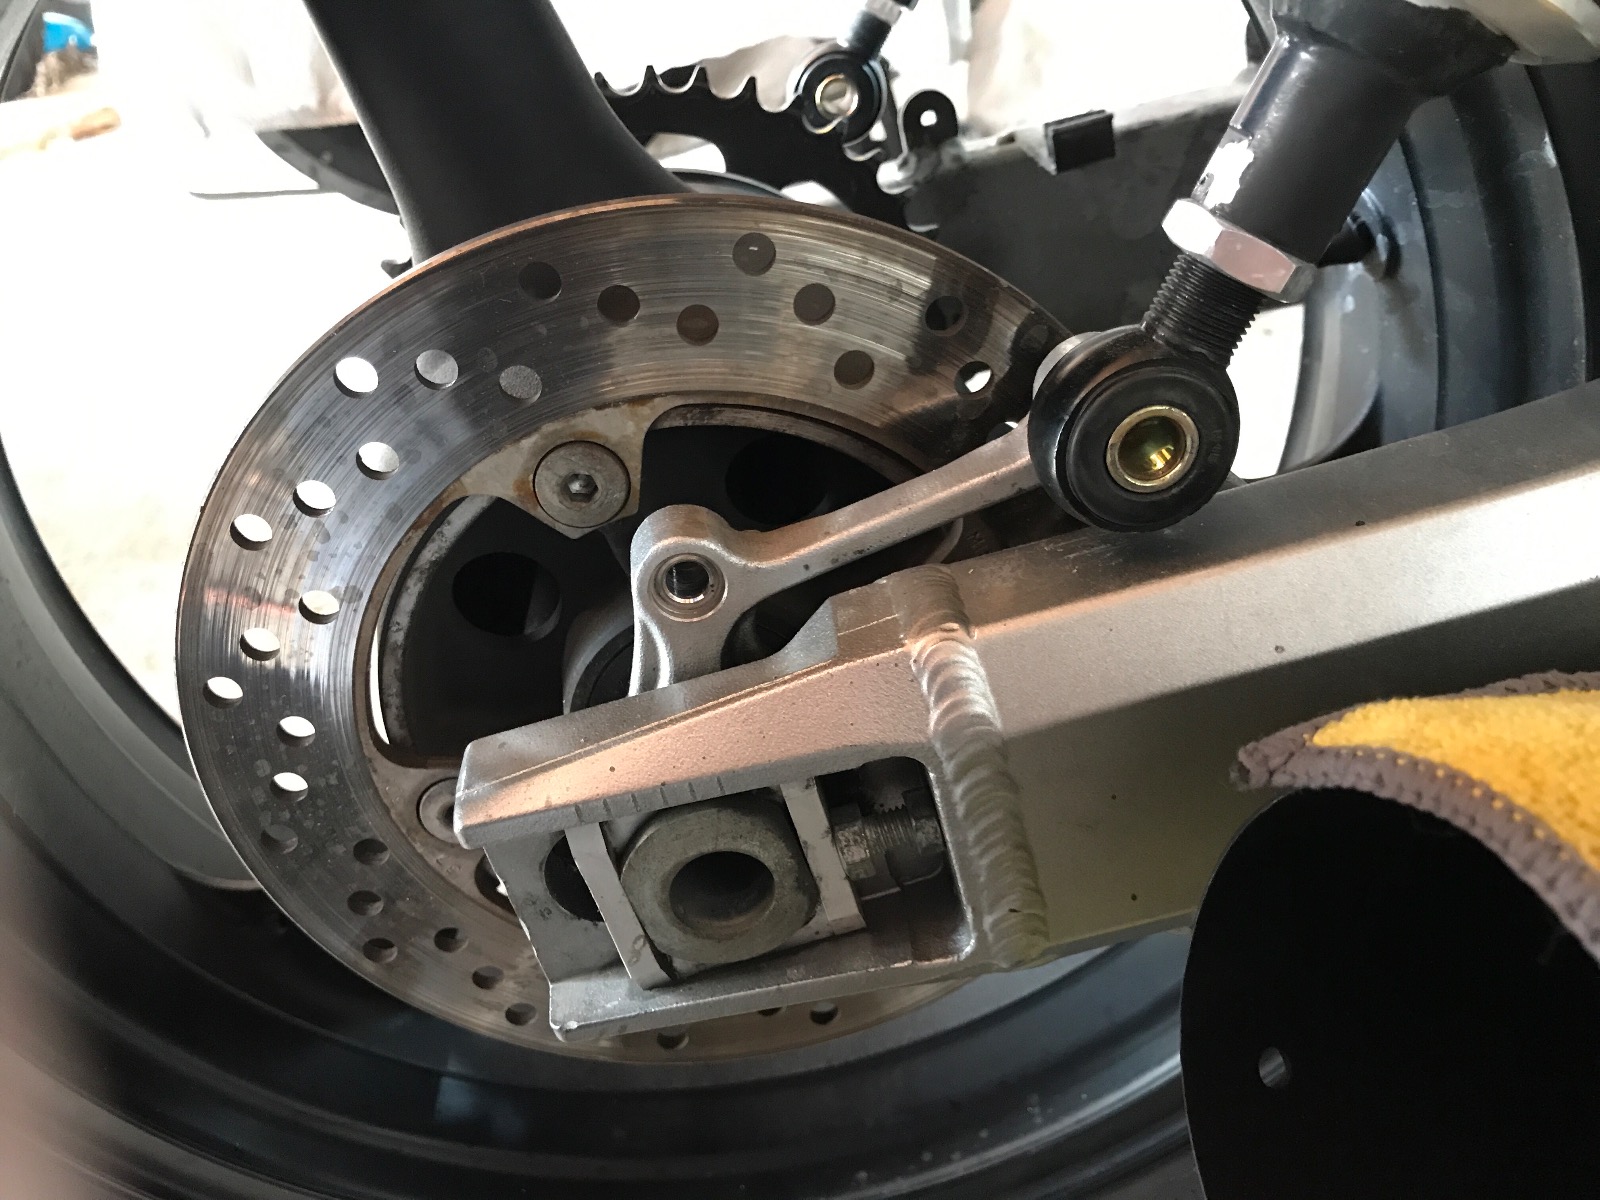
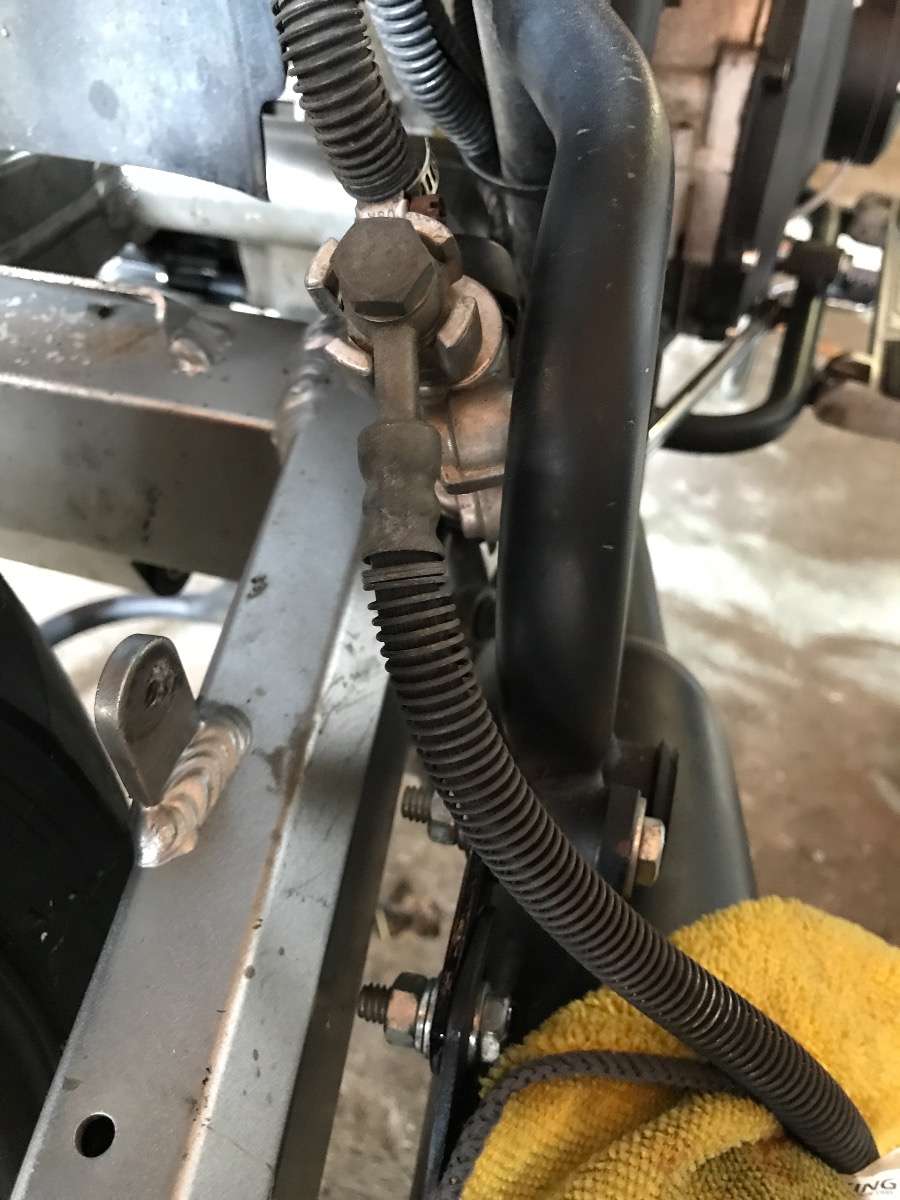
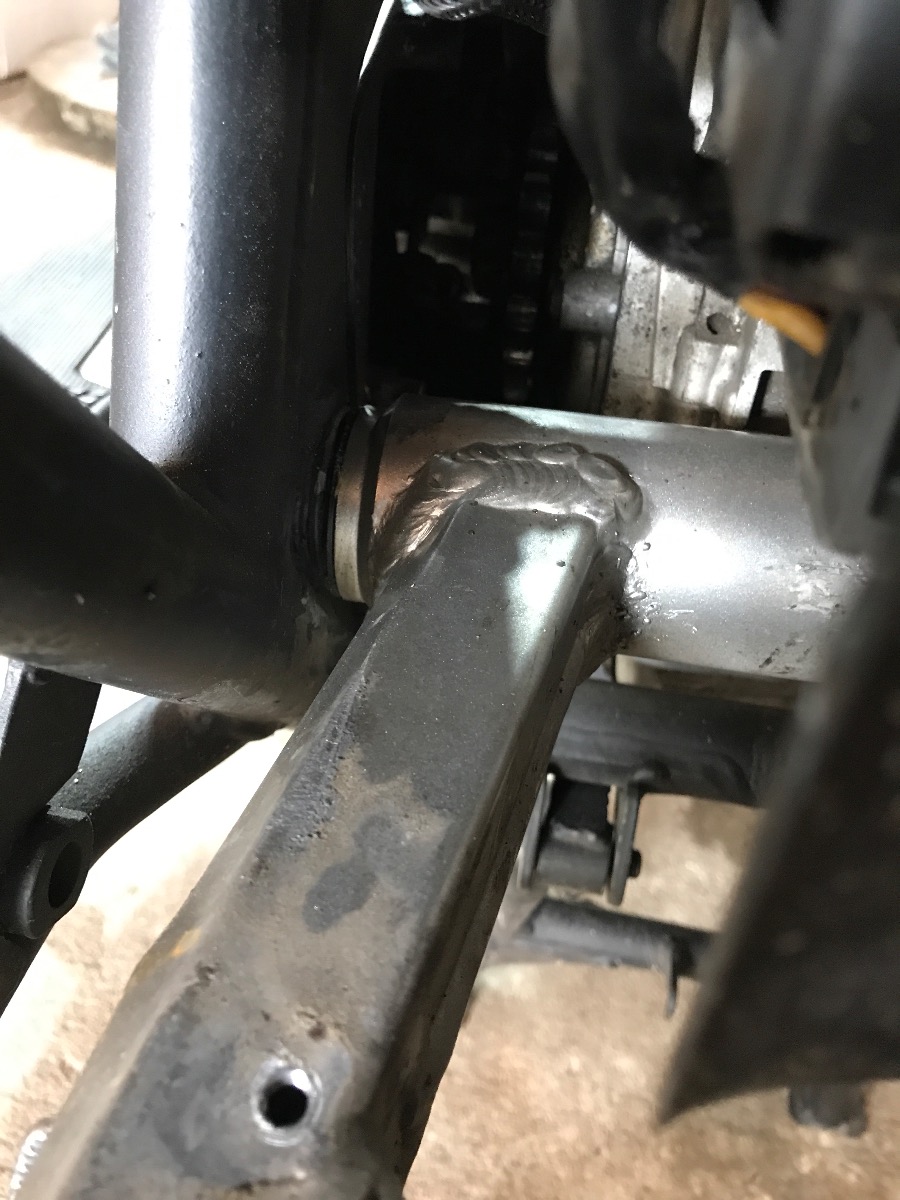
Also set the GS swingarm in for the first time. There is a little interference with the battery box/brake stay, but nothing a hacksaw won't fix.
![20210115_165247[1].jpg](/forum/attachment/143410)
![20210115_165320[1].jpg](/forum/attachment/143411)
Be safe guys.
Also set the GS swingarm in for the first time. There is a little interference with the battery box/brake stay, but nothing a hacksaw won't fix.
Be safe guys.
Replied by z1kzonly on topic 1976 Kz 900 A4
16 Jan 2021 23:30
Another project, I am going to paint the black in spokes. They are bringing some big bucks! Those were on the red dragbike when I bought it. That's the same bike with the spokes and GS1100 swing arm.
Replace Starter with Battery was created by steckrca
11 Jan 2021 19:24
steckrca
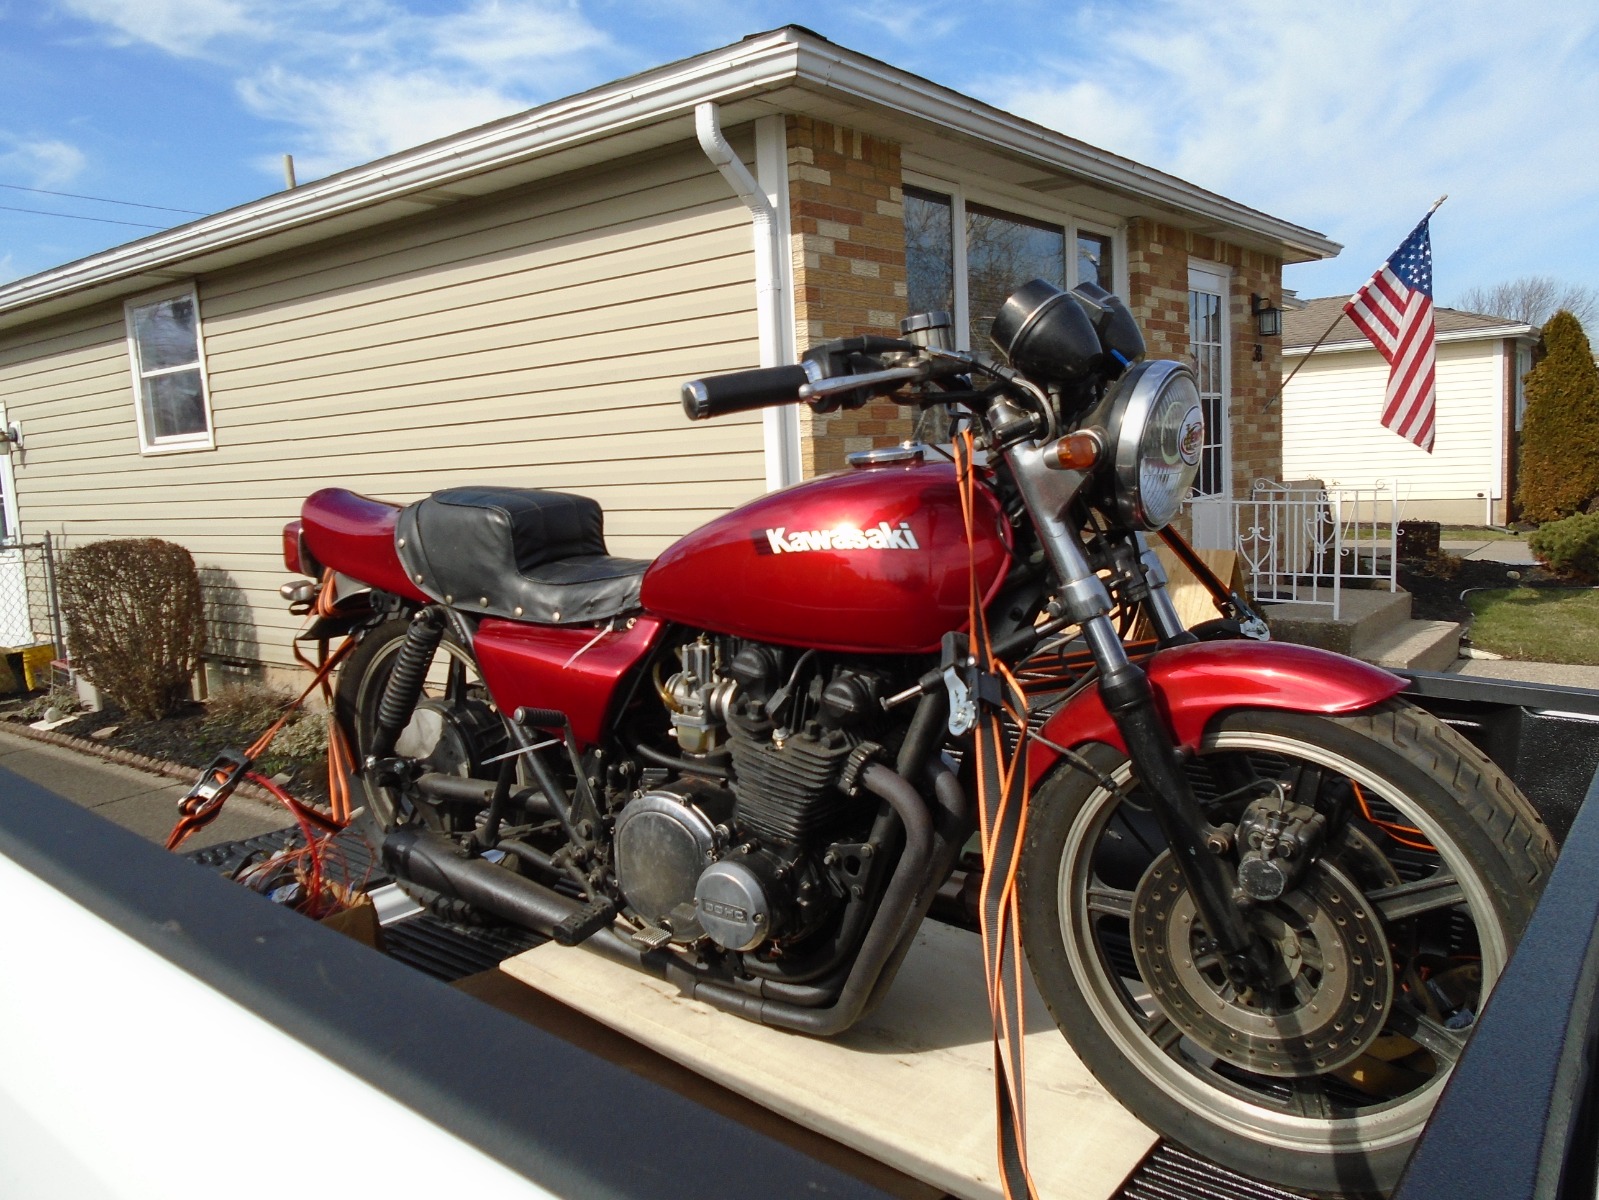
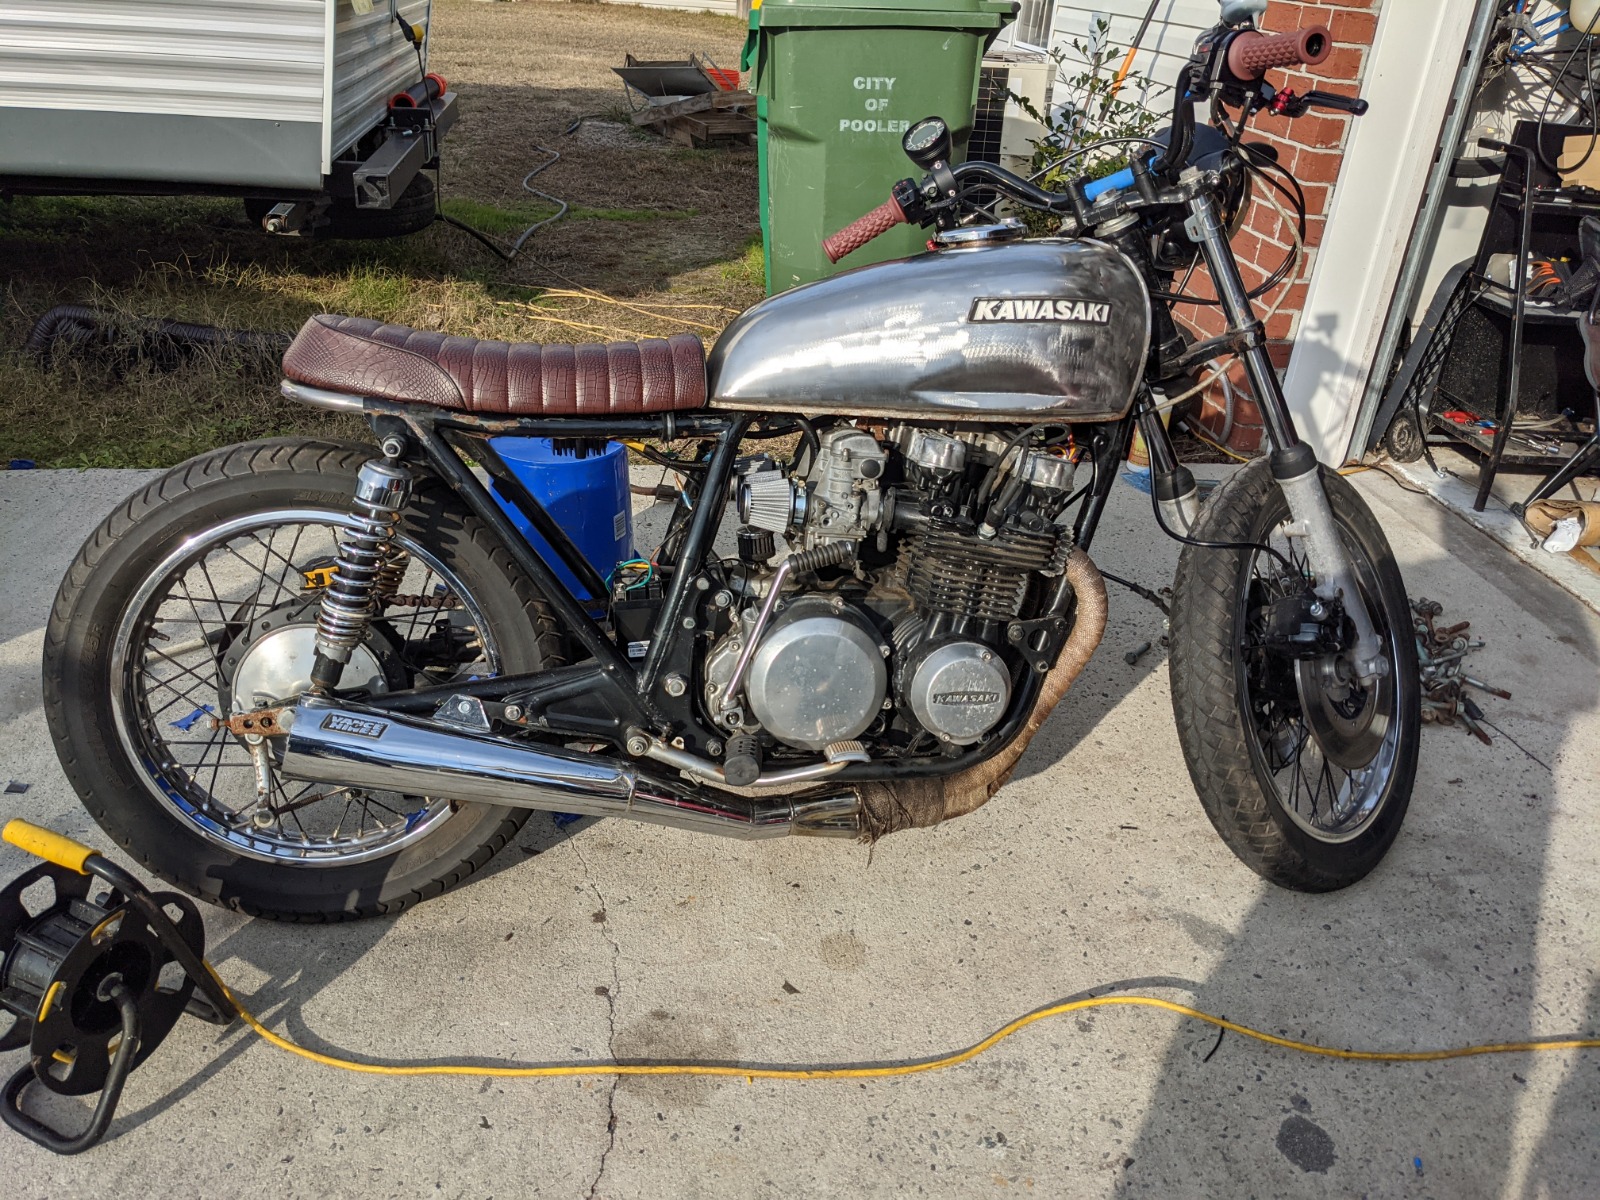
Hey everyone! Long time listener, first time caller. This board has been immensely helpful as I've worked on my 650.
Got the bike a couple months ago and have been steadily working on it. Guy got it on trade and wanted it gone. Someone had tried to turn it into a cafe racer so the frame was already bobbed--don't crucify me for having a bobbed 650. So far I've rewired the whole thing, all new forward controls, new front turn signals, replaced rear brake linkage, front pegs, and shifter, rebuilt carbs, begun rewrapping the 4into1 header, and the list goes on and on. She runs well but need to sync the carbs when my sync kit comes in.
I was out in the garage just looking at the bike trying to figure out a better place for the battery than zip tied to the front end of the swingarm (this was a temporary spot). Then I noticed the gaping hole where the starter used to be. A couple measurements and a few bolts later, the starter is damn near a PERFECT fit in the starter hole. I ended up getting a Anti-Gravity AG-AT7B-BS-RS along with a Rick's reg/rect. I ended up facing the positive out, negative in. Yes, servicing anything electrical will be a pain in the ass, but it keeps the area under the seat nice and clean.
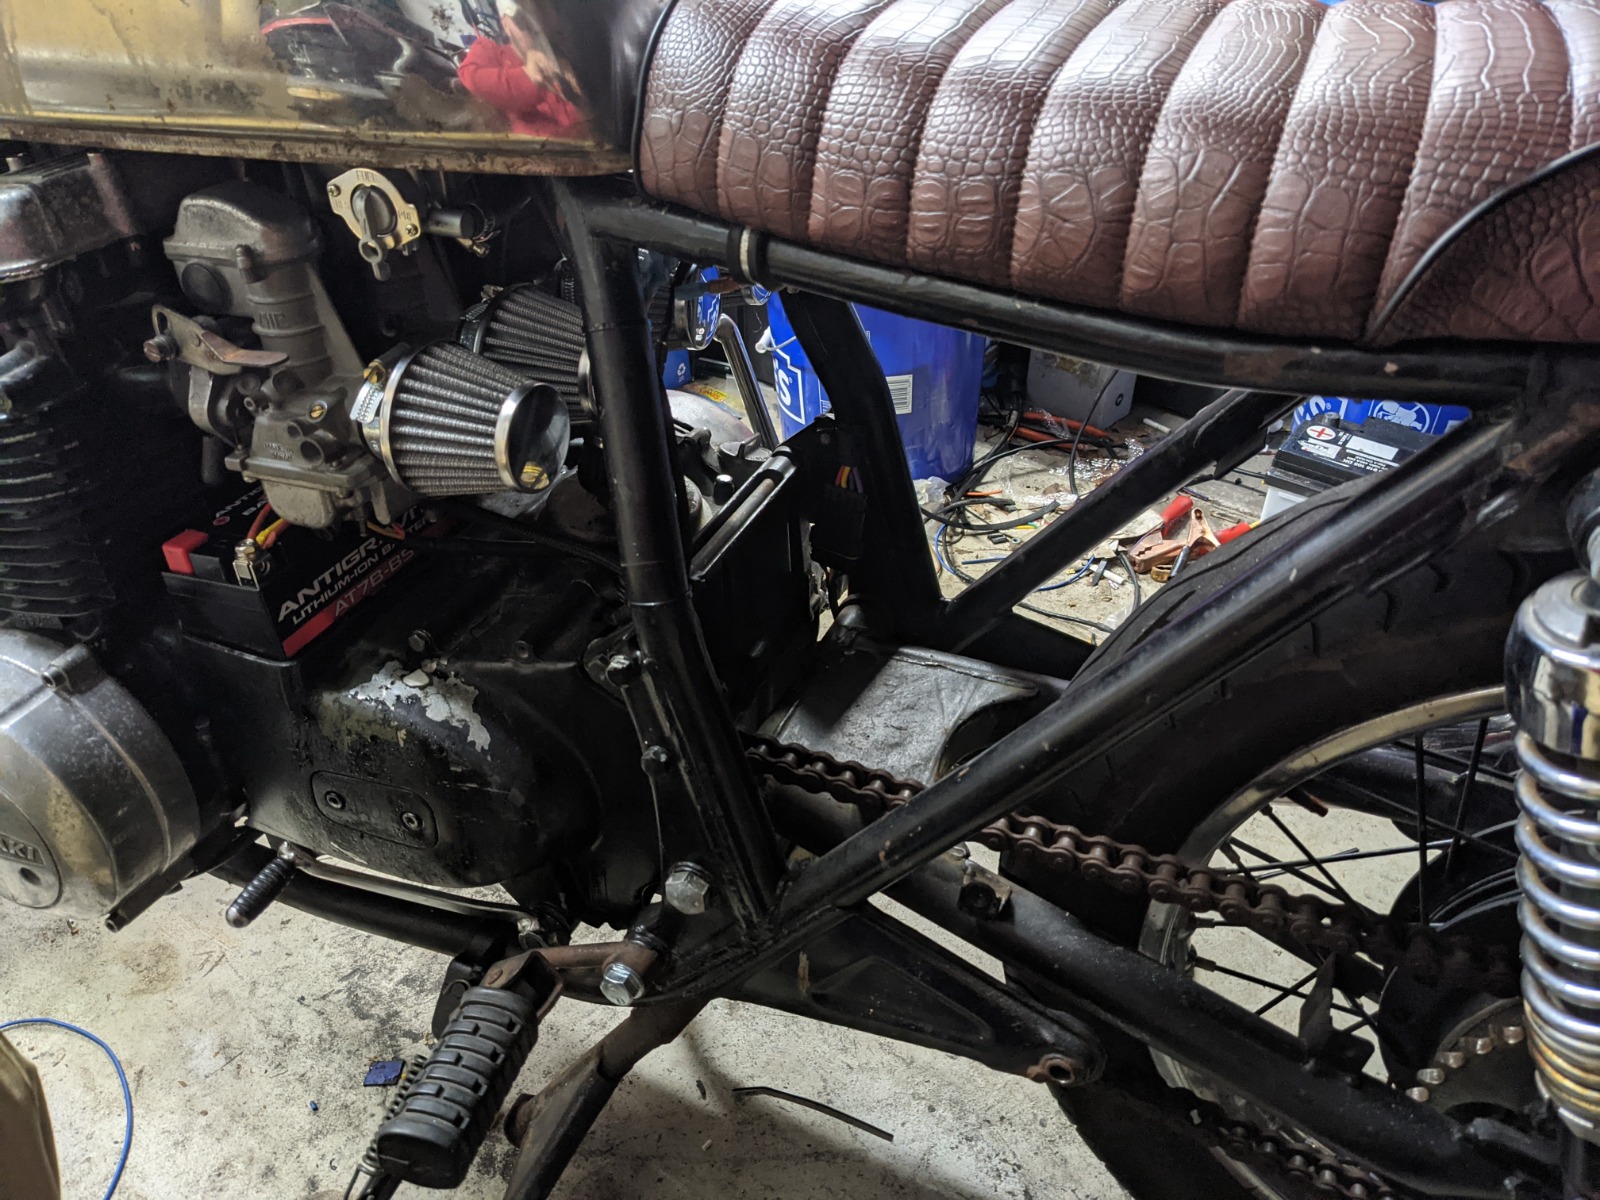
Looking forward to the day I'll have everything to a point where I can actually ride! A bit of welding, motorcycle license (not my first bike but i've never been legal), and a fresh chain and I'll be ready to go.
Here's how it sat on Sunday, before moving the battery. Suggestions welcome.
Got the bike a couple months ago and have been steadily working on it. Guy got it on trade and wanted it gone. Someone had tried to turn it into a cafe racer so the frame was already bobbed--don't crucify me for having a bobbed 650. So far I've rewired the whole thing, all new forward controls, new front turn signals, replaced rear brake linkage, front pegs, and shifter, rebuilt carbs, begun rewrapping the 4into1 header, and the list goes on and on. She runs well but need to sync the carbs when my sync kit comes in.
I was out in the garage just looking at the bike trying to figure out a better place for the battery than zip tied to the front end of the swingarm (this was a temporary spot). Then I noticed the gaping hole where the starter used to be. A couple measurements and a few bolts later, the starter is damn near a PERFECT fit in the starter hole. I ended up getting a Anti-Gravity AG-AT7B-BS-RS along with a Rick's reg/rect. I ended up facing the positive out, negative in. Yes, servicing anything electrical will be a pain in the ass, but it keeps the area under the seat nice and clean.
Looking forward to the day I'll have everything to a point where I can actually ride! A bit of welding, motorcycle license (not my first bike but i've never been legal), and a fresh chain and I'll be ready to go.
Here's how it sat on Sunday, before moving the battery. Suggestions welcome.
Ok so let’s look at it from a scientific perspective.
Zink plating is a rust inhibiter technic, zinc is more reactive than steel and will act like a sacrificial metal and will corrode before the steel does so. In order to inhibit the zinc to corrode to quickly the zinc can be passivated with a passivate like a chromate that bounds the outer electron layer on the zinc, thereby making the zinc less reactive and less prone to corrosion.
Therefor we zinc plate fasteners usually with a coating of zinc 5-25 microns thick and then dip it in a passivate that will end up less than 1 micron thick.
I order to get the zinc to stick to the metal the metal needs to be clean, free from rust och grease.
In most of the cases our fasteners are both greasy and rusty and we need to get them spanking clean before we plate them.
1. If greasy.
Soak in diesel for a day and shake the container from time to time, resorting to equal solves equal and thereby getting the diesel to dissolve grease. Then soak in a petrochemical degreaser for a while, rinse in scalding hot water. Then soak in a alkaline degreaser for a while, rinse in scalding hot water again.
Now your fasteners should be free of grease. They might still be rusty though.
2. If rusty.
Rust can be removed in many different ways,
• mechanically with a steel brush
• by blasting, wet or dry, with less ore more aggressive blasting media. Just make sure your method doesn’t remove too much goods from your fasteners as they will go out of dimension. Dry sand is very aggressive, plastic beds, walnut shells, Vapor blasting, soda and dry ice the least aggressive.
• reverse electrolysis is also a method, but it’s quite cumbersome hanging bolts and nuts in the bath and you will need to remove the black ferrite that will form on the fasteners from the reversed rust.
• Chemically with acid, my favorite method. The more aggressive acid the faster it will dissolve the rust, but be careful because an aggressive acid like HCL will also dissolve the iron in your fasteners if you leave it in for to long.
So now that your fasteners are clean and free of rust its time to set up your plating set.
I set up 7 different plastic tubs and always go through the complete cycle even if my fasteners has just been cleaned with any of the methods described above.
I hang my fasteners in copper wire and start dipping
1. Alkaline degreaser
Just to make sure that there is no grease, remember fingers might be fatty, dip in the degreaser and leave for a couple of minutes.
2. Distilled water
Then a dip in distilled water to get rid of the degreaser.
3. Acid
I use 30% HCL which is pretty aggressive, I looks at the fizzing and when the fasters look clean and the fizzing slows down its done. No need to remove all the zinc but you need a spakning clean surface to get the zinc to plate to.
You can use a less aggressive acid, it might just take a little bit longer.
White vinegar (acetic acid), Tile cleaner (phosphoric acid) at ca 30% can be good alternatives to HCL (hydrochloric acid).
4. Distilled water
Then a dip in water to get rid of the acid.
5. Plating solution
I preheat my plating solution by placing the plastic can where I store the solution in a bucket with scalding hot water in before filling up my plating tub.
The tub is also equipped with an aquarium heater set at 25⁰ C and an aquarium air pump that makes sure the solution is circulated.
Before dropping my zinc anodes into the bath I give the a good brush of and make sure the copper wires has a good connection.
Makes sure I connect the polarity right and then hang my fasteners for plating.
If the fasteners come out dull I rise the current a bit and try again and might add brightener.
As Nessism wrote, let the solution sit for a while every now and then and siphon of the plating solution in order to get rid of the muck that will fall to the bottom of the can when stored.
Some items are a bitch to plate, like inside insex sockets, inside swingarm pivot tubes and might require some moving around and makings sure the solution are able to flow through while plating. If consider that the zinc atoms shall leave the anodes and travel to your fastener through the solution, the atoms will need a clear line of travel in order to attach to the right spot on your goods.
Power source, a bike battery can be used as a power source with some kind of rheostat like a wolfram coil, but a good power supply with a amp meter is the best.
6. Distilled water
Now a last dip in water
7. Passivate
Dip and leave in the passivate for 3-4 minutes
8. Hang to dry
Do I need to say that even though the stuff used to day is not highly toxically, its not meant for human consumption, its pretty nasty stuff and shall be handled and stored accordingly. Passivate used to contain hexavalent chromium that is seriously bad for you, nowadays not so much, they have come up with new solutions but it should still be handled with outmost respect and 30% HCL will hurt you.
Like Nessism I restore carburetors and a lot of the parts on eighties jap bike carburetors are made of unobtanium, therefor are no longer available on the open market and replating is the only option.
Happy dipping!
/Anders
Displaying 341 - 350 out of 7254 results.