
KZ440 LTD Carburettor Tear-down
- Jimbo68
-
 Topic Author
- Offline
- User
-

Registered
- Posts: 103
- Thanks: 7
Re: KZ440 LTD Carburettor Tear-down
02 Oct 2023 14:16
A few questions please:
1. The Adjustment section of the service manual states the pilot screw should be backed out 1 and 3/4 (630 degrees) after seating lightly. When I removed it, I checked the turn count - it was 1/4 of a full turn (90 degrees). I assume I go by the Adjustment section of the manual, rather than the advice in the Carb body assembly notes on p54, “back it out the same number of turns counted during disassembly”?
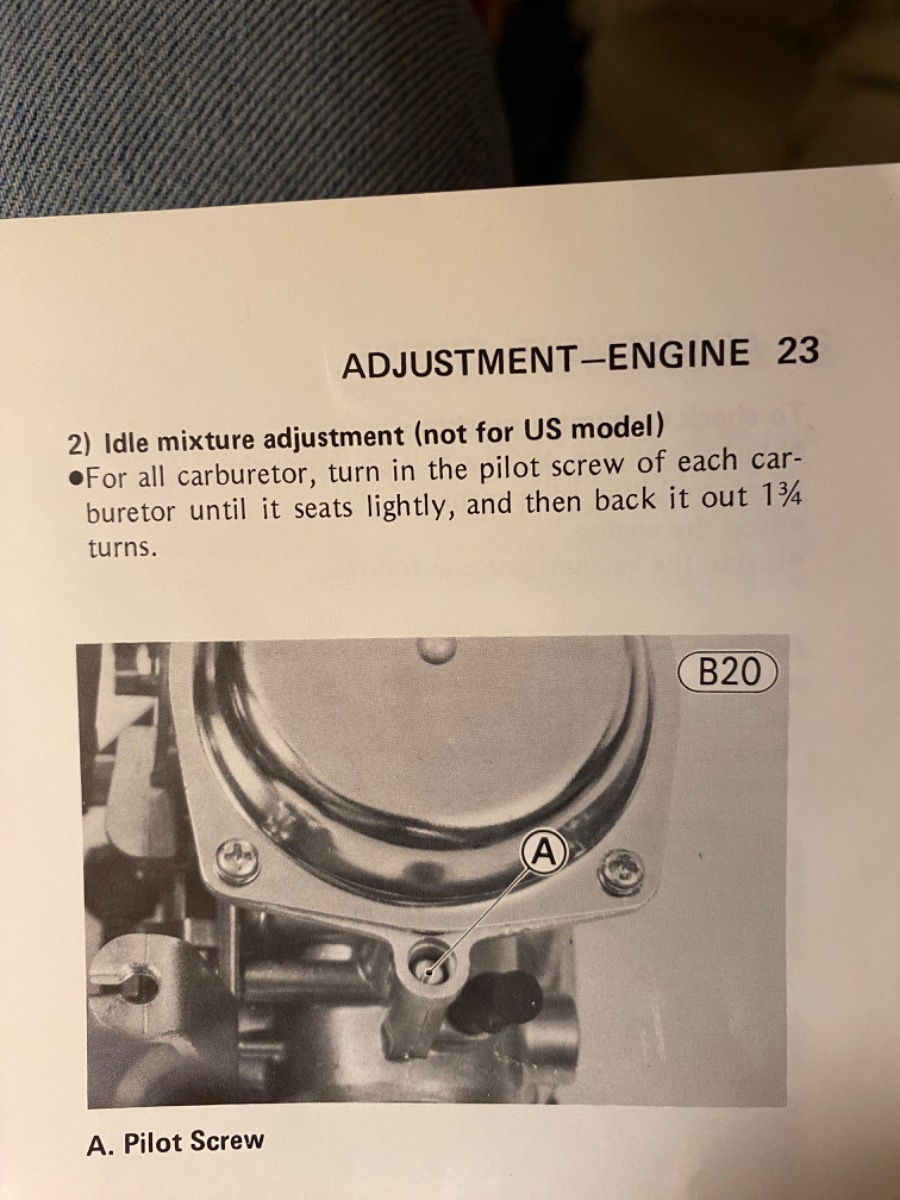
2. There was no plug on top of the pilot screw. Do you have any suggestions for an alternative?
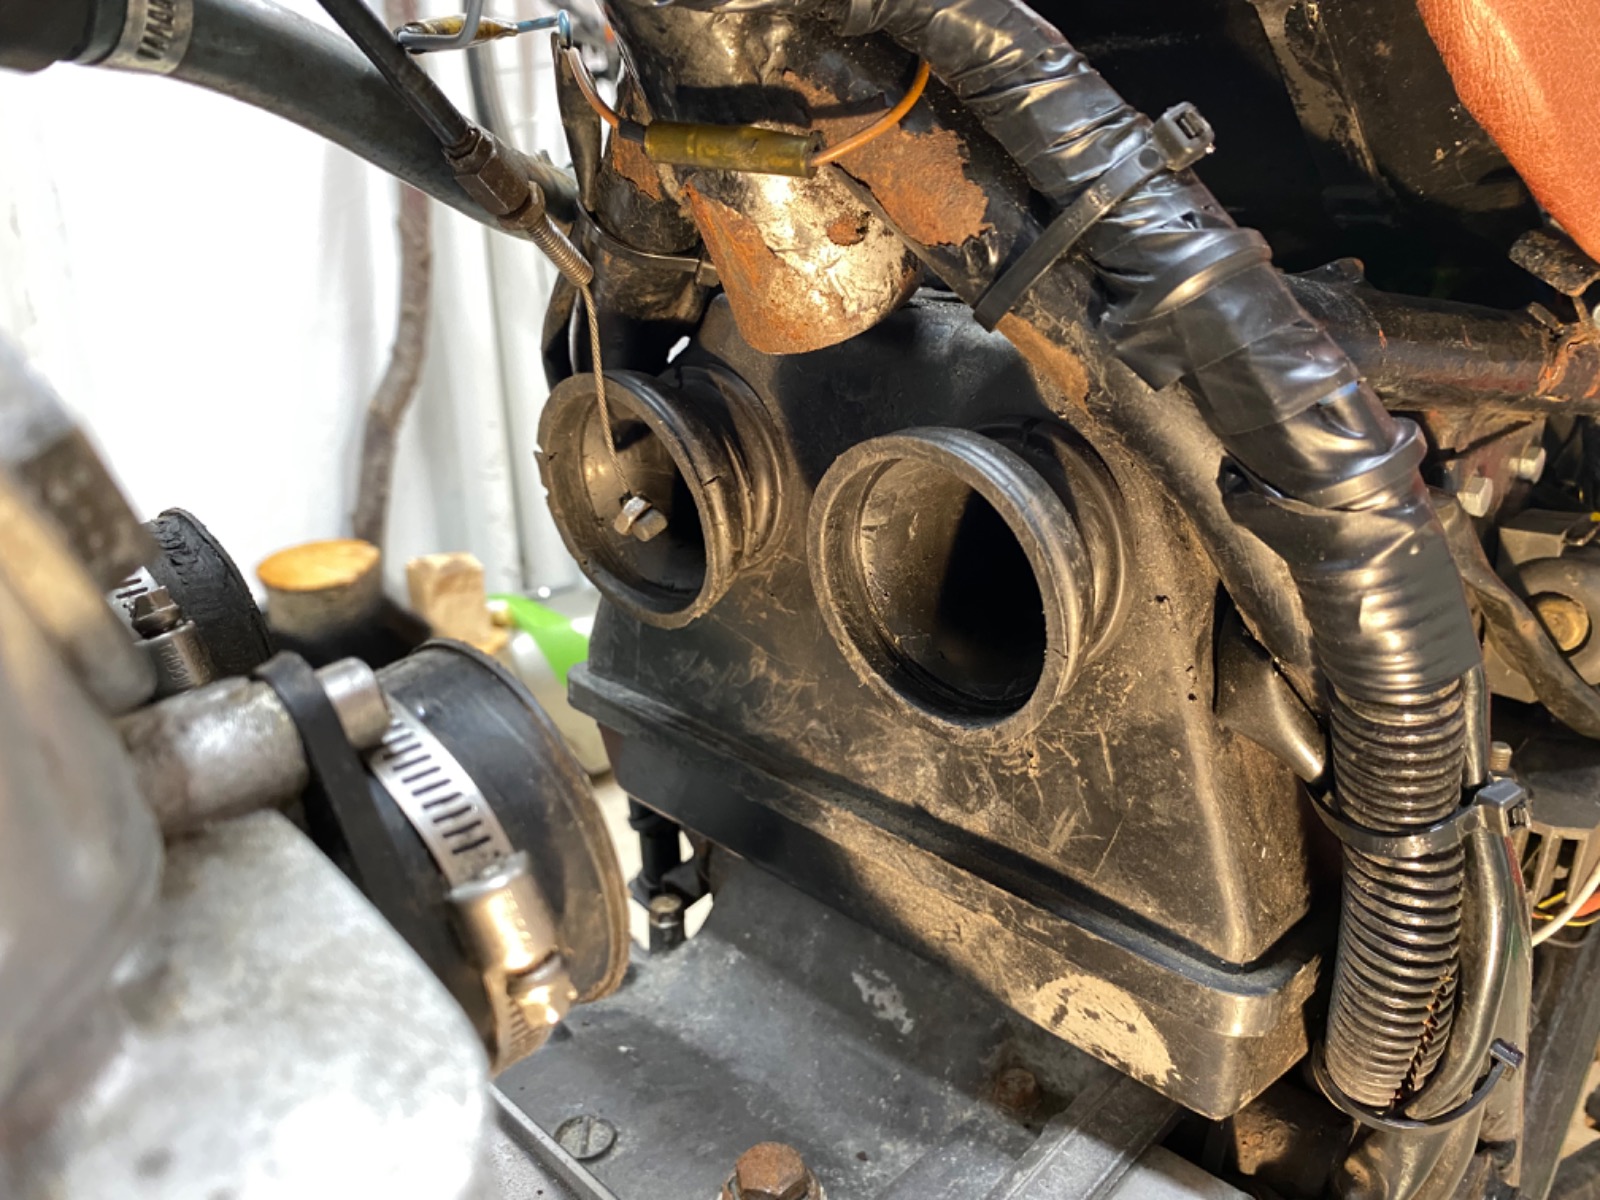
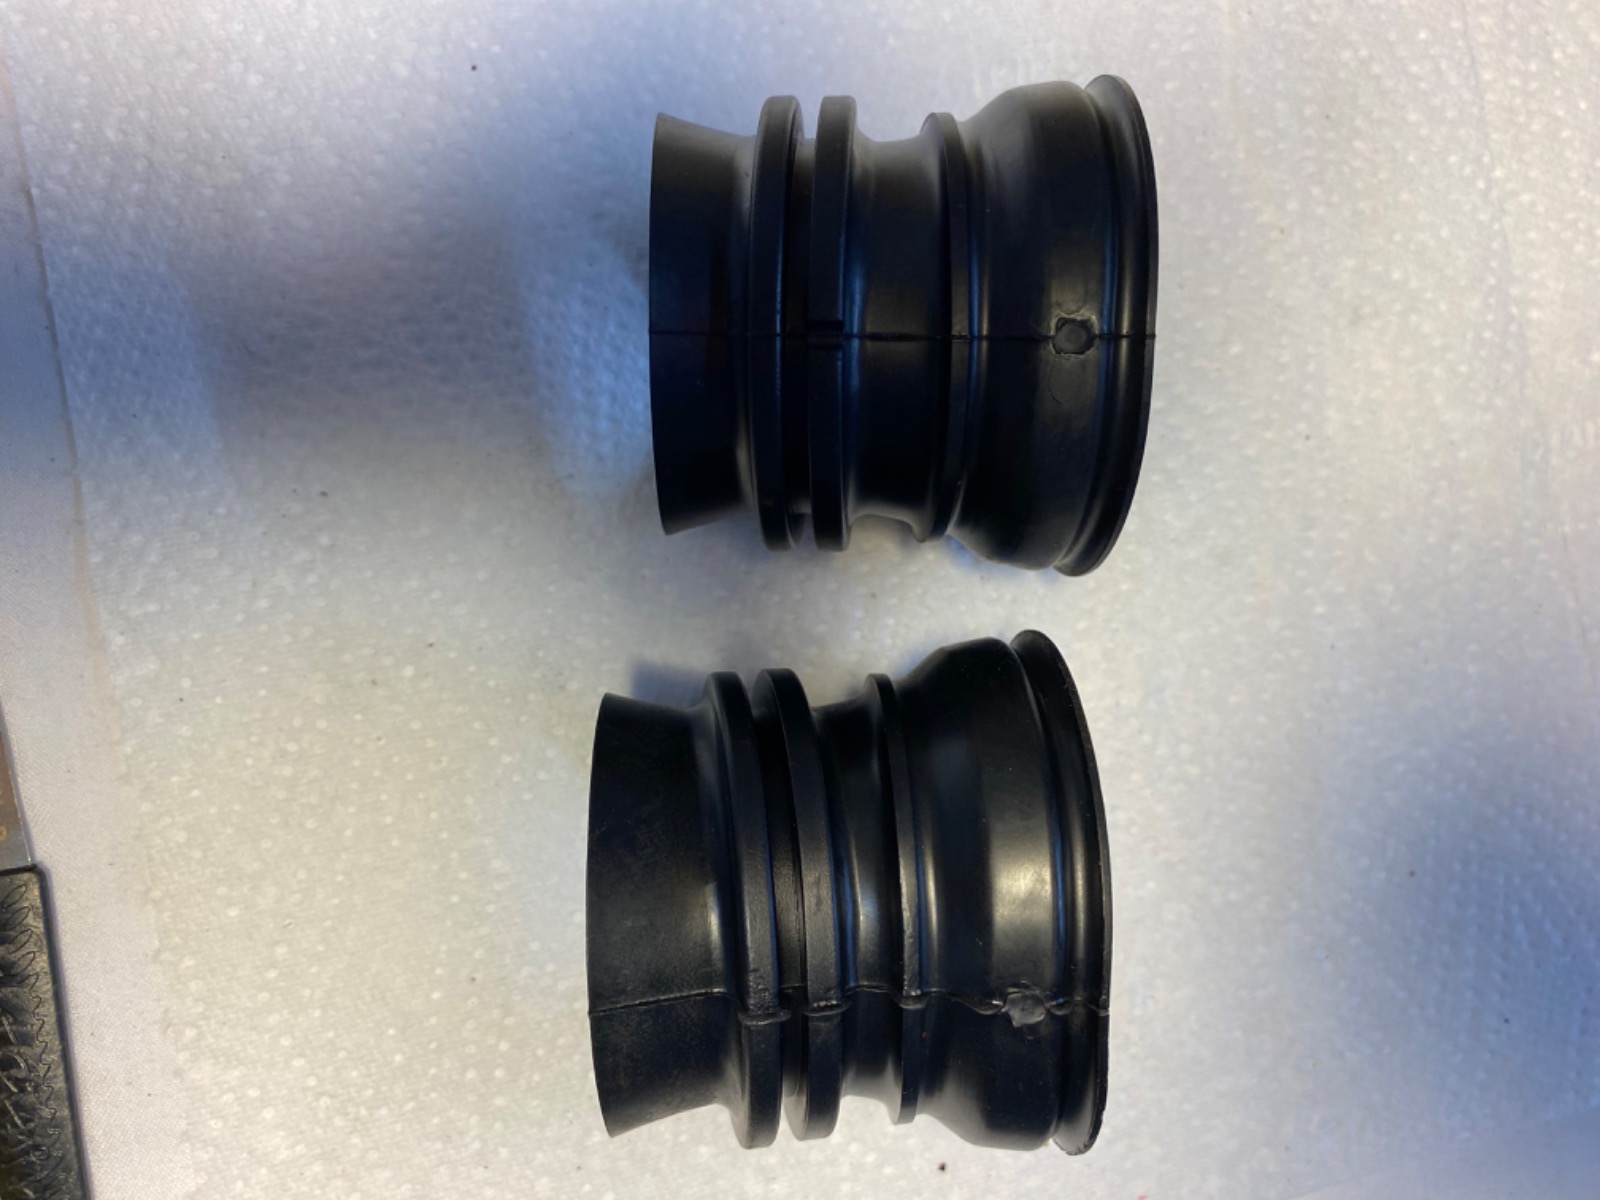
3. I have replacement air cleaner ducts (original Kawasaki parts). The current ones have become stiff. Is brute force all that’s needed to remove the current ones, or is there a slicker and safer way to do it?
4. Can the fuel filter be cleaned, is it worth it, given the sight of orange residue in the float bowl? If so, how is it cleaned?
5. I have the oiled type air cleaner. I’ve ordered a new element from a reputable Kawasaki parts dealer. Not sure if it will come pre-oiled. If not, can I use the 10W-40 engine oil I use in the bike? The manual states SAE 30 oil. I don’t know the significance of the difference.
6. The chrome plating of the upper chamber cover is badly pitted. I’ve done what I can with aluminium kitchen foil and Diet Coke. Any better tips?
That’s it for now. Thank you in advance for any advice offered.
1. The Adjustment section of the service manual states the pilot screw should be backed out 1 and 3/4 (630 degrees) after seating lightly. When I removed it, I checked the turn count - it was 1/4 of a full turn (90 degrees). I assume I go by the Adjustment section of the manual, rather than the advice in the Carb body assembly notes on p54, “back it out the same number of turns counted during disassembly”?
2. There was no plug on top of the pilot screw. Do you have any suggestions for an alternative?
3. I have replacement air cleaner ducts (original Kawasaki parts). The current ones have become stiff. Is brute force all that’s needed to remove the current ones, or is there a slicker and safer way to do it?
4. Can the fuel filter be cleaned, is it worth it, given the sight of orange residue in the float bowl? If so, how is it cleaned?
5. I have the oiled type air cleaner. I’ve ordered a new element from a reputable Kawasaki parts dealer. Not sure if it will come pre-oiled. If not, can I use the 10W-40 engine oil I use in the bike? The manual states SAE 30 oil. I don’t know the significance of the difference.
6. The chrome plating of the upper chamber cover is badly pitted. I’ve done what I can with aluminium kitchen foil and Diet Coke. Any better tips?
That’s it for now. Thank you in advance for any advice offered.
1981 Kawasaki KZ440-A2
Please Log in or Create an account to join the conversation.
- Nessism
-

- Offline
- Sustaining Member
-

Registered
- Posts: 8098
- Thanks: 3481
Re: KZ440 LTD Carburettor Tear-down
02 Oct 2023 15:33
1) I use 2.5 turns out on the pilot screws. The farther out, up to about 3.5 turns, where they max out, means richer. The factory setting is lean for emissions reasons. After the bike is up and running well, perform a vacuum sync on the carbs, and play with the pilot screw adjustment until you achieve the highest idle. Sometimes the idle doesn't respond very well to this, staying the same, if that's the case, leave the screws at 2.5 turns out.
2) No plug needed. It's to prevent tampering, and changing the emissions. Some grease over the screw is a good idea, though, to keep water out.
3) Heat gun, or hair drier will help soften the plastic.
4) Throw the old filter away. If your tank is clean, like it should be, you don't need a filter. If you decide to run a filter regardless, get one intended for a gravety fed fuel system, like a lawn mower. Do NOT use a car fuel filter, which is inteded to be used under pressure.
5) 10W-40 oil is fine
6) You already know the answer. I've sand blasted the chrome off and painted a few particularly bad covers. You can find decent covers off eBay cheap enough, too.
Ed
Carb O-ring Kits : www.kzrider.com/forum/14-vendor-forum/62...rburetor-o-ring-kits
www.kzrider.com/forum/faq-wiki/618026-new-owner-things-to-know
1981 KZ750E2
www.kzrider.com/forum/11-projects/604901...z750e-project-thread
Carb O-ring Kits : www.kzrider.com/forum/14-vendor-forum/62...rburetor-o-ring-kits
www.kzrider.com/forum/faq-wiki/618026-new-owner-things-to-know
1981 KZ750E2
www.kzrider.com/forum/11-projects/604901...z750e-project-thread
The following user(s) said Thank You: Jimbo68
Please Log in or Create an account to join the conversation.
- Jimbo68
-
Topic Author
- Offline
- User
-
Registered
- Posts: 103
- Thanks: 7
Re: KZ440 LTD Carburettor Tear-down
03 Oct 2023 11:50
Thanks Nessim.
Another question please.
In the disassembly section of the manual, for fitting the upper chamber cover, it says,
”With a finger, lift the vacuum piston just enough so that there is no crease on the diaphragm, and taking care not pinch the diaphragm lip, install the upper chamber cover. While holding the cover to keep it from being lifted by the spring, tighten the screws”.
I cannot lift the piston AND install the cover. Does this step matter, as long as the diaphragm is correctly positioned and the cover is screwed in without being lifted by the spring?
Thanks.
1981 Kawasaki KZ440-A2
Please Log in or Create an account to join the conversation.
- Nessism
-
- Offline
- Sustaining Member
-
Registered
- Posts: 8098
- Thanks: 3481
Re: KZ440 LTD Carburettor Tear-down
03 Oct 2023 13:13 - 03 Oct 2023 13:17
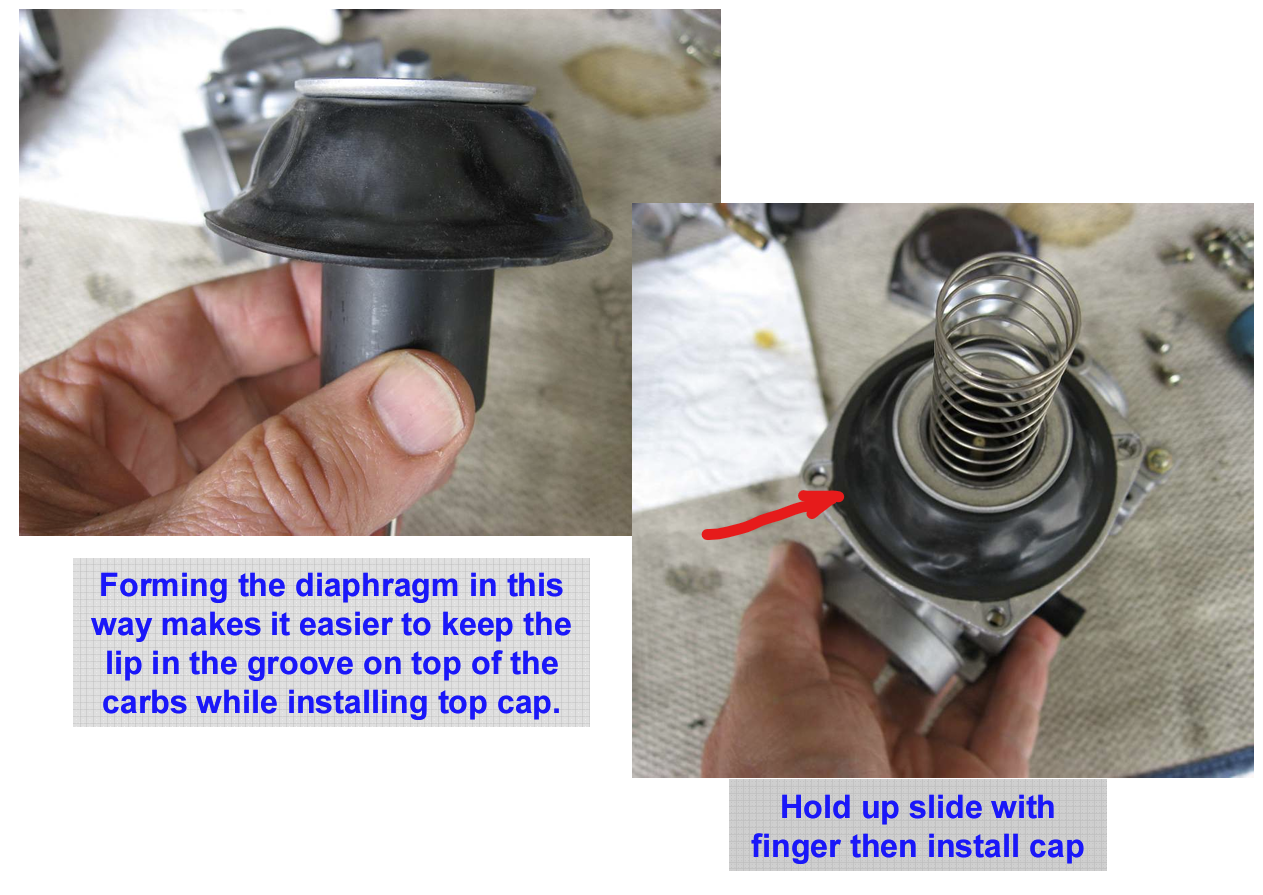
You MUST get the raised lip of the diaphragm safely seated in the carb body groove, before installing the top cover. How you accomplish that is up to you.
What I do is smooth out the diaphragm, angling downward, sort of like an umbrella.
I then lower the slide into the carb body, using one finger through the carb throat, to catch the slid and keep it from falling all the way down.
Align the notch in the diaphragm with the mating notch in the carb body, and smooth down the diaphragm to get it to seat down into the groove. All the while, holding up the slide from the bottom.
Then, drop in the spring, and install the top cap. Once you do that, you can pull your finger out of the carb throat. Now, install the top screws, all the while making sure the diaphragm lip is safely trapped in the carb body groove.
Ed
Carb O-ring Kits : www.kzrider.com/forum/14-vendor-forum/62...rburetor-o-ring-kits
www.kzrider.com/forum/faq-wiki/618026-new-owner-things-to-know
1981 KZ750E2
www.kzrider.com/forum/11-projects/604901...z750e-project-thread
Carb O-ring Kits : www.kzrider.com/forum/14-vendor-forum/62...rburetor-o-ring-kits
www.kzrider.com/forum/faq-wiki/618026-new-owner-things-to-know
1981 KZ750E2
www.kzrider.com/forum/11-projects/604901...z750e-project-thread
Last edit: 03 Oct 2023 13:17 by Nessism.
The following user(s) said Thank You: howardhb, Jimbo68
Please Log in or Create an account to join the conversation.
- Jimbo68
-
Topic Author
- Offline
- User
-
Registered
- Posts: 103
- Thanks: 7
Re: KZ440 LTD Carburettor Tear-down
04 Oct 2023 04:57 - 04 Oct 2023 05:15
What is the diameter of the fuel overflow hose please?
where should it be routed? There is no obvious route behind the carb.
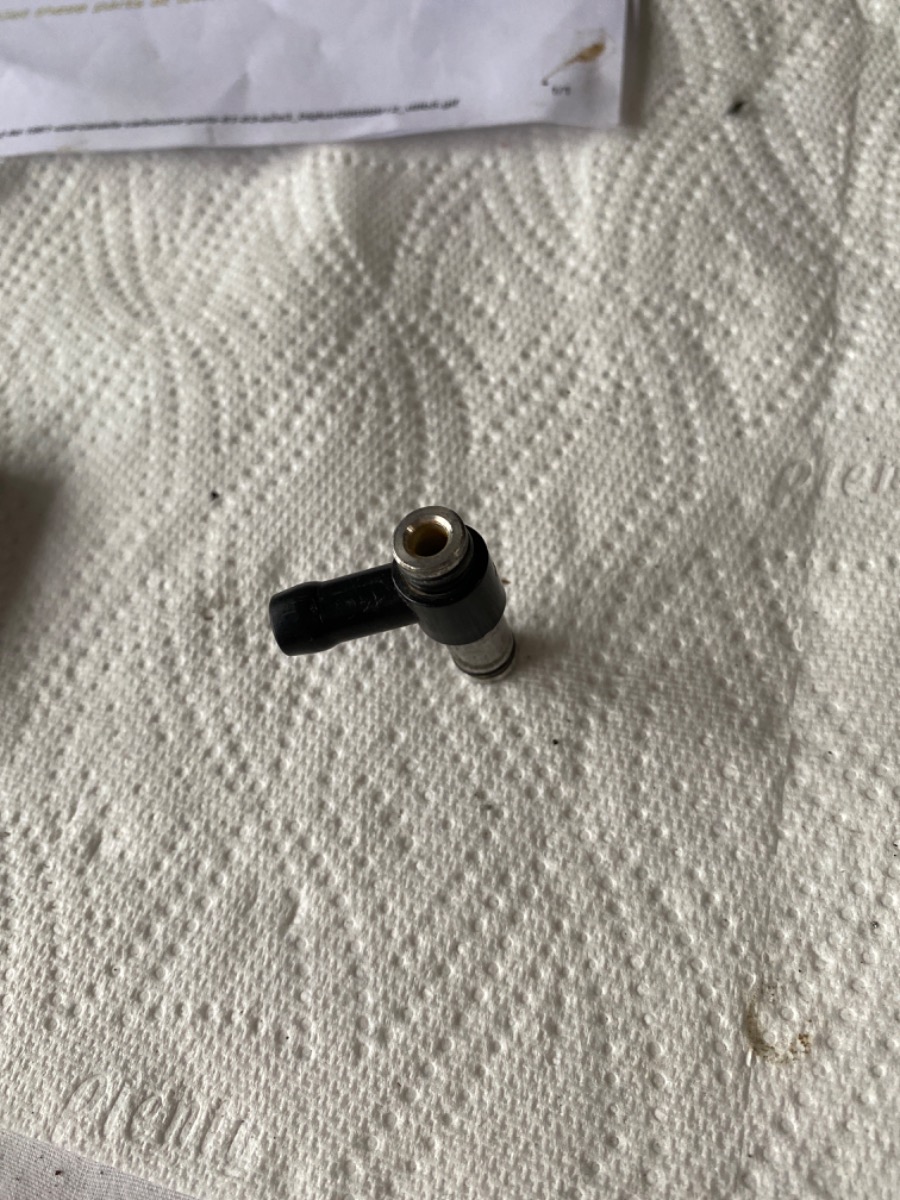
To test the float height. I need to effectively plug one end of the fuel inlet t-bar joint. Any suggestions please?
Is there a torque limit for the internal screws of the carb, including the holding screw for the jet needle?
thank you.
where should it be routed? There is no obvious route behind the carb.
To test the float height. I need to effectively plug one end of the fuel inlet t-bar joint. Any suggestions please?
Is there a torque limit for the internal screws of the carb, including the holding screw for the jet needle?
thank you.
1981 Kawasaki KZ440-A2
Last edit: 04 Oct 2023 05:15 by Jimbo68. Reason: Additional question
Please Log in or Create an account to join the conversation.
- TexasKZ
-

- Offline
- Platinum Member
-
Registered
- Posts: 8212
- Thanks: 2688
Re: KZ440 LTD Carburettor Tear-down
05 Oct 2023 06:21 - 05 Oct 2023 06:28
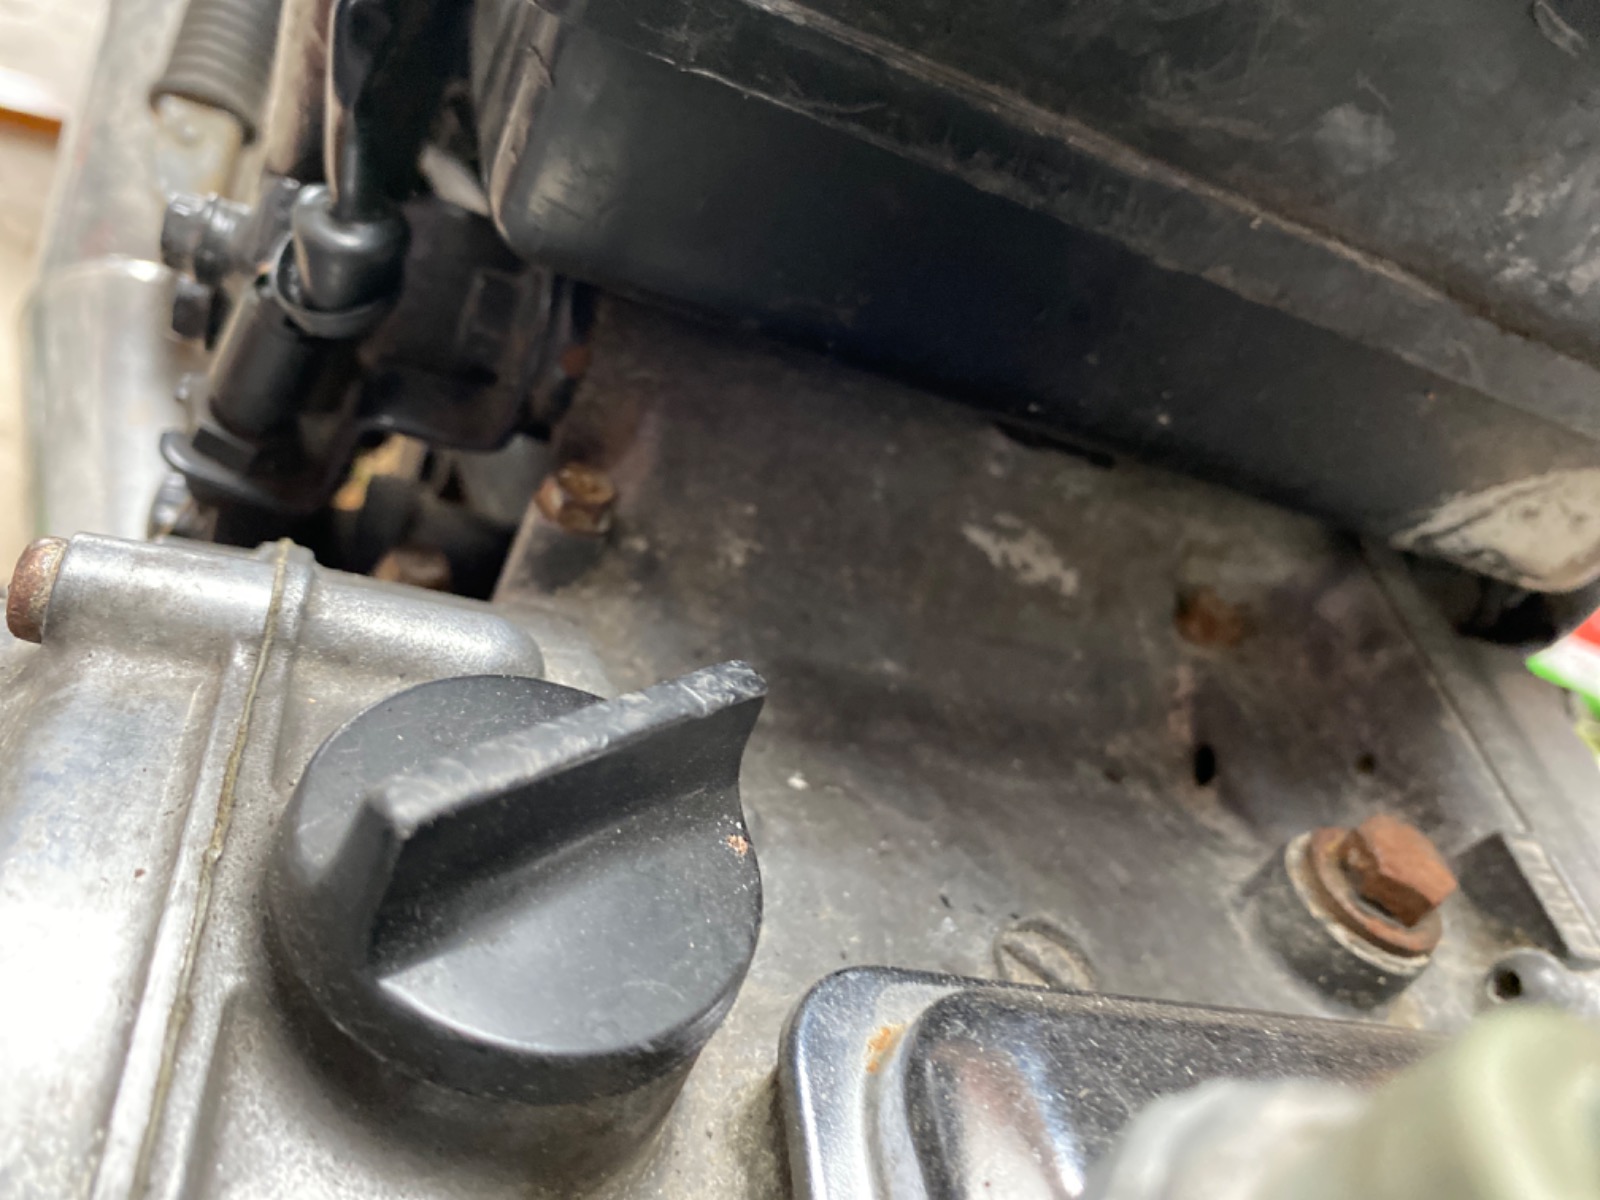
On the bikes I have owned, the overflow tubes go down the back of the transmission case, in front of the swingarm pivot. There should be a wire holder welded to the frame crossmember for those hoses and the battery vent hose to go through.
Why do you want to plug the fuel T? You need to check both carburetors, so they both need fuel. Just follow the procedure in the service manual.
There is always a torque limit for fasteners, beyond which something breaks. Those are small, fine-thread screws going into a soft alloy carburetor body. Lightly snug is plenty.
1982 KZ1000 LTD parts donor
1981 KZ1000 LTD awaiting resurrection
2000 ZRX1100 not ridden enough
www.kzrider.com/11-projects/620336-anoth...uild-thread?start=24
1981 KZ1000 LTD awaiting resurrection
2000 ZRX1100 not ridden enough
www.kzrider.com/11-projects/620336-anoth...uild-thread?start=24
Last edit: 05 Oct 2023 06:28 by TexasKZ.
The following user(s) said Thank You: Jimbo68
Please Log in or Create an account to join the conversation.
- Jimbo68
-
Topic Author
- Offline
- User
-
Registered
- Posts: 103
- Thanks: 7
Re: KZ440 LTD Carburettor Tear-down
05 Oct 2023 10:16
Thanks. I was going test each carb separately, while they are apart but yeh, I’ll check them once they are reconnected.
1981 Kawasaki KZ440-A2
Please Log in or Create an account to join the conversation.
- Jimbo68
-
Topic Author
- Offline
- User
-
Registered
- Posts: 103
- Thanks: 7
Re: KZ440 LTD Carburettor Tear-down
07 Oct 2023 02:48
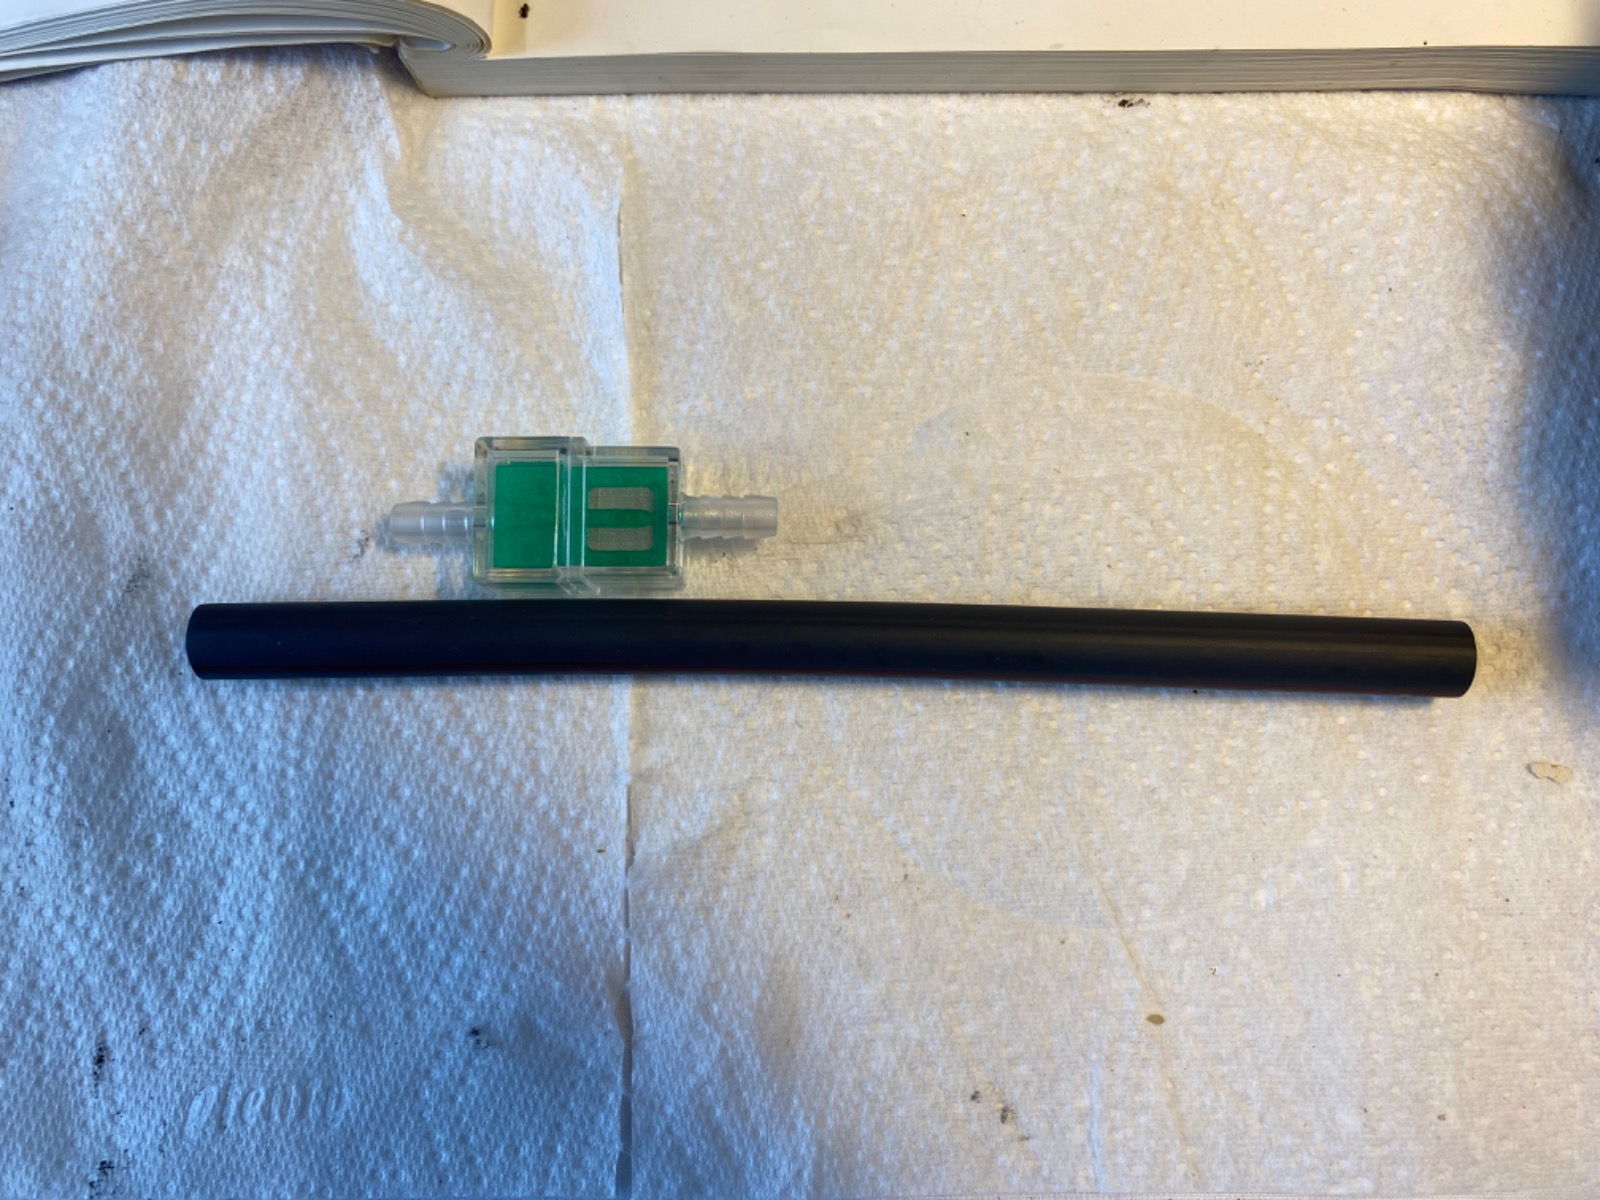
I have an in-line fuel filter.
Do you know If I can insert the filter with a single cut in the hose, which would effectively lengthen the hose between the tank and the carb to 233mm, or will that be too long? I’m concerned too long would interfere with height differences as the pipe ‘snakes’ on its way to the carb.
the alternative is to remove a length from the hose equivalent to the length of the filter to keep the total length 200mm. That seems the logical option but I’d prefer to hear your thoughts before I start cutting.
thanks
1981 Kawasaki KZ440-A2
Please Log in or Create an account to join the conversation.
- Jimbo68
-
Topic Author
- Offline
- User
-
Registered
- Posts: 103
- Thanks: 7
Re: KZ440 LTD Carburettor Tear-down
10 Oct 2023 08:12
Hi Dr F. You might be interested in what I found in the air box that has been acting as the air filter.
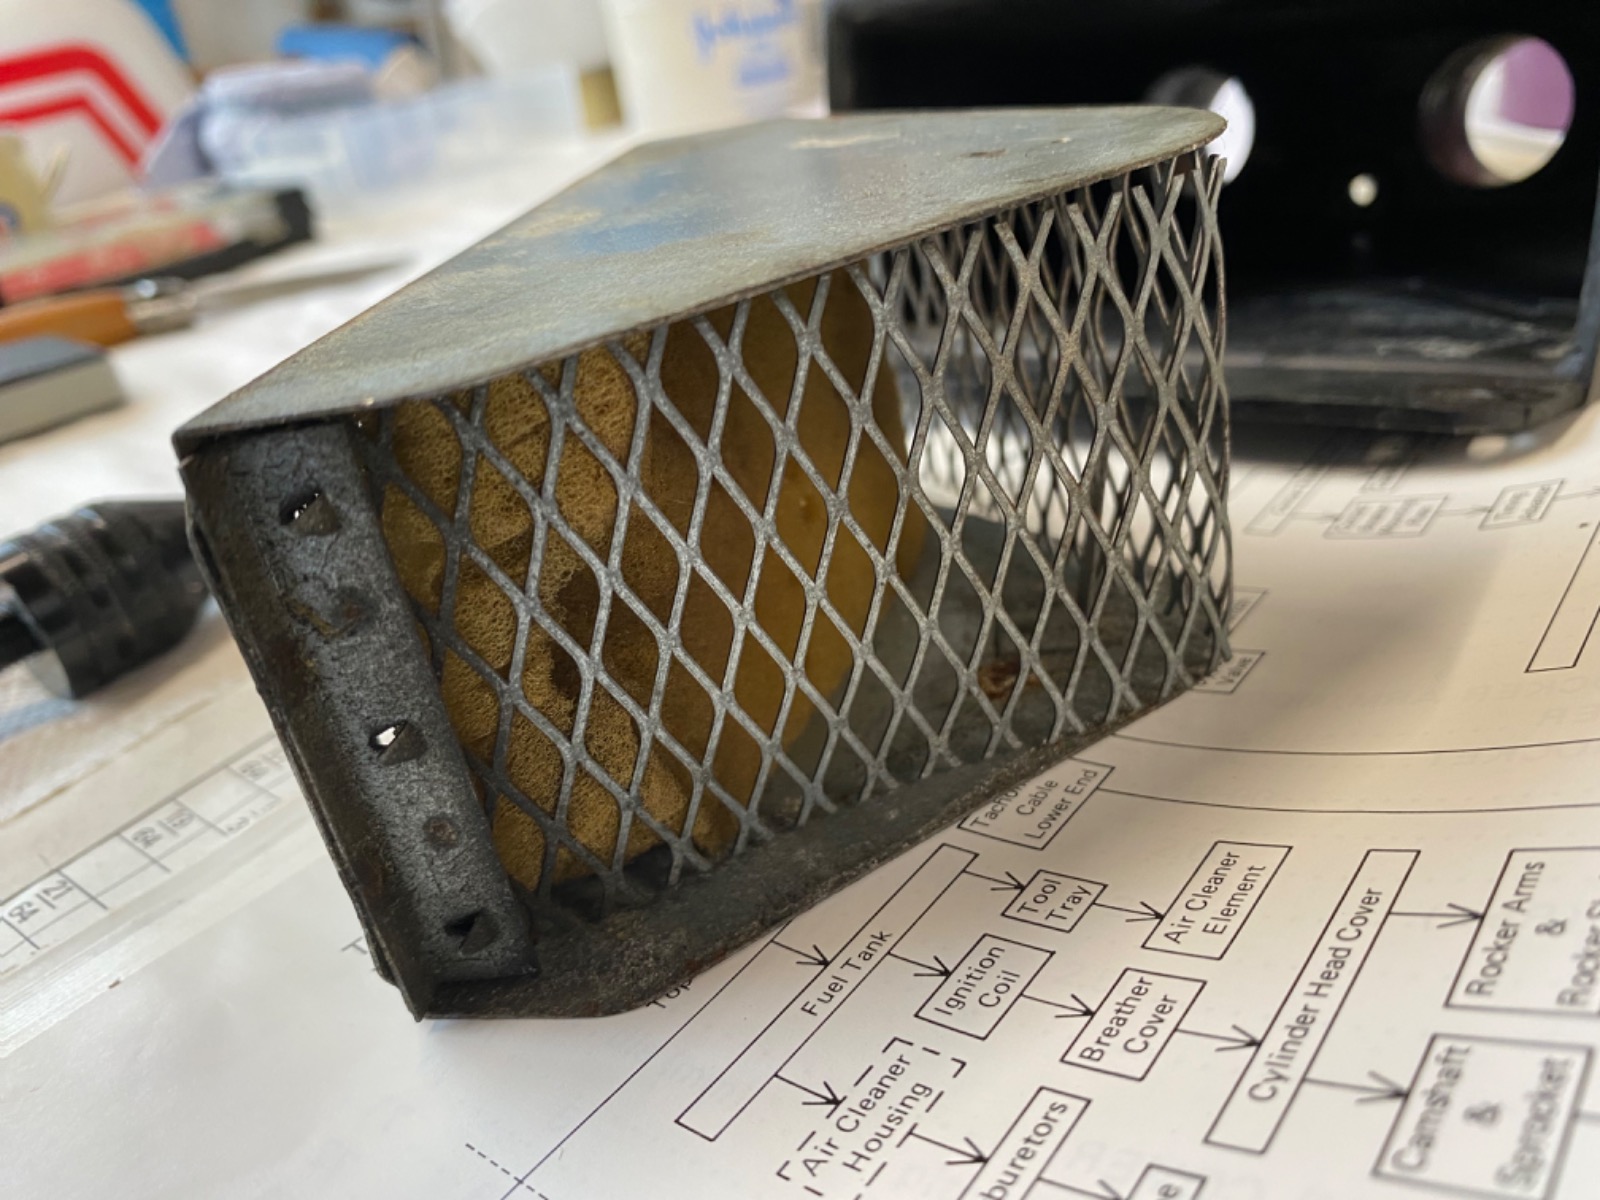
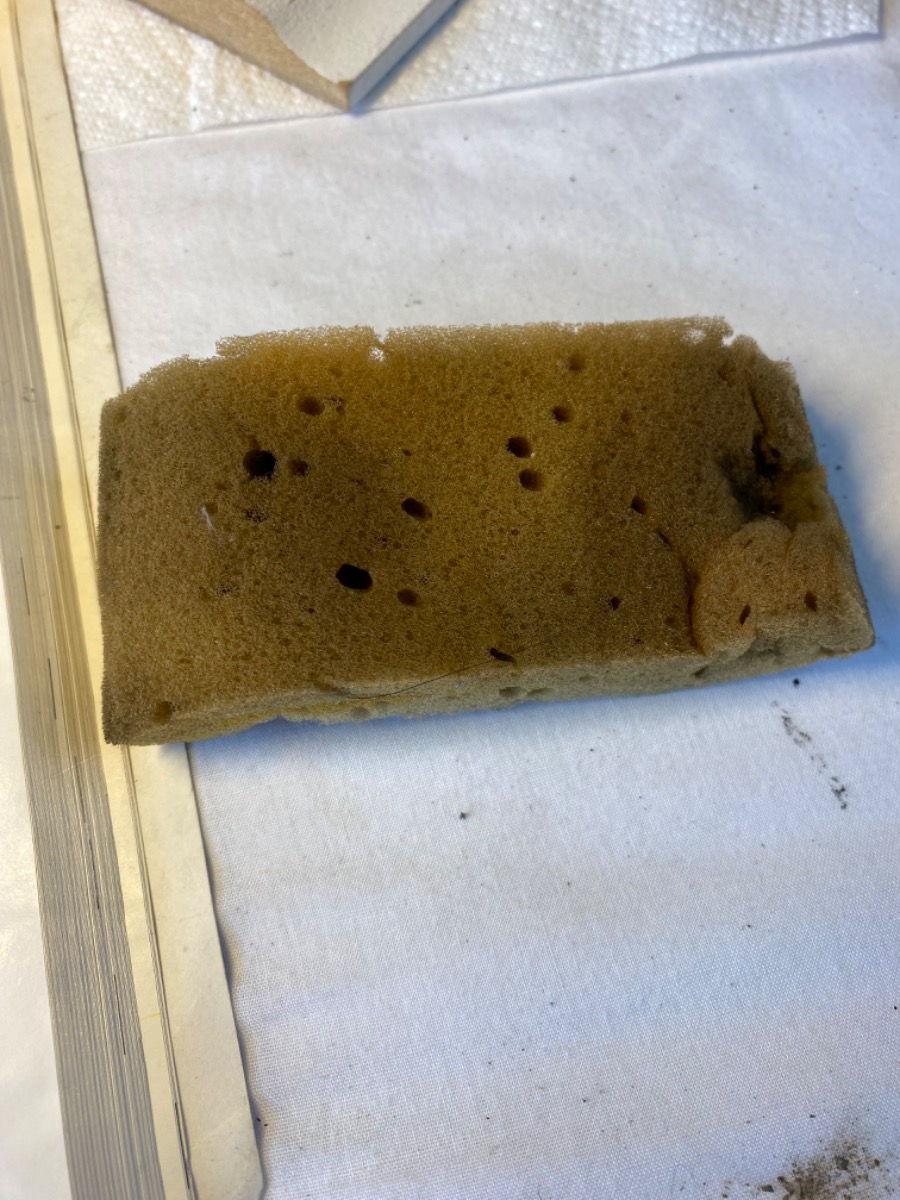
Obviously I’ll put it through the washing machine then keep it by the bath
 .
.
Obviously I’ll put it through the washing machine then keep it by the bath
1981 Kawasaki KZ440-A2
Please Log in or Create an account to join the conversation.
- Jimbo68
-
Topic Author
- Offline
- User
-
Registered
- Posts: 103
- Thanks: 7
Re: KZ440 LTD Carburettor Tear-down
10 Oct 2023 08:28 - 10 Oct 2023 08:33
I have noticed the choke butterfly plates are not synchronised due to the misalignment of the two shafts.
There doesn’t appear to be a screw that can tune the alignment. The only control appears to be re-shaping the part of the Fast Idle Mechanism that presses against the pin on the fast idle link:
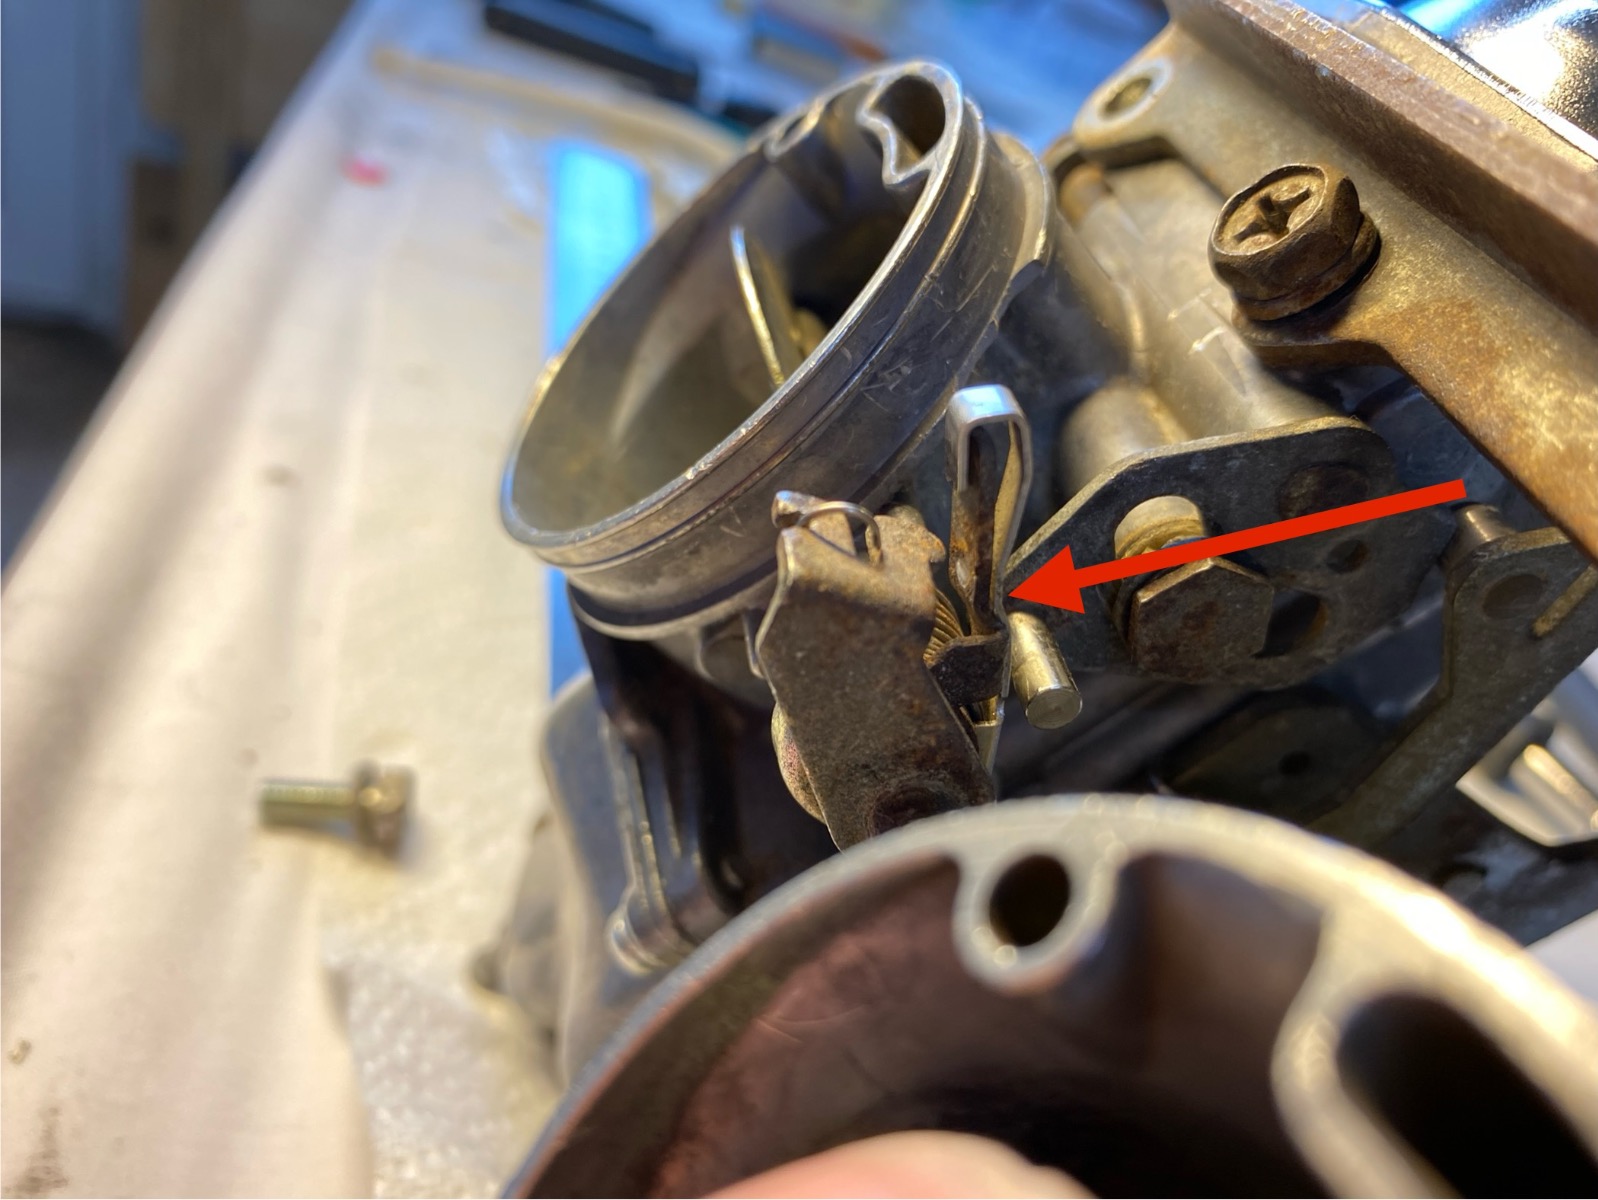
Any suggestions please?
There doesn’t appear to be a screw that can tune the alignment. The only control appears to be re-shaping the part of the Fast Idle Mechanism that presses against the pin on the fast idle link:
Any suggestions please?
1981 Kawasaki KZ440-A2
Last edit: 10 Oct 2023 08:33 by Jimbo68. Reason: Add picture
Please Log in or Create an account to join the conversation.
- Jimbo68
-
Topic Author
- Offline
- User
-
Registered
- Posts: 103
- Thanks: 7
Re: KZ440 LTD Carburettor Tear-down
13 Oct 2023 10:15
Hi folks.
Any thoughts about my question above about adjusting the choke butterflies?
Cheers
Any thoughts about my question above about adjusting the choke butterflies?
Cheers
1981 Kawasaki KZ440-A2
Please Log in or Create an account to join the conversation.
- Nessism
-
- Offline
- Sustaining Member
-
Registered
- Posts: 8098
- Thanks: 3481
Re: KZ440 LTD Carburettor Tear-down
13 Oct 2023 10:35
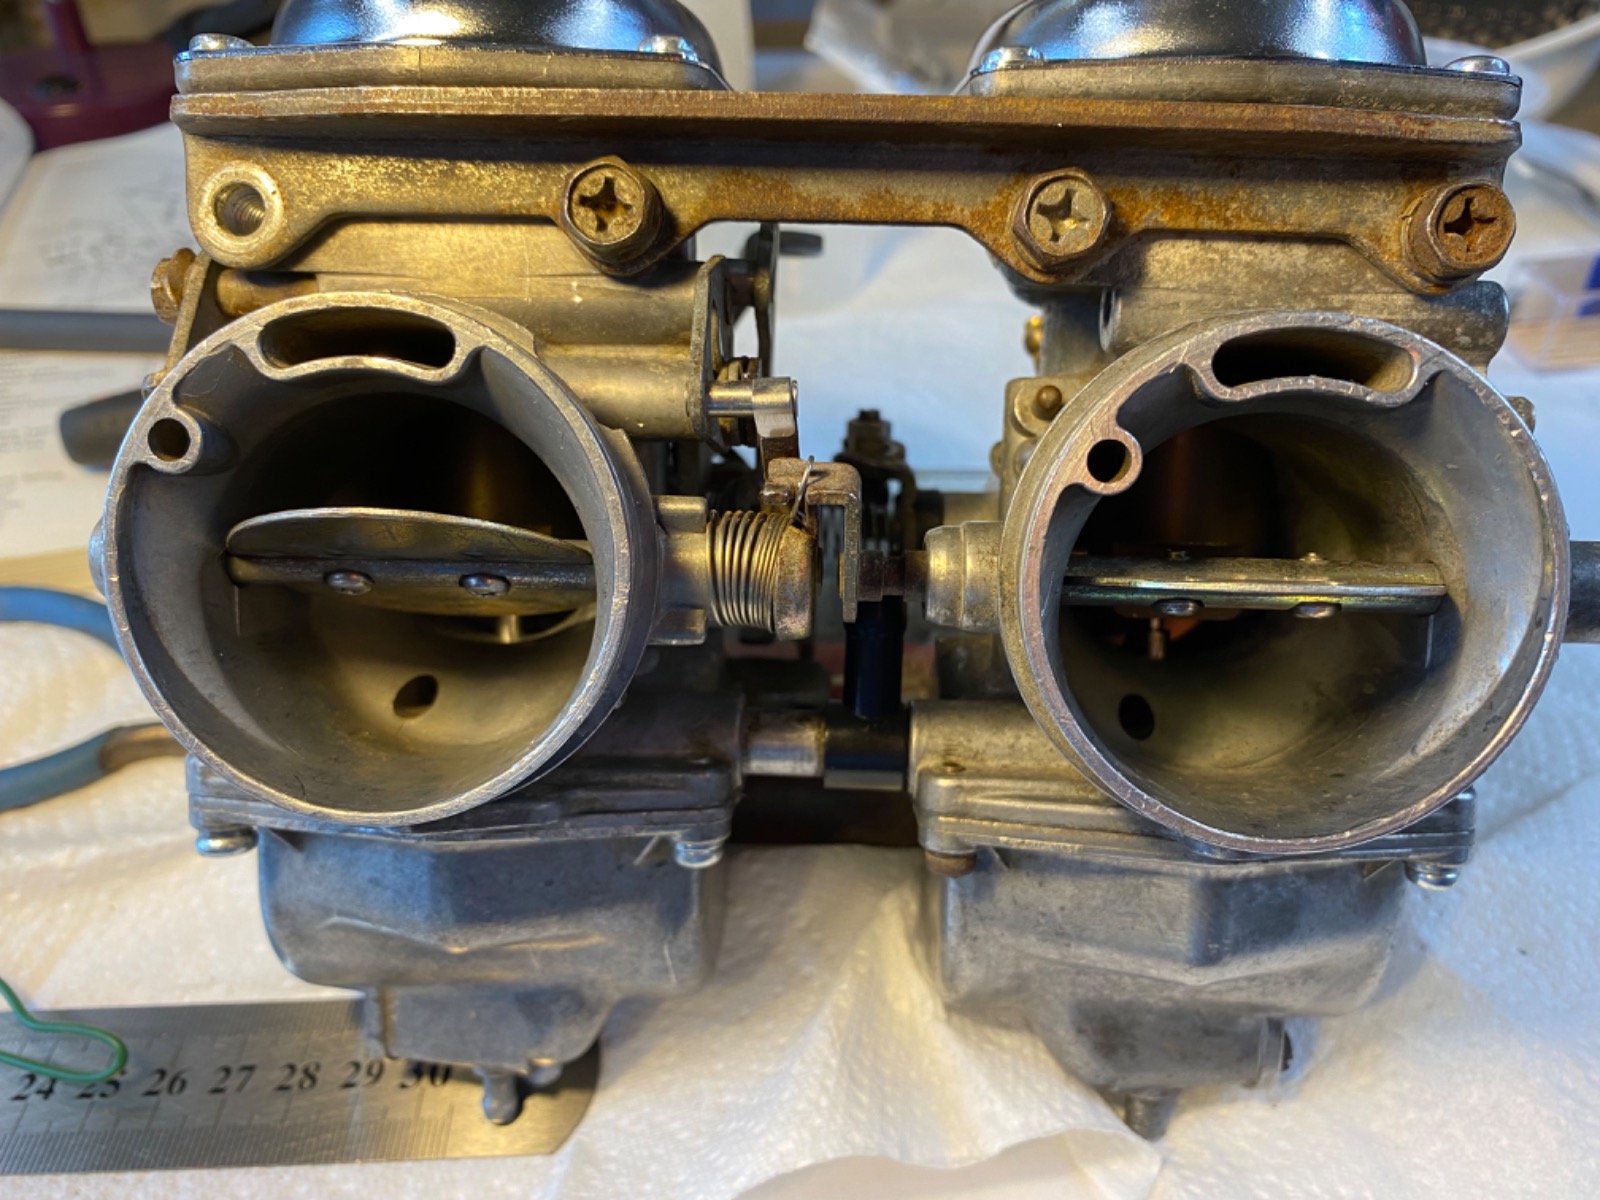
Something is wrong with the way you have the linkage set up. This is a photo from a 750. The choke linkage is almost the same though. One thing I can see is that the spring is not installed correctly. It should nest down inside the linkage. Yours looks bound up.
 P1030123
by
nessism
, on Flickr
P1030123
by
nessism
, on Flickr
Ed
Carb O-ring Kits : www.kzrider.com/forum/14-vendor-forum/62...rburetor-o-ring-kits
www.kzrider.com/forum/faq-wiki/618026-new-owner-things-to-know
1981 KZ750E2
www.kzrider.com/forum/11-projects/604901...z750e-project-thread
Carb O-ring Kits : www.kzrider.com/forum/14-vendor-forum/62...rburetor-o-ring-kits
www.kzrider.com/forum/faq-wiki/618026-new-owner-things-to-know
1981 KZ750E2
www.kzrider.com/forum/11-projects/604901...z750e-project-thread
The following user(s) said Thank You: Jimbo68
Please Log in or Create an account to join the conversation.
Moderators: Street Fighter LTD