
cleaning carbs without removal
- Maninthebox1064
-
 Topic Author
- Offline
- User
-

Registered
- Posts: 7
- Thanks: 0
cleaning carbs without removal
30 May 2016 12:10 - 30 May 2016 12:11
Hello,
I just got my first KZ750 4 cylinder and was hoping to get some guidance on how to approach carb cleaning. It has been sitting for at least a year, if not longer, and really needs some TLC to become roadworthy again.
At first I had it running (poorly) but replaced the spark plugs and it seemed to help but now it only runs consistently with the choke on and it seems to raise and drop in RPMs when it idles.
Does anyone have any suggestions to get it running cleaner? I am under the impression that it needs the carbs cleaned (which they were apparently rebuilt not terribly long ago) but I don't know how to remove or sync the 4 carbs once they are cleaned. If they are removed and cleaned will I have to re-sync them? Does anyone know of any guides or how-to's to help me out? Also, is there a way to clean them by removing the air box and leaving them on the bike?
Thanks in advance for any help")
I just got my first KZ750 4 cylinder and was hoping to get some guidance on how to approach carb cleaning. It has been sitting for at least a year, if not longer, and really needs some TLC to become roadworthy again.
At first I had it running (poorly) but replaced the spark plugs and it seemed to help but now it only runs consistently with the choke on and it seems to raise and drop in RPMs when it idles.
Does anyone have any suggestions to get it running cleaner? I am under the impression that it needs the carbs cleaned (which they were apparently rebuilt not terribly long ago) but I don't know how to remove or sync the 4 carbs once they are cleaned. If they are removed and cleaned will I have to re-sync them? Does anyone know of any guides or how-to's to help me out? Also, is there a way to clean them by removing the air box and leaving them on the bike?
Thanks in advance for any help
Last edit: 30 May 2016 12:11 by Maninthebox1064.
Please Log in or Create an account to join the conversation.
- davido
-

- Offline
- User
-
Registered
- Posts: 1579
- Thanks: 291
Re: cleaning carbs without removal
30 May 2016 12:48
Carbs are usually the last thing you should look at. Do a full on service first. The steps are usually laid out in the right order in the manual. Make sure everything else is tiddly pooh,then,if you need to, jump into the carbs.
Saying that,it is a good idea to drain the float bowls and run some fresh fuel through the system before trying to run the bike.
Also. Beware of POs who tell you theyve rebuilt the carbs!!!!!
Saying that,it is a good idea to drain the float bowls and run some fresh fuel through the system before trying to run the bike.
Also. Beware of POs who tell you theyve rebuilt the carbs!!!!!
www.kzrider.com/forum/11-projects/594313-csr1000-project-build
CB550 (1978)
CB500/4 (1972)*
KZ1000CSR (1981)
XT 600E (1999)
TDM900 (2003)
CB550 (1978)
CB500/4 (1972)*
KZ1000CSR (1981)
XT 600E (1999)
TDM900 (2003)
Please Log in or Create an account to join the conversation.
- SWest
-

- Offline
- Sustaining Member
-

Registered
- 10 22 2014
- Posts: 23701
- Thanks: 3001
Re: cleaning carbs without removal
30 May 2016 13:43
In this case the carbs have to come off first. I got a 550 a year ago that wouldn't run. It was said it wasn't worth fixing. I had it running like a scalded cat the next day.
Steve
kzrider.com/forum/11-projects/598262-kz-...-will-it-live#672882
Steve
kzrider.com/forum/11-projects/598262-kz-...-will-it-live#672882
Z1b1000 1975 Z1b
kzrider.com/forum/11-projects/598262-kz-...-will-it-live#672882
kzrider.com/forum/2-engine/597654-poser?start=240#704229
kzrider.com/forum/11-projects/598262-kz-...-will-it-live#672882
kzrider.com/forum/2-engine/597654-poser?start=240#704229
Please Log in or Create an account to join the conversation.
- 650ed
-

- Offline
- User
-
Registered
- Posts: 15334
- Thanks: 2831
Re: cleaning carbs without removal
30 May 2016 13:52
Here are some tips that you may find helpful. If nothing else be SURE to read the section on JIS screws under the TOOLS heading.
Many newbies and not so newbies run into the same problems or issues with their bikes which could be easily avoided with a little preparation. Here are a couple recommendations that I hope you will find useful.
Before riding your KZ you should take a little time to become familiar with it. Simple things like checking the oil, tire pressures, etc. are explained in the Kawasaki Owner's Manual. If you bike didn't come with one (they normally are in a little holder on the bottom of the seat) you can usually find one on eBay - be sure to get one for your exact year/model.
MANUAL
You really should consider buying the Kawasaki Factory Service Manual for your bike. The factory service manual provides instructions on the various maintenance procedures and schedules for your bike, procedures for diagnosing problems, proper torque values for the various fasteners (VERY IMPORTANT), and insight into how each system on your bike works even if you are not repairing that system. Studying the manual before you attempt performing service on your bike will impart an understanding of the system you are working on which will increase the odds of success.
The manuals usually are readily available for most models on eBay and other sources; but be sure to get one that has your specific year and model in it as there are differences between the various KZ650 models. I do not recommend Clymers, Haynes, or other aftermarket manuals as I have seen instances where they provide inaccurate advice. You may decide to use those to supplement the factory manual, but in my opinion they are not a suitable substitute. If you have trouble finding one for your model ask us to help.
When you get the manual take a look at the torque specs. MANY of them are in INCH pounds, and some of the larger bolts are in FOOT pounds. You will need 2 torque wrenches; one small one calibrated in inch pounds and a larger one calibrated in foot pounds. Trying to use a foot pound calibrated wrench to tighten the inch pound fasteners won't work properly even if you do the conversion correctly because the foot pound wrench will not be sensitive / accurate enough at its lowest settings. No torque wrench is accurate at ranges below 20% of its max setting.
TOOLS
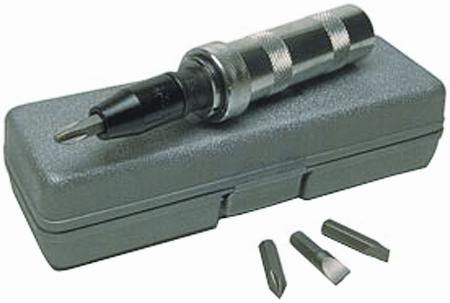
WARNING! Do not even try to use Phillips screwdrivers on the Kawasaki cross head screws. Despite their appearance they are not Phillips screws. They are Japanese Industrial Standard (JIS) screws. The tips of Phillips screwdrivers are too long & pointed to allow the 4 blades of the screwdriver to properly engage the screws, so when you apply force the screw head slots will deform and look like crap. The fact is that Phillips screws were deliberately designed to have the screwdriver bit "cam out." This was done to prevent production line assembly from over-tightening, stripping, or breaking the screws. JIS screws do not have this problem. A proper fitting JIS bit can tighten a JIS screw to and beyond the torque spec without camming out. Here's the good news - you can easily modify standard Phillips screwdriver tips to fit the JIS screws.
I have ground down the tips of DeWalt #2 and DeWalt #3 Phillips to make them fit JIS screws. The large crosshead screws on the cases take modified #3 bits (or genuine #3 JIS bits). To modify the DeWalt bits you need to grind the very tip a little, then test fit, then grind a little more and test fit, etc. until the bit no longer "rocks" back and forth in the screwhead. Picture 1 below shows how a DeWalt #3 bit fits the case screws of my KZ650 after being ground properly. The #2 DeWalt bits can be modified the same way to fit smaller JIS screws. Pictures 2 and 3 below shows DeWalt #2 and #3 modified bits.
I did find a place that sells authentic JIS bits. They don't list the #3 bit, but if you contact them they can provide the #3 JIS bits even though they are not listed on the website. These folks were very easy to work with, and the authentic bits do work great. Here's their site:
www.rjrcooltools.com/shop_item_detail.cfm?subcat_ID=89
Pictures 4 & 5 below show a comparison between my homemade modified bits with the authentic JIS bits.
PICTURE 1

PICTURE 2

PICTURE 3

PICTURE 4

PICTURE 5

Before reaching for that wrench or ratchet consider the following. The bolts are steel, but your engine and front forks are aluminum. The bolts are much tougher than the aluminum and if over tightened will strip the aluminum threads. Although these can be repaired, preventing damage by applying proper torque will save you grief, time, and money. Tightening fasteners properly requires torque wrenches. Various vendors, including Snap-on, CDI, Sears, etc., market torque wrenches. The two most popular types are the bar type and micrometer type. Either will work, but the micrometer type is a bit easier to use, especially if you are tightening several fasteners with the same torque - such as cylinder head covers. You will need a torque wrench calibrated in INCH POUNDS for many of the bolts. You will also need a torque wrench calibrated in FOOT POUNDS for the larger bolts. Don't try to use the foot pounds wrench on the smaller bolts as it will not be sensitive enough at low torque settings to provide accurate torque. There are many fasteners that require low torque. These include such things as 6mm oil pan bolts, cylinder head cover bolts, etc. for which the torque in 61-78 inch pounds. These low torque bolts require a wrench that is accurate at low settings and this wrench should be graduated in inch pounds. In addition, there are numerous high torque fasteners such as the front axle nuts (51 - 65 foot pounds) or swing arm pivot shaft nuts (58 - 87 foot pounds). These require a wrench that is accurate at higher settings; this wrench should be graduated in foot pounds. Using the proper torque wrenches to correctly tighten fasteners will help prevent damage and contribute to a safe bike. The Kawasaki Service Manual will list the various torque specs for the bolts. I suggest you get the manual before buying the torque wrenches so you can decide which wrenches best meet the torque specs.
Consider buying a can of Kroil penetrating oil and use it to soak stubborn fasteners for a couple days before trying to loosen them. Remember, the original screws and bolts were installed on your bike when Ronald Reagan was President, so many of them may be hard to remove. Kroil can be bought online, at guns shows, and at some other venues.
MOTOR OIL
The ingredients in oils have changed over the years. For example, today's Castrol GTX oil (and pretty much all other AUTOMOBILE oil) is not the same as it was in the 1980's. Back then it worked great in KZ bikes. But, things have changed. Early AUTOMOBILE oils contained zinc phosphorus compounds (ZDDP) to protect engine components from metal to metal contact. This was good for engines, but it was found to be destructive to catalytic converters. Consequently, in AUTOMOBILE oils ZDDP was virtually eliminated and replaced with different chemistry generically referred to as "Friction Modifiers." These work fine and offer good protection for normal AUTOMOBILE engines. However, today's AUTOMOBILE oil "Friction Modifiers" are destructive to wet clutches. KZ bikes (and many other brands) have wet clutches. As a result of these oil chemistry changes a distinction needed to be made between those oils which are suitable for wet clutches and those which are not. That distinction was documented by the Japanese Engine Oil Standards Implementation Panel (JASO). JASO developed a number of different oil specifications for different applications. The specifications that apply to 4 stroke motorcycles fall under the "4T Specifications." Within the 4T specifications the JASO MA class oils are specifically formulated for 4 stroke motorcycles with wet clutches.
There are synthetic, semi-synthetic, and non-synthetic oils that meet the JASO-MA standard and any of them will work ok. However, using oils that are not designated as meeting the JASO-MA standard is destructive to KZ clutches.
Good luck with your bike. Ed
Many newbies and not so newbies run into the same problems or issues with their bikes which could be easily avoided with a little preparation. Here are a couple recommendations that I hope you will find useful.
Before riding your KZ you should take a little time to become familiar with it. Simple things like checking the oil, tire pressures, etc. are explained in the Kawasaki Owner's Manual. If you bike didn't come with one (they normally are in a little holder on the bottom of the seat) you can usually find one on eBay - be sure to get one for your exact year/model.
MANUAL
You really should consider buying the Kawasaki Factory Service Manual for your bike. The factory service manual provides instructions on the various maintenance procedures and schedules for your bike, procedures for diagnosing problems, proper torque values for the various fasteners (VERY IMPORTANT), and insight into how each system on your bike works even if you are not repairing that system. Studying the manual before you attempt performing service on your bike will impart an understanding of the system you are working on which will increase the odds of success.
The manuals usually are readily available for most models on eBay and other sources; but be sure to get one that has your specific year and model in it as there are differences between the various KZ650 models. I do not recommend Clymers, Haynes, or other aftermarket manuals as I have seen instances where they provide inaccurate advice. You may decide to use those to supplement the factory manual, but in my opinion they are not a suitable substitute. If you have trouble finding one for your model ask us to help.
When you get the manual take a look at the torque specs. MANY of them are in INCH pounds, and some of the larger bolts are in FOOT pounds. You will need 2 torque wrenches; one small one calibrated in inch pounds and a larger one calibrated in foot pounds. Trying to use a foot pound calibrated wrench to tighten the inch pound fasteners won't work properly even if you do the conversion correctly because the foot pound wrench will not be sensitive / accurate enough at its lowest settings. No torque wrench is accurate at ranges below 20% of its max setting.
TOOLS
WARNING! Do not even try to use Phillips screwdrivers on the Kawasaki cross head screws. Despite their appearance they are not Phillips screws. They are Japanese Industrial Standard (JIS) screws. The tips of Phillips screwdrivers are too long & pointed to allow the 4 blades of the screwdriver to properly engage the screws, so when you apply force the screw head slots will deform and look like crap. The fact is that Phillips screws were deliberately designed to have the screwdriver bit "cam out." This was done to prevent production line assembly from over-tightening, stripping, or breaking the screws. JIS screws do not have this problem. A proper fitting JIS bit can tighten a JIS screw to and beyond the torque spec without camming out. Here's the good news - you can easily modify standard Phillips screwdriver tips to fit the JIS screws.
I have ground down the tips of DeWalt #2 and DeWalt #3 Phillips to make them fit JIS screws. The large crosshead screws on the cases take modified #3 bits (or genuine #3 JIS bits). To modify the DeWalt bits you need to grind the very tip a little, then test fit, then grind a little more and test fit, etc. until the bit no longer "rocks" back and forth in the screwhead. Picture 1 below shows how a DeWalt #3 bit fits the case screws of my KZ650 after being ground properly. The #2 DeWalt bits can be modified the same way to fit smaller JIS screws. Pictures 2 and 3 below shows DeWalt #2 and #3 modified bits.
I did find a place that sells authentic JIS bits. They don't list the #3 bit, but if you contact them they can provide the #3 JIS bits even though they are not listed on the website. These folks were very easy to work with, and the authentic bits do work great. Here's their site:
www.rjrcooltools.com/shop_item_detail.cfm?subcat_ID=89
Pictures 4 & 5 below show a comparison between my homemade modified bits with the authentic JIS bits.
PICTURE 1
PICTURE 2
PICTURE 3
PICTURE 4
PICTURE 5
Before reaching for that wrench or ratchet consider the following. The bolts are steel, but your engine and front forks are aluminum. The bolts are much tougher than the aluminum and if over tightened will strip the aluminum threads. Although these can be repaired, preventing damage by applying proper torque will save you grief, time, and money. Tightening fasteners properly requires torque wrenches. Various vendors, including Snap-on, CDI, Sears, etc., market torque wrenches. The two most popular types are the bar type and micrometer type. Either will work, but the micrometer type is a bit easier to use, especially if you are tightening several fasteners with the same torque - such as cylinder head covers. You will need a torque wrench calibrated in INCH POUNDS for many of the bolts. You will also need a torque wrench calibrated in FOOT POUNDS for the larger bolts. Don't try to use the foot pounds wrench on the smaller bolts as it will not be sensitive enough at low torque settings to provide accurate torque. There are many fasteners that require low torque. These include such things as 6mm oil pan bolts, cylinder head cover bolts, etc. for which the torque in 61-78 inch pounds. These low torque bolts require a wrench that is accurate at low settings and this wrench should be graduated in inch pounds. In addition, there are numerous high torque fasteners such as the front axle nuts (51 - 65 foot pounds) or swing arm pivot shaft nuts (58 - 87 foot pounds). These require a wrench that is accurate at higher settings; this wrench should be graduated in foot pounds. Using the proper torque wrenches to correctly tighten fasteners will help prevent damage and contribute to a safe bike. The Kawasaki Service Manual will list the various torque specs for the bolts. I suggest you get the manual before buying the torque wrenches so you can decide which wrenches best meet the torque specs.
Consider buying a can of Kroil penetrating oil and use it to soak stubborn fasteners for a couple days before trying to loosen them. Remember, the original screws and bolts were installed on your bike when Ronald Reagan was President, so many of them may be hard to remove. Kroil can be bought online, at guns shows, and at some other venues.
MOTOR OIL
The ingredients in oils have changed over the years. For example, today's Castrol GTX oil (and pretty much all other AUTOMOBILE oil) is not the same as it was in the 1980's. Back then it worked great in KZ bikes. But, things have changed. Early AUTOMOBILE oils contained zinc phosphorus compounds (ZDDP) to protect engine components from metal to metal contact. This was good for engines, but it was found to be destructive to catalytic converters. Consequently, in AUTOMOBILE oils ZDDP was virtually eliminated and replaced with different chemistry generically referred to as "Friction Modifiers." These work fine and offer good protection for normal AUTOMOBILE engines. However, today's AUTOMOBILE oil "Friction Modifiers" are destructive to wet clutches. KZ bikes (and many other brands) have wet clutches. As a result of these oil chemistry changes a distinction needed to be made between those oils which are suitable for wet clutches and those which are not. That distinction was documented by the Japanese Engine Oil Standards Implementation Panel (JASO). JASO developed a number of different oil specifications for different applications. The specifications that apply to 4 stroke motorcycles fall under the "4T Specifications." Within the 4T specifications the JASO MA class oils are specifically formulated for 4 stroke motorcycles with wet clutches.
There are synthetic, semi-synthetic, and non-synthetic oils that meet the JASO-MA standard and any of them will work ok. However, using oils that are not designated as meeting the JASO-MA standard is destructive to KZ clutches.
Good luck with your bike. Ed
1977 KZ650-C1 Original Owner - Stock (with additional invisible FIAMM horn)
Please Log in or Create an account to join the conversation.
- SWest
-
- Offline
- Sustaining Member
-
Registered
- 10 22 2014
- Posts: 23701
- Thanks: 3001
Re: cleaning carbs without removal
30 May 2016 14:02
Don't forget your best friend and a manual.
Steve
Steve
Z1b1000 1975 Z1b
kzrider.com/forum/11-projects/598262-kz-...-will-it-live#672882
kzrider.com/forum/2-engine/597654-poser?start=240#704229
kzrider.com/forum/11-projects/598262-kz-...-will-it-live#672882
kzrider.com/forum/2-engine/597654-poser?start=240#704229
Please Log in or Create an account to join the conversation.
- Nessism
-

- Offline
- Sustaining Member
-
Registered
- Posts: 8088
- Thanks: 3471
Re: cleaning carbs without removal
30 May 2016 14:38
Remember the Amco commercial where the transmission repair shop guy said (something to the effect of ) "I've fixed this (same) transmission 45 times."
That's what it's like when people shortcut carb cleaning. Pay me now or pay me later.
That's what it's like when people shortcut carb cleaning. Pay me now or pay me later.
Ed
Carb O-ring Kits : www.kzrider.com/forum/14-vendor-forum/62...rburetor-o-ring-kits
www.kzrider.com/forum/faq-wiki/618026-new-owner-things-to-know
1981 KZ750E2
www.kzrider.com/forum/11-projects/604901...z750e-project-thread
Carb O-ring Kits : www.kzrider.com/forum/14-vendor-forum/62...rburetor-o-ring-kits
www.kzrider.com/forum/faq-wiki/618026-new-owner-things-to-know
1981 KZ750E2
www.kzrider.com/forum/11-projects/604901...z750e-project-thread
Please Log in or Create an account to join the conversation.
- theApehouse
-
- Offline
- User
-
Registered
- Posts: 41
- Thanks: 11
Re: cleaning carbs without removal
30 May 2016 15:22
Here's a good carb cleaning tutorial:
www.google.com/url?sa=t&source=web&rct=j...zRQGd3ghJ_QAqcg7mS8A
1987 KZ1000P, dynatek 2.2 coils
www.youtube.com/channel/UC3VtY1XWwKH3zK2trI2Hz1w
www.youtube.com/channel/UC3VtY1XWwKH3zK2trI2Hz1w
The following user(s) said Thank You: Nessism
Please Log in or Create an account to join the conversation.
- bountyhunter
-

- Offline
- User
-
Registered
- Posts: 7245
- Thanks: 338
Re: cleaning carbs without removal
30 May 2016 15:31First most important: take off the fuel tank and flush it thoroughly with mineral spirits. Clean the petcock assy. Install inline fuel filters.Maninthebox1064 wrote: Hello,
I just got my first KZ750 4 cylinder and was hoping to get some guidance on how to approach carb cleaning. It has been sitting for at least a year, if not longer, and really needs some TLC to become roadworthy again.
Flush carbs on bike: use Gumout spray cleaner and squirt down through the top where the fuel goes in the carb, let it drain out the drain plug. Keep hosing. I would also fill the carbs with Gumout or Seafoam and let them sit a week "capped off" to loosen up varnish then repeat the hose down flush again.
You can kluge up a small screwdriver that can get the bowls off without removing the carbs. Keep all parts marked and separate for each carb. That will let you thoroughly clean the bowls, floats, valves.
Use clear tube to set fuel levels once the carbs are clean.
1979 KZ-750 Twin
Please Log in or Create an account to join the conversation.
- Maninthebox1064
-
Topic Author
- Offline
- User
-
Registered
- Posts: 7
- Thanks: 0
Re: cleaning carbs without removal
02 Jun 2016 17:15
I ordered the fuel filter today, do you have any recommendations on where to install it at?
Please Log in or Create an account to join the conversation.
- SWest
-
- Offline
- Sustaining Member
-
Registered
- 10 22 2014
- Posts: 23701
- Thanks: 3001
Re: cleaning carbs without removal
02 Jun 2016 17:55
One fuel line or two? Rout the line so there will be no kinks.
Steve
Steve
Z1b1000 1975 Z1b
kzrider.com/forum/11-projects/598262-kz-...-will-it-live#672882
kzrider.com/forum/2-engine/597654-poser?start=240#704229
kzrider.com/forum/11-projects/598262-kz-...-will-it-live#672882
kzrider.com/forum/2-engine/597654-poser?start=240#704229
The following user(s) said Thank You: Maninthebox1064
Please Log in or Create an account to join the conversation.
- TexasKZ
-

- Offline
- Platinum Member
-
Registered
- Posts: 8200
- Thanks: 2679
Re: cleaning carbs without removal
02 Jun 2016 17:57
Location is not terribly important as long as it does not rub on or interfere with anything else.
1982 KZ1000 LTD parts donor
1981 KZ1000 LTD awaiting resurrection
2000 ZRX1100 not ridden enough
www.kzrider.com/11-projects/620336-anoth...uild-thread?start=24
1981 KZ1000 LTD awaiting resurrection
2000 ZRX1100 not ridden enough
www.kzrider.com/11-projects/620336-anoth...uild-thread?start=24
Please Log in or Create an account to join the conversation.
- drmiller100
-
- Offline
- User
-
Registered
- Posts: 20
- Thanks: 0
Re: cleaning carbs without removal
02 Jun 2016 18:32Maninthebox1064 wrote: Hello,
IIt has been sitting for at least a year, if not longer, and really needs some TLC to become roadworthy again.
At first I had it running (poorly) but replaced the spark plugs and it seemed to help but now it only runs consistently with the choke on a
the pilot jets are plugged. pull the air boots between carbs and air box. loosen all the clamps holding the carbs on. remove the carbs, remove the cable.
turn the carbs over and pour the gas all over your shoes.
remove the 4 screws on the bottom of each carb. clean the float bowls out. don't screw up or bend the floats.
use a VERY small wire (like from a wire brush) and a can of carb cleaner make sure each pilot jet flows. try not to spray too much carb cleaner in your eyes.
put it back together. use wd40 on the carb boots to get them back on.
I like sea foam in the gas tank for a ride or two after this. it will clean stuff up from the inside of the carb as you ride around.
Please Log in or Create an account to join the conversation.
Moderators: Street Fighter LTD