
- Posts: 1808
- Thank you received: 249
Installing Webcamshafts
- kaw-a-holic
-
 Topic Author
- Offline
- User
Less
More
14 May 2016 17:23 #726422
by kaw-a-holic
Jon
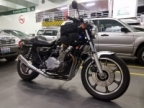
1977 KZ1000a1
Mesa, AZ
Phoenix Fighter Project
Installing Webcamshafts was created by kaw-a-holic
Has anyone ever installed Web Camshafts? Not had them installed but installed them in their bike?
These are the instructions from the manufacturer:
WHAT IS DEGREEING IN YOUR CAMSHAFT?
Degreeing in your camshaft means synchronizing the camshaft's position with the crankshaft. A few degrees of misalignment can affect the engine's operation dramatically. If there were no manufacturing tolerances, you would only need to line up the marks on the timing chain sprockets and the cam would be degreed, but with a group of components (the camshaft, crankshaft, timing chain, and sprockets) all with their own standards and tolerances that when installed, can stack up against you. You can never be sure that the cam is in its correct position until you degree it in. For best performance, you should degree in all performance camshafts.
The basic tools required are a degree wheel, a stable pointer that can be mounted to the engine, a dial indicator with at least one inch of travel in .001" increments, a stand that mounts it to the engine, and a positive stop device to locate TDC.
Web-Cam offers a complete cam degreeing kit, see below for part number information or call for more information.
If you change your timing belt or chain, chain tensioner, cut your head, or deck your block, you must degree in your cams.
FINDING TRUE TOP DEAD CENTER ( TDC )
DISCONNECT THE BATTERY! Do not use the starter to perform any of these steps.
To find Top Dead Center use a piston stop, to stop the piston in the same position on either side of TDC and take readings from the degree wheel. You will then split the difference in these readings and move the pointer this amount, making it the true TDC point.
First mount the degree wheel on the end of the crankshaft, and rotate the engine to approximate TDC
Mount the pointer and line it up at zero on the degree wheel.
Now rotate the engine to move the piston down into the cylinder. Install your positive stop device into the spark plug hole and extend the bolt.
Turn the engine by hand, rotating it until the piston comes up and stops against the piston stop bolt.
Look at the degree wheel and write down the number of degrees shown by the pointer.
Turn the engine by hand in the opposite direction until the piston comes up and stops on the piston stop bolt again.
Go back to the degree wheel and write down the degrees it now reads.
Add these two readings together and divide the answer by two.
Now either move your pointer by this many degrees, or carefully loosen the degree wheel (without disturbing the position of the crankshaft) and move the wheel this required amount.
Retighten the bolts, and rotate the engine again making sure that the readings on each side of TDC are equal degrees away from zero. If they are, the zero on the degree wheel will now be the true TDC point.
Remove the positive stop device from the spark plug hole.
You're now done finding true TDC.
FINDING INTAKE LOBE CENTER LINE
Remove all valve lash (clearance). Place your dial indicator on the valve spring retainer, or tappet. If you are degreeing in a pushrod engine we recommend placing the indicator on the valve retainer. Please be sure the angle of your indicator travels at the same angle that your valve travels. Zero the dial indicator, then turn the engine until you reach full lift and record how far the valve traveled off its fully seated position. This will be the actual valve lift of your desired cam profile. Note: Rocker arm engines can vary. At this point make sure there is additional clearance with your dial indicator to verify plenty of travel for our next step.
Rotate the engine until you are back to Top Dead Center (TDC). Zero your dial indicator. Next you will start turning the engine until you are .050 off the seated position of the valve (It is very important to turn the engine it’s normal way of rotation). Look at the degree wheel and determine how many degrees the valve opened. If we are working on the intake valve this will normally occur Before Top Dead Center (BTDC). Record that number in degrees. NOTE: Some low overlap engines may open After Top Dead Center (ATDC). Record that number in degrees for further calculations.
Look at your inner dial on the dial indicator and record that number to help achieve our next step, however some dial indicators do not have this feature and is not needed to proceed. See WEB CAM camshaft degree kit part #95-144. Proceed to rotate the engine until your inner dial is back on the number it left from. You will notice your big dial is almost back to .050. Slightly move it until it is exactly reads at .050. If you pass it back way up and come at it again. You are now .050 from closing on the opposite side to achieve your next number on the degree wheel, which is normally After Bottom Dead center (ABDC). Now you will use the following steps to properly calculate what actual lobe centers are on the opening valve timing events.
If the valve opened Before Top Dead Center (BTDC) do the following calculation:
Take the open number plus the closing number plus 180°, which will be the duration at .050. Next divide the duration into 2. Subtract the open from that number, which will equals the centerline of the intake cam.
Example:
+10° Opening Before Top Dead Center (BTDC)
+39° Closing After Bottom Dead Center (ABDC)
+180° Distance from Top Dead Center (TDC) to Bottom Dead Center (BDC)
=229° Total Duration @ .050 inches of lift
229°/2 = 114.5°
114.5° - 10° = 104.5° Lobe Center
If the valve opened After Top Dead Center (ATDC) subtract the open from the close plus 180°, which will be your duration at .050. Next divide the duration into 2. Add back the open number, which will equal the centerline of the intake side.
Example:
-10° Opening After Top Dead Center (ATDC)
+39° Closing After Bottom Dead Center (ABDC)
+180° Distance from Top Dead Center (TDC) to Bottom Dead Center (BDC)
=209° Total Duration @ .050 inches of lift
209°/2 = 104.5°
104.5° +10° = 114.5° Lobe Center
If you have adjustable gears move them at this time and redo above procedure.
FINDING EXHAUST LOBE CENTER LINE
Next step is to set up your dial indicator and repeat the above procedure. The exhaust valve normally opens Before Bottom Dead Center (BBDC), and the closing will occur After Top Dead Center (ATDC). On some low overlap cam profiles the exhaust valve may close Before Top Dead Center (BTDC) however, record for further calculations. Once you have achieved your opening and closing events we can precede to the following calculations.
If the exhaust closed After Top Dead Center (ATDC) add the exhaust opening figure to the exhaust closing figure plus 180°, which will equal the duration at .050. Divide the duration by 2. Subtract the closing number, which will equal the centerline of the exhaust side.
Example:
+39° Opening Before Bottom Dead Center (BBDC)
+10° Closing After Top Dead Center (ATDC)
+180° Distance from Bottom Dead Center (BDC) to Top Dead Center (TDC)
=229° Total Duration @ .050 inches of lift
229°/2 = 114.5°
114.5° - 10° = 104.5° Lobe Center
If the exhaust closed Before Top Dead Center (BTDC) subtract the exhaust closing from the opening figure plus 180°, which will equal the duration at .050. Divide the duration by 2. Add back the closing number, which will equal the centerline of the exhaust side.
Example:
+39° Opening Before Bottom Dead Center (BBDC)
-10° Closing Before Top Dead Center (BTDC)
+180° Distance from Bottom Dead Center (BDC) to Top Dead Center (TDC)
=209° Total Duration @ .050 inches of lift
209°/2 = 104.5°
104.5° + 10° = 114.5° Lobe Center
If you have adjustable gears move them at this time and redo above procedure.
ALWAYS CHECK SEVERAL TIMES FOR ACCURACY
This doesn't make sense to me because it is an overhead cam. How am I supposed to tell how many degrees open the valve is when the lobe is pointed down?
Jon
1977 KZ1000a1
Mesa, AZ
Phoenix Fighter Project
Please Log in or Create an account to join the conversation.
- bluezbike
-
- Offline
- Sustaining Member
Less
More
- Posts: 598
- Thank you received: 104
14 May 2016 17:47 #726425
by bluezbike
79 KZ 1000 LTD
77 KZ 1000 B1 LTD (awaiting electrical resurrection)
Replied by bluezbike on topic Installing Webcamshafts
Not entirely sure but I will have to do this myself in the near future...what I do know though is that I remember Old Man Rock doing a really good write-up on degreeing cams in his build thread....I tried searching for it but it is unavailable, maybe asking him to repost it ?
79 KZ 1000 LTD
77 KZ 1000 B1 LTD (awaiting electrical resurrection)
Please Log in or Create an account to join the conversation.
- z1kzonly
-

- Offline
- User
- Sustaining Member
Less
More
- Posts: 2890
- Thank you received: 540
14 May 2016 17:49 #726426
by z1kzonly
Livin in "CheektaVegas, NY
Went thru 25 of these in 40 yrs.
I SOLD OUT! THE KAW BARN IS EMPTY.
More room for The Old Girl, Harley 75 FLH Electra Glide,
Old faithful! Points ign. Bendix Orig. carb.
Starts everytime!
Replied by z1kzonly on topic Installing Webcamshafts
Hey you Kaw holic! Are these old school or newer or brand new? Drop in? around .400" -.410" gross lift?
If you got some drop in's. Just use the stock cam sprockets! 3 holes no adjustments!
If they are a little bigger, you might need a bigger valve pocket on the piston dome say 10 / 1 C ratio. 12 /1 C ratio. Compression ratio's.
You can run shim on top buckets if you have all good and fresh valve train parts. Fresh springs, HD cam chain. Might have to mill out the valve bucket lifter holes a slight bit at top to be safe for cam lobes?.
First we need to know the cam specs?
Livin in "CheektaVegas, NY
Went thru 25 of these in 40 yrs.
I SOLD OUT! THE KAW BARN IS EMPTY.
More room for The Old Girl, Harley 75 FLH Electra Glide,
Old faithful! Points ign. Bendix Orig. carb.
Starts everytime!
The following user(s) said Thank You: kaw-a-holic
Please Log in or Create an account to join the conversation.
- Patton
-

- Offline
- KZr Legend
Less
More
- Posts: 18640
- Thank you received: 2098
14 May 2016 17:50 #726427
by Patton
1973 Z1
KZ900 LTD
Replied by Patton on topic Installing Webcamshafts
Perhaps will make more sense:
Click here > www.kzrider.com/filebase/download/27-gen...egreeing-for-zombies
Good Fortune!")
Click here > www.kzrider.com/filebase/download/27-gen...egreeing-for-zombies
Good Fortune!
1973 Z1
KZ900 LTD
The following user(s) said Thank You: kaw-a-holic, bluezbike
Please Log in or Create an account to join the conversation.
- DFIGPZ
- Offline
- User
Less
More
- Posts: 635
- Thank you received: 122
14 May 2016 18:23 #726436
by DFIGPZ
1984 750 Turbo
Replied by DFIGPZ on topic Installing Webcamshafts
Yes I have done many I degree them all.
1984 750 Turbo
Please Log in or Create an account to join the conversation.
- kaw-a-holic
-
Topic Author
- Offline
- User
Less
More
- Posts: 1808
- Thank you received: 249
14 May 2016 18:54 #726447
by kaw-a-holic
Jon
1977 KZ1000a1
Mesa, AZ
Phoenix Fighter Project
Replied by kaw-a-holic on topic Installing Webcamshafts
art #:60091 ; 60092 Grind:110
Intake Exhaust Valve Lash (Inch): .006" .006" Valve Lift (Inch): 0.395 0.395 Valve Lift (mm): 10.03 10.03 Advertised Duration: 284° 284° Duration @ 0.050": 256° 256° Lobe Center: 106° 108° = 107° Overall
Intake Opens 22° Before TDC
Exhaust Opens 56° Before BDC
Intake Closes 54° After BDC
Exhaust Closes 20° After TDC
Valve Timing Is Checked With Zero Valve Lash @ 0.050 Inches Of Valve Lift.
Jon
1977 KZ1000a1
Mesa, AZ
Phoenix Fighter Project
Please Log in or Create an account to join the conversation.
- kaw-a-holic
-
Topic Author
- Offline
- User
Less
More
- Posts: 1808
- Thank you received: 249
14 May 2016 19:36 #726458
by kaw-a-holic
Jon
1977 KZ1000a1
Mesa, AZ
Phoenix Fighter Project
Replied by kaw-a-holic on topic Installing Webcamshafts
Thanks guys, I will read through the PDF. I probably could just drop them in but I want them degreed. These are brand new Web 110° camshafts.
Jon
1977 KZ1000a1
Mesa, AZ
Phoenix Fighter Project
Please Log in or Create an account to join the conversation.
- SWest
-

- Offline
- Sustaining Member
- 10 22 2014
Less
More
- Posts: 22972
- Thank you received: 2749
14 May 2016 21:22 #726472
by SWest
Replied by SWest on topic Installing Webcamshafts
Can you do that with them?
Steve
Steve
Please Log in or Create an account to join the conversation.
- kaw-a-holic
-
Topic Author
- Offline
- User
Less
More
- Posts: 1808
- Thank you received: 249
14 May 2016 21:30 #726473
by kaw-a-holic
Jon
1977 KZ1000a1
Mesa, AZ
Phoenix Fighter Project
Replied by kaw-a-holic on topic Installing Webcamshafts
I bought adjustable cam gears so I should be able to.swest wrote: Can you do that with them?
Steve
Jon
1977 KZ1000a1
Mesa, AZ
Phoenix Fighter Project
Please Log in or Create an account to join the conversation.
- SWest
-
- Offline
- Sustaining Member
- 10 22 2014
Less
More
- Posts: 22972
- Thank you received: 2749
14 May 2016 21:41 #726476
by SWest
Replied by SWest on topic Installing Webcamshafts
I mean drop them in with the stock sprockets. :huh:
Steve
Steve
Please Log in or Create an account to join the conversation.
- SWest
-
- Offline
- Sustaining Member
- 10 22 2014
Less
More
- Posts: 22972
- Thank you received: 2749
14 May 2016 21:41 #726477
by SWest
Replied by SWest on topic Installing Webcamshafts
I mean drop them in with the stock sprockets. :huh:
Steve
Steve
Please Log in or Create an account to join the conversation.
- kaw-a-holic
-
Topic Author
- Offline
- User
Less
More
- Posts: 1808
- Thank you received: 249
14 May 2016 21:47 #726479
by kaw-a-holic
I don't know, they are not labeled as drop in cams which is part of the reason I want to degree them. I want the timing to be right on the money, not just close like factory. Keep in mind I am running C5 ignition, it doesn't use mechanical advance. It uses an ignition map.
Jon
1977 KZ1000a1
Mesa, AZ
Phoenix Fighter Project
Replied by kaw-a-holic on topic Installing Webcamshafts
swest wrote: I mean drop them in with the stock sprockets. :huh:
Steve
I don't know, they are not labeled as drop in cams which is part of the reason I want to degree them. I want the timing to be right on the money, not just close like factory. Keep in mind I am running C5 ignition, it doesn't use mechanical advance. It uses an ignition map.
Jon
1977 KZ1000a1
Mesa, AZ
Phoenix Fighter Project
Please Log in or Create an account to join the conversation.