
KZ1000A1 Spare Parts Project
- calum
-
 Topic Author
- Offline
- User
-

Registered
- Posts: 1144
- Thanks: 415
Re: KZ1000A1 Spare Parts Project
02 Jul 2023 07:44
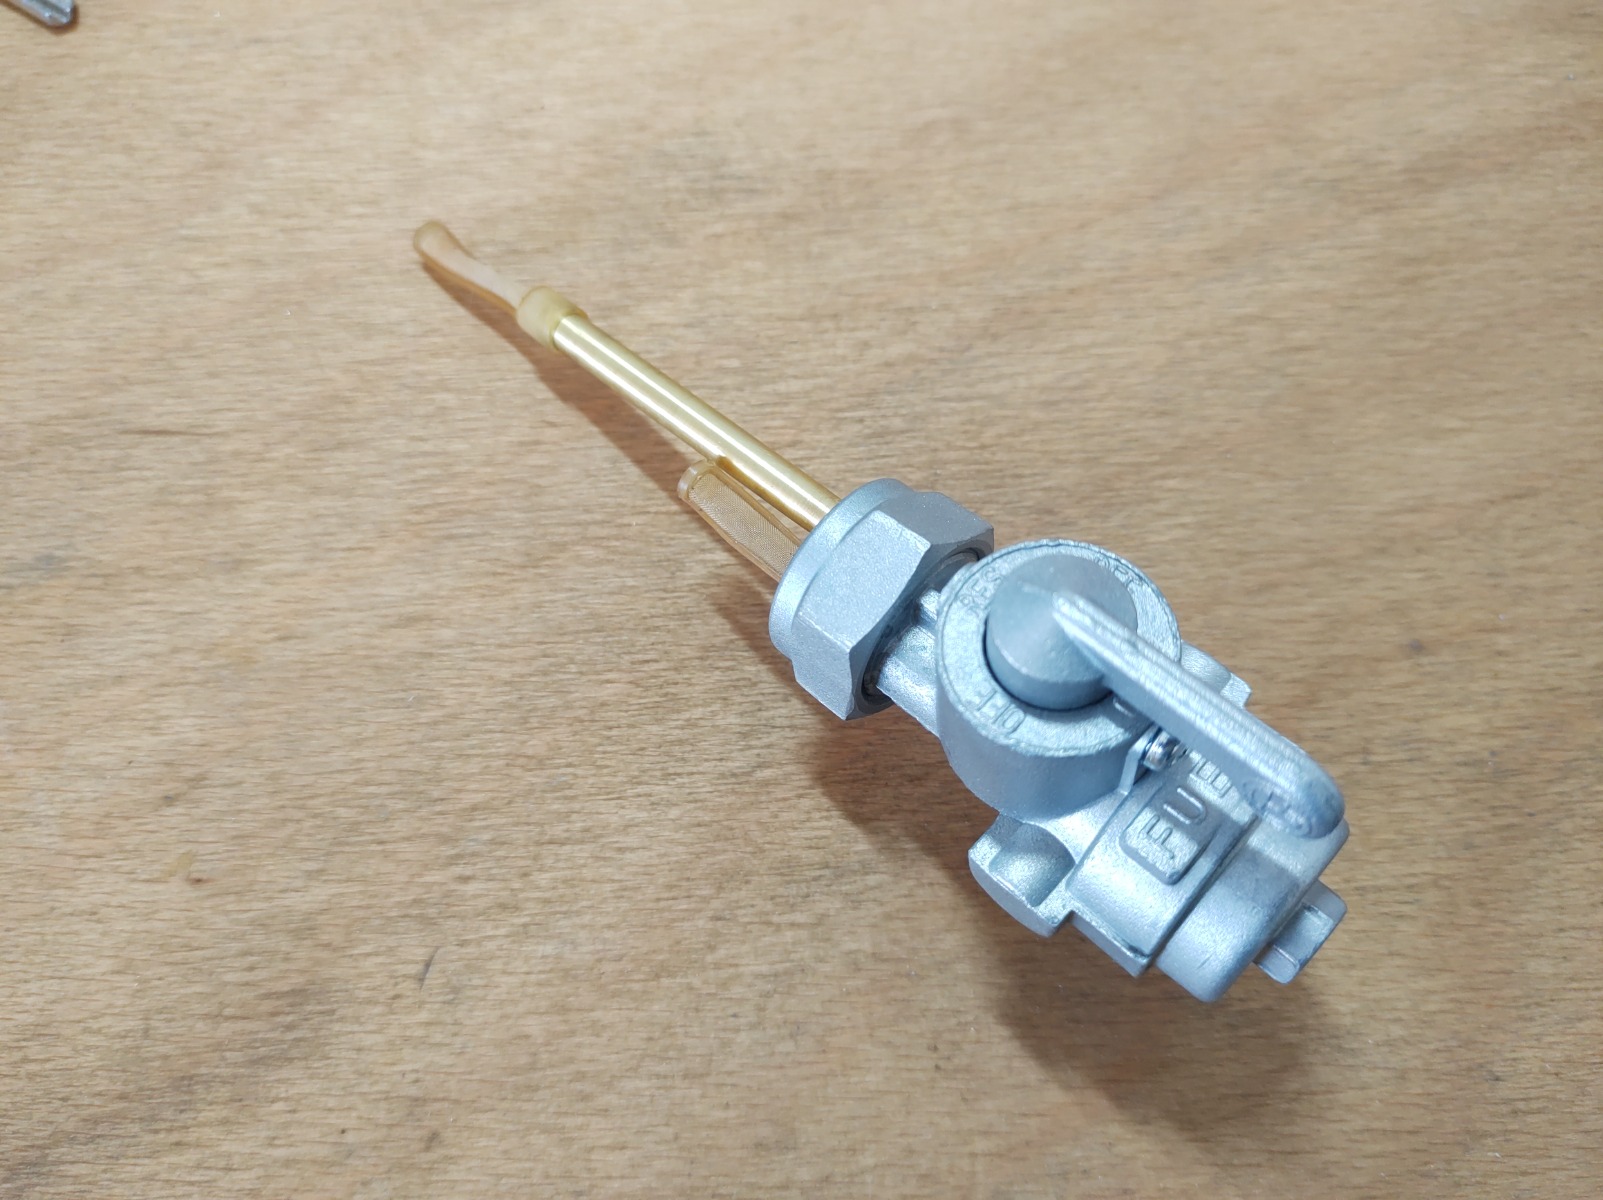
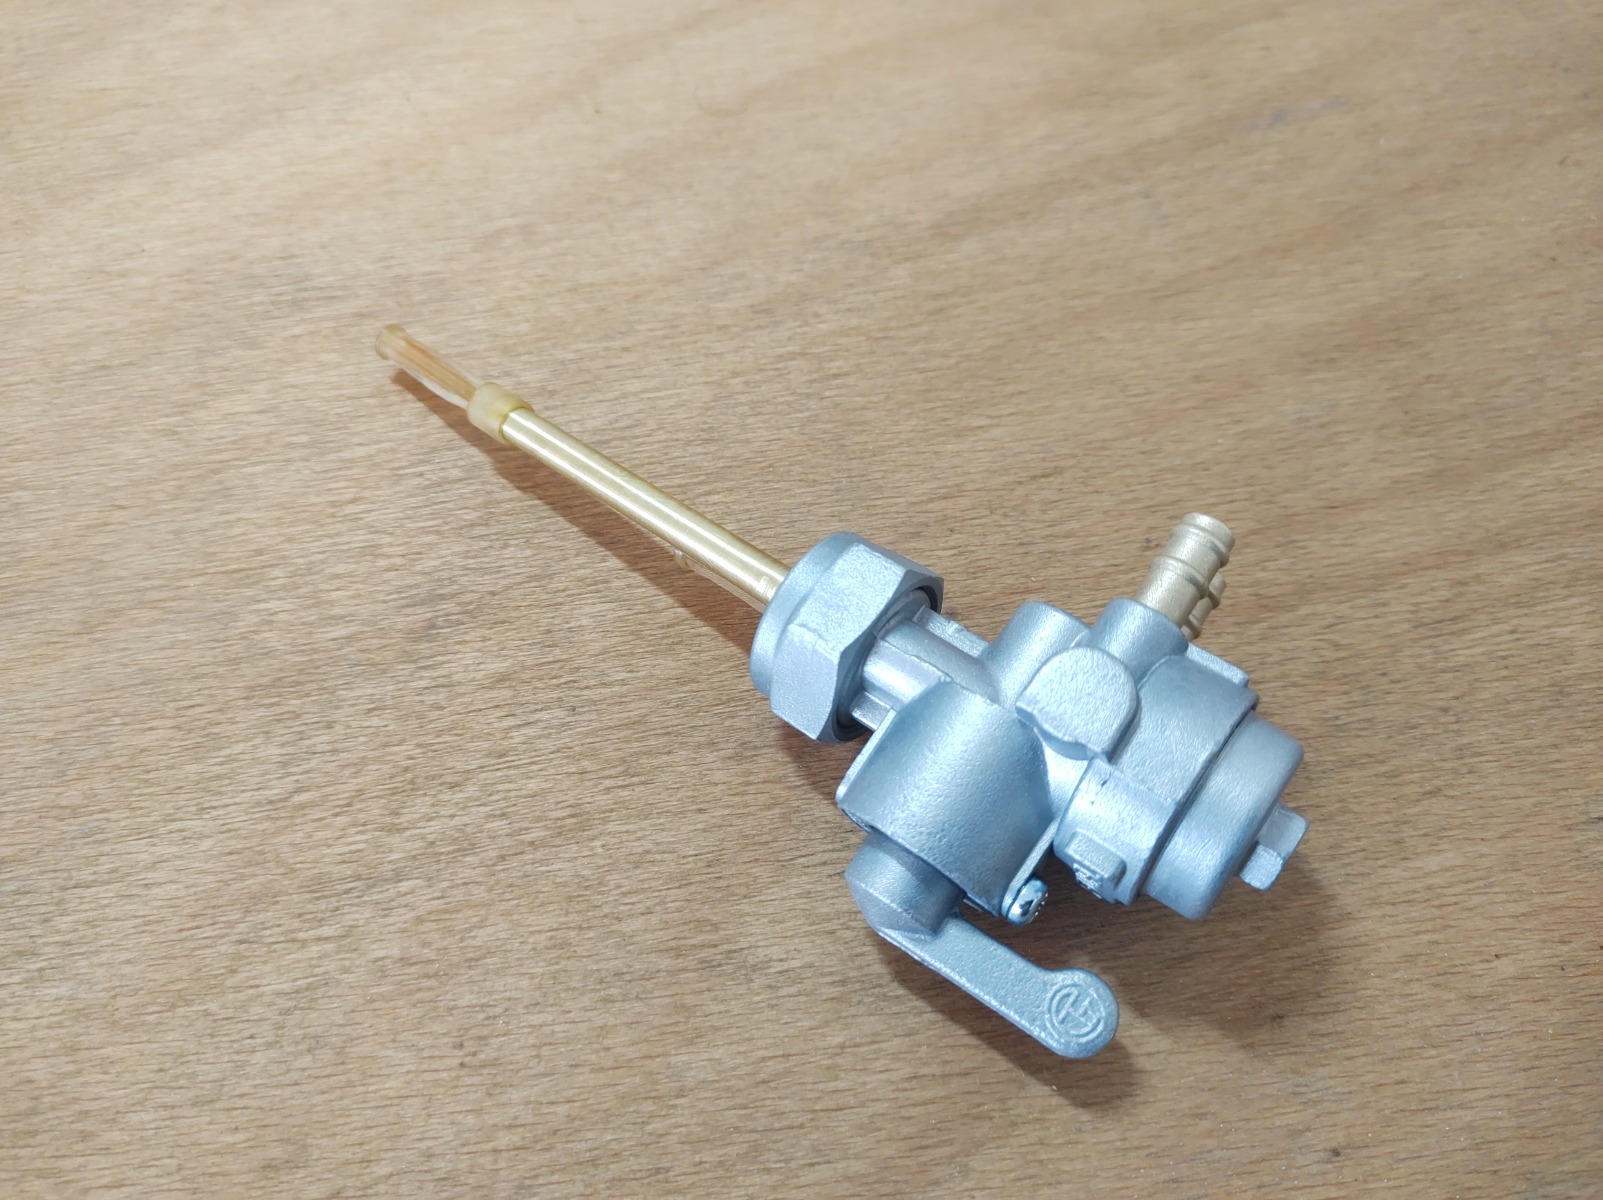
Put the petcock back together today. Should I take the filters off the inlets so all the gunge collects in the bottom of the petcock? It would make it easier to clean.
KZ1000 Restomod (
www.kzrider.com/forum/11-projects/614517-1977-kz1000-restomod
)
1977 KZ1000A1 ( www.kzrider.com/forum/11-projects/616901...-spare-parts-project )
1980 KZ750H ( kzrider.com/forum/11-projects/612054-kz750h-restoration )
2000 BMW F650GS
1977 KZ1000A1 ( www.kzrider.com/forum/11-projects/616901...-spare-parts-project )
1980 KZ750H ( kzrider.com/forum/11-projects/612054-kz750h-restoration )
2000 BMW F650GS
Please Log in or Create an account to join the conversation.
- sf4t7
-

- Offline
- Sustaining Member
-

Registered
- Posts: 976
- Thanks: 798
Re: KZ1000A1 Spare Parts Project
03 Jul 2023 14:55
But that would run any grunge through the valve section. Just my 2c.

Scotty
Scotty
Scotty
1974 Z1A
Yoshimura 987, 10.25:1
welded Z1 crank
Andrews 1X Cams
Delkevic 4 into 1
Superbike bars
530 conversion
1974 Z1A
Yoshimura 987, 10.25:1
welded Z1 crank
Andrews 1X Cams
Delkevic 4 into 1
Superbike bars
530 conversion
The following user(s) said Thank You: Wookie58
Please Log in or Create an account to join the conversation.
- calum
-
Topic Author
- Offline
- User
-
Registered
- Posts: 1144
- Thanks: 415
Re: KZ1000A1 Spare Parts Project
03 Jul 2023 15:11
True. I was just wondering as I don't think they were on the original petcock. I'll leave them on and check the flow - should be fine though, given the dual outlets.
KZ1000 Restomod (
www.kzrider.com/forum/11-projects/614517-1977-kz1000-restomod
)
1977 KZ1000A1 ( www.kzrider.com/forum/11-projects/616901...-spare-parts-project )
1980 KZ750H ( kzrider.com/forum/11-projects/612054-kz750h-restoration )
2000 BMW F650GS
1977 KZ1000A1 ( www.kzrider.com/forum/11-projects/616901...-spare-parts-project )
1980 KZ750H ( kzrider.com/forum/11-projects/612054-kz750h-restoration )
2000 BMW F650GS
The following user(s) said Thank You: sf4t7
Please Log in or Create an account to join the conversation.
- calum
-
Topic Author
- Offline
- User
-
Registered
- Posts: 1144
- Thanks: 415
Re: KZ1000A1 Spare Parts Project
09 Oct 2023 11:11
Just an update on this thing...
Unfortunately this bike will be sold as soon as it's finished. I don't really have any use for it as I would just be using it for the same rides as I currently use the 750 - which isn't going anywhere. It would be a shame for it to just sit around and not get ridden. The money will go into building a small workshop next to the house so I have somewhere to paint and don't have to weld in the carport during winter.
All this means that I'll be getting the bodywork painted instead of doing it myself - will make it easier to sell if the bodywork is done properly. I just need to clear coat the switch blocks sometime before christmas so I can get the bike running and sort out the carbs, timing etc. By that time the bodywork should be done.
Will post again when the switch blocks are done.
KZ1000 Restomod (
www.kzrider.com/forum/11-projects/614517-1977-kz1000-restomod
)
1977 KZ1000A1 ( www.kzrider.com/forum/11-projects/616901...-spare-parts-project )
1980 KZ750H ( kzrider.com/forum/11-projects/612054-kz750h-restoration )
2000 BMW F650GS
1977 KZ1000A1 ( www.kzrider.com/forum/11-projects/616901...-spare-parts-project )
1980 KZ750H ( kzrider.com/forum/11-projects/612054-kz750h-restoration )
2000 BMW F650GS
The following user(s) said Thank You: Wookie58, Kelly E
Please Log in or Create an account to join the conversation.
- calum
-
Topic Author
- Offline
- User
-
Registered
- Posts: 1144
- Thanks: 415
Re: KZ1000A1 Spare Parts Project
03 Dec 2023 08:42 - 03 Dec 2023 08:43
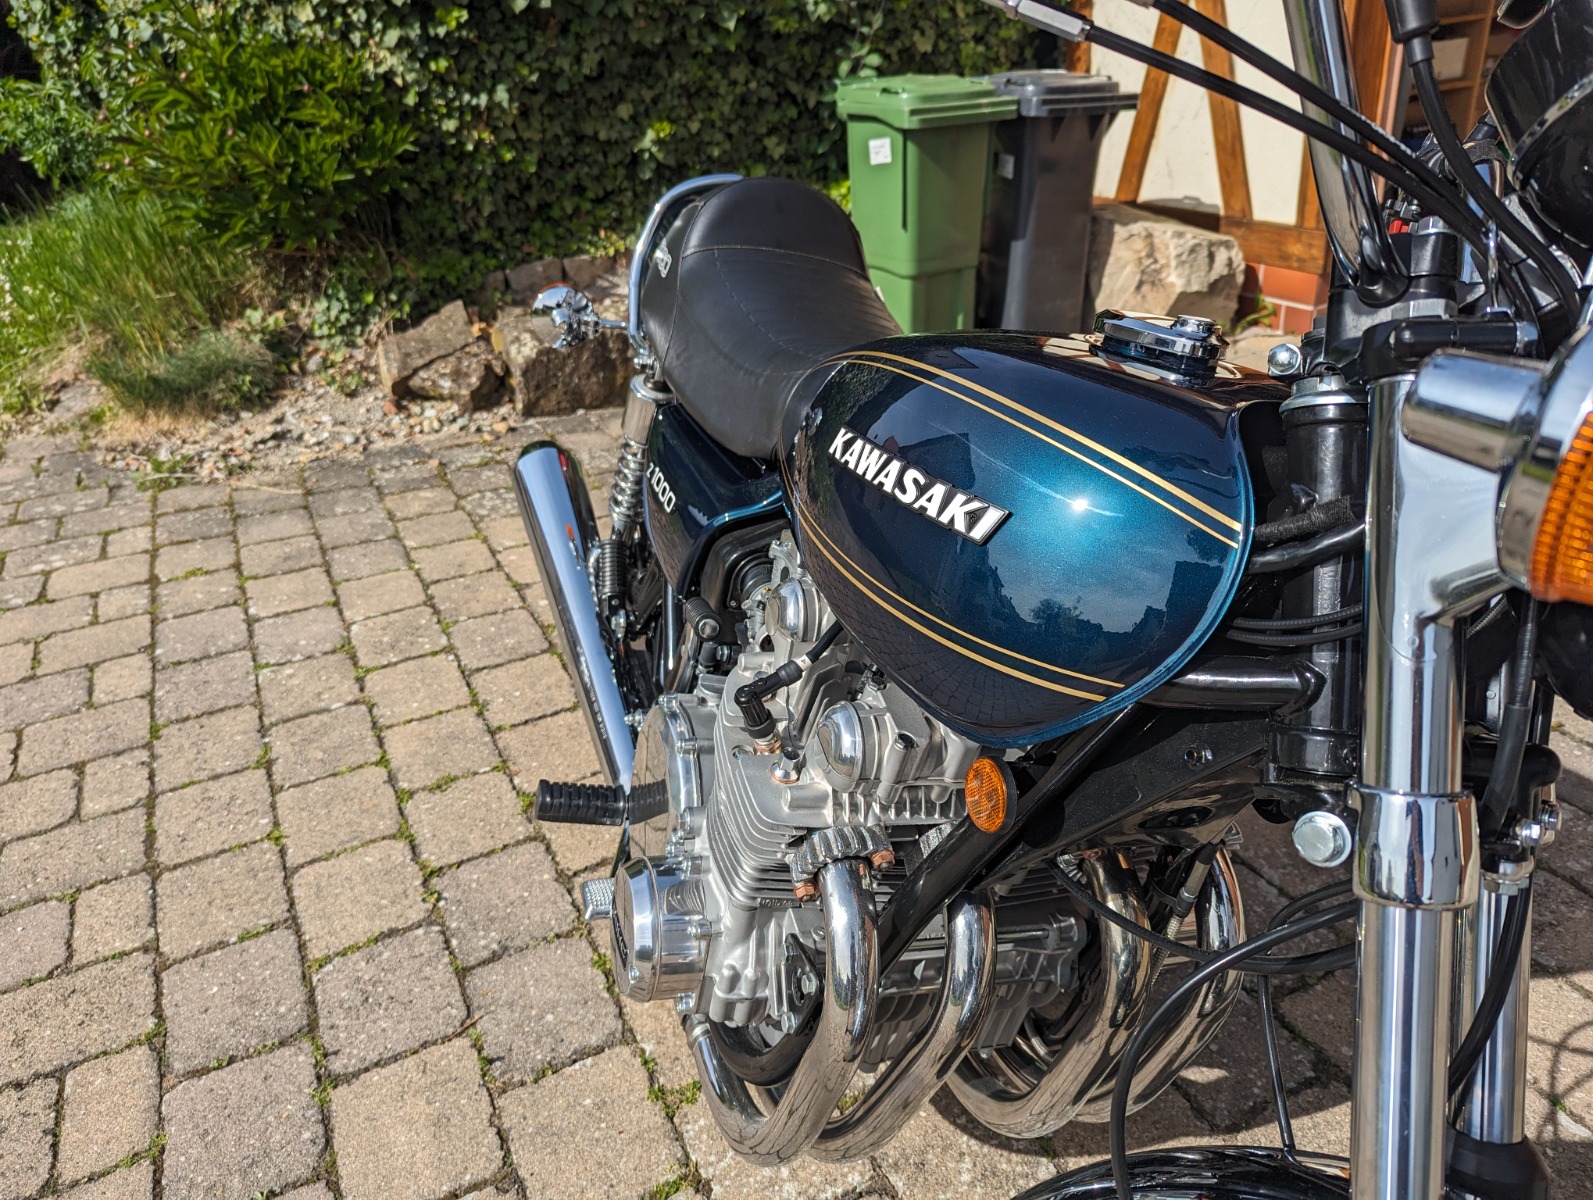
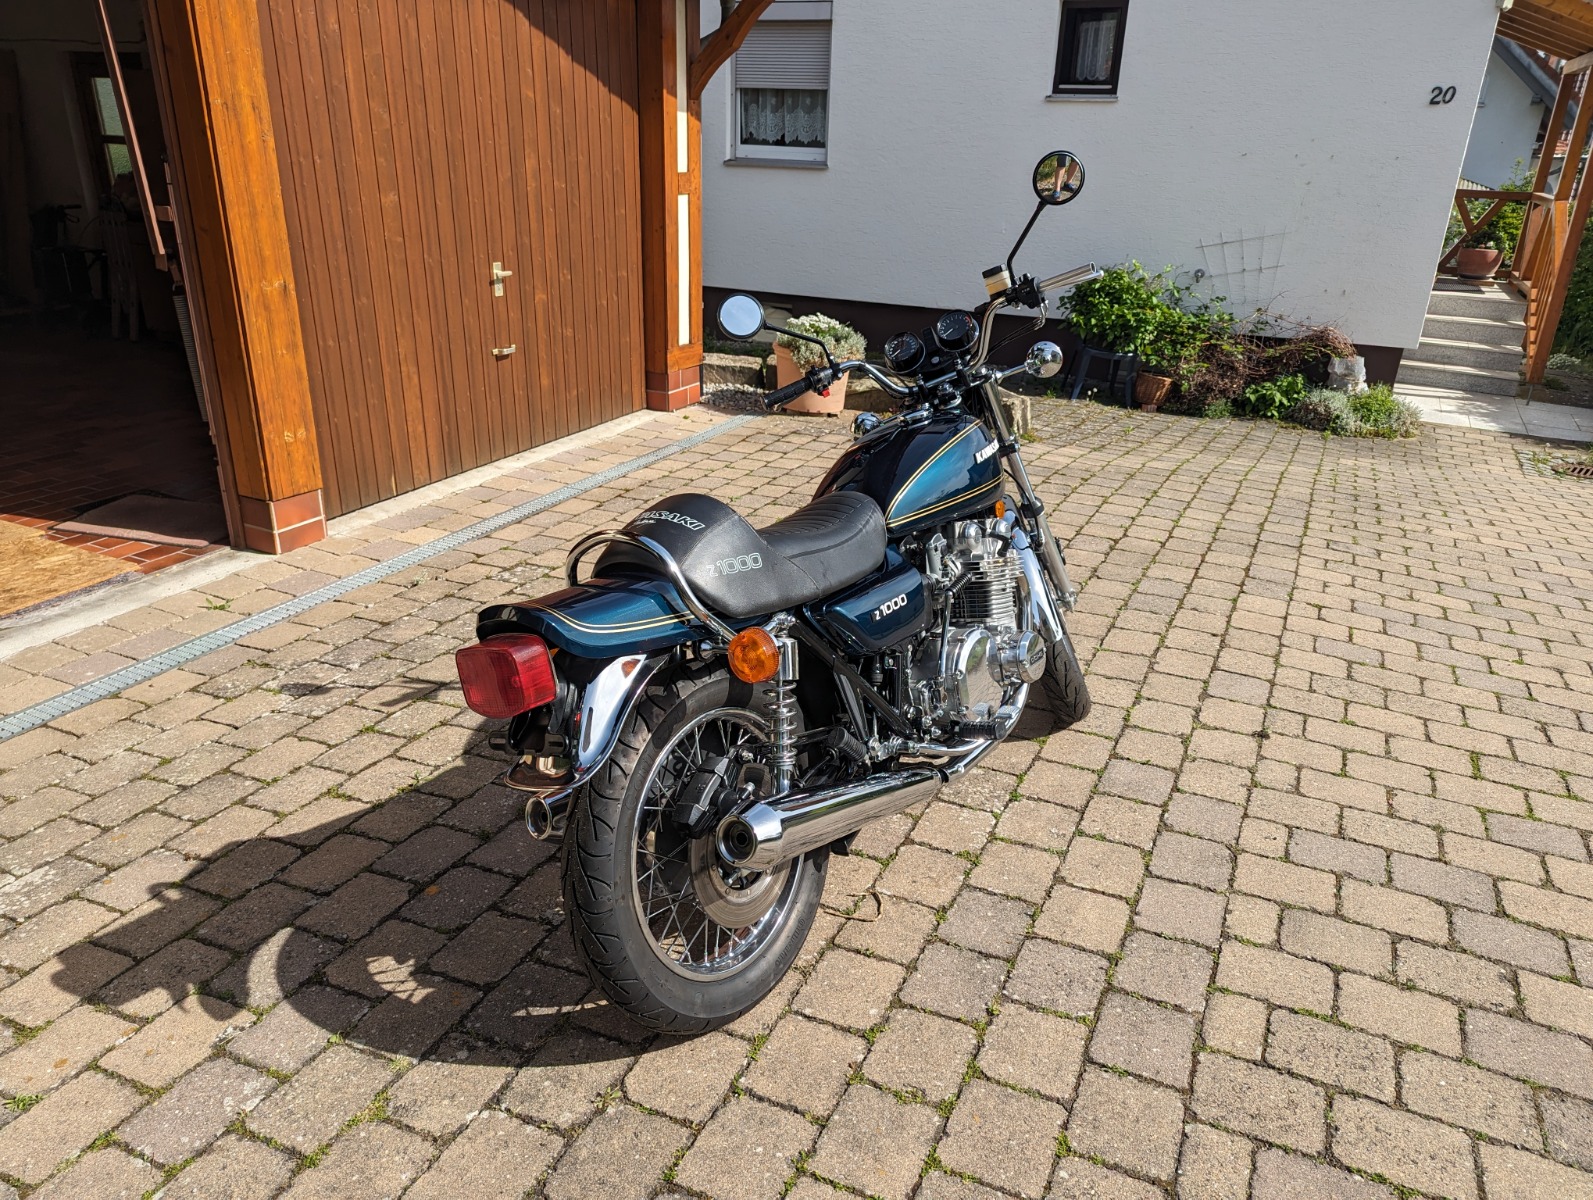
Got the bodywork back today. Looks really nice - the photos don't really do it justice. I'm really busy trying to get the renovations in the kitchen done so the new kitchen can be installed before Christmas. Otherwise we'll have to wait until everyone goes back to work and it won't be finished until mid-January. I'll get the switch blocks done in January and then start this thing up.
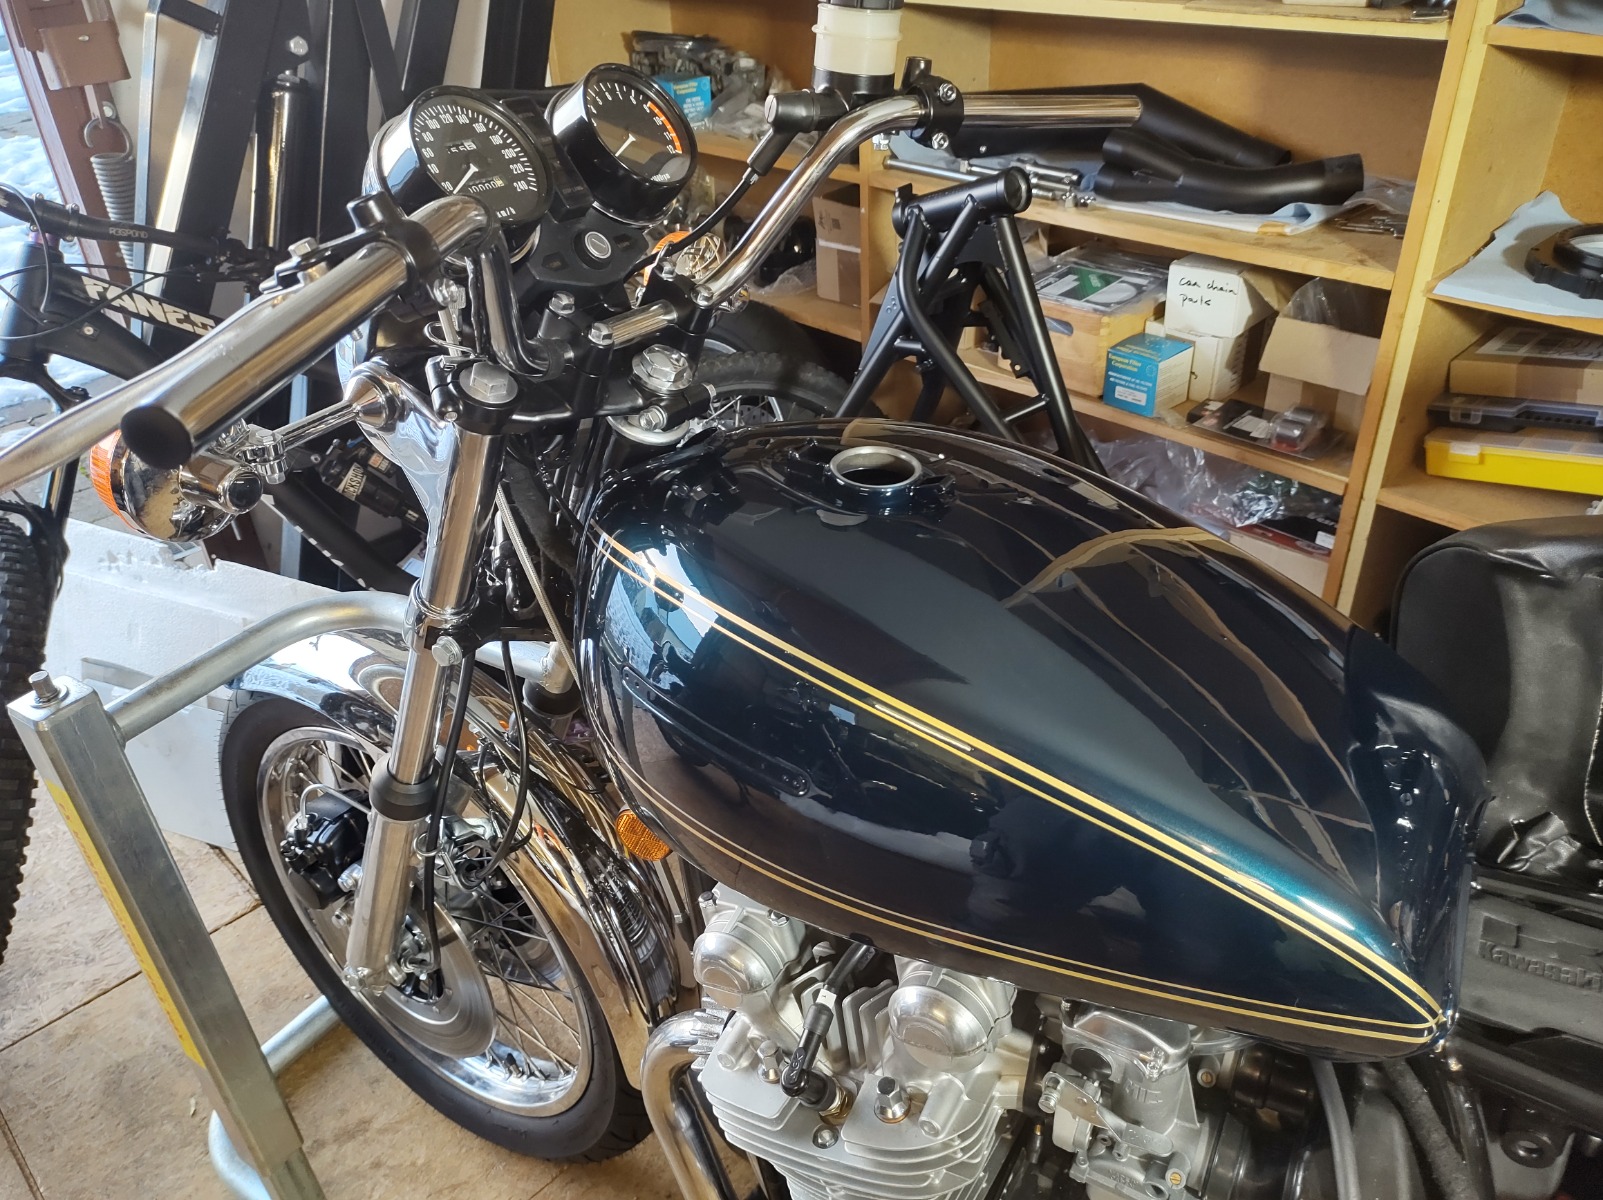
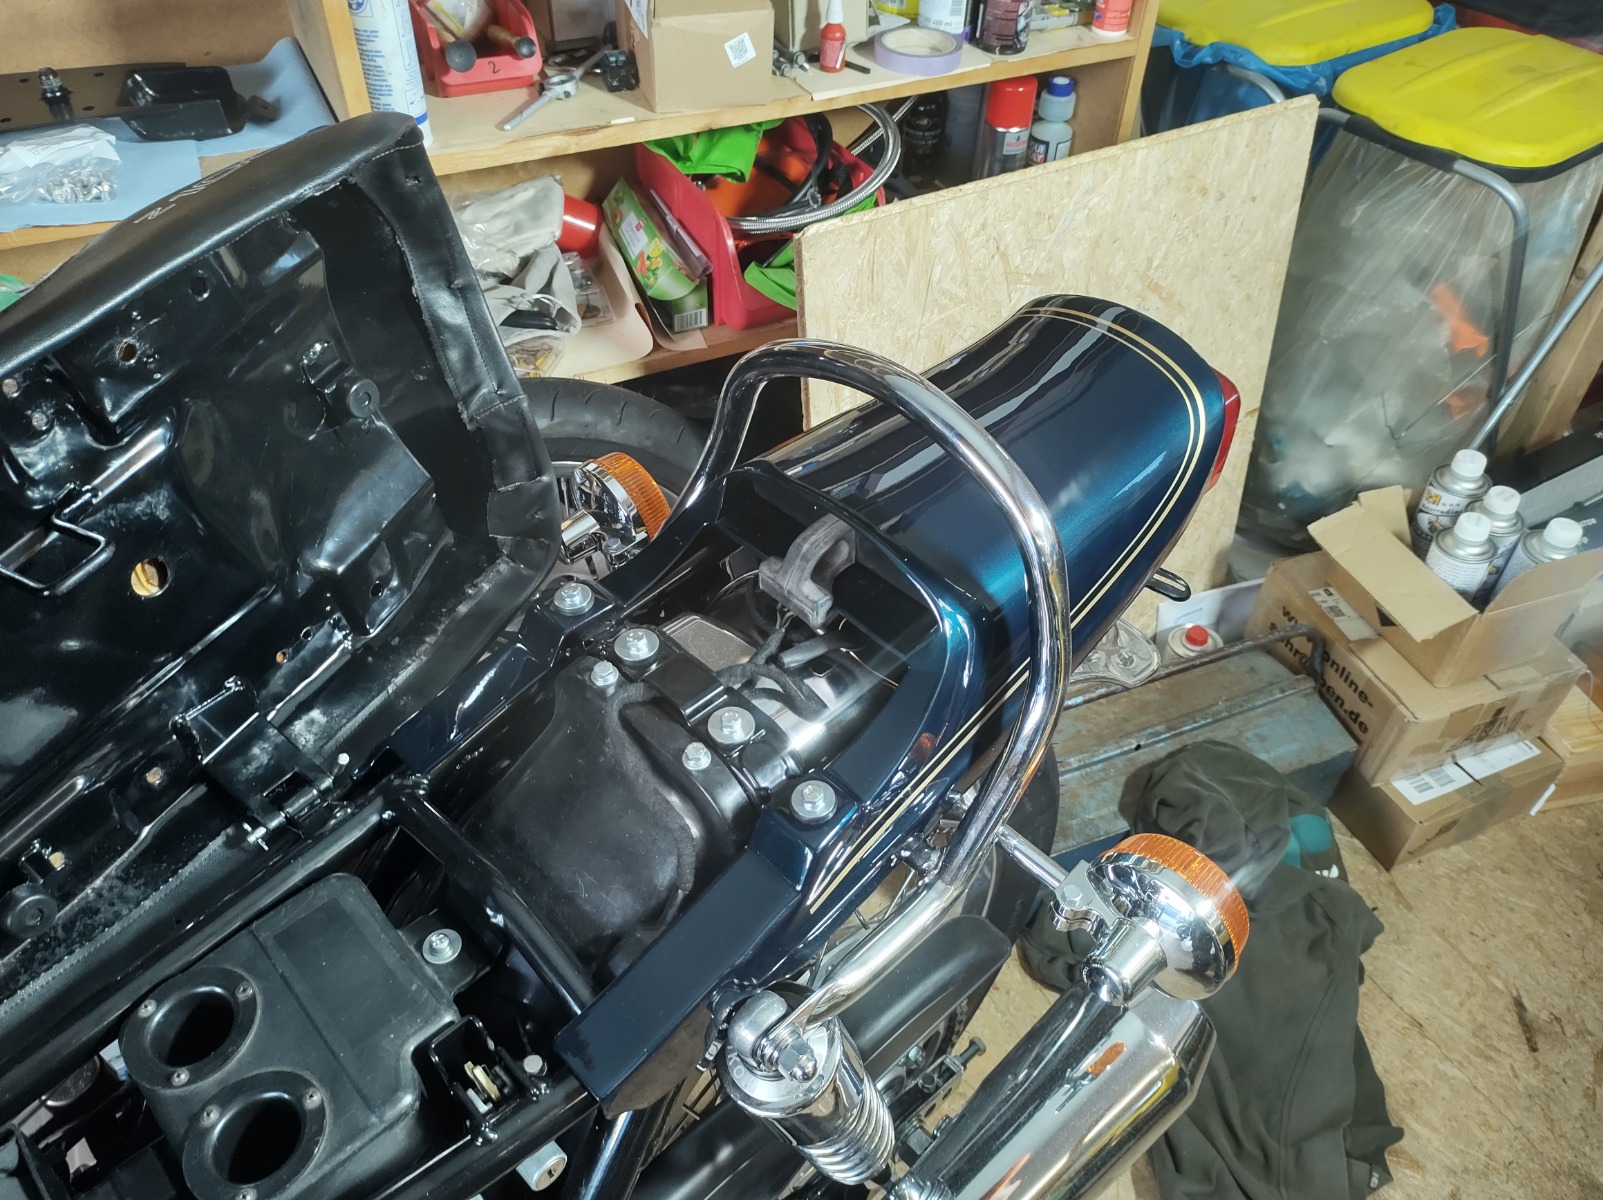

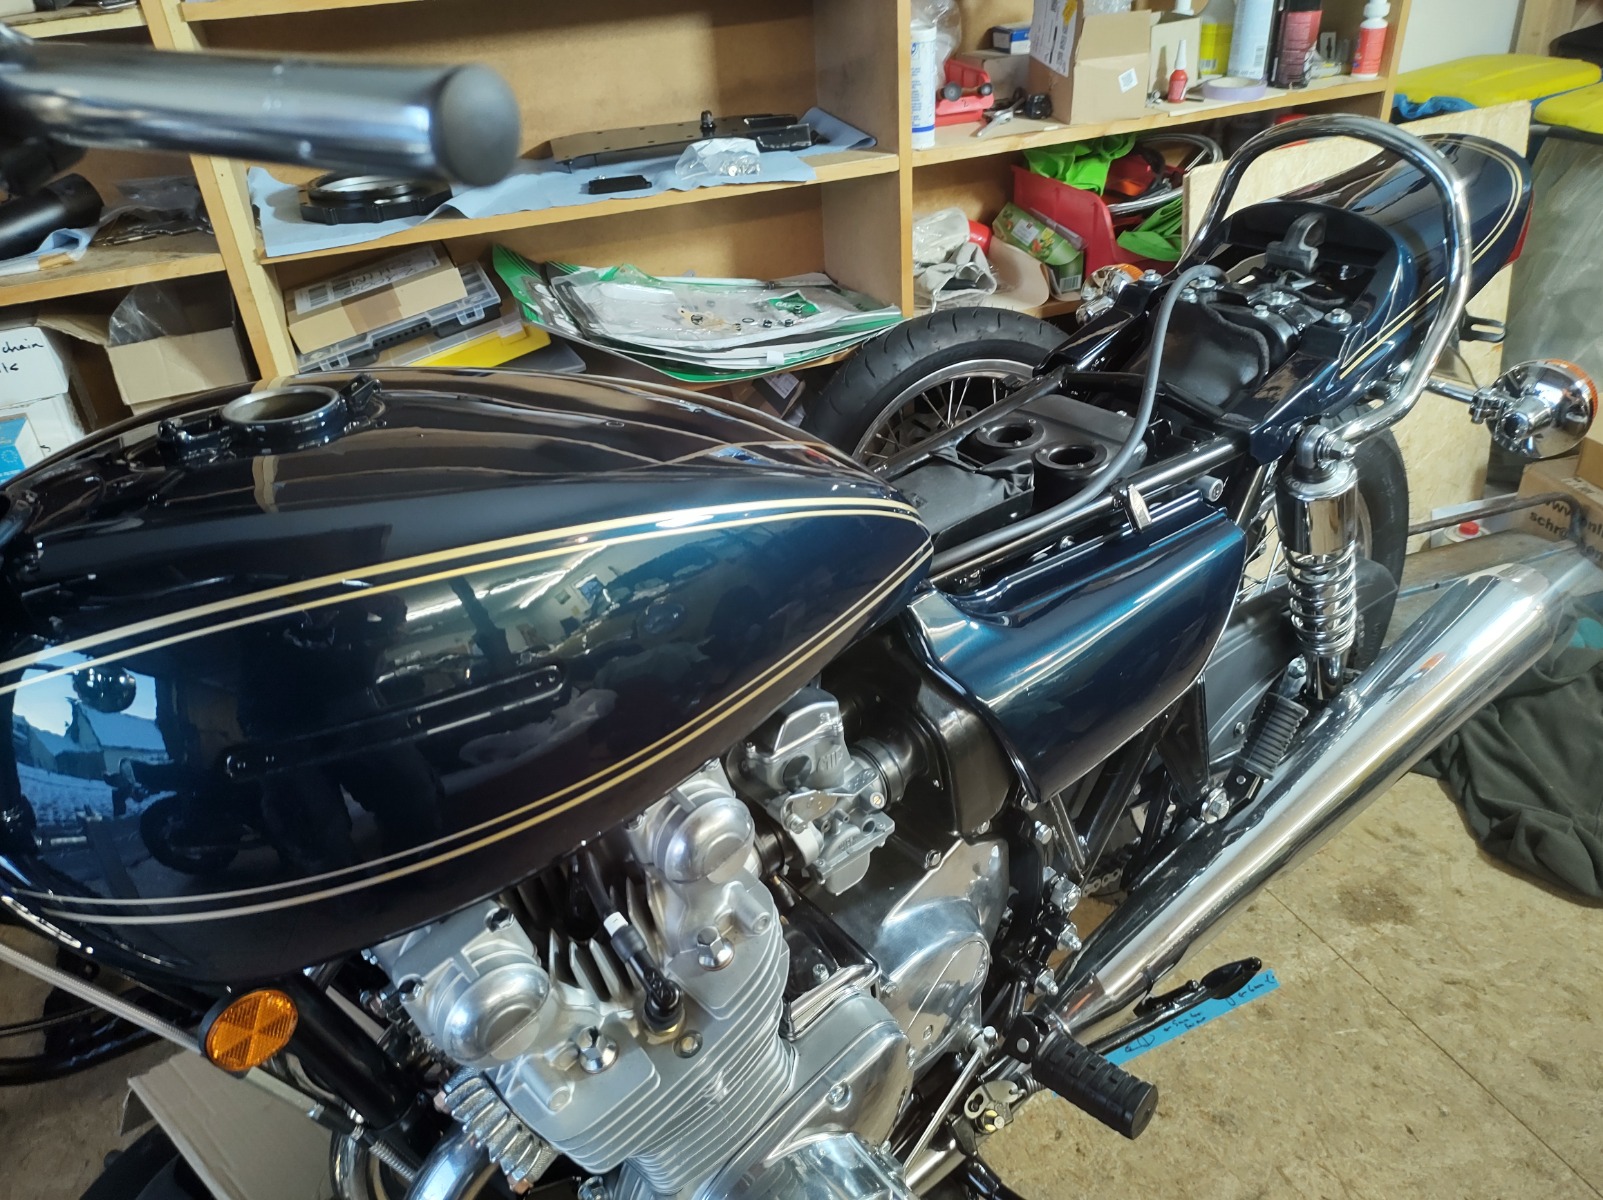
Unfortunately the seat catches on the tank. Not sure if it's the aftermarket seat or the repro tank. Will file back the seat pan and glue the cover back down. The tank only needs a small touch-up under the seat so I guess I got away with one there.
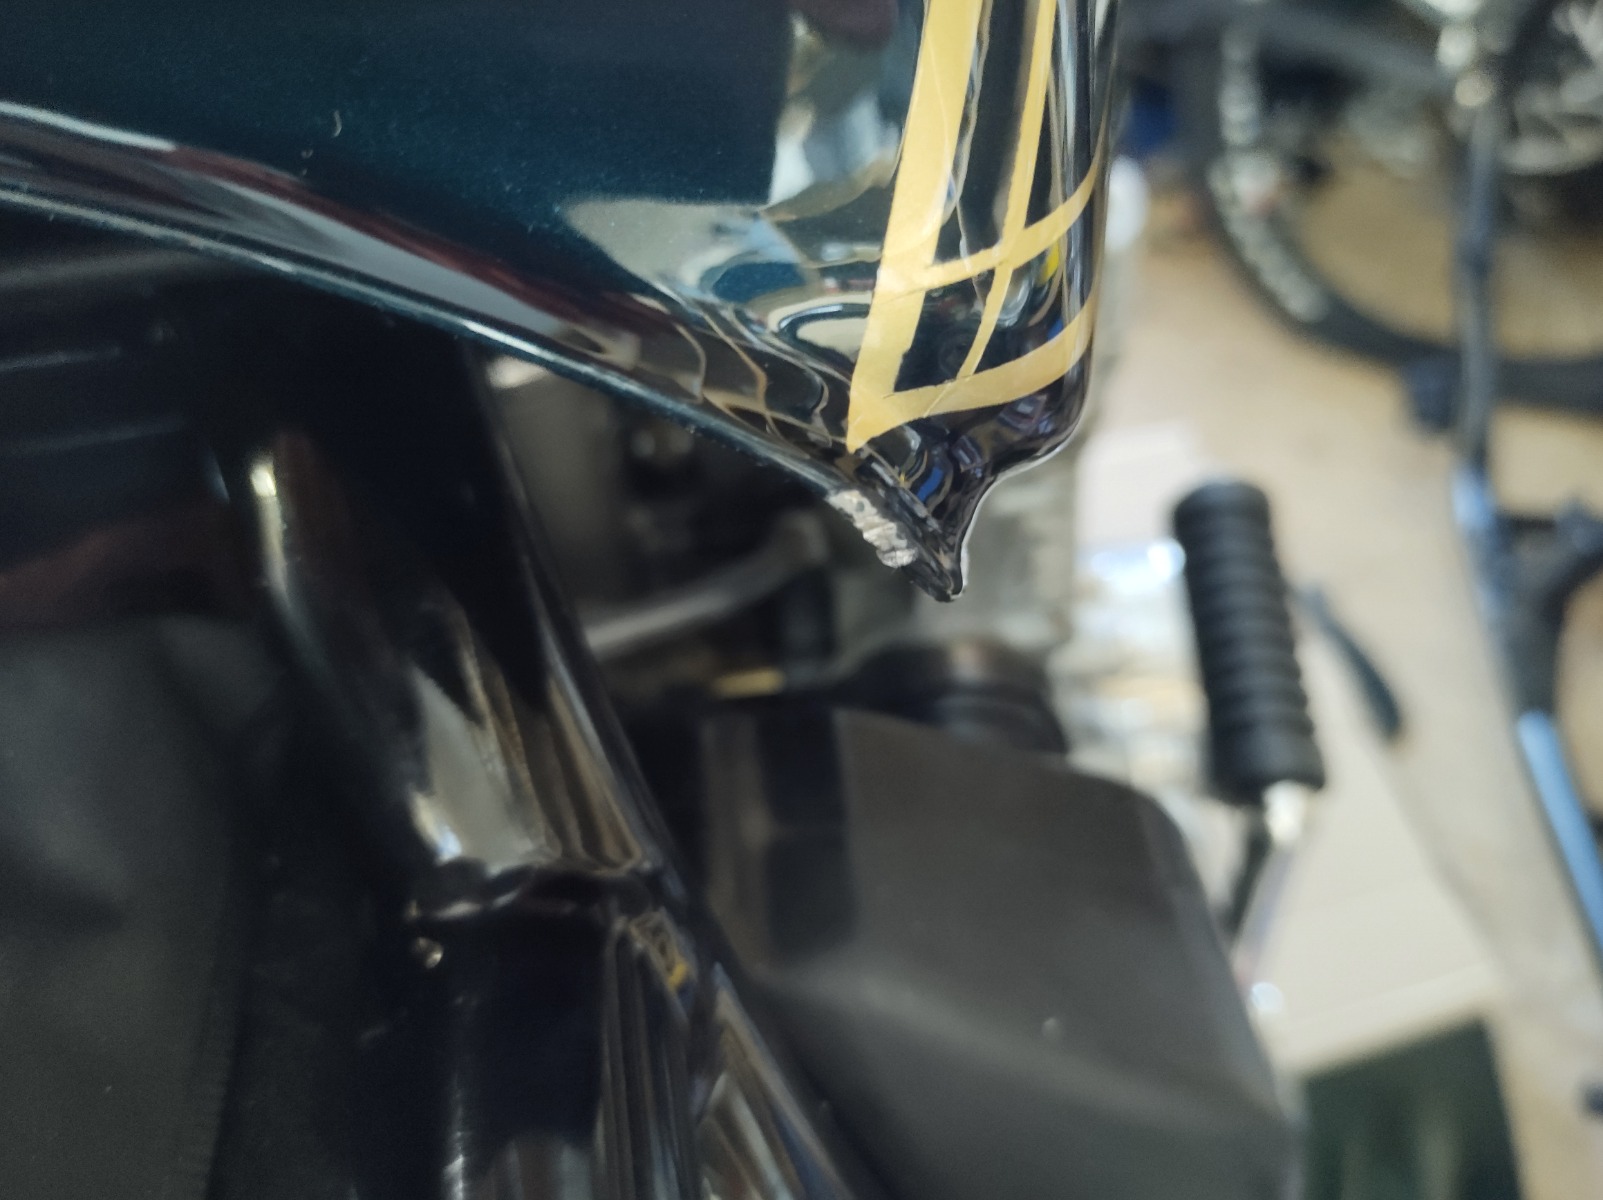
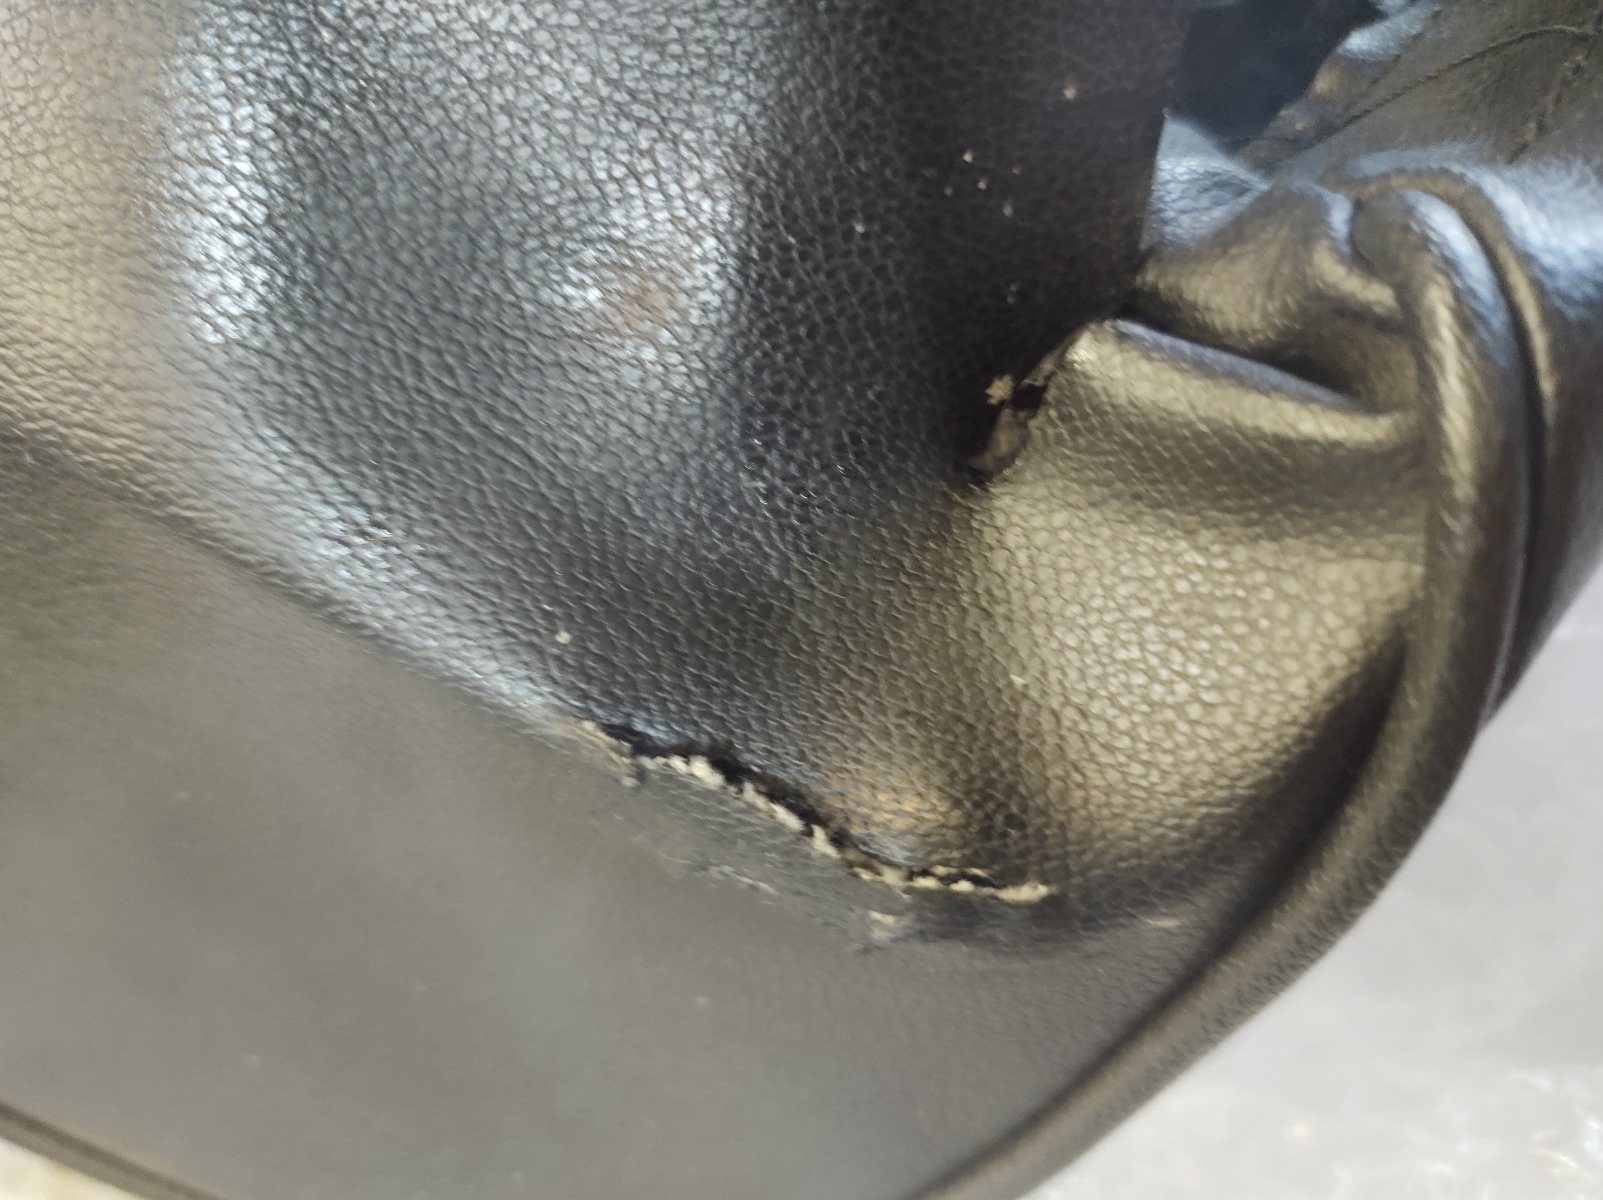
Unfortunately the seat catches on the tank. Not sure if it's the aftermarket seat or the repro tank. Will file back the seat pan and glue the cover back down. The tank only needs a small touch-up under the seat so I guess I got away with one there.
KZ1000 Restomod (
www.kzrider.com/forum/11-projects/614517-1977-kz1000-restomod
)
1977 KZ1000A1 ( www.kzrider.com/forum/11-projects/616901...-spare-parts-project )
1980 KZ750H ( kzrider.com/forum/11-projects/612054-kz750h-restoration )
2000 BMW F650GS
1977 KZ1000A1 ( www.kzrider.com/forum/11-projects/616901...-spare-parts-project )
1980 KZ750H ( kzrider.com/forum/11-projects/612054-kz750h-restoration )
2000 BMW F650GS
Last edit: 03 Dec 2023 08:43 by calum.
The following user(s) said Thank You: Nessism, BCScott
Please Log in or Create an account to join the conversation.
- Wookie58
-

- Away
- Moderator
-

Registered
- Posts: 6068
- Thanks: 3802
Re: KZ1000A1 Spare Parts Project
03 Dec 2023 11:30
Looking really nice Calum

1982 KZ1000 Ltd
www.kzrider.com/forum/11-projects/617631...-82-begins?start=192
kzrider.com/filebase-alias?view=download...d-fault-diagnosis&ca
www.kzrider.com/forum/11-projects/617631...-82-begins?start=192
kzrider.com/filebase-alias?view=download...d-fault-diagnosis&ca
The following user(s) said Thank You: calum
Please Log in or Create an account to join the conversation.
- calum
-
Topic Author
- Offline
- User
-
Registered
- Posts: 1144
- Thanks: 415
Re: KZ1000A1 Spare Parts Project
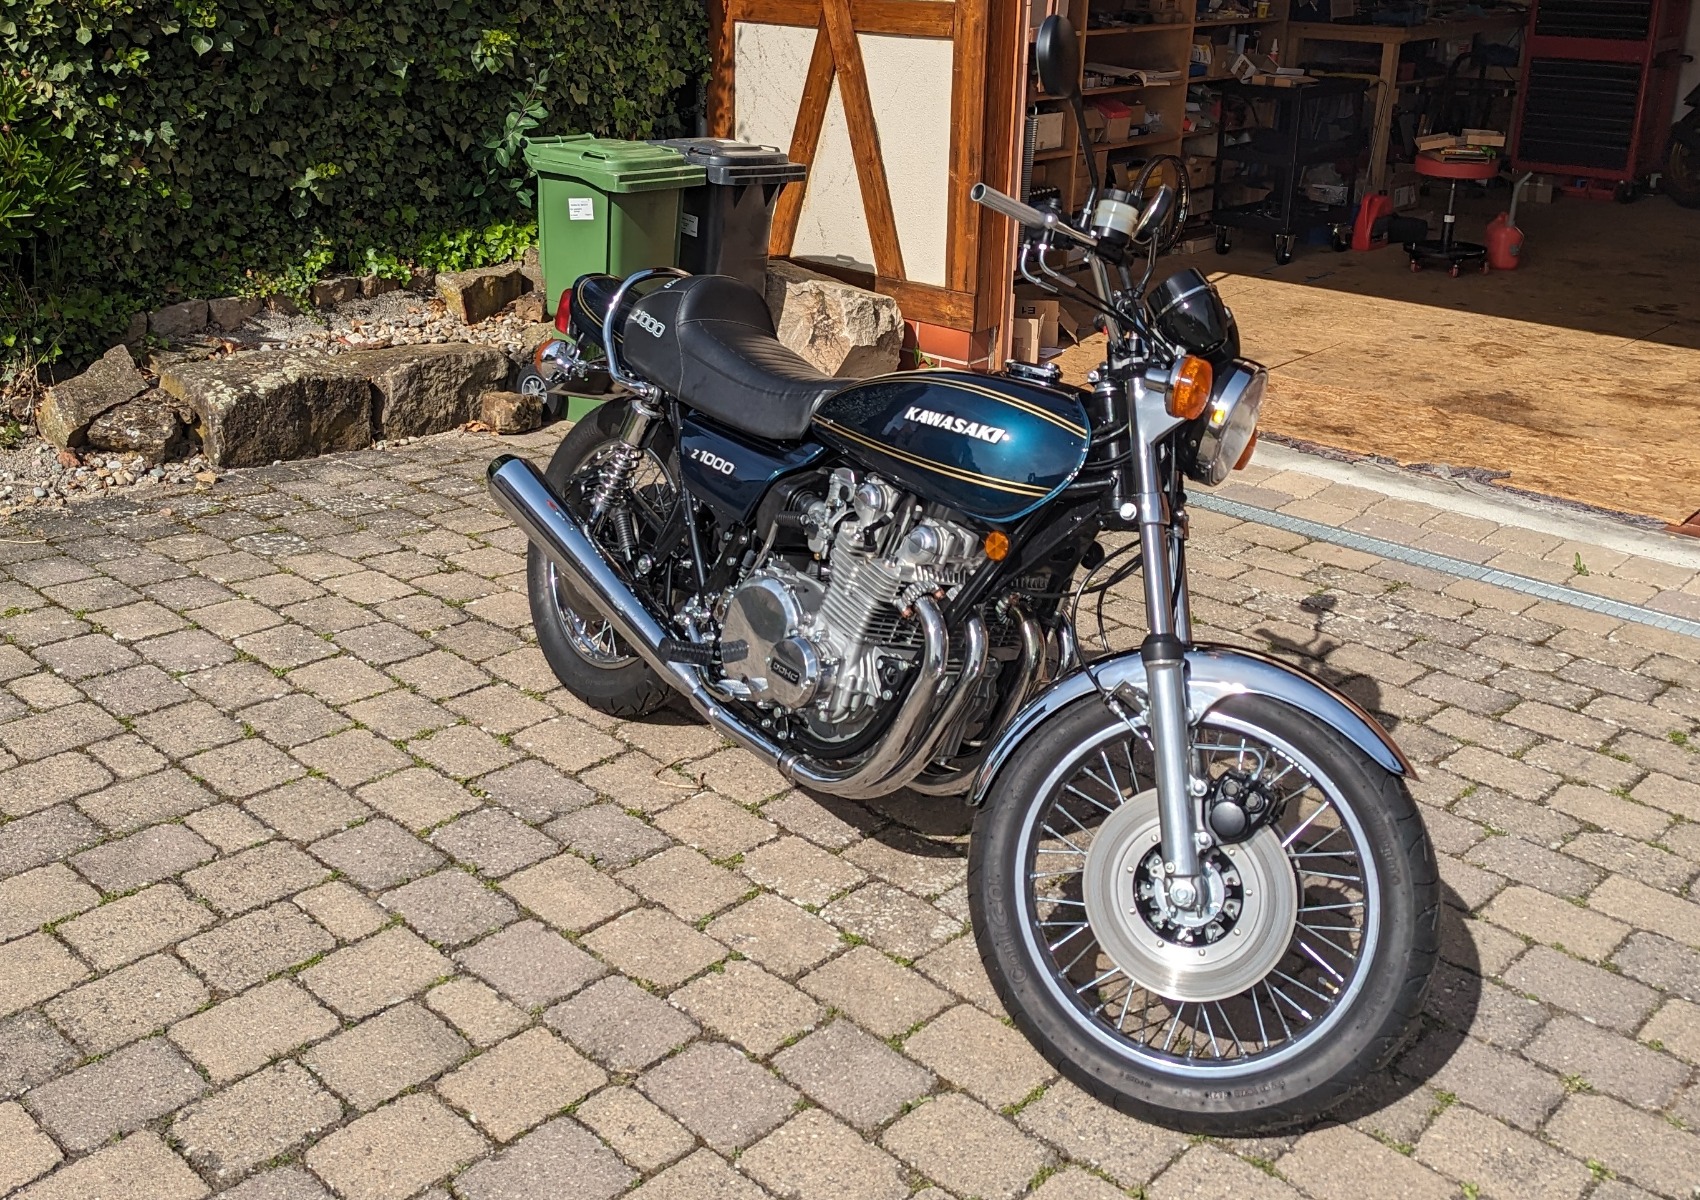
30 Apr 2024 11:08 - 30 Apr 2024 12:23
Finished putting this thing together today. Got it started, took a bit of effort as it turned out I only had about 8V at the coils. The wiring and switches on the right hand switch block are badly corroded, I fixed it up a bit but a replacement with some better switches is on the way. I ended up just doing the coil relay mod until I can get the switches sorted out.
Anyway, it ran nicely until I got it off the choke. Then I noticed an oil leak around the base gasket (probably the oil pressure switch housing) and one of the carbs started overflowing... Nothing too bad, figured I'd need to sort the carbs out. Hopefully the oil leak is an easy fix.

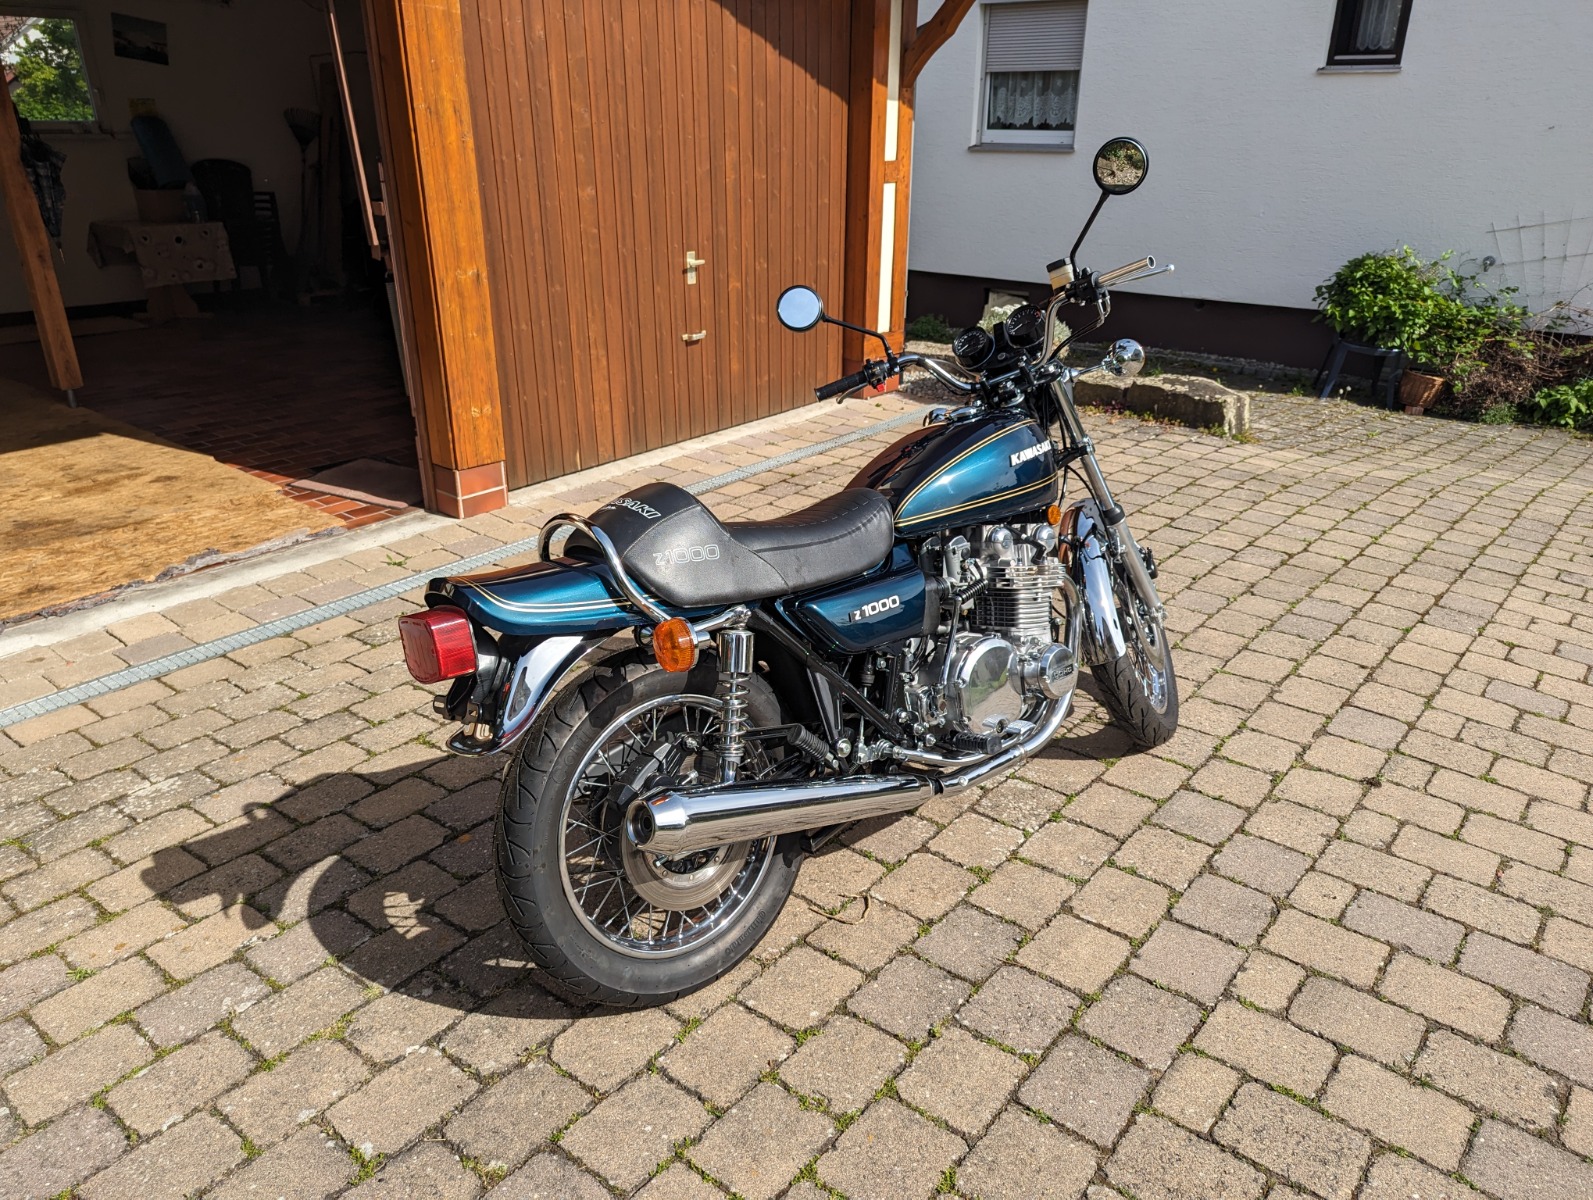
Anyway, it ran nicely until I got it off the choke. Then I noticed an oil leak around the base gasket (probably the oil pressure switch housing) and one of the carbs started overflowing... Nothing too bad, figured I'd need to sort the carbs out. Hopefully the oil leak is an easy fix.
KZ1000 Restomod (
www.kzrider.com/forum/11-projects/614517-1977-kz1000-restomod
)
1977 KZ1000A1 ( www.kzrider.com/forum/11-projects/616901...-spare-parts-project )
1980 KZ750H ( kzrider.com/forum/11-projects/612054-kz750h-restoration )
2000 BMW F650GS
1977 KZ1000A1 ( www.kzrider.com/forum/11-projects/616901...-spare-parts-project )
1980 KZ750H ( kzrider.com/forum/11-projects/612054-kz750h-restoration )
2000 BMW F650GS
Last edit: 30 Apr 2024 12:23 by calum.
The following user(s) said Thank You: Scirocco, BCScott, howardhb, Rolf1976_KZ900
Please Log in or Create an account to join the conversation.
- Wookie58
-
- Away
- Moderator
-
Registered
- Posts: 6068
- Thanks: 3802
Re: KZ1000A1 Spare Parts Project
30 Apr 2024 11:14
That's turned out really nice (especially given it's humble beginnings) I would leave the coil relay on even after you have replaced the switch (everything else in the circuit is still 40 years old
)
1982 KZ1000 Ltd
www.kzrider.com/forum/11-projects/617631...-82-begins?start=192
kzrider.com/filebase-alias?view=download...d-fault-diagnosis&ca
www.kzrider.com/forum/11-projects/617631...-82-begins?start=192
kzrider.com/filebase-alias?view=download...d-fault-diagnosis&ca
The following user(s) said Thank You: Scirocco, calum
Please Log in or Create an account to join the conversation.
- calum
-
Topic Author
- Offline
- User
-
Registered
- Posts: 1144
- Thanks: 415
Re: KZ1000A1 Spare Parts Project
19 Jun 2024 05:43 - 19 Jun 2024 05:53
Got back to this last weekend. Oil leak is fixed, but the bike still dies as soon as the choke is off. Replaced the float valves and checked the fuel levels - was all good on the bench but had some leaking when it was back on the bike. Number 3 seemed to be overflowing. I swapped the floats between three and four to see if the leak followed the float and the leaking just stopped. A bit strange but at least I didn't have a puddle of fuel on the floor.
Then I decided to see how well the carbs were balanced and noticed some fuel leaking out of the vacuum port on number 2... Will need to re-check the fuel level there. Checked to see if they were balanced anyway and they are OK - need some adjustment but nothing so bad as to make the bike die as soon as the choke is off.
Checked the idle screw and it even with it screwed in as far as it would go the bike wouldn't idle. The pilot air screws had not effect at all.
I figure there must be something wrong with the idle circuit on two or three cylinders - if it was only one figure it would run a bit rough but still idle.
Next step is to take the carbs back off and triple check the fuel levels, then go through all the idle circuits. Not sure what I should be looking for though...
KZ1000 Restomod (
www.kzrider.com/forum/11-projects/614517-1977-kz1000-restomod
)
1977 KZ1000A1 ( www.kzrider.com/forum/11-projects/616901...-spare-parts-project )
1980 KZ750H ( kzrider.com/forum/11-projects/612054-kz750h-restoration )
2000 BMW F650GS
1977 KZ1000A1 ( www.kzrider.com/forum/11-projects/616901...-spare-parts-project )
1980 KZ750H ( kzrider.com/forum/11-projects/612054-kz750h-restoration )
2000 BMW F650GS
Last edit: 19 Jun 2024 05:53 by calum.
Please Log in or Create an account to join the conversation.
- Rolf1976_KZ900
-

- Offline
- Sustaining Member
-
Registered
- Posts: 498
- Thanks: 261
Re: KZ1000A1 Spare Parts Project
19 Jun 2024 07:24 - 19 Jun 2024 11:59
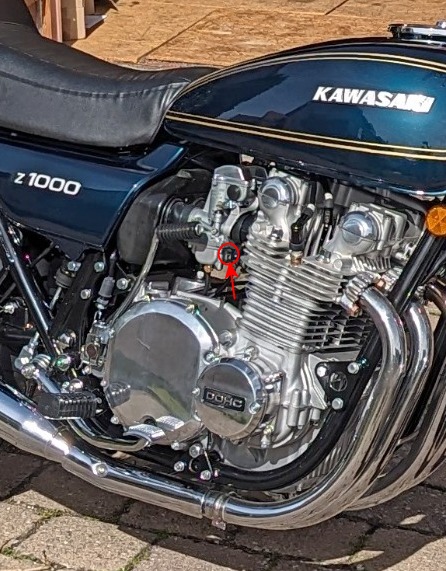
Bike looks super! i like the giuliari seat .I bought a used one a few days ago that will need a new seat cover i also planning putting on a fairing to get a little mad max look ") that is a light mod that is easy to reverse.I have the fairing the problem is to get it painted in similar color as the rest of the bike so im now experementing with mixing some colors.I went to a carpaintshop that used a colormeasuretool and mixed a can with paint but that color was way off and the mettalic particles was very small.About the carbs it looks like you have both airscrews and fuelscrews ? or is the fuelscrews blocked off? se pick i mean does this carbs have the fuelscrews plumbed? was the plugs totally sotted down after using choke? my bike soots the plugs real fast after using the choke but after riding with high revs the soot clears off. I have done maybe 60 adjustments to the fuel screws the last 800miles since rebuild to get the mix perfect,but it still soots down after a choke start sometime so bad thatit will not fire on the worst cylinder so i have to clean the plug a little and then ride the .........out of it like Steve say to clean the plugs againhere are a pick found online of how i want the bike to look but in the kz900 color cheme
that is a light mod that is easy to reverse.I have the fairing the problem is to get it painted in similar color as the rest of the bike so im now experementing with mixing some colors.I went to a carpaintshop that used a colormeasuretool and mixed a can with paint but that color was way off and the mettalic particles was very small.About the carbs it looks like you have both airscrews and fuelscrews ? or is the fuelscrews blocked off? se pick i mean does this carbs have the fuelscrews plumbed? was the plugs totally sotted down after using choke? my bike soots the plugs real fast after using the choke but after riding with high revs the soot clears off. I have done maybe 60 adjustments to the fuel screws the last 800miles since rebuild to get the mix perfect,but it still soots down after a choke start sometime so bad thatit will not fire on the worst cylinder so i have to clean the plug a little and then ride the .........out of it like Steve say to clean the plugs againhere are a pick found online of how i want the bike to look but in the kz900 color cheme

that is a light mod that is easy to reverse.I have the fairing the problem is to get it painted in similar color as the rest of the bike so im now experementing with mixing some colors.I went to a carpaintshop that used a colormeasuretool and mixed a can with paint but that color was way off and the mettalic particles was very small.About the carbs it looks like you have both airscrews and fuelscrews ? or is the fuelscrews blocked off? se pick i mean does this carbs have the fuelscrews plumbed? was the plugs totally sotted down after using choke? my bike soots the plugs real fast after using the choke but after riding with high revs the soot clears off. I have done maybe 60 adjustments to the fuel screws the last 800miles since rebuild to get the mix perfect,but it still soots down after a choke start sometime so bad thatit will not fire on the worst cylinder so i have to clean the plug a little and then ride the .........out of it like Steve say to clean the plugs againhere are a pick found online of how i want the bike to look but in the kz900 color cheme
Last edit: 19 Jun 2024 11:59 by Rolf1976_KZ900.
The following user(s) said Thank You: SWest
Please Log in or Create an account to join the conversation.
- SWest
-

- Offline
- Sustaining Member
-
Registered
- 10 22 2014
- Posts: 23656
- Thanks: 2991
Re: KZ1000A1 Spare Parts Project
19 Jun 2024 07:50Do you have a vacuum petcock? That might be your problem.Got back to this last weekend. Oil leak is fixed, but the bike still dies as soon as the choke is off. Replaced the float valves and checked the fuel levels - was all good on the bench but had some leaking when it was back on the bike. Number 3 seemed to be overflowing. I swapped the floats between three and four to see if the leak followed the float and the leaking just stopped. A bit strange but at least I didn't have a puddle of fuel on the floor.
Then I decided to see how well the carbs were balanced and noticed some fuel leaking out of the vacuum port on number 2... Will need to re-check the fuel level there. Checked to see if they were balanced anyway and they are OK - need some adjustment but nothing so bad as to make the bike die as soon as the choke is off.
Checked the idle screw and it even with it screwed in as far as it would go the bike wouldn't idle. The pilot air screws had not effect at all.
I figure there must be something wrong with the idle circuit on two or three cylinders - if it was only one figure it would run a bit rough but still idle.
Next step is to take the carbs back off and triple check the fuel levels, then go through all the idle circuits. Not sure what I should be looking for though...
Z1b1000 1975 Z1b
kzrider.com/forum/11-projects/598262-kz-...-will-it-live#672882
kzrider.com/forum/2-engine/597654-poser?start=240#704229
kzrider.com/forum/11-projects/598262-kz-...-will-it-live#672882
kzrider.com/forum/2-engine/597654-poser?start=240#704229
Please Log in or Create an account to join the conversation.
- calum
-
Topic Author
- Offline
- User
-
Registered
- Posts: 1144
- Thanks: 415
Re: KZ1000A1 Spare Parts Project
20 Jun 2024 14:44
Thanks guys. I recently replaced the stock petcock with a Pingel, so no problem with fuel delivery. I'll swap the NGK plugs out with some Champions - they deal with soot a lot better. Will take me a while to get back to it though - need to do some work on the house.
KZ1000 Restomod (
www.kzrider.com/forum/11-projects/614517-1977-kz1000-restomod
)
1977 KZ1000A1 ( www.kzrider.com/forum/11-projects/616901...-spare-parts-project )
1980 KZ750H ( kzrider.com/forum/11-projects/612054-kz750h-restoration )
2000 BMW F650GS
1977 KZ1000A1 ( www.kzrider.com/forum/11-projects/616901...-spare-parts-project )
1980 KZ750H ( kzrider.com/forum/11-projects/612054-kz750h-restoration )
2000 BMW F650GS
Please Log in or Create an account to join the conversation.
Moderators: Street Fighter LTD