
1973 Z1 Maui
- MauiZ1
-
 Topic Author
- Offline
- User
-

Registered
- Posts: 235
- Thanks: 25
Re: 1973 Z1 Maui
18 May 2022 15:03
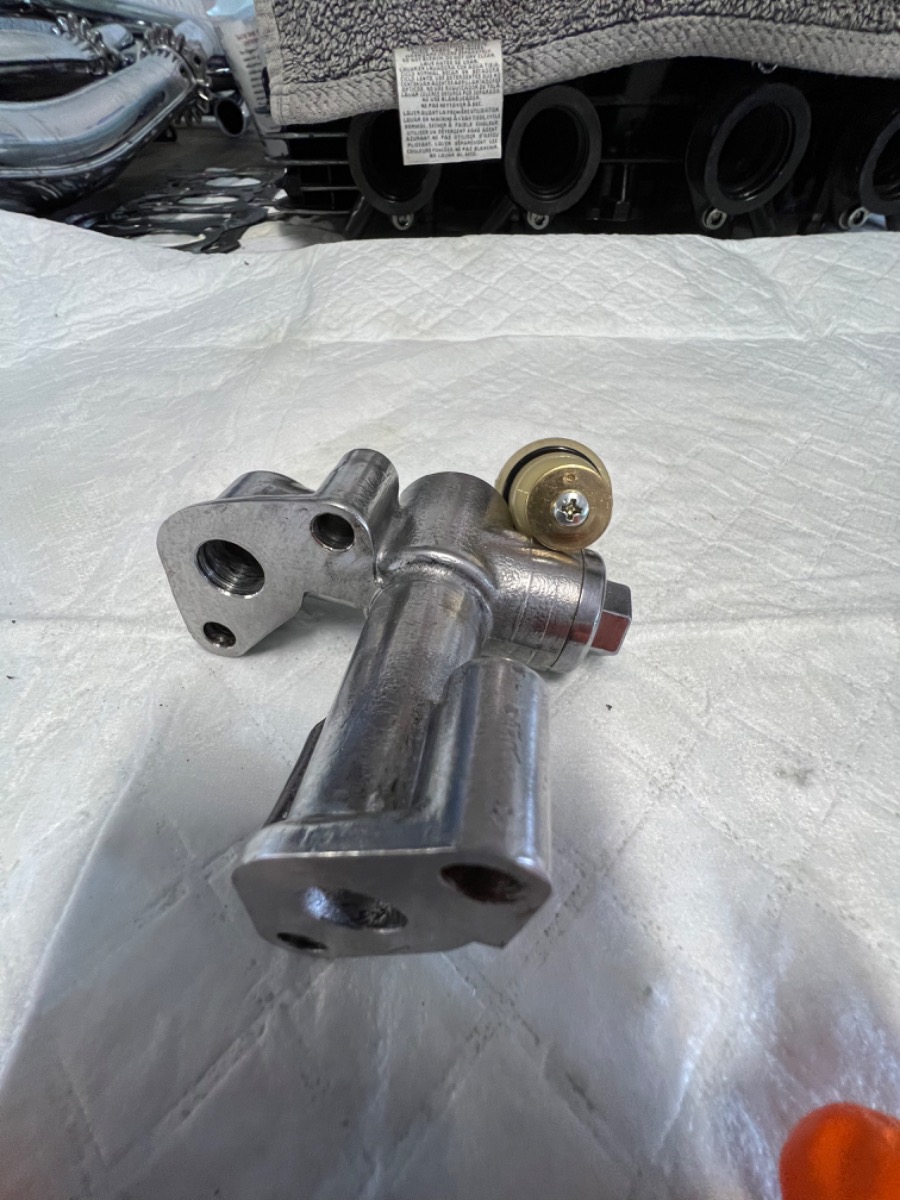
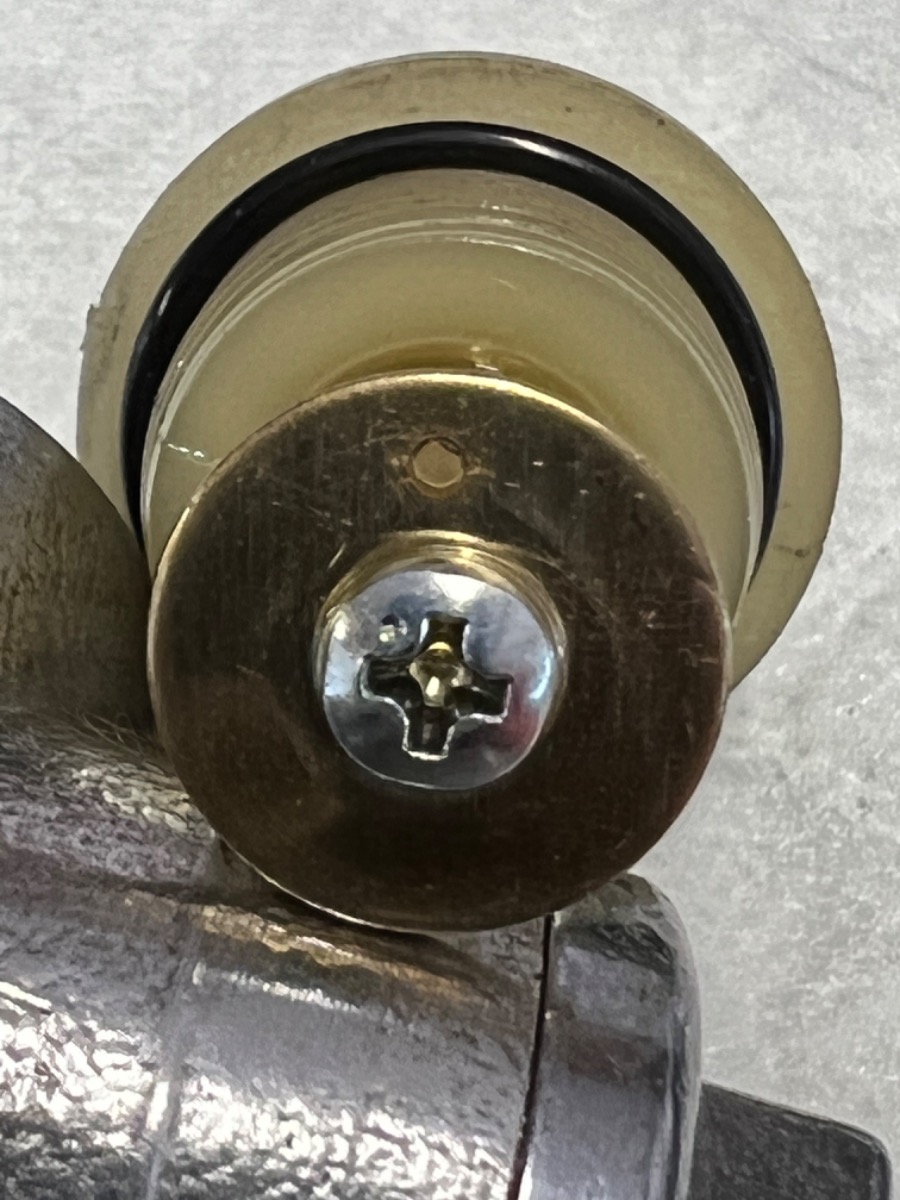
I’m working my way through inspecting all oil passages with light, air, brake clean, etc. I’m looking for anything that could prevent flow or divert it somewhere else. I also verified the oil light switch plunger has an unobstructed vent hole. Have to keep checking.
I will also take the valves out of the head and assemble the cams to see if I can detect anything wrong.
I will also take the valves out of the head and assemble the cams to see if I can detect anything wrong.
Please Log in or Create an account to join the conversation.
- slmjim+Z1BEBE
-

- Offline
- User
-
Registered
- Enjoy Life! IT HAS AN EXPIRATION DATE!
- Posts: 1477
- Thanks: 973
Re: 1973 Z1 Maui
19 May 2022 07:04
We didn't re-read all 37 pages of this thread, but we saw on Pg.2, post #853177 that the #2 EX lobe was observed to be scored upon your initial disassembly. Is it the #2 cam bushings that are the problem? Apologies if it's been stated in the past...
Even though the oil pump is a low pressure/high volume device, it apparently makes enough pressure to fracture the oil filter cover if flow is blocked immediately upstream. We recall that a KZR member (Steve?) had an issue wherein the filter cover would fracture upon startup. We don't remember what the problem was, but the KZR forum member resolved it. Perhaps he could chime in. Point is, the pump makes sufficient pressure to fracture the filter cover on cold start. Pump flow can be tested by immersing the intake screen in WD40, motor oil or vegetable oil, and driving the pump (slowly at first) with a variable-speed drill. Try blocking the outlet with a finger & you'll realize how much pressure the 'low pressure' pump really makes.
Early in this thread, it was stated the motor had been bored 1st. over, and HD studs installed. That makes internal parts suspect just 'cause. If it's been the #2 EX bearings both times, that would direct the focus of troubleshooting pretty precisely. If it's not the factory cam cap that was original to the head, it could be identified by torquing the cam cap sans bearings and testing with a bore gauge, then compare to other cam cap bores. Too, if it's not an original cam cap, there may be a 'lip' observable at each side of the bore where the cap sits on the head. The lip may only be a few thou. overhang, but it doesn't take much to introduce binding.
Although perhaps counterintuitive, flow could be checked through the oil galleries in the head with a water hose. With the head completely disassembled, use some small corks to block the gallery outlets in the camchain tunnel, and apply water pressure into the oil inlets at each corner of the head using a soft nozzle conical to get a good seal. Observe relative flow at each cam bushing outlet. Counterintuitive because water. Coat each valve seat with waterproof wheel bearing grease to prevent rust. Thinking some early(?) valve guides were iron, so test with a magnet & protect from rust accordingly.
Interesting problem, although very unfortunate and a Royal B|tc#. Watching closely to learn.
Good Ridin'
slmjim & Z1BEBE
A biker looks at your engine and chrome.
A Rider looks at your odometer and tags.
1973 ('72 builds) Z1 x2
1974 Z1-A x2
1975 Z1-B x2
1993 CB 750 Nighthawk x2
2009 ST1300A
www.kawasaki-z-classik.com
A Forum tightly focused on all things Z1 and Z2.
A Rider looks at your odometer and tags.
1973 ('72 builds) Z1 x2
1974 Z1-A x2
1975 Z1-B x2
1993 CB 750 Nighthawk x2
2009 ST1300A
www.kawasaki-z-classik.com
A Forum tightly focused on all things Z1 and Z2.
Please Log in or Create an account to join the conversation.
- MauiZ1
-
Topic Author
- Offline
- User
-
Registered
- Posts: 235
- Thanks: 25
Re: 1973 Z1 Maui
19 May 2022 07:55
All good ideas that I will check, especially the caps.
I am not finding anything in the oil system that concerns me. I did however find something yesterday.
I removed the valves and springs.
I set good bearings in the saddles, set the cams in with some lube, lightly set the caps on and lightly torqued them, just enough to seat the caps.
The intake cam locked up, the exhaust cam turns, if a bit tightly.
I could loosen everything, rotate the intake cam a bit and re-tighten but it still locks up. Since I have two sets of now unusable cams I tried the other intake cam, it locked up too.
The head was not assembled on the cylinders and cases so the definitive test would be to assemble the cylinders and head and torque it down and do the whole thing again, which I may do but I think I have the unfortunate luck of having a bent camshaft. I tried to check it using a lash up with my wheel truing stand but it was too crude. I will need to buy some V Blocks to get a better setup to check the next cam set.
I will flip the engine right side up and try this again with the cylinders and everything torqued up.
I also need to look for cams.
Please Log in or Create an account to join the conversation.
- Wookie58
-

- Offline
- Moderator
-

Registered
- Posts: 6339
- Thanks: 4004
Re: 1973 Z1 Maui
19 May 2022 11:09
Hi Maui, I think you would be very unfortunate to have two bent inlet and a bent exhaust camshaft. As others have suggested the caps may not be original to the head. As there are no valves in currently putting pressure on the cams, you could loosen the caps one at a time to see which are causing the tightness. It may also be worth putting a straight edge across the faces the caps pull down against in the head (it's not common but not unheard of for the head to have a twist along it's length) Only my opinion but I think you should be doing a lot of measuring before investing any more in the head you have (you have already swopped out the cams so it would appear to be the head/caps that are the issue)
You could try a light smear of grease on the 8 contact points in the picture below and lay a piece of glass onto it (glass tends to be about the most flat thing easily available) you would be able to see through the glass if you have even contact across all points (not twisted)
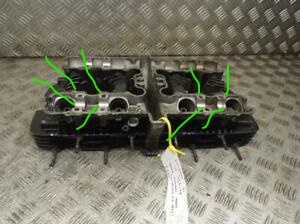
You could try a light smear of grease on the 8 contact points in the picture below and lay a piece of glass onto it (glass tends to be about the most flat thing easily available) you would be able to see through the glass if you have even contact across all points (not twisted)
1982 KZ1000 Ltd
www.kzrider.com/forum/11-projects/617631...-82-begins?start=192
kzrider.com/filebase-alias?view=download...d-fault-diagnosis&ca
www.kzrider.com/forum/11-projects/617631...-82-begins?start=192
kzrider.com/filebase-alias?view=download...d-fault-diagnosis&ca
Please Log in or Create an account to join the conversation.
- MauiZ1
-
Topic Author
- Offline
- User
-
Registered
- Posts: 235
- Thanks: 25
Re: 1973 Z1 Maui
19 May 2022 14:17
Good ideas
im going to be doing a lot of checking before I proceed.
the caps seem to be original and the butts seem to line up nicely at the splits.
I checked the head with a good straight edge I have and it seems to be nice and flat, I used a 0.0015” feeler along the straight edge, It was rejected.
I like the glass idea, I’ll try it.
Please Log in or Create an account to join the conversation.
- urankjj
-

- Offline
- Sustaining Member
-

Registered
- Posts: 399
- Thanks: 246
Re: 1973 Z1 Maui
19 May 2022 14:38
Wouldn't Jay at APE have some first hand knowledge on this. Is he still around ?
Please Log in or Create an account to join the conversation.
- MauiZ1
-
Topic Author
- Offline
- User
-
Registered
- Posts: 235
- Thanks: 25
Re: 1973 Z1 Maui
20 May 2022 08:03
The cams seen fine, not bent. I set up my wheel truing stand and re-checked. It works well enough to determine they are not bent.
I did a Prussian blue check yesterday and it seems there is pinching at the split of the bearings in some places, I'll need to figure out why.
I did a Prussian blue check yesterday and it seems there is pinching at the split of the bearings in some places, I'll need to figure out why.
Please Log in or Create an account to join the conversation.
- slmjim+Z1BEBE
-
- Offline
- User
-
Registered
- Enjoy Life! IT HAS AN EXPIRATION DATE!
- Posts: 1477
- Thanks: 973
Re: 1973 Z1 Maui
20 May 2022 13:54
A few pages back you indicated you plasti-guaged the bearings. Try that again just above the upper (cam cap) sides of the joint splits where the ends of the bearings meet. ooking for bore overhang at the joints if the cam caps aren't original to the head. That could result in correct plasti-gauge readings if done under the top of the cam cap but still bind at the joints
Cam bearings wear uniquely. If we remove cam bearings we always keep them sorted so they can be replaced in their original positions. The only time we've ever installed new bearings is if a head came to us sans bearings, but we've never had any binding problems.
If you still have the old cam bearings, try them. They may have wear patterns that result in sufficient clearance.
If you do still have the old bearings, mic the thickness of old vs new, on unworn areas. Unlikely but not impossible that the new bearings are out of spec & too thick. A digital caliper may have enough resolution to know if the new bearings are the same thickness as the old ones.
Wish we were there to assist...
Good Ridin'
slmjim & Z1BEBE
A biker looks at your engine and chrome.
A Rider looks at your odometer and tags.
1973 ('72 builds) Z1 x2
1974 Z1-A x2
1975 Z1-B x2
1993 CB 750 Nighthawk x2
2009 ST1300A
www.kawasaki-z-classik.com
A Forum tightly focused on all things Z1 and Z2.
A Rider looks at your odometer and tags.
1973 ('72 builds) Z1 x2
1974 Z1-A x2
1975 Z1-B x2
1993 CB 750 Nighthawk x2
2009 ST1300A
www.kawasaki-z-classik.com
A Forum tightly focused on all things Z1 and Z2.
Please Log in or Create an account to join the conversation.
- MauiZ1
-
Topic Author
- Offline
- User
-
Registered
- Posts: 235
- Thanks: 25
Re: 1973 Z1 Maui
20 May 2022 15:00
I’ll do the plastigage check again, I don’t have the old bearings unfortunately..
im going to check for pinching one set of shells at a time to be sure I understand if it’s more than one location. I’m feeling like I’m getting to the answer.
im going to check for pinching one set of shells at a time to be sure I understand if it’s more than one location. I’m feeling like I’m getting to the answer.
Please Log in or Create an account to join the conversation.
- hardrockminer
-

- Offline
- Sustaining Member
-
Registered
- Posts: 3131
- Thanks: 1235
Re: 1973 Z1 Maui
20 May 2022 16:00
I'm sure you thought about this but you should mic your cams to see if they are out of spec. I've never played with hollow cams but maybe they were thicker than solid cams.
I have several restored bikes along with a 2006 Goldwing with a sidecar.
Please Log in or Create an account to join the conversation.
- MauiZ1
-
Topic Author
- Offline
- User
-
Registered
- Posts: 235
- Thanks: 25
Re: 1973 Z1 Maui
21 May 2022 14:17
Went through all the bearing locations one at a time with the other end supported by a lower half shell. I learned that three locations were pinching the split. Two on intake, one on exhaust. I lightly eased the very edges of the split on the caps and head, just like removing an edge burr. This fixed the problem, cams move easily now when fully assembled.
this begs the question, why now?
I did not save the old bearing shells so I can’t compare them but the only thing that changed was the bearing shells. I’m going to have to settle on a minor difference in the newer bearing parts and perhaps an unfortunate stack up of manufacturing tolerances, it’s all I can think of. It took so little to fix it just boggles the mind. The bearings are from Z1 enterprises and I think I was just unlucky and inexperienced with the Z1.
the other option is that the caps are not original to the head. This would be tempting to latch on to but the motor ran well when I straightened out the carbs. I now want to find a set of cams. If I can’t find stock I want as close to stock as I can get.
rookie learning curve is steep.
Please Log in or Create an account to join the conversation.
- Wookie58
-
- Offline
- Moderator
-
Registered
- Posts: 6339
- Thanks: 4004
Re: 1973 Z1 Maui
21 May 2022 16:56 - 21 May 2022 16:56
Good to hear you seem to have gotten to the bottom of it and the head isn’t twisted
 tickling things to work on old vehicles is normal. Cam bearings don’t have to work as hard as crank bearing (newer motors run direct in the alloy head) so you should be fine
1982 KZ1000 Ltd
www.kzrider.com/forum/11-projects/617631...-82-begins?start=192
kzrider.com/filebase-alias?view=download...d-fault-diagnosis&ca
www.kzrider.com/forum/11-projects/617631...-82-begins?start=192
kzrider.com/filebase-alias?view=download...d-fault-diagnosis&ca
Last edit: 21 May 2022 16:56 by Wookie58.
Please Log in or Create an account to join the conversation.
Moderators: Street Fighter LTD