
1979 UK Spec Z400B2
- TexasKZ
-

- Offline
- Platinum Member
-

Registered
- Posts: 8244
- Thanks: 2707
Re: 1979 UK Spec Z400B2
10 Aug 2019 05:58Pookie wrote: I removed the forks yesterday to paint them satin black, I noticed the rubbers for the handlebar mounts were perished and cracked. As I did not know if I could get new ones I decided to print them one my 3D printer using a flexible filament, a quick bit of work on the PC had them designed and a hour or so on the printer and ready to fit.
Nice job! If for any reason they do not work as well as you hope, the factory parts are still available (at least in the U.S.) and are plenty cheap.
www.partzilla.com/catalog/kawasaki/motor...9/kz400-b2/handlebar
1982 KZ1000 LTD parts donor
1981 KZ1000 LTD awaiting resurrection
2000 ZRX1100 not ridden enough
www.kzrider.com/forum/11-projects/620336...amateur-build-thread
1981 KZ1000 LTD awaiting resurrection
2000 ZRX1100 not ridden enough
www.kzrider.com/forum/11-projects/620336...amateur-build-thread
The following user(s) said Thank You: Pookie
Please Log in or Create an account to join the conversation.
- Pookie
-
 Topic Author
- Offline
- User
-

Registered
- Posts: 54
- Thanks: 6
Re: 1979 UK Spec Z400B2
15 Aug 2019 06:01
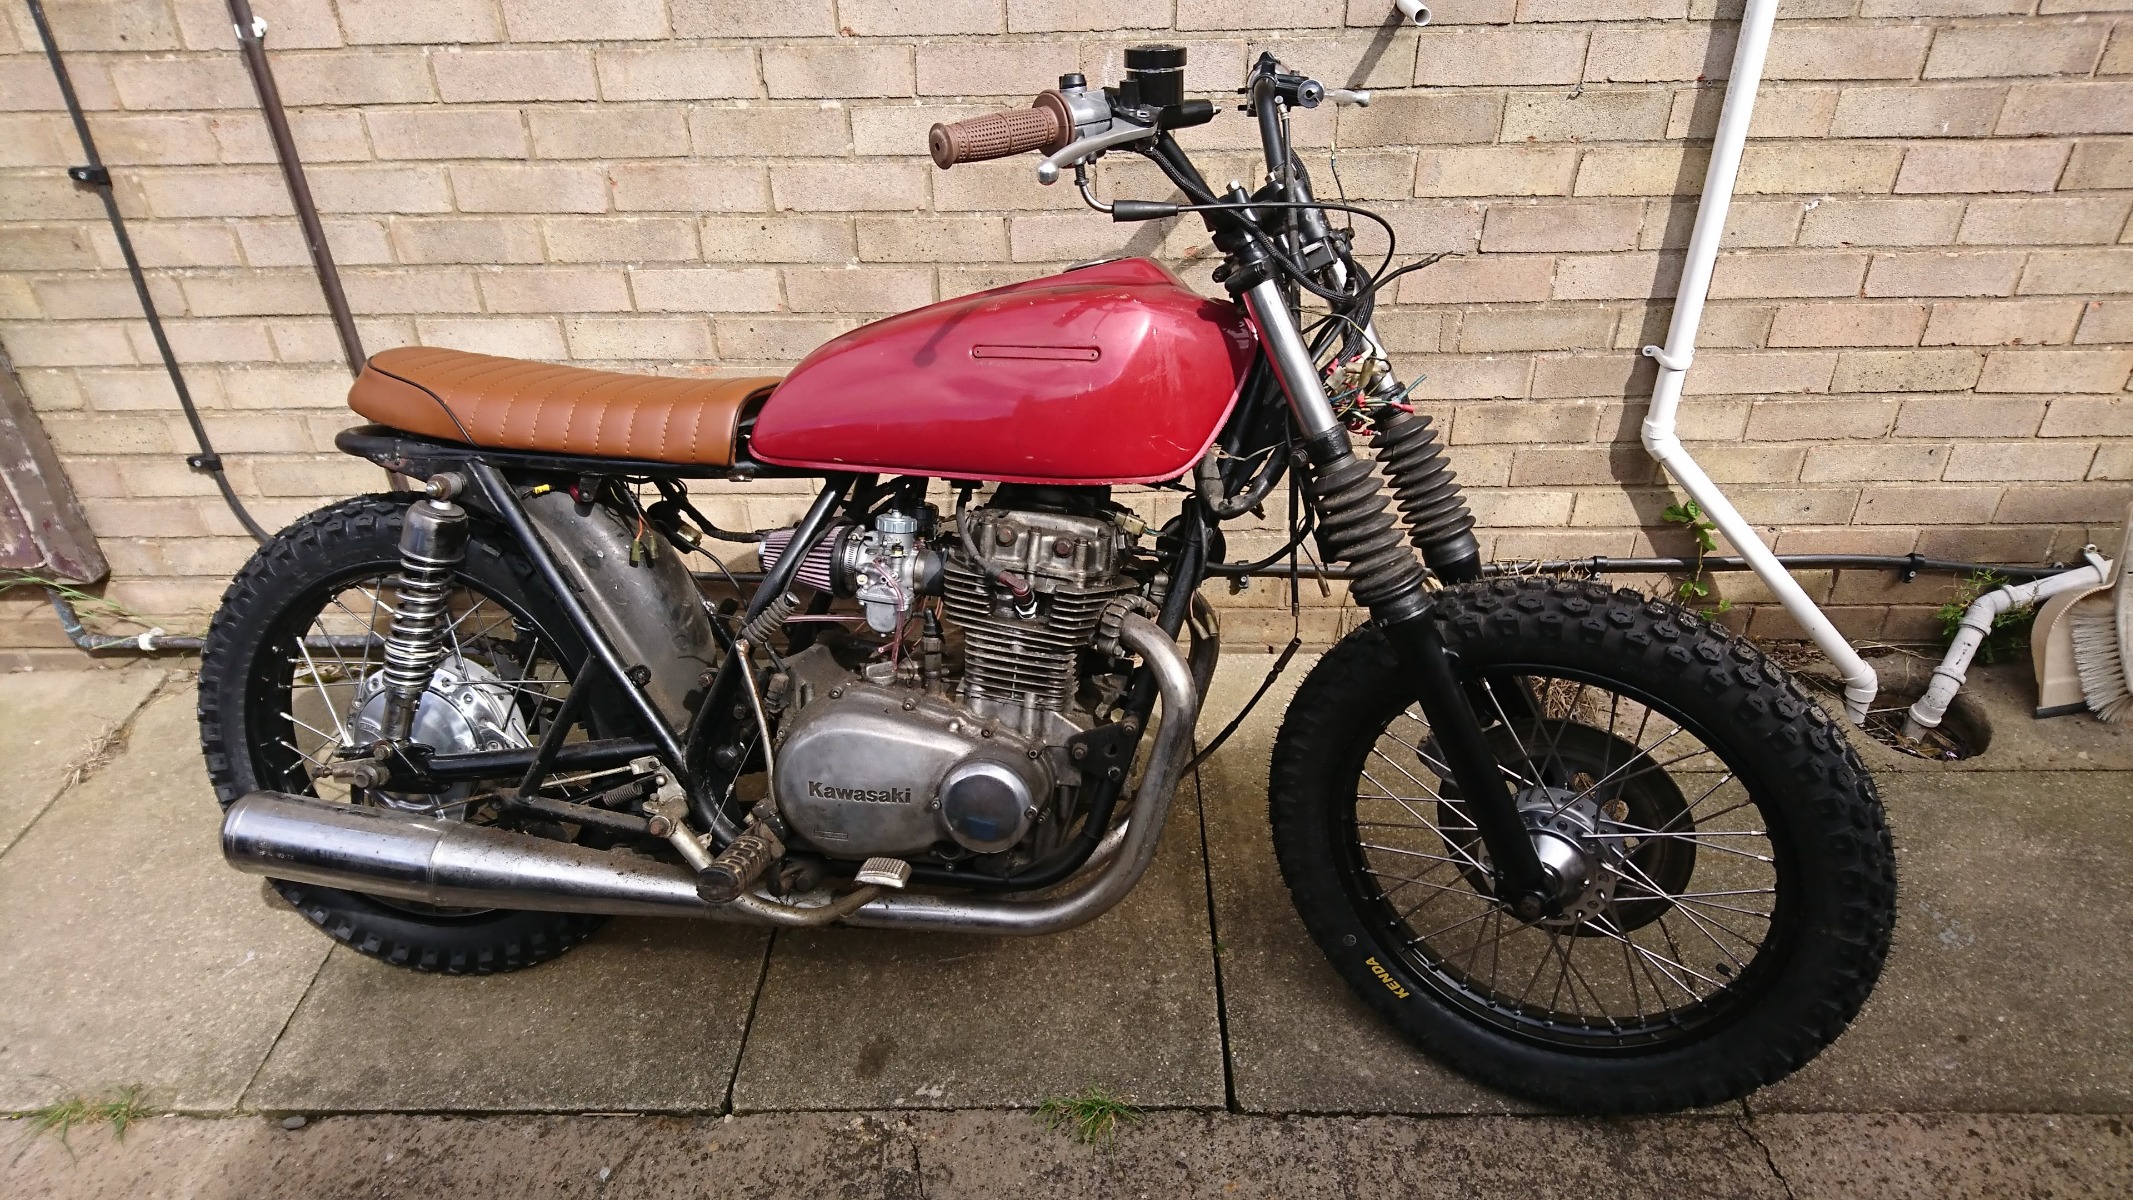
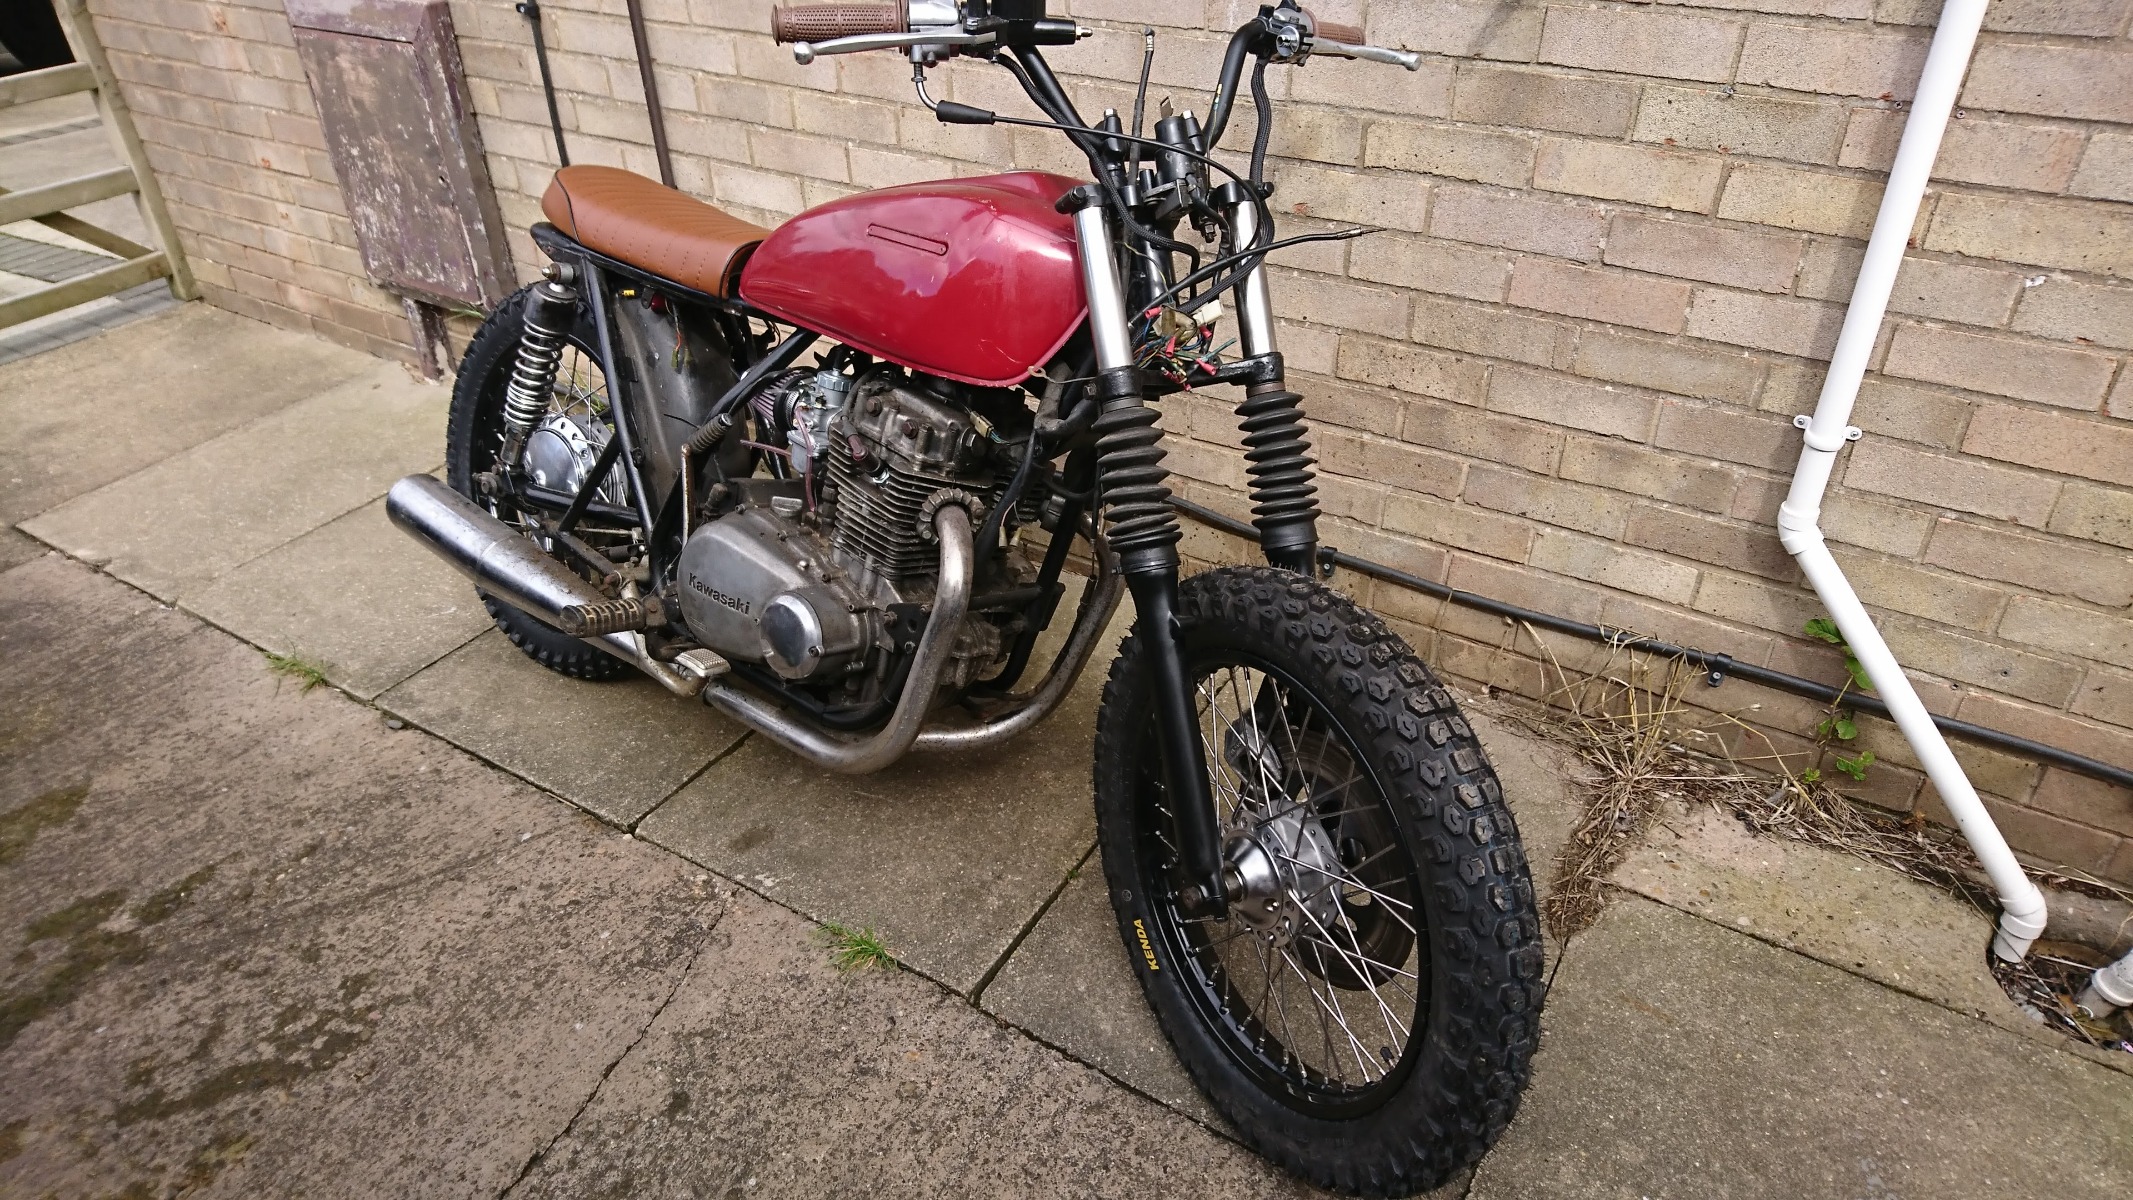
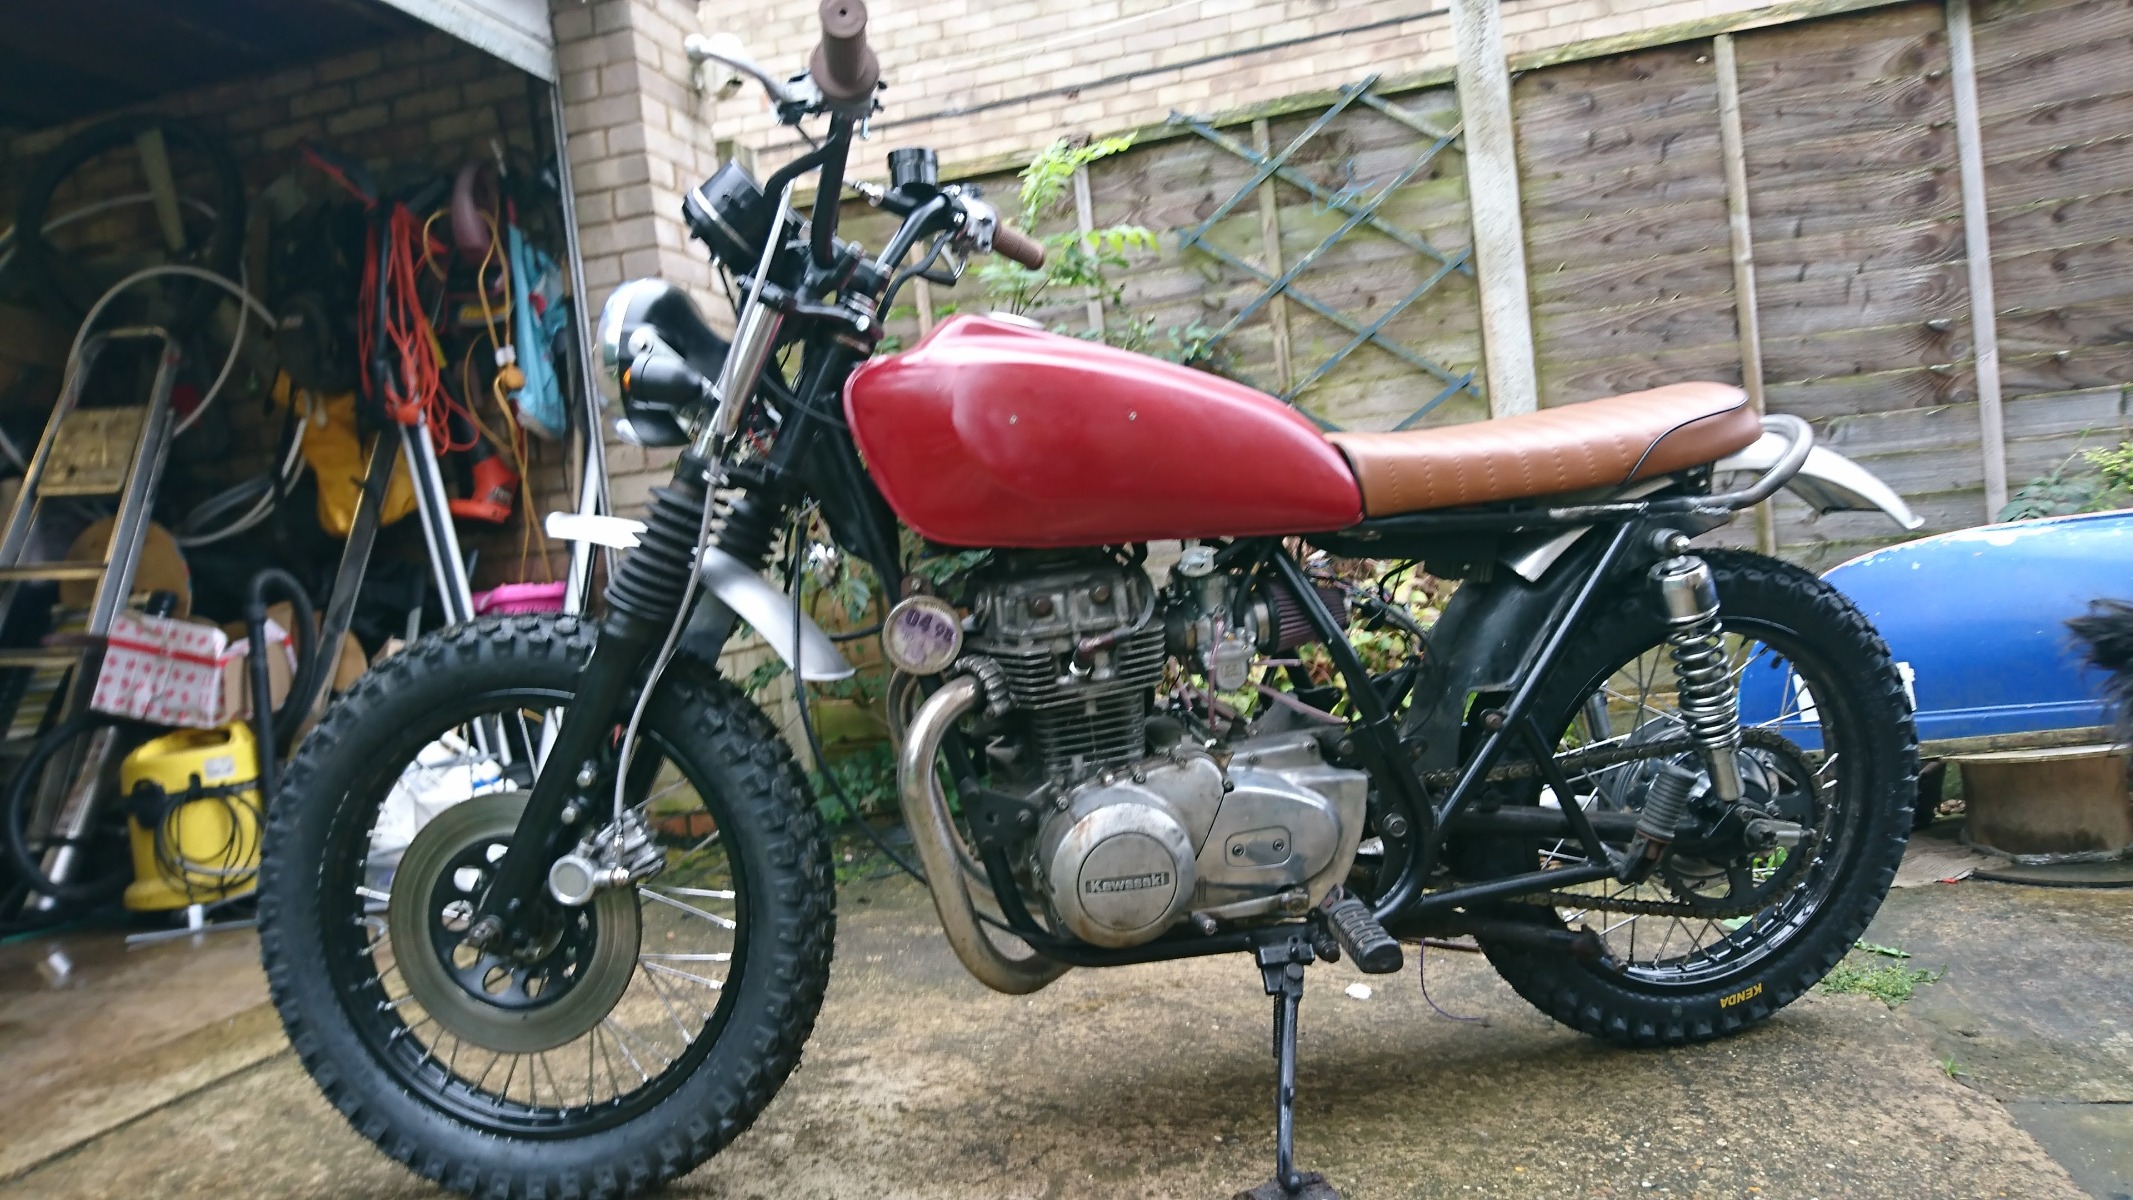
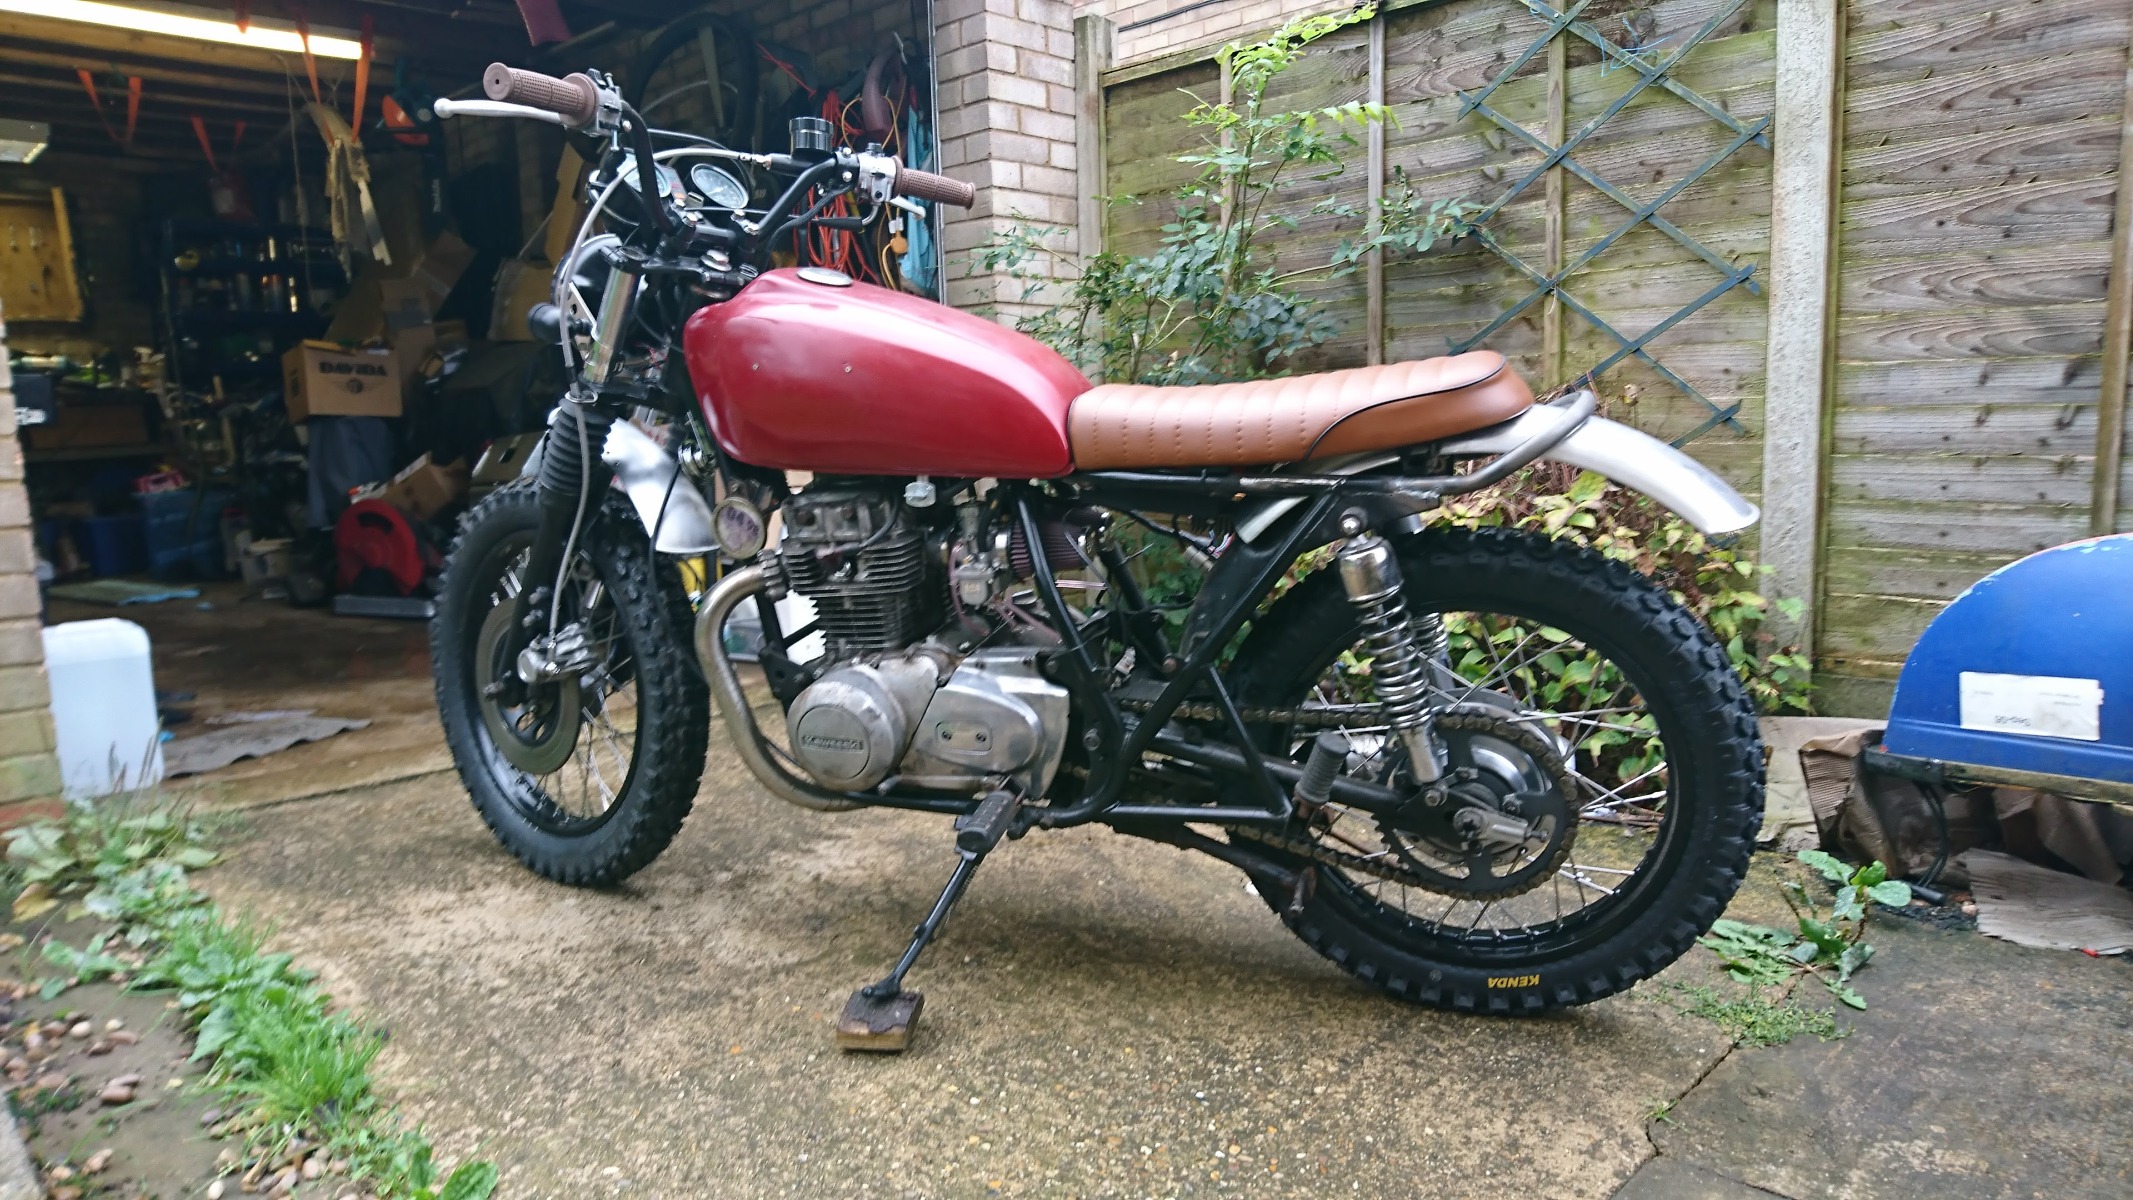
Starting to make progress now, I got the wheels back, the guy who rebuilt them removed the bearings and seals so I ordered new ones rather than put the old ones back in.
Once the bearing were fitted I put the wheels on to see how it looked with chunky tyres.
When I had the forks off to paint, them the upper fork legs had gone rusty from being in the headlamp mounts, so polished some 1.5" stainless tube and cut to length cover the upper forks, I think it makes the forks look beefier!
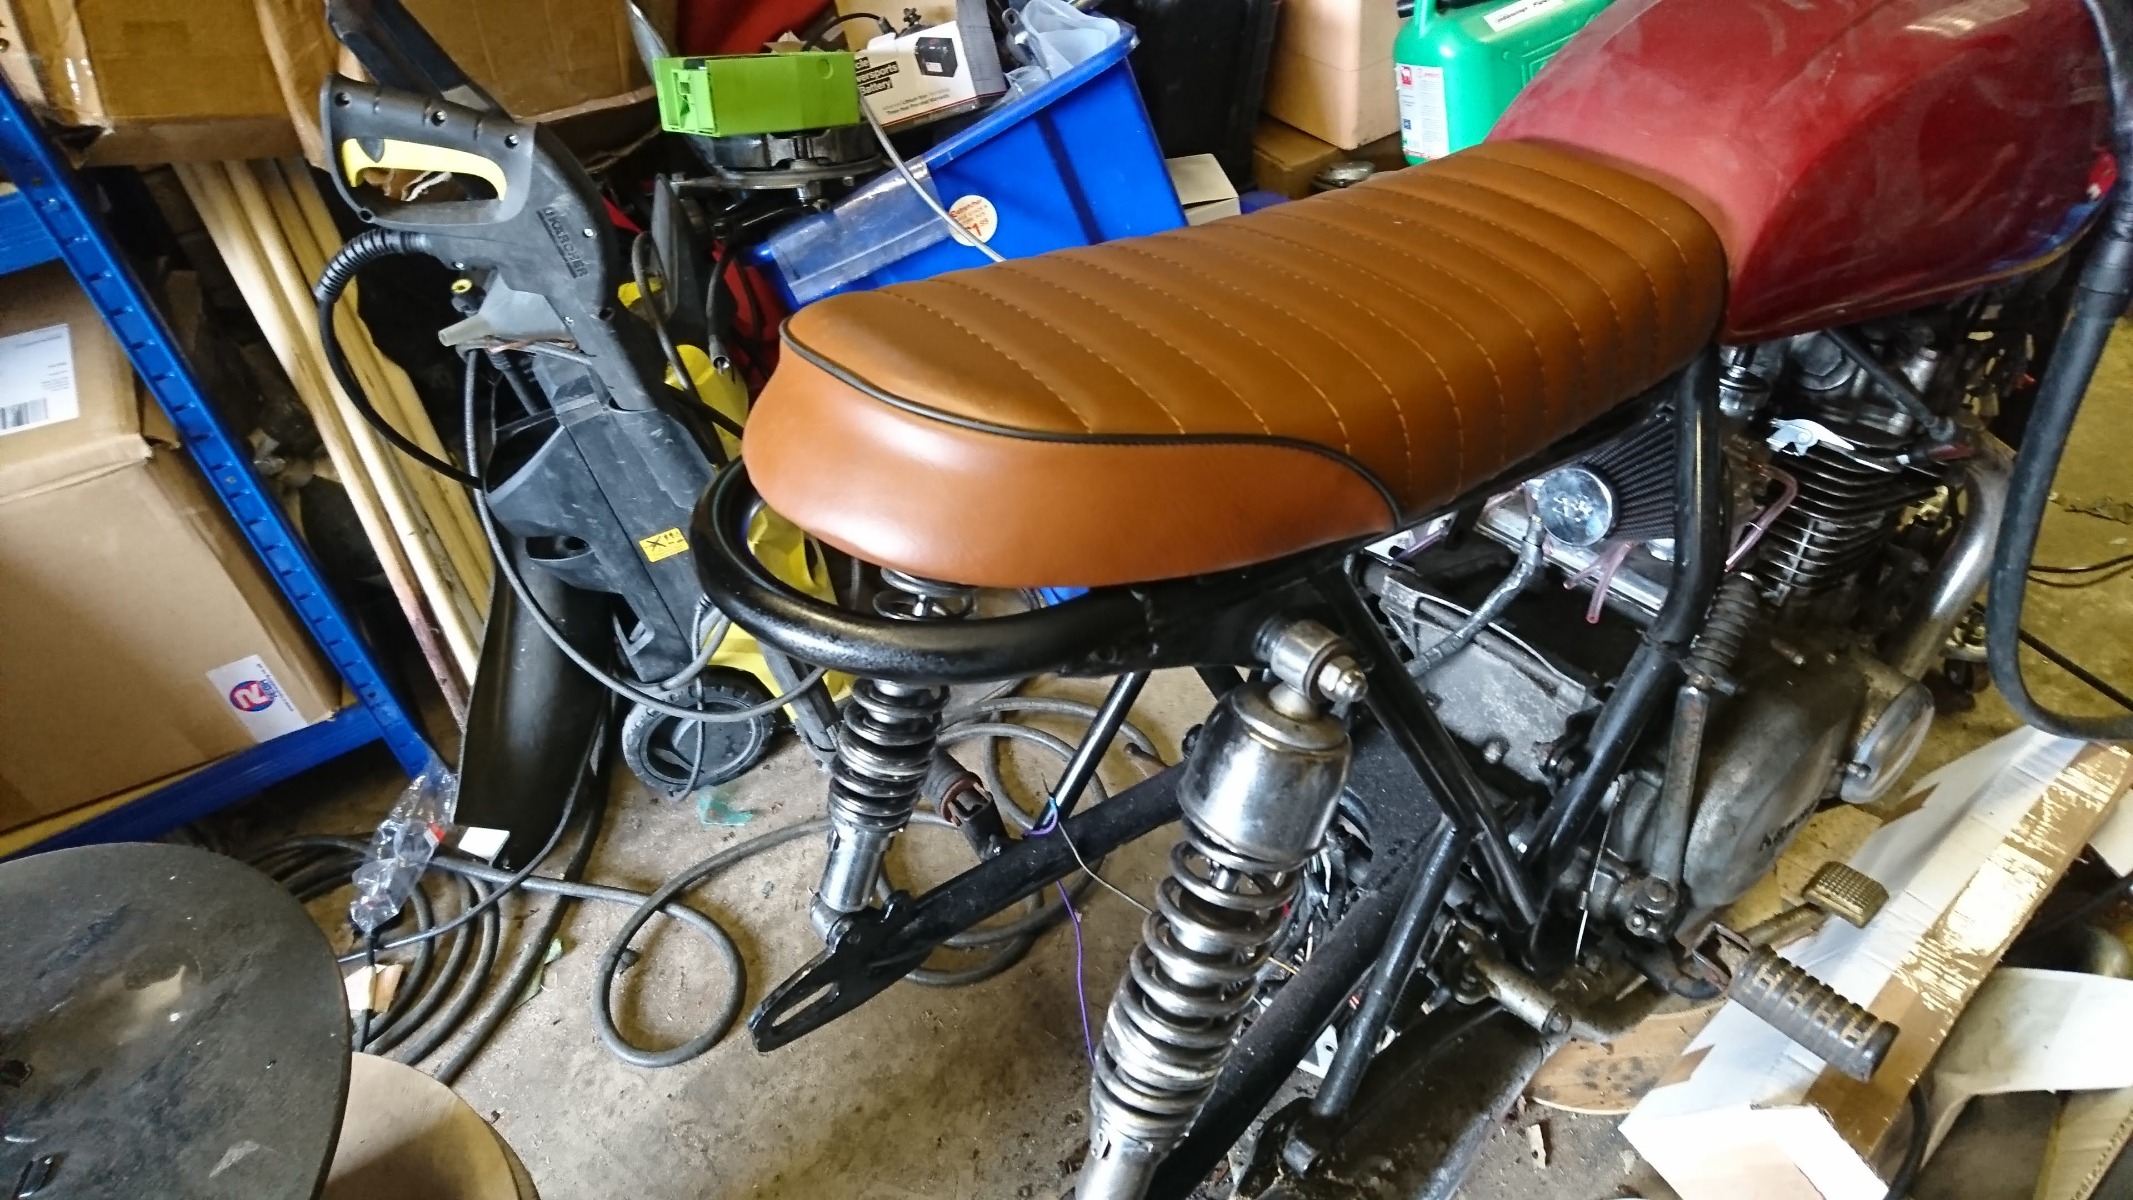
The new seat arrived so I cut the rear frame to mount a seat hoop. Think I may need to make a few changes to fit the rear mudgaurd?
Next job to sort the battery and fuse
 box
box
Once the bearing were fitted I put the wheels on to see how it looked with chunky tyres.
When I had the forks off to paint, them the upper fork legs had gone rusty from being in the headlamp mounts, so polished some 1.5" stainless tube and cut to length cover the upper forks, I think it makes the forks look beefier!
The new seat arrived so I cut the rear frame to mount a seat hoop. Think I may need to make a few changes to fit the rear mudgaurd?
Next job to sort the battery and fuse
Please Log in or Create an account to join the conversation.
- Pookie
-
Topic Author
- Offline
- User
-
Registered
- Posts: 54
- Thanks: 6
Re: 1979 UK Spec Z400B2
17 Aug 2019 00:24
I was right about the rear hoop, when the alloy mud-guards arrived the rear seat hoop is too low to allow enough clearance between the mud-guard and tire so I'm going to have to cut it off and put an up-swept hoop on.
For the front mud-guard I'm making a stainless steel fork brace similar to the standard one but with a bit more clearance and fitting a short alloy mud-guard.
For the front mud-guard I'm making a stainless steel fork brace similar to the standard one but with a bit more clearance and fitting a short alloy mud-guard.
Please Log in or Create an account to join the conversation.
- Pookie
-
Topic Author
- Offline
- User
-
Registered
- Posts: 54
- Thanks: 6
Re: 1979 UK Spec Z400B2
07 Sep 2019 23:50
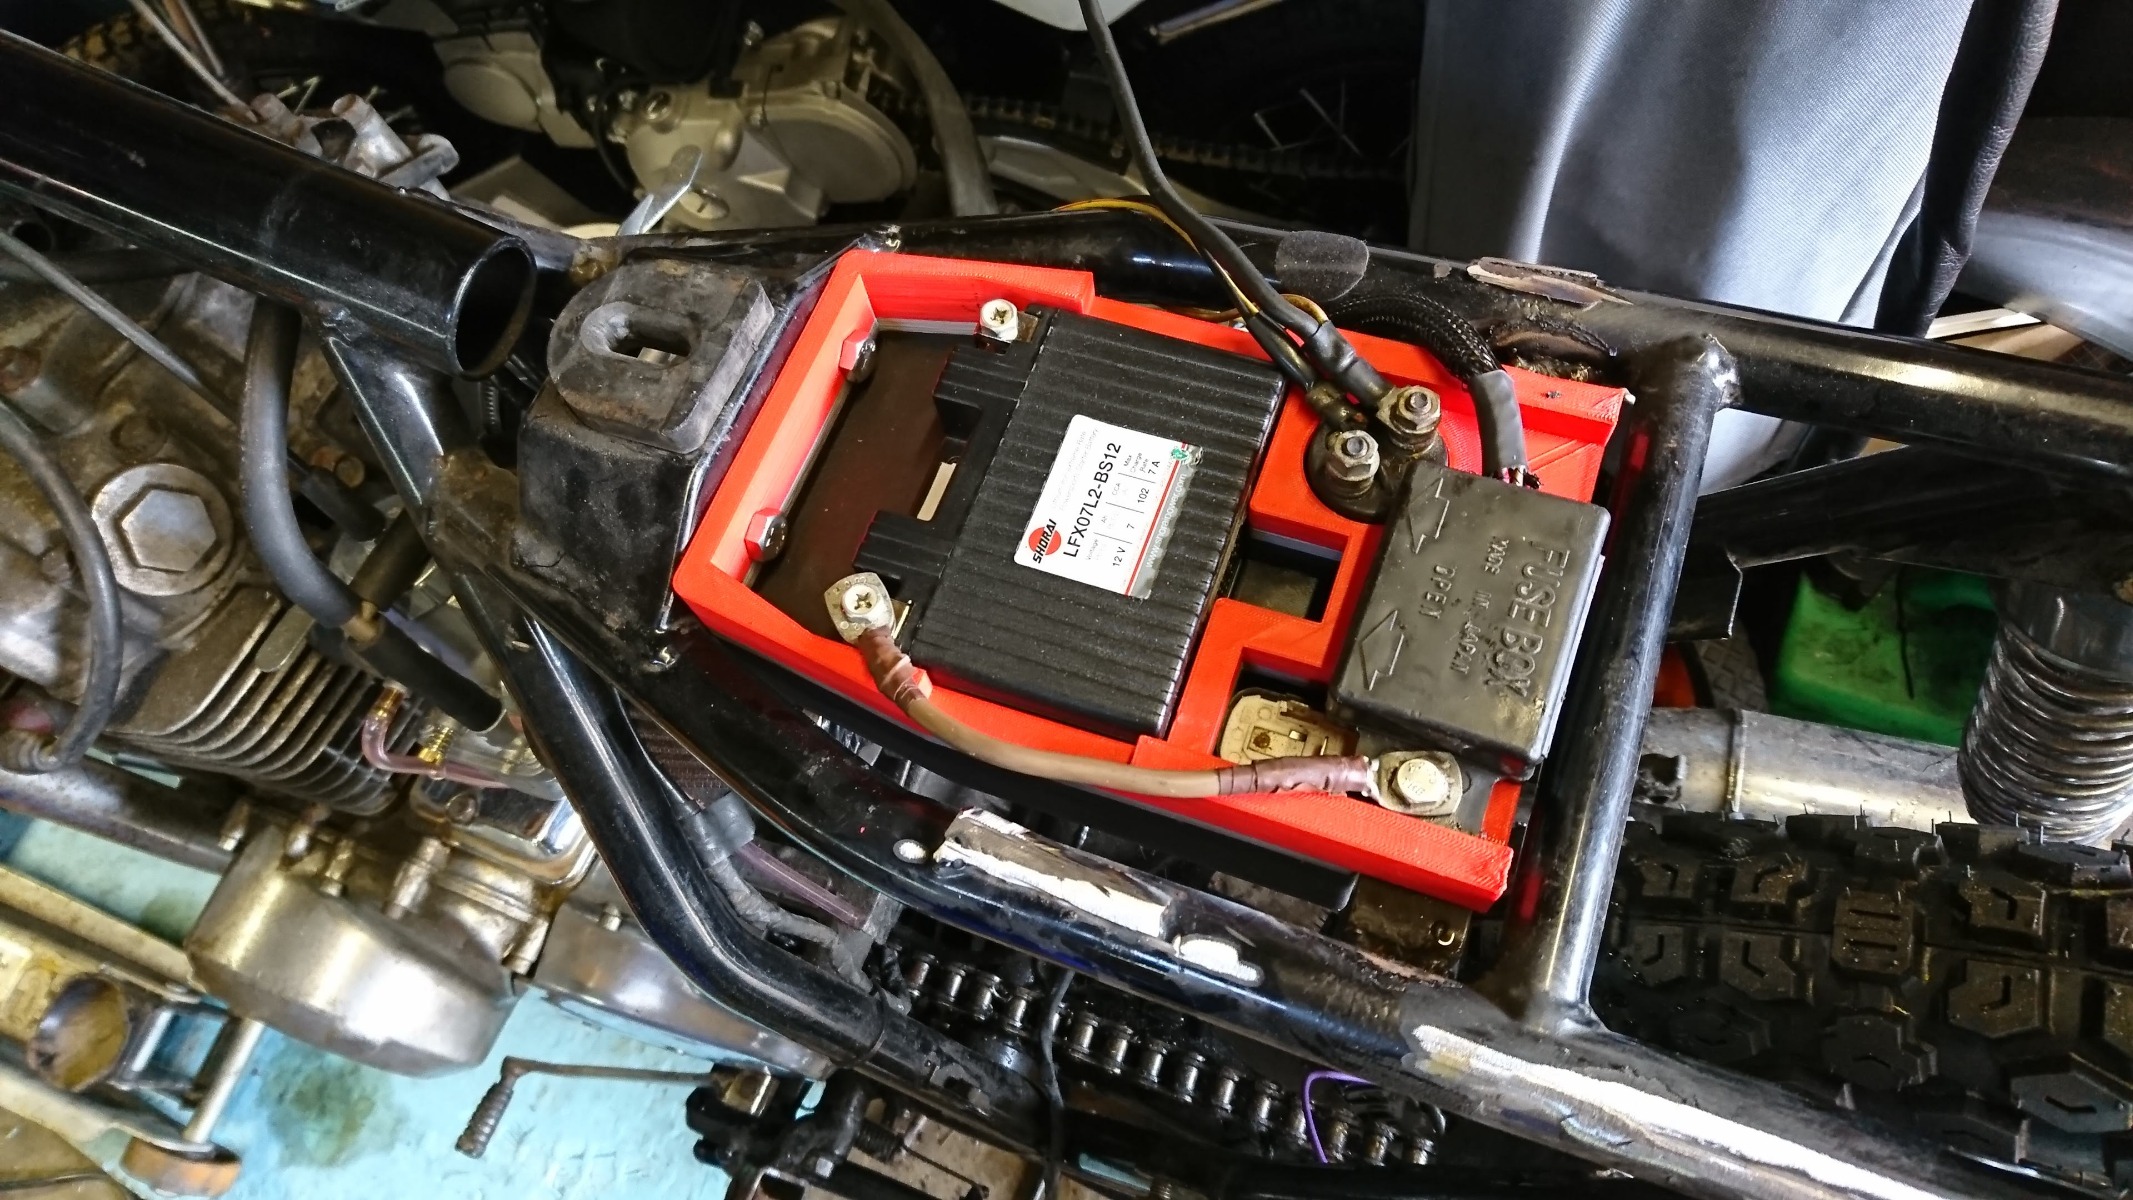
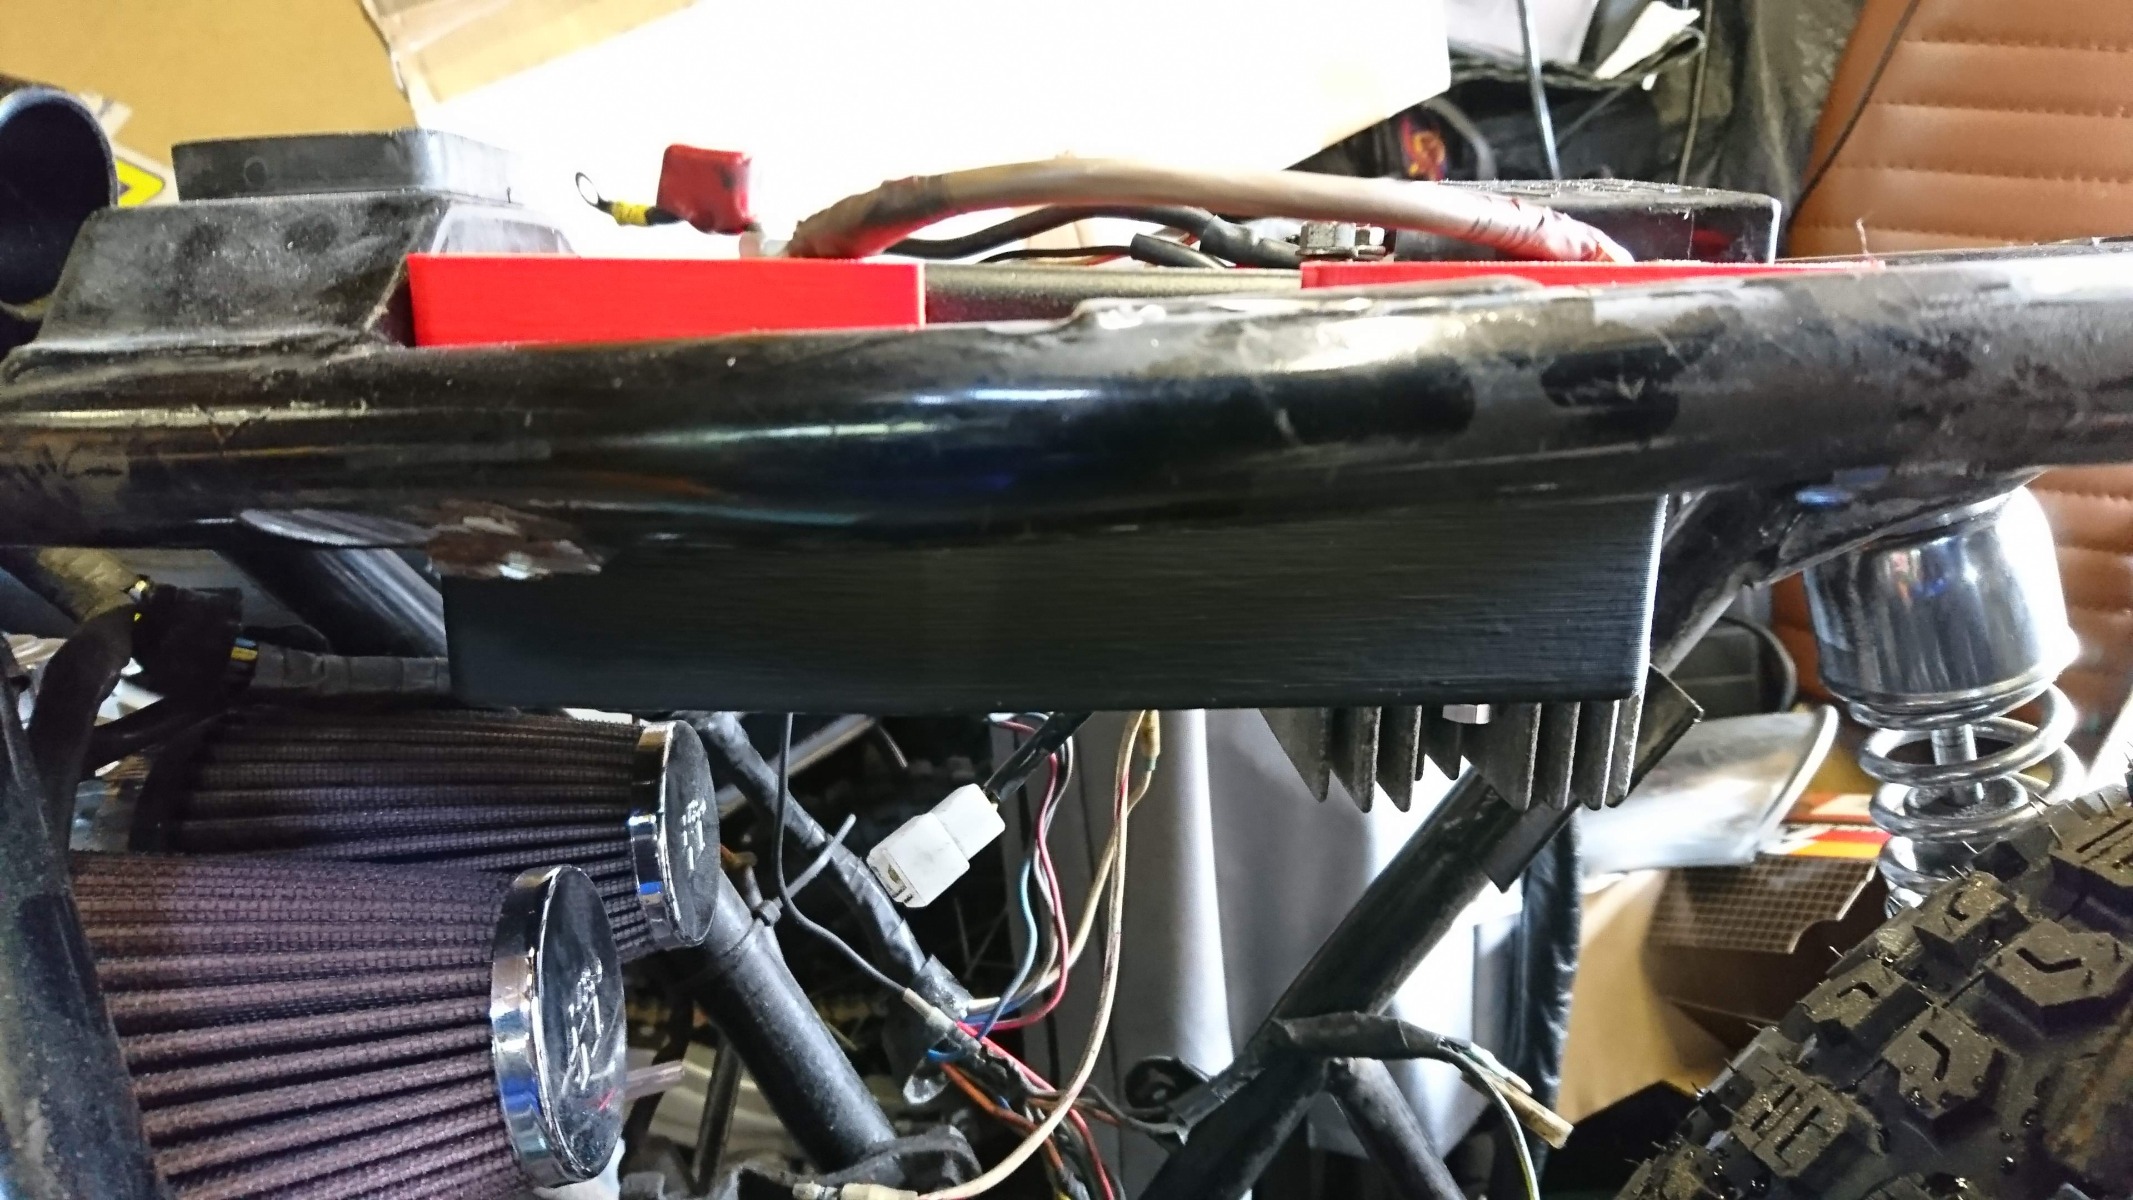
I have done a few more bit on the Scrambled Zed, I decided to 3D print the battery box and incorporate holders for starter and turn signal relays.
Please Log in or Create an account to join the conversation.
- loudhvx
-

- Offline
- KZr Legend
-

Registered
- Posts: 10863
- Thanks: 1622
Re: 1979 UK Spec Z400B2
08 Sep 2019 06:41
That is a very cool battery box!
1981 KZ550 D1 gpz.
Kz550 valve train warning.
Other links.
Kz550 valve train warning.
Other links.
Please Log in or Create an account to join the conversation.
- Pookie
-
Topic Author
- Offline
- User
-
Registered
- Posts: 54
- Thanks: 6
Re: 1979 UK Spec Z400B2
14 Sep 2019 09:56
Still looking for an up-swept rear seat hoop that will fit the frame, bought a few from China but the measurements are always way off, so might buy a tube bender and make one myself! In the meantime I have moved to the front end. I bought a LED headlight (also from China) that too was the wrong size! So the 3D printer came to the rescue. I designed a hoop to act as a transition piece to fit the chrome plated bezel and the LED light unit, then used epoxy glue to fix the LED unit to the transition piece.
I tried the LED light and it is much brighter than the standard one.
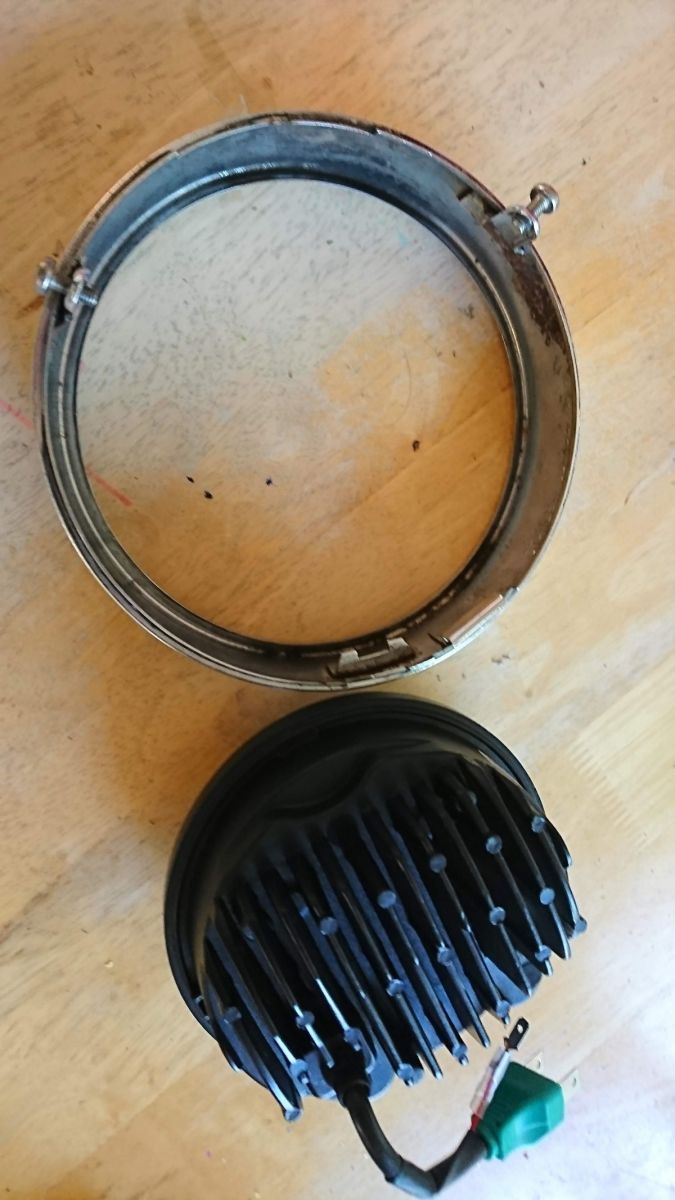
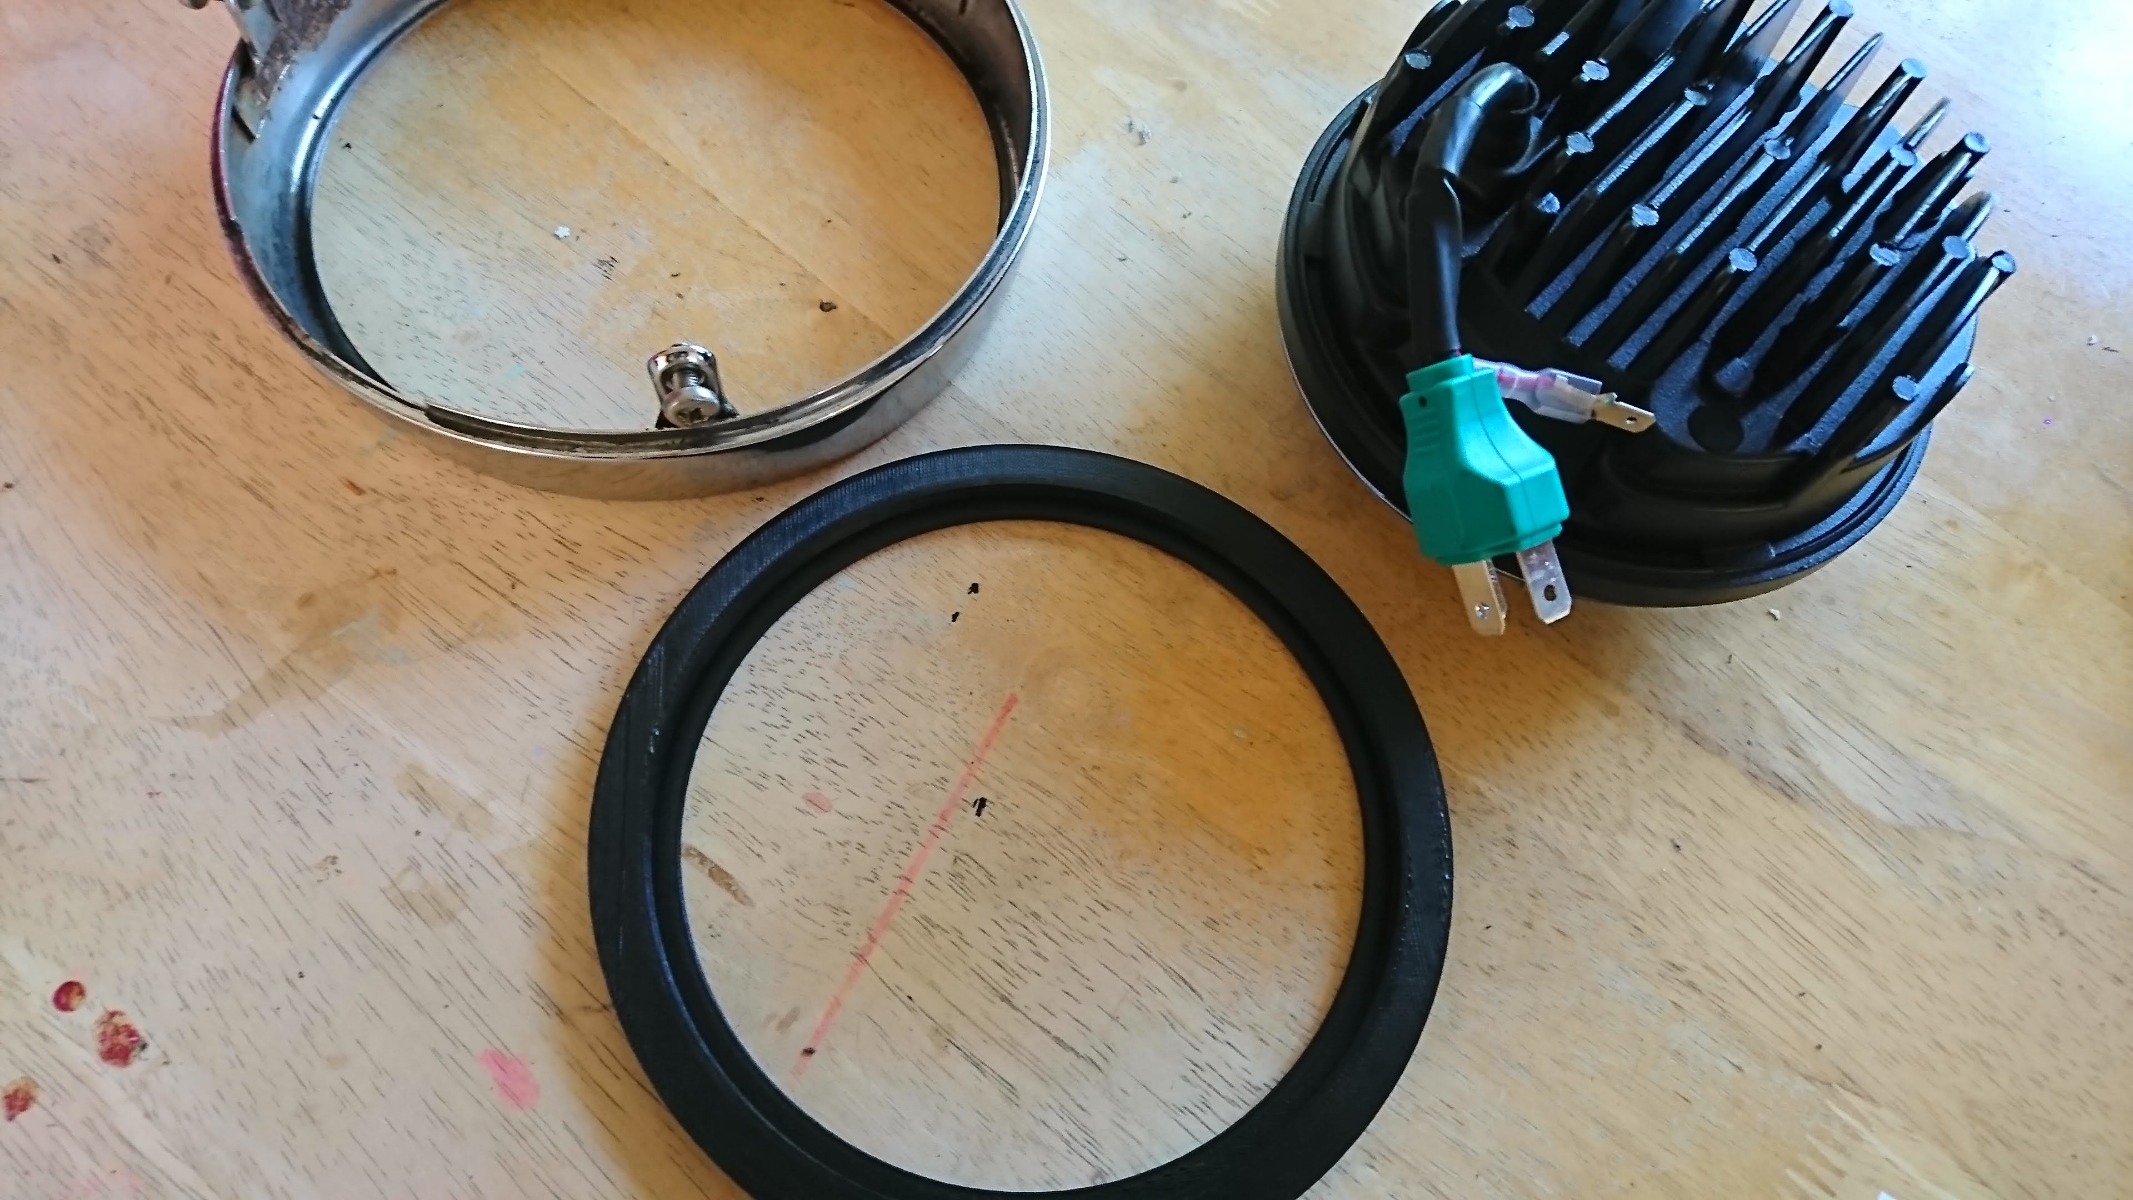
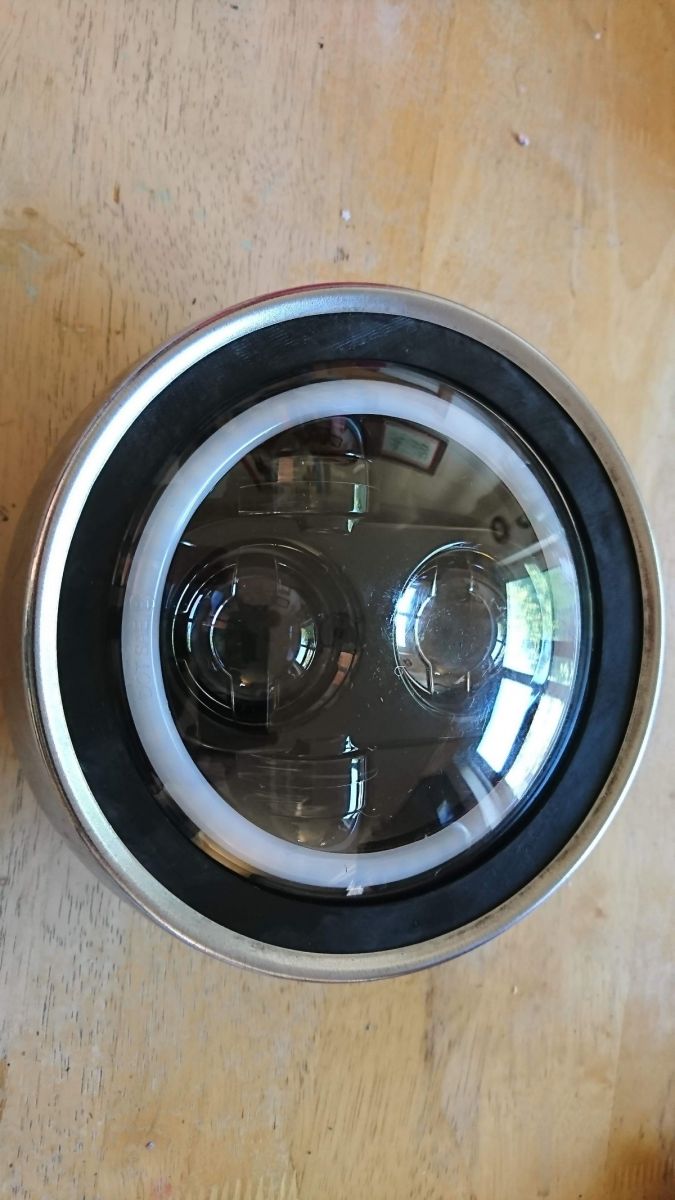
I tried the LED light and it is much brighter than the standard one.
Please Log in or Create an account to join the conversation.
- Pookie
-
Topic Author
- Offline
- User
-
Registered
- Posts: 54
- Thanks: 6
Re: 1979 UK Spec Z400B2
10 Oct 2019 00:46
I finally got a rear seat hoop that's the right size, so fitted that, I'm pleased with it as I now have the clearance between the rear tyre and rear fender.. Next job sort the brackets for the seat and rear fender.
Please Log in or Create an account to join the conversation.
- loudhvx
-
- Offline
- KZr Legend
-
Registered
- Posts: 10863
- Thanks: 1622
Re: 1979 UK Spec Z400B2
10 Oct 2019 07:50
That looks great!
1981 KZ550 D1 gpz.
Kz550 valve train warning.
Other links.
Kz550 valve train warning.
Other links.
Please Log in or Create an account to join the conversation.
- TexasKZ
-
- Offline
- Platinum Member
-
Registered
- Posts: 8244
- Thanks: 2707
Re: 1979 UK Spec Z400B2
16 Oct 2019 08:17
That is coming along nicely. Do you plan to keep the low exhaust, or are you considering a higher system like scramblers of old?
1982 KZ1000 LTD parts donor
1981 KZ1000 LTD awaiting resurrection
2000 ZRX1100 not ridden enough
www.kzrider.com/forum/11-projects/620336...amateur-build-thread
1981 KZ1000 LTD awaiting resurrection
2000 ZRX1100 not ridden enough
www.kzrider.com/forum/11-projects/620336...amateur-build-thread
Please Log in or Create an account to join the conversation.
- Pookie
-
Topic Author
- Offline
- User
-
Registered
- Posts: 54
- Thanks: 6
Re: 1979 UK Spec Z400B2
16 Oct 2019 23:54
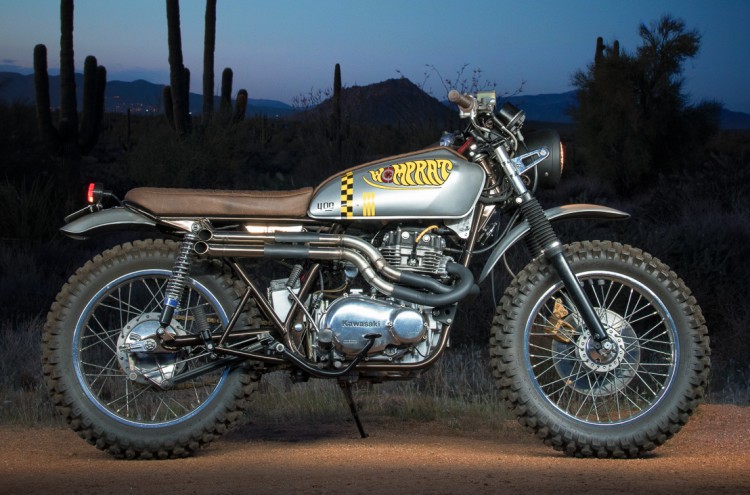
High level, both down one side. Bit like this (I hope)!
Please Log in or Create an account to join the conversation.
- TexasKZ
-
- Offline
- Platinum Member
-
Registered
- Posts: 8244
- Thanks: 2707
Re: 1979 UK Spec Z400B2
17 Oct 2019 15:38
Nice
1982 KZ1000 LTD parts donor
1981 KZ1000 LTD awaiting resurrection
2000 ZRX1100 not ridden enough
www.kzrider.com/forum/11-projects/620336...amateur-build-thread
1981 KZ1000 LTD awaiting resurrection
2000 ZRX1100 not ridden enough
www.kzrider.com/forum/11-projects/620336...amateur-build-thread
Please Log in or Create an account to join the conversation.
- Pookie
-
Topic Author
- Offline
- User
-
Registered
- Posts: 54
- Thanks: 6
Re: 1979 UK Spec Z400B2
27 Nov 2019 05:29
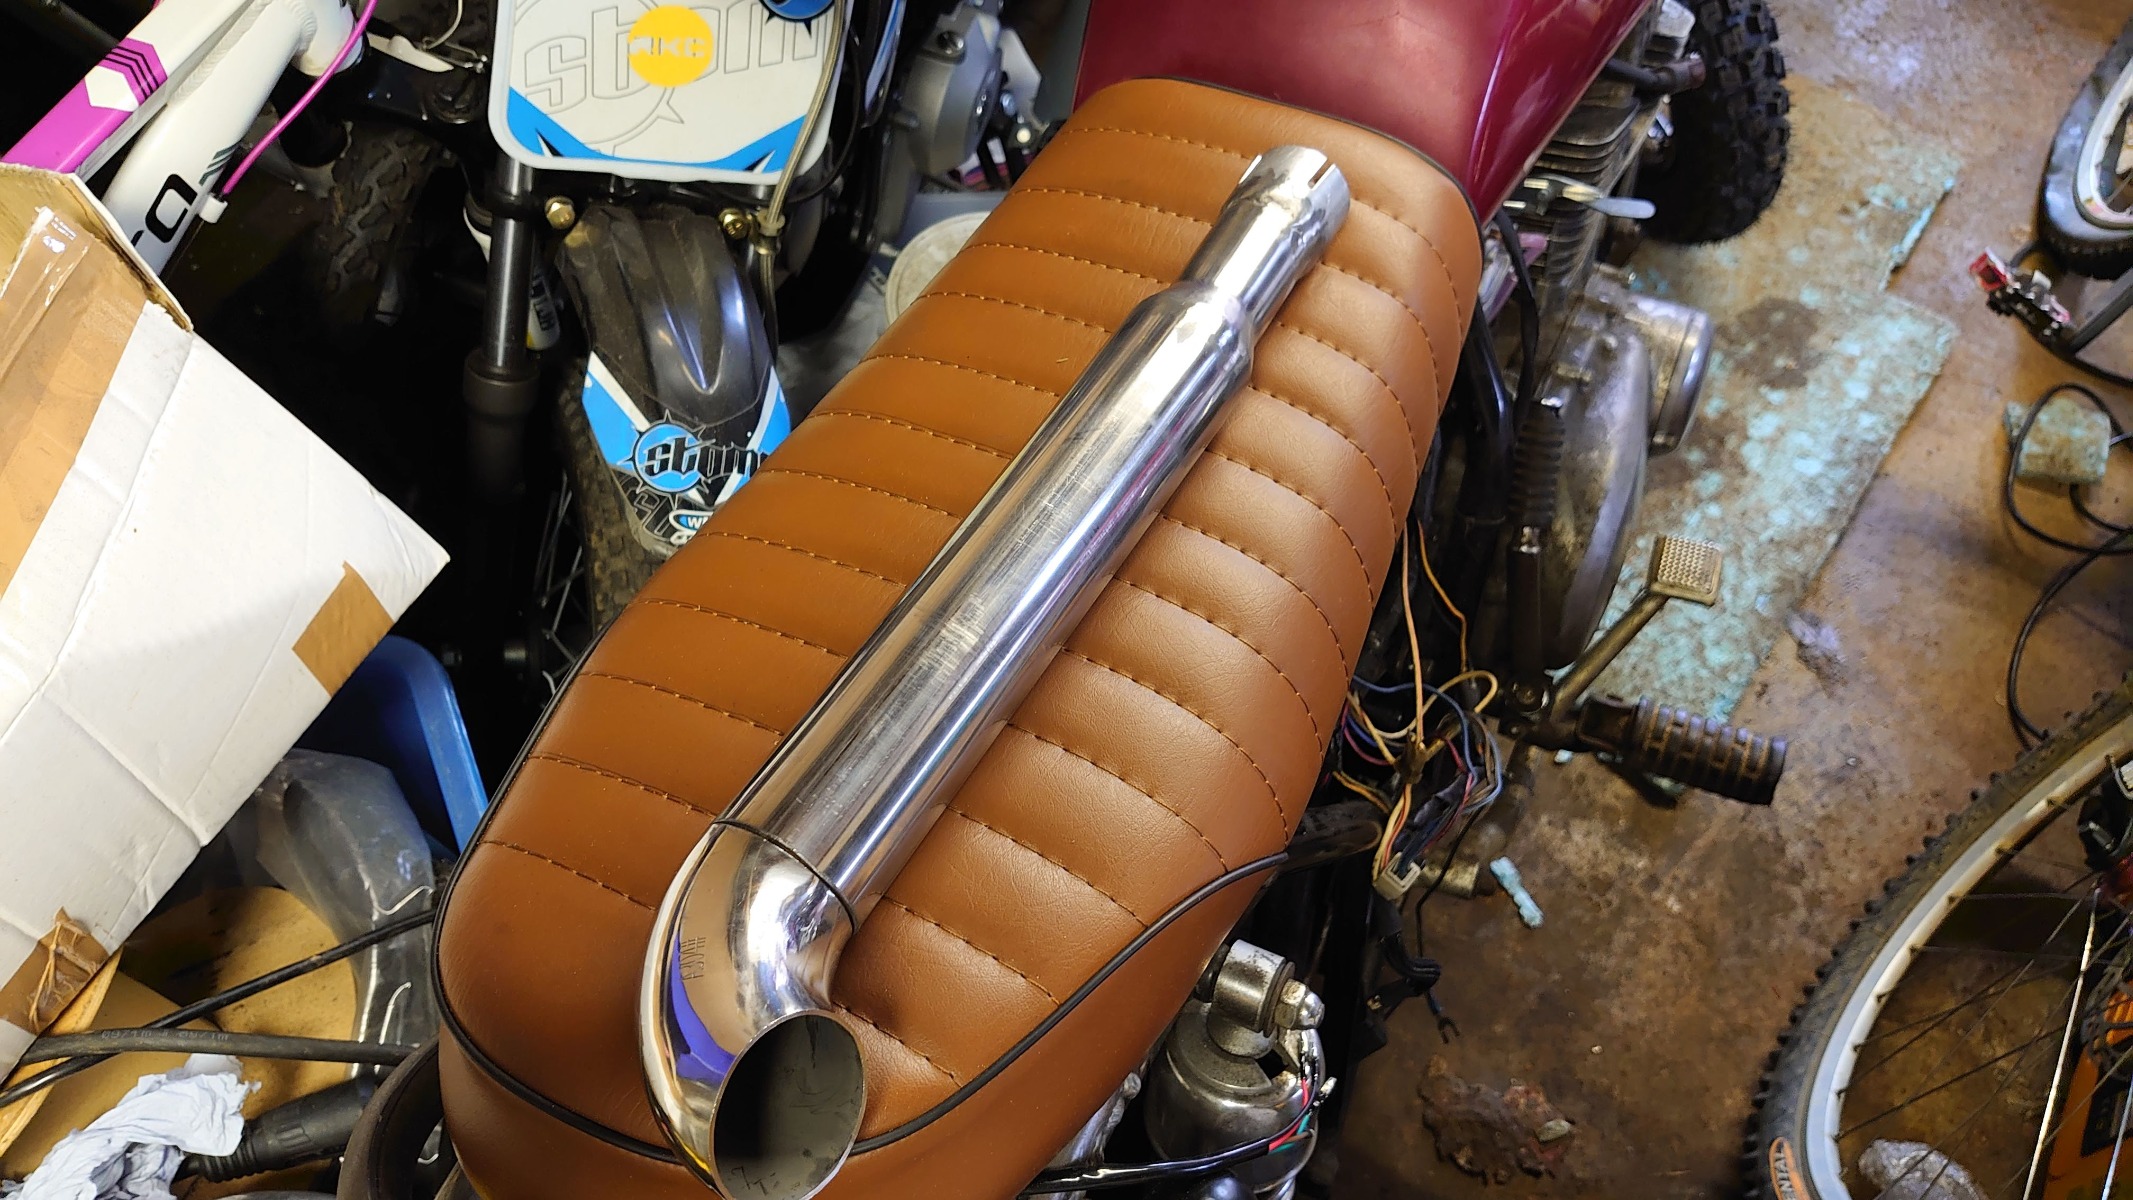
I have made a start on the exhaust pipes, this is one of the two silencers, all stainless steel with removable baffles so they can be repacked. I'm now awaiting gas for the tig welder as I forgot to turn off the back purge pipe and wasted a load of argon!
Please Log in or Create an account to join the conversation.
Moderators: Street Fighter LTD