
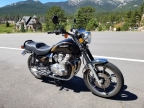
85 GPz 750 Cafe Project
- ayeckley
-
- Offline
- User
-

Registered
- Posts: 169
- Thanks: 34
Re: 85 GPz 750 Cafe Project
26 Apr 2017 20:12
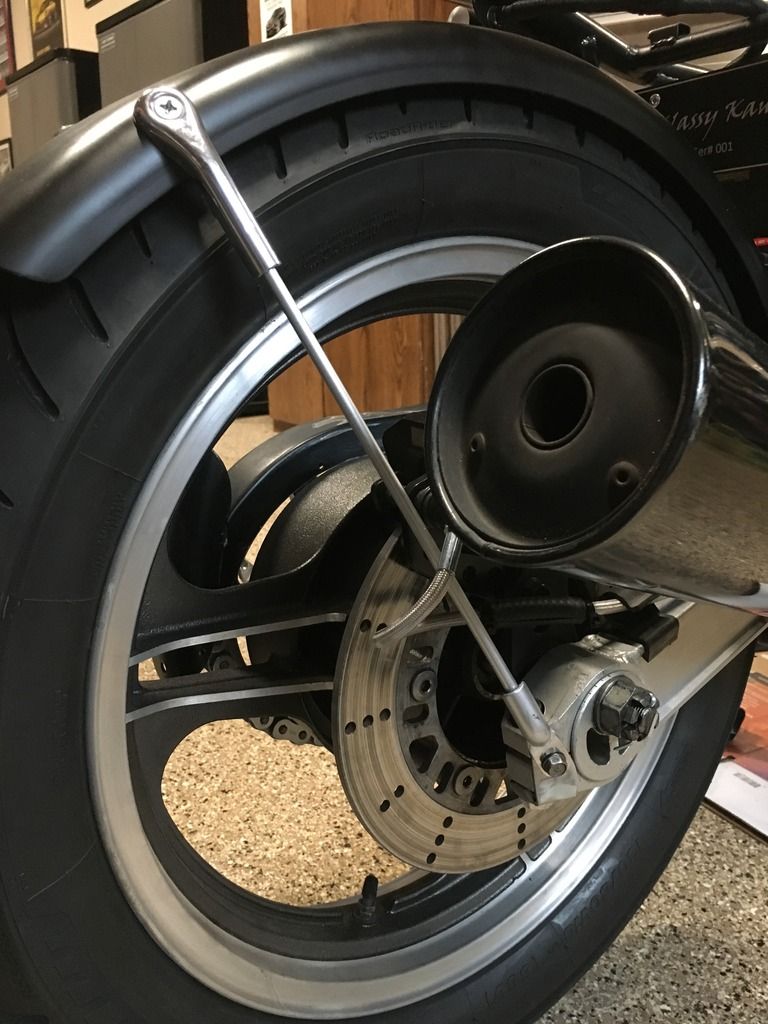
They should rotate pretty freely. Probably should pull and lubricate them.
1976 KZ900A4
1976 KZ900A4
1978 KZ1000A2
1983 ZX750 A1 aka GPz 750
1983 ZX750 A1
1973 CL350K4
1984 ZX1100 A2 aka GPz1100
1969 CT90
2006 Burgman 400
1976 KZ900A4
1978 KZ1000A2
1983 ZX750 A1 aka GPz 750
1983 ZX750 A1
1973 CL350K4
1984 ZX1100 A2 aka GPz1100
1969 CT90
2006 Burgman 400
Please Log in or Create an account to join the conversation.
- loudhvx
-

- Offline
- KZr Legend
-

Registered
- Posts: 10863
- Thanks: 1622
Re: 85 GPz 750 Cafe Project
27 Apr 2017 09:21
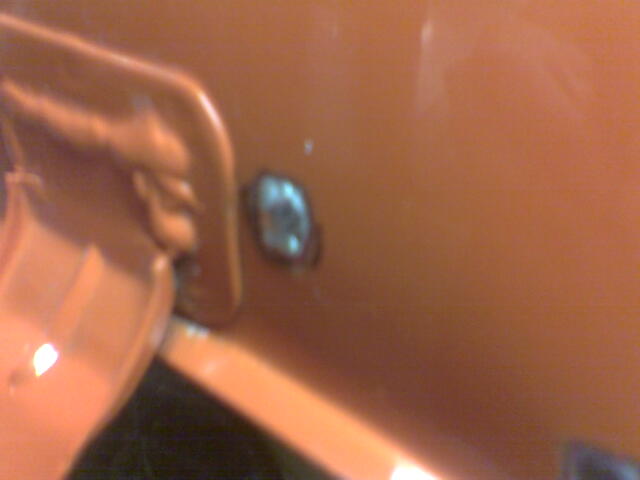
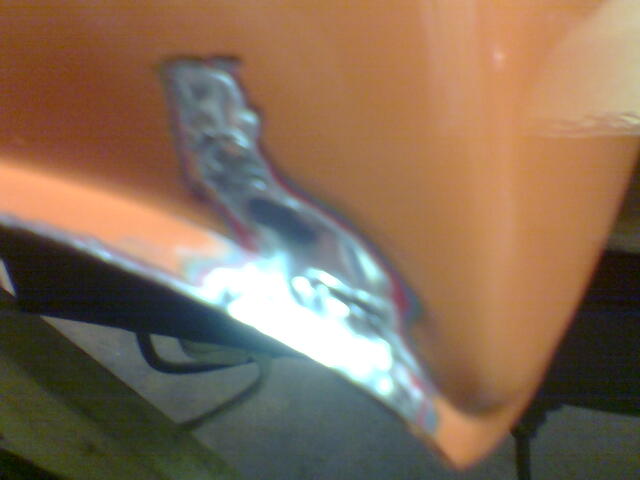
I had some pinholes in a tank that showed up just after it was painted. I had good luck with solder.
I removed just a tiny spot of paint around the pinholes then used a big brass rod as a soldering iron with a propane torch.
I first made sure the brass rod would not ignite gasoline by heating it and placing it in a little puddle of gasoline. It just fizzled.
So I filled the tank most of the way with water, and just tipped it so the pinhole area would not be wet, and just soldered it with plumbing solder, using a very sparing bit of plumbing flux.
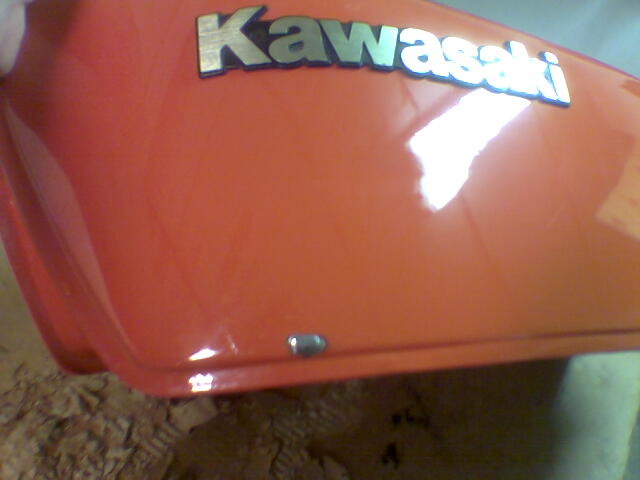
Sorry for the crappy photos. The seat covered most of the patches. The only one visible is the one below the Kawasaki logo.
I removed just a tiny spot of paint around the pinholes then used a big brass rod as a soldering iron with a propane torch.
I first made sure the brass rod would not ignite gasoline by heating it and placing it in a little puddle of gasoline. It just fizzled.
So I filled the tank most of the way with water, and just tipped it so the pinhole area would not be wet, and just soldered it with plumbing solder, using a very sparing bit of plumbing flux.
Sorry for the crappy photos. The seat covered most of the patches. The only one visible is the one below the Kawasaki logo.
1981 KZ550 D1 gpz.
Kz550 valve train warning.
Other links.
Kz550 valve train warning.
Other links.
Please Log in or Create an account to join the conversation.
- ajsfirehawk
-
 Topic Author
- Offline
- Sustaining Member
-

Registered
- Posts: 513
- Thanks: 90
Re: 85 GPz 750 Cafe Project
27 Apr 2017 09:43ayeckley wrote: They should rotate pretty freely. Probably should pull and lubricate them.
Hmmm, as critical as the chain tension is to safety it never occurred to me to lubricate them. I realized they are clamped, but it could be disastrous to have them vibrate/rotate and loosen the chain. Plus if lubricated wouldn't they want to slip back to a position with less tension on them before one was able to tighten the clamping bolts?
80 KZ1000 Z1 Classic
83 KZ1100 LTD
18 Z900RS
23 Mach 1
83 KZ1100 LTD
18 Z900RS
23 Mach 1
Please Log in or Create an account to join the conversation.
- ajsfirehawk
-
Topic Author
- Offline
- Sustaining Member
-
Registered
- Posts: 513
- Thanks: 90
Re: 85 GPz 750 Cafe Project
27 Apr 2017 09:45loudhvx wrote: I had some pinholes in a tank that showed up just after it was painted. I had good luck with solder.
I removed just a tiny spot of paint around the pinholes then used a big brass rod as a soldering iron with a propane torch.
I first made sure the brass rod would not ignite gasoline by heating it and placing it in a little puddle of gasoline. It just fizzled.
So I filled the tank most of the way with water, and just tipped it so the pinhole area would not be wet, and just soldered it with plumbing solder, using a very sparing bit of plumbing flux.
Looks like a nice piece of work Loud. Have you sanded it down to repaint? Any sense that you got good solder penetration? I know when sweating copper joints you can see the solder flow into the joint towards the heat. (plumber in a previous life)
80 KZ1000 Z1 Classic
83 KZ1100 LTD
18 Z900RS
23 Mach 1
83 KZ1100 LTD
18 Z900RS
23 Mach 1
Please Log in or Create an account to join the conversation.
- ayeckley
-
- Offline
- User
-
Registered
- Posts: 169
- Thanks: 34
Re: 85 GPz 750 Cafe Project
27 Apr 2017 12:03
Fair point. Mine haven't slipped but then again I haven't put a whole lot of miles on it, or put large loads on. It's a pretty large clamping area though. If nothing else it sounds like they could use a cleaning and reassembly.
1976 KZ900A4
1976 KZ900A4
1978 KZ1000A2
1983 ZX750 A1 aka GPz 750
1983 ZX750 A1
1973 CL350K4
1984 ZX1100 A2 aka GPz1100
1969 CT90
2006 Burgman 400
1976 KZ900A4
1978 KZ1000A2
1983 ZX750 A1 aka GPz 750
1983 ZX750 A1
1973 CL350K4
1984 ZX1100 A2 aka GPz1100
1969 CT90
2006 Burgman 400
Please Log in or Create an account to join the conversation.
- ajsfirehawk
-
Topic Author
- Offline
- Sustaining Member
-
Registered
- Posts: 513
- Thanks: 90
Re: 85 GPz 750 Cafe Project
27 Apr 2017 19:42
Pretty sure I figured out why I've had so much trouble with the chain tensioner on the GPz. I've been loosening the axle bolt. If you loosen the clamps and leave the axle bolt tight, you can simply put a wrench on the axle nut (nice leverage) and rotate.
80 KZ1000 Z1 Classic
83 KZ1100 LTD
18 Z900RS
23 Mach 1
83 KZ1100 LTD
18 Z900RS
23 Mach 1
Please Log in or Create an account to join the conversation.
- ajsfirehawk
-
Topic Author
- Offline
- Sustaining Member
-
Registered
- Posts: 513
- Thanks: 90
Re: 85 GPz 750 Cafe Project
28 Apr 2017 17:37
Rotating the chain tensioners so the rear axle was at the top of the swingarm caused interference with the chain on the chain guard and the tire hitting the rear fender. So I'm in the process remaking the fender brackets and chain guard.


80 KZ1000 Z1 Classic
83 KZ1100 LTD
18 Z900RS
23 Mach 1
83 KZ1100 LTD
18 Z900RS
23 Mach 1
Please Log in or Create an account to join the conversation.
- ajsfirehawk
-
Topic Author
- Offline
- Sustaining Member
-
Registered
- Posts: 513
- Thanks: 90
Re: 85 GPz 750 Cafe Project
04 May 2017 09:08
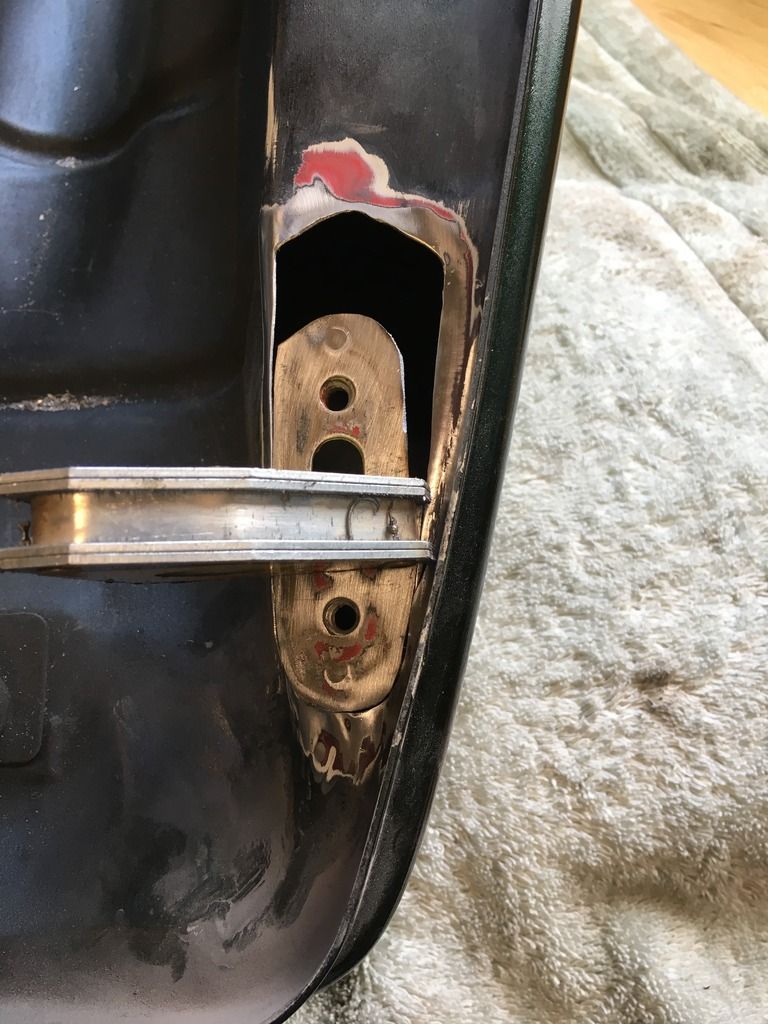
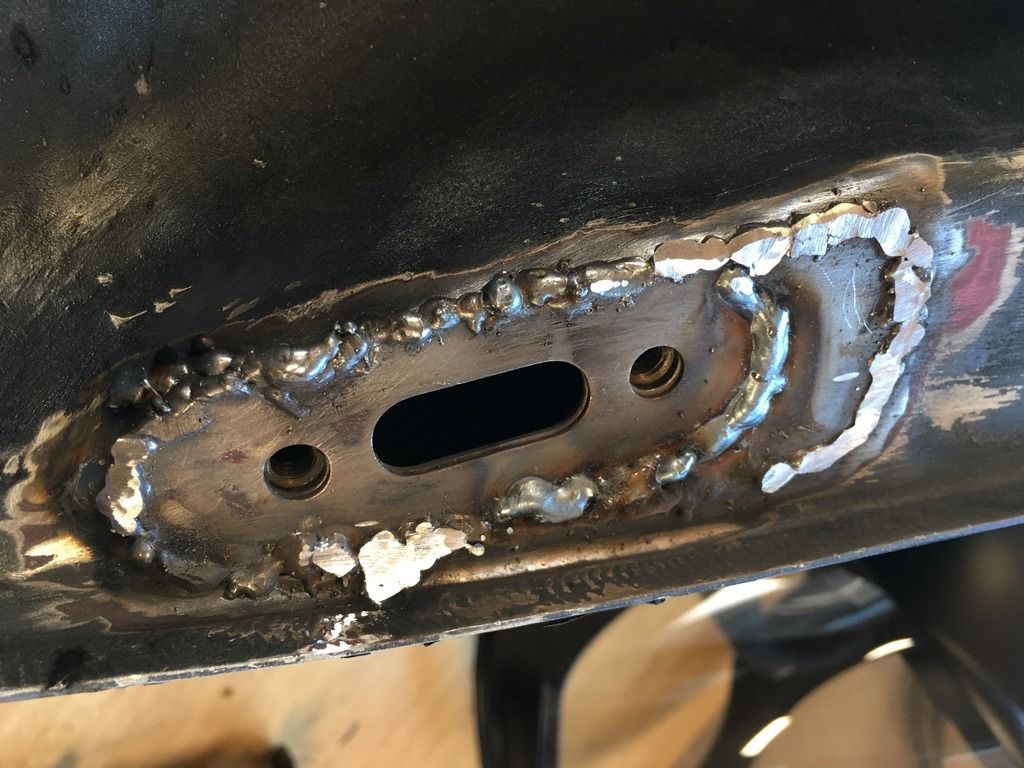
I've decided to move the petcock. I just can't come up with an acceptable alternative. Yesterday I cut out the petcock mount after determining the clearance I would need and began cutting it in. Unfortunately I needed to move it back far enough I got into the curved area where the upper frame tubes pass through the back of the tank. That complicated the bottom inboard corner. The welds are a bit proud but anytime I took the amperage up I got blowouts. I'll finish cleaning it up, fill it up with gas for 10 days to ensure I don't have any leaks anywhere. Finish the tuning process during the 10 days and then paint the tank.


80 KZ1000 Z1 Classic
83 KZ1100 LTD
18 Z900RS
23 Mach 1
83 KZ1100 LTD
18 Z900RS
23 Mach 1
Please Log in or Create an account to join the conversation.
- ajsfirehawk
-
Topic Author
- Offline
- Sustaining Member
-
Registered
- Posts: 513
- Thanks: 90
Re: 85 GPz 750 Cafe Project
06 May 2017 21:05
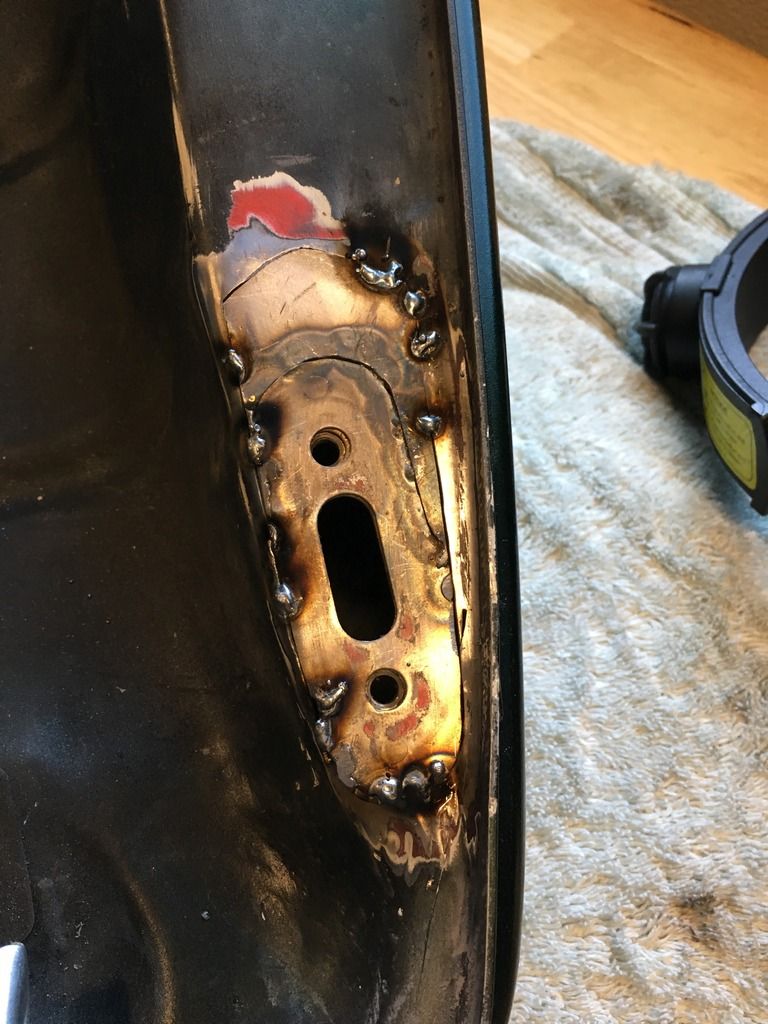
I got around to finishing the grinding/sanding without messing with the petcock mounting surface. Blasted out the tank with water to remove the slag, metal shaving and sanding fragments. Filled it with 1/3 gallon of WD40 and shook it around many times. Drained it and put a hairdryer in it on warm for 5 hours.
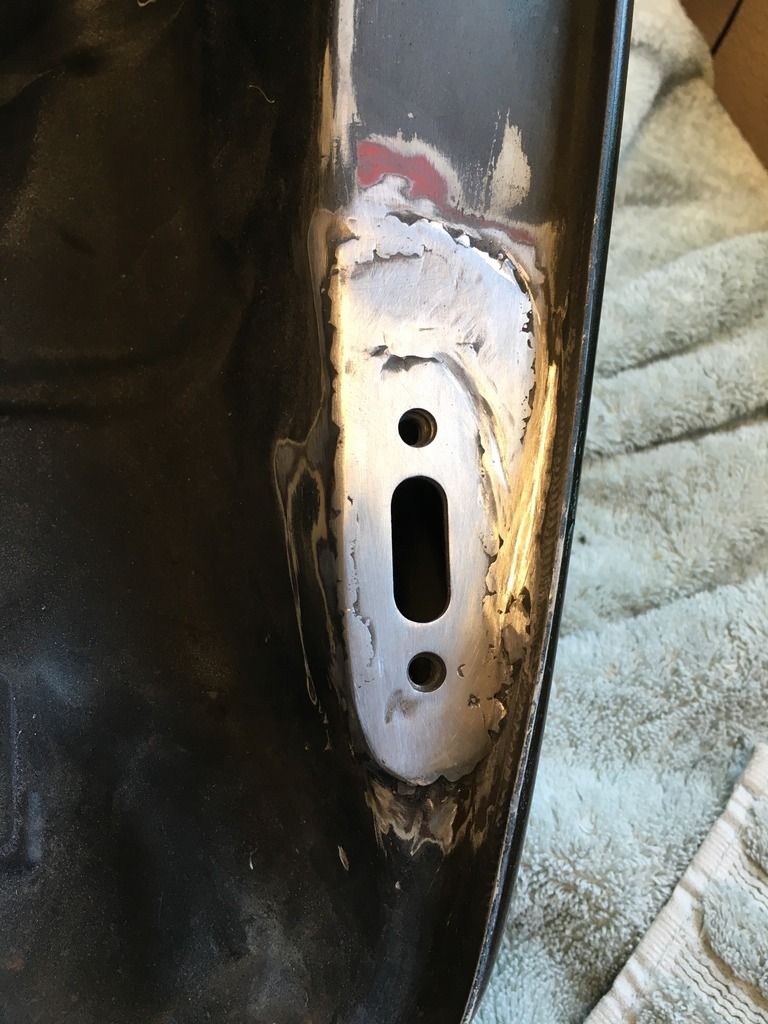
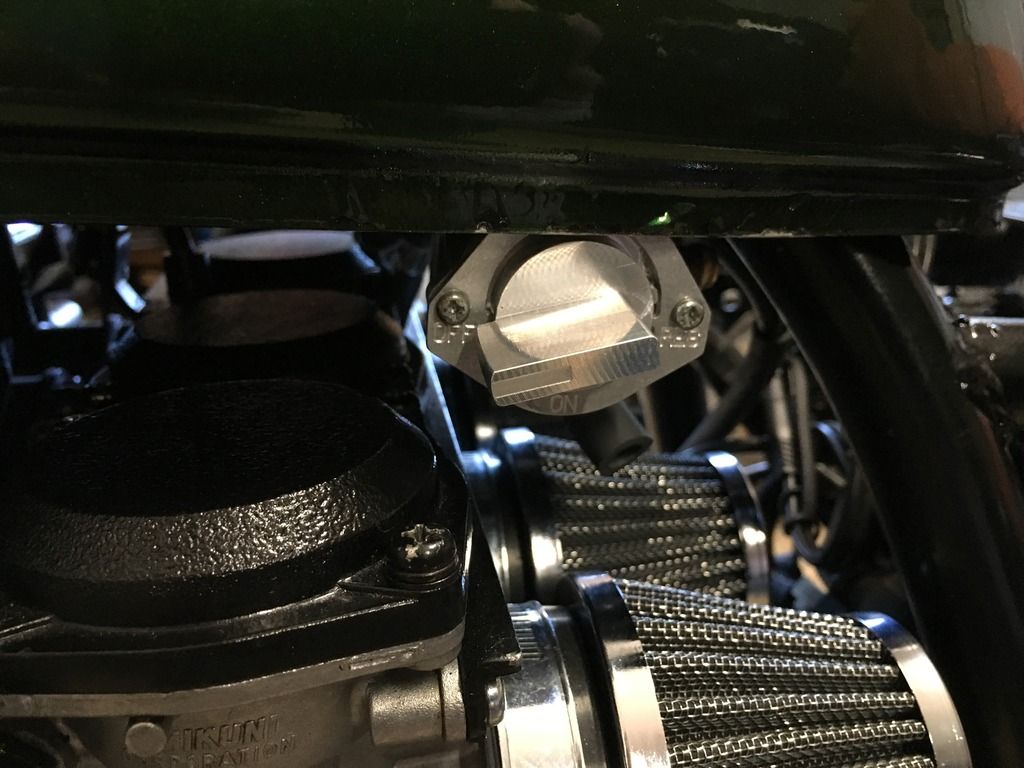
The I test fit the tank with the petcock installed back on the bike. I now have plenty of room.

The I test fit the tank with the petcock installed back on the bike. I now have plenty of room.

80 KZ1000 Z1 Classic
83 KZ1100 LTD
18 Z900RS
23 Mach 1
83 KZ1100 LTD
18 Z900RS
23 Mach 1
Please Log in or Create an account to join the conversation.
- GPzMOD750
-

- Offline
- User
-
Registered
- Posts: 1365
- Thanks: 148
Re: 85 GPz 750 Cafe Project
07 May 2017 09:18
Great work. I've been waiting for ages to see this bad boy done.
The following user(s) said Thank You: GPz550D1
Please Log in or Create an account to join the conversation.
- ajsfirehawk
-
Topic Author
- Offline
- Sustaining Member
-
Registered
- Posts: 513
- Thanks: 90
Re: 85 GPz 750 Cafe Project
07 May 2017 16:24
Thank you, I'm going to drive it across the finish line as it is almost warm enough to paint. (repaint damnit)
80 KZ1000 Z1 Classic
83 KZ1100 LTD
18 Z900RS
23 Mach 1
83 KZ1100 LTD
18 Z900RS
23 Mach 1
Please Log in or Create an account to join the conversation.
- ajsfirehawk
-
Topic Author
- Offline
- Sustaining Member
-
Registered
- Posts: 513
- Thanks: 90
Re: 85 GPz 750 Cafe Project
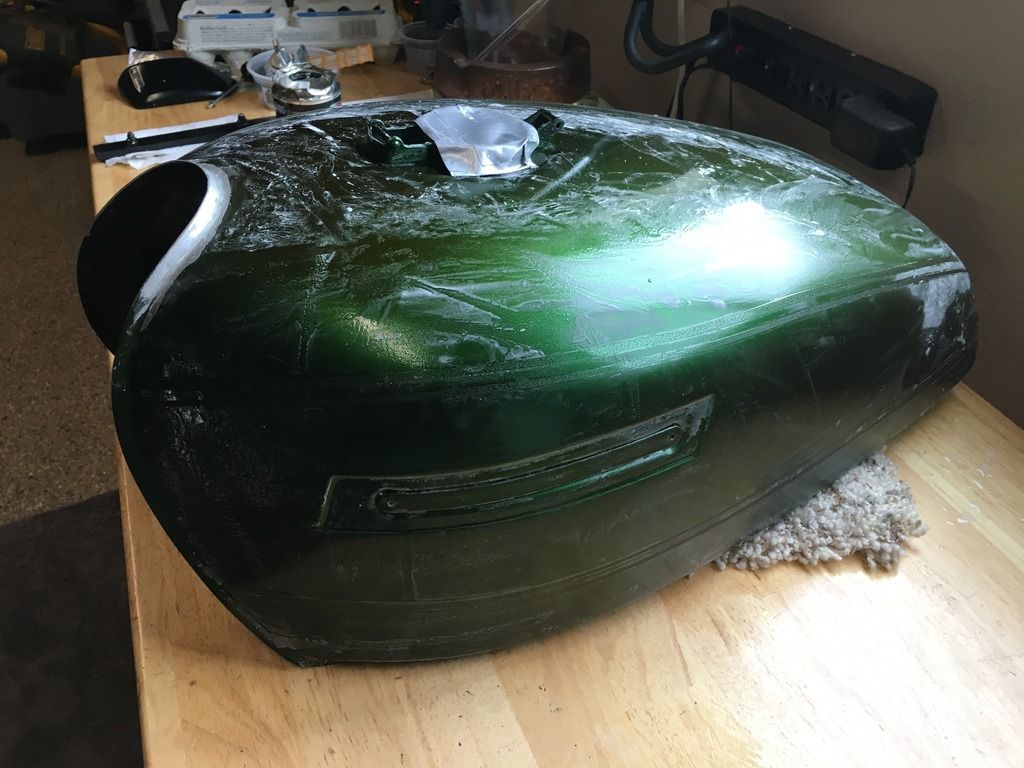
10 May 2017 19:10
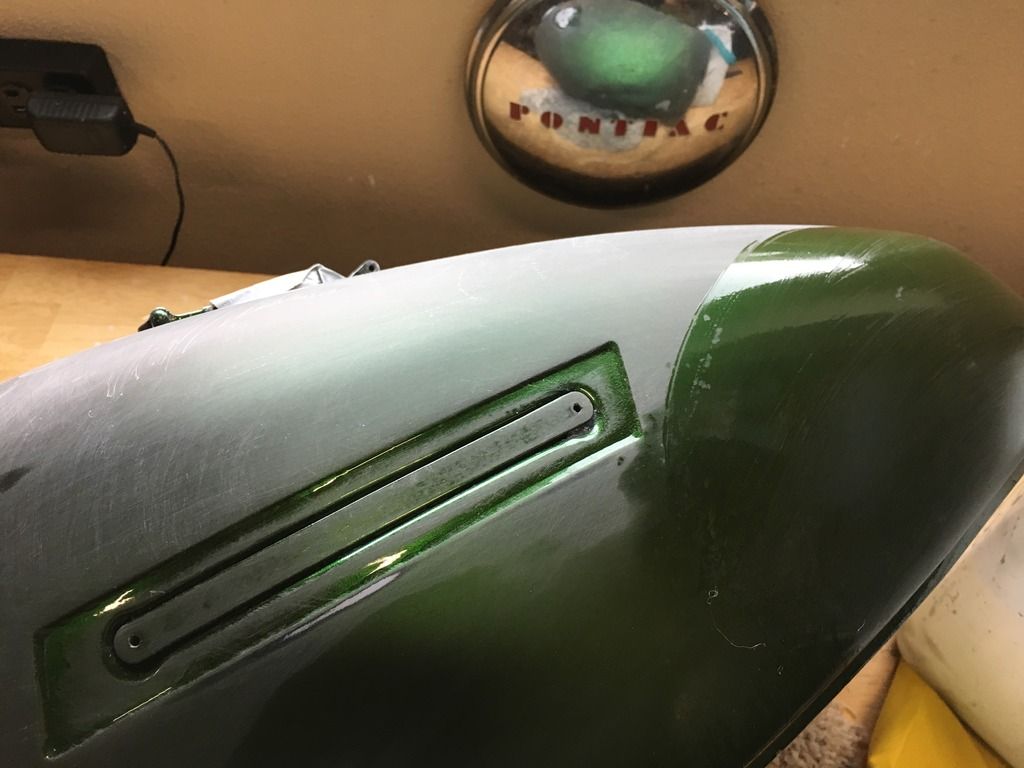
Back at it. Wet sanding the tank to prep it for the repaint. Removed the stripes and then proceeded to wet sand it to flatten the surface. When it quits raining I'll mount it on the bike, fill her with gas and finish the tuning. Once I see it hold fuel without any leaks, I'll paint it again.


80 KZ1000 Z1 Classic
83 KZ1100 LTD
18 Z900RS
23 Mach 1
83 KZ1100 LTD
18 Z900RS
23 Mach 1
The following user(s) said Thank You: GPz550D1
Please Log in or Create an account to join the conversation.
Moderators: Street Fighter LTD