
'78 KZ 650 Refreshing/Upgrade Project
- Dumont
-
- Offline
- User
-

Registered
- Posts: 26
- Thanks: 2
Re: '78 KZ 650 Refreshing/Upgrade Project
06 Feb 2014 10:34
Hey Jonny, I got your email with pics last night. Was working on my Ducati Monster until late in the evening (30K mile Maintenance). I will get into the garage today and take a look, I think what I have will work. the only question about them will be the fork caps. Mine has the external Hex, and yours has the internal plug type otherwise visual/memory it looks like it is the same.
650ed or anyone else know off hand if the type of end caps are interchangeable? If so I will send this out to Jonny and he can use his OE end cap on this tube.
650ed or anyone else know off hand if the type of end caps are interchangeable? If so I will send this out to Jonny and he can use his OE end cap on this tube.
78 KZ650(Project)
09 Monster 1100s
07 Monster S2R1000 sold
97 Daytona T595 sold
95 KX250 sold
82 GPz 550 sold
87 Ninja ZX10r sold
79 KZ650csr sold
82 CR250 sold
09 Monster 1100s
07 Monster S2R1000 sold
97 Daytona T595 sold
95 KX250 sold
82 GPz 550 sold
87 Ninja ZX10r sold
79 KZ650csr sold
82 CR250 sold
Please Log in or Create an account to join the conversation.
- Dumont
-
- Offline
- User
-
Registered
- Posts: 26
- Thanks: 2
Re: '78 KZ 650 Refreshing/Upgrade Project
06 Feb 2014 14:26
Jon, I just replied to your email but thought I should post up. As it turns out these two typs of forks are indeed different. My KZ has the intenal top cap like yours and my spare set of forks has the outer/external top nut type of cap. I pulled the cap off the spare set and measured the ID, then walked over to my KZ and measured the ID of the internal type (was able to measure without pulling the cap out) and they are indeed different sizes.
Unfortunately it looks like the hunt is still on...
Good Luck!
Scott
Unfortunately it looks like the hunt is still on...
Good Luck!
Scott
78 KZ650(Project)
09 Monster 1100s
07 Monster S2R1000 sold
97 Daytona T595 sold
95 KX250 sold
82 GPz 550 sold
87 Ninja ZX10r sold
79 KZ650csr sold
82 CR250 sold
09 Monster 1100s
07 Monster S2R1000 sold
97 Daytona T595 sold
95 KX250 sold
82 GPz 550 sold
87 Ninja ZX10r sold
79 KZ650csr sold
82 CR250 sold
Please Log in or Create an account to join the conversation.
- Nessism
-

- Away
- Sustaining Member
-

Registered
- Posts: 8047
- Thanks: 3428
Re: '78 KZ 650 Refreshing/Upgrade Project
08 Feb 2014 06:04
Can't say for sure because of the photos, but it looks like one of those inner fork tubes is bent. I'd do a hard stop on that and get another if the new spring won't fit down inside. There are lots of forks for sale on ebay for reasonable prices.
Ed
Carb O-ring Kits : www.kzrider.com/forum/14-vendor-forum/62...rburetor-o-ring-kits
www.kzrider.com/forum/faq-wiki/618026-new-owner-things-to-know
1981 KZ750E2
www.kzrider.com/forum/11-projects/604901...z750e-project-thread
Carb O-ring Kits : www.kzrider.com/forum/14-vendor-forum/62...rburetor-o-ring-kits
www.kzrider.com/forum/faq-wiki/618026-new-owner-things-to-know
1981 KZ750E2
www.kzrider.com/forum/11-projects/604901...z750e-project-thread
Please Log in or Create an account to join the conversation.
- Jonny
-
 Topic Author
- Offline
- User
-
Registered
- woot!
- Posts: 210
- Thanks: 22
Re: '78 KZ 650 Refreshing/Upgrade Project
09 Feb 2014 16:53
Whew!
Back with a few updates and some promised photos. As per the usual, good news and bad news. Thankfully a little more of the former this time.
Good news:
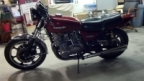
VM26s!! More power? (Thanks KPond!)
Bad News:
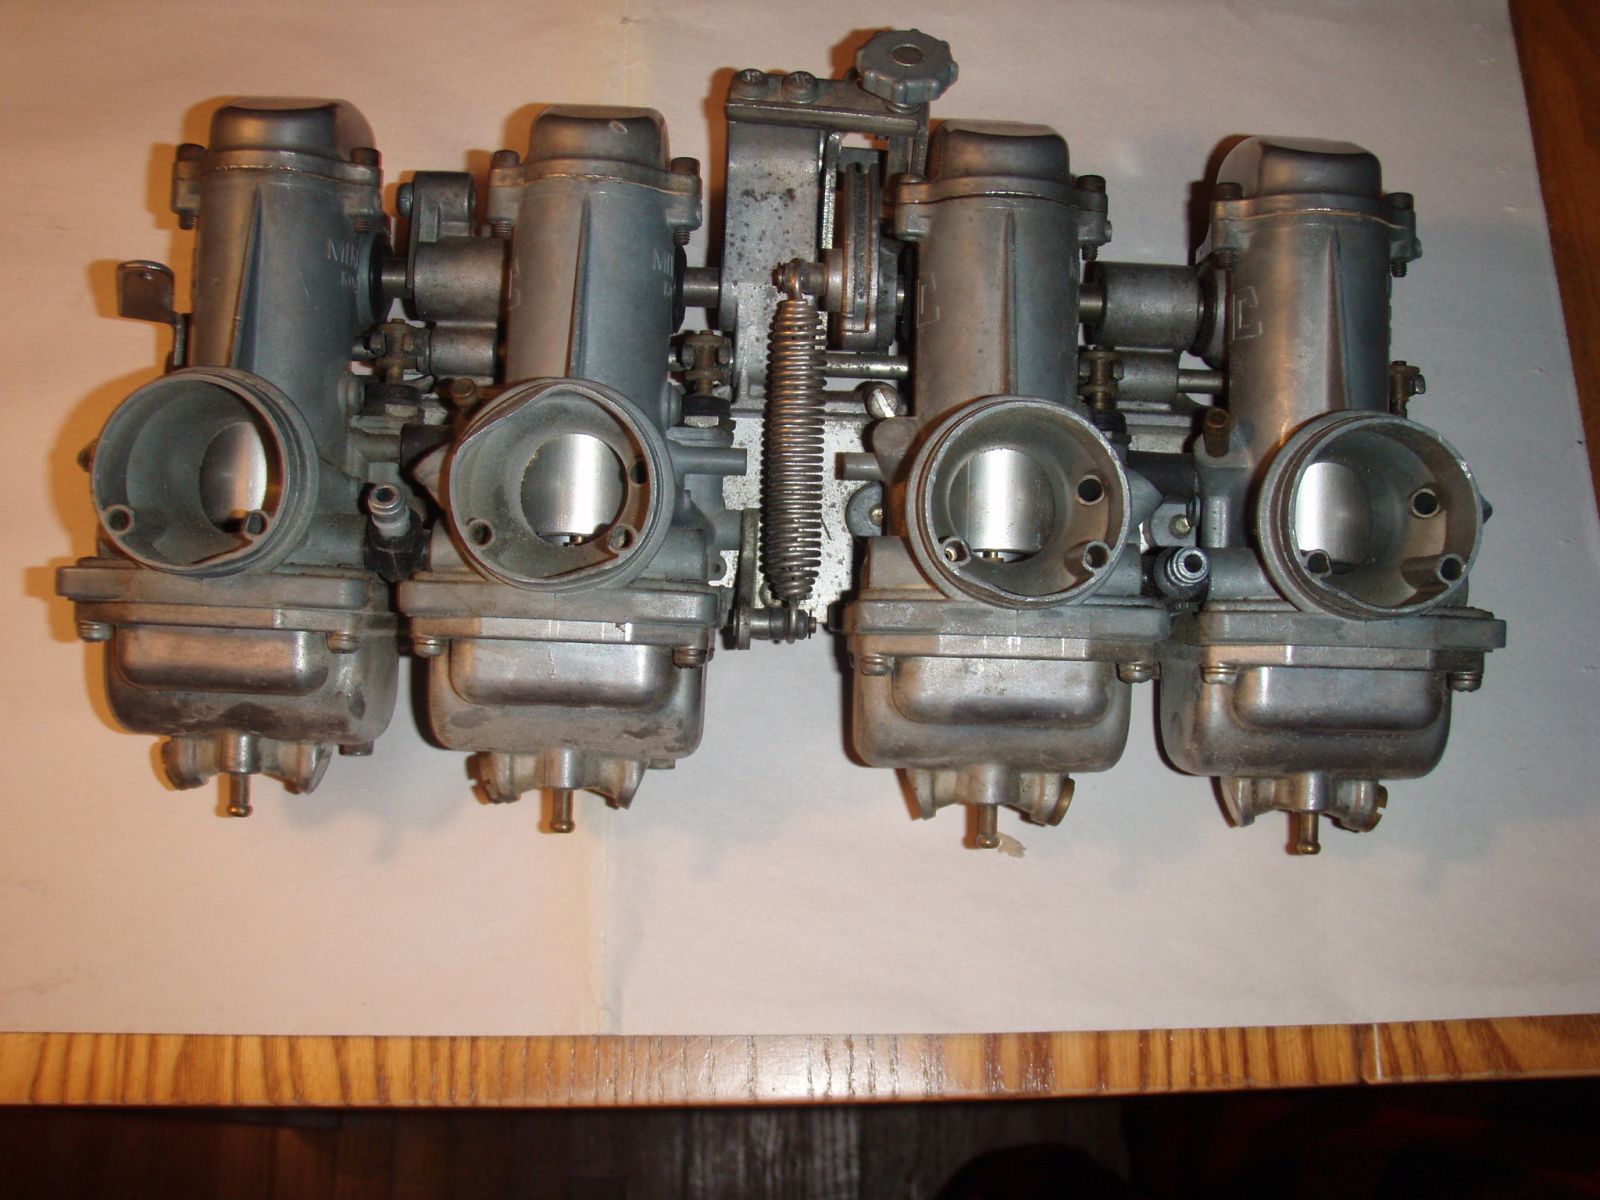
Somebody got a little rough with 'em during transport, and they knocked in a pretty good dent in the #2 carbs filter side passageway. I am thinking that perhaps I will just something of the correct diameter and try and knock it back out a little... Does anyone think that's a bad idea? I mean, its fairly think aluminum there and I kinda don't see breaking anything getting it back to where it ought to be.
Good News:
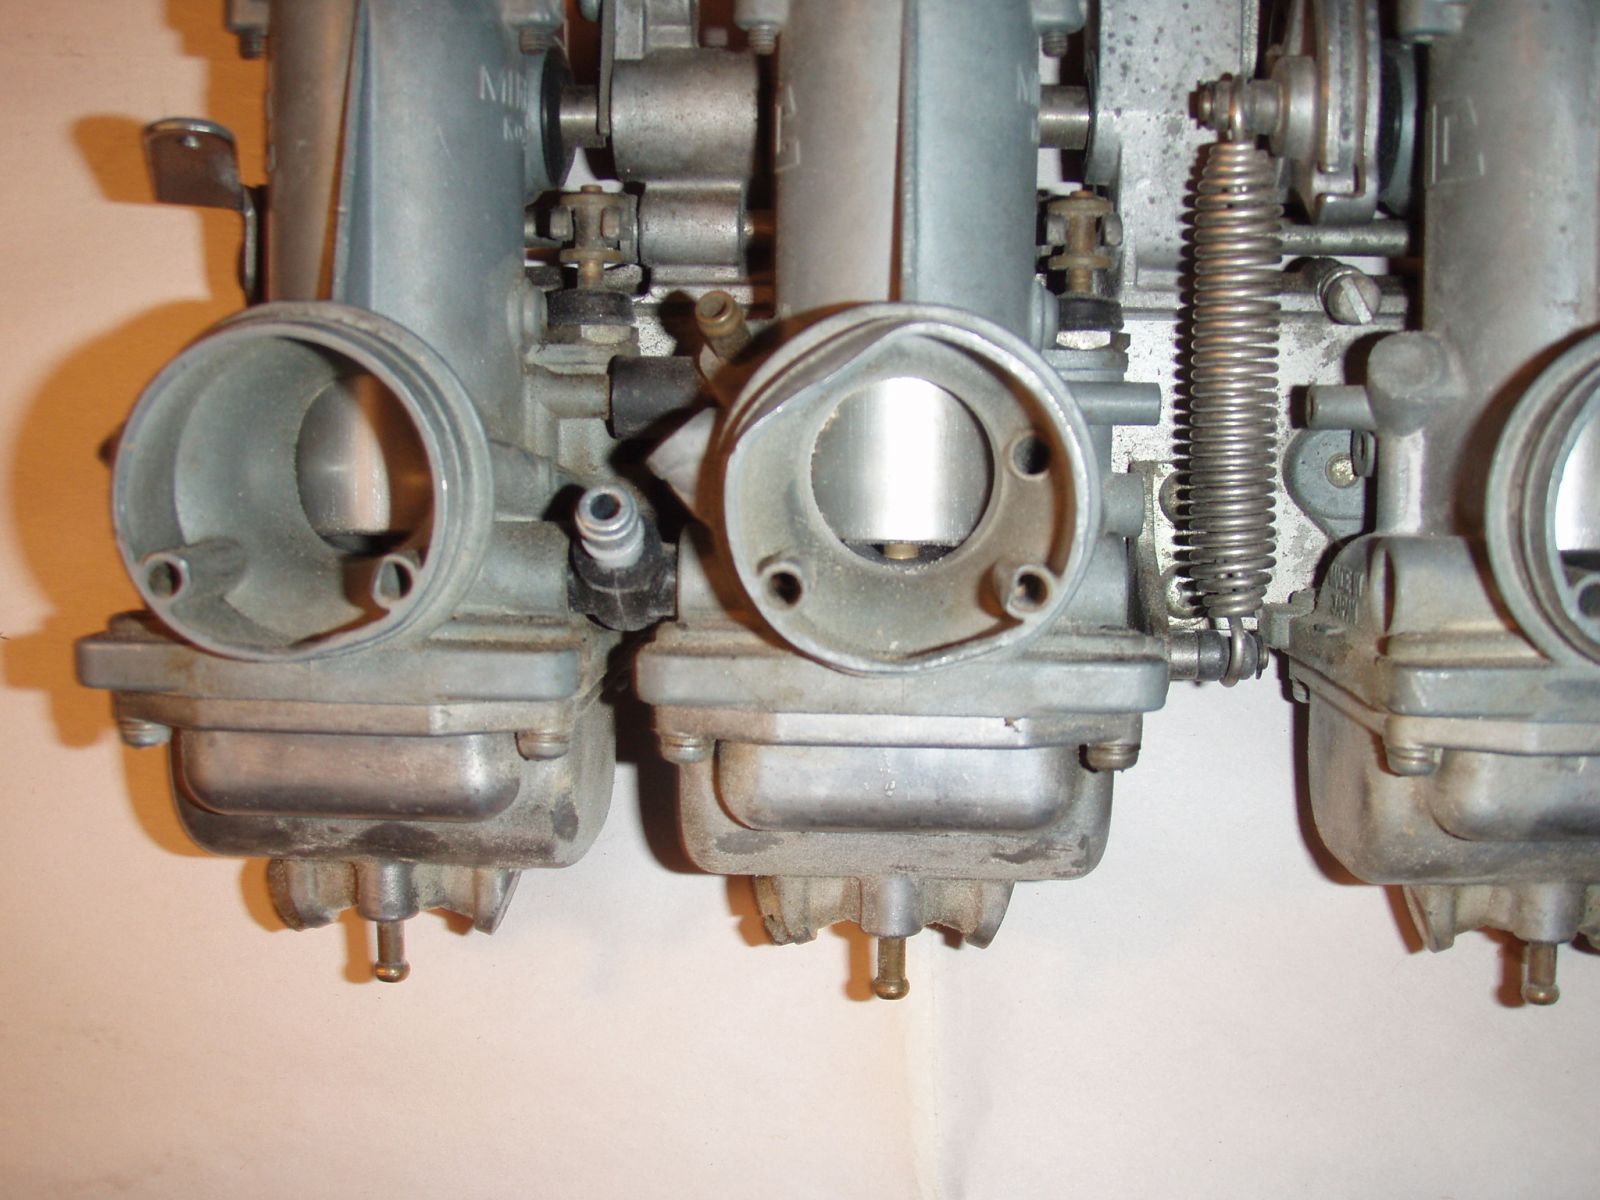
Headers are done, and no more nasty dent to interfere with correct exhaust flow.
Bad News(ish): They also threw on a complimentary coat of paint, which is a nice gesture, but sorta mistimed. I had given them a quick sandblast when I was doing my frame, and they were pretty much ready for final cleaning, proper high temp primer and paint. Now I would have to strip them by hand, again. So, for the moment I am just going to leave well enough alone, and clean 'em up and throw on a little more paint.
That is the best and worst of the recent work.
On the plus side, I cleaned all the internal bits pretty well.
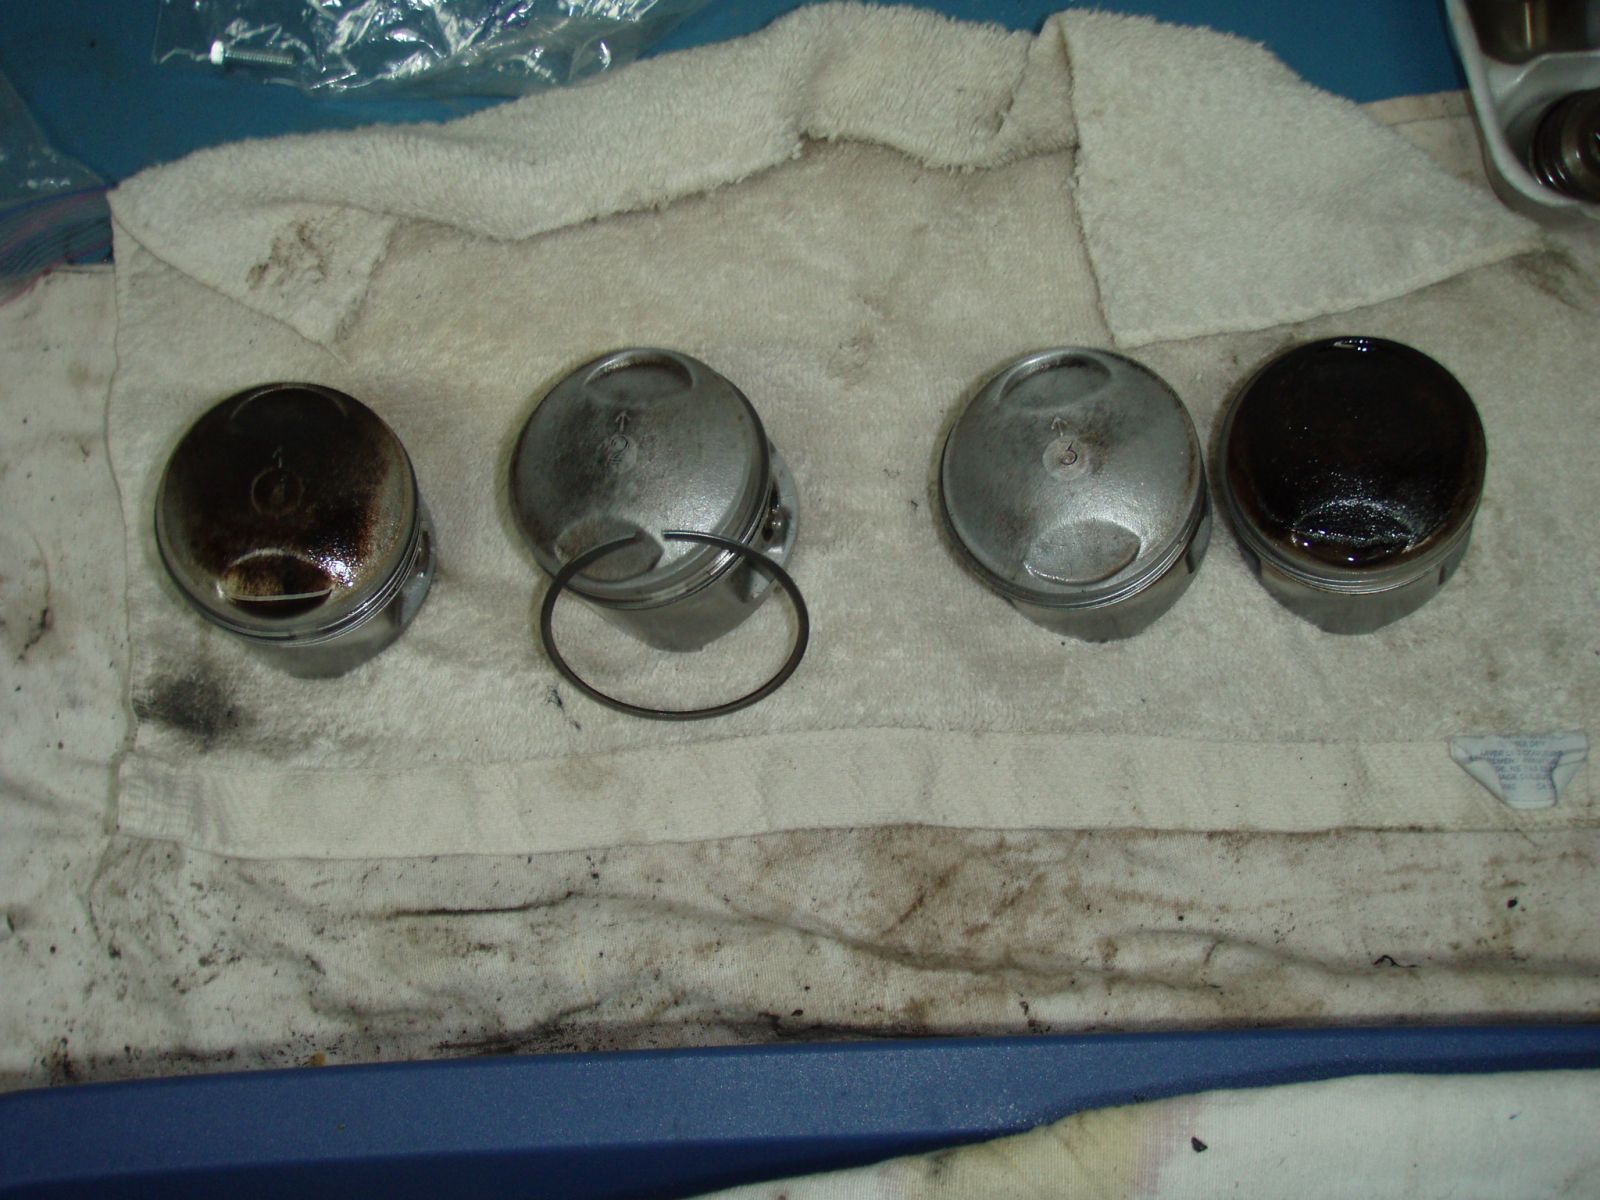
(All the pistons now look like the two in the middle)
I also took a measurement of all the cylinder bores while I have it apart, and aside from the expected wear, they are all within acceptable spec for use without going to the +0.5 overbore, and the rings also seem to be within spec. So, for better or for worse, it is all going to get re-used, and put back together one I gather enough guts to hone the cylinders. (And get in a few washers and suchlike from Z1) I realize honing isn't a big job, and the grit of the bottle hone is only 240, so I'm not taking off material, so much as breaking the glazing and providing a fresh cross hatch to help seat the rings again, but somehow the idea of taking abrasive things to internal engine parts makes me nervous nonetheless. I will however, follow the instructions and do it. Just maybe tomorrow.")
Should be able to drop by the machinists tomorrow have a chat regarding the work being done there. I might be a while before they get to it, but at least I will know what it needs, and what it is likely to cost.... Hopefully not a ton.
Nessism: Thanks for the concern, and given my frustrations with the fork rebuild, I will keep a look out for a new set if something reasonably priced does appear on Ebay, but while I agree with you I think it more the optics of the picture that make the tube appear bent. When I put a straightedge to it, they are fine, except where they have been dented by the triple tree clamp. Still not an ideal condition, and far from perfect, but not seriously damaged, and I don't think it will be a safety issue. At the moment I am leaving them assembled, but not filling them with oil, in case I end up finding a good set somewhere else!
Cheers all. Hopefully more to come before too long.
Jon
Back with a few updates and some promised photos. As per the usual, good news and bad news. Thankfully a little more of the former this time.
Good news:
VM26s!! More power? (Thanks KPond!)
Bad News:
Somebody got a little rough with 'em during transport, and they knocked in a pretty good dent in the #2 carbs filter side passageway. I am thinking that perhaps I will just something of the correct diameter and try and knock it back out a little... Does anyone think that's a bad idea? I mean, its fairly think aluminum there and I kinda don't see breaking anything getting it back to where it ought to be.
Good News:
Headers are done, and no more nasty dent to interfere with correct exhaust flow.
Bad News(ish): They also threw on a complimentary coat of paint, which is a nice gesture, but sorta mistimed. I had given them a quick sandblast when I was doing my frame, and they were pretty much ready for final cleaning, proper high temp primer and paint. Now I would have to strip them by hand, again. So, for the moment I am just going to leave well enough alone, and clean 'em up and throw on a little more paint.
That is the best and worst of the recent work.
On the plus side, I cleaned all the internal bits pretty well.
(All the pistons now look like the two in the middle)
I also took a measurement of all the cylinder bores while I have it apart, and aside from the expected wear, they are all within acceptable spec for use without going to the +0.5 overbore, and the rings also seem to be within spec. So, for better or for worse, it is all going to get re-used, and put back together one I gather enough guts to hone the cylinders. (And get in a few washers and suchlike from Z1) I realize honing isn't a big job, and the grit of the bottle hone is only 240, so I'm not taking off material, so much as breaking the glazing and providing a fresh cross hatch to help seat the rings again, but somehow the idea of taking abrasive things to internal engine parts makes me nervous nonetheless. I will however, follow the instructions and do it. Just maybe tomorrow.
Should be able to drop by the machinists tomorrow have a chat regarding the work being done there. I might be a while before they get to it, but at least I will know what it needs, and what it is likely to cost.... Hopefully not a ton.
Nessism: Thanks for the concern, and given my frustrations with the fork rebuild, I will keep a look out for a new set if something reasonably priced does appear on Ebay, but while I agree with you I think it more the optics of the picture that make the tube appear bent. When I put a straightedge to it, they are fine, except where they have been dented by the triple tree clamp. Still not an ideal condition, and far from perfect, but not seriously damaged, and I don't think it will be a safety issue. At the moment I am leaving them assembled, but not filling them with oil, in case I end up finding a good set somewhere else!
Cheers all. Hopefully more to come before too long.
Jon
'78 KZ 650C2 'Lila'
'71 Norton Commando 750 'Eadie'
St. Catharines, ON (Mostly, anyway...)
'71 Norton Commando 750 'Eadie'
St. Catharines, ON (Mostly, anyway...)
Please Log in or Create an account to join the conversation.
- Patton
-

- Offline
- KZr Legend
-

Registered
- Posts: 18567
- Thanks: 2103
Re: '78 KZ 650 Refreshing/Upgrade Project
09 Feb 2014 21:33
The carbs are not aluminum, but likely some zinc alloy, and may break rather easily (like pot metal).
Good Fortune!")
Good Fortune!
1973 Z1
KZ900 LTD
KZ900 LTD
Please Log in or Create an account to join the conversation.
- 531blackbanshee
-
- Offline
- Vendor
-
Vendors
- Posts: 7444
- Thanks: 796
Re: '78 KZ 650 Refreshing/Upgrade Project
10 Feb 2014 07:46 - 10 Feb 2014 07:48
Zinc? Asian bikes, no. Pushrod-era Brit bikes, yes.
i believe that you will find most japanese carburetors to be aluminum.
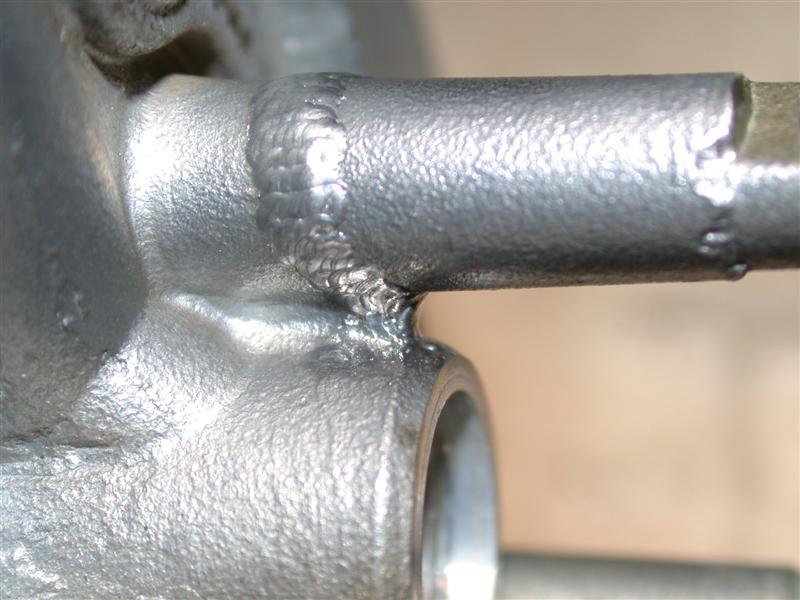
which is why the micro laser welding works to repair broken float bowl posts.
i would anneal it first,to soften the now work hardened aluminum to keep it from cracking when you try to bend it back.
thats my .02,
leon
i believe that you will find most japanese carburetors to be aluminum.
which is why the micro laser welding works to repair broken float bowl posts.
i would anneal it first,to soften the now work hardened aluminum to keep it from cracking when you try to bend it back.
thats my .02,
leon
skiatook,oklahoma 1980 z1r,1978 kz 1000 z1r x 3,
1976 kz 900 x 3
i make what i can,and save the rest!
billybiltit.blogspot.com/
www.kzrider.com/forum/5-chassis/325862-triple-tree-custom-work
kzrider.com/forum/5-chassis/294594-frame-bracing?limitstart=0
1976 kz 900 x 3
i make what i can,and save the rest!
billybiltit.blogspot.com/
www.kzrider.com/forum/5-chassis/325862-triple-tree-custom-work
kzrider.com/forum/5-chassis/294594-frame-bracing?limitstart=0
Last edit: 10 Feb 2014 07:48 by 531blackbanshee.
Please Log in or Create an account to join the conversation.
- Jonny
-
Topic Author
- Offline
- User
-
Registered
- woot!
- Posts: 210
- Thanks: 22
Re: '78 KZ 650 Refreshing/Upgrade Project
10 Feb 2014 08:39531blackbanshee wrote:
i would anneal it first,to soften the now work hardened aluminum to keep it from cracking when you try to bend it back.
thats my .02,
leon
Thanks Patton and Leon. I guess I had just assumed it was going to be aluminum. I suppose it doesn't make a big difference. It is broken, and I need to fix it!
So, not to be too simple about the whole thing, but you reckon just remove any bits which are heat senstive and give the area a light torching to start a heat and cool cycle? From what I've been able to find the temps for annealing even low grade aluminum are way beyond what I can get to in my oven.... Also I have no fancy gear for testing temp, so it will have to be the old 'mechanics gut feeling' about what will be alright! :whistle: I mean, the goal is just to reduce some of the work hardening and internal stress correct?
Cheers!
'78 KZ 650C2 'Lila'
'71 Norton Commando 750 'Eadie'
St. Catharines, ON (Mostly, anyway...)
'71 Norton Commando 750 'Eadie'
St. Catharines, ON (Mostly, anyway...)
Please Log in or Create an account to join the conversation.
- DoctoRot
-
- Offline
- Sustaining Member
-
Registered
- Oh, the usual... I bowl, I drive around...
- Posts: 2607
- Thanks: 773
Re: '78 KZ 650 Refreshing/Upgrade Project
14 Feb 2014 22:15 - 14 Feb 2014 22:19
I would remove everything i could from the carb body. Then hit it with a butane torch. aluminum changes tone when it get to the "bendy point" as my fabricator friend calls it. So by continuously tapping it you might notice a shift in the sound. When you notice this shift i would attempt to bend it back by pushing a tube of similar diameter on the inside to lessen the load on one particular spot, heat in between each attempt as the tube you push against it will likely pull alot of heat form the flange because it it so thin. good luck!
Last edit: 14 Feb 2014 22:19 by DoctoRot.
Please Log in or Create an account to join the conversation.
- Jonny
-
Topic Author
- Offline
- User
-
Registered
- woot!
- Posts: 210
- Thanks: 22
Re: '78 KZ 650 Refreshing/Upgrade Project
14 Mar 2014 14:23
Thanks DoctoRot,
Good advice, and when I get back home to Canada, I will sort through a few things, and pick the best course. A friend of mine, it turns out is a mechanical engineer, so I showed him the photos, and he did some digging for me. Without know more about the grade and blend of the aluminum (mystery metal) alloy, the books seem to suggest that a temp between 350 and 450 F should be enough to anneal it, and hopefully prevent cracking on adjusting it out. So, I reckon either borrow some tempisticks from his shop, or strip it down, set my oven for 400, and have a go at it then. More than anything, it is nice to know that the working range for a metal like this is probably attainable with a normal stove.
In any case, I think it will be prudent to set up the engine with the old 24s, since I know they are pretty much dialed in for the current set up, (pods, 4-1 etc...) and don't need to be rejetted. I won't be running the bike that hard for a while, considering break in period on all the new internal parts, rings etc... So, hopefully, sometime later in the summer, I will have the 26s cleaned up, and some bigger boots ready to try out that new set up.
In the meantime, I have the heads, barrels and pistons at a local machinist, getting spec'd. As of the last thing I heard, the heads are all good, with no need to replace anything, and they've been given a mild port and polish, as well as new a new 3 angle cut and grind on the valve seats. APE springs and new valve seals should round everything out. As to the pistons/barrels, I mainly wanted to have a good check to make sure there was no real barrelling of the cylinders. I did the basic test at home, and am pretty confident that they should be fine, but at ~$600 for a proper gauge to check down to the thousands range, I figure the couple dollars spent at the shop for a hone and a quick check are well spent. With a little luck, it should all be good to go when I get back home in Early may, and ready for reassembly! The machinist is being great about lowering the costs a little, knowing I am away for a while. I guess when it is a small job and they can do it when things are slower, it helps everyone out a little.
Anyway, I will continue with the research while i am away, and hope to have a busy couple of weeks painting and assembling when I get back. Be a little while before there are a whole lot more updates, but they will come!
Cheers!
Jon
'78 KZ 650C2 'Lila'
'71 Norton Commando 750 'Eadie'
St. Catharines, ON (Mostly, anyway...)
'71 Norton Commando 750 'Eadie'
St. Catharines, ON (Mostly, anyway...)
Please Log in or Create an account to join the conversation.
- 650ed
-

- Offline
- User
-
Registered
- Posts: 15334
- Thanks: 2830
Re: '78 KZ 650 Refreshing/Upgrade Project
14 Mar 2014 16:01
As Patton mentioned I believe you will find the carbs are made of a zinc alloy. Mikuni did make some aluminum carb bodies, but I don't think they came on the KZ650. Ed
1977 KZ650-C1 Original Owner - Stock (with additional invisible FIAMM horn)
Please Log in or Create an account to join the conversation.
- Jonny
-
Topic Author
- Offline
- User
-
Registered
- woot!
- Posts: 210
- Thanks: 22
Re: '78 KZ 650 Refreshing/Upgrade Project
26 May 2014 06:10
Thanks Ed, I will have a go at the carbs sometime soon, tho I may just pass the one body off to the same buddy who works at the engineering facility. He said he could have one of his guys take a look and see if they can't knock it back into shape quick. It would cost me a pint, and get done faster than I can find time to do it, I would think. May yet do it myself just for the satisfaction of it, but there is a long list of other things which are a bit of a priority, so we will see about that.
Thanks for all the feedback on that anyway. I have decided that I am just going to run the 24s for now, and take my time to clean and inspect the 26s before having to deal with rejetting and all the fun stuff that goes along with changing to bigger carbs. One thing at a time!
Thanks for all the feedback on that anyway. I have decided that I am just going to run the 24s for now, and take my time to clean and inspect the 26s before having to deal with rejetting and all the fun stuff that goes along with changing to bigger carbs. One thing at a time!
'78 KZ 650C2 'Lila'
'71 Norton Commando 750 'Eadie'
St. Catharines, ON (Mostly, anyway...)
'71 Norton Commando 750 'Eadie'
St. Catharines, ON (Mostly, anyway...)
Please Log in or Create an account to join the conversation.
- Jonny
-
Topic Author
- Offline
- User
-
Registered
- woot!
- Posts: 210
- Thanks: 22
Re: '78 KZ 650 Refreshing/Upgrade Project
26 May 2014 08:09
Anyway, back in Canada, and spending most of my time in the basement putting the old girl back together! Since all the machine work was done before I got back from NZ, it was just a matter of heading down to the shop to pick up the motor bits, and getting cracking on the reassembly. (Well, it takes longer than just that, since I can back to parking tickets, expired plates, and a mild insurance company snafu. Nothing about owning vehicles is easy, is it?)
Pictures!!
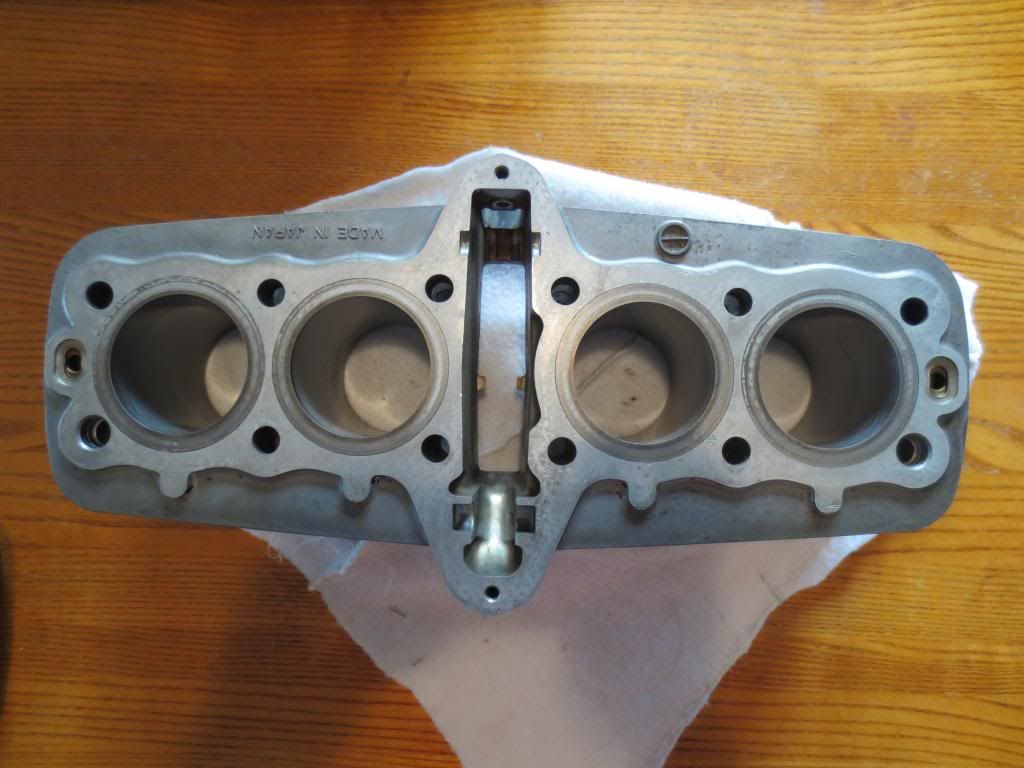
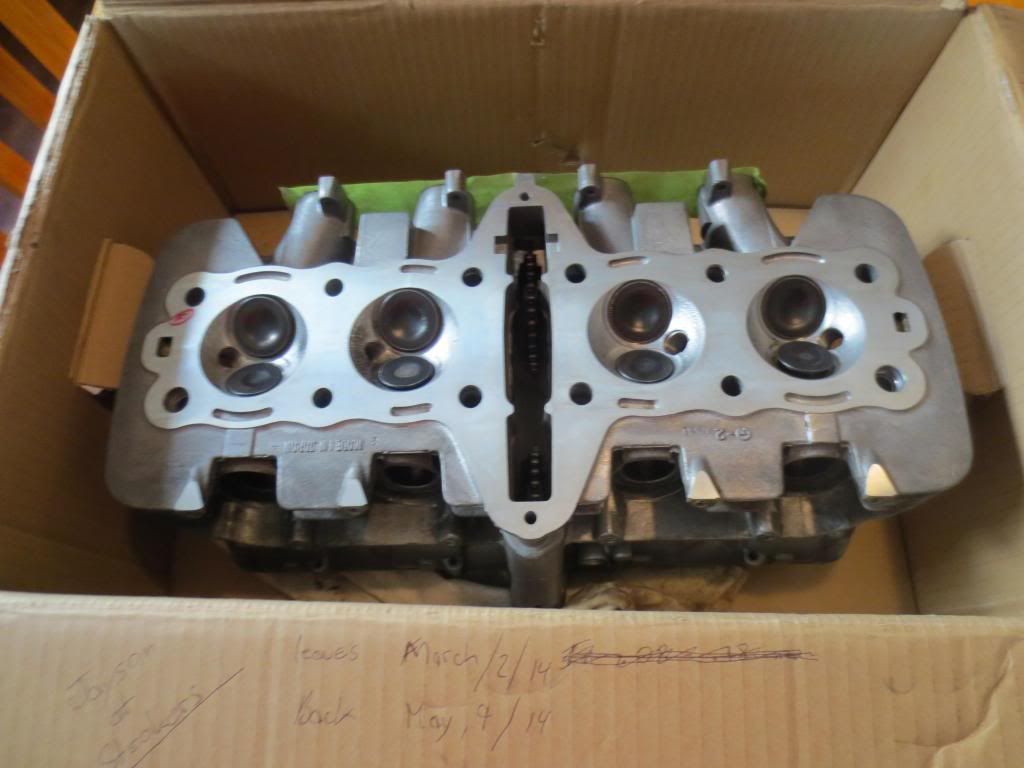
Shiny!!! Now, it's not like everyone hasn't seen photos here of redone heads/blocks, but there are MY shiny rebuilt parts, and I was just about jumping around when I got them back and saw have nice they looked. That, and in the interest of completion, on the off chance anyone else is still having a look at this rebuilt thread.
So, the rebuild was generally painless, and probably not quite as hard as I was anticipating. But, that said, I also had plenty of encouragement from friends, and especially TekNine, who lives near me, and runs a motorcycle repair show now. So....
All cleaned up and getting put back together:
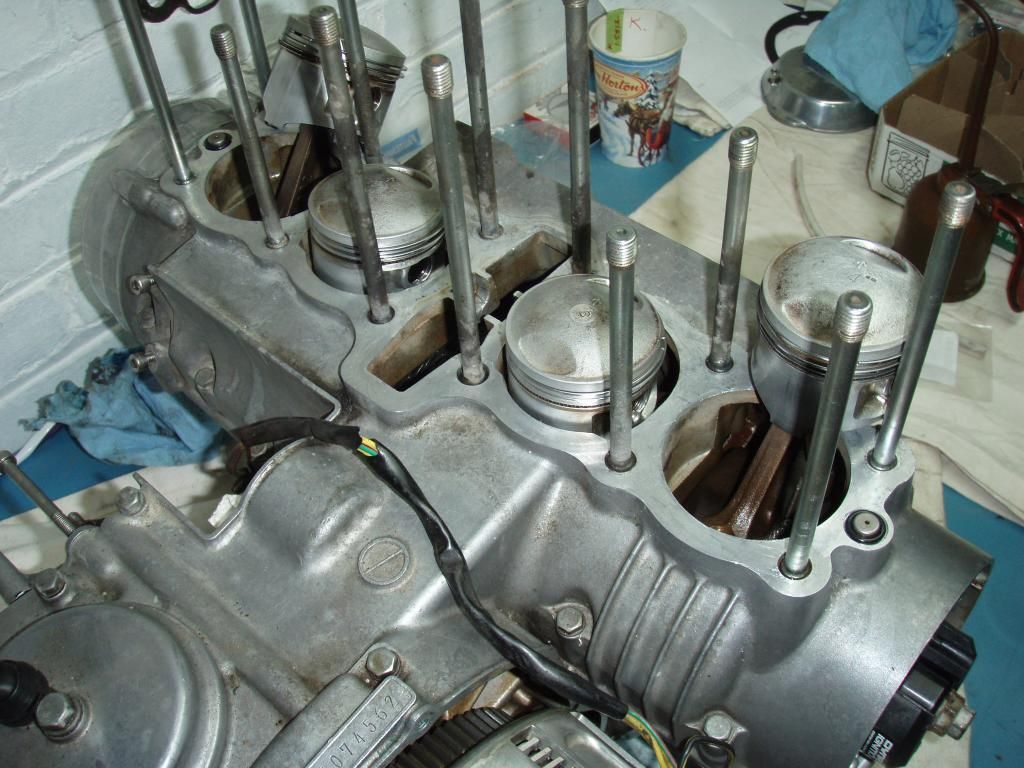
Bit of work getting the block back on, but not as hard as I thought it might be. The chamfers at the bottom of the piston make pretty short work of getting the rings in with a minimum of fuss.
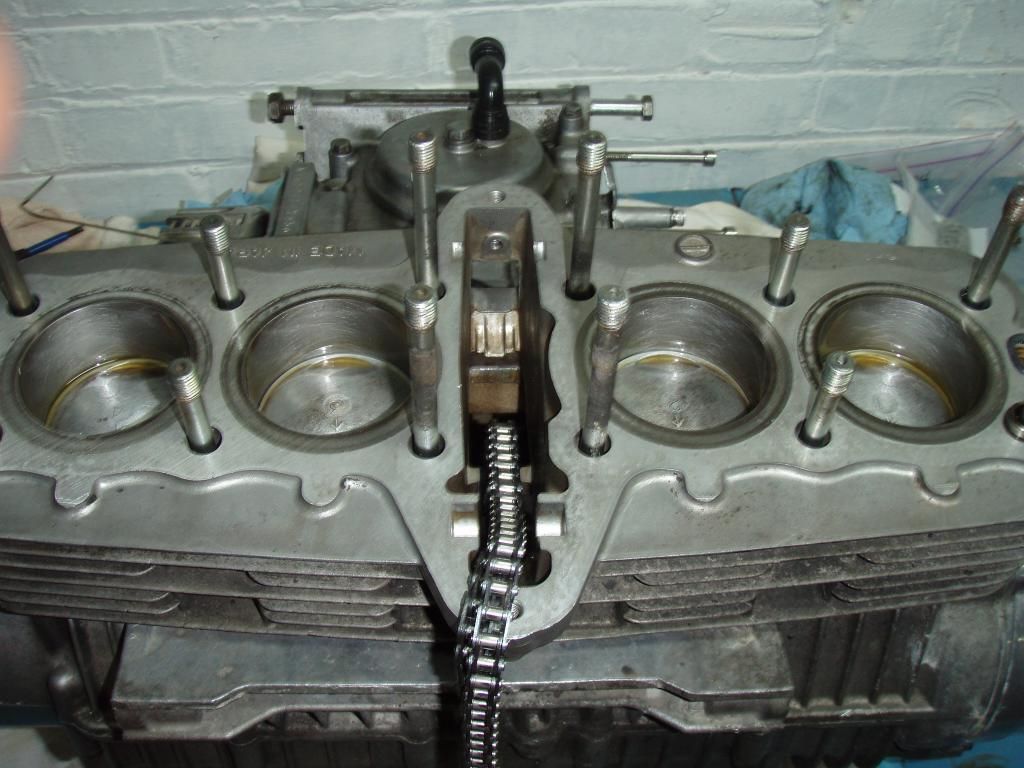
Reassembled, timing triple checked, and about to install top tensioner unit. Almost there! ( I have never counted to 36 so many times in one day...)
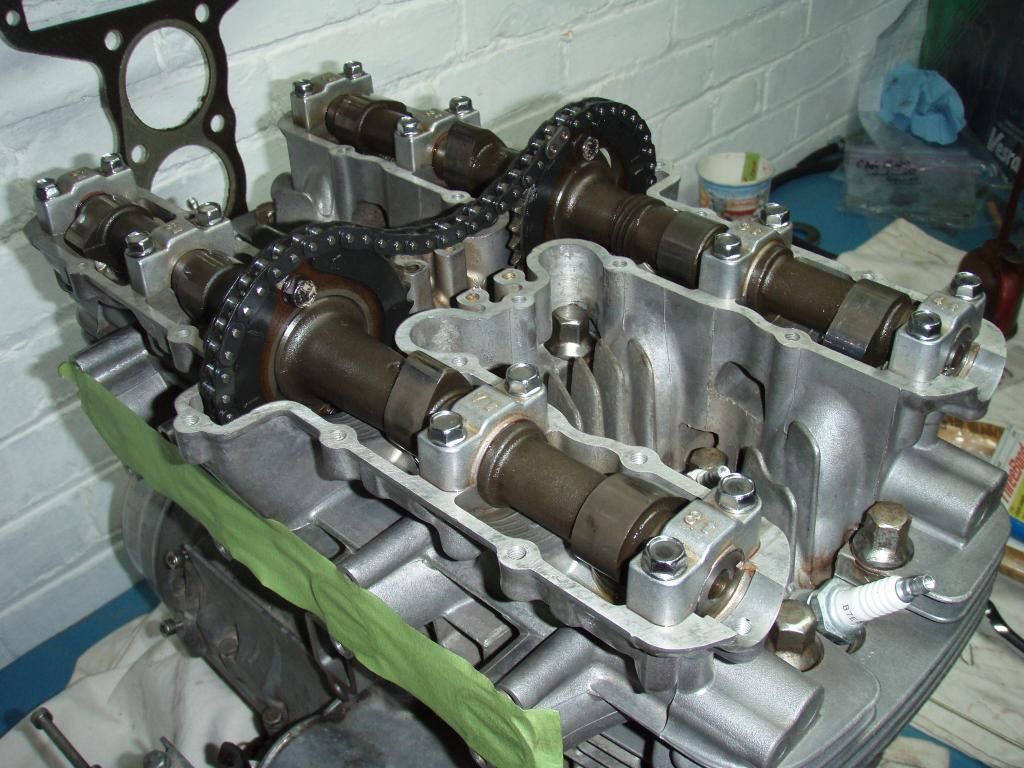
Let's just check the manual one more time to make sure I've not forgotten anything.....
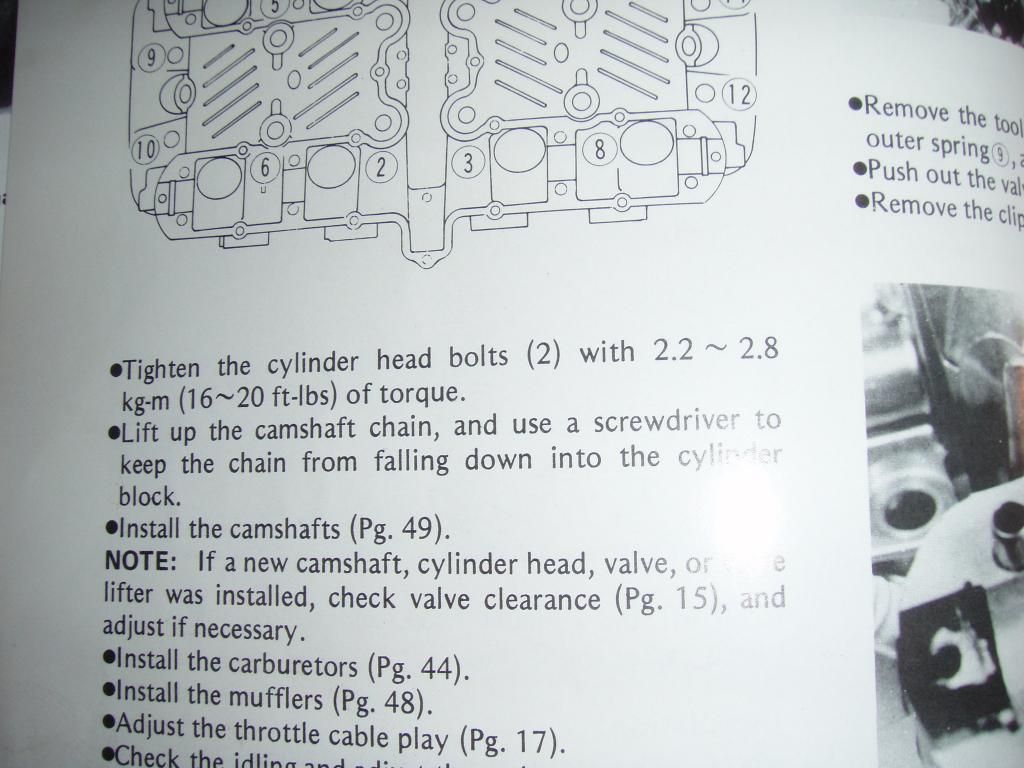
Cylinder Head Bolts?!? Hmmm.. What cylinder head bolts? It's all held on with studs is it not? What the hell are the cylinder head bolts?
Oh..... Those cylinder head bolts:
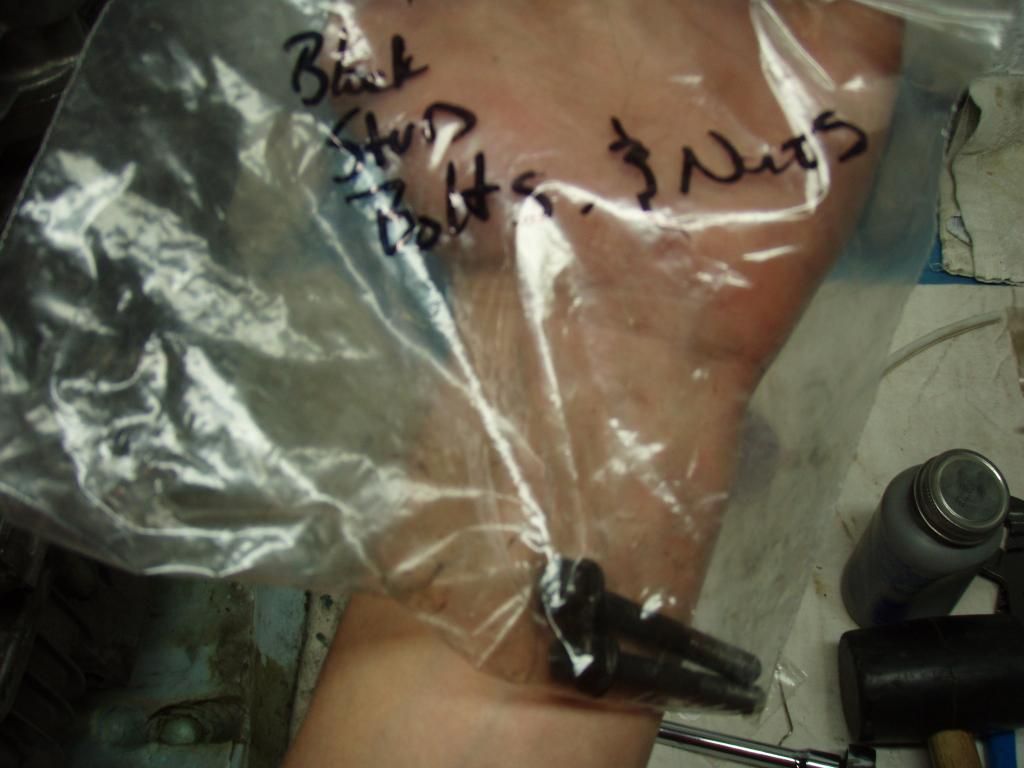
No prob... I will just get them in right now. Where do they go again? Oh yeah. Underneath the cams! Of course.... Just undo everything, and let get them in there. :pinch:
Just don't break one while torquing them. No pictures of that, but I can testify that it will probably cost you a bunch of money in beer to sooth the frustrations.
More to come. But for now, it is back to the shop! The weather is too nice... Updates will probably mainly happen when I need a break, or the bike is running!
Cheers!
Jon
Pictures!!


Shiny!!! Now, it's not like everyone hasn't seen photos here of redone heads/blocks, but there are MY shiny rebuilt parts, and I was just about jumping around when I got them back and saw have nice they looked. That, and in the interest of completion, on the off chance anyone else is still having a look at this rebuilt thread.
So, the rebuild was generally painless, and probably not quite as hard as I was anticipating. But, that said, I also had plenty of encouragement from friends, and especially TekNine, who lives near me, and runs a motorcycle repair show now. So....
All cleaned up and getting put back together:


Bit of work getting the block back on, but not as hard as I thought it might be. The chamfers at the bottom of the piston make pretty short work of getting the rings in with a minimum of fuss.
Reassembled, timing triple checked, and about to install top tensioner unit. Almost there! ( I have never counted to 36 so many times in one day...)

Let's just check the manual one more time to make sure I've not forgotten anything.....

Cylinder Head Bolts?!? Hmmm.. What cylinder head bolts? It's all held on with studs is it not? What the hell are the cylinder head bolts?
Oh..... Those cylinder head bolts:

No prob... I will just get them in right now. Where do they go again? Oh yeah. Underneath the cams! Of course.... Just undo everything, and let get them in there. :pinch:
Just don't break one while torquing them. No pictures of that, but I can testify that it will probably cost you a bunch of money in beer to sooth the frustrations.
More to come. But for now, it is back to the shop! The weather is too nice... Updates will probably mainly happen when I need a break, or the bike is running!
Cheers!
Jon
'78 KZ 650C2 'Lila'
'71 Norton Commando 750 'Eadie'
St. Catharines, ON (Mostly, anyway...)
'71 Norton Commando 750 'Eadie'
St. Catharines, ON (Mostly, anyway...)
Please Log in or Create an account to join the conversation.
Moderators: Street Fighter LTD