
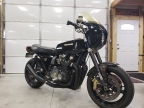
1966 Kawasaki A1 Samurai restoration project
- clutch
-
 Topic Author
- Offline
- User
-

Registered
- I wish I had a tad more patience to do it better!
- Posts: 1051
- Thanks: 12
Re: 1966 Kawasaki A1 Samurai restoration project
23 Oct 2011 03:17
I went straight into the garage after work. I was out there for a couple hours. I got step #2 of my tear-down done...the electrical is out (minus the taillight and the handlebar wiring (it's through the bars)! I also pulled the carbs. It took me a while to figure out how the heck to get the throttle cable out until the first slide finally came loose...second one was a little easier. No pics tonight, but I will take some shots of what I pulled out tomorrow.
Tomorrow I will be removing the little bits...the rear fender and taillight, the one remaining footpeg that I haven't pulled yet, the front fender, and the chain guard. At that point, I'll be pushing that thing outside and giving my pressure washer a workout ( I figure it's the easiest way to clean it up before stripping the frame. Once cleaned, the swingarm and forks come off and the real fun begins!
Tomorrow I will be removing the little bits...the rear fender and taillight, the one remaining footpeg that I haven't pulled yet, the front fender, and the chain guard. At that point, I'll be pushing that thing outside and giving my pressure washer a workout ( I figure it's the easiest way to clean it up before stripping the frame. Once cleaned, the swingarm and forks come off and the real fun begins!
Southern Maryland, USA
1980 KZ250 LTD (traded, but still missed)
1982 KZ750 E3 (Cafe Project) (Dyna-S, Dyna Coils, V&H 4-1, K&N Pods, 6 Sigma Jet Kit, Acewell Computer, Woodcraft Clip-ons, Custom Rewire)
1966 A1 Samurai (Restoration Project)
Wish List:
KZ1000 P (For a "touring" bike)
Z1 (need I...
1980 KZ250 LTD (traded, but still missed)
1982 KZ750 E3 (Cafe Project) (Dyna-S, Dyna Coils, V&H 4-1, K&N Pods, 6 Sigma Jet Kit, Acewell Computer, Woodcraft Clip-ons, Custom Rewire)
1966 A1 Samurai (Restoration Project)
Wish List:
KZ1000 P (For a "touring" bike)
Z1 (need I...
Please Log in or Create an account to join the conversation.
- clutch
-
Topic Author
- Offline
- User
-
Registered
- I wish I had a tad more patience to do it better!
- Posts: 1051
- Thanks: 12
Re: 1966 Kawasaki A1 Samurai restoration project
23 Oct 2011 15:40
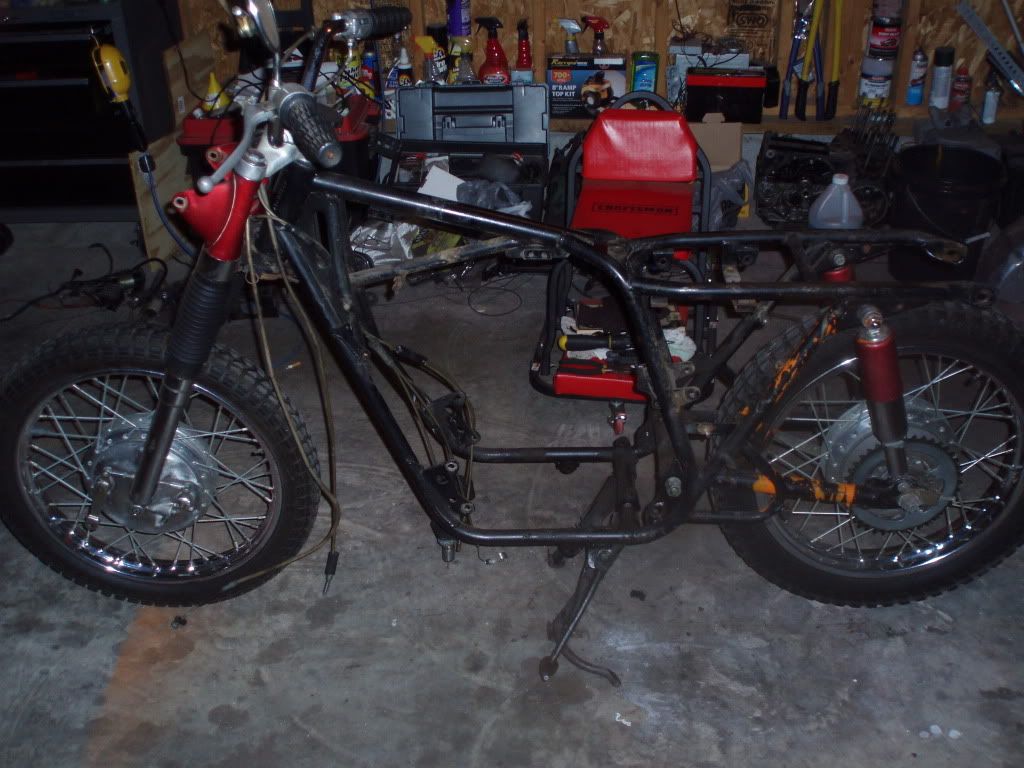
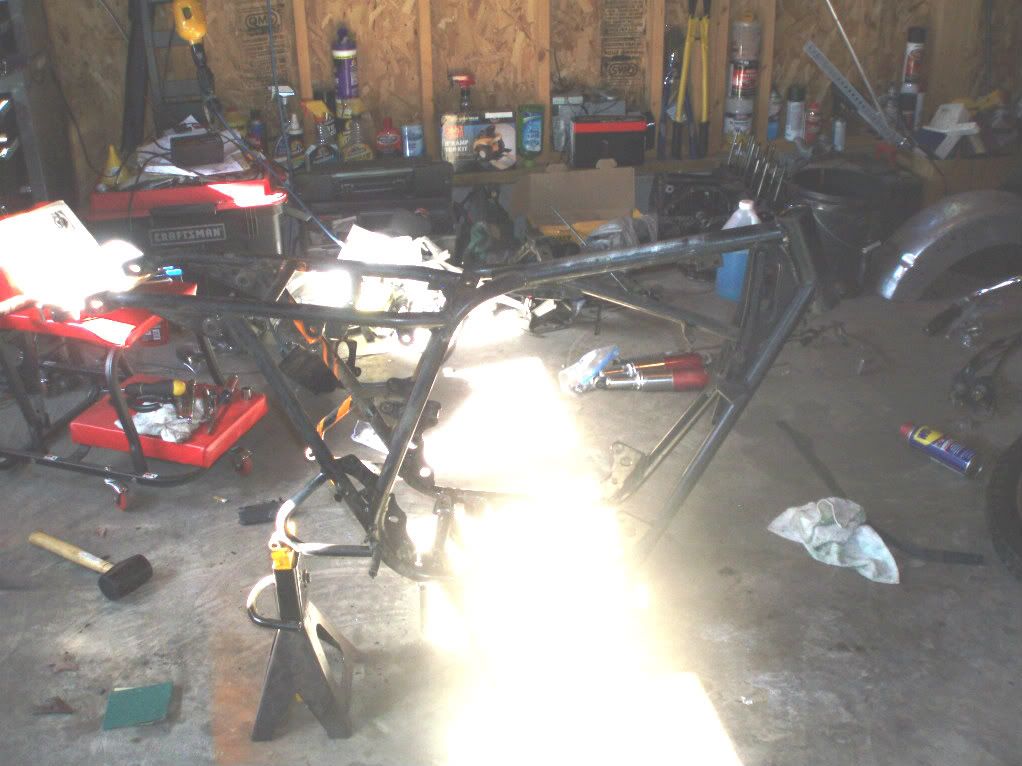
I feel like I'm making a lot of progress, and quicker than I expected. I know the teardown is not as time consuming as the rebuild, but I'm only a few days in and this is where I am:
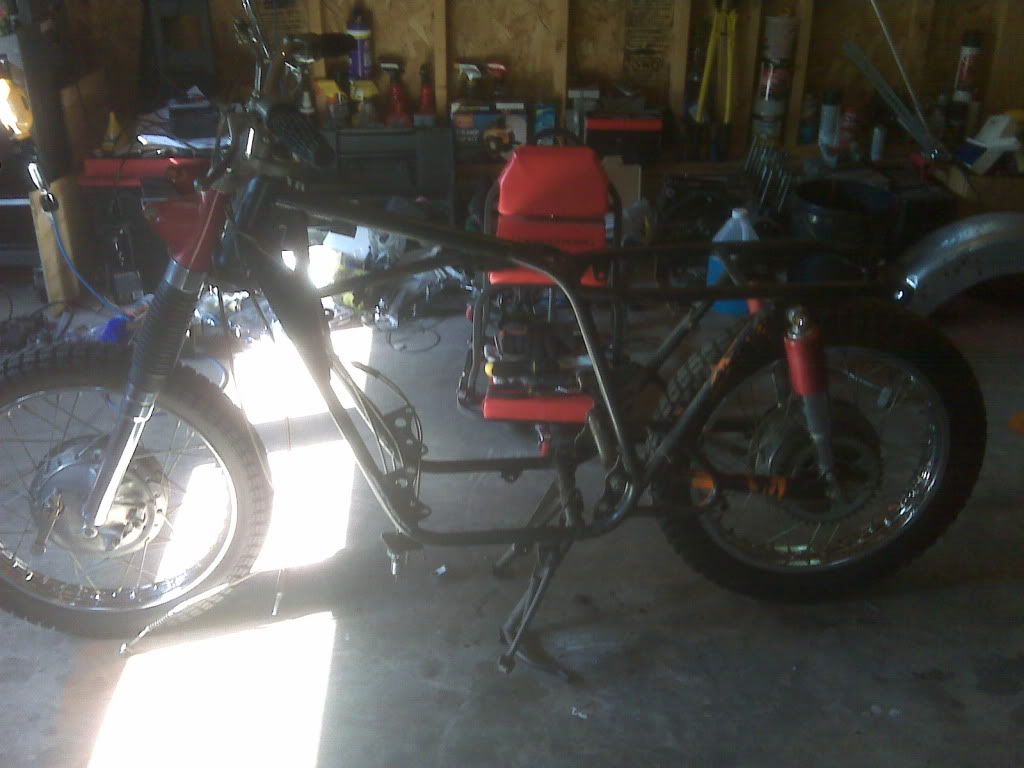
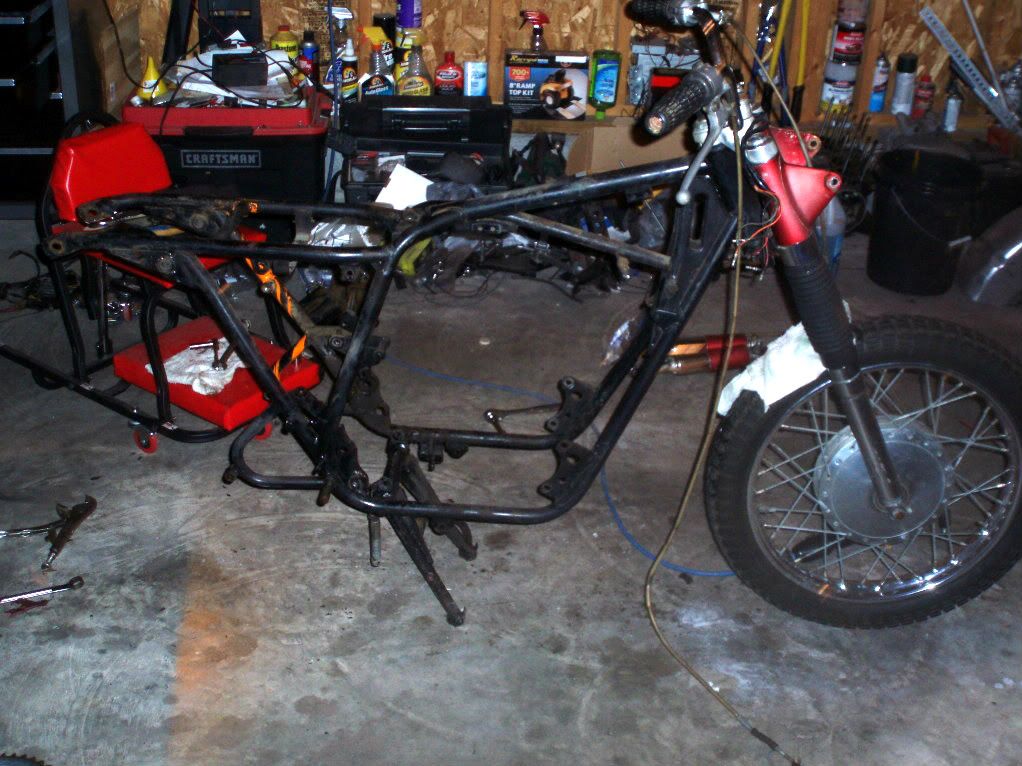
The only things still attached to the frame are the forks, swingarm (and shocks), the side stand, and the center stand. Tomorrow I will roll it out into the driveway and clean the gunk off the frame. It's only a few spots, so I may not use the pressure washer, and just use some heavy degreaser and elbow grease. In any case...it's almost time to be done with taking it apart and actually start restoring it!! :woohoo:
The only things still attached to the frame are the forks, swingarm (and shocks), the side stand, and the center stand. Tomorrow I will roll it out into the driveway and clean the gunk off the frame. It's only a few spots, so I may not use the pressure washer, and just use some heavy degreaser and elbow grease. In any case...it's almost time to be done with taking it apart and actually start restoring it!! :woohoo:
Southern Maryland, USA
1980 KZ250 LTD (traded, but still missed)
1982 KZ750 E3 (Cafe Project) (Dyna-S, Dyna Coils, V&H 4-1, K&N Pods, 6 Sigma Jet Kit, Acewell Computer, Woodcraft Clip-ons, Custom Rewire)
1966 A1 Samurai (Restoration Project)
Wish List:
KZ1000 P (For a "touring" bike)
Z1 (need I...
1980 KZ250 LTD (traded, but still missed)
1982 KZ750 E3 (Cafe Project) (Dyna-S, Dyna Coils, V&H 4-1, K&N Pods, 6 Sigma Jet Kit, Acewell Computer, Woodcraft Clip-ons, Custom Rewire)
1966 A1 Samurai (Restoration Project)
Wish List:
KZ1000 P (For a "touring" bike)
Z1 (need I...
Please Log in or Create an account to join the conversation.
- clutch
-
Topic Author
- Offline
- User
-
Registered
- I wish I had a tad more patience to do it better!
- Posts: 1051
- Thanks: 12
Re: 1966 Kawasaki A1 Samurai restoration project
24 Oct 2011 00:51
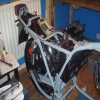
No more progress since the last post, but I did take my digital camera out there to get a better shot of where I'm at now.
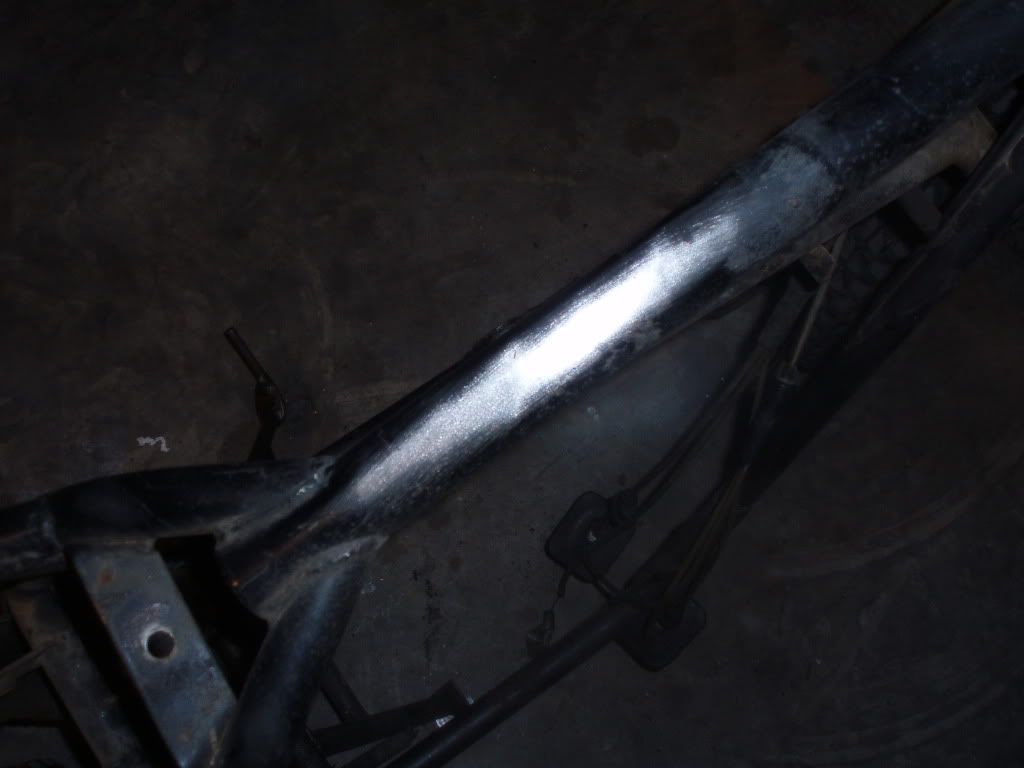
The frame looks to be in good shape. There is very minimal rust on it near the rear fender mounts. It looks to be surface rust, but what do I know? :silly:

I've been browsing the internet looking for the best way to strip the frame down. Some say sand, some say chemical, and some say bead blast. I have some chemical stripper, but that would make a huge mess, and I don't want to pay to have someone strip it for me (kind of defeats the purpose of it being MY project), so I hit a spot with some 60 grit sand paper to test it out. In a matter of seconds, I was down to bare metal. The dewalt orbital sander will be getting a nice workout soon! :woohoo:
SO tomorrow after work, I will clean it up and work on removing the swingarm and forks...then to start restoring it!
The frame looks to be in good shape. There is very minimal rust on it near the rear fender mounts. It looks to be surface rust, but what do I know? :silly:
I've been browsing the internet looking for the best way to strip the frame down. Some say sand, some say chemical, and some say bead blast. I have some chemical stripper, but that would make a huge mess, and I don't want to pay to have someone strip it for me (kind of defeats the purpose of it being MY project), so I hit a spot with some 60 grit sand paper to test it out. In a matter of seconds, I was down to bare metal. The dewalt orbital sander will be getting a nice workout soon! :woohoo:
SO tomorrow after work, I will clean it up and work on removing the swingarm and forks...then to start restoring it!
Southern Maryland, USA
1980 KZ250 LTD (traded, but still missed)
1982 KZ750 E3 (Cafe Project) (Dyna-S, Dyna Coils, V&H 4-1, K&N Pods, 6 Sigma Jet Kit, Acewell Computer, Woodcraft Clip-ons, Custom Rewire)
1966 A1 Samurai (Restoration Project)
Wish List:
KZ1000 P (For a "touring" bike)
Z1 (need I...
1980 KZ250 LTD (traded, but still missed)
1982 KZ750 E3 (Cafe Project) (Dyna-S, Dyna Coils, V&H 4-1, K&N Pods, 6 Sigma Jet Kit, Acewell Computer, Woodcraft Clip-ons, Custom Rewire)
1966 A1 Samurai (Restoration Project)
Wish List:
KZ1000 P (For a "touring" bike)
Z1 (need I...
Please Log in or Create an account to join the conversation.
- 531blackbanshee
-
- Offline
- Vendor
-

Vendors
- Posts: 7444
- Thanks: 796
Re: 1966 Kawasaki A1 Samurai restoration project
24 Oct 2011 10:07
while most two-strokes do have oil injection pumps(for the fuel),many engines have been siezed up from a faulty oil pump.
for off road toys most folks remove the oil injection and "mix"their fuel and oil in the can.
the bad thing about an oil injection pump failing is the way you are most likely to find out is when the engine siezes. :sick:
i have always removed them and mixed my own fuel,that way there is no doubt that it is the right ratio.
your bike,your choice.
keep us posted,
leon
skiatook,oklahoma 1980 z1r,1978 kz 1000 z1r x 3,
1976 kz 900 x 3
i make what i can,and save the rest!
billybiltit.blogspot.com/
www.kzrider.com/forum/5-chassis/325862-triple-tree-custom-work
kzrider.com/forum/5-chassis/294594-frame-bracing?limitstart=0
1976 kz 900 x 3
i make what i can,and save the rest!
billybiltit.blogspot.com/
www.kzrider.com/forum/5-chassis/325862-triple-tree-custom-work
kzrider.com/forum/5-chassis/294594-frame-bracing?limitstart=0
Please Log in or Create an account to join the conversation.
- SPARKY47
-
- Offline
- User
-
Registered
- 1980 KZ500 B2
- Posts: 415
- Thanks: 5
Re: 1966 Kawasaki A1 Samurai restoration project
24 Oct 2011 19:22
For taking the frame down to bare metal you'd do worse than using a twisted knot wire brush,about 7" just rips the crap off faster than youd believe. ")
With reference to oil pumps, my 350 had 7 cables coming out of the throttle,3 to carbs 3 to chokes and one to the oil pump.
Guess which one snapped at 11000rpm.
At 2am.
Just mix the oil and fuel.No nightmares.25:1 or if you're nervous 20:1. It'll smoke a bit.
With reference to oil pumps, my 350 had 7 cables coming out of the throttle,3 to carbs 3 to chokes and one to the oil pump.
Guess which one snapped at 11000rpm.
At 2am.
Just mix the oil and fuel.No nightmares.25:1 or if you're nervous 20:1. It'll smoke a bit.
1980 KZ500 B2
Location: Middle England[/b
Location: Middle England[/b
Please Log in or Create an account to join the conversation.
- clutch
-
Topic Author
- Offline
- User
-
Registered
- I wish I had a tad more patience to do it better!
- Posts: 1051
- Thanks: 12
Re: 1966 Kawasaki A1 Samurai restoration project
24 Oct 2011 22:05
Ok...that's something I hadn't thought of! I think I will go the way of premix! In doing this, there will be no need for oil in the oil tank then right? If so, I will probably still run an "oil line" for nostalgia. In removing the oil pump itself, I'm assuming that I would need to block off the oil ports?? Another strange question while I have you guys thinking about 2 strokes and oil...is the transmission oil also 2 stroke oil, or is something else used there? (can you tell I am a 2 stroke virgin? LOL!)
Southern Maryland, USA
1980 KZ250 LTD (traded, but still missed)
1982 KZ750 E3 (Cafe Project) (Dyna-S, Dyna Coils, V&H 4-1, K&N Pods, 6 Sigma Jet Kit, Acewell Computer, Woodcraft Clip-ons, Custom Rewire)
1966 A1 Samurai (Restoration Project)
Wish List:
KZ1000 P (For a "touring" bike)
Z1 (need I...
1980 KZ250 LTD (traded, but still missed)
1982 KZ750 E3 (Cafe Project) (Dyna-S, Dyna Coils, V&H 4-1, K&N Pods, 6 Sigma Jet Kit, Acewell Computer, Woodcraft Clip-ons, Custom Rewire)
1966 A1 Samurai (Restoration Project)
Wish List:
KZ1000 P (For a "touring" bike)
Z1 (need I...
Please Log in or Create an account to join the conversation.
- clutch
-
Topic Author
- Offline
- User
-
Registered
- I wish I had a tad more patience to do it better!
- Posts: 1051
- Thanks: 12
Re: 1966 Kawasaki A1 Samurai restoration project
24 Oct 2011 22:23
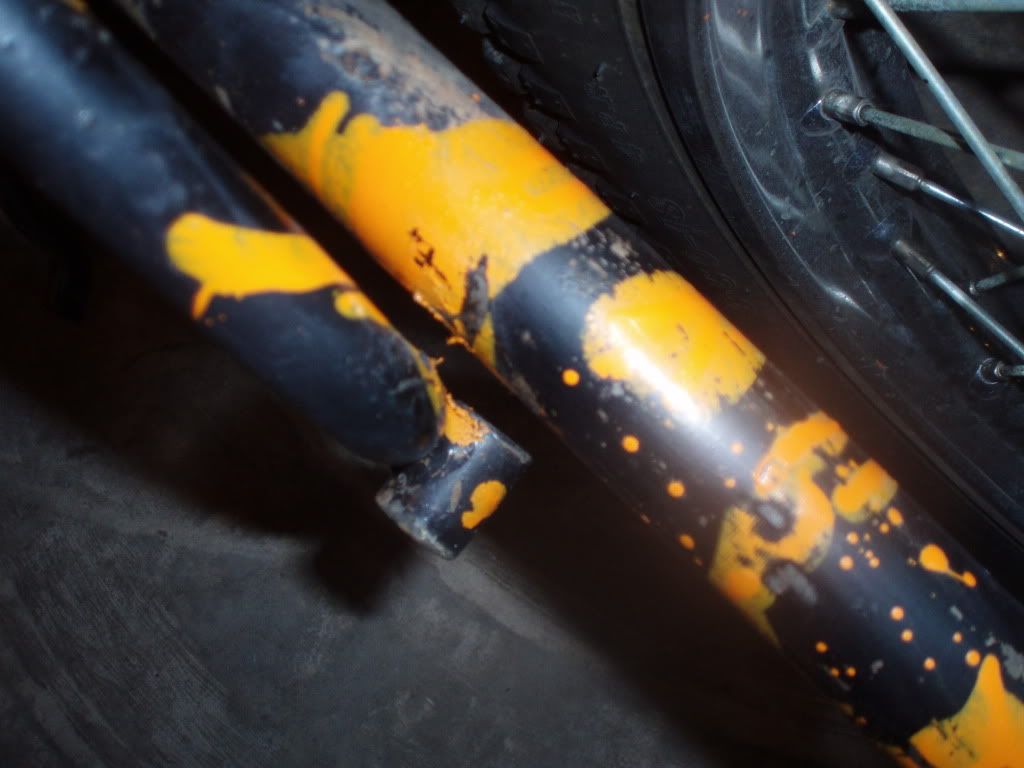
As promised, I pushed the frame out into the driveway to clean it off. I didn't do as good of a job as I had hoped (didn't use the pressure washer), but I did notice something I hadn't before....the left side passenger peg mount was pushed too far in and was rubbing on the swingarm

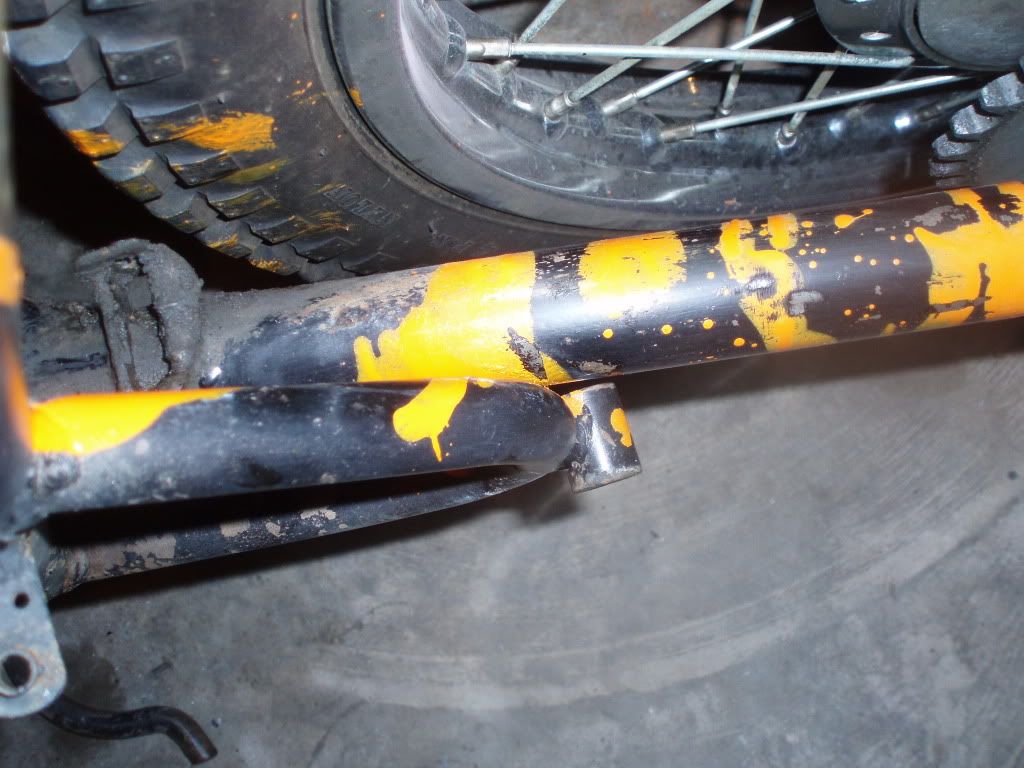
I used a method that you guys probably would have talked me out of to correct the issue (crowbar and some leverage).
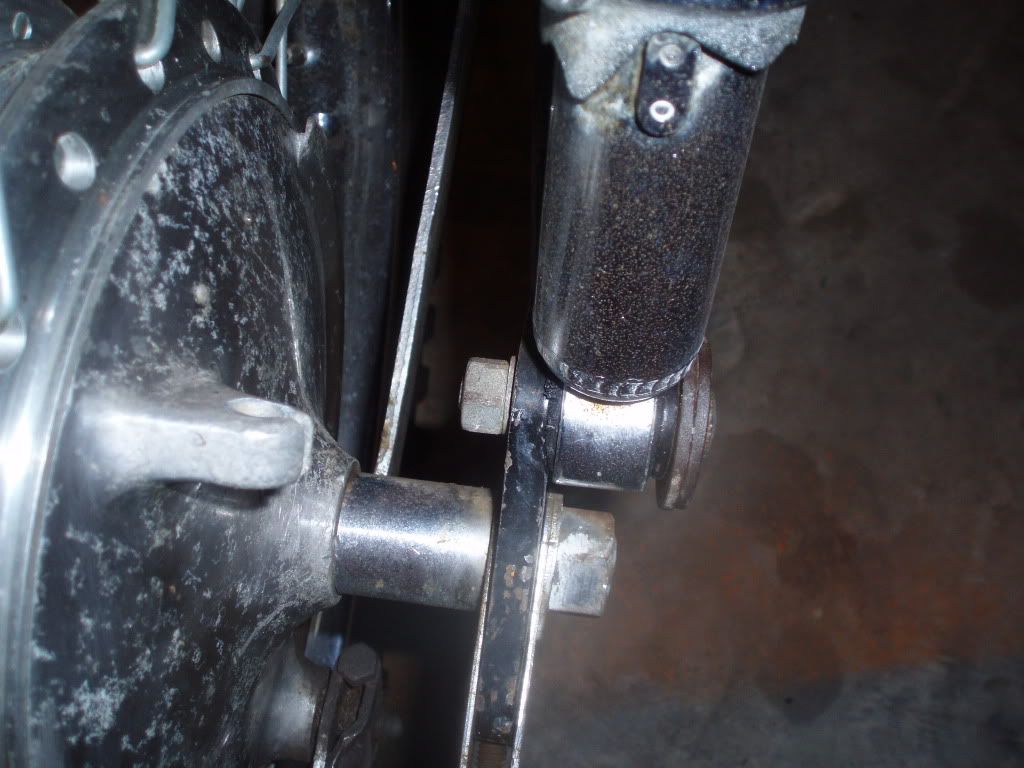
After correcting that issue. Someone had kind of thrown a few random bolts they found that worked on this bike...this isn't the only one, just one I actually took a pic of. The other side was a standard hex bolt. I will put the proper hardware on when putting the bike back together!

Next, I removed the rear wheel. The kind of neat thing about this bike, is that if you need to remove it to change a tire, balance, etc, the chain and sprocket don't need to be removed!
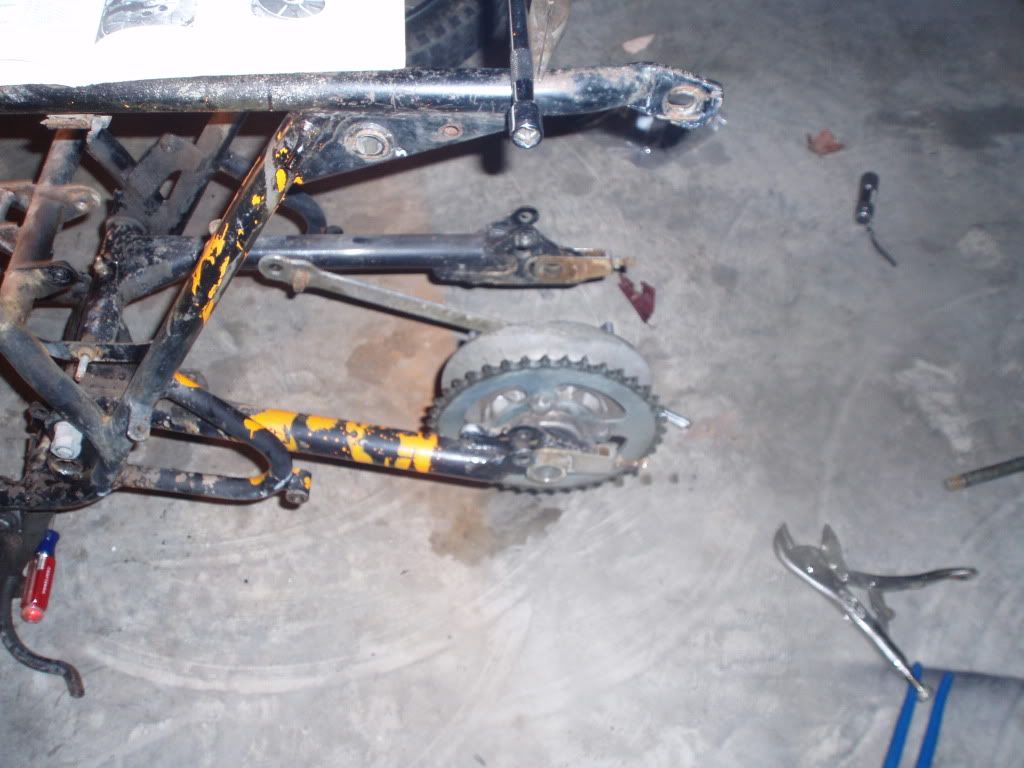
I finished off the rear of the bike by removing the swingarm...no issues here")
@SPARKY47: Here is my choke/throttle assembly. It's kind of a mess, and without the need for the oil pump cable, I will look into replacing it with something a little easier to work with. Most of the cables seem to slide ok, and with a little lube will be as good as new functionally...but the outer sleeves are cracking. That's just cosmetic, and I may be able to pretty them back up cheaper than getting new cable setups.

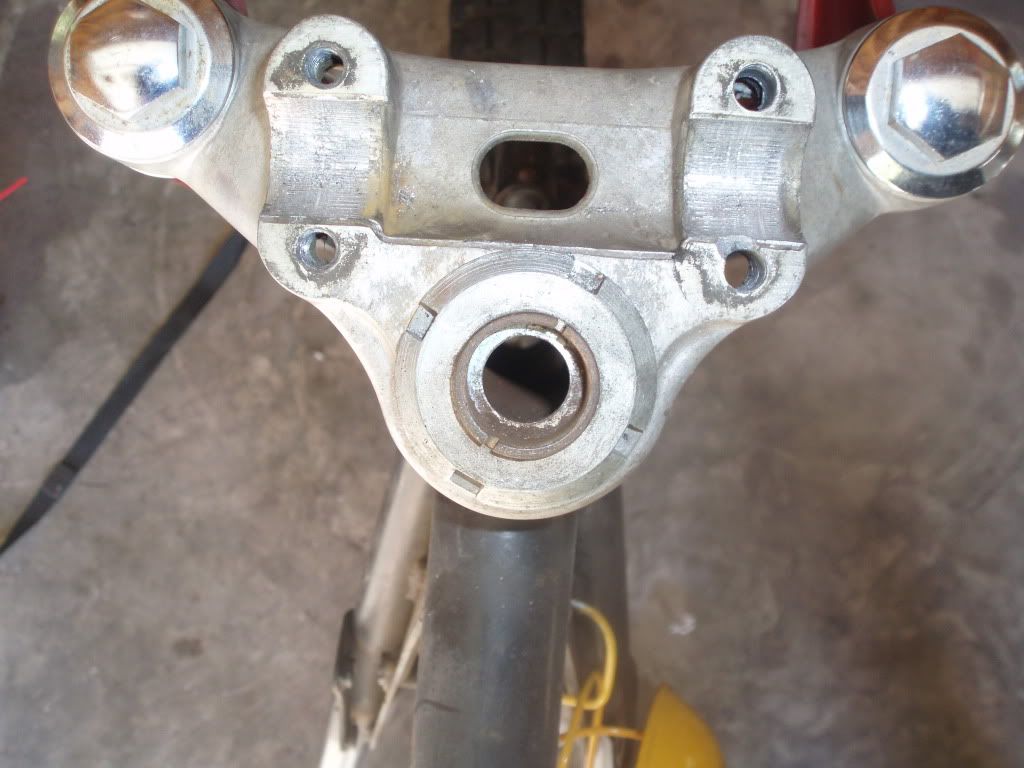
So after removing the swingarm, I removed the side stand. The center stand is coming off after the forks. Speaking of which...I moved onto the forks! The first step for removing (after headlight, wiring, cables, etc (already done) is to remove a cotter pin and loosen the steering damper for removal. I got the cotter pin out ok, but the steering damper equipment is all rusted up underneath the neck. Anyone remember this pic from my walk around?
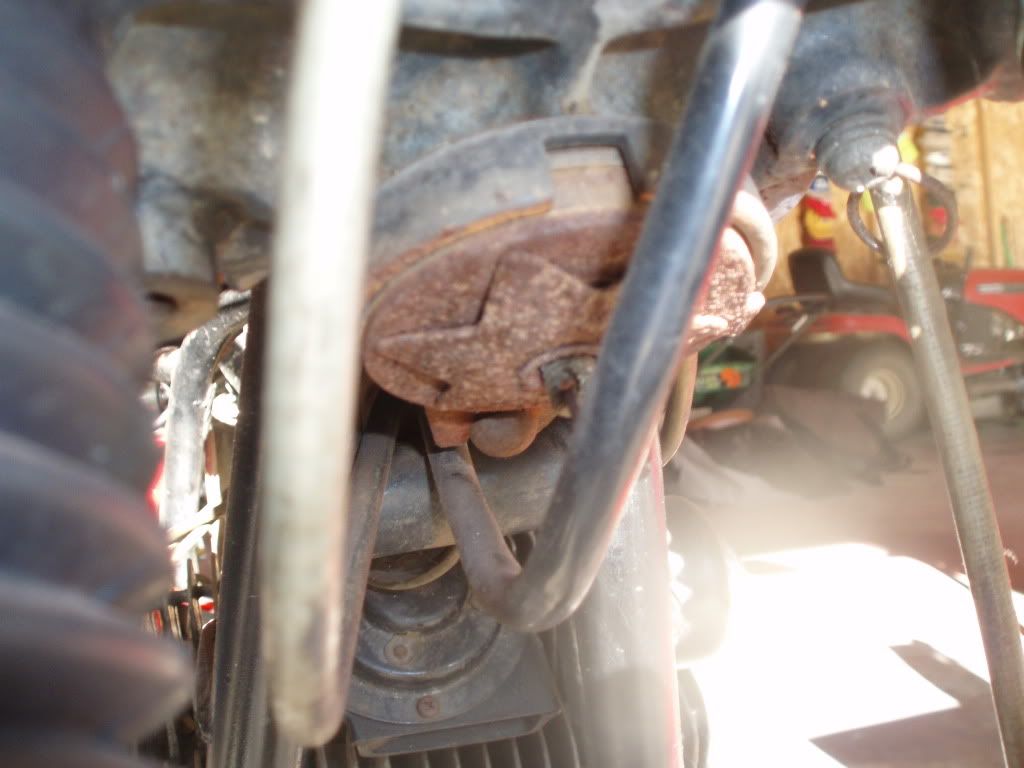
So, being upset that I'm stuck for the moment, I was at least glad that I did a good thorough walk around and wasn't caught off guard by this. I sprayed the crap out of it with some WD-40 and I'm letting it soak. Hopefully tomorrow, I will be able to loosen it up. I also had the idea of getting on of those adjustable strap wrenches to get a better grip on the damper knob, but I'm open to ideas about moving on without damaging the parts (whether they may be salvageable or not...it is possible I will have to have some things fabbed for me).
I used a method that you guys probably would have talked me out of to correct the issue (crowbar and some leverage).
After correcting that issue. Someone had kind of thrown a few random bolts they found that worked on this bike...this isn't the only one, just one I actually took a pic of. The other side was a standard hex bolt. I will put the proper hardware on when putting the bike back together!
Next, I removed the rear wheel. The kind of neat thing about this bike, is that if you need to remove it to change a tire, balance, etc, the chain and sprocket don't need to be removed!
I finished off the rear of the bike by removing the swingarm...no issues here
@SPARKY47: Here is my choke/throttle assembly. It's kind of a mess, and without the need for the oil pump cable, I will look into replacing it with something a little easier to work with. Most of the cables seem to slide ok, and with a little lube will be as good as new functionally...but the outer sleeves are cracking. That's just cosmetic, and I may be able to pretty them back up cheaper than getting new cable setups.
So after removing the swingarm, I removed the side stand. The center stand is coming off after the forks. Speaking of which...I moved onto the forks! The first step for removing (after headlight, wiring, cables, etc (already done) is to remove a cotter pin and loosen the steering damper for removal. I got the cotter pin out ok, but the steering damper equipment is all rusted up underneath the neck. Anyone remember this pic from my walk around?
So, being upset that I'm stuck for the moment, I was at least glad that I did a good thorough walk around and wasn't caught off guard by this. I sprayed the crap out of it with some WD-40 and I'm letting it soak. Hopefully tomorrow, I will be able to loosen it up. I also had the idea of getting on of those adjustable strap wrenches to get a better grip on the damper knob, but I'm open to ideas about moving on without damaging the parts (whether they may be salvageable or not...it is possible I will have to have some things fabbed for me).
Southern Maryland, USA
1980 KZ250 LTD (traded, but still missed)
1982 KZ750 E3 (Cafe Project) (Dyna-S, Dyna Coils, V&H 4-1, K&N Pods, 6 Sigma Jet Kit, Acewell Computer, Woodcraft Clip-ons, Custom Rewire)
1966 A1 Samurai (Restoration Project)
Wish List:
KZ1000 P (For a "touring" bike)
Z1 (need I...
1980 KZ250 LTD (traded, but still missed)
1982 KZ750 E3 (Cafe Project) (Dyna-S, Dyna Coils, V&H 4-1, K&N Pods, 6 Sigma Jet Kit, Acewell Computer, Woodcraft Clip-ons, Custom Rewire)
1966 A1 Samurai (Restoration Project)
Wish List:
KZ1000 P (For a "touring" bike)
Z1 (need I...
Please Log in or Create an account to join the conversation.
- clutch
-
Topic Author
- Offline
- User
-
Registered
- I wish I had a tad more patience to do it better!
- Posts: 1051
- Thanks: 12
Re: 1966 Kawasaki A1 Samurai restoration project
25 Oct 2011 03:35
THE GOOD, THE BAD, AND THE UGLY!
SO I'm just about done with the tear-down of the A1, and finally figured out the ugly!
GOOD: the bike is pretty much all there, and ran (not very well) when I bought it
BAD: It appears now that the bike was hit, dropped or layed on the left side. The left rear peg mount was bent in, the left driver peg bung (holds the peg in position) is broken off, and the left carb cover is pretty scratched up
UGLY: Many of the hardware and fasteners have been replaced. SOme with correct threads, but others not. The right handlebar mount was reattached with incorrect size bolts. It appears someone decided on a quick fix to ride and/or sell this bike, rather than respecting this piece of kawasaki history by taking a short trip to their local hardware store to get the correct items....but have no fear fellow KAW lovers...it will be properly reassembled!
Southern Maryland, USA
1980 KZ250 LTD (traded, but still missed)
1982 KZ750 E3 (Cafe Project) (Dyna-S, Dyna Coils, V&H 4-1, K&N Pods, 6 Sigma Jet Kit, Acewell Computer, Woodcraft Clip-ons, Custom Rewire)
1966 A1 Samurai (Restoration Project)
Wish List:
KZ1000 P (For a "touring" bike)
Z1 (need I...
1980 KZ250 LTD (traded, but still missed)
1982 KZ750 E3 (Cafe Project) (Dyna-S, Dyna Coils, V&H 4-1, K&N Pods, 6 Sigma Jet Kit, Acewell Computer, Woodcraft Clip-ons, Custom Rewire)
1966 A1 Samurai (Restoration Project)
Wish List:
KZ1000 P (For a "touring" bike)
Z1 (need I...
Please Log in or Create an account to join the conversation.
- clutch
-
Topic Author
- Offline
- User
-
Registered
- I wish I had a tad more patience to do it better!
- Posts: 1051
- Thanks: 12
Re: 1966 Kawasaki A1 Samurai restoration project
25 Oct 2011 15:06
So I went to Lowes today and picked up a few new toys

The adjustable strap wrench worked like a charm on the damper knob...but now there's this spanner nut. The spanner wrench I have for my shocks was a perfect fit, but too flimsy for the torque needed to break the thing loose.
I'm looking at my options right now...looks like I may need to take a trip to Sears today too! LOL!
Southern Maryland, USA
1980 KZ250 LTD (traded, but still missed)
1982 KZ750 E3 (Cafe Project) (Dyna-S, Dyna Coils, V&H 4-1, K&N Pods, 6 Sigma Jet Kit, Acewell Computer, Woodcraft Clip-ons, Custom Rewire)
1966 A1 Samurai (Restoration Project)
Wish List:
KZ1000 P (For a "touring" bike)
Z1 (need I...
1980 KZ250 LTD (traded, but still missed)
1982 KZ750 E3 (Cafe Project) (Dyna-S, Dyna Coils, V&H 4-1, K&N Pods, 6 Sigma Jet Kit, Acewell Computer, Woodcraft Clip-ons, Custom Rewire)
1966 A1 Samurai (Restoration Project)
Wish List:
KZ1000 P (For a "touring" bike)
Z1 (need I...
Please Log in or Create an account to join the conversation.
- clutch
-
Topic Author
- Offline
- User
-
Registered
- I wish I had a tad more patience to do it better!
- Posts: 1051
- Thanks: 12
Re: 1966 Kawasaki A1 Samurai restoration project
25 Oct 2011 16:10 - 25 Oct 2011 16:34
Not wanting to go back out to stores today, or waiting for special order tools to arrive, I started thinking about what I had in the garage that might work. I tried the spanner wrench I have for my dewalt angle grinder...too small. So what else do I have? I asked myself. I opened one of the drawers of my tool box and pulled out my clutch holder tool.

I tried, and tried, but didn't want to put too much pressure on it as it looked to be flexing a little. I almost gave up, and sat down, and then thought of a solution! (maybe I should change my name from clutch to macgyver! LOL!)
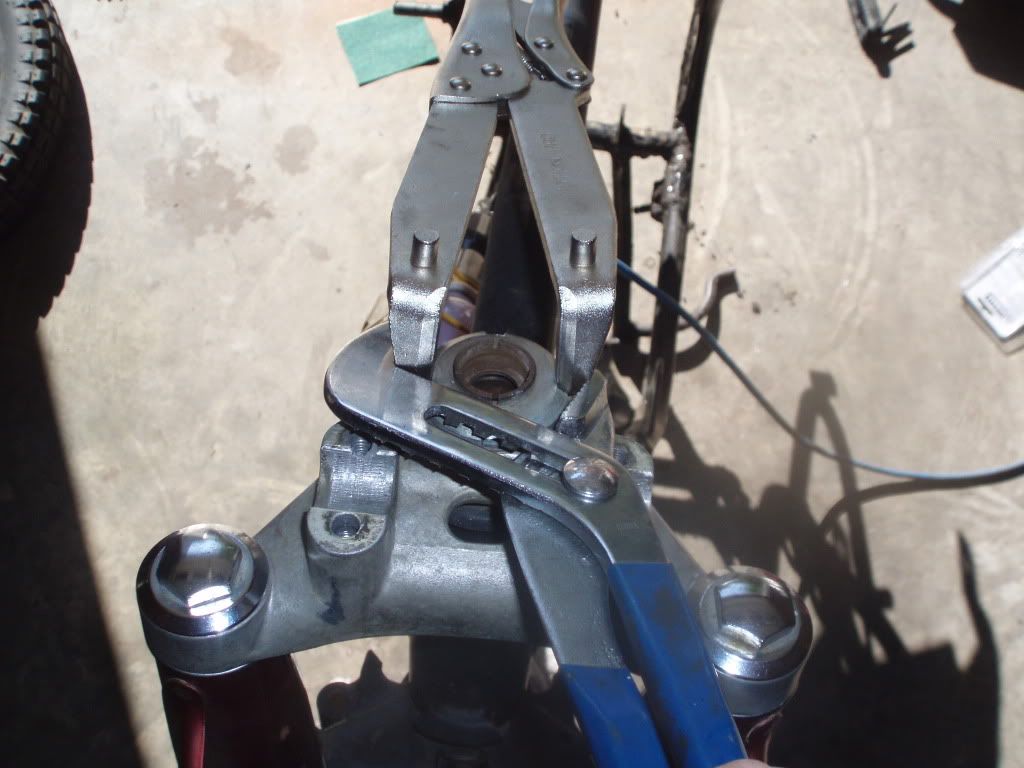
WIth that punk nut out of the way, and the top clamp off, I realized...OMG! There's another one!
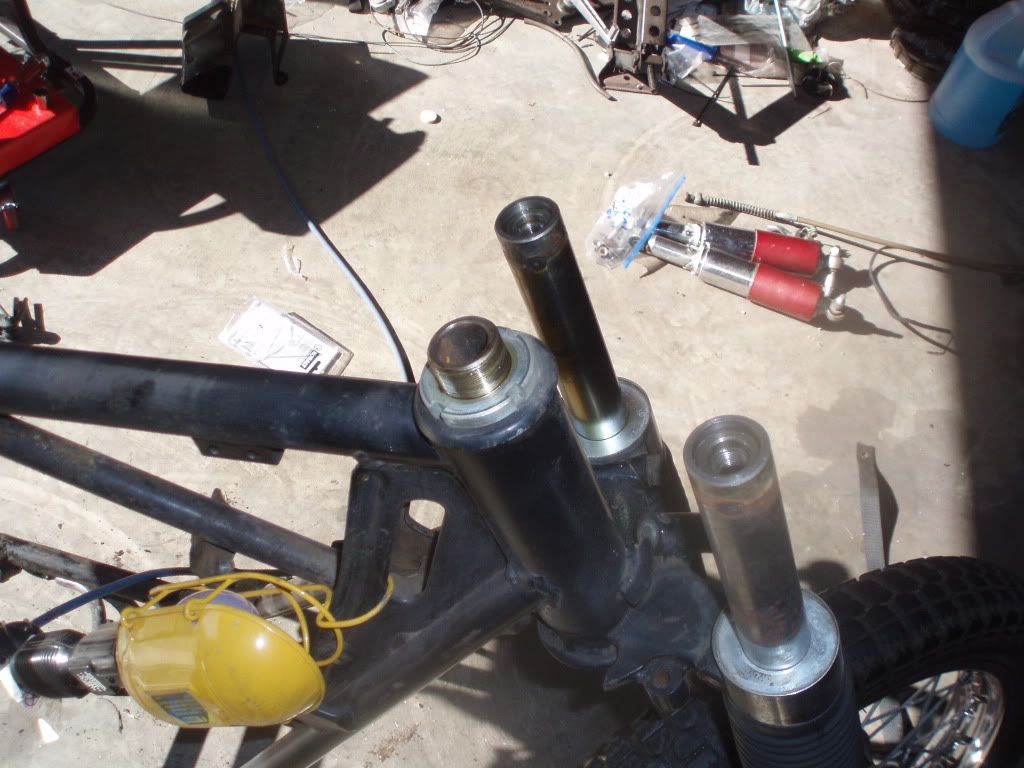
That one came off easily with the clutch holder tool/spanner wrench alone. So, With all the hardware out of the way, I pulled up on the frame and started to slide the forks out. CRAP! Ball bearings started falling out, but I think I got them all. Anyway, at the end of the day, I'm down to the frame!
I think I will leave the center stand on for now while I'm stripping the paint off the top part of the frame. I'm slightly exhausted after that whole ordeal, but I may go back out there to work on that. In Any case, The tear-down is complete, and the restoration begins! :woohoo:
EDIT: So now that I'm at the point where I will be stripping and painting the frame, does anyone have any advice about the VIN? Will sanding this area rub down the VIN stamp? Will priming and painting this area clog the VIN stamp? Any advice here will be GREATLY appreciated.
I tried, and tried, but didn't want to put too much pressure on it as it looked to be flexing a little. I almost gave up, and sat down, and then thought of a solution! (maybe I should change my name from clutch to macgyver! LOL!)
WIth that punk nut out of the way, and the top clamp off, I realized...OMG! There's another one!
That one came off easily with the clutch holder tool/spanner wrench alone. So, With all the hardware out of the way, I pulled up on the frame and started to slide the forks out. CRAP! Ball bearings started falling out, but I think I got them all. Anyway, at the end of the day, I'm down to the frame!
I think I will leave the center stand on for now while I'm stripping the paint off the top part of the frame. I'm slightly exhausted after that whole ordeal, but I may go back out there to work on that. In Any case, The tear-down is complete, and the restoration begins! :woohoo:
EDIT: So now that I'm at the point where I will be stripping and painting the frame, does anyone have any advice about the VIN? Will sanding this area rub down the VIN stamp? Will priming and painting this area clog the VIN stamp? Any advice here will be GREATLY appreciated.
Southern Maryland, USA
1980 KZ250 LTD (traded, but still missed)
1982 KZ750 E3 (Cafe Project) (Dyna-S, Dyna Coils, V&H 4-1, K&N Pods, 6 Sigma Jet Kit, Acewell Computer, Woodcraft Clip-ons, Custom Rewire)
1966 A1 Samurai (Restoration Project)
Wish List:
KZ1000 P (For a "touring" bike)
Z1 (need I...
1980 KZ250 LTD (traded, but still missed)
1982 KZ750 E3 (Cafe Project) (Dyna-S, Dyna Coils, V&H 4-1, K&N Pods, 6 Sigma Jet Kit, Acewell Computer, Woodcraft Clip-ons, Custom Rewire)
1966 A1 Samurai (Restoration Project)
Wish List:
KZ1000 P (For a "touring" bike)
Z1 (need I...
Last edit: 25 Oct 2011 16:34 by clutch.
Please Log in or Create an account to join the conversation.
- clutch
-
Topic Author
- Offline
- User
-
Registered
- I wish I had a tad more patience to do it better!
- Posts: 1051
- Thanks: 12
Re: 1966 Kawasaki A1 Samurai restoration project
25 Oct 2011 18:32
I pulled the frame, swingarm, and side stand out into the driveway again. I tried a scrub brush to clean up the final bits of gunk, but it was so tough, I had to use the pressure washer with the high-press fine stream fitting to get it all off. All clean and ready to be stripped now
Southern Maryland, USA
1980 KZ250 LTD (traded, but still missed)
1982 KZ750 E3 (Cafe Project) (Dyna-S, Dyna Coils, V&H 4-1, K&N Pods, 6 Sigma Jet Kit, Acewell Computer, Woodcraft Clip-ons, Custom Rewire)
1966 A1 Samurai (Restoration Project)
Wish List:
KZ1000 P (For a "touring" bike)
Z1 (need I...
1980 KZ250 LTD (traded, but still missed)
1982 KZ750 E3 (Cafe Project) (Dyna-S, Dyna Coils, V&H 4-1, K&N Pods, 6 Sigma Jet Kit, Acewell Computer, Woodcraft Clip-ons, Custom Rewire)
1966 A1 Samurai (Restoration Project)
Wish List:
KZ1000 P (For a "touring" bike)
Z1 (need I...
Please Log in or Create an account to join the conversation.
- KZ250LTD
-

- Offline
- User
-
Registered
- Posts: 1311
- Thanks: 16
Last edit: 13 Feb 2012 18:02 by KZ250LTD.
Please Log in or Create an account to join the conversation.
Moderators: Street Fighter LTD