- Posts: 2494
- Thank you received: 43
'76 KZ900 (ZRX1200R) Build
- 79MKII
-

- Offline
- User
- Love Them Kaws!
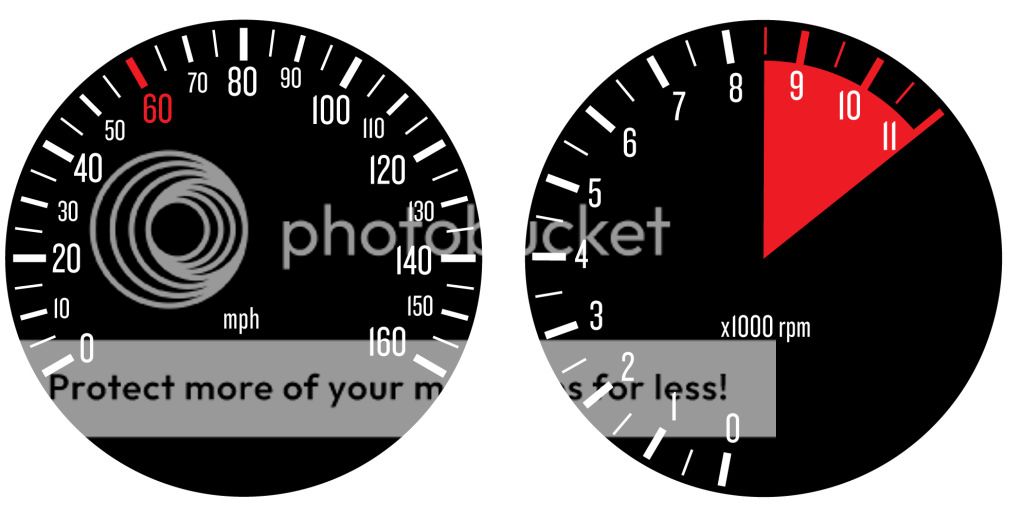
DoctoRot wrote: also since speed hut makes the faces one off, you can get the template from them and design whatever gauge face you want. they only charged me $15 extra to do this.
Those look awesome! Very much like the stock gauges but even cooler!
The Kaw List:
Current: 79 KZ1000 A3 MKII, 78 KZ1000 A2, 78 KZ1000 Z1-R, 78 KZ650 SR, 80 KE175
Former: 03 KLX400SR, 99 ZRX1000, 82 KZ750 LTD, 80 KZ1000 A4 MKII, 80 KZ1000 LTD, 78 KZ1000 A2, 74 H-2 750 Triple, 78 KL250
Please Log in or Create an account to join the conversation.
- Bozo
-

- Offline
- Sustaining Member
- Ride it like u stole it
- Posts: 591
- Thank you received: 105
79MKII wrote:
DoctoRot wrote: also since speed hut makes the faces one off, you can get the template from them and design whatever gauge face you want. they only charged me $15 extra to do this.
Those look awesome! Very much like the stock gauges but even cooler!
Very nice, is the speedo a GPS or standard drive?. My Z1R gauges still work very well and the speedo is very accurate so it'll have to wait BUTTTTTTTTTTTT one bloody twitch out of any gauge needle and if I can afford it I'll buy a set.
First Permanent ride the Z1R since Dec1977 (220,000km) as of June 2015
Second permanent bike 1989 FJ1200 dyno'd 140RWH, great bike.
Third ride is now the Frankenstein 1981 GPZ1100B1, 1983 fully recon motor fitted LOVE THIS BIKE
Forth my work bike FJ1200 1989 (same type as FJ above)
Please Log in or Create an account to join the conversation.
- DoctoRot
-
- Offline
- Sustaining Member
- Oh, the usual... I bowl, I drive around...
- Posts: 2540
- Thank you received: 674
Bozo wrote: Very nice, is the speedo a GPS or standard drive?. My Z1R gauges still work very well and the speedo is very accurate so it'll have to wait BUTTTTTTTTTTTT one bloody twitch out of any gauge needle and if I can afford it I'll buy a set.
Speedo is GPS. I designed a set that was very close to stock, however instead of the standard 8-4 needle sweep on the tach I changed it so redline would be at 12 o'cock. I would be happy to change it back to a 8-4 sweep and send you the illustrator file if you were interested in getting them from Speedhut.
Sorry to thread jack Cory! carry on. :whistle:
Please Log in or Create an account to join the conversation.
- Hollywoodmx
-

- Offline
- User
- Posts: 562
- Thank you received: 16
Hollywoodmx wrote:
NakedFun wrote: So I have a question to pose to the machining/engineering/thinkin' portion of the board. It comes down to bolted joint design. I am thinking about my securing method of the brake rotors and my cush drive basket to the wheel hubs. My original design requires the use of Flat Head Allen cap screws utiling an 82 degree counter sunk recess in the cush drive basket and brake rotor mounting holes. This would allow flush or very low profile securing for clearance and let me work with the 5/16"-18 fastener bosses on the hubs.
Now engienering practive teaches that button heads and countersunk/flat head Allen fasteners are not to be used in critical joint applications. However, ASTM F835 which specifically addresses this fastener type in its mechanical properties specifcally calls out for use in shear type applications is its designed purpose. Specifically fasteners of this type will have the properties of 145,000 psi Min Tensile and a C39 Min Rockwell specifications for diameters of 1/2" or less. There is no Min Yield or Min Proof for this type of fastener, most likely to the the head design....though i have not found the ACTUAL reason for this.
Does this seem feasible to use them for mounting of my brake rotors and cush drive basket to the wheel hubs? I have clearance issues that I need to deal with. I don't want to cause an unsafe situation. My only other option is to redrill the front hub using a jig and re-use the stock ZRX brake hardware.
Thoughts? Am I nuts?
Cory
I have a similar issue on my other build..
I'm switching to nuts or recessed Alan bolts on the cush vs studs and bolts to gain the little clearance I need. Just going to use lock tight. I'm not worried.
Also most dirt bikes use alan bolts for mounting the sprocket and the rear wheels on dirt bikes see some strenuous loads off road.
We should be good.
FYI. I did this today as a test. I used r6 (iirc) hollowed Allan bolts, the have a wider lower seat, lower profile and a bit of rotational weight savings over studs and nuts. Best thing is I got my clearance!
- 82 GPz1100injection
- 77 Kz1075 Supercharged
- 81 Yamaha TR-1
- 81 Yamaha xv920
Calgary
Please Log in or Create an account to join the conversation.
- NakedFun
-
 Topic Author
- Offline
- User
- Posts: 1095
- Thank you received: 99
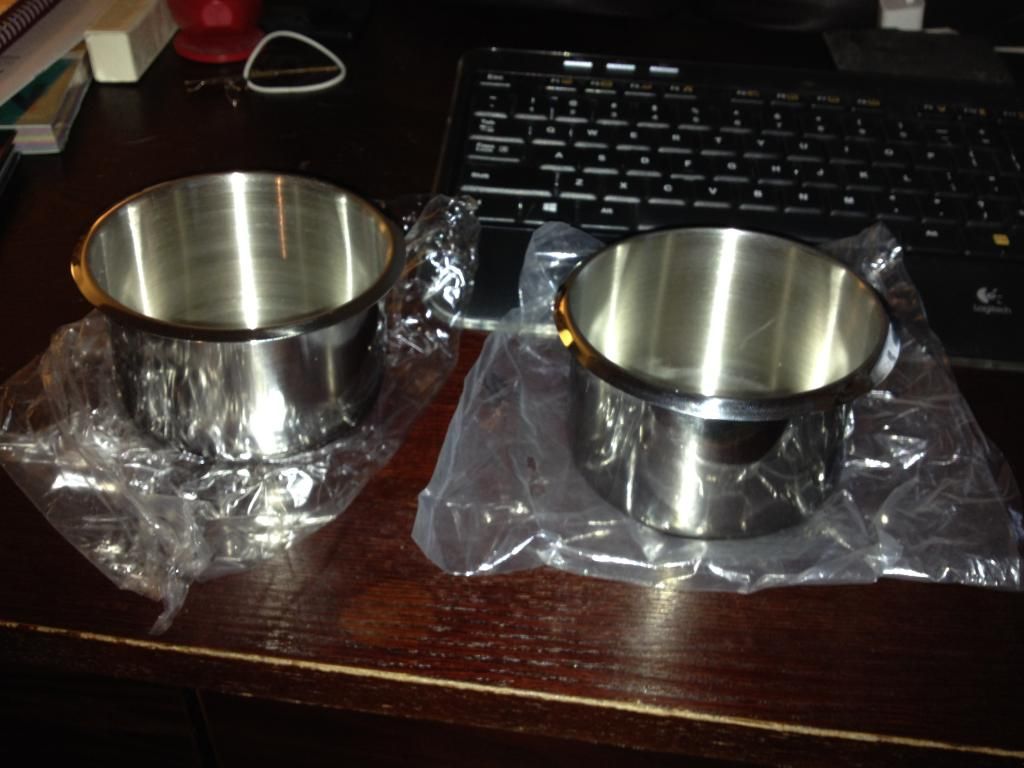
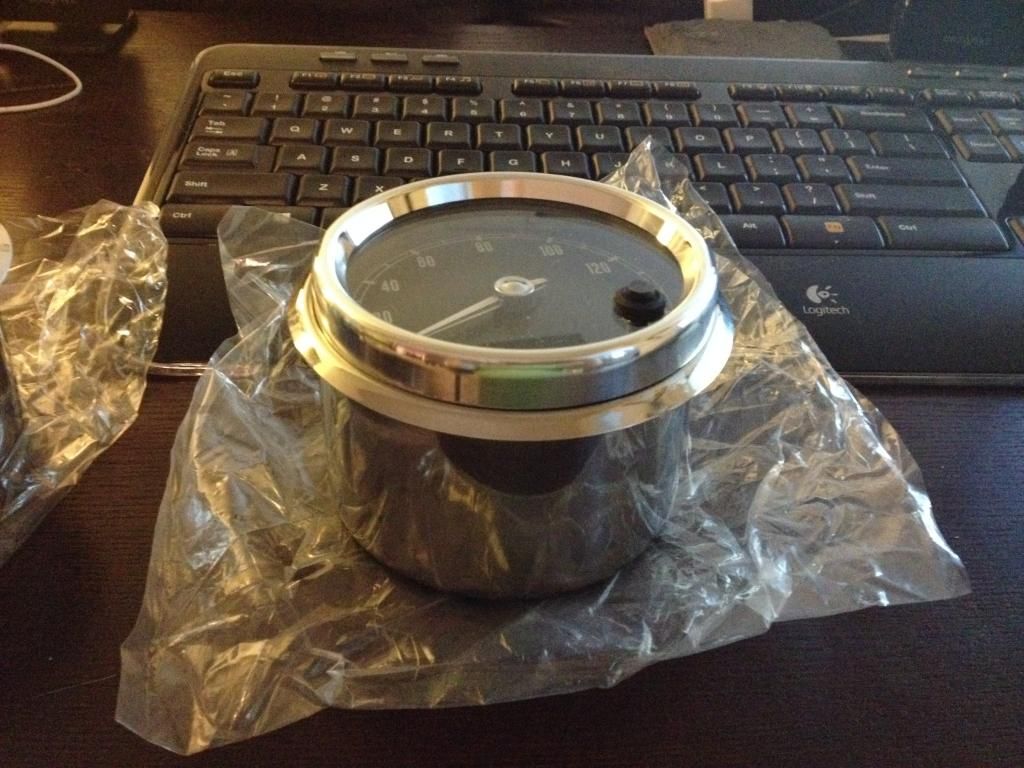
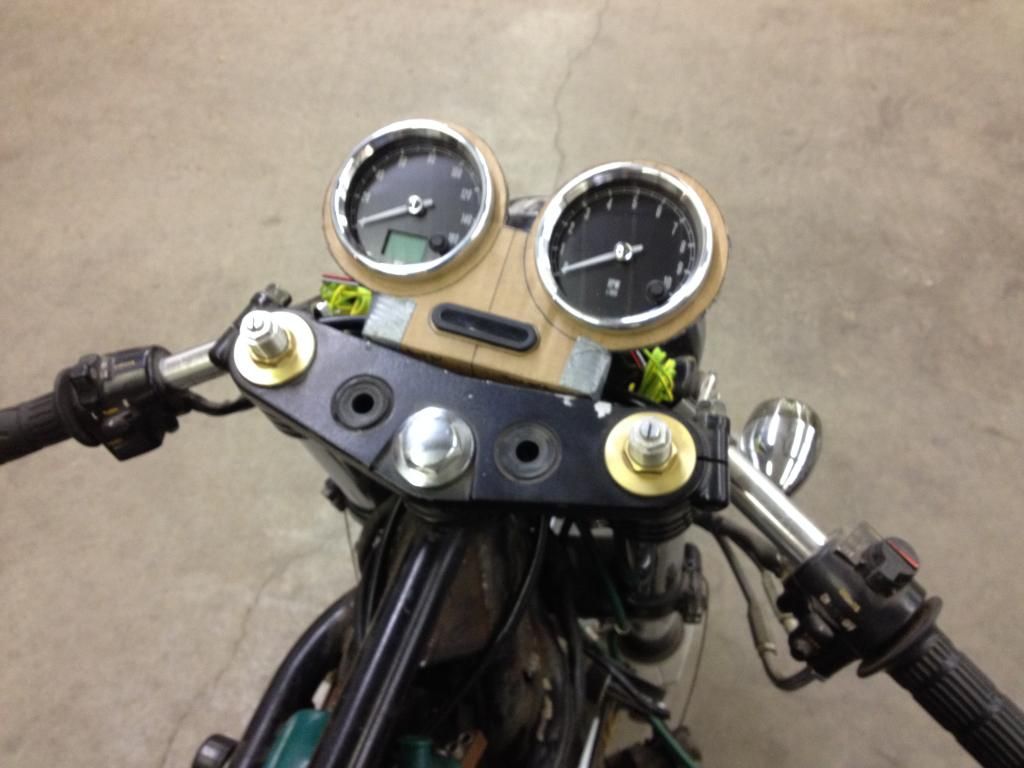
My gen-u-wine jumbo size poker table drink cups arrived in stainless steel so I can make them into thread on retaining cups for the instrument cluster. Going to take some extra spin on mounting rings I bought that mount the gauges, and spin them on the lathe to press fit into the cups, cut the cup flange off, and then use bonding epoxy when pressing the ring into the cup. Will cut out a aluminum or stainless sheet to look sweet and each gauge will drop into them. Then these cups will spin onto the back and secure the gauge, leaving a sealed, finished look.
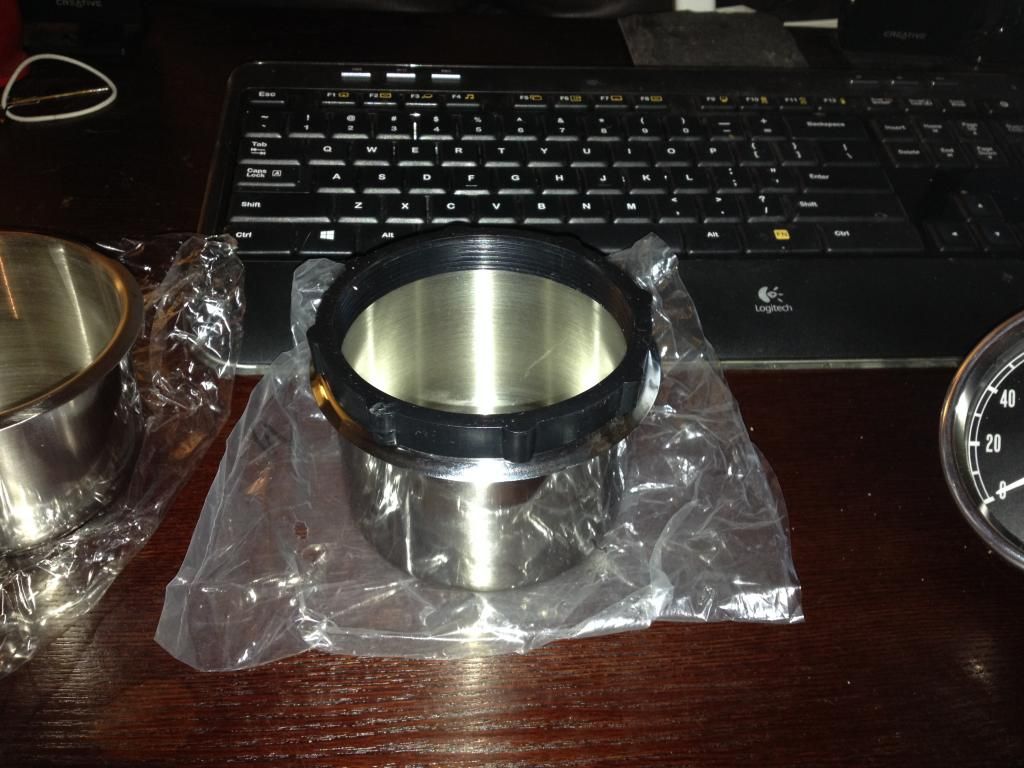
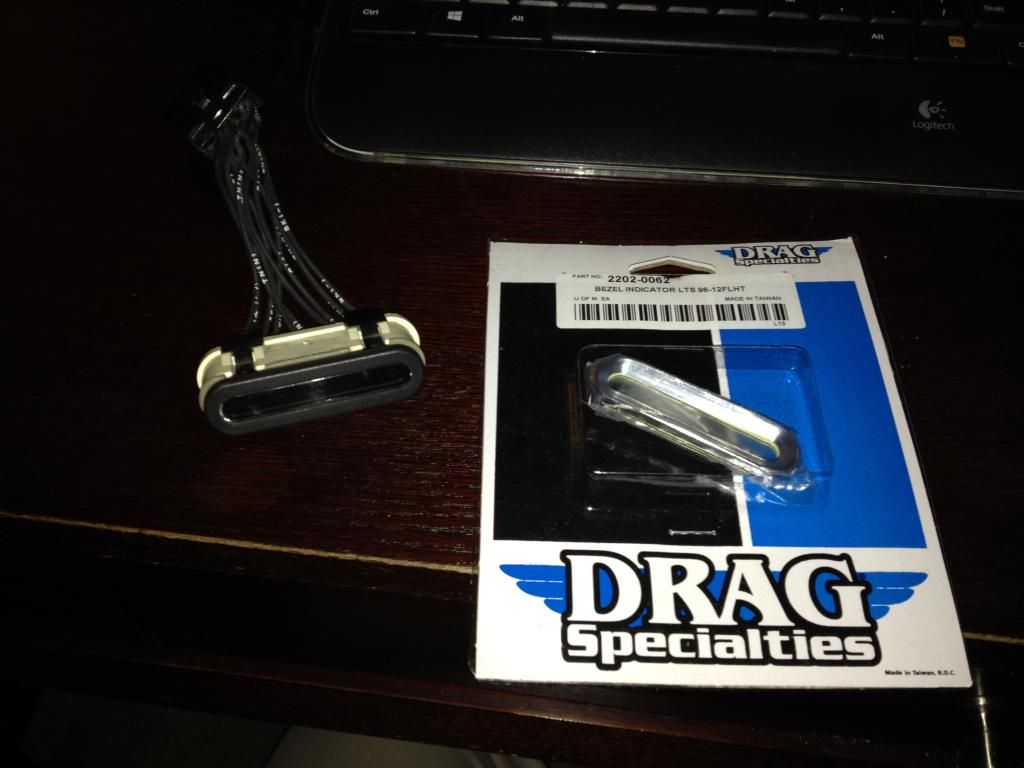
I also picked up my instrument indicator bezel from a Harley Touring bike. Also got my Drag Specialties polished aluminum bezel for it so it matches the gauges, Will probable powdercoat the main gauge plate in semi-gloss black.
My custom HEL line got here as well.....
Cory
2008 Kawasaki Concours 14
1999 Kawasaki ZRX1100
1976 Kawasaki KZ900
Please Log in or Create an account to join the conversation.
- kaw-a-holic
-

- Offline
- User
- Posts: 1808
- Thank you received: 249
Thank you for adding the Speedhut link, I love those gauges, now I need a set.
Jon
1977 KZ1000a1
Mesa, AZ
Phoenix Fighter Project
Please Log in or Create an account to join the conversation.
- NakedFun
-
 Topic Author
- Offline
- User
- Posts: 1095
- Thank you received: 99
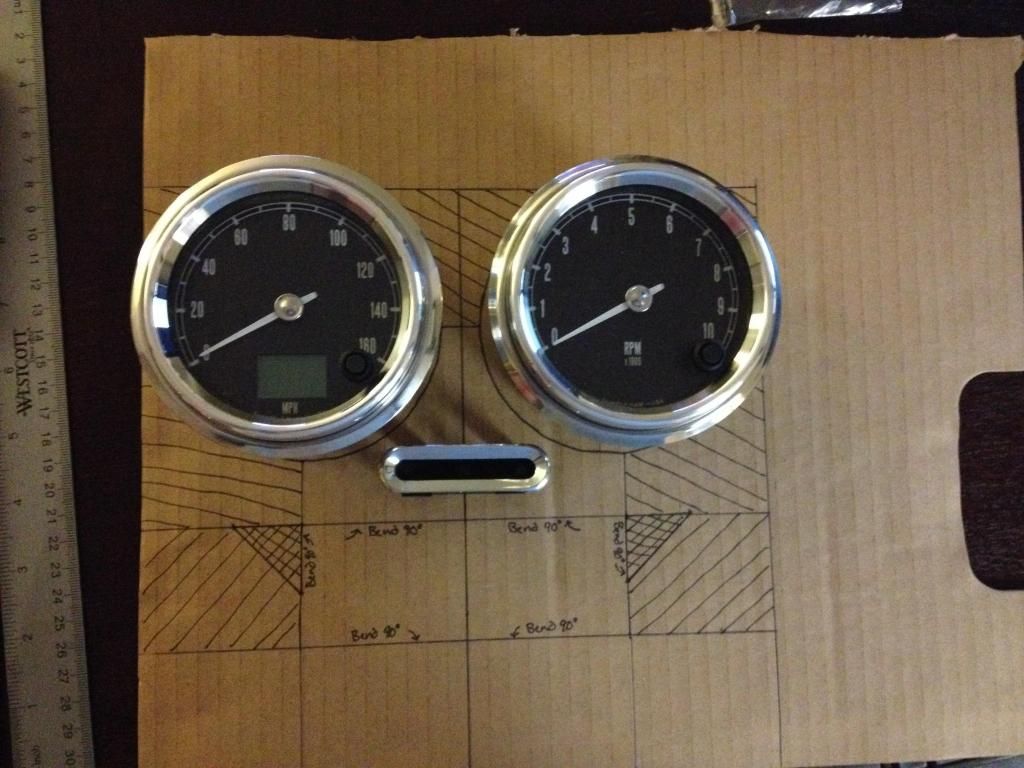
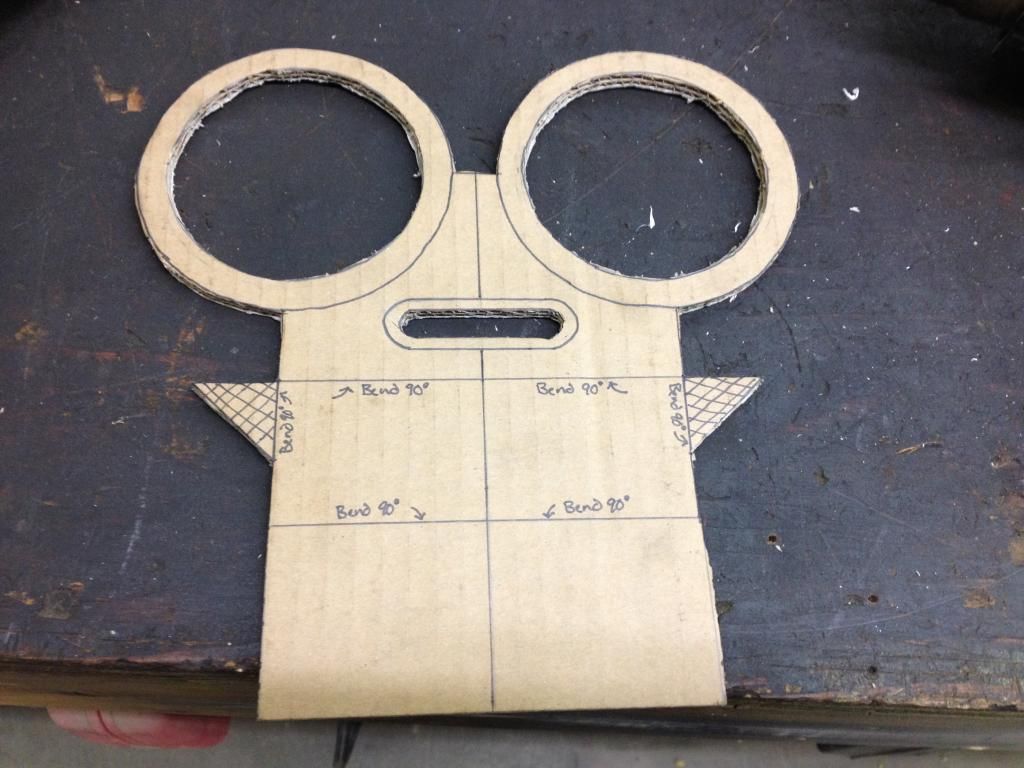
Thinking .125" aluminum and going to add a couple braces so will require two short 1" welds.
Cory
2008 Kawasaki Concours 14
1999 Kawasaki ZRX1100
1976 Kawasaki KZ900
Please Log in or Create an account to join the conversation.
- NakedFun
-
 Topic Author
- Offline
- User
- Posts: 1095
- Thank you received: 99
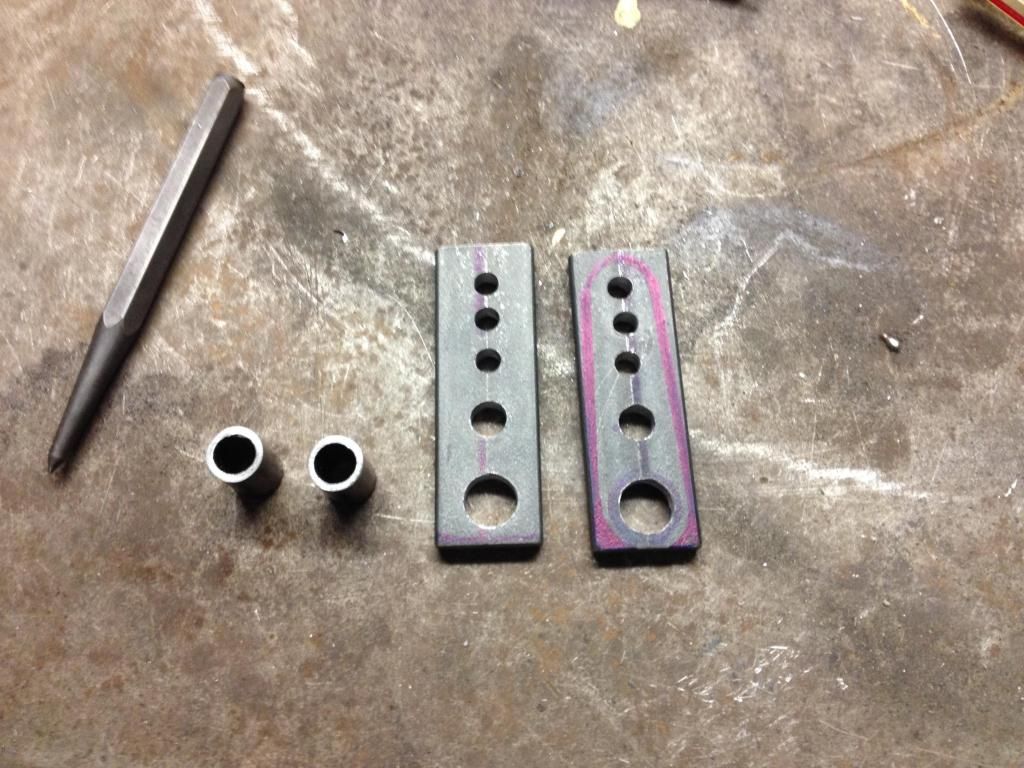
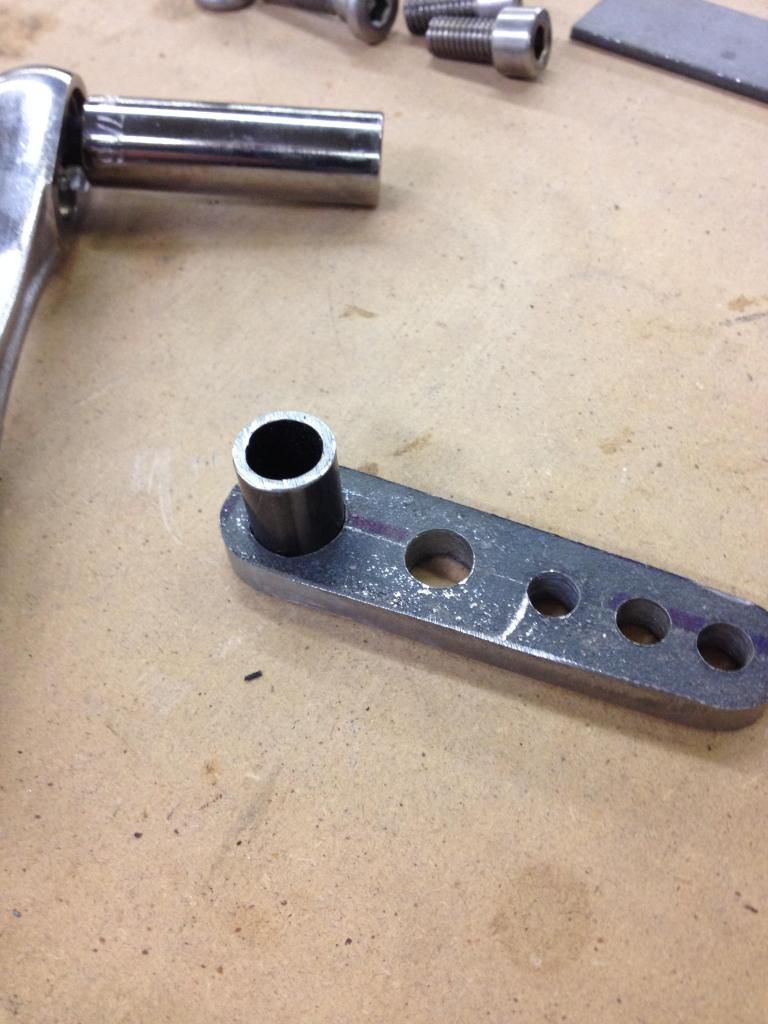
Then I decided to change the levers I created. They worked, but too ugly. I also decide I didn't have the equipment to weld them to where they looked good. So I decided to make them surround the pivot tube and give a medium press fit. This allows for not having to weld them. I also went to .250" thick material that made the press work better and fit the cable and master clevis's better. Will still need to come up with the cable end guide/retainer.
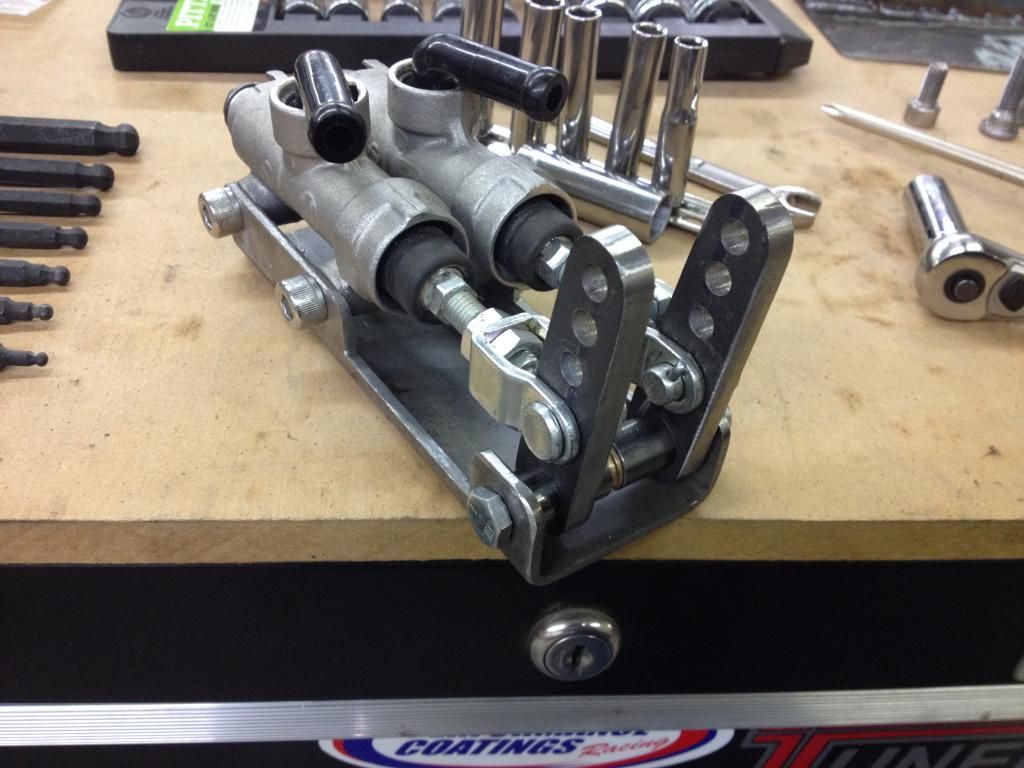
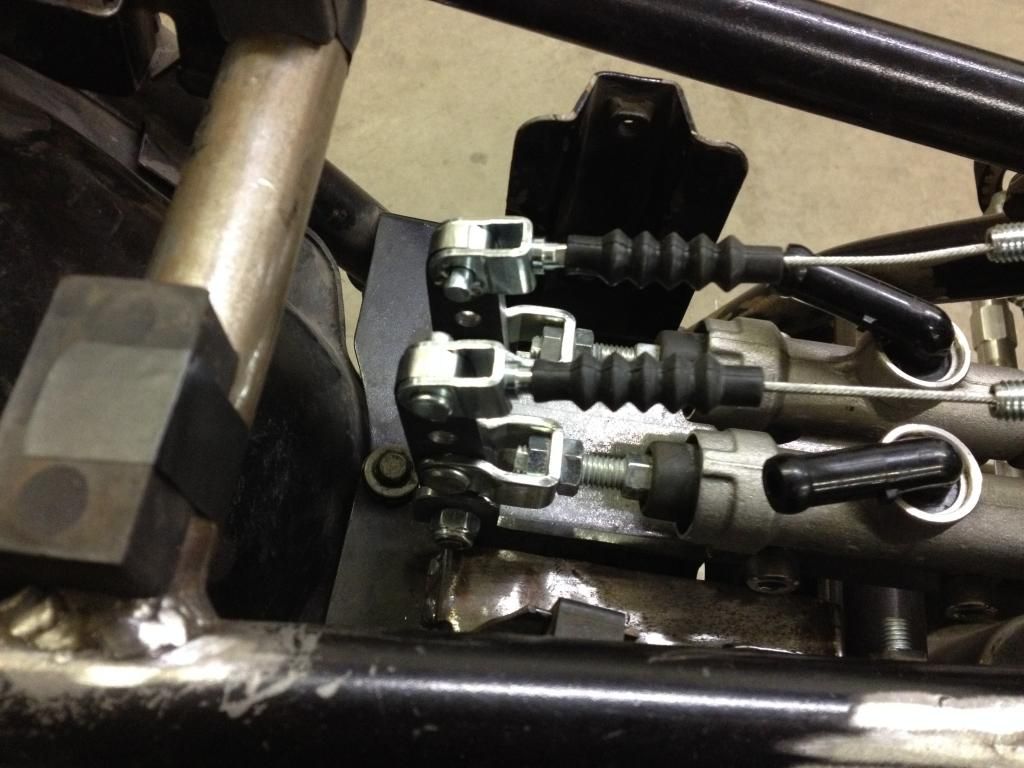
I routed the cables and found they will have to go under the braces I welded in and then on top of the back bone towards the back of the tank. This interfered with the seat pan I made, so I had to re work the pan and gave it a "transmission tunnel". So now I will have to trim the tail accordingly so it fits the pan.
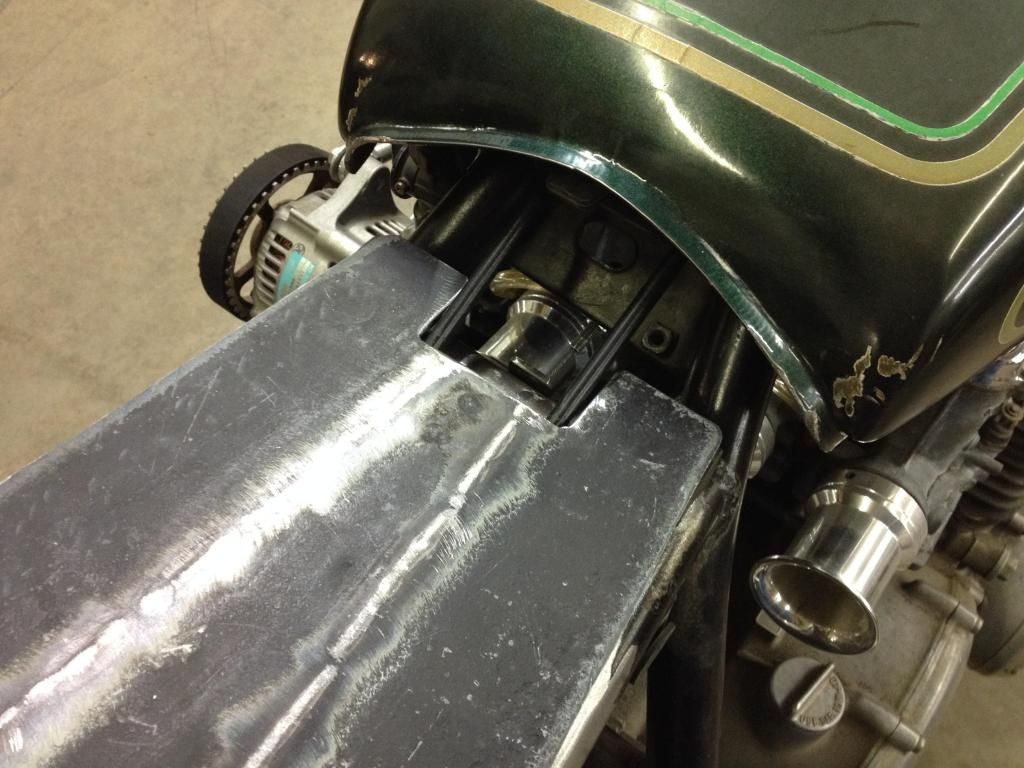
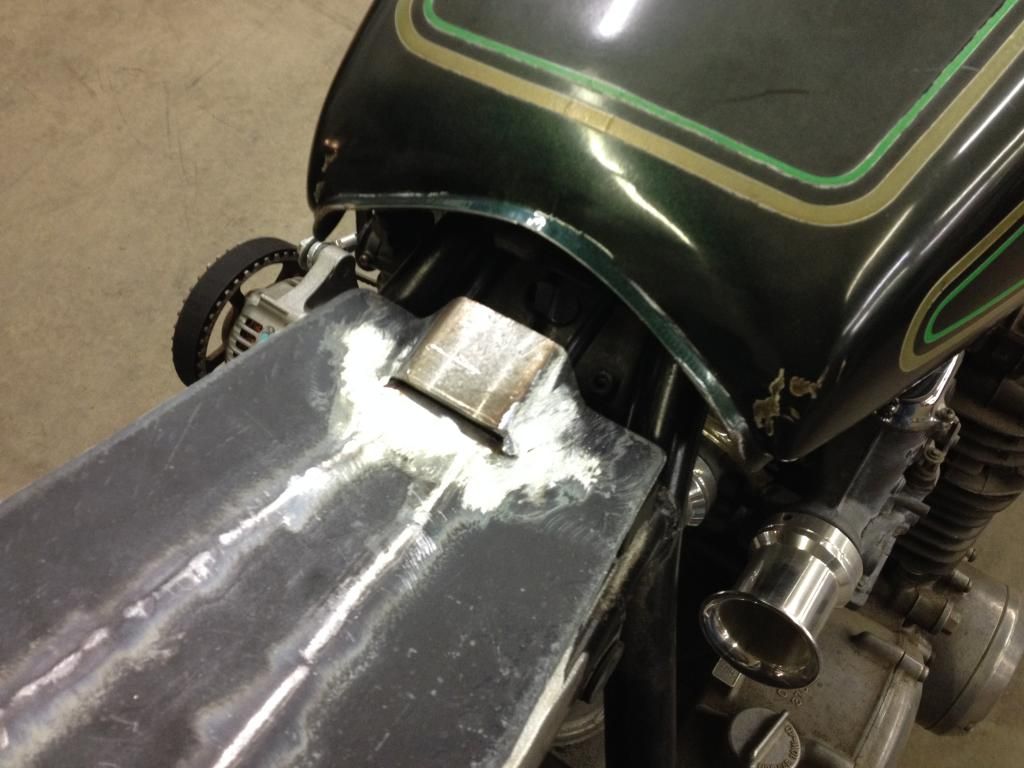
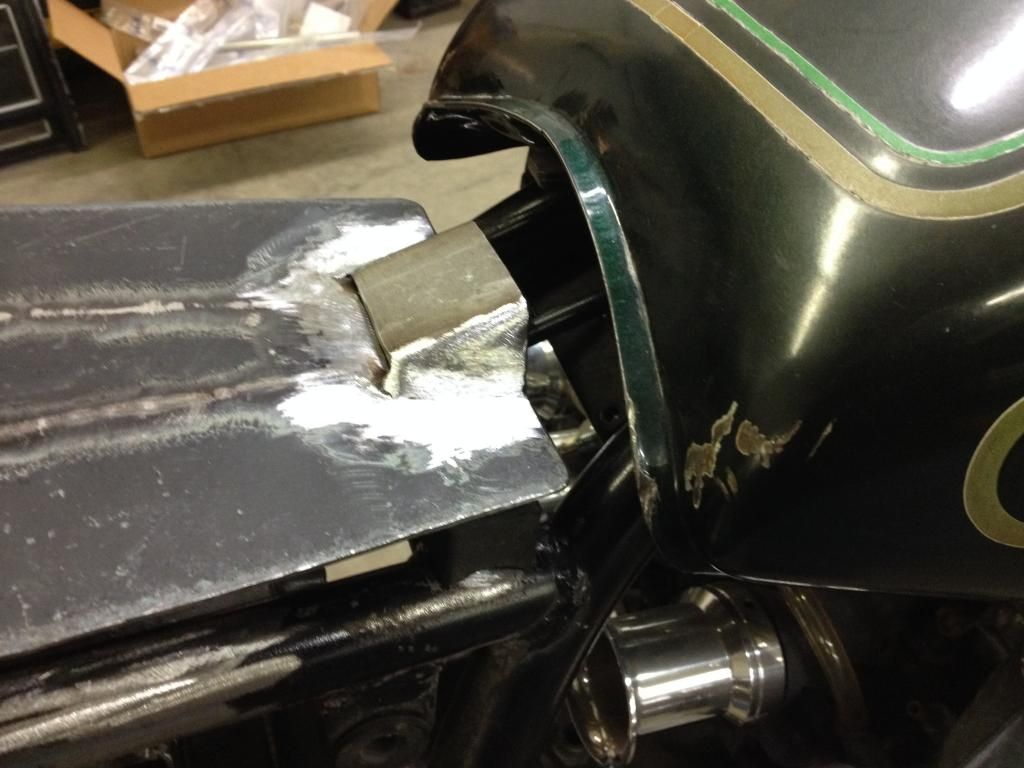
I also drilled my holes and positioned the rubber bumpers. I think instead of the clamps, I may have to use them and weld them into the cross tubes as tabs to prevent side to side movement.....Still thinking on it......
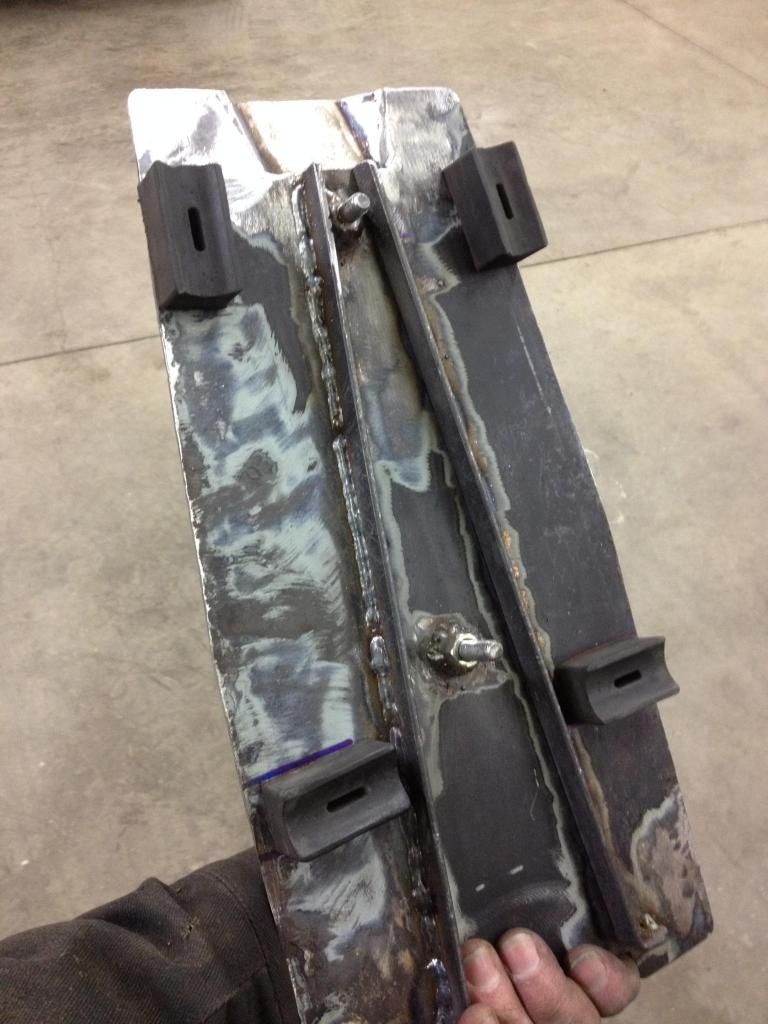
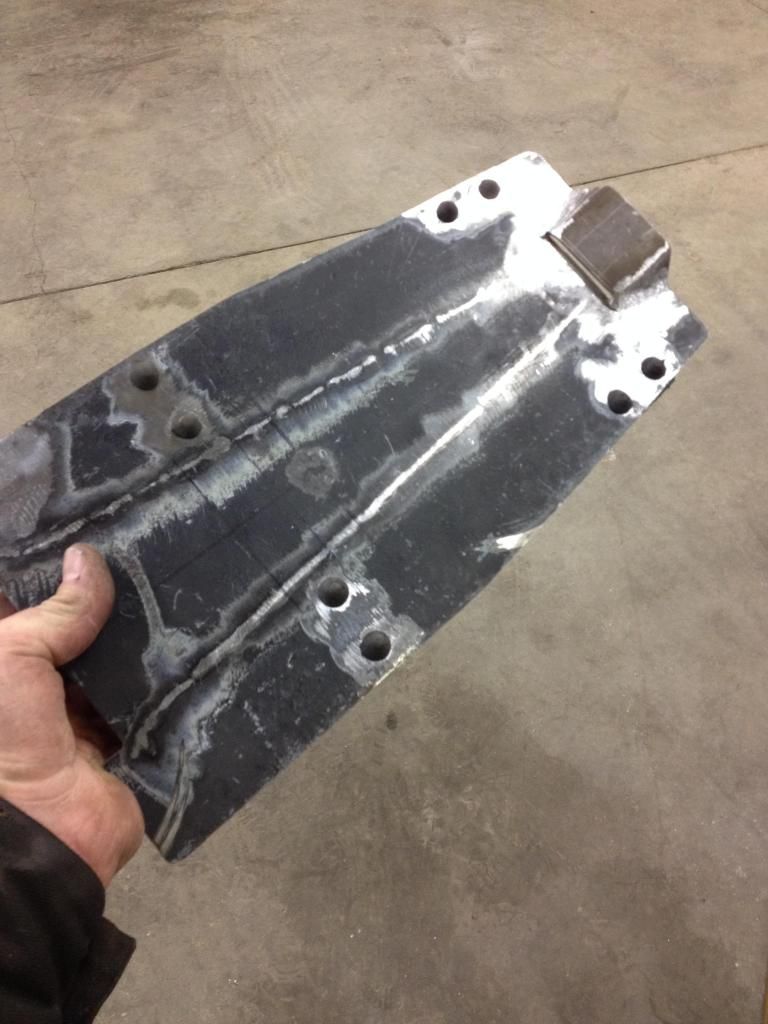
Also tried out my new custom Greg Couch oil cap.....I have my bottle cap center just waiting for it.....
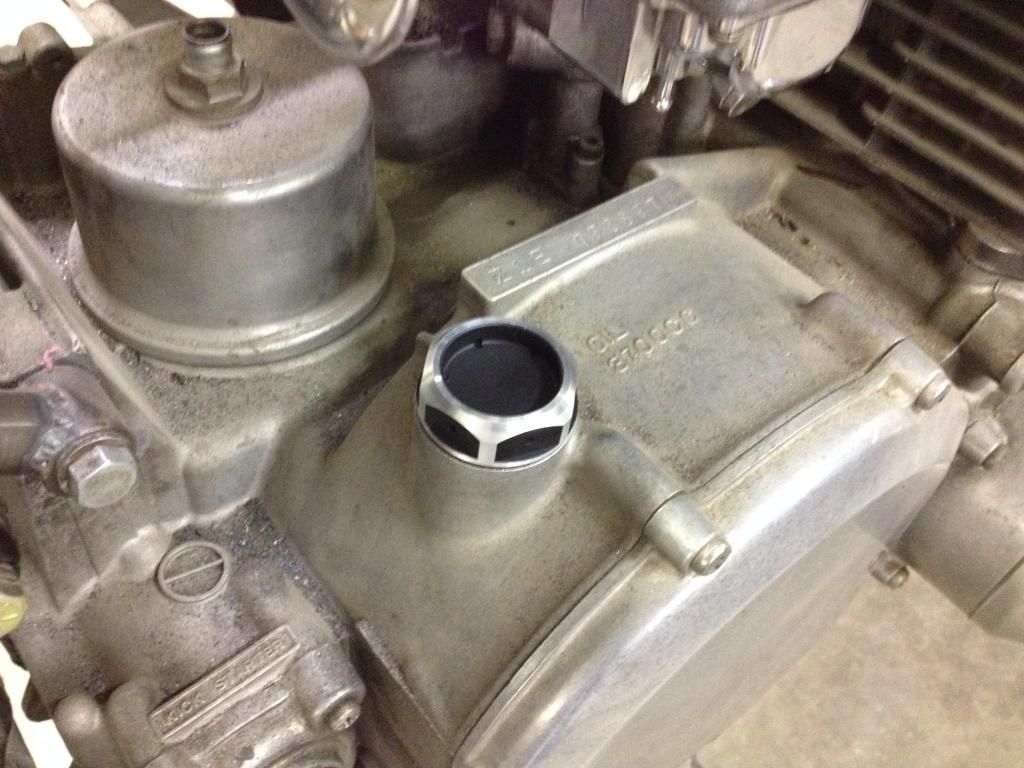
Thats it for now...not much progress......
Cory
2008 Kawasaki Concours 14
1999 Kawasaki ZRX1100
1976 Kawasaki KZ900
Please Log in or Create an account to join the conversation.
- NakedFun
-
 Topic Author
- Offline
- User
- Posts: 1095
- Thank you received: 99
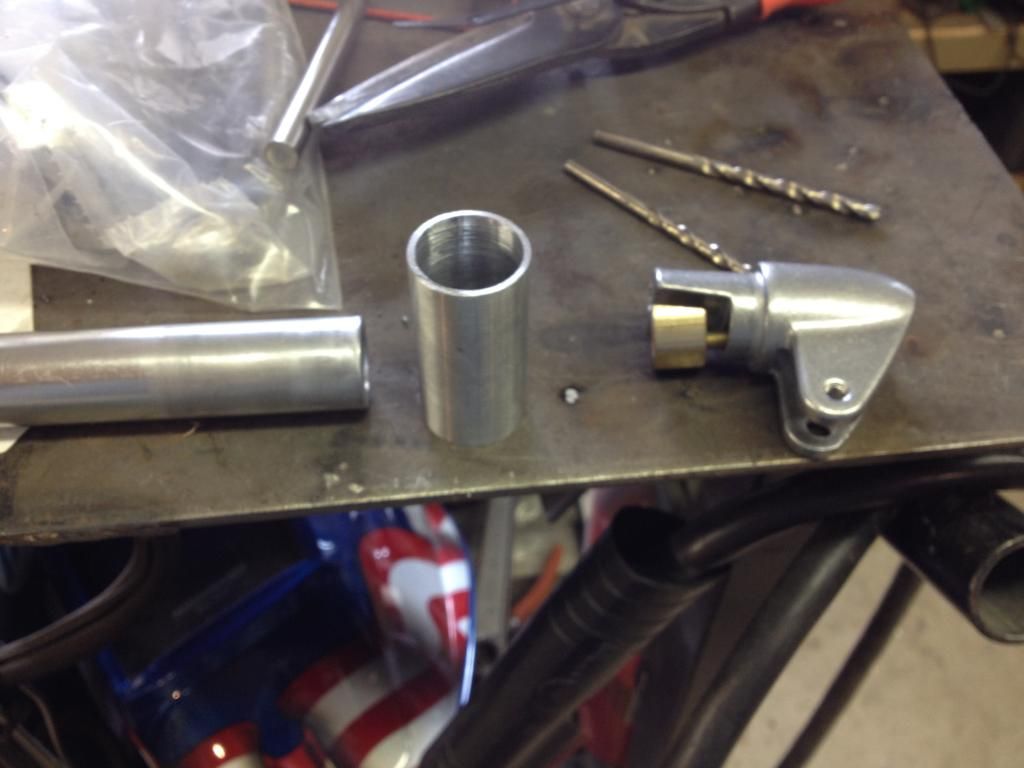
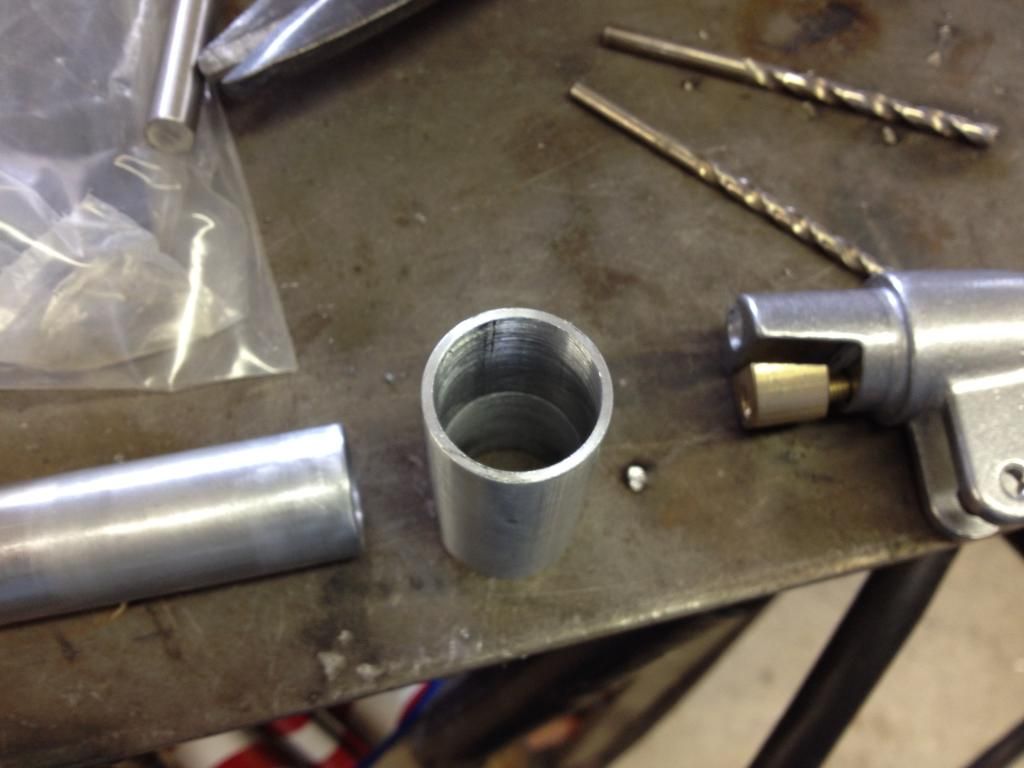
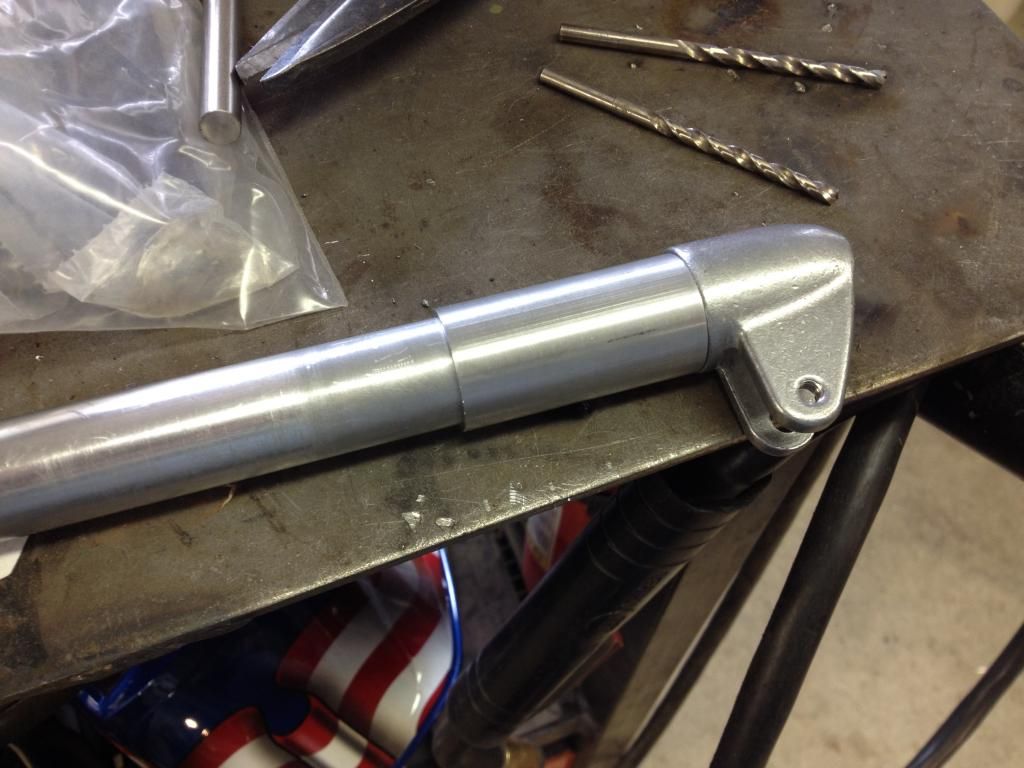
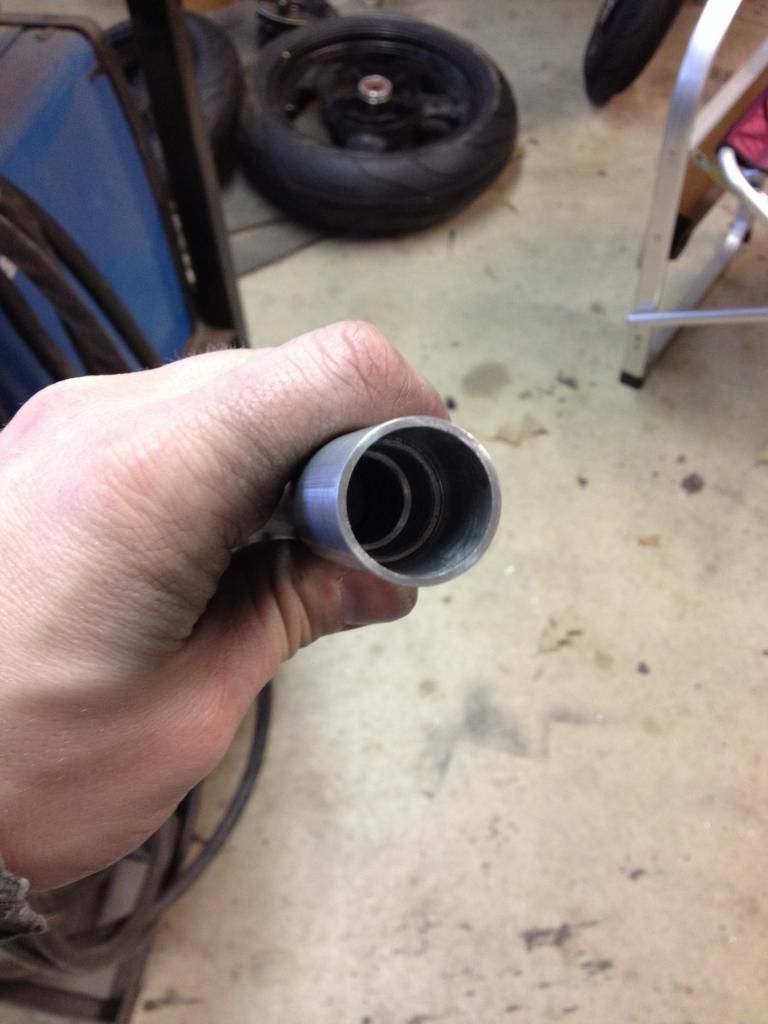
Now I did end up having to taper the inside of the clip on tube from .750" to the nominal .625" inoreder to allow enough clearance for the cable to transition from the larger end into the narrower section of the clip on.
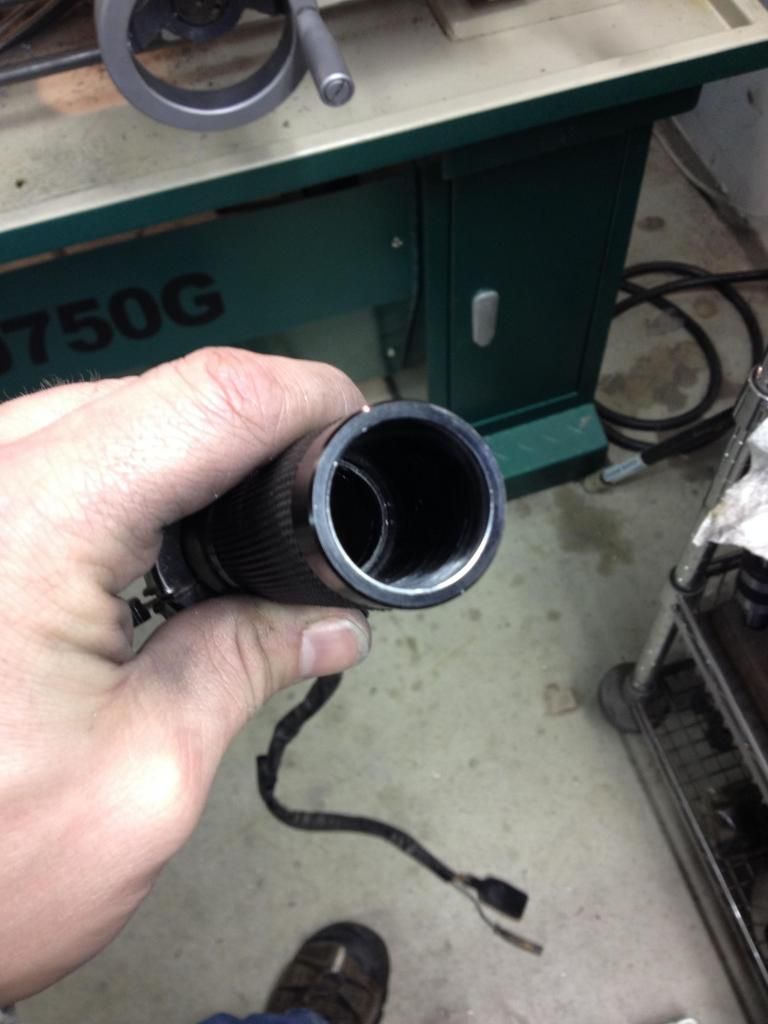
Now one problem I thought i would going to run into, I did. Since these required these adapter collars to go from the 1" OD levers to the 7/8" clip ons, this pushed the grips toward the center of the bike 2" away from the lever pivots. This created a misalignment of the hand to the lever. I ended up machining the Rizoma grips to fit over the adapter collars by maching the ID of the LH grip and cutting down the throttle tube about 1.5". This leaves about .5" exposed which I will build a egg shaped clamp that will slide over that section and attache my bar end mirrors to them.
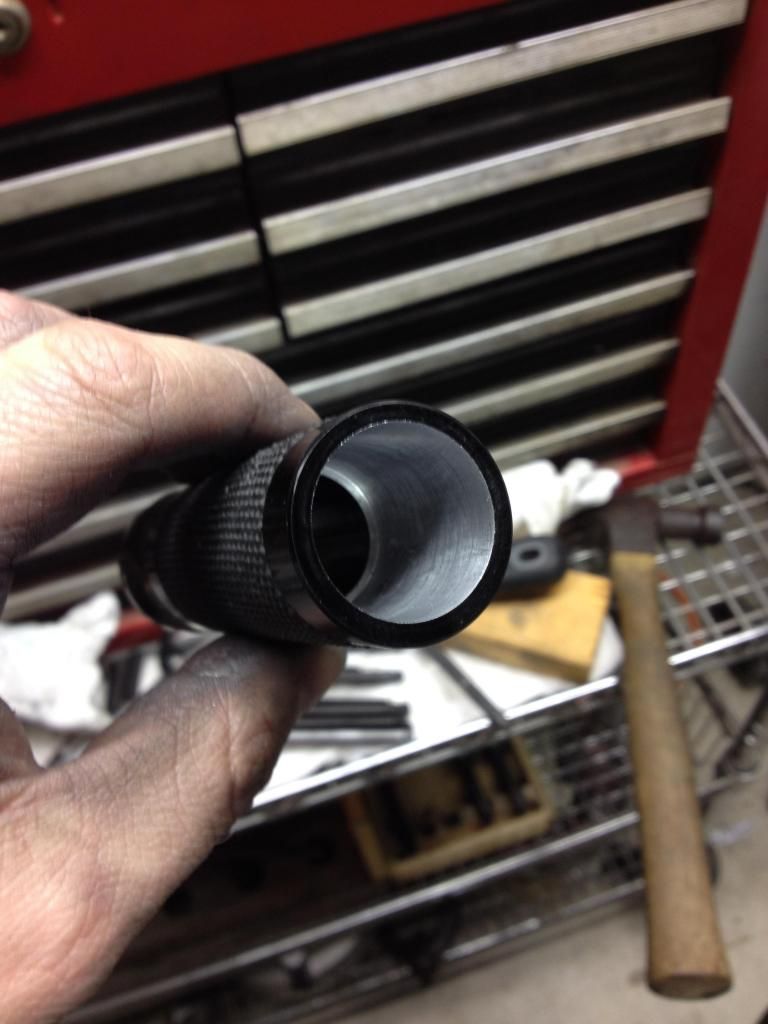
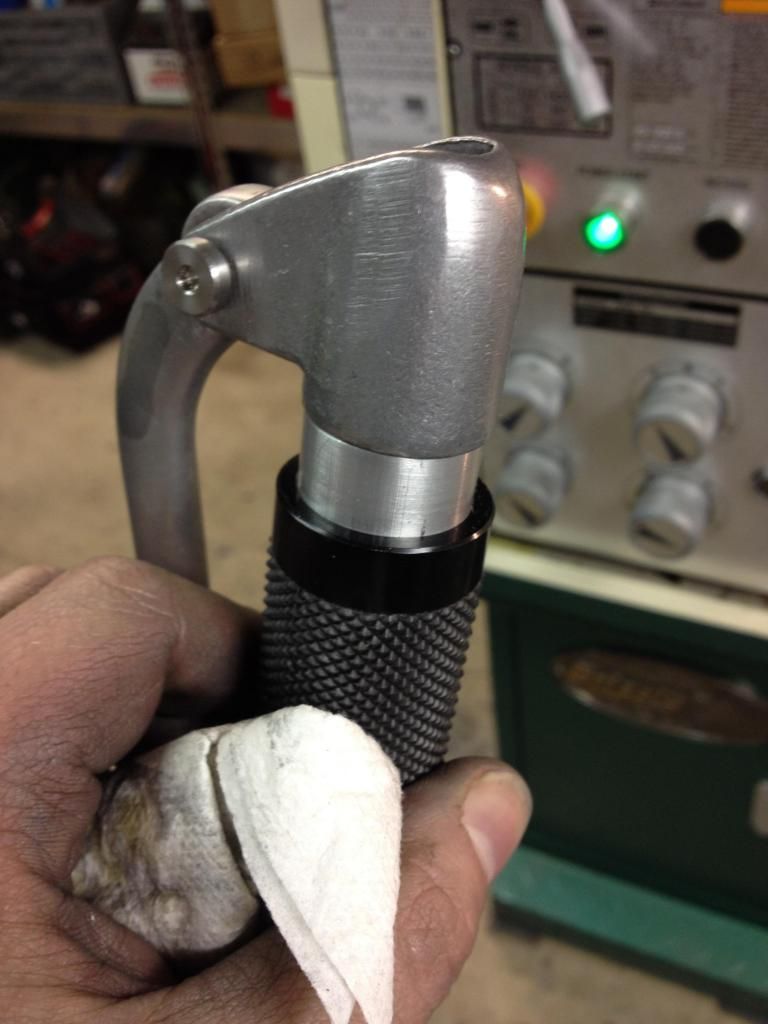
The (almost) finished lever setup....turned out Ok I think. Will polish out the adapters and clip on tubes. Also going to look at repainting and refurbishing my controls.
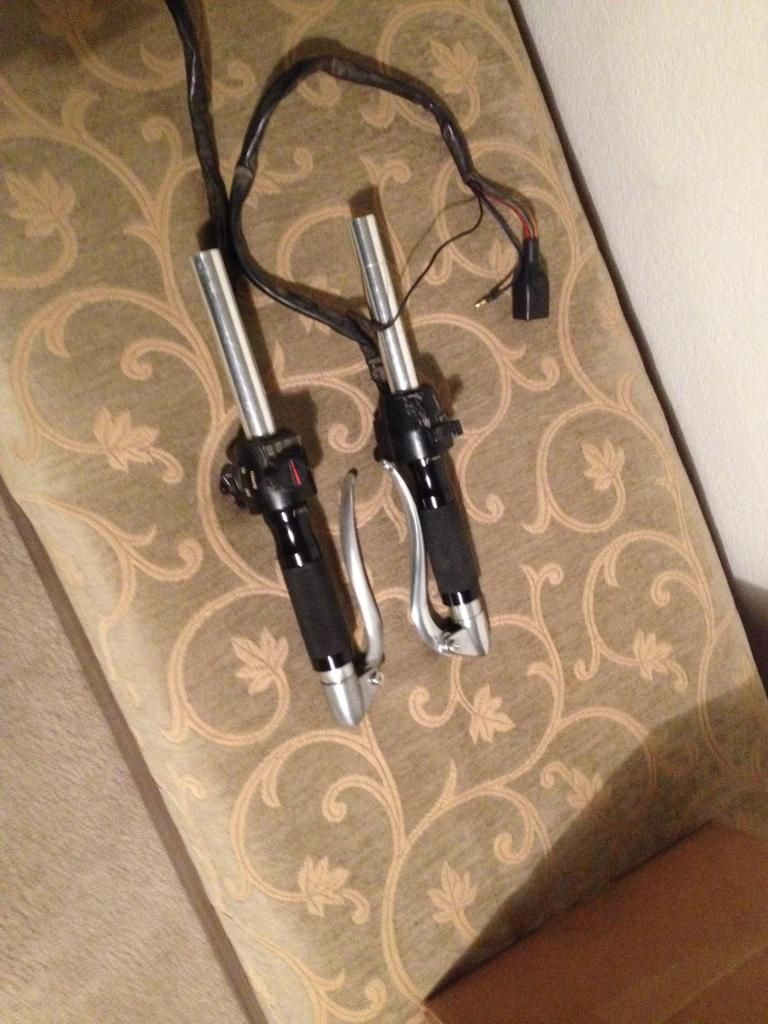
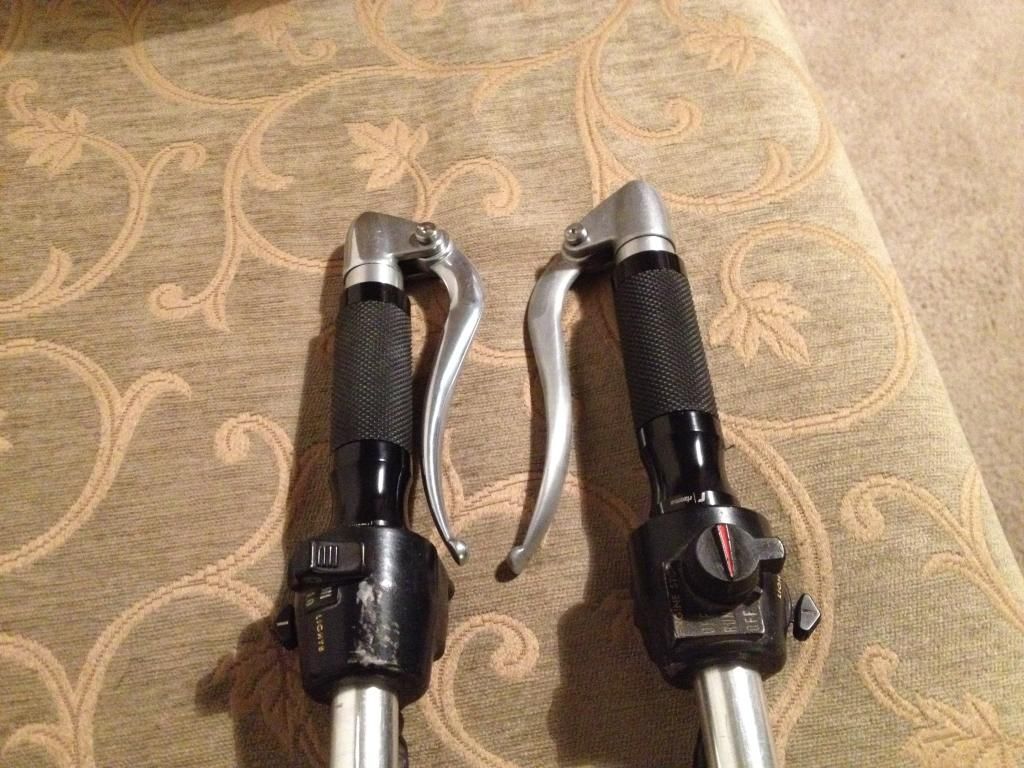
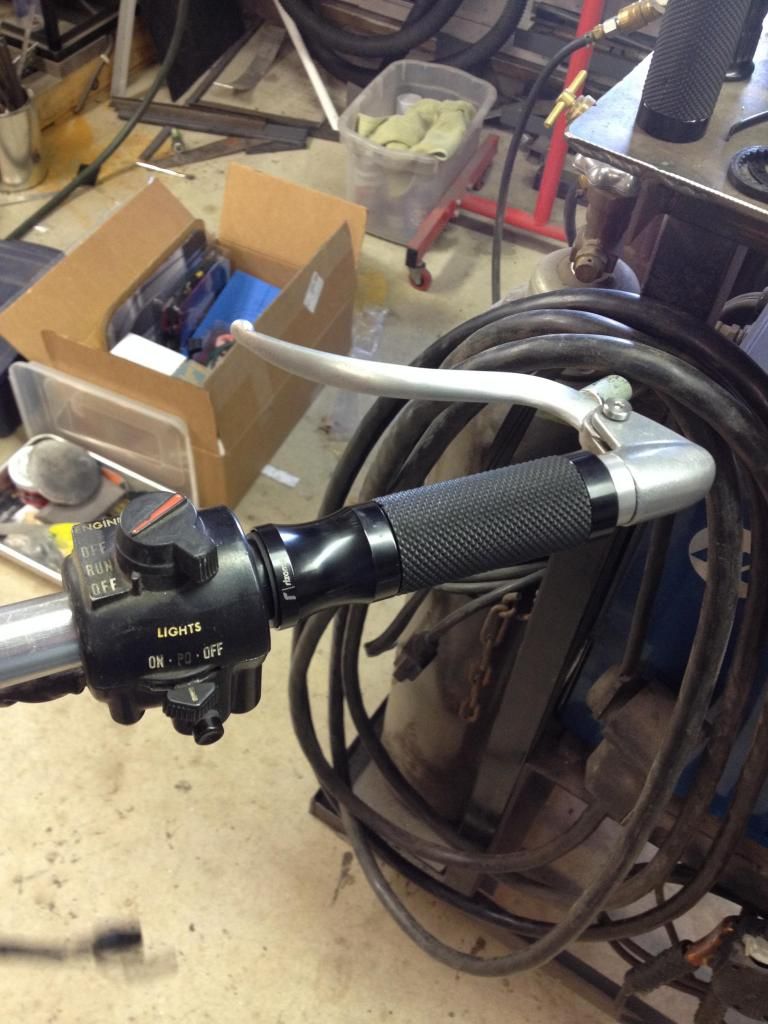
Thats it for now.....
Cory
2008 Kawasaki Concours 14
1999 Kawasaki ZRX1100
1976 Kawasaki KZ900
Please Log in or Create an account to join the conversation.
- spdygon
-
- Offline
- Platinum Member
- Posts: 1013
- Thank you received: 117
keep up the great work u doing.
1982 GS1000sz Katana ( #15...17K Miles)
1982 GS1000sz Katana ( # 297....7100k Miles)
1978 Kz1000 Z1R. 10K Miles1
1978 kz1000 z1r 27k miles
1977 KZ 1000 A ( Project ) 54K Miles
1976 Kz900A4 (Red)21K miles
1976 Kz900A4 ( Red)7500 miles
1974 Z1 900 project
Please Log in or Create an account to join the conversation.
- NakedFun
-
 Topic Author
- Offline
- User
- Posts: 1095
- Thank you received: 99
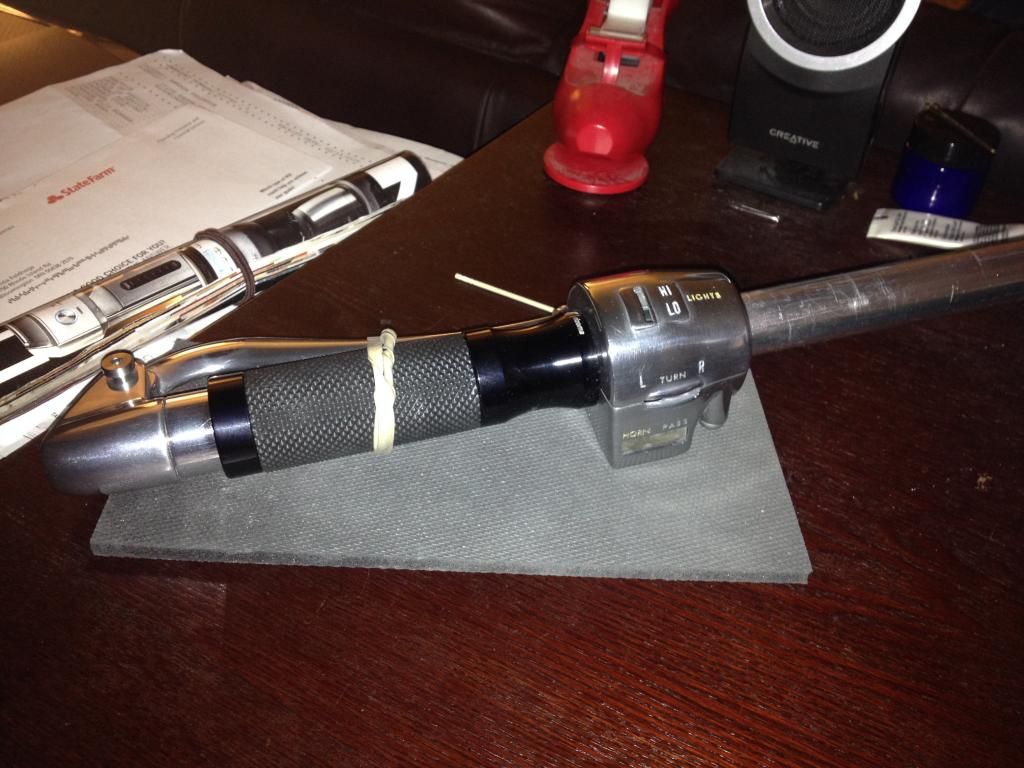
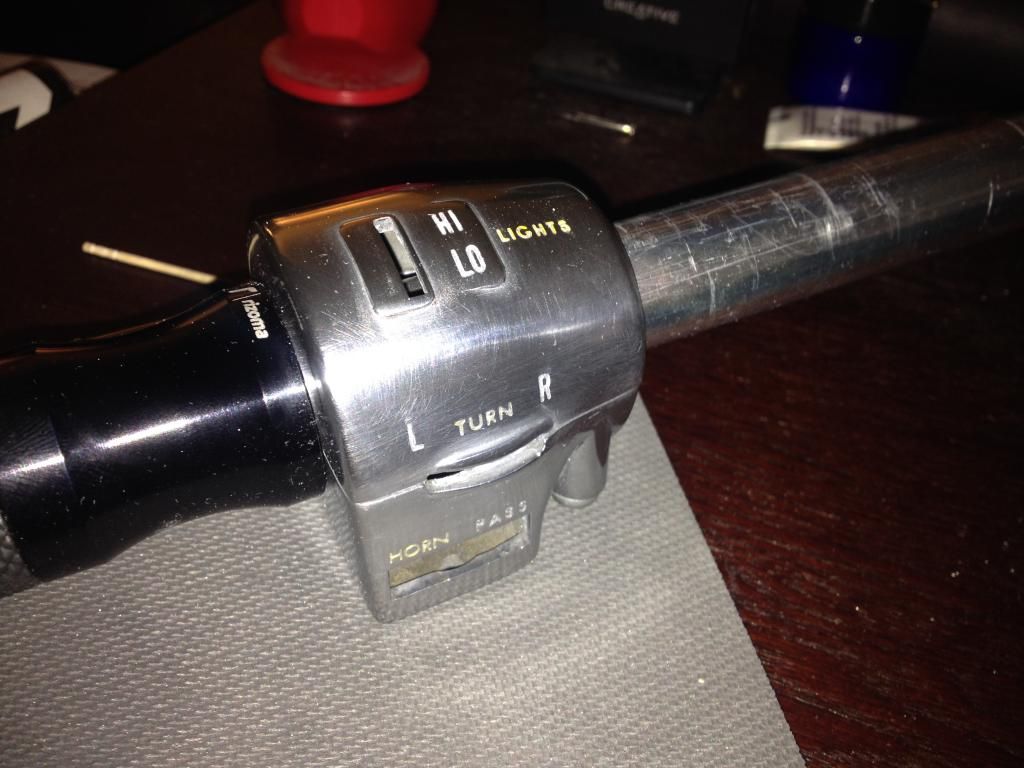
Has anyone done this? Thoughts on it? I think I like it, but I am not sold yet on it. If I do, will probable clear powder coat over all the polished bits. It looks better I think than the pics show. Should I leave it, or paint it black again?
Cory
2008 Kawasaki Concours 14
1999 Kawasaki ZRX1100
1976 Kawasaki KZ900
Please Log in or Create an account to join the conversation.
- 531blackbanshee
-
- Offline
- Vendor
- Posts: 7447
- Thank you received: 797
leon
skiatook,oklahoma 1980 z1r,1978 kz 1000 z1r x 3,
1976 kz 900 x 3
i make what i can,and save the rest!
billybiltit.blogspot.com/
www.kzrider.com/forum/5-chassis/325862-triple-tree-custom-work
kzrider.com/forum/5-chassis/294594-frame-bracing?limitstart=0
Please Log in or Create an account to join the conversation.

