- Posts: 346
- Thank you received: 42
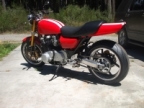
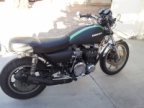
93' KZ1000 Police cafe' project
- Haybus
-

- Offline
- User
- Big Al
1976 KZ900 LTD (sort of)
2005 FJR
2009 Hayabusa
www.kzrider.com/forum/11-projects/557845...-streetfighter-build
Please Log in or Create an account to join the conversation.
- gengomerpyle
-
- Offline
- User
- Posts: 616
- Thank you received: 17
1982 GPZ750R1 ELR
1978 Honda CB750F SuperSport
1971 Honda CB750K
1970 Honda CL100 Scrambler
Please Log in or Create an account to join the conversation.
- RLB454
-
 Topic Author
- Offline
- User
- Posts: 77
- Thank you received: 4
I havent really done much since the last set of pics, progress is slow. I suppose I should sell some surplus parts so I can buy KZ parts, but it is sooooo hard to let go of parts! ha ha.
Since last update, all I have gotten done is rebuilding the brake calipers, ordered up new top and bottom fork bushings (I should have done this before I put the forks back together), ordered a slim line LED tail light from Airtech, and today I made the pattern for the rearset brackets. I thought I would be ok with the stock side stand location, but as it turns out, it is going to be right in the way of my left toe and the shift arm :blush: I think I just might have figured out how to remedy this problem though as I am typing this :woohoo:
74' RD350
79' RD400F
02' Aprilia Capo Nord
92' KZ1000 Police cafe "Snoopy"
Please Log in or Create an account to join the conversation.
- Haybus
-

- Offline
- User
- Big Al
- Posts: 346
- Thank you received: 42
1976 KZ900 LTD (sort of)
2005 FJR
2009 Hayabusa
www.kzrider.com/forum/11-projects/557845...-streetfighter-build
Please Log in or Create an account to join the conversation.
- RLB454
-
 Topic Author
- Offline
- User
- Posts: 77
- Thank you received: 4
74' RD350
79' RD400F
02' Aprilia Capo Nord
92' KZ1000 Police cafe "Snoopy"
Please Log in or Create an account to join the conversation.
- Primer
-

- Offline
- User
- Posts: 52
- Thank you received: 4
Of course, with your pics and Porchev914s build, I might have to give it a go with making my own seat section! :woohoo:
Please Log in or Create an account to join the conversation.
- Renninger
-

- Offline
- User
- Posts: 32
- Thank you received: 0
RLB454 wrote: The tank is a 79' Yamaha XS750. Not much work at all to fit it to the frame.
what did you do to make it fit?
Please Log in or Create an account to join the conversation.
- RLB454
-
 Topic Author
- Offline
- User
- Posts: 77
- Thank you received: 4
I integrated/molded in mounting posts on the underside of the seat, and welded on mounting brackets to the frame. It slips right down into place, and is very solid. I will try to post pics in the next day or two. A lot of aftermarket seats are mounted up with a custom frame, using the stock hinges and latch, then bolted down through the top of the seat into the custom seat frame. The bolts are covered by the pad/upholstery.
Renninger:
To make the tank fit, I removed the front mounts on the frame, and had to weld up new ones that would fit the Yamaha tank rubbers. They also needed to be in a different location, but still on the beefy section of the frame gusset. The rear mount was almost perfect with no modification, but not quite right, so a little cutting and welding later, the tank fit perfectly.
74' RD350
79' RD400F
02' Aprilia Capo Nord
92' KZ1000 Police cafe "Snoopy"
Please Log in or Create an account to join the conversation.
- Primer
-

- Offline
- User
- Posts: 52
- Thank you received: 4
The bike looks awesome, I will definitely be following your progress. Good luck!
Please Log in or Create an account to join the conversation.
- RLB454
-
 Topic Author
- Offline
- User
- Posts: 77
- Thank you received: 4
Here are a couple, hope it helps explain how I did it a little bit. To get the mounting studs lined up perfect, I welded on bolts onto 1" X 1/8" flat stock, then I jigged up the seat so it would slip down and rest perfectly in place, and adjusted the flat stock up til it touched the bottom of the seat, and nutted it down. Then of course lifted the seat off, and put generous amounts of epoxy on the top of the flat stock, and slipped the seat into place. Once dry, I fiber glassed over the flat stock, fit some PVC sections around the bolts, and filled with liquid rubber. Voila! seat mounts. Make sense?
74' RD350
79' RD400F
02' Aprilia Capo Nord
92' KZ1000 Police cafe "Snoopy"
Please Log in or Create an account to join the conversation.
- Primer
-

- Offline
- User
- Posts: 52
- Thank you received: 4
The seat integrates so well with that tank...it has a killer stance and I can't wait to see more!
Please Log in or Create an account to join the conversation.
- RLB454
-
 Topic Author
- Offline
- User
- Posts: 77
- Thank you received: 4
Primer wrote: RLB454: No troubles, thank you very much for taking the time to explain and post pics. I think that does make sense. So when all is said and done, the seat rests on the liquid rubber spacers and is held in place with the integral bolts attached the flat stock, which is under the second layer of fiberglass...correct?
Exactly. Oh, the rubber is now solid, just a two part liquid before mixing. Thanks for the compliments. I just wish this project was moving a little faster.
74' RD350
79' RD400F
02' Aprilia Capo Nord
92' KZ1000 Police cafe "Snoopy"
Please Log in or Create an account to join the conversation.


