
Search Results (Searched for: gs swing arm)
Replied by Kidkawie on topic Looking for updating my Z1000J 1983
14 Feb 2020 00:26 - 14 Feb 2020 00:28
The problem is you used a 750cc rear wheel. If you study the Kawasaki parts diagrams and compare bearing and axle sizes youd see they went with a larger axle on 900cc+ bikes. I think the swingarm pivot is smaller on 750 and smaller bikes too.
To use that wheel you can probably use the 750 axle and machine T shaped bushings to make up the space in the axle adjusters
Check the chain sizes too.
To use that wheel you can probably use the 750 axle and machine T shaped bushings to make up the space in the axle adjusters
Check the chain sizes too.
Replied by Scirocco on topic Looking for updating my Z1000J 1983
13 Feb 2020 16:12 - 13 Feb 2020 16:18
Leave the inner spacer (socket) between the new wheel bearings untouched!!!
The inner spacer will keep the ID races of the new (old) bearings in place as same as the outer L/R spacer that maybe need to modify to fit the swing arm opening (maybe).
Do you want to use the Z1000J rear sproket carrier on the GPZ750 wheel, did it fit in the damping Rubbers?
The inner spacer will keep the ID races of the new (old) bearings in place as same as the outer L/R spacer that maybe need to modify to fit the swing arm opening (maybe).
Do you want to use the Z1000J rear sproket carrier on the GPZ750 wheel, did it fit in the damping Rubbers?
Replied by NakedFun on topic KZ1000 Muscle Bike Build - ZRX Swingarm, ZX9R Fork
04 Feb 2020 17:52
My ears must have been burning....... Responded to your PMs.
My bike is still in progress and hope to have it done this summer.
I’ll try to answer what I can, but I wrote a pretty detailed thread...... I have kept all of my pictures and detailed drawings of what I have machined, etc.... so I will help in any way I can.
I had to just figure it out, no blueprints in custom bike building......
Cory
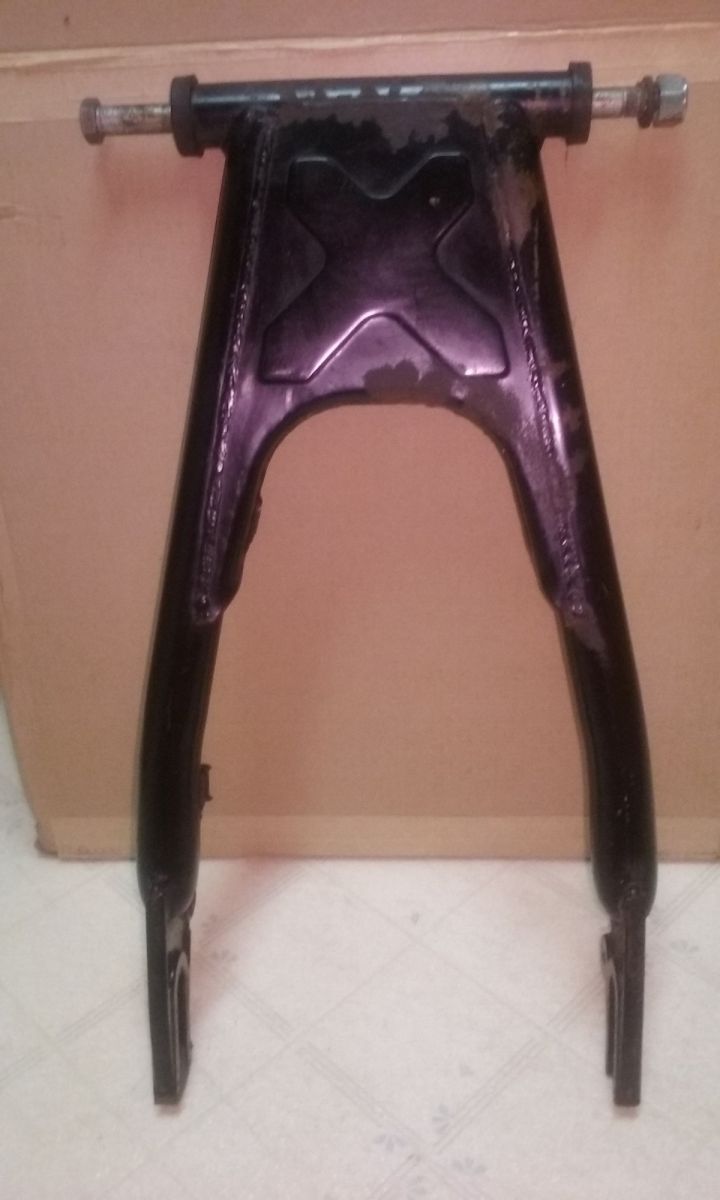
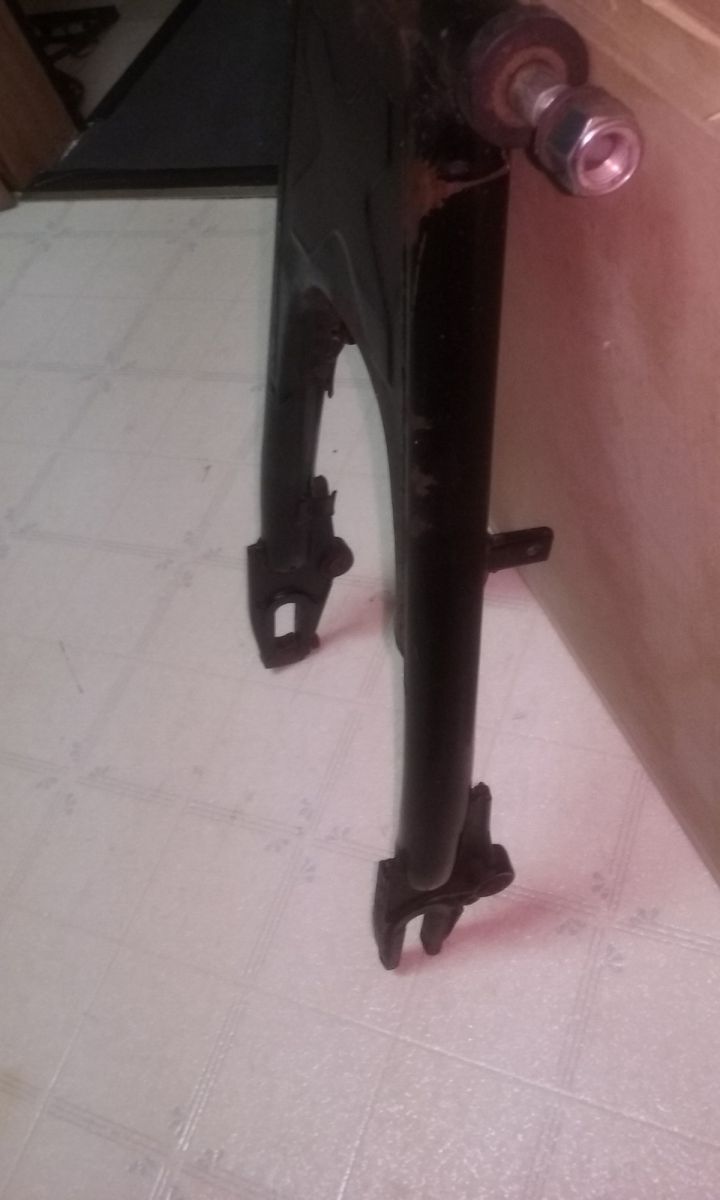
GS1000 swingarm fits kz900/kz1000 was created by Pat6470
04 Feb 2020 01:22 Pat6470
GS 1000 swingarm for your kz the Suzuki arm is both longer and wider than stock 900's nd 1000's. Good condition $50.00 + shipping from 16602
In case it needs to be said, the wheel should be rock solid. No movement at all.
And be sure to check the swing arm for movement as well >> those bearings can fail.
And be sure to check the swing arm for movement as well >> those bearings can fail.
Nice! glad you got out, it was warm enough here too but we are going through a thaw and everything is mush so I knuckled down and changed the fork seals, springs and front brakes on the Mrs bike, now it's the Kz's turn for maintenance.
That's a sharp looking Wing but the bridge looks like it has seen better days
Theses are pics taken in Utica IL showing 3 generations of bridges crossing the Illinois river
I'm standing on the original road/ramp to what was a swing bridge, facing the new bridge with old steel bridge slated to come down this year in the background.
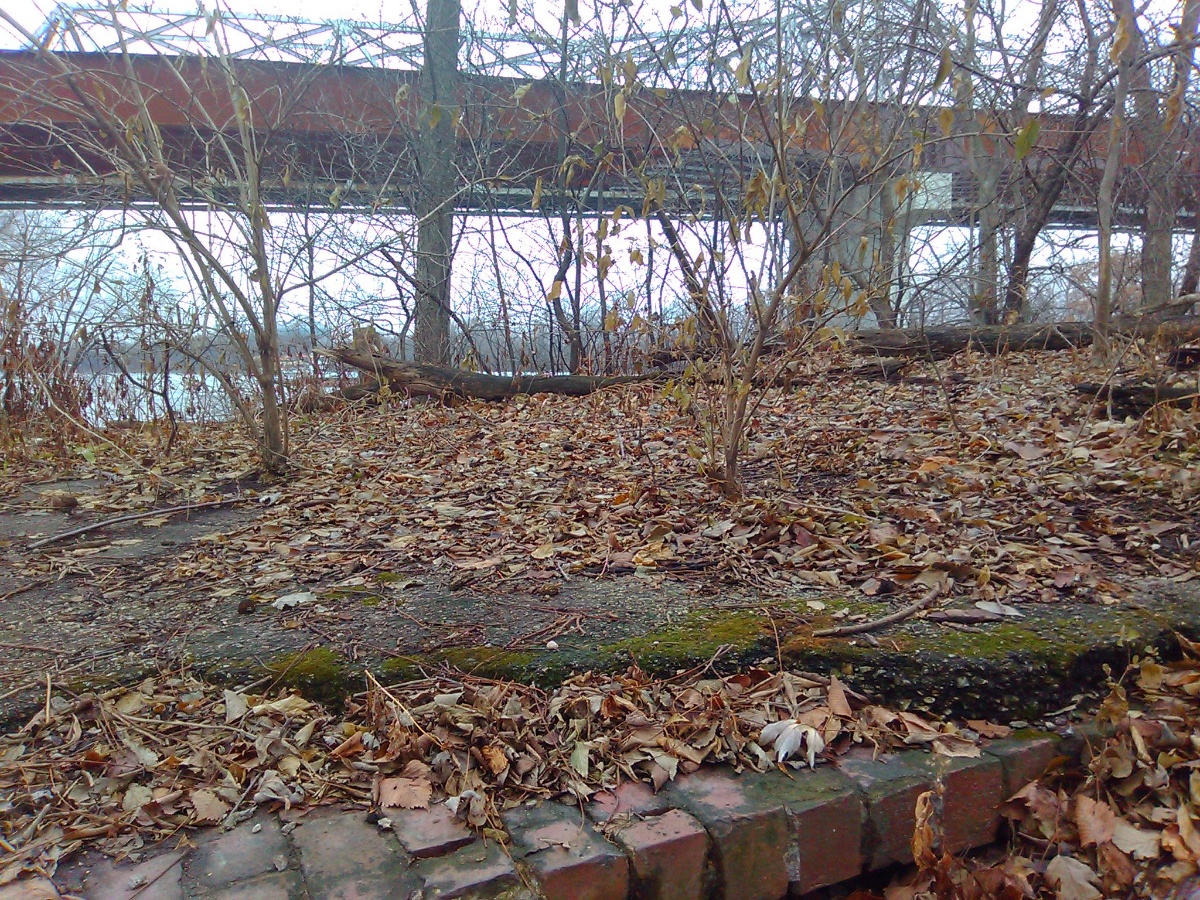
Replied by Mikaw on topic KZ900 - updated suspension
28 Jan 2020 07:49Kidkawie wrote: Is the GS swingarm longer than stock? Does it allow for a wider tire?
I’ll measure my stock and compair to these dimensions. What I have heard is about 1 1/2” - 2” longer and maybe up to a 160 tire
Replied by Kidkawie on topic KZ900 - updated suspension
28 Jan 2020 00:43
Is the GS swingarm longer than stock? Does it allow for a wider tire?
Replied by Mikaw on topic Rear caliper issue
25 Jan 2020 14:48
No eBay APP ID and/or Cert ID defined in Kunena configurationScirocco is correct... That a GS1100E swingarm… I think this is the bushing you need...
Looks like a 81-83 Suzuki GS1100E swingarm.
kzrider.com/forum/13-bike-related/612005...ating-my-z1000j-1983
kzrider.com/forum/13-bike-related/612005...ating-my-z1000j-1983
Displaying 491 - 500 out of 7254 results.