
Search Results (Searched for: gs swing arm)
Replied by Wookie58 on topic And finally, Wookie's 82 begins !
26 Mar 2023 10:30
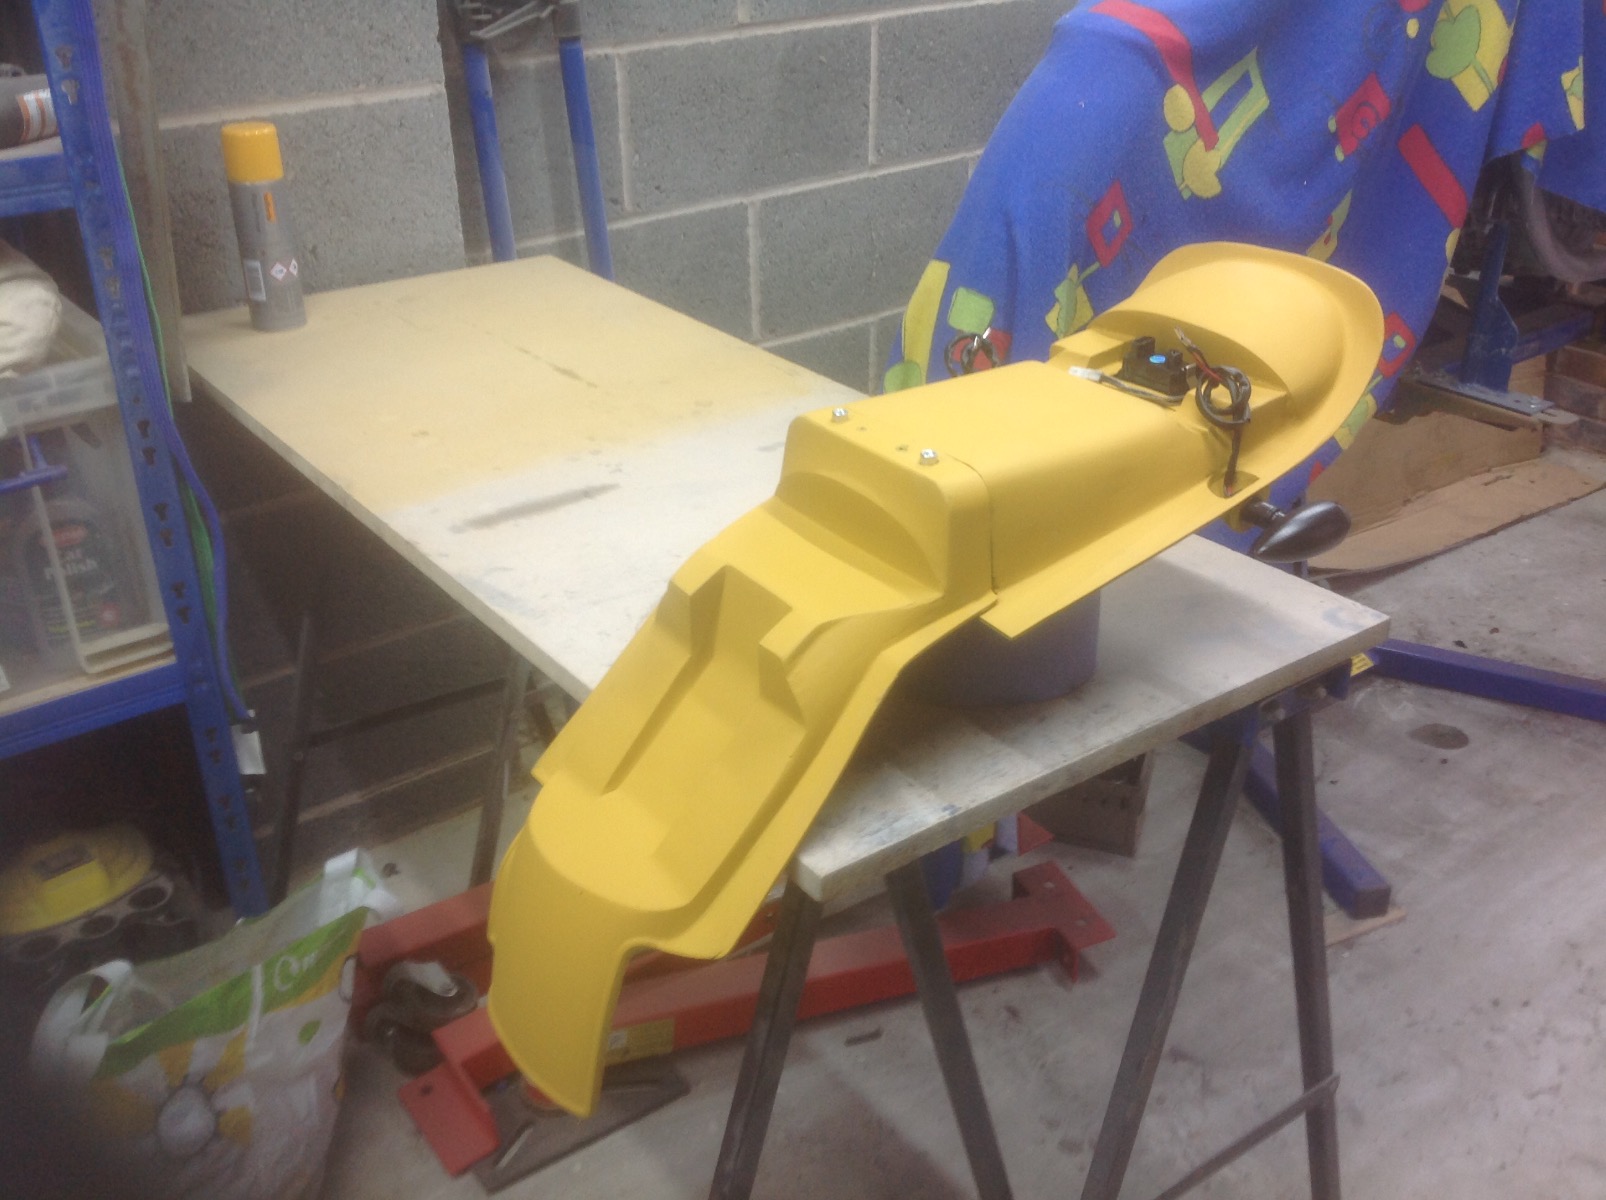
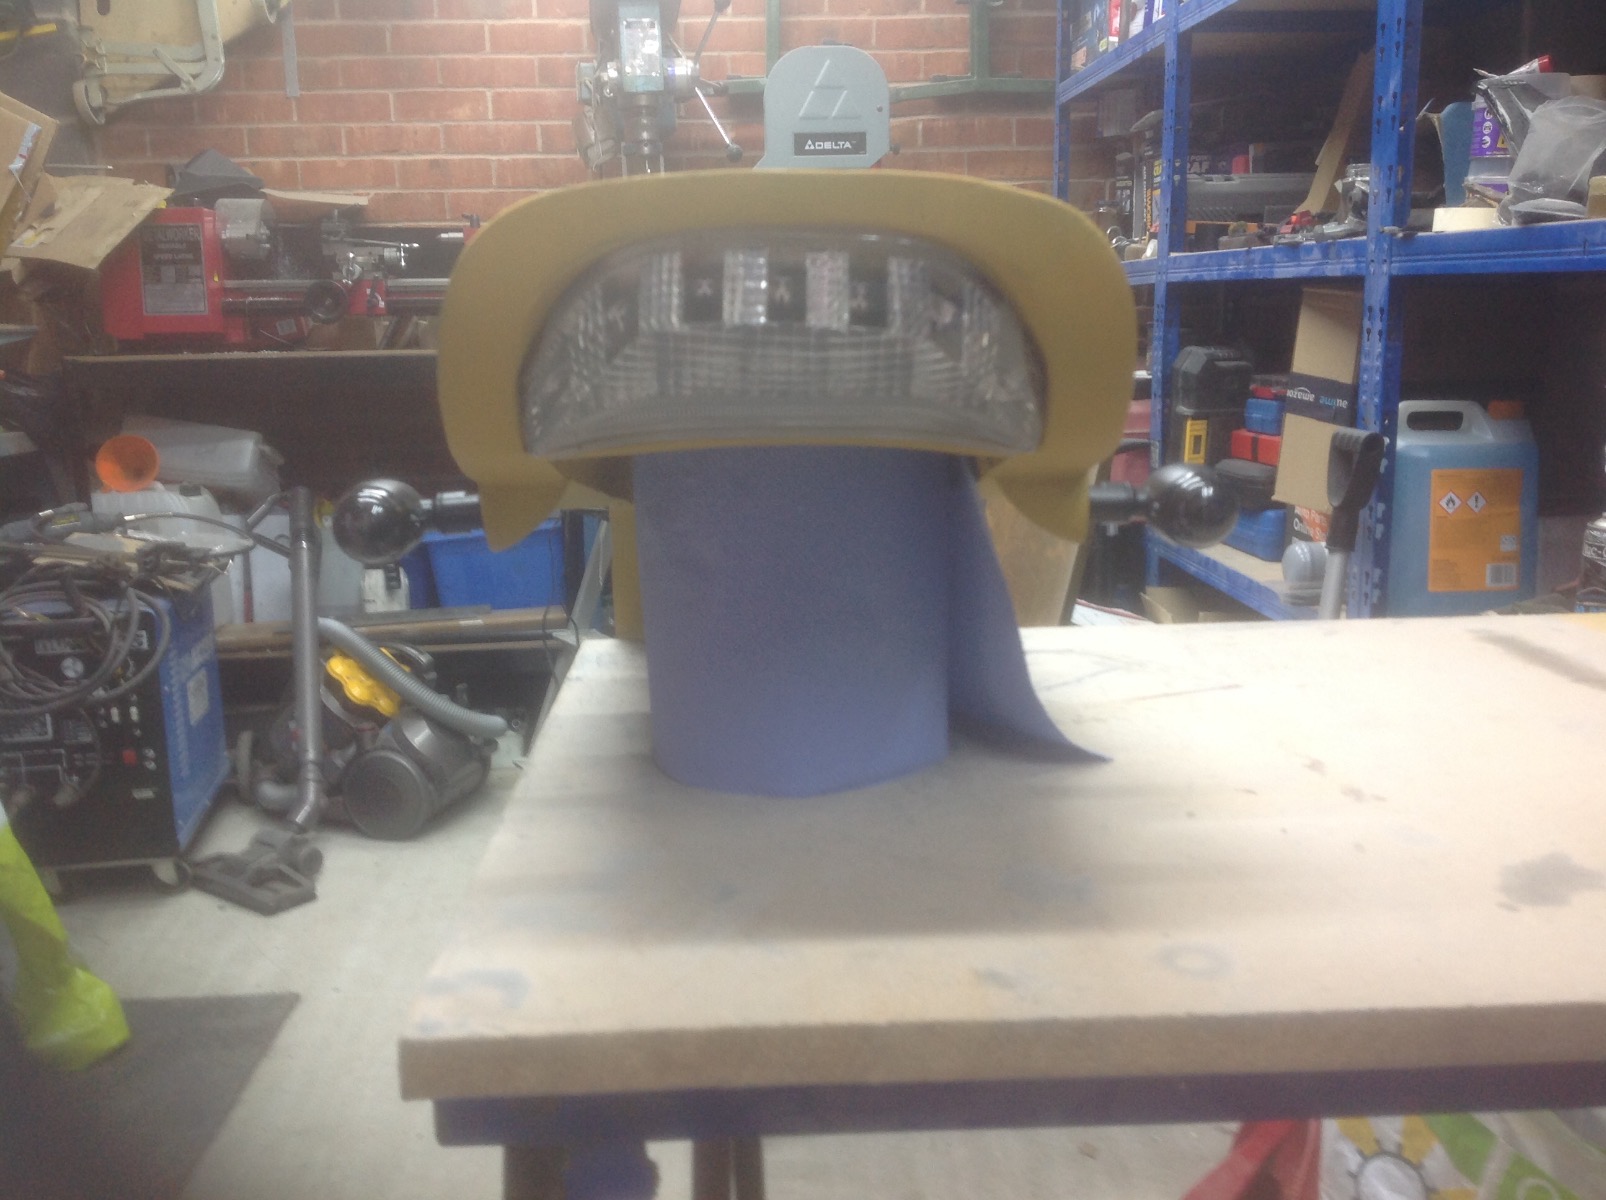
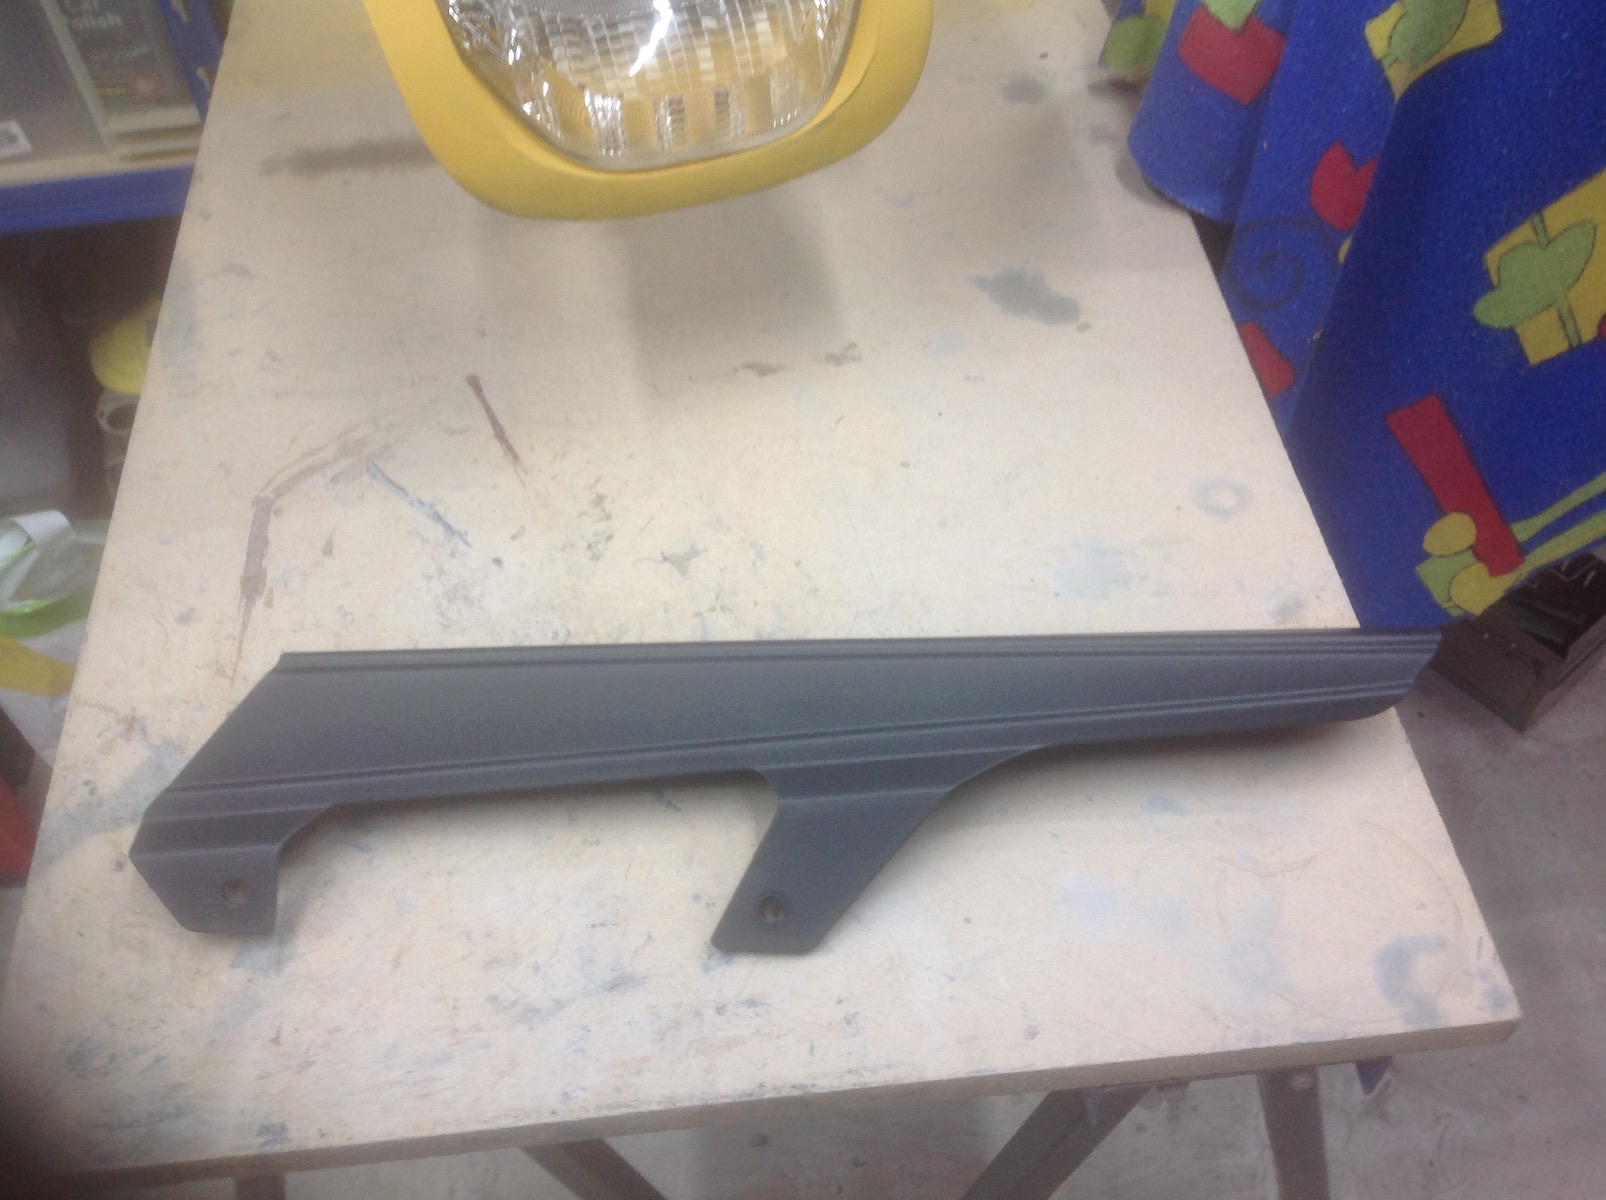
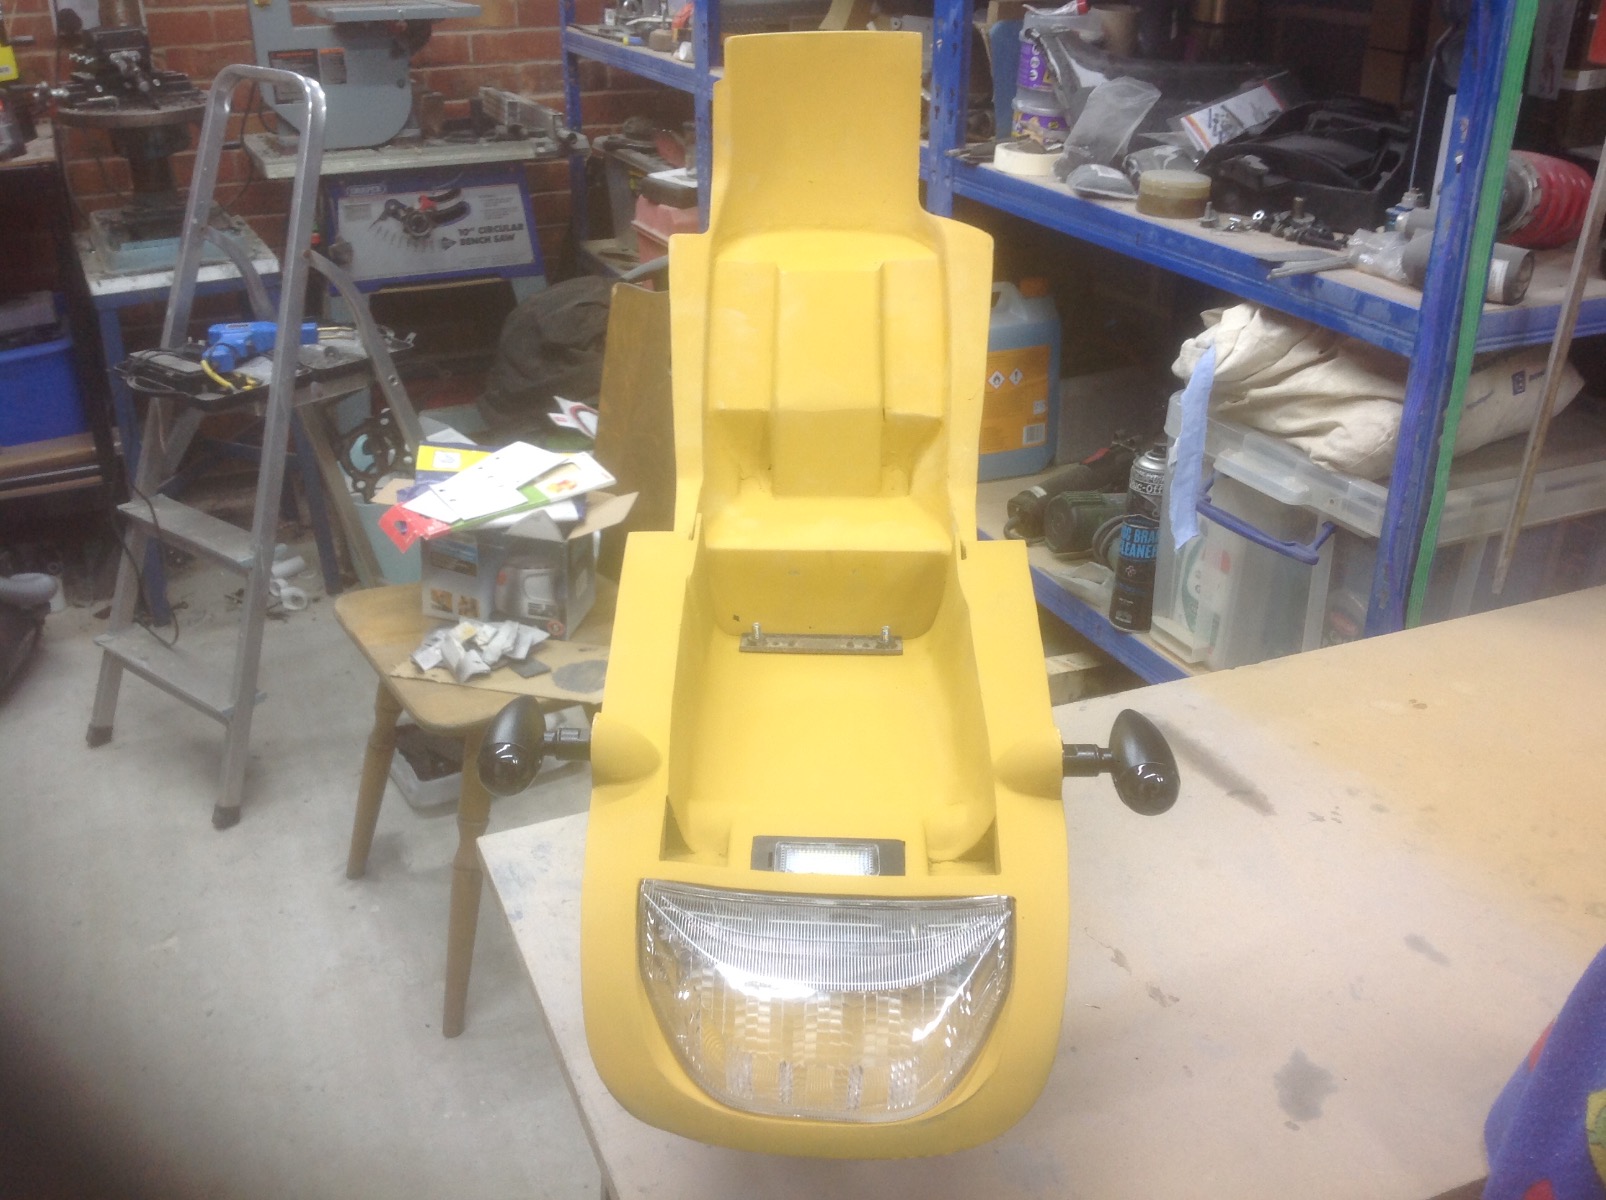
I have really been struggling to get time on the build since Christmas but managed to get a day on it today. I've finally finished up the light panel/rear fender (this has been a complete PITA to scratch build in plastic) I'm really happy with how it's turned out. I also managed to score a chain guard on evilbay, this is an OEM GSXR item which is correct for the swinging arm I am using. It was removed from the donor 20 years ago when it was almost new. The condition as you see it is how it arrived (like new)
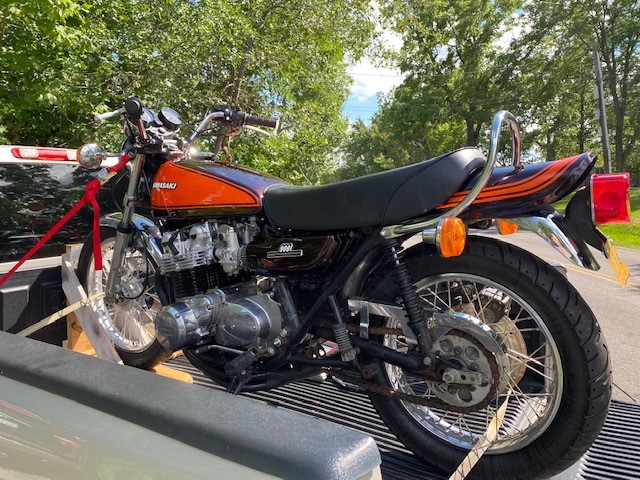
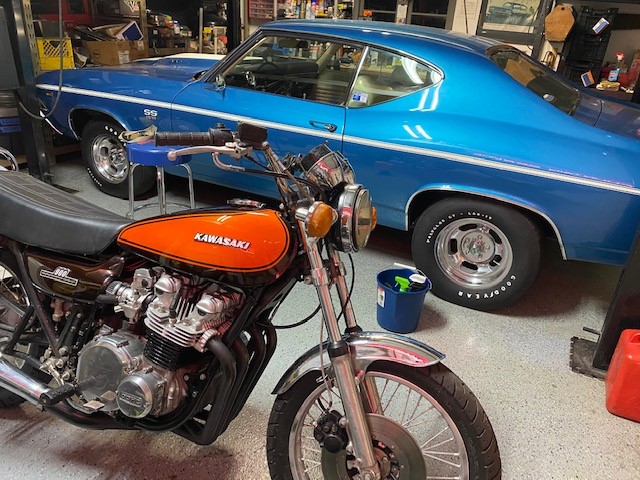
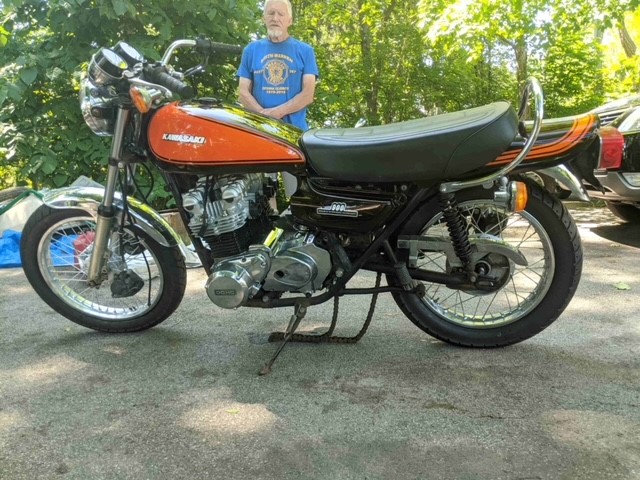
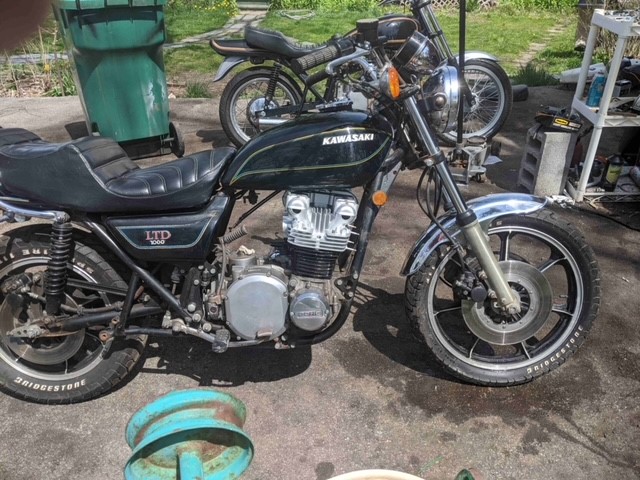
Replied by moizeau on topic Thanks for letting me in
10 Mar 2023 03:57 moizeau
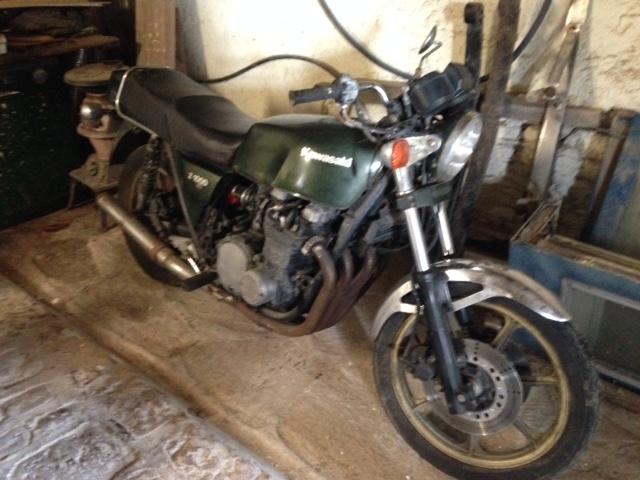
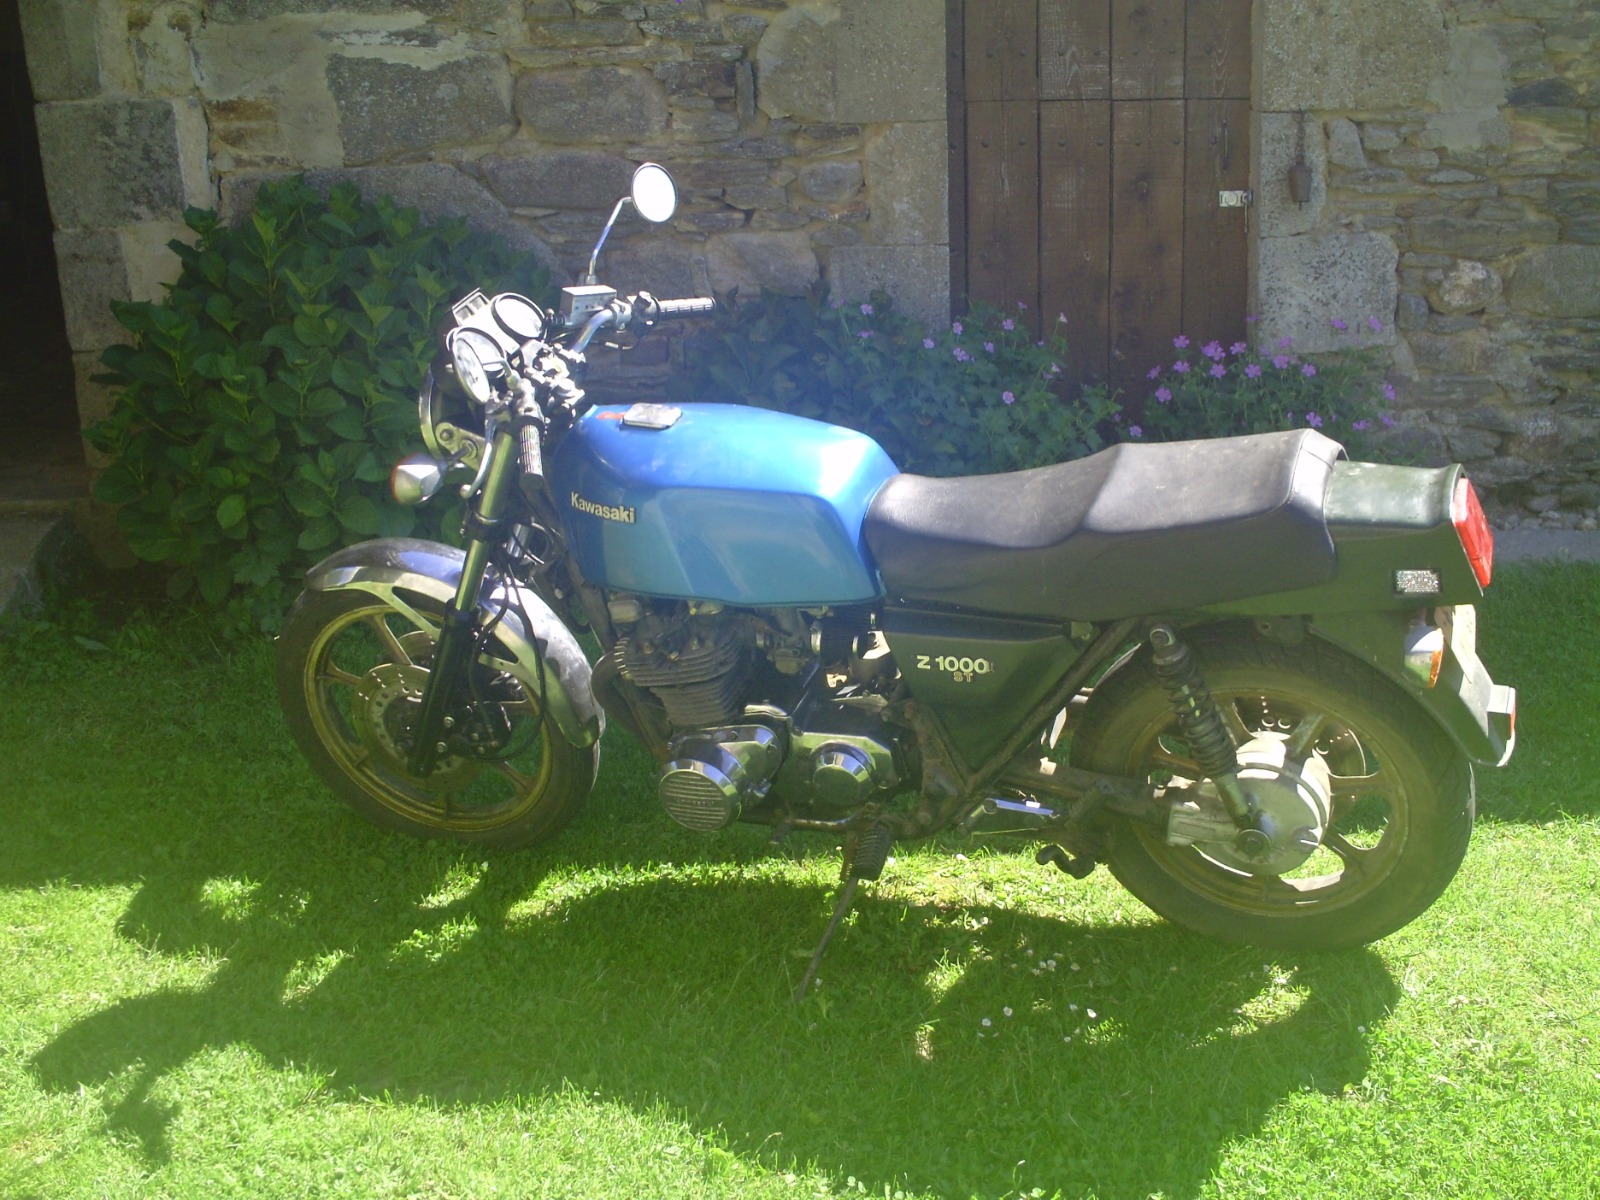
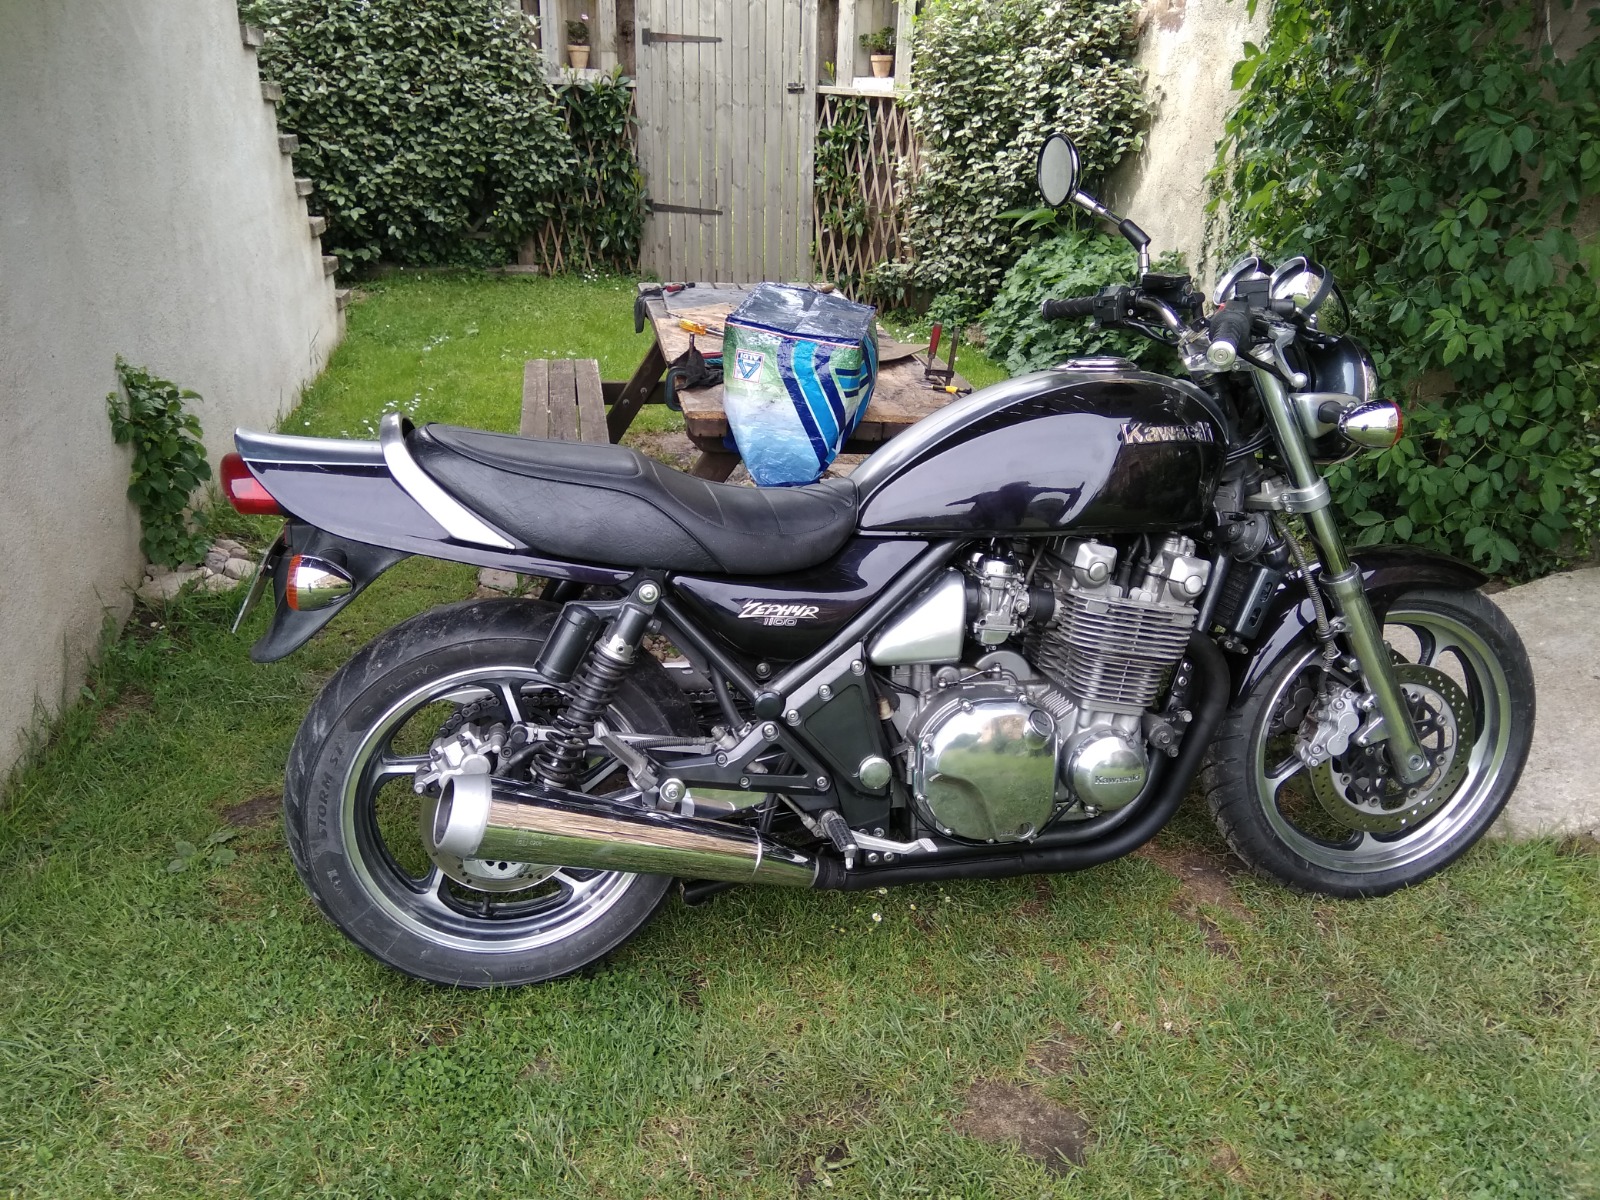
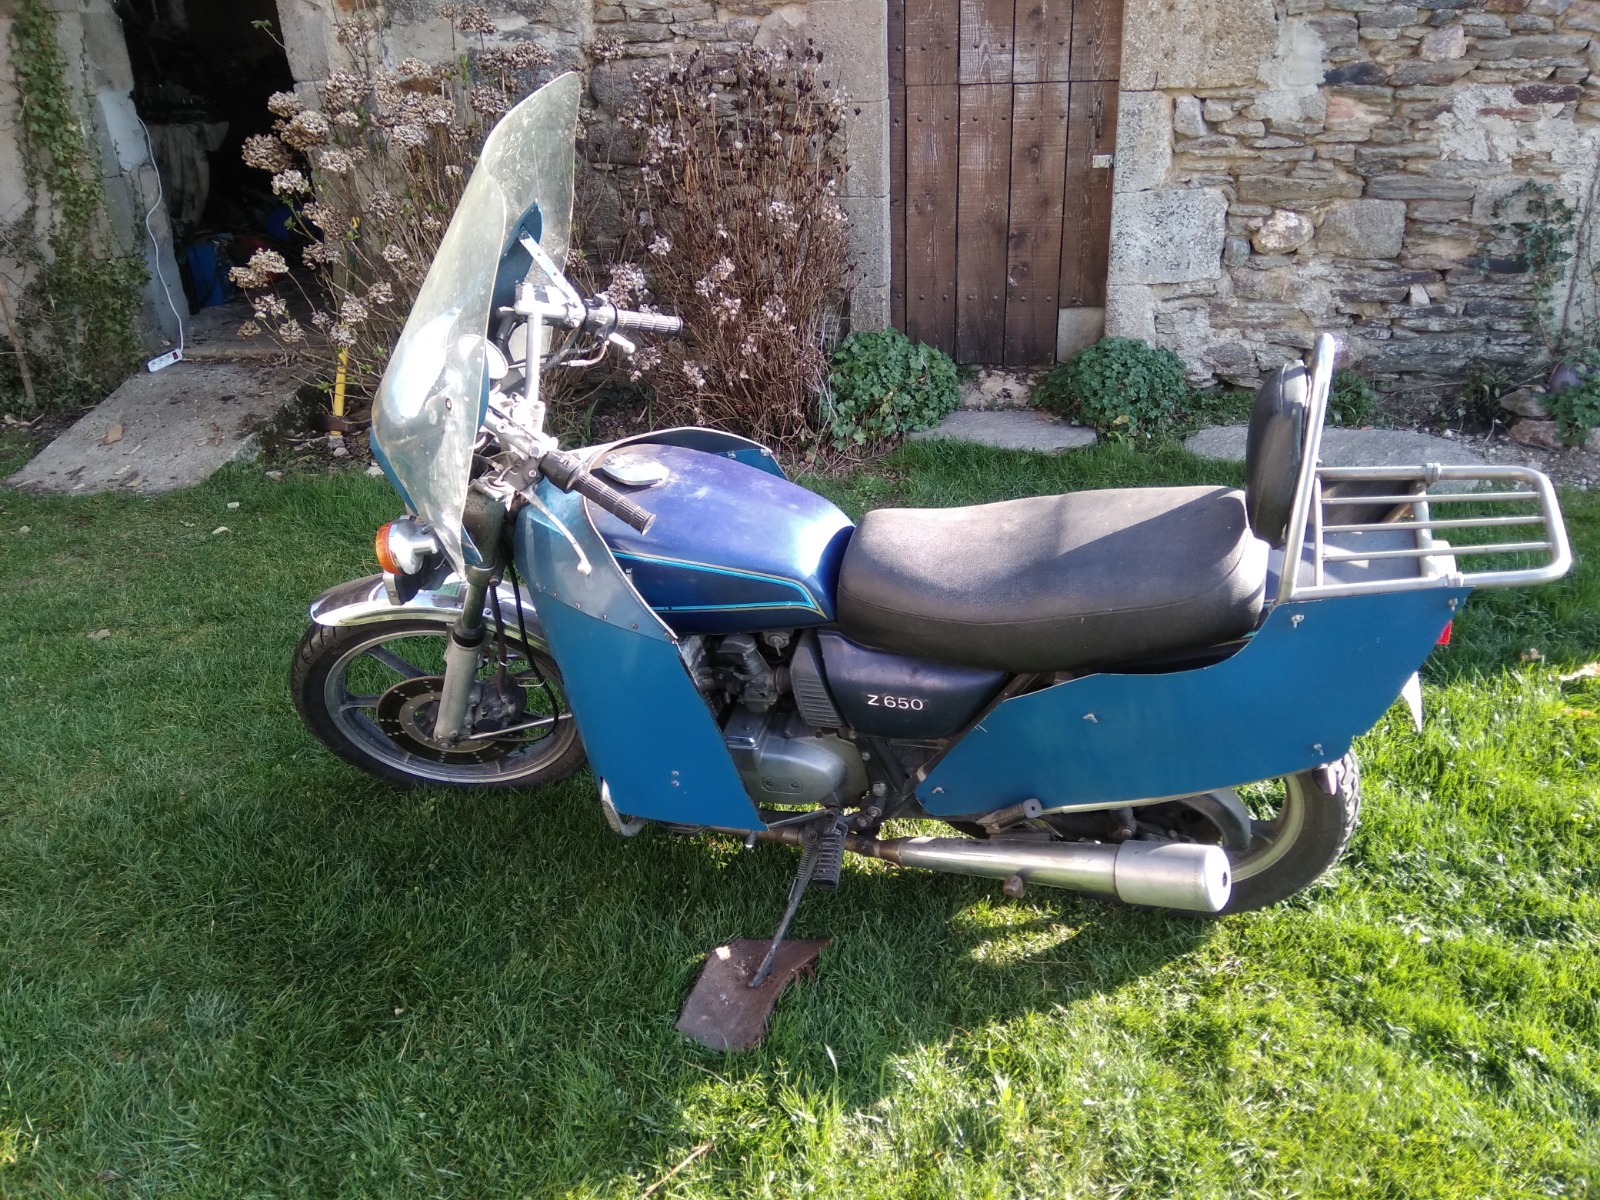
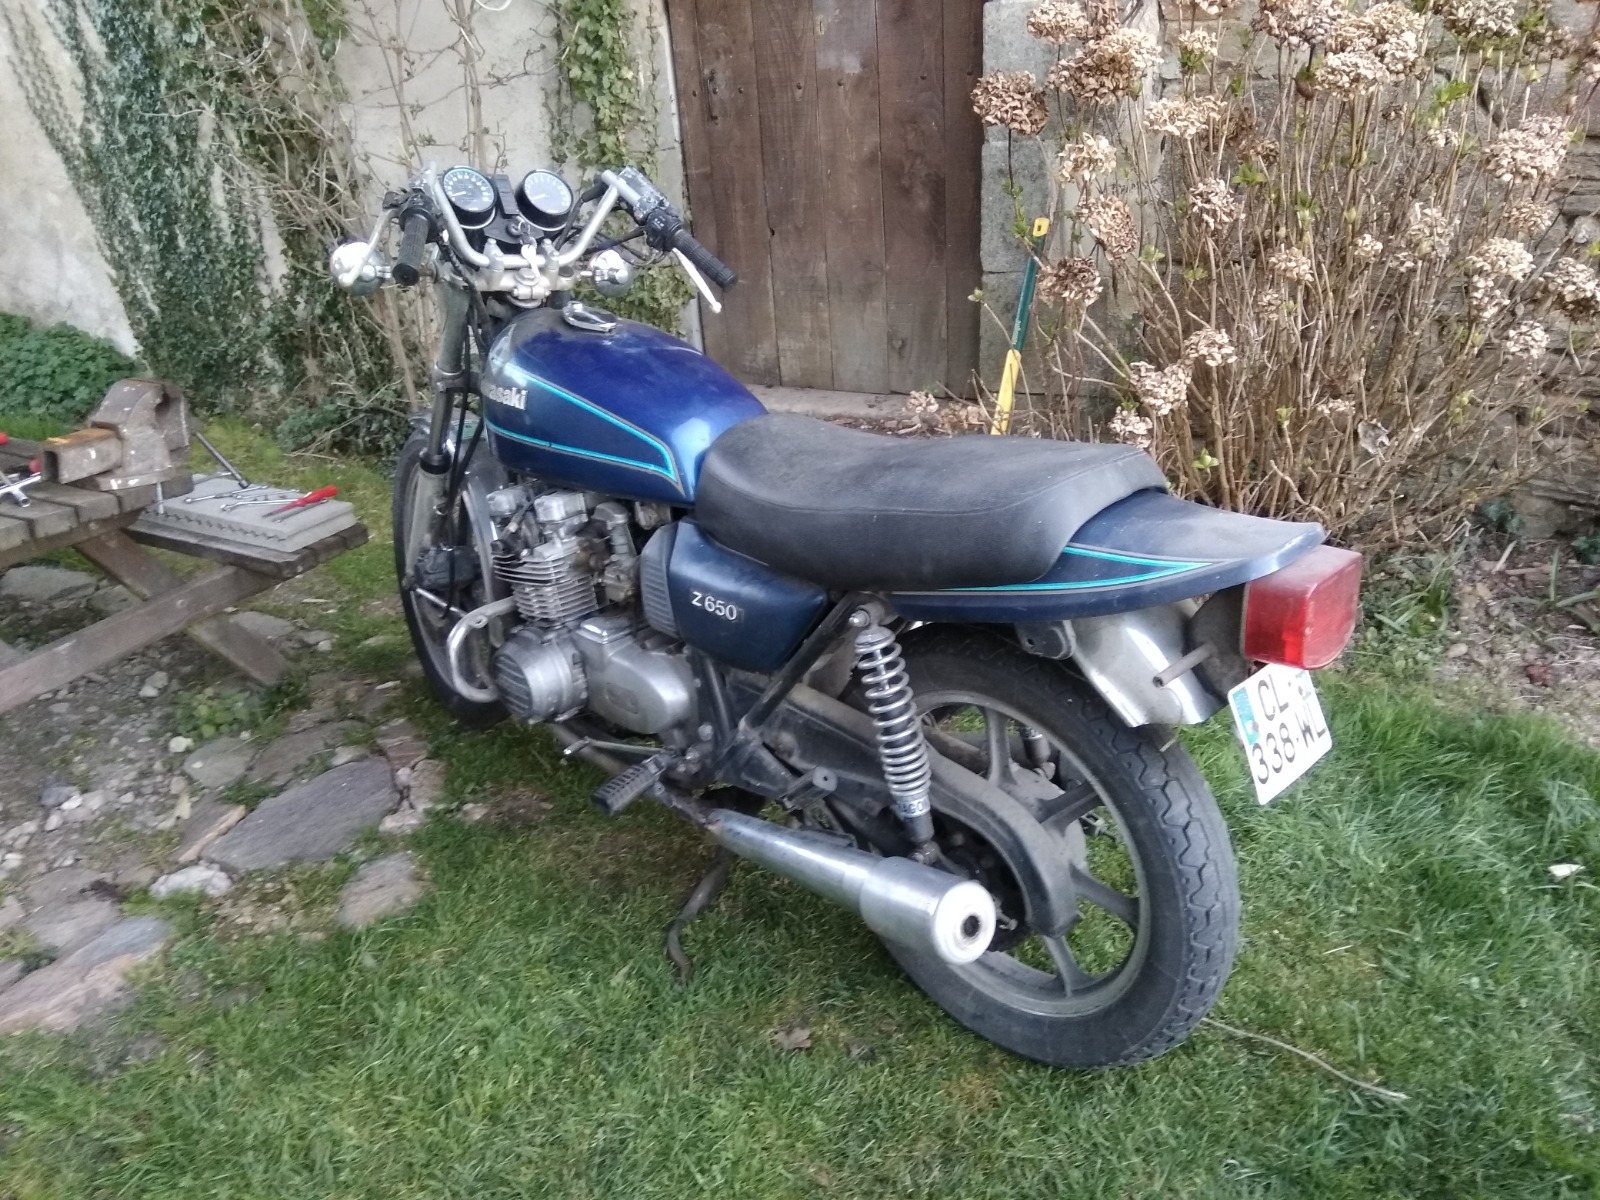
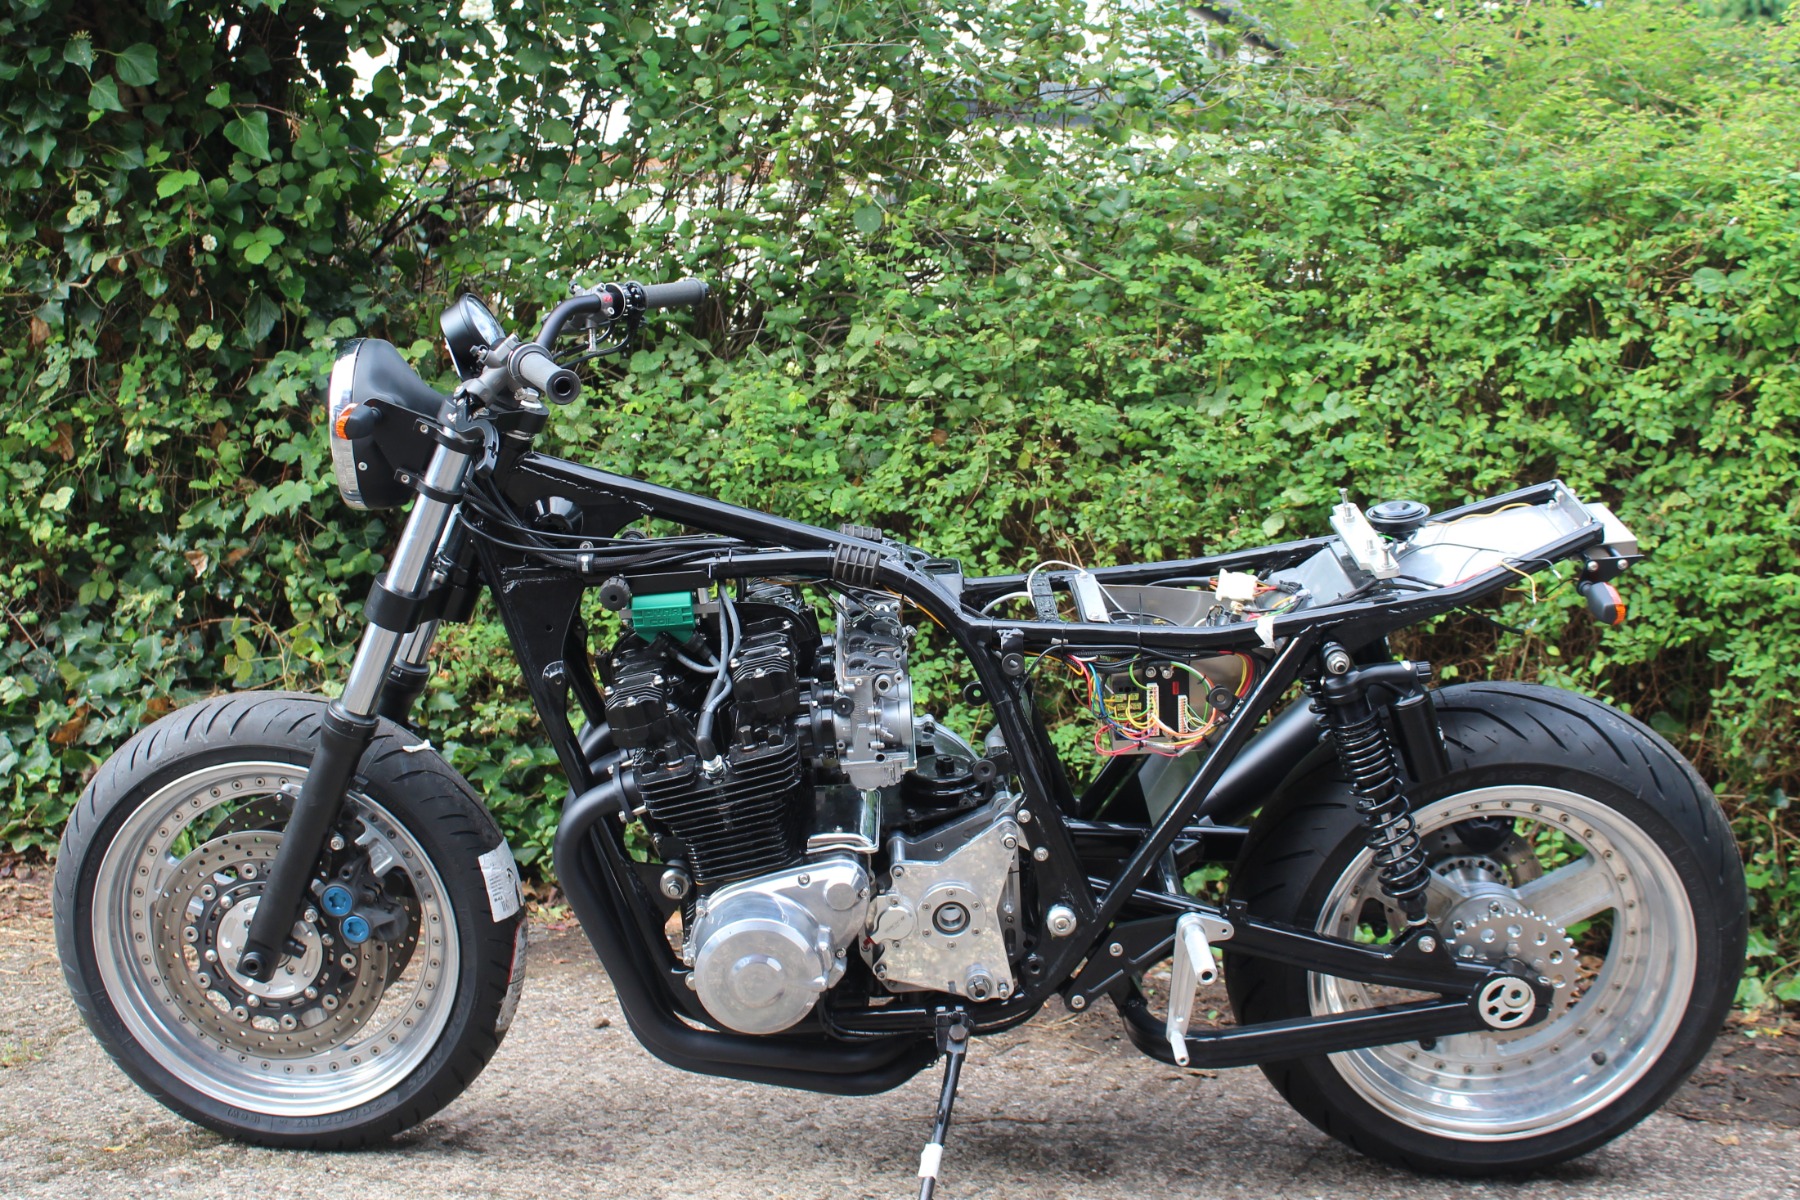
Thanks everyone. Here are pics in chronological order of purchase. Please remember all these bikes were bought with work needed to varying degrees
As it arrived, not been run in 10 years with lots of strange parts fitted
.
Still a scruffy beast but now mechanically sound
The GPz11 was the next one. As it arrived
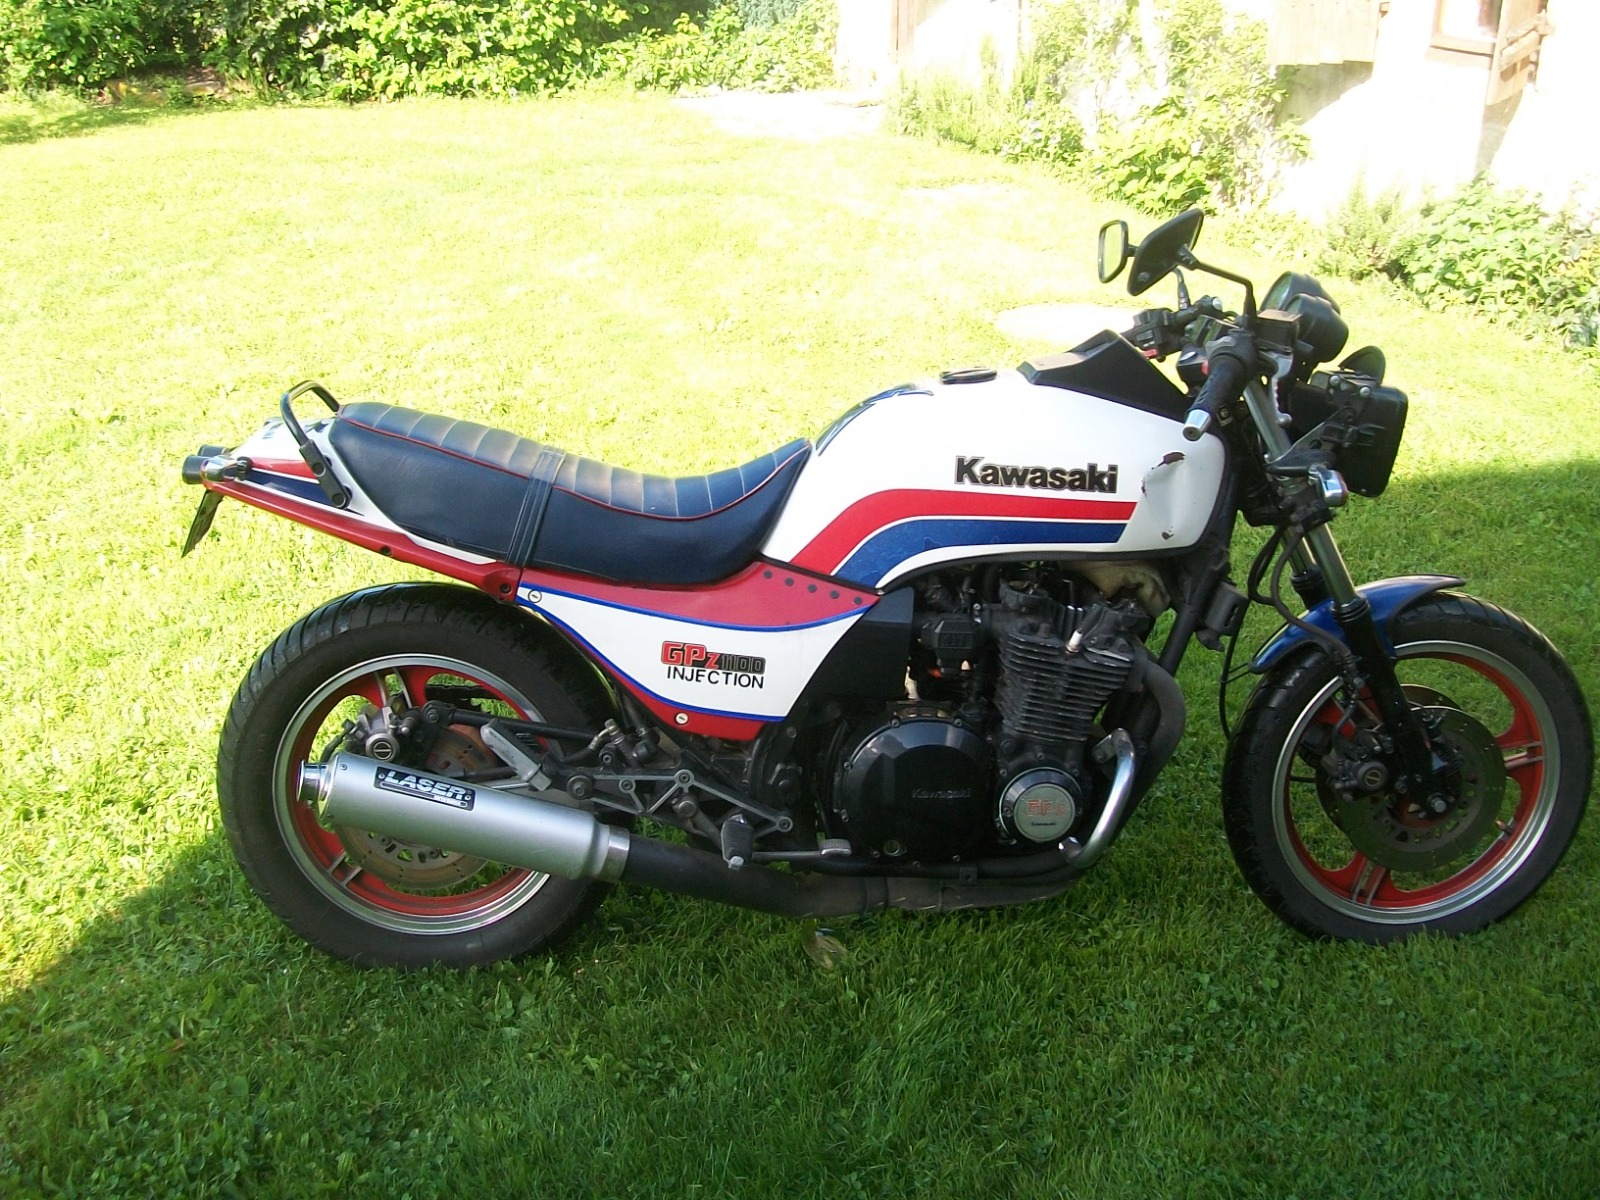
With a very seized engine

Stripped the wheels, forks, swingarm, engine casings, matt blacked the rusty downpipes and spent too much money on the carbs
Next up 'Batfink'
Now had it's clothes removed, It has got normal bars now as well
This will be attacked when the GPz is done.
There you go, not the prettiest bunch, but I like them.
As it arrived, not been run in 10 years with lots of strange parts fitted
.
Still a scruffy beast but now mechanically sound
The GPz11 was the next one. As it arrived
With a very seized engine
Stripped the wheels, forks, swingarm, engine casings, matt blacked the rusty downpipes and spent too much money on the carbs
Next up 'Batfink'
Now had it's clothes removed, It has got normal bars now as well
This will be attacked when the GPz is done.
There you go, not the prettiest bunch, but I like them.
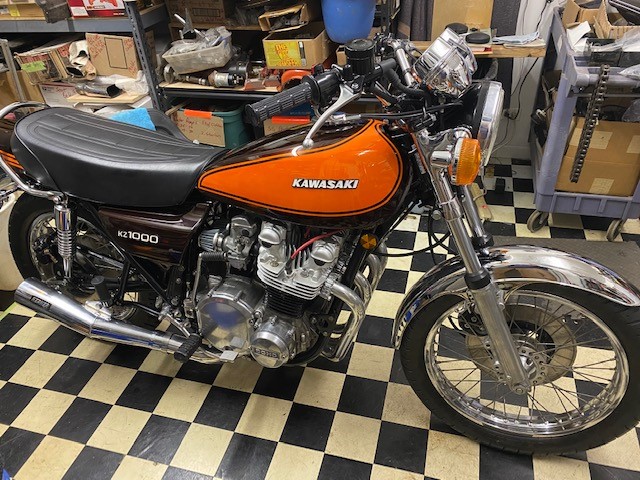
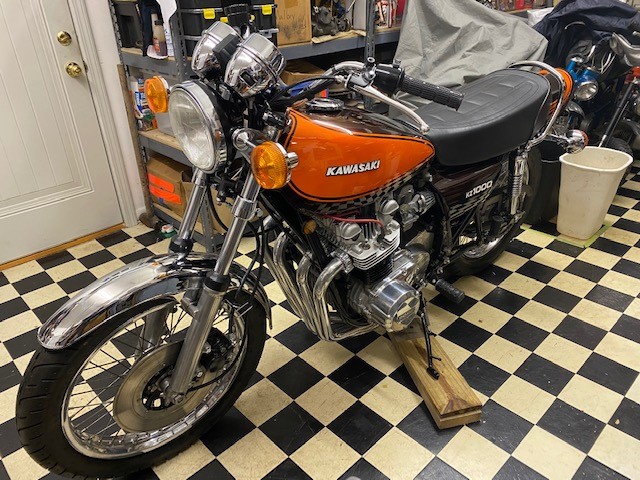
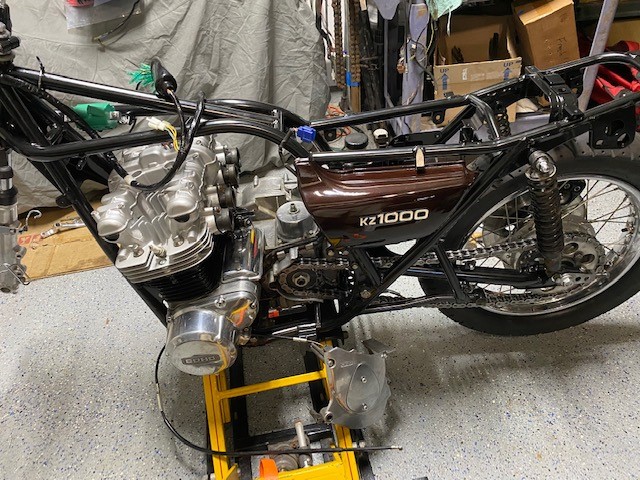
Replied by calum on topic 1977 KZ1000 Restomod
05 Mar 2023 09:17
Finally got back to this thing on the weekend. Most of my time was spent taking stock but I figured I'd post an update...
I have decided to get somebody to integrate the brake light in the tail section. I could try my hand at it but I have no idea what I'm doing and really have absolutely no desire to do the work - this has made me realise I'm best just paying for it to be done properly. I'll concentrate on the metalwork and get the oil cooler bracket done this week.
I am also still back and forward on the front fairing. Current plan is to get the front mudguard done and then paint the tail, tank, mudguard and fairing. I'll make a bracket for the fairing as well. Then I can put the decision off until everything else is done and I know I'm not just deciding against the fairing because I can't be bothered")
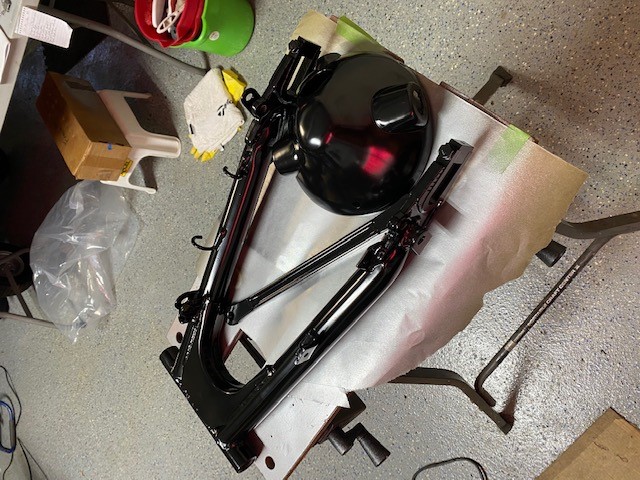
The only thing I actually got done this weekend was align the back wheel and see how much needs to come off the sprocket carrier (the guy who made the hub set the offset too wide). This job wasn't as easy as I was hoping. The swingarm is from a GSX-R 750 and is offset to the left as it usually has a monoshock. The offset is hard to measure so I didn't want to rely on it. This basically means I needed to get the wheel centered and aligned without knowing what size spacers I need on the rear axle. I started off with some spacers that were in the ball park and then projected points from the frame to the floor with a square. Then I could draw a centre line under the bike and align the wheel to that. This sort of worked but the line was about 5-10mm off from the centre of the bike (going off the steering stem). I'm assuming this was a combination of the frame not being symmetrical and me not being very accurate.
In the end I used a laser on both the rear sprocket and the countershaft sprocket as I figured that was the only thing that really mattered. I adjusted the angle of the back wheel until the offset was the same whether measuríng from the rear or countershaft sprockets. This meant the sprockets were parallel and the rear wheel was pointing in the right direction. The rear sprocket ended up being 5mm to far left and the wheel was 12mm to the right when I measured it against the swingarm mounts and the frame bracing above the swingarm. This means I can send the sprocket carrier off and hopefully the guy can shave 11mm off it. Then I can get same spacers made up based on the makeshift ones I used for the measurements.
I have decided to get somebody to integrate the brake light in the tail section. I could try my hand at it but I have no idea what I'm doing and really have absolutely no desire to do the work - this has made me realise I'm best just paying for it to be done properly. I'll concentrate on the metalwork and get the oil cooler bracket done this week.
I am also still back and forward on the front fairing. Current plan is to get the front mudguard done and then paint the tail, tank, mudguard and fairing. I'll make a bracket for the fairing as well. Then I can put the decision off until everything else is done and I know I'm not just deciding against the fairing because I can't be bothered
The only thing I actually got done this weekend was align the back wheel and see how much needs to come off the sprocket carrier (the guy who made the hub set the offset too wide). This job wasn't as easy as I was hoping. The swingarm is from a GSX-R 750 and is offset to the left as it usually has a monoshock. The offset is hard to measure so I didn't want to rely on it. This basically means I needed to get the wheel centered and aligned without knowing what size spacers I need on the rear axle. I started off with some spacers that were in the ball park and then projected points from the frame to the floor with a square. Then I could draw a centre line under the bike and align the wheel to that. This sort of worked but the line was about 5-10mm off from the centre of the bike (going off the steering stem). I'm assuming this was a combination of the frame not being symmetrical and me not being very accurate.
In the end I used a laser on both the rear sprocket and the countershaft sprocket as I figured that was the only thing that really mattered. I adjusted the angle of the back wheel until the offset was the same whether measuríng from the rear or countershaft sprockets. This meant the sprockets were parallel and the rear wheel was pointing in the right direction. The rear sprocket ended up being 5mm to far left and the wheel was 12mm to the right when I measured it against the swingarm mounts and the frame bracing above the swingarm. This means I can send the sprocket carrier off and hopefully the guy can shave 11mm off it. Then I can get same spacers made up based on the makeshift ones I used for the measurements.
Replied by CptnKyro on topic 1977 KZ650C1 Rear Shock absorber/ Rear Brake stabilzer (torque link)
02 Mar 2023 07:59
To start off, THANK YOU EVERYONE for all the information so far!!! And my apologies for being mia from the post, apparently my email decided everything from this site needed to go to my spam folder so I had no idea y’all had even seen my post. I believe I fixed that issue so I should get notified whenever some posts on here.
So after spending more time with the bike thinking about the issues surrounding the. Entire rear end of this bike, it’s nice to know that I was on the right track in noticing all the incorrect things. I don’t know anything about motorcycles other than how to ride and I would say I only know the basics on that, I bought this after a test ride of it being in decent operational condition, and it does run, but its not great, I suspect it to be a carb issue but that’s for a later date. I feel I might have been taken advantage of when purchasing, but I also should have been more attentive and cautious.
There was concern of me riding it in its current state and I can assure you that the moment I saw the rubbing on the swing arm and torque link (which also has grinding marks with sharp burrs on it still) that I parked it until I can fix all of it.
Torque Link
so from all the diagrams I found (and the ones you guys shared as well) the torque link for this swing arm and caliper combination is a straight bar with 2 holes on both ends. It is currently mounted incorrectly and has been bent to clear the coil spring on the shock, you guys are correct. It’s all had a grinder taken to it to ”clear” the tire so it won’t rub. Neither of which I’m cool with. There’s a few bars up for sale on the internet and if I can’t get a hole of one I planned on machining one at work, possibly one that’s slimmer in design to allow for more clearance now and in the future.
Swing Arm
The swing arm is stock and looks to be in good shape, one of the brake line grommet loops or whatever they’re called is bent out of the way and the grommet is missing, because the PO installed the brake line upside down, idk why because from what I can see it would have cleared everything regardless of aftermarket shocks and exhaust. Also yes the exhaust is aftermarket and he made a bracket to mount it but that does not currently cause any visible issues with the shocks, swing arm, rear wheel, or breaks, it’s just….ugly… sounds good! Just ugly.
Rear Wheel
I didn’t even think that these wheels would have spacers so that’s very helpful! It is not aligned correctly which I believed was the reason why it rubs on the swing arm but it very well could be spacers missing or installed incorrectly. So I will be looking into that, I don’t have the tire size on hand at the moment but from what I remember it’s a correct size/a size that people on this forum have posted about running successfully, so it’s not oversized which is one less thing to worry about right now. I did notice the axle nut being stopped short of the end of the bolt but I didn’t know that was a problem, again my ignorance on motorcycles, so hopefully I can solve that issue as well and correct it.
Again thank you all for the help and interest, I’m hoping I didn’t spend money on a lost cause.
Replied by tk11b40 on topic 1975 KZ 900 , ZRX Swingarm, 89 GSXR front end
28 Feb 2023 21:35
Kind of miss building the KZ.
I wonder how it is doing, it's somewhere in California now with the new owner.
.... Anyone seen it at a show or on the road?
I wonder how it is doing, it's somewhere in California now with the new owner.
.... Anyone seen it at a show or on the road?
Replied by Bevelhead on topic The Free Z650F2
09 Feb 2023 10:40
Bevelhead
Been a busy week, while waiting for the frame to be powder coated at Triple S in Bingley. I painted a few small parts that I didn't take to be powder coated, including the swing arm. I didn't take the latter as it was in good condition, with little rust and perfect bearings. The bearings would have to be removed, and no doubt destroyed in the process, as if it went for powder coating, as in the oven the grease will melt and perhaps ruin the finish. Used etch primer followed by a few coats of smooth black Hammerite, which gives a hard wearing finish, similar to powder coating.
I've also cleaned up the points cover, which had some deep scratches, still got to polish the other engine covers, but at least they are in good condition. Also had the cam cover vapour blasted, which cleaned it up, but not so much that it looks new, as that would make it stand out compared to the rest of the engine.
I'm waiting for a big order from Z-Power to arrive, along with some stainless fasteners for the engine. Also found someone on Ebay who makes new side panels from ABS, which have stronger than OE mounting lugs. Was cheaper than some of the used side panels on Ebay too.
Should have the new stainless engine bolts finished by Saturday, while the rear wheel and engine spacers have been replicated in stainless.


Cam cover before

After

Spacers old and new

I've also cleaned up the points cover, which had some deep scratches, still got to polish the other engine covers, but at least they are in good condition. Also had the cam cover vapour blasted, which cleaned it up, but not so much that it looks new, as that would make it stand out compared to the rest of the engine.
I'm waiting for a big order from Z-Power to arrive, along with some stainless fasteners for the engine. Also found someone on Ebay who makes new side panels from ABS, which have stronger than OE mounting lugs. Was cheaper than some of the used side panels on Ebay too.
Should have the new stainless engine bolts finished by Saturday, while the rear wheel and engine spacers have been replicated in stainless.
Cam cover before
After
Spacers old and new
Following on from Lee's stunning modified 650 last month we have now jumped across the pond to take a look at Jim's (Wheelhop) rebuilt KZ. Close to stock and doing an excellent job of replicating the classic Z1. I'll let Jim give you the story.
It was in spring of 2020 (during start of pandemic) and I started looking at Kawasaki 900's and 1000's online. I always wanted one since I had a friend in High School who I raced motocross with and his father had an early Kawasaki Z1900 and I would always drool when i saw the bike! I knew that I couldn't afford a early Z1 900 at the time so I was looking for more of a project than a completed bike.I emailed a guy in New York who had listed a 76 KZ900 on ebay and we started exchanging phone calls and a deal was made for him to take a 1978 KZ1000 LTD he had in his inventory and put spoke wheels on it, a reproduction seat / body kit from Z1parts. I thought I would be getting a more complete bike but when I brought it home I realized how many things were wrong with it and began to take it apart immediately.The frame was then powder-coated along with all the bits and pieces including swing arm, battery box, triple clamps, headlight bucket, and “Kerker” exhaust was jet-coated. Reproduction wiring harnesses were purchased, brake systems rebuilt, and new switches-controls, fenders and handlebars were installed.The Z1parts body kit had come with painted side-covers for an earlier Z1 that didn't fit on my 78 KZ so I had to get a set of side-covers and have them colour matched to the tank and tail.Many thanks go out to Matt "Mikaw" who was able to help me with some wiring / electrical issues which had been holding me up for many months.with more help from Matt "Mikaw", Dave (Street Fighter LTD) and the guys up at the Zukey Lake, Michigan get-together we were able to get the bike running for first time since I owned it.The bike took two years from purchase to getting it running again and I am still doing some things this winter to it so it will be ready for the spring of 2023 season.

It was in spring of 2020 (during start of pandemic) and I started looking at Kawasaki 900's and 1000's online. I always wanted one since I had a friend in High School who I raced motocross with and his father had an early Kawasaki Z1900 and I would always drool when i saw the bike! I knew that I couldn't afford a early Z1 900 at the time so I was looking for more of a project than a completed bike.I emailed a guy in New York who had listed a 76 KZ900 on ebay and we started exchanging phone calls and a deal was made for him to take a 1978 KZ1000 LTD he had in his inventory and put spoke wheels on it, a reproduction seat / body kit from Z1parts. I thought I would be getting a more complete bike but when I brought it home I realized how many things were wrong with it and began to take it apart immediately.The frame was then powder-coated along with all the bits and pieces including swing arm, battery box, triple clamps, headlight bucket, and “Kerker” exhaust was jet-coated. Reproduction wiring harnesses were purchased, brake systems rebuilt, and new switches-controls, fenders and handlebars were installed.The Z1parts body kit had come with painted side-covers for an earlier Z1 that didn't fit on my 78 KZ so I had to get a set of side-covers and have them colour matched to the tank and tail.Many thanks go out to Matt "Mikaw" who was able to help me with some wiring / electrical issues which had been holding me up for many months.with more help from Matt "Mikaw", Dave (Street Fighter LTD) and the guys up at the Zukey Lake, Michigan get-together we were able to get the bike running for first time since I owned it.The bike took two years from purchase to getting it running again and I am still doing some things this winter to it so it will be ready for the spring of 2023 season.
Replied by 73z1 on topic 1973 Kawasaki Z1 hits record $50,000 at Mecum
29 Jan 2023 07:07 - 29 Jan 2023 07:08
>>>>>>>>>>>>>>>>>>>>>>> We're curious about the ser #'s and mfgr. dates of those Z1's..
Z1F07979 sold for $55k built in February 1973 (crazy price, does not reflect real market)
Z1F17142 sold for $35k built in June 1973
Highlights of Z1F07979
Z1F07979 sold for $55k built in February 1973 (crazy price, does not reflect real market)
Z1F17142 sold for $35k built in June 1973
Highlights of Z1F07979
- Comprehensive mechanical and cosmetic restoration with attention to original specifications
- Original frame with matching number
- In running condition
- Engine has been professionally rebuilt, rebored with the cylinder and head and carburetors also rebuilt
- New gaskets and seals throughout
- Professionally tuned by a licensed mechanic
- Engine was ceramic coated Black
- New fuel tank, side covers and tail section from Doremi, painted in Japan
- New front and rear wheel rims from the UK, new front and rear tires and tubes, spokes, reflectors, wheel bearings, fork oil, fork tubes, front fender, fork ears and trim with chrome hardware
- Gauges professionally rebuilt by Z-Resto
- New turn signals front and rear, grips, dash, horn, ignition and tapered steering head bearings
- New front and rear brake parts, handlebars and switches, mirrors and wiring harness, Dyna S ignition, Dyna coils and Dyna plug wires
- New badges, foot pegs, kick start arm, shift lever, swing arm roller bearings, and air box
- New exhaust with hardware from Z1 Parts
- New seat, rear fender, chain and sprockets, chain guard and cables
- Powdercoated frame, swing arm, front hub, side stand, center stand, triple trees, head light bucket, gauge cones, dash bracket and taillight bracket
- Re-chromed rear brake lever and grab bar
- Polished aluminum parts including the front fork legs, rear hub, valve cover and engine side covers
- Frame number Z1F-07979
- Engine number Z1E-08296
Replied by Haggis61 on topic Zephyr 550 swingarm on 81 GPZ550
24 Jan 2023 14:15
Haggis61
Hi, I’m interested in doing this same swap. Did it work out ok? I’m looking for some info on the things I’ll need to consider. Many thanks
To re-launch BOTM we are starting with a heavily modified 650/1170 from Lee (Bevelhead) in the UK. The intention is to use BOTM to showcase the passion and hard work of our members in their quest to preserve KHI’s finest from the “glory days”. With this in mind I am looking to feature a mix of modified/stock/restored and survivor bikes of the era, if it “has a story” drop me a line. I don’t intend this to be a haven only for mega buck show winners (although they are also welcome) I want BOTM to inspire other members around the world to get out in the garage and smother their rides in love and attention.
The project started with a badly 'bobbed' 1978 Z650 frame, GPz1100B1 engine cases, Z1000 tank, and not much else. The project belonged to a good friend, who'd already cut the rear part of the frame to widen it to accommodate a wider modern rear wheel and tyre, without the need for spacers on the shock top mount. The frame has now been braced to cope with the extra power and now uses a 20mm swingarm spindle.<br />Since the frame had been widened, a standard seat and ducktail would not fit, therefore a new seat base had to be made in fibreglass and the tail piece widened. The seat then went to specialist upholsterer who did a good job, except he'd got front and back mixed up!! the assumption was made (don’t ever do that) that it was obvious which was the front and which the back, but apparently not.<br /> Bodywork is early Z1, but the tank is from a Z1000. Paint is similar to OE, but with a few changes. For example the upper tank stripe is dark mica blue, not black, to match the blue of the front callipers. The plan originally was to fit a cockpit fairing, but the BMW R90S fairing that was purchased didn't look quite right, so wasn't used. Lee has a “Z900RS café” fairing on his Z1000A1 build which would look much better on the 1170.. perhaps something for the future.<br />The rear sets were made long before the engine was ready, and turned out to be too low, so Lee had to make new mounts to raise the pegs and clear the exhaust. The latter is a Delkevic, whose 4 into 1 collector had to be cut and widened to clear the now wider back end of the bike. Since it had to be cut, Lee also altered the silencer to a jauntier angle.<br />The front end consists of forks and brakes from a 2001 Yamaha R6, in one off billet yokes. The back end uses ZRX 1200 swing arm, Brembo rear calliper on a one-off mount, along with K-Tech shocks built for the bike by the factory. Wheels are also one off split rims, made for Lee’s old drag bike by a friend (the one who sold Lee the project).<br />The engine was taken out to 1170 cc using Wossner forged pistons, the crank has been balanced and welded, while carbs are Mikuni RS34s. Clutch and points cover are home made, as are the rear sets.. levers pivot on roller bearings, hydraulic clutch conversion, and an gearbox output sprocket outrigger. The latter has been causing Lee problems as it has an oil leak, but then he had to use a “home-made” gasket, and that could be the problem.. Lee is still working on that. That's why in some pics the chain has been removed, as Lee was working on the outrigger inner plate at the time.<br />Wiring is done by Lee using a “Moto-Gadget M-Unit” which helps simplify the wiring, along with their matching switchgear. Ignition is Dyna S with Dyna coils. It has an electronic Daytona Velona combined tacho/speedo gauge. <br />Brake and clutch master cylinders are by a UK company HEL, as are the brake lines.<br /><br />Once the outrigger oil leak is fixed and the engine is run in, Lee will take it to a dyno and have the carbs dialled in, but it was snowing at the time of writing, so that will have to wait until the spring.<br />The build was without doubt the most frustrating Lee has done, as there were countless problems, while Covid lockdown didn't help. The engine case was found to be cracked, after they had been ceramically coated at great expense. Thankfully they were repairable.<br />
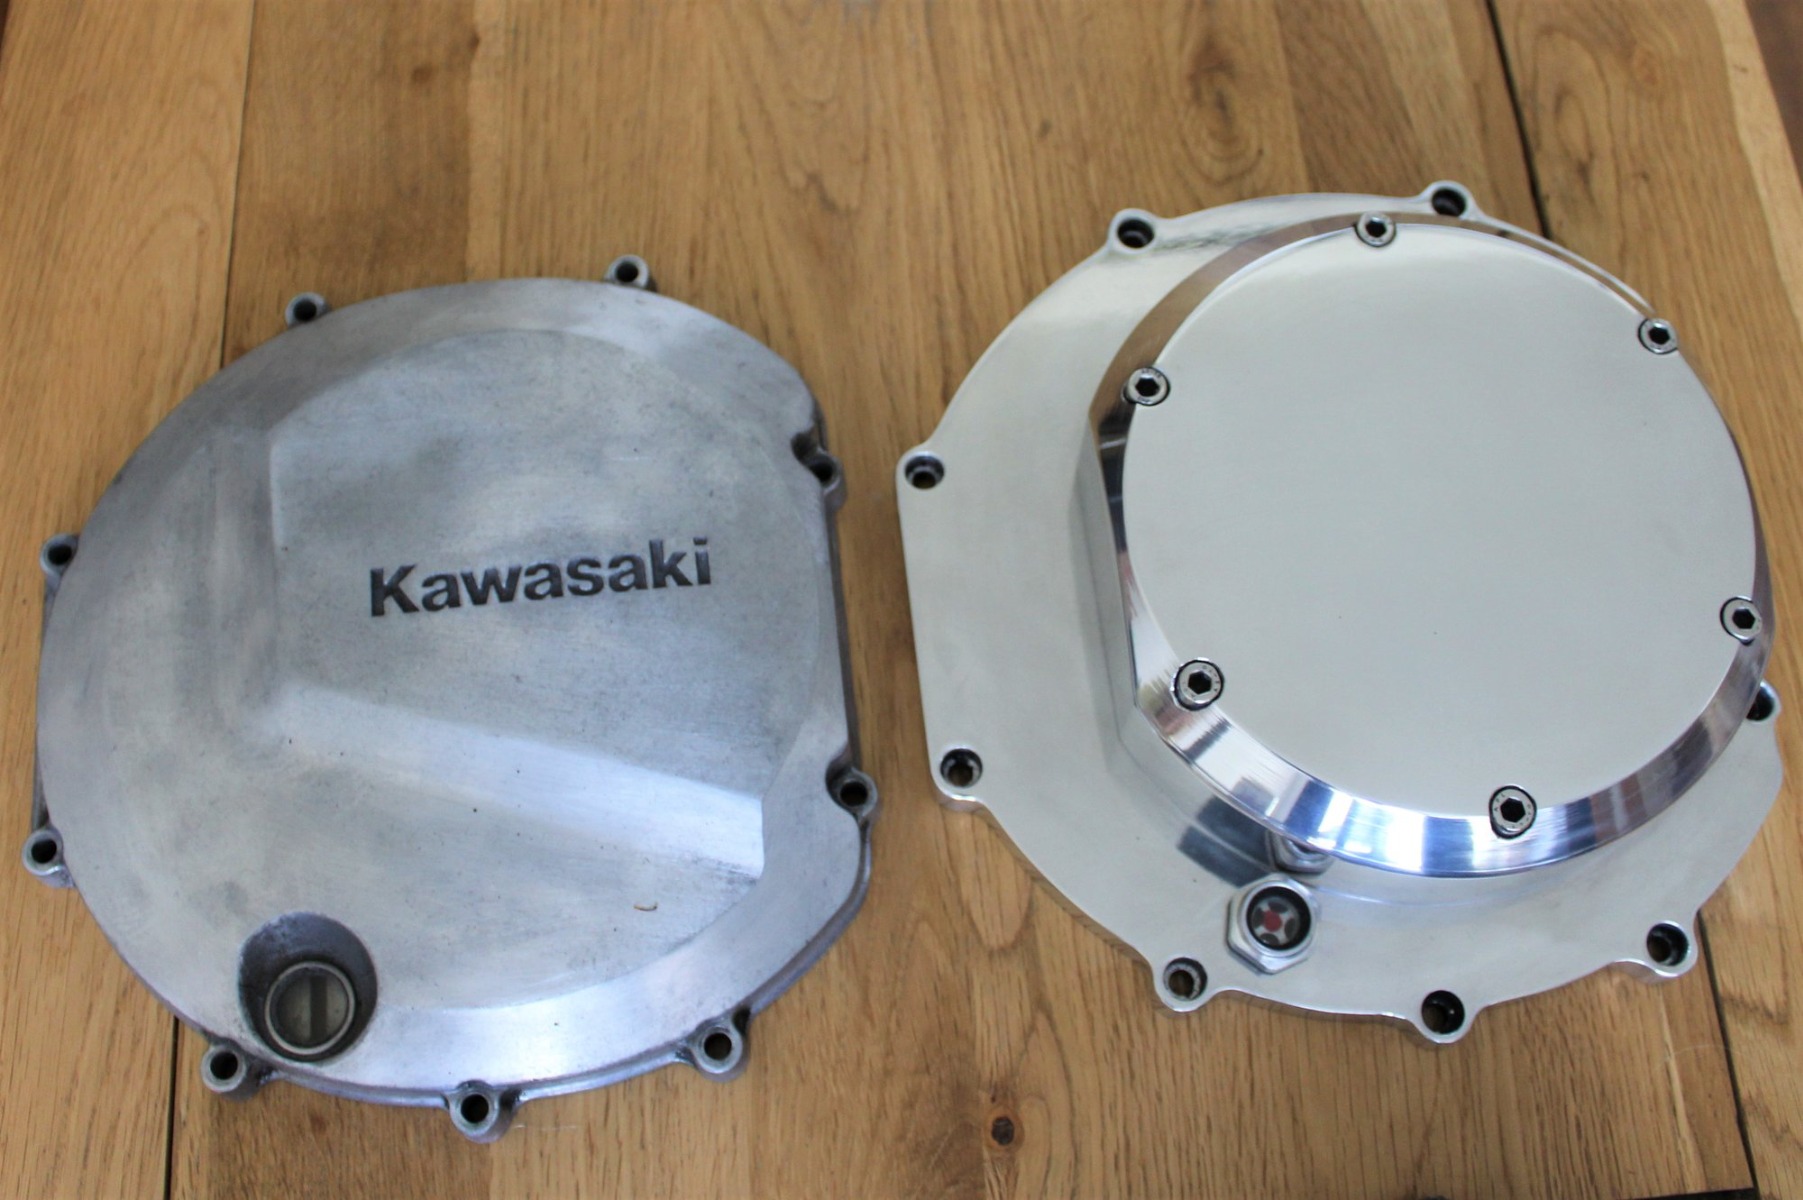
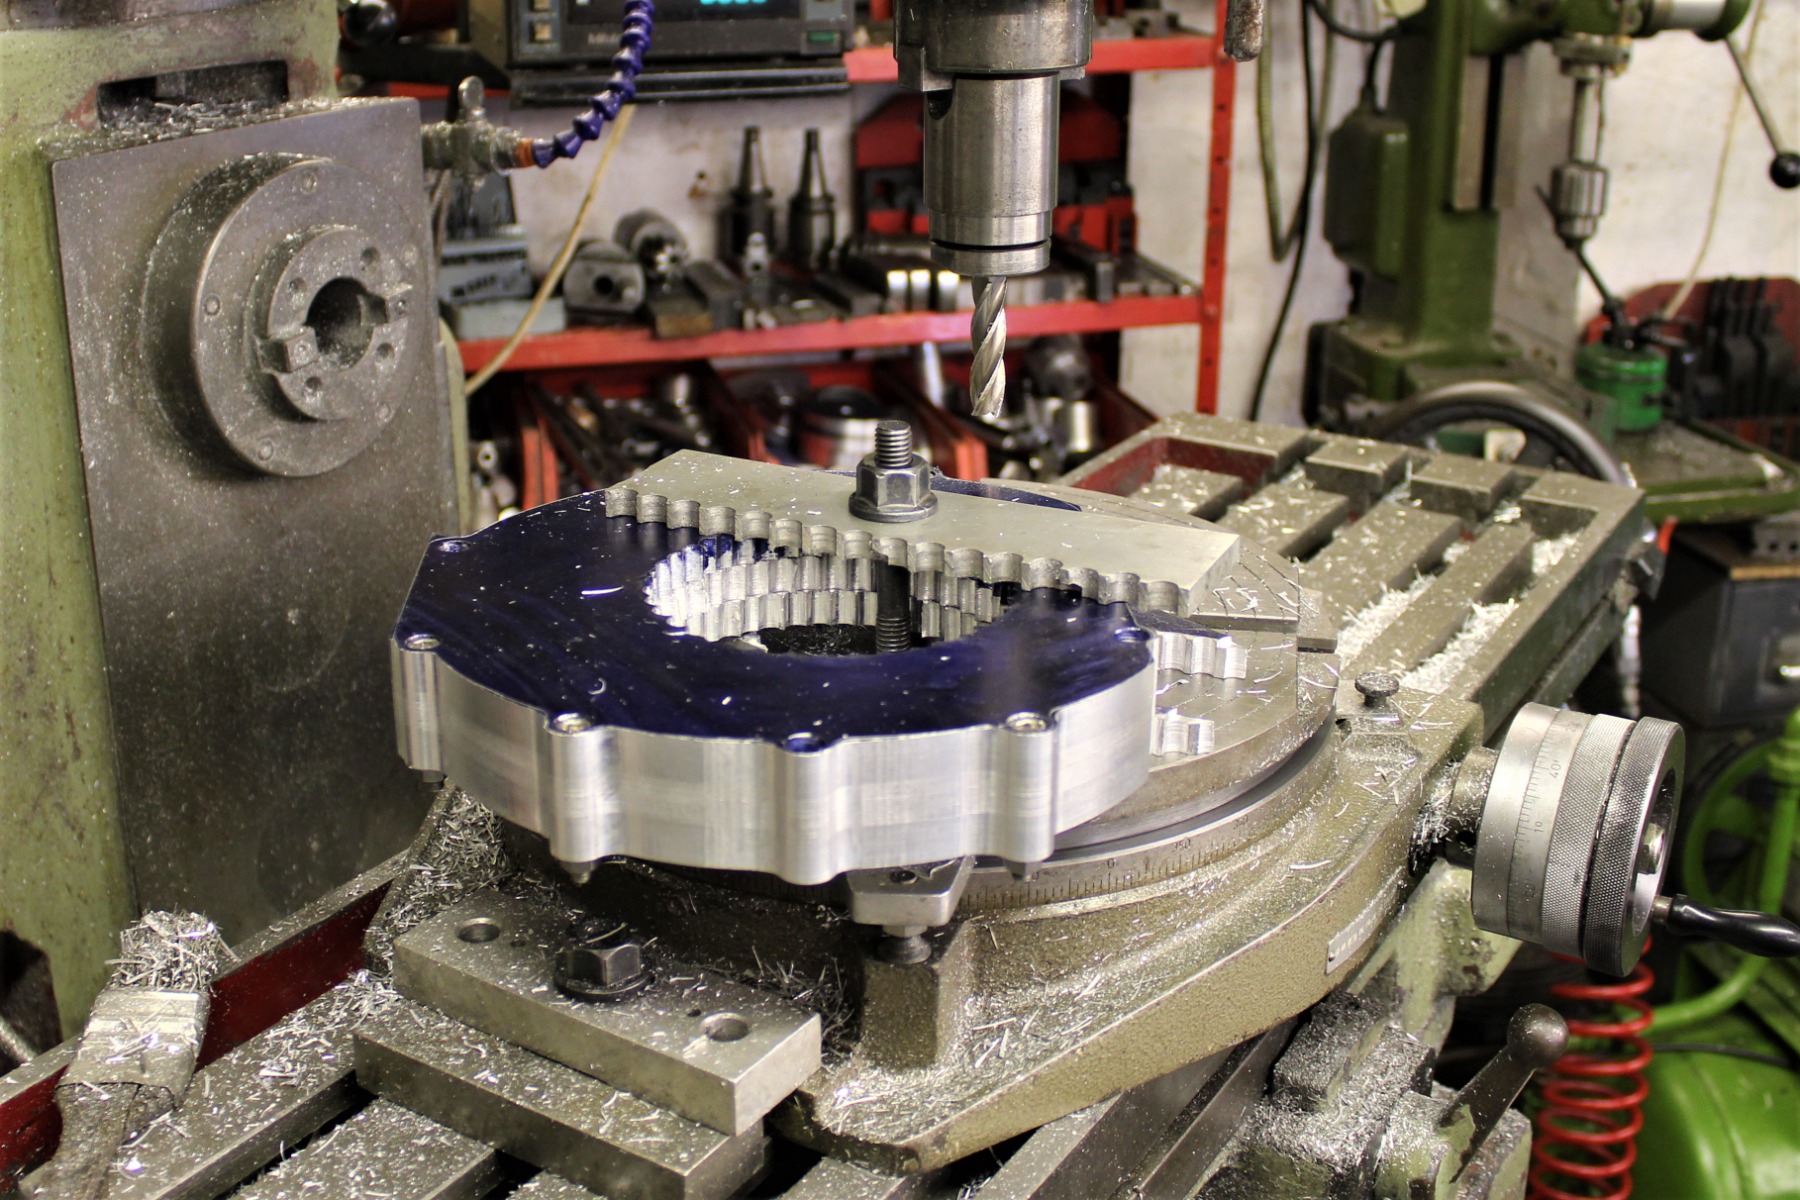
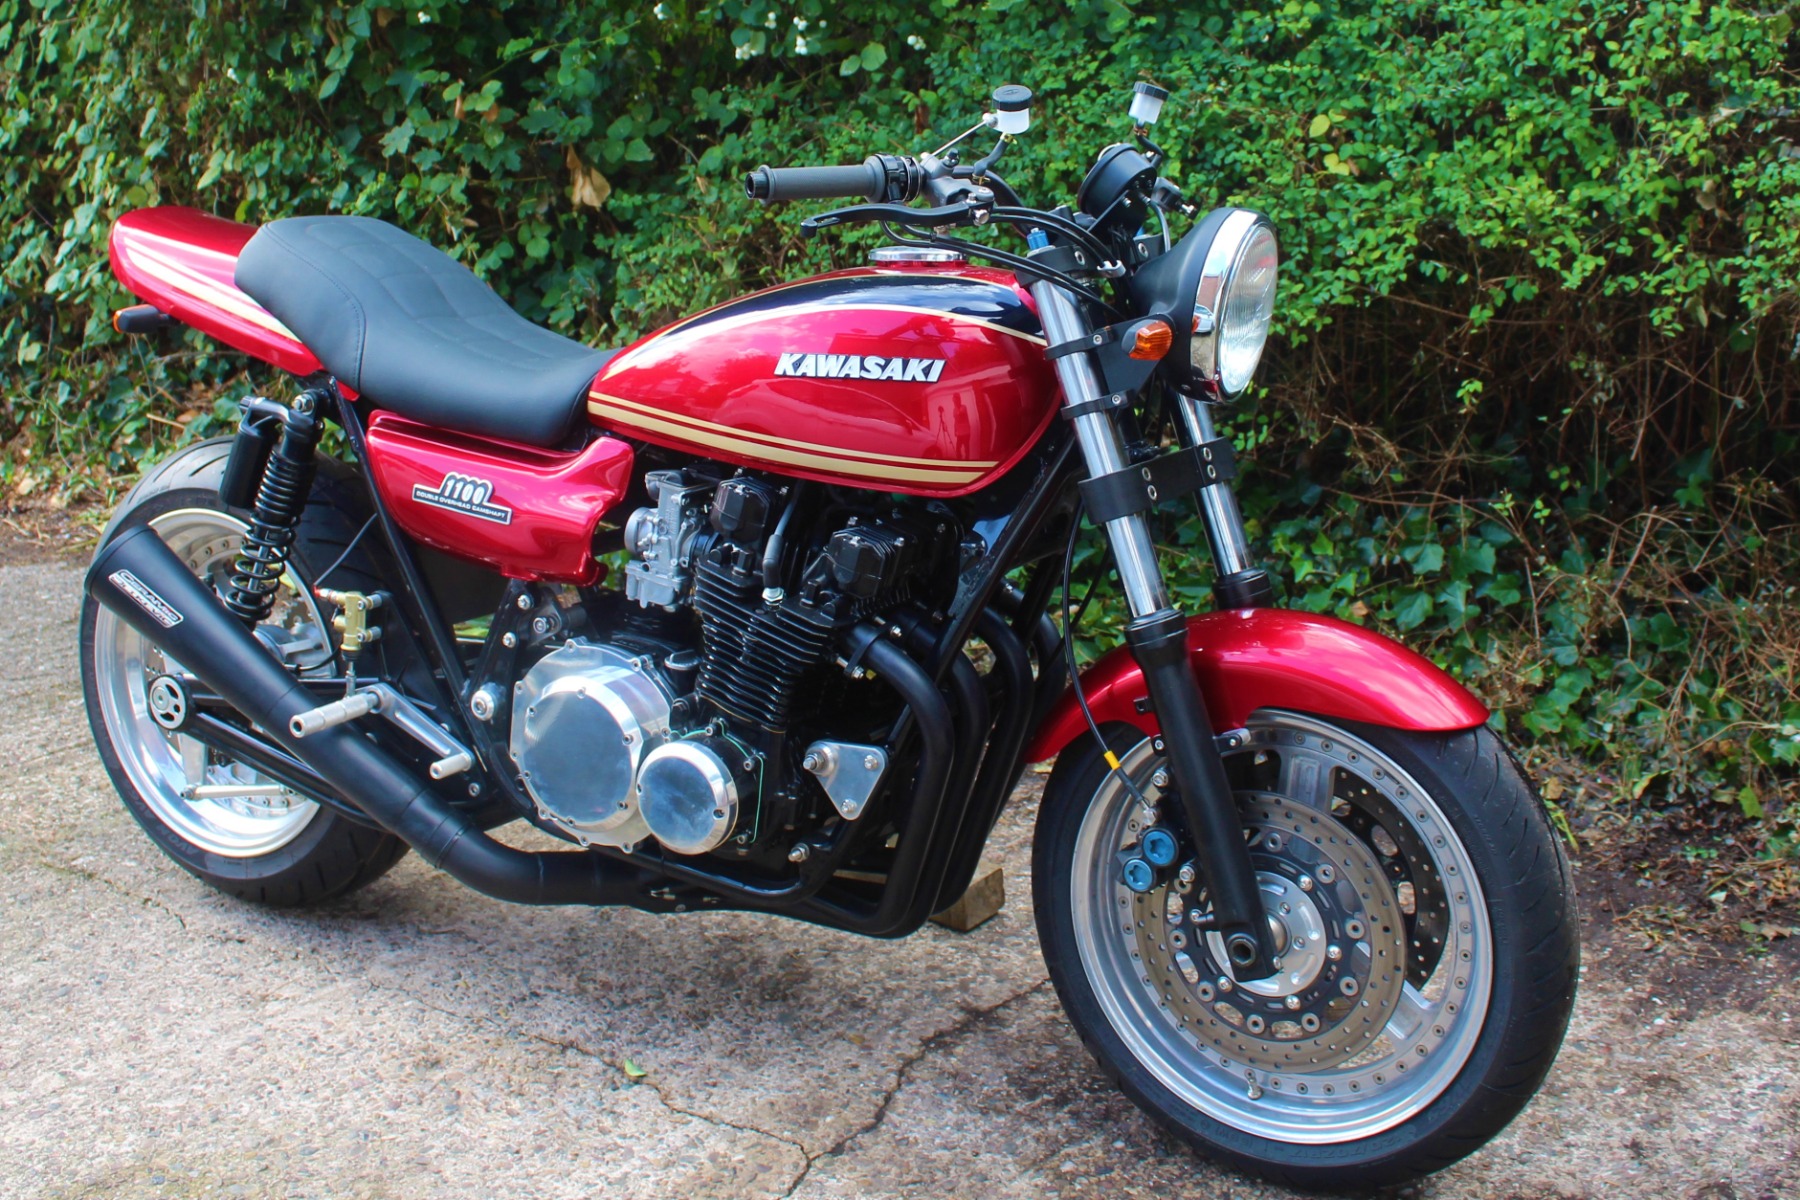
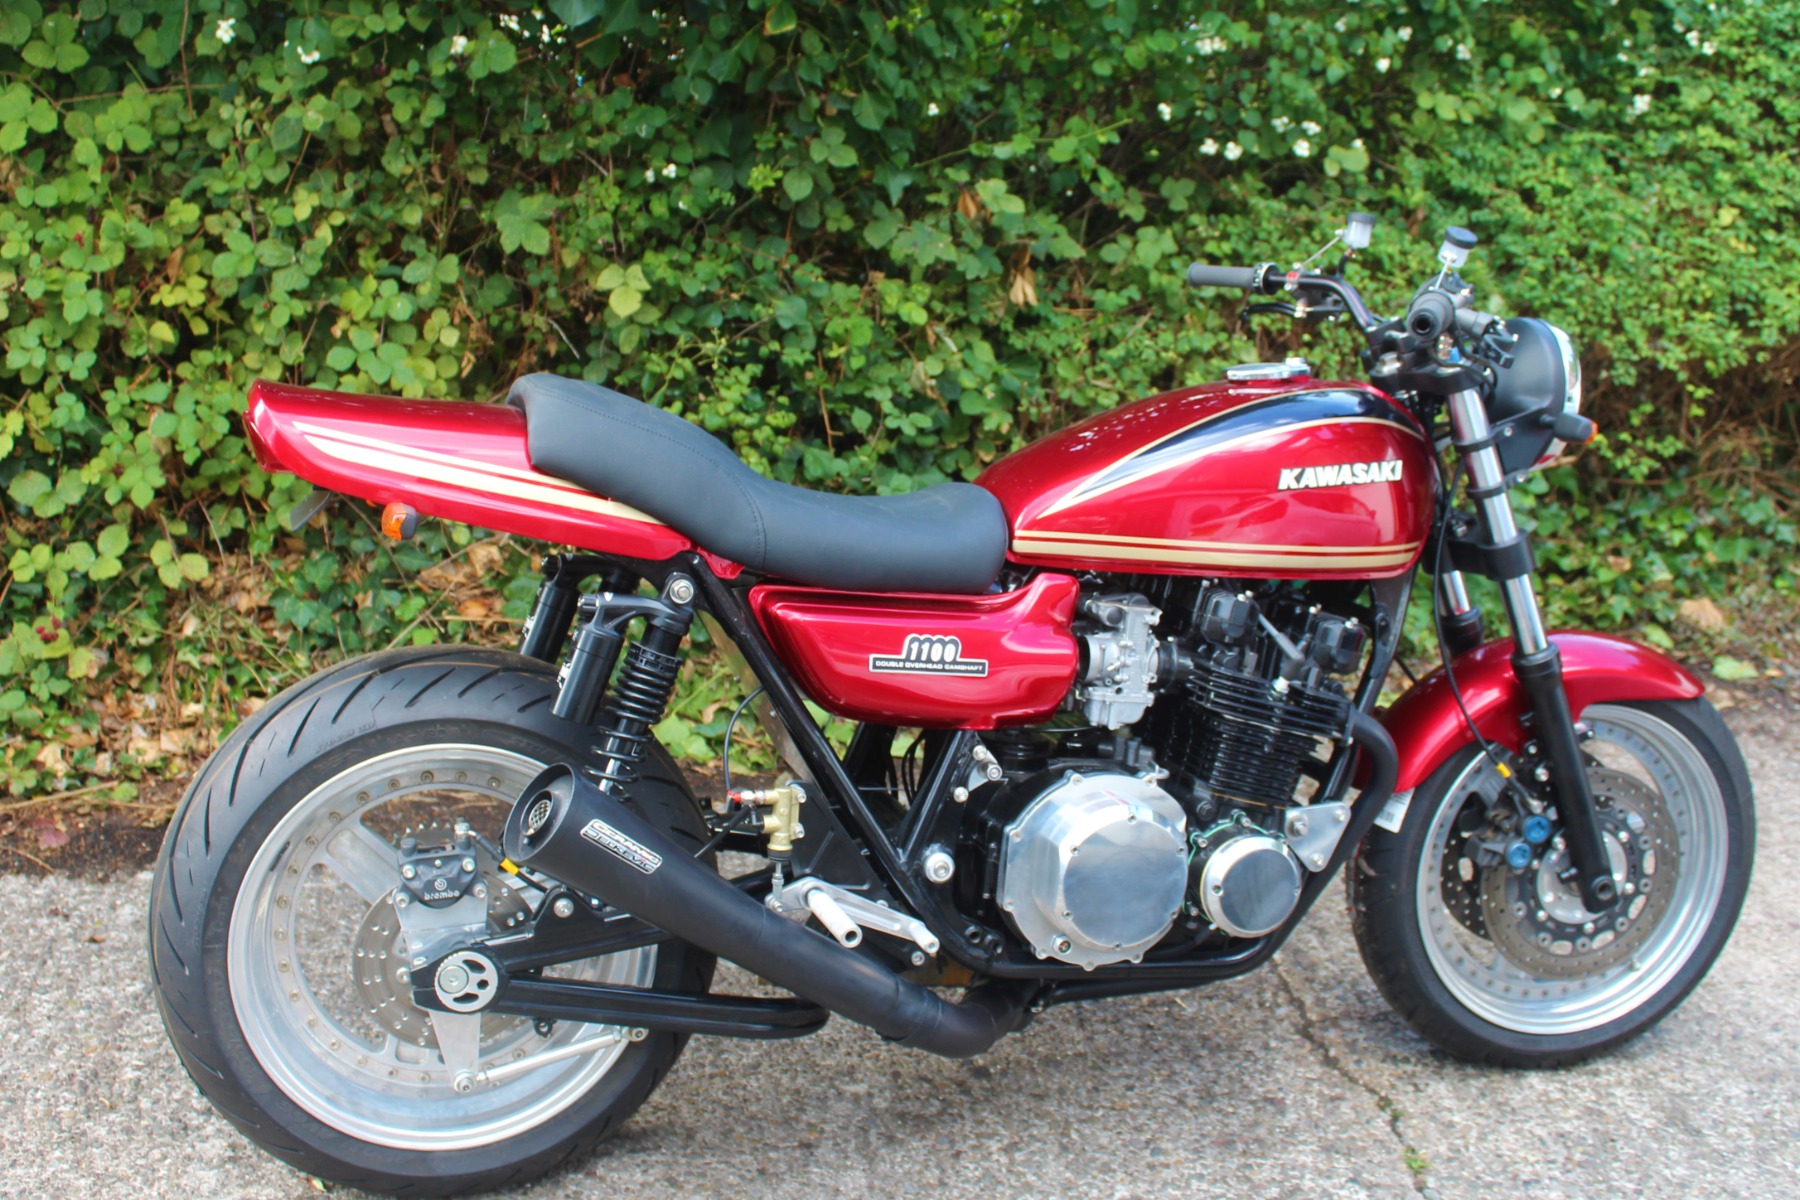
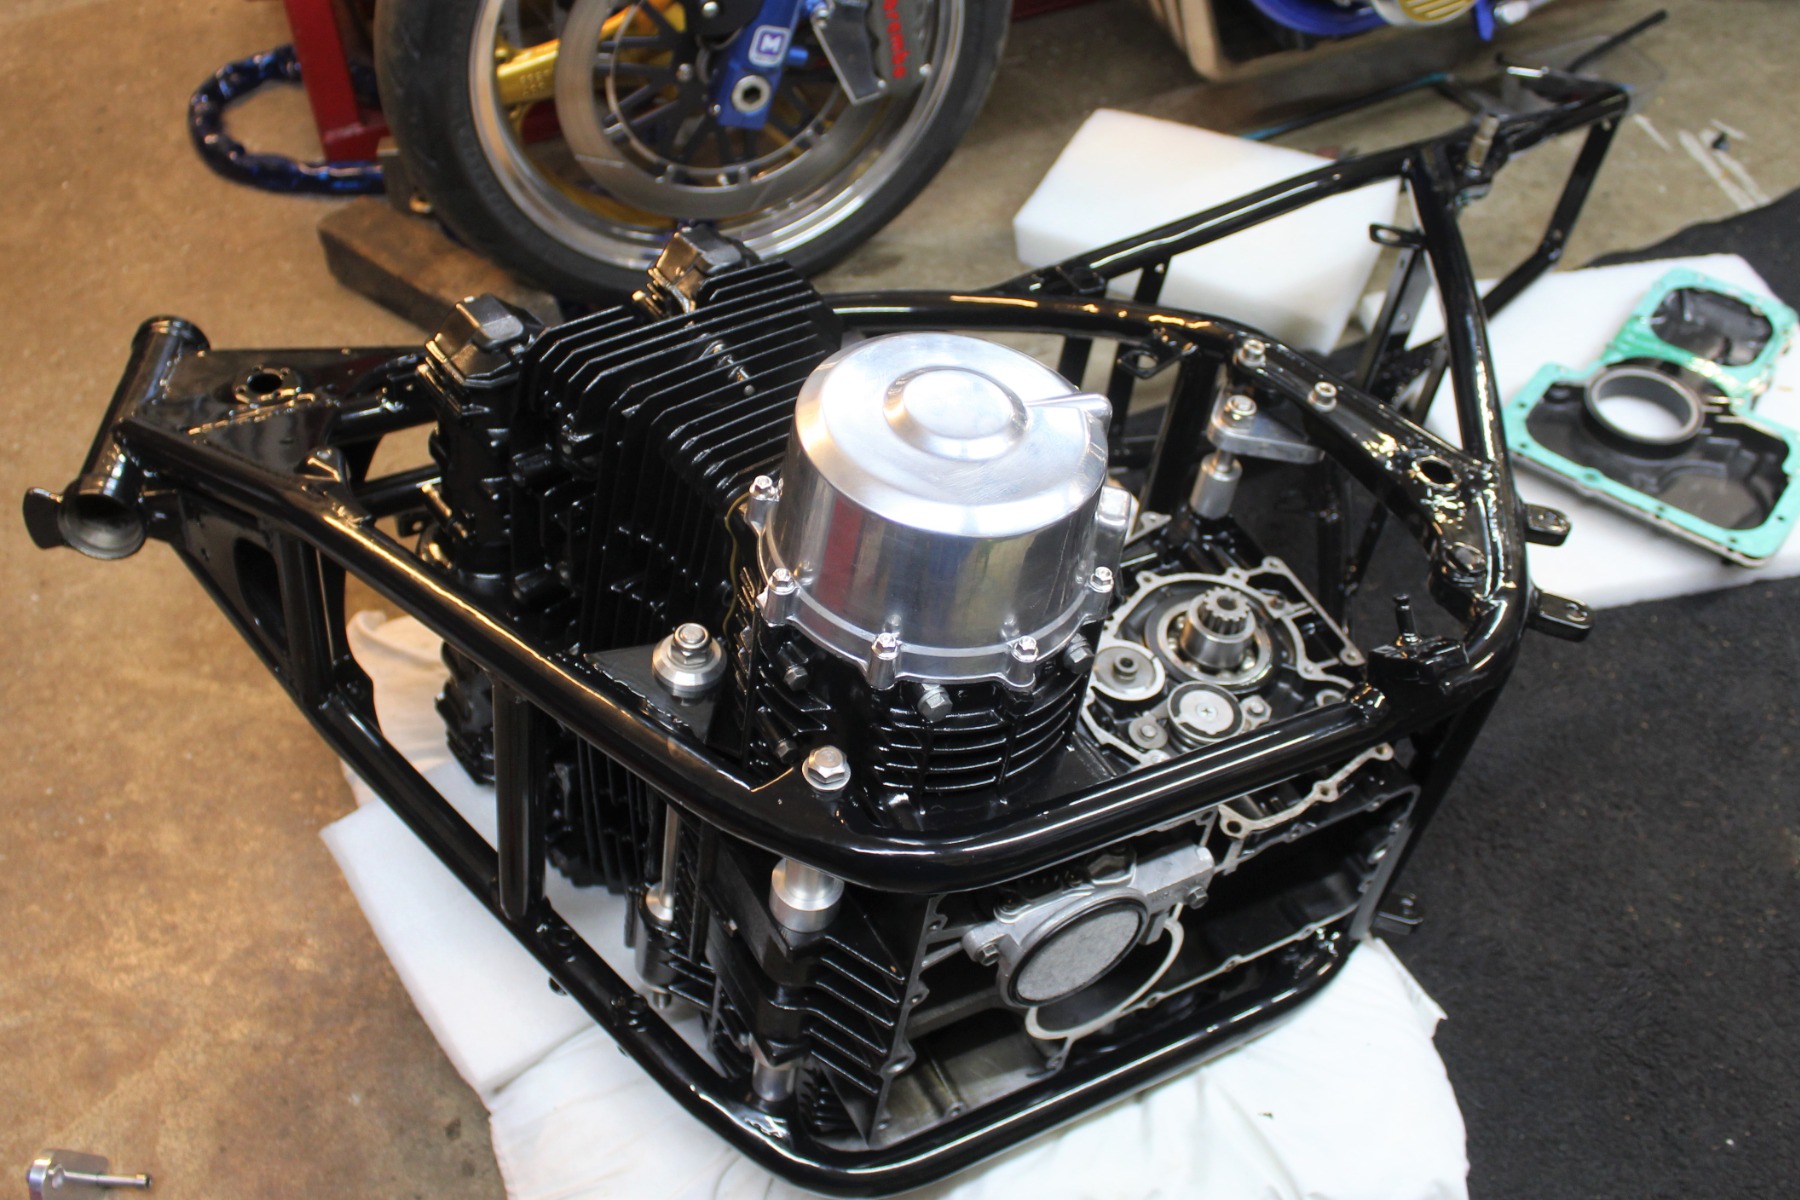

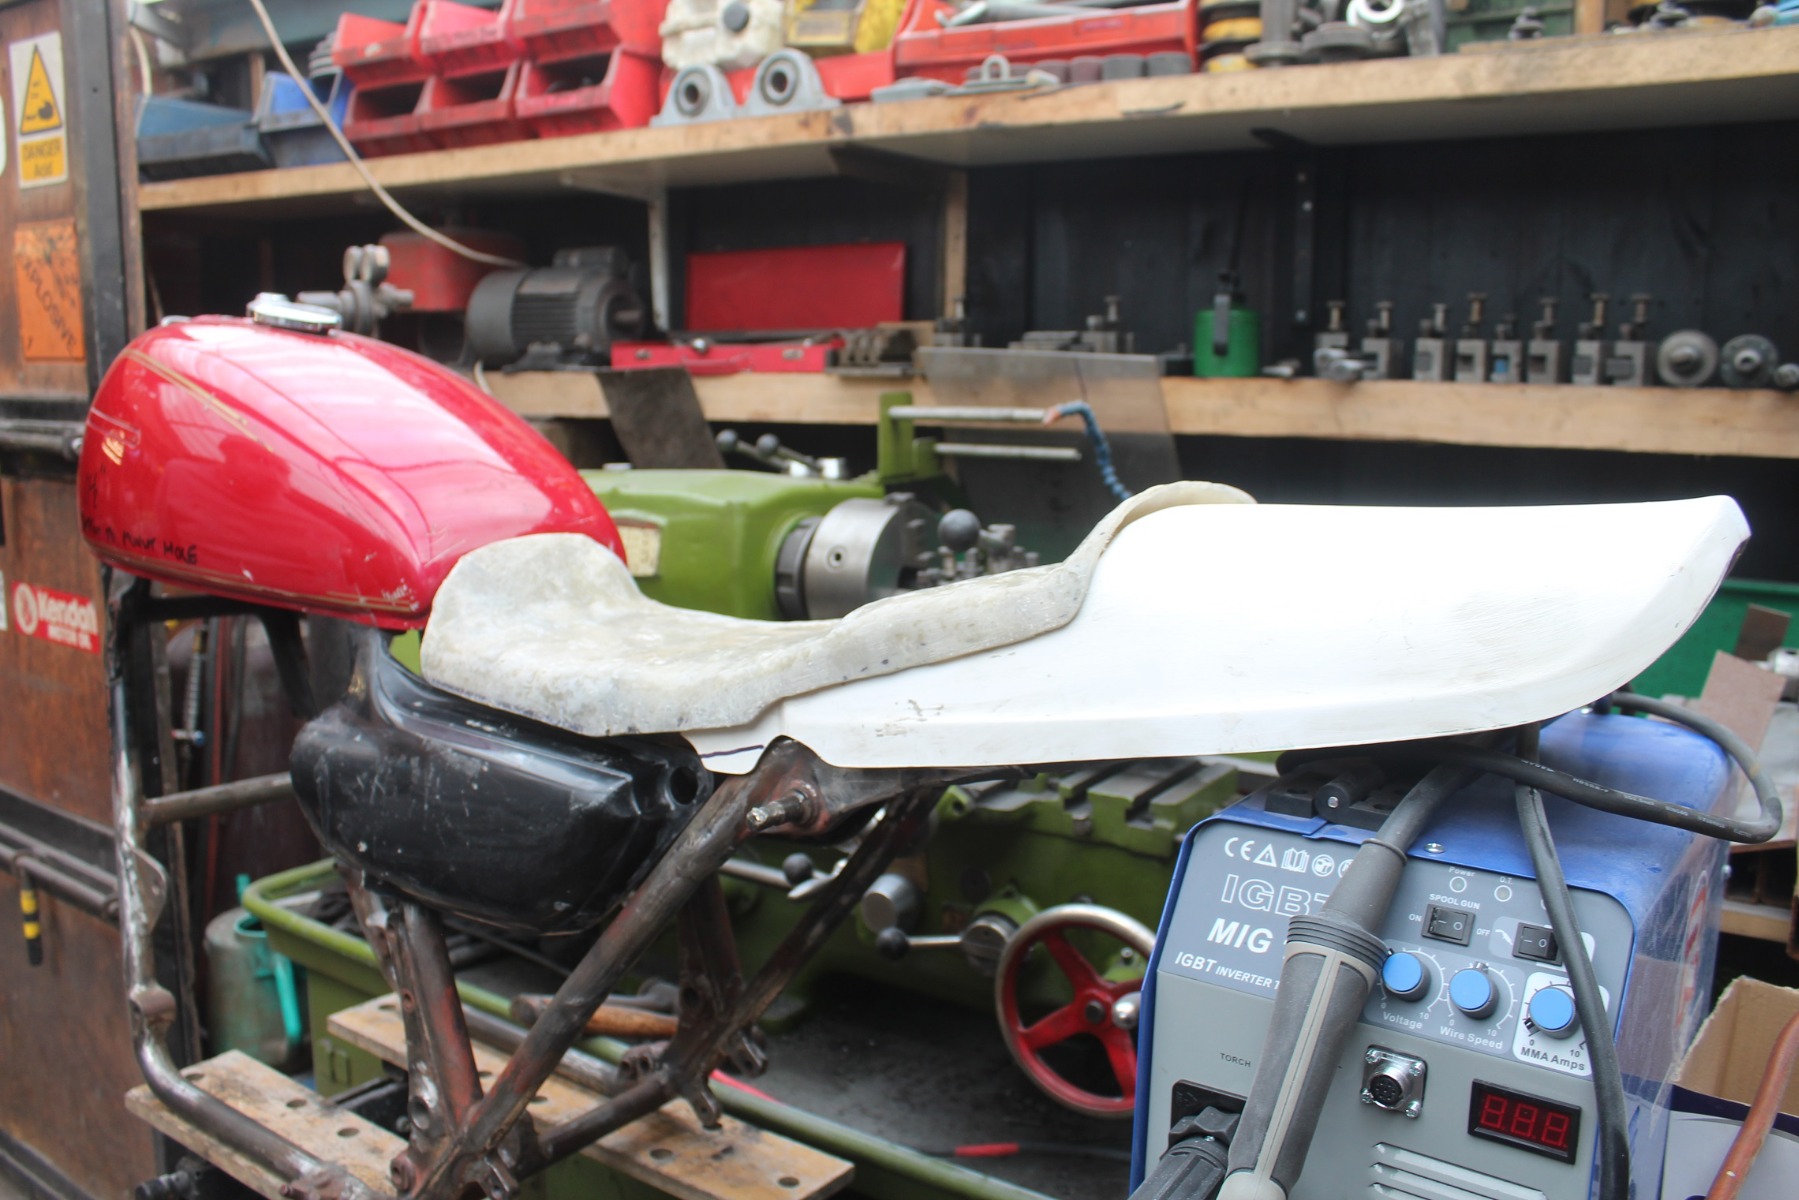
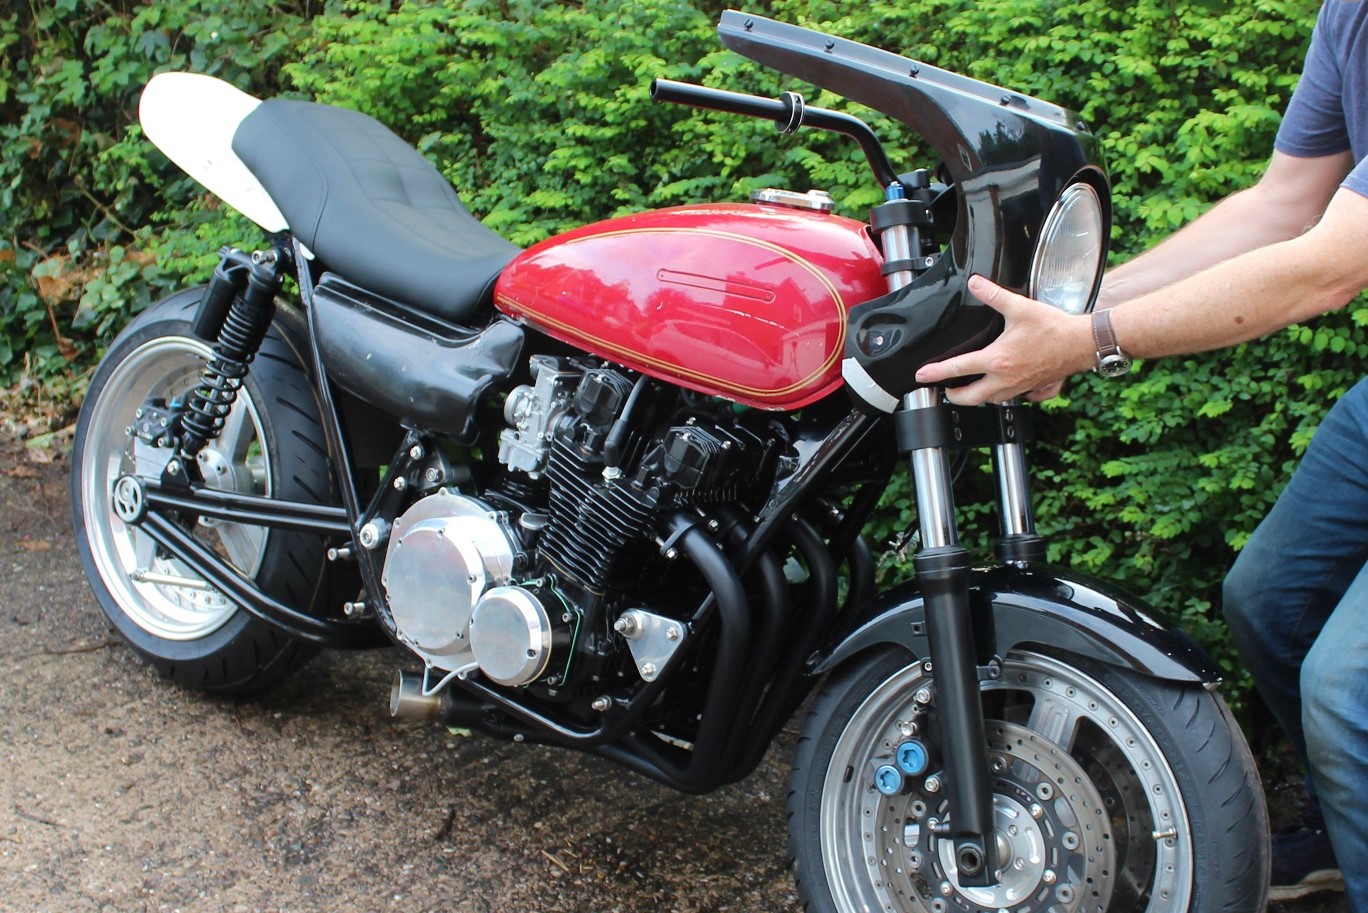
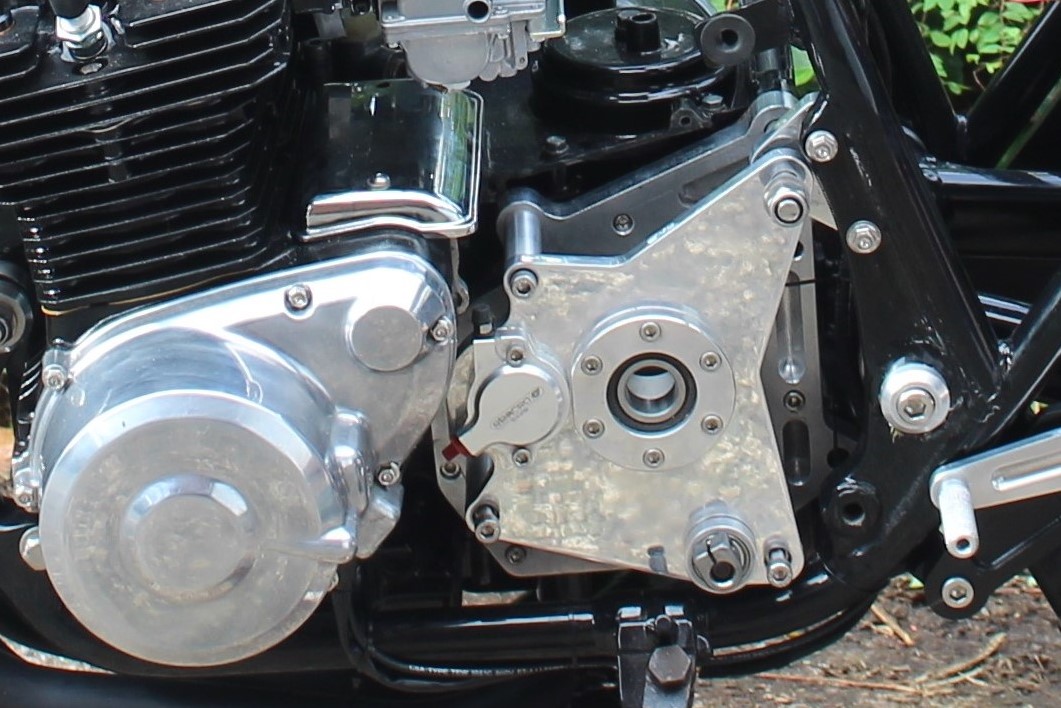
The project started with a badly 'bobbed' 1978 Z650 frame, GPz1100B1 engine cases, Z1000 tank, and not much else. The project belonged to a good friend, who'd already cut the rear part of the frame to widen it to accommodate a wider modern rear wheel and tyre, without the need for spacers on the shock top mount. The frame has now been braced to cope with the extra power and now uses a 20mm swingarm spindle.<br />Since the frame had been widened, a standard seat and ducktail would not fit, therefore a new seat base had to be made in fibreglass and the tail piece widened. The seat then went to specialist upholsterer who did a good job, except he'd got front and back mixed up!! the assumption was made (don’t ever do that) that it was obvious which was the front and which the back, but apparently not.<br /> Bodywork is early Z1, but the tank is from a Z1000. Paint is similar to OE, but with a few changes. For example the upper tank stripe is dark mica blue, not black, to match the blue of the front callipers. The plan originally was to fit a cockpit fairing, but the BMW R90S fairing that was purchased didn't look quite right, so wasn't used. Lee has a “Z900RS café” fairing on his Z1000A1 build which would look much better on the 1170.. perhaps something for the future.<br />The rear sets were made long before the engine was ready, and turned out to be too low, so Lee had to make new mounts to raise the pegs and clear the exhaust. The latter is a Delkevic, whose 4 into 1 collector had to be cut and widened to clear the now wider back end of the bike. Since it had to be cut, Lee also altered the silencer to a jauntier angle.<br />The front end consists of forks and brakes from a 2001 Yamaha R6, in one off billet yokes. The back end uses ZRX 1200 swing arm, Brembo rear calliper on a one-off mount, along with K-Tech shocks built for the bike by the factory. Wheels are also one off split rims, made for Lee’s old drag bike by a friend (the one who sold Lee the project).<br />The engine was taken out to 1170 cc using Wossner forged pistons, the crank has been balanced and welded, while carbs are Mikuni RS34s. Clutch and points cover are home made, as are the rear sets.. levers pivot on roller bearings, hydraulic clutch conversion, and an gearbox output sprocket outrigger. The latter has been causing Lee problems as it has an oil leak, but then he had to use a “home-made” gasket, and that could be the problem.. Lee is still working on that. That's why in some pics the chain has been removed, as Lee was working on the outrigger inner plate at the time.<br />Wiring is done by Lee using a “Moto-Gadget M-Unit” which helps simplify the wiring, along with their matching switchgear. Ignition is Dyna S with Dyna coils. It has an electronic Daytona Velona combined tacho/speedo gauge. <br />Brake and clutch master cylinders are by a UK company HEL, as are the brake lines.<br /><br />Once the outrigger oil leak is fixed and the engine is run in, Lee will take it to a dyno and have the carbs dialled in, but it was snowing at the time of writing, so that will have to wait until the spring.<br />The build was without doubt the most frustrating Lee has done, as there were countless problems, while Covid lockdown didn't help. The engine case was found to be cracked, after they had been ceramically coated at great expense. Thankfully they were repairable.<br />
Displaying 151 - 160 out of 7254 results.