
Search Results (Searched for: gs swing arm)
Replied by Irish-Kawi on topic 85 GPz750 Refresh Project
24 May 2016 10:58
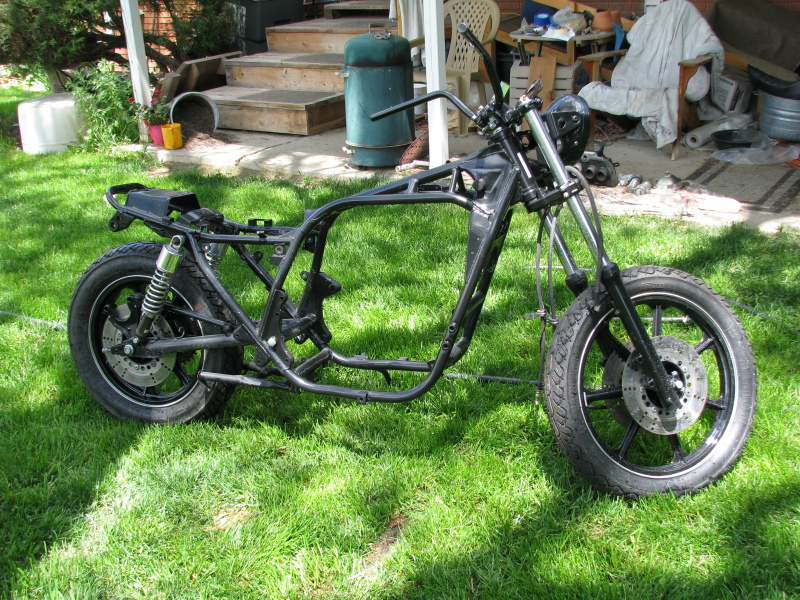
Still making some small steps here and there, nothing major but lots of cleaning and touch up work. Got my front MC painted to get rid of the faded and scrapped off paint. Not perfect but wasn't trying to make it that way, just get it covers and sealed until I can remove it and strip it completely and put it back together. Same with the stator case and the other case on the other side (forget what is being it) of the road rash and put some paint on it to seal and clean it up until I can pull them off and sand it out and feather it back in and then paint again. Touched up some chips and corrosion on the cases and a few other things here and there. Spent about 1.5 hrs scrubbing and cleaning her up this past weekend too and even took degreaser and brushes to the wheels and swing arm and underside of the bike. All together she really cleaned up nicely and is looking great. Will keep making small steps as I can over the next several weeks
")


Brett
 KZB2 650
After double checking with the 2 inch lb wrenches I found out with my trusty 3 and a half inch 10mm boxed end I was getting my cam cap and valve cover bolts closer too 60 inch lbs before calling them tight enough....... the oil drain plug, filter nut and plugs were all light maybe 20% too along with the pan bolts........ and no I've not yet stripped a thread yet (and I can see why) thank God. Not sure about the big nuts that call for big numbers like the clutch hub, axle, swing arm etc with be doing that someday soon.
Ha 831st comment....... dreamed and planned about that 831 cc MTC piston kit for many years in the 80s....wish I had it to do over again.
Ha 831st comment....... dreamed and planned about that 831 cc MTC piston kit for many years in the 80s....wish I had it to do over again.
Replied by 650ed on topic Long time rider. First KZ750
23 May 2016 17:18
Welcome aboard!
Here are some tips that you may find helpful:
Many newbies and not so newbies run into or issues with their bikes which could be easily avoided with a little preparation or information. Here are a couple recommendations that I hope you will find useful.
Before riding your KZ you should take a little time to become familiar with it. Simple things like checking the oil, tire pressures, etc. are explained in the Kawasaki Owner's Manual. If you bike didn't come with one (they normally are in a little holder on the bottom of the seat) you can usually find one on eBay - be sure to get one for your exact year/model.
MANUAL
You really should consider buying the Kawasaki Factory Service Manual for your bike. The factory service manual provides instructions on the various maintenance procedures and schedules for your bike, procedures for diagnosing problems, proper torque values for the various fasteners (VERY IMPORTANT), and insight into how each system on your bike works even if you are not repairing that system. Studying the manual before you attempt performing service on your bike will impart an understanding of the system you are working on which will increase the odds of success.
The manuals usually are readily available for most models on eBay and other sources; but be sure to get one that has your specific year and model in it as there are differences between the various KZ650 models. I do not recommend Clymers, Haynes, or other aftermarket manuals as I have seen instances where they provide inaccurate advice. You may decide to use those to supplement the factory manual, but in my opinion they are not a suitable substitute. If you have trouble finding one for your model ask us to help.
TOOLS
WARNING! Do not even try to use Phillips screwdrivers on the Kawasaki cross head screws. Despite their appearance they are not Phillips screws. They are Japanese Industrial Standard (JIS) screws. The tips of Phillips screwdrivers are too long & pointed to allow the 4 blades of the screwdriver to properly engage the screws, so when you apply force the screw head slots will deform and look like crap. The fact is that Phillips screws were deliberately designed to have the screwdriver bit "cam out." This was done to prevent production line assembly from over-tightening, stripping, or breaking the screws. JIS screws do not have this problem. A proper fitting JIS bit can tighten a JIS screw to and beyond the torque spec without camming out. Here's the good news - you can easily modify standard Phillips screwdriver tips to fit the JIS screws.
I have ground down the tips of DeWalt #2 and DeWalt #3 Phillips to make them fit JIS screws. The large crosshead screws on the cases take modified #3 bits (or genuine #3 JIS bits). To modify the DeWalt bits you need to grind the very tip a little, then test fit, then grind a little more and test fit, etc. until the bit no longer "rocks" back and forth in the screwhead. Picture 1 below shows how a DeWalt #3 bit fits the case screws of my KZ650 after being ground properly. The #2 DeWalt bits can be modified the same way to fit smaller JIS screws. Pictures 2 and 3 below shows DeWalt #2 and #3 modified bits.
I did find a place that sells authentic JIS bits. They don't list the #3 bit, but if you contact them they can provide the #3 JIS bits even though they are not listed on the website. These folks were very easy to work with, and the authentic bits do work great. Here's their site:
www.rjrcooltools.com/shop_item_detail.cfm?subcat_ID=89
Pictures 4 & 5 below show a comparison between my home made modified bits with the authentic JIS bits.
PICTURE 1

PICTURE 2

PICTURE 3

PICTURE 4

PICTURE 5

Before reaching for that wrench or ratchet consider the following. The bolts are steel, but your engine and front forks are aluminum. The bolts are much tougher than the aluminum and if over tightened will strip the aluminum threads. Although these can be repaired, preventing damage by applying proper torque will save you grief, time, and money. Tightening fasteners properly requires torque wrenches. Various vendors, including Snap-on, CDI, Sears, etc., market torque wrenches. The two most popular types are the bar type and micrometer type. Either will work, but the micrometer type is a bit easier to use, especially if you are tightening several fasteners with the same torque - such as cylinder head covers. You will need a torque wrench calibrated in INCH POUNDS for many of the bolts. You will also need a torque wrench calibrated in FOOT POUNDS for the larger bolts. Don't try to use the foot pounds wrench on the smaller bolts as it will not be sensitive enough at low torque settings to provide accurate torque. There are many fasteners that require low torque. These include such things as 6mm oil pan bolts, cylinder head cover bolts, etc. for which the torque in 61-78 inch pounds. These low torque bolts require a wrench that is accurate at low settings and this wrench should be graduated in inch pounds. In addition, there are numerous high torque fasteners such as the front axle nuts (51 - 65 foot pounds) or swing arm pivot shaft nuts (58 - 87 foot pounds). These require a wrench that is accurate at higher settings; this wrench should be graduated in foot pounds. Using the proper torque wrenches to correctly tighten fasteners will help prevent damage and contribute to a safe bike. The Kawasaki Service Manual will list the various torque specs for the bolts. I suggest you get the manual before buying the torque wrenches so you can decide which wrenches best meet the torque specs.
Consider buying a can of Kroil penetrating oil and use it to soak stubborn fasteners for a couple days before trying to loosen them. Remember, the original screws and bolts were installed on your bike when Jimmy Carter was President, so many of them may be hard to remove. Kroil can be bought online, at guns shows, and at some other venues.
MOTOR OIL
The ingredients in oils have changed over the years. For example, today's Castrol GTX oil (and pretty much all other AUTOMOBILE oil) is not the same as it was in the 1980's. Back then it worked great in KZ bikes. But, things have changed. Early AUTOMOBILE oils contained zinc phosphorus compounds (ZDDP) to protect engine components from metal to metal contact. This was good for engines, but it was found to be destructive to catalytic converters. Consequently, in AUTOMOBILE oils ZDDP was virtually eliminated and replaced with different chemistry generically referred to as "Friction Modifiers." These work fine and offer good protection for normal AUTOMOBILE engines. However, today's AUTOMOBILE oil "Friction Modifiers" are destructive to wet clutches. KZ bikes (and many other brands) have wet clutches. As a result of these oil chemistry changes a distinction needed to be made between those oils which are suitable for wet clutches and those which are not. That distinction was documented by the Japanese Engine Oil Standards Implementation Panel (JASO). JASO developed a number of different oil specifications for different applications. The specifications that apply to 4 stroke motorcycles fall under the "4T Specifications." Within the 4T specifications the JASO MA class oils are specifically formulated for 4 stroke motorcycles with wet clutches.
There are synthetic, semi-synthetic, and non-synthetic oils that meet the JASO-MA standard and any of them will work ok. However, using oils that are not designated as meeting the JASO-MA standard is destructive to KZ clutches.
Good luck with your bike. Ed
Here are some tips that you may find helpful:
Many newbies and not so newbies run into or issues with their bikes which could be easily avoided with a little preparation or information. Here are a couple recommendations that I hope you will find useful.
Before riding your KZ you should take a little time to become familiar with it. Simple things like checking the oil, tire pressures, etc. are explained in the Kawasaki Owner's Manual. If you bike didn't come with one (they normally are in a little holder on the bottom of the seat) you can usually find one on eBay - be sure to get one for your exact year/model.
MANUAL
You really should consider buying the Kawasaki Factory Service Manual for your bike. The factory service manual provides instructions on the various maintenance procedures and schedules for your bike, procedures for diagnosing problems, proper torque values for the various fasteners (VERY IMPORTANT), and insight into how each system on your bike works even if you are not repairing that system. Studying the manual before you attempt performing service on your bike will impart an understanding of the system you are working on which will increase the odds of success.
The manuals usually are readily available for most models on eBay and other sources; but be sure to get one that has your specific year and model in it as there are differences between the various KZ650 models. I do not recommend Clymers, Haynes, or other aftermarket manuals as I have seen instances where they provide inaccurate advice. You may decide to use those to supplement the factory manual, but in my opinion they are not a suitable substitute. If you have trouble finding one for your model ask us to help.
TOOLS
WARNING! Do not even try to use Phillips screwdrivers on the Kawasaki cross head screws. Despite their appearance they are not Phillips screws. They are Japanese Industrial Standard (JIS) screws. The tips of Phillips screwdrivers are too long & pointed to allow the 4 blades of the screwdriver to properly engage the screws, so when you apply force the screw head slots will deform and look like crap. The fact is that Phillips screws were deliberately designed to have the screwdriver bit "cam out." This was done to prevent production line assembly from over-tightening, stripping, or breaking the screws. JIS screws do not have this problem. A proper fitting JIS bit can tighten a JIS screw to and beyond the torque spec without camming out. Here's the good news - you can easily modify standard Phillips screwdriver tips to fit the JIS screws.
I have ground down the tips of DeWalt #2 and DeWalt #3 Phillips to make them fit JIS screws. The large crosshead screws on the cases take modified #3 bits (or genuine #3 JIS bits). To modify the DeWalt bits you need to grind the very tip a little, then test fit, then grind a little more and test fit, etc. until the bit no longer "rocks" back and forth in the screwhead. Picture 1 below shows how a DeWalt #3 bit fits the case screws of my KZ650 after being ground properly. The #2 DeWalt bits can be modified the same way to fit smaller JIS screws. Pictures 2 and 3 below shows DeWalt #2 and #3 modified bits.
I did find a place that sells authentic JIS bits. They don't list the #3 bit, but if you contact them they can provide the #3 JIS bits even though they are not listed on the website. These folks were very easy to work with, and the authentic bits do work great. Here's their site:
www.rjrcooltools.com/shop_item_detail.cfm?subcat_ID=89
Pictures 4 & 5 below show a comparison between my home made modified bits with the authentic JIS bits.
PICTURE 1
PICTURE 2
PICTURE 3
PICTURE 4
PICTURE 5
Before reaching for that wrench or ratchet consider the following. The bolts are steel, but your engine and front forks are aluminum. The bolts are much tougher than the aluminum and if over tightened will strip the aluminum threads. Although these can be repaired, preventing damage by applying proper torque will save you grief, time, and money. Tightening fasteners properly requires torque wrenches. Various vendors, including Snap-on, CDI, Sears, etc., market torque wrenches. The two most popular types are the bar type and micrometer type. Either will work, but the micrometer type is a bit easier to use, especially if you are tightening several fasteners with the same torque - such as cylinder head covers. You will need a torque wrench calibrated in INCH POUNDS for many of the bolts. You will also need a torque wrench calibrated in FOOT POUNDS for the larger bolts. Don't try to use the foot pounds wrench on the smaller bolts as it will not be sensitive enough at low torque settings to provide accurate torque. There are many fasteners that require low torque. These include such things as 6mm oil pan bolts, cylinder head cover bolts, etc. for which the torque in 61-78 inch pounds. These low torque bolts require a wrench that is accurate at low settings and this wrench should be graduated in inch pounds. In addition, there are numerous high torque fasteners such as the front axle nuts (51 - 65 foot pounds) or swing arm pivot shaft nuts (58 - 87 foot pounds). These require a wrench that is accurate at higher settings; this wrench should be graduated in foot pounds. Using the proper torque wrenches to correctly tighten fasteners will help prevent damage and contribute to a safe bike. The Kawasaki Service Manual will list the various torque specs for the bolts. I suggest you get the manual before buying the torque wrenches so you can decide which wrenches best meet the torque specs.
Consider buying a can of Kroil penetrating oil and use it to soak stubborn fasteners for a couple days before trying to loosen them. Remember, the original screws and bolts were installed on your bike when Jimmy Carter was President, so many of them may be hard to remove. Kroil can be bought online, at guns shows, and at some other venues.
MOTOR OIL
The ingredients in oils have changed over the years. For example, today's Castrol GTX oil (and pretty much all other AUTOMOBILE oil) is not the same as it was in the 1980's. Back then it worked great in KZ bikes. But, things have changed. Early AUTOMOBILE oils contained zinc phosphorus compounds (ZDDP) to protect engine components from metal to metal contact. This was good for engines, but it was found to be destructive to catalytic converters. Consequently, in AUTOMOBILE oils ZDDP was virtually eliminated and replaced with different chemistry generically referred to as "Friction Modifiers." These work fine and offer good protection for normal AUTOMOBILE engines. However, today's AUTOMOBILE oil "Friction Modifiers" are destructive to wet clutches. KZ bikes (and many other brands) have wet clutches. As a result of these oil chemistry changes a distinction needed to be made between those oils which are suitable for wet clutches and those which are not. That distinction was documented by the Japanese Engine Oil Standards Implementation Panel (JASO). JASO developed a number of different oil specifications for different applications. The specifications that apply to 4 stroke motorcycles fall under the "4T Specifications." Within the 4T specifications the JASO MA class oils are specifically formulated for 4 stroke motorcycles with wet clutches.
There are synthetic, semi-synthetic, and non-synthetic oils that meet the JASO-MA standard and any of them will work ok. However, using oils that are not designated as meeting the JASO-MA standard is destructive to KZ clutches.
Good luck with your bike. Ed
Replied by Tyler on topic Oh NO! What have I done! My new KZ1300
23 May 2016 11:45 - 23 May 2016 14:01
So here is the build tally...
Project Bike was Purchased for $800
This bike was not running, and it looks much better than it really was. There were some serious issues with this bike, but it was complete and that is the most important thing I can say about a 1300. If you buy one that is not running make sure it's complete. Rear turn signals sell for $100 a piece of you want originals, front fork ears sell for $400-$500 a pair... the head light bucket can fetch $200, some parts are just about impossible to find at any price. So just be aware of that. The salvage value of these bikes come from only a hand full of parts, the rest of thing you can't give away. I bought an entire rear swing arm/final drive/drive shaft set for $30 plus shipping... the guy tried to get me to take the rest of the bike... This means you may not be able to part out a 1300 for much money at all if the pricey bits are already missing. The Chrome air box cover on the right side of my bike sole for nearly $300 to a guy in Europe.... just crazy!
This project took quite a while (6 Years) because my life got busy, I bought my first house, got married, went back to Graduate School in Engineering while working a professional job that often includes nights and weekends, my Daughter was born, I Graduated and now have a 2nd child due in July.... so it was a lesson in time management and patience to get this one done. Most of this work was done between the hours of 9pm and 2am in may one-car garage.
Total Project Cost Including Purchase Price = $5600
This is better than I expected, I managed to keep this project on a budget. Nice 1300's are selling between 5 and 6K currently and it is very rare that a project bike is finished for less than they are worth (it is just the cold hard truth of wrenching on old bikes). Of coarse I'm counting my time as free, but I love tinkering in the garage at night... who doesn't right.")
I know some of you following this project may be surprised at the costs, but this really was budget restoration. Look through the detailed list below...
Parts and Repair List
Carburation/Induction - $250
Carbs ultrasonically cleaned
Enrichener tubes repaired
(3) Carb Kits (Z1-Enterprizes)
(3) Brass Floats (Forum Member at KZ1300.com)
Jet Kit (6 Sigma, Cheap on E-bay)
Air box Top “Snorkel” Replaced
Carb Boots (Used E-Bay)
Pingle Fuel Tap w/Adaptor (Dennis Kirk)
Fuel Line and Filter
Uni Air Filter (E-Bay)
Fuel Level Gauge (Used, E-bay)
Engine - $2250
All Engine Mount Bolts and Nuts (Used, E-Bay)
Gasket Kit (Generic)
OEM Base Gasket
Custom Comitec Head Gasket
OEM Timing Chain Rollers (Updated Version)
ZX-10 Tensioner
Timing Shaft (Used, E-bay)
Water Pump Drive Gear, Plastic (Used, E-bay)
Water Pump Mechanical Seal
Water Pump Oil Seal
Thermostat (OEM)
Thermostat Cover Gasket (OEM, pattern gasket was crap)
Radiator Hoses (Cut Pieces from Single Automotive Hose from NAPA)
Colling Fan Switch Sensor (OEM)
Repaired Colling Fan Wiring
(6) Forged Pistons from Ross w/Wrist Pins and Clips
(6) Total Seal Piston Ring Sets
(6) Vesrah Intake Valves
(6) Exhaust Valves (possibly Vesrah from the UK)
(12) Valve Seals, Steel Bucket Type from Z1-Enterprizes
A Few Valve Shims (Two from Z1-Enterprizes, One from E-bay)
SS Allen-head Bolt Kit (E-bay)
Custom Blanking Plates for Emissions Reed Valves
A Ridiculous Number of O-rings (All OEM)
Valve Job, Re-Surface, and Mild Porting from Cavanaugh Racing
Cylinders Bored by Quality Machine in Fargo, ND
(4) Rubber Cam Plugs form Z1-Enterprizes
OEM Clutch Cable
Chrome Engine Covers Stripped and Polished
Exhaust - $550
DG 6 into 1 - Worth Every Cent!
Suspension and Brakes - $400
Front Fork Seals (OEM)
15w Fork Oil
Front Tire, Shinko 230 Series
Rear Tire, Shinko 230 Series
Rear Swing Arm, Pivots and Bearings (Used Parts, E-bay)
(2) Rebuild Kits for Front Calipers
Rebuild Kit w/Center Seal for Rear Caliper
Rebuild Kit for Front Master Cylinder
Piston Seal for Rear Master Cylinder
Spiegel SS Break Line Kit w/Bolts and Washers
Front and Rear Brake Pads
Progressive Air Shocks (Used E-Bay – Rebuilt)
Final Drive - $50
Drive Shaft (Used Parts, E-bay)
Drive Shaft Boot (Used Parts, Ebay)
Ring Gear Shims
Final Drive Oil Seals
Gear Housing O-ring
Ignition and Electrical - $300
(3) Dyna Coils, Green (Ebay, One at a Time)
Fabricated a Plate to Mount Coils Where Tool Tray Would Normally Be
Added Wires and Loom to New Coil Location, Threw Old Coil Resistor in Garbage
Spark Plugs, NGK
Plug Wires (Generic Automotive 6 Cylinder Kit)
Battery, AGM Type (Batteries Plus)
Battery Tray (Used, E-bay)
Battery Hold-Down Bracket (New OEM, Found One Cheap Old Stock)
Rear Turn Signals (Generic ones from Dennis Kirk)
Turn Signal Stems (Used Parts I Already Had)
Rubber Mounting Grommets for Turn Signals (American Classix)
Repaired Wiring for Rear Lights, Replaced Diode for Running Lights
Cleaned all Connectors, Replaced Stator Connector and Contacts (Z1-Enterprizes)
Lower Head Light Bracket with Rubber Parts (from Germany)
Rubber Side Mounts for Head Light (OEM)
Spare Ignition Module (from Lauri in Finland) - Price not counted, purchased by selling some unused parts
Body Work - $1000
Air Box Covers (E-bay, Lucky To Get Them Cheap)
Left Rear Foot Peg (Used, E-Bay)
Side Cover Mounting Grommets (Z1_Enterprizes)
Rear Grab Bar (Reproduction from the UK, E-bay)
Tail Piece Rubber Mounts (E-Bay)
Gas Tank Rear Mount and Bushing (E-bay)
Gas Tank Caustic Dipped, Then Old Epoxy Liner Removed
Repaint Body Work GM Synergy Green (Local Body Shop)
Repainted Frame, Swing Arm, Engine, and Misc. Brackets ( Rattle Cans, VHT and PJ1)
Miscellaneous Other Crap
Screws, Nuts, Bolts, Washers, Etc.
Used Bore Gauge (E-bay)
Sealants, and Silicone
Honda Bond 4 (for the Water Jackets in the Head Gasket)
Grease, Gear Lube and Engine Oil (Filter Too)
Assembly Lube
Antifreeze
Permatex Gasket Remover
Some of the costs, especially in the engine should serve as a sobering reminder... The engine work I did myself apart form machining work, the pistons were pricey but they are still in line with costs of the alternatives discounting the cheap e-bay kits. Larry's charges were very reasonable for the work he did on the head, but I had to replace the valves and they are not cheap. All the little things add up, and this engine is full of little things. I would bet there are $150 or so in just O-rings and oil seals. And really every one should be replaced, these engines are way more work to take apart than an air cooled 4, you can't justify skipping something small because its just too much work to take it all apart again. A number of people on other forums have had problems with the oil seal on the water pump drive shaft leaking after a rebuild, and that requires removing the cylinder head to get to.... for a $6 seal... you get the idea.
Another example is the water pump, the mechanical seal is $55, but there is a gasket $4 and three O-rings $4 a piece and the oil seal at $6, and the Thermostat at $37 and if you find the plastic drive gear is damaged you can out much more $$$...
I am not trying to discourage people from tearing into one of these, just be realistic as to what you are dealing with. Just a set of stock bore piston rings will run nearly $300.
I will update this list again as I am sure I've missed some things. I hope this project thread will continue to be useful to those considering a 1300 project or working on one. There really are only a few good project threads on these bikes out there. I will go back through the entire thread at some point and add some additional info about parts availability as there are some different options now that were not available when I did the work. The German shop has added quite a few reproduction parts... if you can afford them.
This was a fun project to work on, but it tested my patience many times. Totally worth the effort though... these things are just awesome!
Project Bike was Purchased for $800
Attachment IMG_0457.jpg not found
This bike was not running, and it looks much better than it really was. There were some serious issues with this bike, but it was complete and that is the most important thing I can say about a 1300. If you buy one that is not running make sure it's complete. Rear turn signals sell for $100 a piece of you want originals, front fork ears sell for $400-$500 a pair... the head light bucket can fetch $200, some parts are just about impossible to find at any price. So just be aware of that. The salvage value of these bikes come from only a hand full of parts, the rest of thing you can't give away. I bought an entire rear swing arm/final drive/drive shaft set for $30 plus shipping... the guy tried to get me to take the rest of the bike... This means you may not be able to part out a 1300 for much money at all if the pricey bits are already missing. The Chrome air box cover on the right side of my bike sole for nearly $300 to a guy in Europe.... just crazy!
This project took quite a while (6 Years) because my life got busy, I bought my first house, got married, went back to Graduate School in Engineering while working a professional job that often includes nights and weekends, my Daughter was born, I Graduated and now have a 2nd child due in July.... so it was a lesson in time management and patience to get this one done. Most of this work was done between the hours of 9pm and 2am in may one-car garage.
Total Project Cost Including Purchase Price = $5600
This is better than I expected, I managed to keep this project on a budget. Nice 1300's are selling between 5 and 6K currently and it is very rare that a project bike is finished for less than they are worth (it is just the cold hard truth of wrenching on old bikes). Of coarse I'm counting my time as free, but I love tinkering in the garage at night... who doesn't right.
I know some of you following this project may be surprised at the costs, but this really was budget restoration. Look through the detailed list below...
Parts and Repair List
Carburation/Induction - $250
Carbs ultrasonically cleaned
Enrichener tubes repaired
(3) Carb Kits (Z1-Enterprizes)
(3) Brass Floats (Forum Member at KZ1300.com)
Jet Kit (6 Sigma, Cheap on E-bay)
Air box Top “Snorkel” Replaced
Carb Boots (Used E-Bay)
Pingle Fuel Tap w/Adaptor (Dennis Kirk)
Fuel Line and Filter
Uni Air Filter (E-Bay)
Fuel Level Gauge (Used, E-bay)
Engine - $2250
All Engine Mount Bolts and Nuts (Used, E-Bay)
Gasket Kit (Generic)
OEM Base Gasket
Custom Comitec Head Gasket
OEM Timing Chain Rollers (Updated Version)
ZX-10 Tensioner
Timing Shaft (Used, E-bay)
Water Pump Drive Gear, Plastic (Used, E-bay)
Water Pump Mechanical Seal
Water Pump Oil Seal
Thermostat (OEM)
Thermostat Cover Gasket (OEM, pattern gasket was crap)
Radiator Hoses (Cut Pieces from Single Automotive Hose from NAPA)
Colling Fan Switch Sensor (OEM)
Repaired Colling Fan Wiring
(6) Forged Pistons from Ross w/Wrist Pins and Clips
(6) Total Seal Piston Ring Sets
(6) Vesrah Intake Valves
(6) Exhaust Valves (possibly Vesrah from the UK)
(12) Valve Seals, Steel Bucket Type from Z1-Enterprizes
A Few Valve Shims (Two from Z1-Enterprizes, One from E-bay)
SS Allen-head Bolt Kit (E-bay)
Custom Blanking Plates for Emissions Reed Valves
A Ridiculous Number of O-rings (All OEM)
Valve Job, Re-Surface, and Mild Porting from Cavanaugh Racing
Cylinders Bored by Quality Machine in Fargo, ND
(4) Rubber Cam Plugs form Z1-Enterprizes
OEM Clutch Cable
Chrome Engine Covers Stripped and Polished
Exhaust - $550
DG 6 into 1 - Worth Every Cent!
Suspension and Brakes - $400
Front Fork Seals (OEM)
15w Fork Oil
Front Tire, Shinko 230 Series
Rear Tire, Shinko 230 Series
Rear Swing Arm, Pivots and Bearings (Used Parts, E-bay)
(2) Rebuild Kits for Front Calipers
Rebuild Kit w/Center Seal for Rear Caliper
Rebuild Kit for Front Master Cylinder
Piston Seal for Rear Master Cylinder
Spiegel SS Break Line Kit w/Bolts and Washers
Front and Rear Brake Pads
Progressive Air Shocks (Used E-Bay – Rebuilt)
Final Drive - $50
Drive Shaft (Used Parts, E-bay)
Drive Shaft Boot (Used Parts, Ebay)
Ring Gear Shims
Final Drive Oil Seals
Gear Housing O-ring
Ignition and Electrical - $300
(3) Dyna Coils, Green (Ebay, One at a Time)
Fabricated a Plate to Mount Coils Where Tool Tray Would Normally Be
Added Wires and Loom to New Coil Location, Threw Old Coil Resistor in Garbage
Spark Plugs, NGK
Plug Wires (Generic Automotive 6 Cylinder Kit)
Battery, AGM Type (Batteries Plus)
Battery Tray (Used, E-bay)
Battery Hold-Down Bracket (New OEM, Found One Cheap Old Stock)
Rear Turn Signals (Generic ones from Dennis Kirk)
Turn Signal Stems (Used Parts I Already Had)
Rubber Mounting Grommets for Turn Signals (American Classix)
Repaired Wiring for Rear Lights, Replaced Diode for Running Lights
Cleaned all Connectors, Replaced Stator Connector and Contacts (Z1-Enterprizes)
Lower Head Light Bracket with Rubber Parts (from Germany)
Rubber Side Mounts for Head Light (OEM)
Spare Ignition Module (from Lauri in Finland) - Price not counted, purchased by selling some unused parts
Body Work - $1000
Air Box Covers (E-bay, Lucky To Get Them Cheap)
Left Rear Foot Peg (Used, E-Bay)
Side Cover Mounting Grommets (Z1_Enterprizes)
Rear Grab Bar (Reproduction from the UK, E-bay)
Tail Piece Rubber Mounts (E-Bay)
Gas Tank Rear Mount and Bushing (E-bay)
Gas Tank Caustic Dipped, Then Old Epoxy Liner Removed
Repaint Body Work GM Synergy Green (Local Body Shop)
Repainted Frame, Swing Arm, Engine, and Misc. Brackets ( Rattle Cans, VHT and PJ1)
Miscellaneous Other Crap
Screws, Nuts, Bolts, Washers, Etc.
Used Bore Gauge (E-bay)
Sealants, and Silicone
Honda Bond 4 (for the Water Jackets in the Head Gasket)
Grease, Gear Lube and Engine Oil (Filter Too)
Assembly Lube
Antifreeze
Permatex Gasket Remover
Some of the costs, especially in the engine should serve as a sobering reminder... The engine work I did myself apart form machining work, the pistons were pricey but they are still in line with costs of the alternatives discounting the cheap e-bay kits. Larry's charges were very reasonable for the work he did on the head, but I had to replace the valves and they are not cheap. All the little things add up, and this engine is full of little things. I would bet there are $150 or so in just O-rings and oil seals. And really every one should be replaced, these engines are way more work to take apart than an air cooled 4, you can't justify skipping something small because its just too much work to take it all apart again. A number of people on other forums have had problems with the oil seal on the water pump drive shaft leaking after a rebuild, and that requires removing the cylinder head to get to.... for a $6 seal... you get the idea.
Another example is the water pump, the mechanical seal is $55, but there is a gasket $4 and three O-rings $4 a piece and the oil seal at $6, and the Thermostat at $37 and if you find the plastic drive gear is damaged you can out much more $$$...
I am not trying to discourage people from tearing into one of these, just be realistic as to what you are dealing with. Just a set of stock bore piston rings will run nearly $300.
I will update this list again as I am sure I've missed some things. I hope this project thread will continue to be useful to those considering a 1300 project or working on one. There really are only a few good project threads on these bikes out there. I will go back through the entire thread at some point and add some additional info about parts availability as there are some different options now that were not available when I did the work. The German shop has added quite a few reproduction parts... if you can afford them.
This was a fun project to work on, but it tested my patience many times. Totally worth the effort though... these things are just awesome!
Attachment kz1300-8-2.jpg not found
Replied by Nessism on topic So it begins 1980 Kz750E?
23 May 2016 08:11
Regarding the work needed, all sounds routine.
All Balls sells a steering head bearing kit.
OEM Kawasaki cables are best and fresh cables are a thing of beauty. Be sure to grease the clutch actuation helix mechanism since that's often overlooked (along with the swingarm bearings like you have discovered).
Side covers are all over ebay. Master cylinders are too, only finding an original that's not corrosion pitted in the bore area is not easy. I put an EX650 master on my 750E. They are cheap and easy to find, and being late model you don't have to worry about internal corrosion. For the rear master all I can say is good luck. Most you will find are corroded on the inside.
So it begins 1980 Kz750E? was created by Mickey1031
23 May 2016 03:07
Ok well got the bike home to where it is going to live till its back on its own wheels again, after tear down its not as bad as expected.
Concerns I do have are finding some parts that broke or were not there.
Both side covers are gone
Both front and rear master cyc. For brakes are cracked or leak.
Cables all but one were broke so I'll have to find them
The berrings for the swing arm don't look like they have seen greases since it was new. The front steering head they came out in many pecies so they need to be replaced.
Seat pan
Keys
Otherwise
In decent shape. Want to take the paint off and repaint or powder coat it
Same with the motor
And the controls I haven't gotten apart yet but they don't feel good its locked in the run position on the cut off switch.
The triple trees where the bars mount all the bolts but one snapped off.
Speedo and tack don't look bad but not sure they can be saved yet but plant to try
With 17k or just over I hope to use as many parts as I can and repaint.
Replied by Shdwdrgn on topic 1981 KZ1000 J-to-K build
22 May 2016 20:21
Finished up the rear wheel and stripped off the tape this morning. Finally had everything ready to go, so I reassembled the rear axle, finally getting everything in the right order and direction. A very close inspection will make it apparent that I hand-cut the line for the bare silver stripe on the wheels, however step back a few feet and it looks just fine.
I don't remember if I mentioned this, and you can't see it in the photos, but there was a problem with the paint over the Winter. I'm not sure exactly what it is, my guess is tree pollen, but something coated a number of areas on the frame and made the paint feel like sandpaper. I had an idea today though... I have one of those polishing kits for headlights, so I took the fine foam polishing disc and started working on one of the smaller pieces. Amazingly, it cleaned right up and showed the nice coat of paint underneath, so with much more confidence I started working on the frame. I've gotten through about half of it, but after the cleanup followed by some rubbing compound, I have the original shine back in most of the places I've worked. The one exception it the top 'platform' area of the swingarm. I got rid of the coating, but even the rubbing compound isn't really bringing back the shine. At least the areas that show are looking much better now!
So the last thing to finish up on the wheels is the brakes. I'll hit all three units with a fast pass of the sandblaster to clean them up and knock loose and flakes of paint, then give them the old gloss-black treatment. I'll have to be really careful not to spill any brake fluid on the fresh paint, but after its had a few months to cure I won't be quite so worried about it. I also need to fill the forks, and then go through and re-tighten all the bolts. I know I didn't snug down several because I expected to take things apart again, but at this stage I believe the main framework is pretty well set.
After I finish that up, I'll head back to the engine, which is still lying in pieces all over my garage floor. I need to clean up and paint the casing, then start reassembling everything. The real problem there is that since the bike sits outside, I need to have ALL the engine parts ready to bolt up at once. Can't have rain getting inside the crank. It'll be a lot of work to finish up before it shows any real progress, but then I'll be down to mostly smaller parts left to clean and paint, and some things can be removed and painted later, if I get antsy to get her started up.
Replied by z1kzonly on topic Swingarm parts question
22 May 2016 06:41
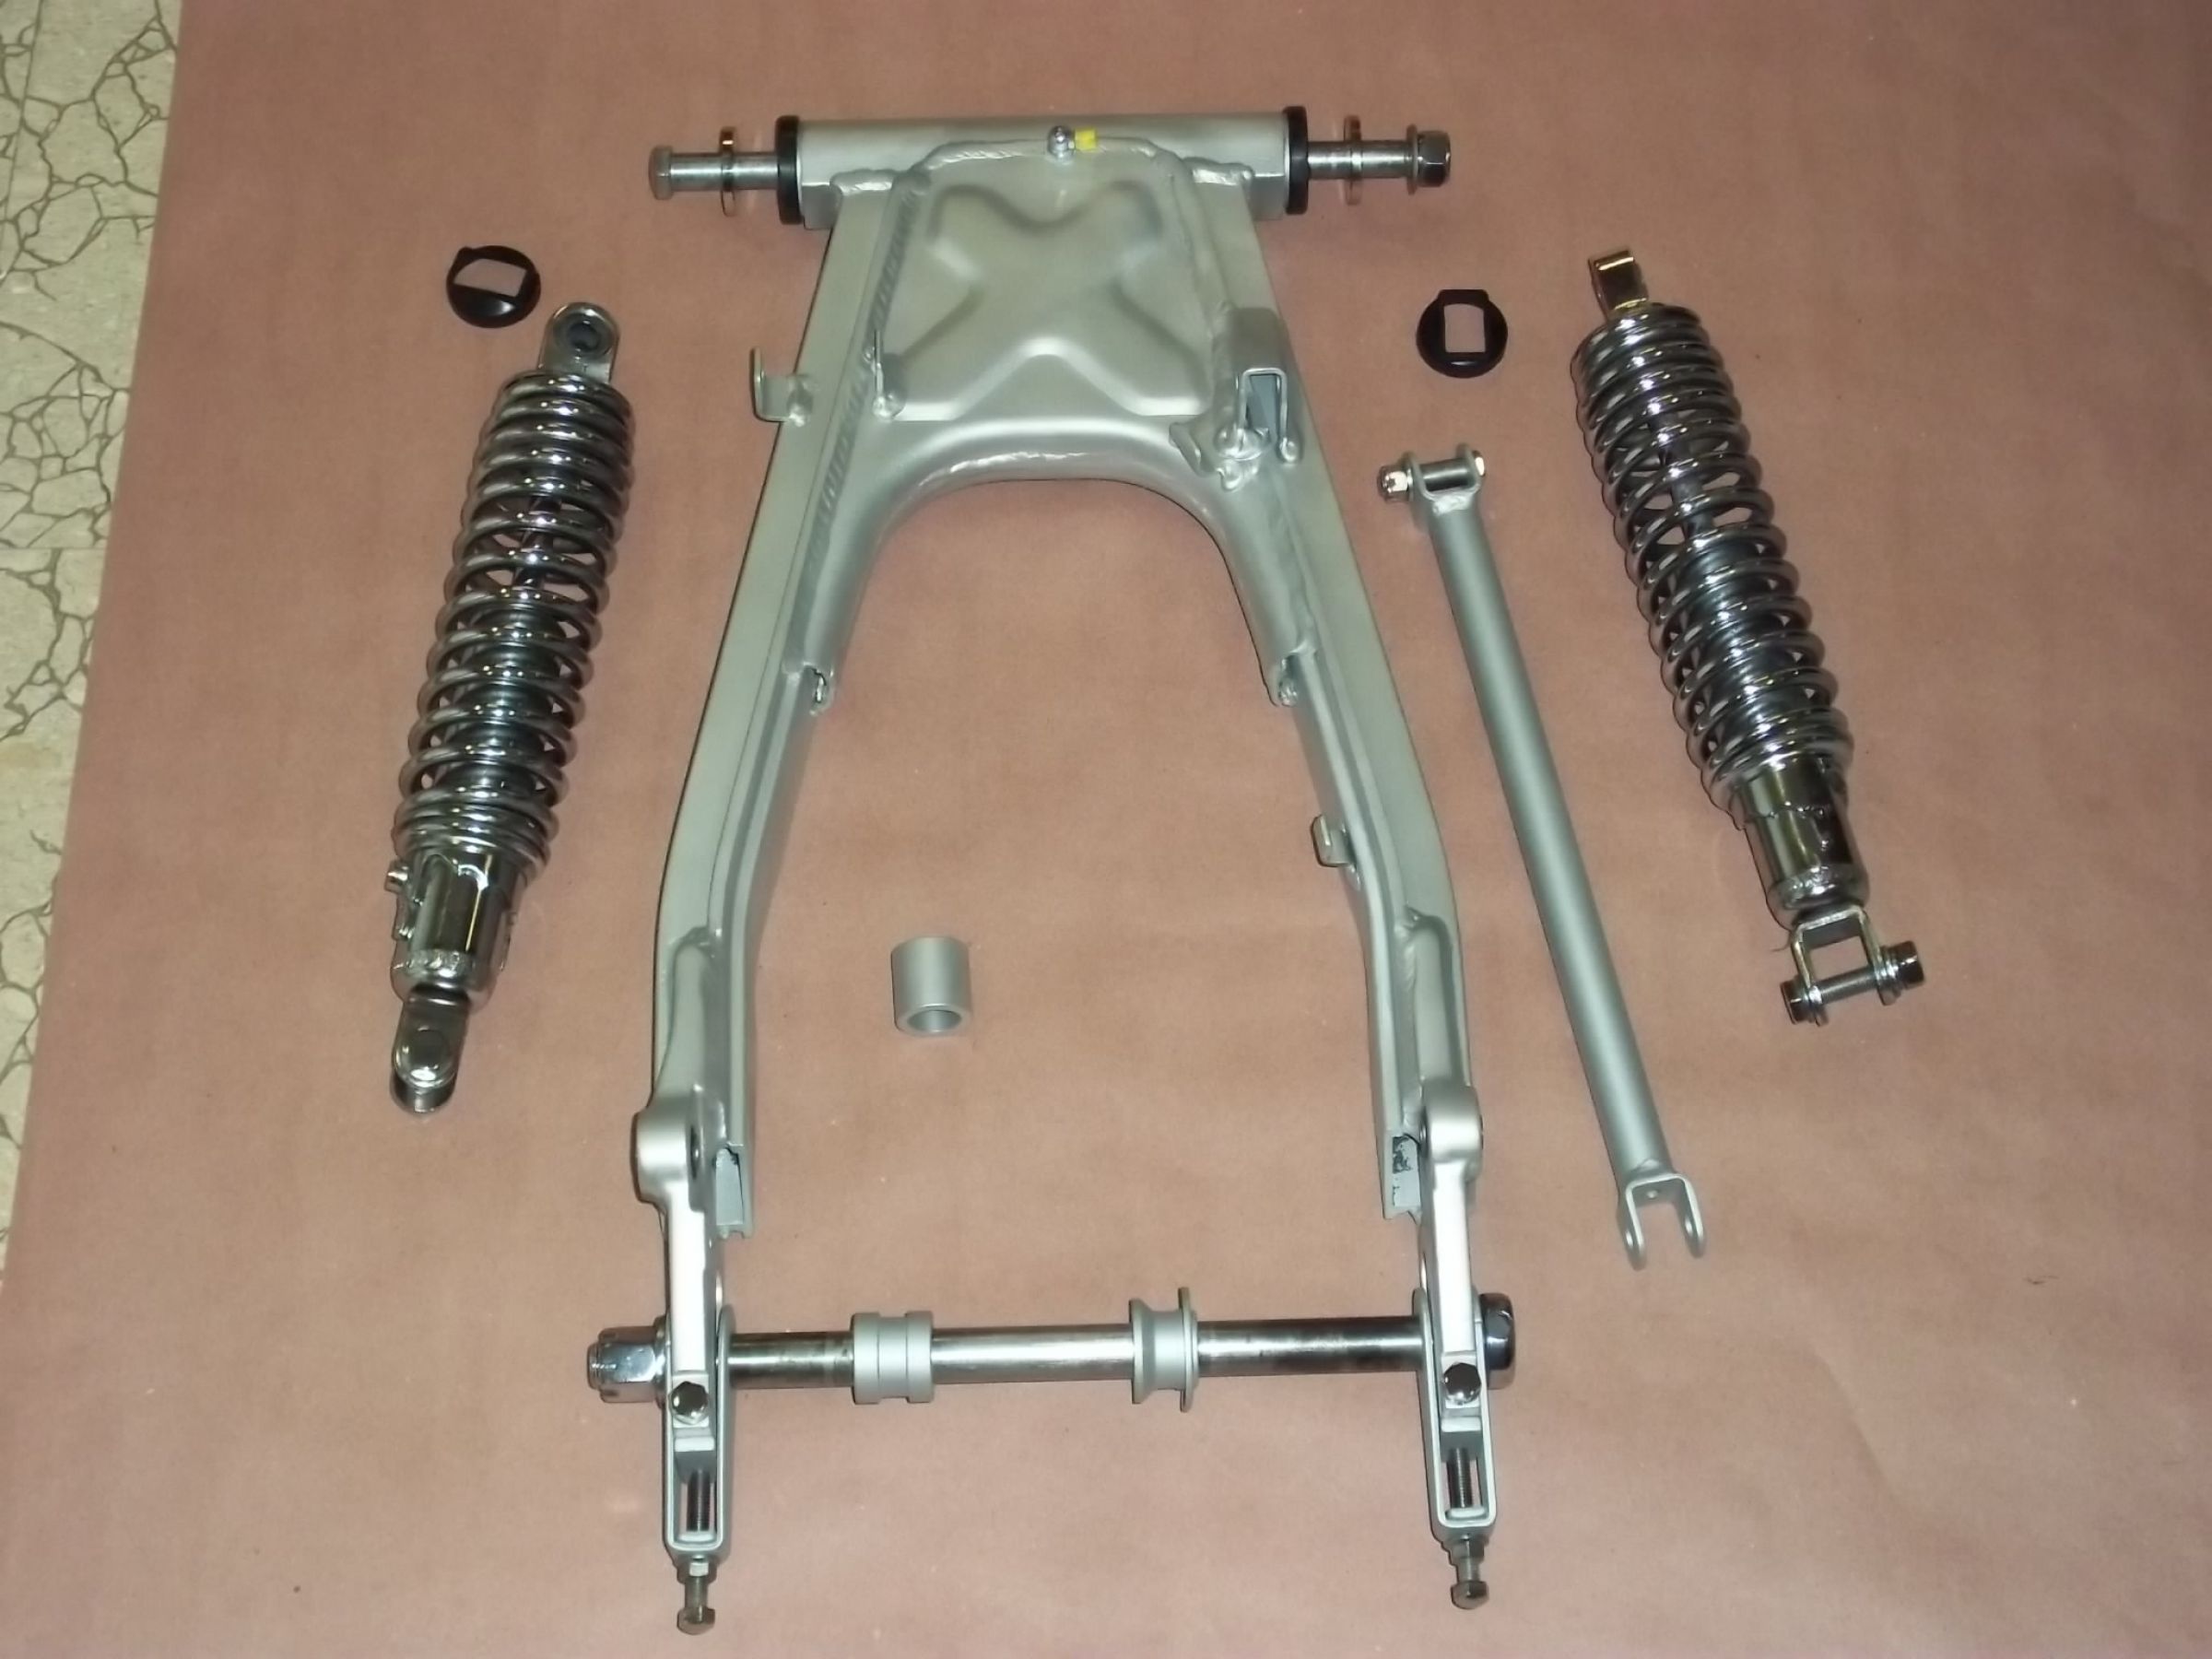
Your Kaw pivot frame bolt will fit it they are 16mm. you do need a spacer on each side. 2 cheap hardware store 5/8" flat washers will work or machine 2 spacers about .160" - .180".
You will need a rear axle a little longer than the Kaw. The adjusters and 2 small tab piece will work.
Plus you need Suzi rear shocks with a clevis end on them at bottom.
Search ebay for those.
I showed you this pic before.
Good luck.
You will need a rear axle a little longer than the Kaw. The adjusters and 2 small tab piece will work.
Plus you need Suzi rear shocks with a clevis end on them at bottom.
Search ebay for those.
I showed you this pic before.
Good luck.
If you mean GS swingarm, the last time I checked, those parts were still available at your neighborhood Suzuki dealer.
Swingarm parts question was created by Tirefire Pat
22 May 2016 05:31
I've bought a 83 vs swingarm. To swap out my 80 1000 b swing arm..however when I received the vs swingarm,,she was naked..no adjusters,axle bolts ,pivot bolt,,anything,,my questions,,willmy adjusters fit onto The gs arm? Any link where I can find the gs parts if that's what I need to do? Thanks for any input..pat
Displaying 1021 - 1030 out of 7257 results.