Building a custom cafe seat
- nickleo373
-
 Topic Author
- Offline
- User
- Posts: 587
- Thanks: 33
Building a custom cafe seat
09 Oct 2013 00:38
Hey everyone
I want to build a café seat for my KZ550 but I don't want to chop up the frame. I also do not want to shave any foam off of the original seat. The frame below the seat angles up towards the back of the bike. Does anyone have some advice on how to build a custom seat that will make the whole seat appear flat?
I want to build a café seat for my KZ550 but I don't want to chop up the frame. I also do not want to shave any foam off of the original seat. The frame below the seat angles up towards the back of the bike. Does anyone have some advice on how to build a custom seat that will make the whole seat appear flat?
1981 KZ550C LTD
"If you ain't first, you're last"
"If you ain't first, you're last"
Please Log in or Create an account to join the conversation.
- DoctoRot
-

- Offline
- Sustaining Member
- Oh, the usual... I bowl, I drive around...
- Posts: 2545
- Thanks: 680
Re: Building a custom cafe seat
09 Oct 2013 07:53
if you dont shave the foam off your existing seat (assuming its the LTD seat in your avatar) it will probably look huge and out of proportion with the rest of the bike. You could just buy a beat up seat pan play around foam and upholstery options without sacrificing your existing seat. just my .02
The following user(s) said Thank You: BlackZ1R
Please Log in or Create an account to join the conversation.
- 531blackbanshee
-

- Offline
- Vendor
- Posts: 7447
- Thanks: 797
Re: Building a custom cafe seat
09 Oct 2013 10:45
you are not going to be able to build a flat seat on top of a stepped frame and have it look right.
thats my .02 fwiw,
leon
thats my .02 fwiw,
leon
skiatook,oklahoma 1980 z1r,1978 kz 1000 z1r x 3,
1976 kz 900 x 3
i make what i can,and save the rest!
billybiltit.blogspot.com/
www.kzrider.com/forum/5-chassis/325862-triple-tree-custom-work
kzrider.com/forum/5-chassis/294594-frame-bracing?limitstart=0
1976 kz 900 x 3
i make what i can,and save the rest!
billybiltit.blogspot.com/
www.kzrider.com/forum/5-chassis/325862-triple-tree-custom-work
kzrider.com/forum/5-chassis/294594-frame-bracing?limitstart=0
Please Log in or Create an account to join the conversation.
- SevKZ9
-

- Offline
- User
- Posts: 12
- Thanks: 3
Re: Building a custom cafe seat
09 Oct 2013 13:25
Heres hoe you do it.
This is an involved process but its very rewarding at the end and a simple cafe seat would be an excellent first project.
First start by carfully wraping the frame tubes that you want your seat to attach to with saran wrap trying to avoid any wrinkles.
Then tape paper just below the horizontal tangent line between those frame tubes to create a "pan" area.
Then create a similar "pan" type surface a couple inches around the outside of the designated frame tubes, again with just tape and paper.
Then get a piece of 1/2" XPS foam board and cut it to slightly oversize of the entire "pan" area. It should just lay on the top of the designated frame tubes. Make it stable by blocking in small XPS blocks to give it 3 points of contact to the frame.
Tape plastic from the underside edge of the "pan" area to the top surface of your XPS. You should now have a "bubble" that encapsulates your frame tubes that you want the seat to mount to, the inside surface of the "pan" area, as well as the underside and edge of the XPS.
The only thing left to do is fill the air space in the "bubbble" with expanding foam and let it set up for 2 DAYS! at least! The foam will take a long time to properly cure in the air starved environment. Once it is all dry, it should POP off the frame rails and leave you with a perfectly formed seat attachment area on the underside and a funky lookin blob for carving on the top surface.
It carves wonderfully with a sharp knife, wire wheel on a grinder, or a hot wire cutter. Cut it to the shape you want/like, then fiberglass it and throw some upholstery over it!
Be sure to plan how you would like the upholstery to attach.
Please Log in or Create an account to join the conversation.
- nickleo373
-
 Topic Author
- Offline
- User
- Posts: 587
- Thanks: 33
Re: Building a custom cafe seat
09 Oct 2013 21:17 - 09 Oct 2013 21:17
No eBay APP ID and/or Cert ID defined in Kunena configurationThanks for the replies everyone. I've decided to buy a used KZ550 seat that somebody already messed with so I don't ruin a good original part. I found an 82 550 Spectre seat somebody's selling on ebay for cheap. Is the seat pan on the spectre compatible with the original setup on my 81 500C LTD?
1981 KZ550C LTD
"If you ain't first, you're last"
"If you ain't first, you're last"
Last edit: 09 Oct 2013 21:17 by nickleo373.
Please Log in or Create an account to join the conversation.
- Stazi
-
- Offline
- User
- Posts: 115
- Thanks: 11
Re: Building a custom cafe seat
09 Oct 2013 22:08Any pics of what you mean. I got lost after the 3rd line. :silly:SevKZ9 wrote: Heres hoe you do it.
This is an involved process but its very rewarding at the end and a simple cafe seat would be an excellent first project.
First start by carfully wraping the frame tubes that you want your seat to attach to with saran wrap trying to avoid any wrinkles.
Then tape paper just below the horizontal tangent line between those frame tubes to create a "pan" area.
Then create a similar "pan" type surface a couple inches around the outside of the designated frame tubes, again with just tape and paper.
Then get a piece of 1/2" XPS foam board and cut it to slightly oversize of the entire "pan" area. It should just lay on the top of the designated frame tubes. Make it stable by blocking in small XPS blocks to give it 3 points of contact to the frame.
Tape plastic from the underside edge of the "pan" area to the top surface of your XPS. You should now have a "bubble" that encapsulates your frame tubes that you want the seat to mount to, the inside surface of the "pan" area, as well as the underside and edge of the XPS.
The only thing left to do is fill the air space in the "bubbble" with expanding foam and let it set up for 2 DAYS! at least! The foam will take a long time to properly cure in the air starved environment. Once it is all dry, it should POP off the frame rails and leave you with a perfectly formed seat attachment area on the underside and a funky lookin blob for carving on the top surface.
It carves wonderfully with a sharp knife, wire wheel on a grinder, or a hot wire cutter. Cut it to the shape you want/like, then fiberglass it and throw some upholstery over it!
Be sure to plan how you would like the upholstery to attach.
82 KZ1000-K2 LTD
Please Log in or Create an account to join the conversation.
- DoctoRot
-

- Offline
- Sustaining Member
- Oh, the usual... I bowl, I drive around...
- Posts: 2545
- Thanks: 680
Re: Building a custom cafe seat
09 Oct 2013 22:40 - 09 Oct 2013 22:40
No eBay APP ID and/or Cert ID defined in Kunena configuration
can you pop your seat off real quick and compare the pans?
nickleo373 wrote: Thanks for the replies everyone. I've decided to buy a used KZ550 seat that somebody already messed with so I don't ruin a good original part. I found an 82 550 Spectre seat somebody's selling on ebay for cheap. Is the seat pan on the spectre compatible with the original setup on my 81 500C LTD?
can you pop your seat off real quick and compare the pans?
Last edit: 09 Oct 2013 22:40 by DoctoRot.
Please Log in or Create an account to join the conversation.
- nickleo373
-
 Topic Author
- Offline
- User
- Posts: 587
- Thanks: 33
Re: Building a custom cafe seat
09 Oct 2013 23:25
It looks like the latches and everything are in the same places but I'm unsure if the width and the height of the two seats are the same
1981 KZ550C LTD
"If you ain't first, you're last"
"If you ain't first, you're last"
Please Log in or Create an account to join the conversation.
- DoctoRot
-

- Offline
- Sustaining Member
- Oh, the usual... I bowl, I drive around...
- Posts: 2545
- Thanks: 680
Re: Building a custom cafe seat
10 Oct 2013 06:22
ask the seller for dimensions. or for $36 you could find out :laugh:
The following user(s) said Thank You: nickleo373
Please Log in or Create an account to join the conversation.
- SevKZ9
-

- Offline
- User
- Posts: 12
- Thanks: 3
Re: Building a custom cafe seat
11 Oct 2013 00:11
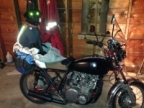
I thought that might happen, I wrote with the knowledge I learned from my endeavor so my pics don't follow exactly but here are some. I started by laying out the flat surfaces and building up the back portion from a flat base. Then you can see the plastic wrapped underneath the whole mess... Then came the expanding foam, like I said, I learned from this experience, it got messy... But then you can see how well it formed to the frame rails and most of the underside work was done with that knife in the pic... Then I cut everything that didnt look like what I wanted and fiberglassed it, put lights in it hid the electronics on the underside and have a crappy fizz can paint job haha!
Attachments:
The following user(s) said Thank You: Stazi
Please Log in or Create an account to join the conversation.
- DoctoRot
-

- Offline
- Sustaining Member
- Oh, the usual... I bowl, I drive around...
- Posts: 2545
- Thanks: 680
Re: Building a custom cafe seat
11 Oct 2013 04:28SevKZ9 wrote: I thought that might happen, I wrote with the knowledge I learned from my endeavor so my pics don't follow exactly but here are some. I started by laying out the flat surfaces and building up the back portion from a flat base. Then you can see the plastic wrapped underneath the whole mess... Then came the expanding foam, like I said, I learned from this experience, it got messy... But then you can see how well it formed to the frame rails and most of the underside work was done with that knife in the pic... Then I cut everything that didnt look like what I wanted and fiberglassed it, put lights in it hid the electronics on the underside and have a crappy fizz can paint job haha!
that is hands down the strangest tail i have ever seen on a bike.
Please Log in or Create an account to join the conversation.
- 531blackbanshee
-

- Offline
- Vendor
- Posts: 7447
- Thanks: 797
Re: Building a custom cafe seat
11 Oct 2013 10:13
you gotta have a better side shot than that dontcha  !
!
as crazy as it is i think it is cool that you went all the way with it.
is that a passenger seating area in the back?
leon
as crazy as it is i think it is cool that you went all the way with it.
is that a passenger seating area in the back?
leon
skiatook,oklahoma 1980 z1r,1978 kz 1000 z1r x 3,
1976 kz 900 x 3
i make what i can,and save the rest!
billybiltit.blogspot.com/
www.kzrider.com/forum/5-chassis/325862-triple-tree-custom-work
kzrider.com/forum/5-chassis/294594-frame-bracing?limitstart=0
1976 kz 900 x 3
i make what i can,and save the rest!
billybiltit.blogspot.com/
www.kzrider.com/forum/5-chassis/325862-triple-tree-custom-work
kzrider.com/forum/5-chassis/294594-frame-bracing?limitstart=0
Please Log in or Create an account to join the conversation.

