
frame bracing
- kaw-a-holic
-
- Offline
- User
-

Registered
- Posts: 1808
- Thanks: 249
Re: frame bracing
27 Mar 2014 20:06
I have a dilemma. I need to brace my frame for the upgrades I have made. One guy wants $400 to TIG it in. That is me providing the kit and having the frame blasted and ready to weld. My brother knows a guy that does this sort of thing and he wanted 700-1200. He checks to make sure the frame is square and puts the frame in a jig. To those of you that have put a bracing in did you TIG, MIG or braze? If you did it yourself did you have the frame braced up? If not was the frame empty? How do you keep the frame from warping? If you had it professionally done how much did it cost you? $700 is just to much money. I just want to get rid of the frame flex not race the damn thing.
Thanks Jon
Thanks Jon
Jon
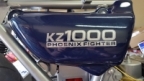
1977 KZ1000a1
Mesa, AZ
Phoenix Fighter Project
1977 KZ1000a1
Mesa, AZ
Phoenix Fighter Project
Please Log in or Create an account to join the conversation.
- zed1015
-

- Offline
- User
-
Registered
- Posts: 3247
- Thanks: 1940
Re: frame bracing
28 Mar 2014 02:45
Ideally the frame would be set in a jig but having some crankcases and the swing arm bolted in the frame at the very least will work.
You should have the frame checked for straightness if it is an unknown quantity, if you have rode the bike before and all was ok then just get on and weld it.
Gas weld /braze or Tig are the best methods.
Arc and mig can create brittle joints.
Work equally along both sides of the frame to avoid distortion.
Also when fitting triangular gussets etc DO NOT weld right in to the corners as this creates stress areas (See the first pages of my café project for examples ).
AIR CORRECTOR JETS FOR VM CARBS AND ETHANOL RESISTANT VITON CHOKE PLUNGER SEAL REPLACMENT FOR ALL CLASSIC AND MODERN MOTORCYCLE CARBURETTORS
www.kzrider.com/forum/23-for-sale/611992...lide-mikunis?start=1
www.kzrider.com/forum/23-for-sale/611992...lide-mikunis?start=1
The following user(s) said Thank You: PLUMMEN, kaw-a-holic
Please Log in or Create an account to join the conversation.
- 531blackbanshee
-
 Topic Author
- Offline
- Vendor
-

Vendors
- Posts: 7444
- Thanks: 796
Re: frame bracing
28 Mar 2014 05:50
zed1015's advice is spoton 100%.
paying close attention to doing the same spot welds/welds equally from side to side is one of the biggest things to keep in mind.
this gives every pull an equal and opposite pull to help prevent deformation.
if you have to mig it pre-heat is a good way to help reduce the brittleness zed referred to.
leon
skiatook,oklahoma 1980 z1r,1978 kz 1000 z1r x 3,
1976 kz 900 x 3
i make what i can,and save the rest!
billybiltit.blogspot.com/
www.kzrider.com/forum/5-chassis/325862-triple-tree-custom-work
kzrider.com/forum/5-chassis/294594-frame-bracing?limitstart=0
1976 kz 900 x 3
i make what i can,and save the rest!
billybiltit.blogspot.com/
www.kzrider.com/forum/5-chassis/325862-triple-tree-custom-work
kzrider.com/forum/5-chassis/294594-frame-bracing?limitstart=0
The following user(s) said Thank You: PLUMMEN, kaw-a-holic
Please Log in or Create an account to join the conversation.
- NakedFun
-

- Offline
- User
-
Registered
- Posts: 1129
- Thanks: 121
Re: frame bracing
28 Mar 2014 07:42
Those are all real good tips. I did not Jig my frame, but left engine and swing arm components in place. I MIG'd the frame as that is the preferred method of welding that I have access to. Otherwise I would TIG. I did not preheat the frame, but I did move from side to side and using a stitch welding method that helps regulate the amount of heat you put into the joint. You need enough to complete the fusion, but not enough to cause warpage or melting of the base steel. I found the frame material to be pretty thin and of less quality than the material of the gussets. I felt if I did not stitch it I could blow some holes into it. FWIW. I am sure there are much more knowledgable welders on here than me (Leon and Zed)
Cory
Cory
2008 Kawasaki Concours 14
1999 Kawasaki ZRX1100
1976 Kawasaki KZ900
1999 Kawasaki ZRX1100
1976 Kawasaki KZ900
The following user(s) said Thank You: kaw-a-holic
Please Log in or Create an account to join the conversation.
- NakedFun
-
- Offline
- User
-
Registered
- Posts: 1129
- Thanks: 121
Re: frame bracing
28 Mar 2014 07:45
Oh and lastly, do not quench the welded joints with water or similar to cool them. This will draw the carbon to the surface of the metal and cause it to get harder and lose ductility, making it brittle. Just let it air-cool to room temp.
Cory
Cory
2008 Kawasaki Concours 14
1999 Kawasaki ZRX1100
1976 Kawasaki KZ900
1999 Kawasaki ZRX1100
1976 Kawasaki KZ900
The following user(s) said Thank You: 531blackbanshee
Please Log in or Create an account to join the conversation.
- jcw
-

- Offline
- User
-
Registered
- Posts: 6
- Thanks: 3
Re: frame bracing
22 Aug 2014 13:16
My first post and I wanted to say this is an awesome thread. Thanks to the OP and all that contributed.
I'm bracing my Yamaha and there's more info here and on this forum about frame bracing than any other I've found.
I'm bracing my Yamaha and there's more info here and on this forum about frame bracing than any other I've found.
The following user(s) said Thank You: 531blackbanshee
Please Log in or Create an account to join the conversation.
- kaw-a-holic
-
- Offline
- User
-
Registered
- Posts: 1808
- Thanks: 249
Re: frame bracing
24 Aug 2014 16:48jcw wrote: My first post and I wanted to say this is an awesome thread. Thanks to the OP and all that contributed.
I'm bracing my Yamaha and there's more info here and on this forum about frame bracing than any other I've found.
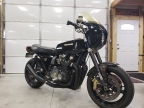
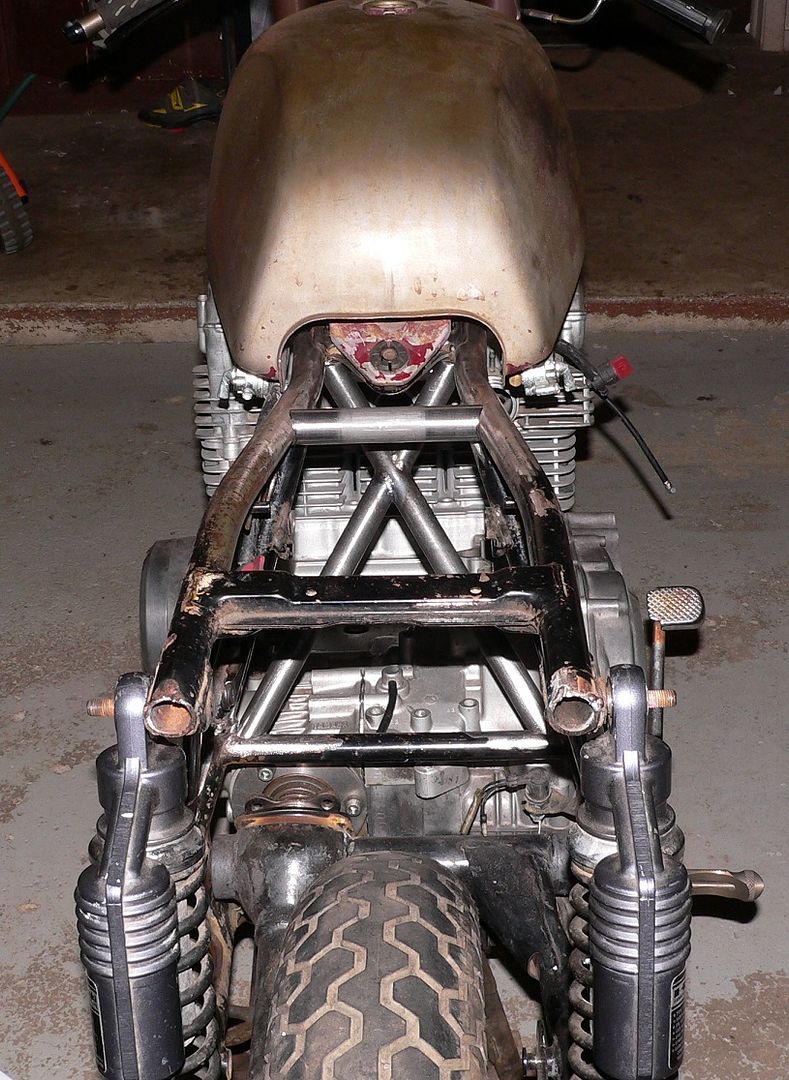
Glad it helped, Here are some picks of how my frame bracing turned out.
Jon
1977 KZ1000a1
Mesa, AZ
Phoenix Fighter Project
1977 KZ1000a1
Mesa, AZ
Phoenix Fighter Project
The following user(s) said Thank You: 531blackbanshee, jcw
Please Log in or Create an account to join the conversation.
- jcw
-
- Offline
- User
-
Registered
- Posts: 6
- Thanks: 3
Re: frame bracing
29 Aug 2014 12:04 - 29 Aug 2014 12:11kaw-a-holic wrote: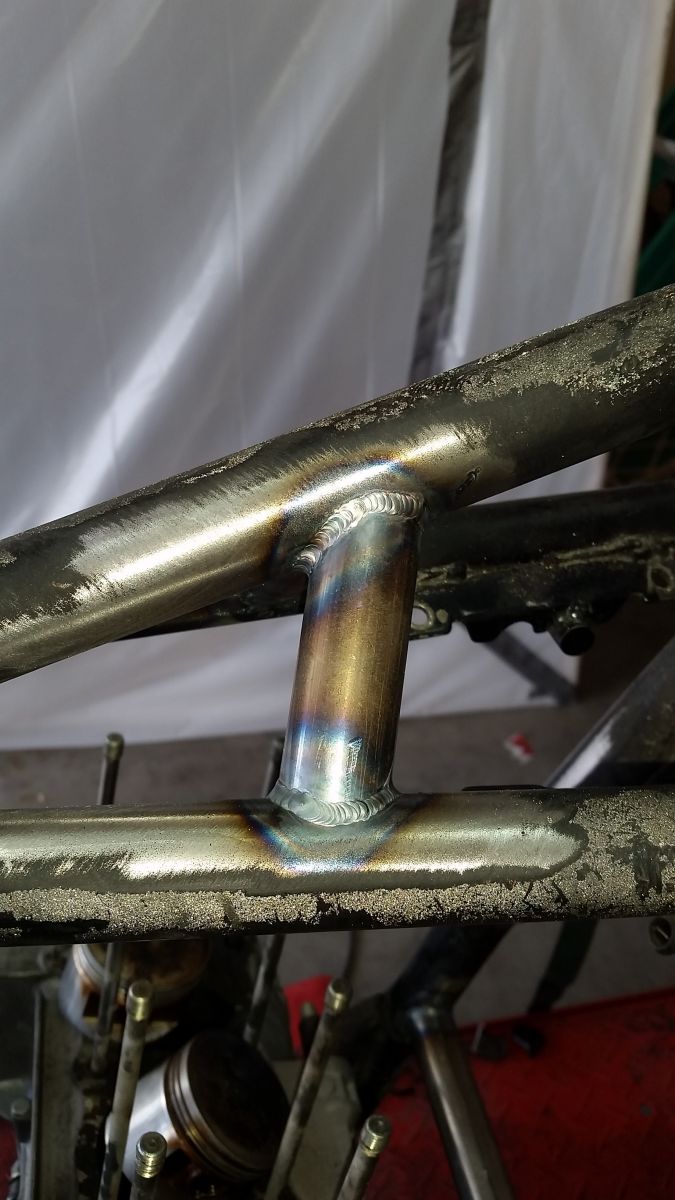
Nice bead!
Tigged, right?
what settings?
Last edit: 29 Aug 2014 12:11 by jcw.
Please Log in or Create an account to join the conversation.
- kaw-a-holic
-
- Offline
- User
-
Registered
- Posts: 1808
- Thanks: 249
Re: frame bracing
29 Aug 2014 12:10
JCW, yes those were TIG'd, I wish I could take credit for them but I paid someone else to do it as I have never TIG'd but am eager to learn soon. He used a $600 chinese TIG welder. Obviously the machine does not always define the quality of the weld.
Jon
1977 KZ1000a1
Mesa, AZ
Phoenix Fighter Project
1977 KZ1000a1
Mesa, AZ
Phoenix Fighter Project
The following user(s) said Thank You: jcw
Please Log in or Create an account to join the conversation.
- CruisingRam
-
- Offline
- User
-
Registered
- Posts: 643
- Thanks: 16
Re: frame bracing
30 Aug 2014 11:16
I have the everlast TIG machine myself. It is actually a very high quality machine, despite the rep of chinese manufacturing. I love mine!
1975 Z1 B 900- soon to be heavily modded
Pahoa, Hawaii is my new hom
I am working hard to save up the shipping money to get my shop opened here in Hawaii
I hate electrical stuff.
Pahoa, Hawaii is my new hom
I am working hard to save up the shipping money to get my shop opened here in Hawaii
I hate electrical stuff.
The following user(s) said Thank You: jcw
Please Log in or Create an account to join the conversation.
- Hemmek
-
- Offline
- User
-
Registered
- Posts: 82
- Thanks: 8
Re: frame bracing
30 Aug 2014 14:10
As a professional welder I feel that I am obliged to give some hints.
we start with the big NR.1
Always and I mean Always prep the surface to perfection.
You want the paint off and just clean degreased metal where you want to weld and at least one centimetre of clean metal both sides of your weld. (everything that have a snowballs chance in hell getting into your weld will get into your weld and contaminate)
No matter what you are welding with you want to do it in a still environment (wind is your enemy)
O2 is your nemesis when welding.
Bolt as many things in as possible that will help holding the frame in place and it will probably fit back on afterwards.
Brace the frame in critical areas to reduce warpage (take a piece of rebar and tack it on to act as an brace while welding and remove later)
I have yet to work on a motorcycle frame so I don't know where you would want to put your rebar bracing.
Use the method that you can handle best.
TIG will get you the best quality welds IF you can handle it well enough.
And since TIG is the thing I am using now I will give some hints here as well.
The number one mistake all new welders do with TIG is that they are going to slow.
Low heat (amperes) and going slow.
This will over heat the material and you will start to lose all the good stuff in the alloy.
and you will ending up putting more heat into the metal and that will lead to more warpage.
Want you want to do is going fast, insanely fast and at high amps.
For a corner joint using no filler on stainless steel 1mm I use 75amps for an example.
This will fuse the material fast and the heat will not have time to spread through the material keeping HAZ to a minimum (heat affected zone).
This is true for all the welding methods, the faster you can go the better results you will get.
But we are not finished yet are we?
No because after welding we want to do some things to further strengthen the bond and release some tension.
(especially true on thin gauge sheet metal and MIG/MAG)
Now what have happened when we fused the materials together?
First we superheated the metal and it expanded, then it fused together what will happened next?
It cools and contract and since the fuse was made when hot it will be under tension.
We can say that all welds shrink the material or wants to shrink.
This is what causes warpage.
what can we do to fix this?
We could heat threat the entire frame but that's not something we can do ourselves and it is a complicated and expensive process.
But we can beat the metal into submission, taking a hammer and beating (only on the seem itself) we will expand the metal little and relive some tension.
Now what more can we do?
We do not want to put any more heat into the frame than necessary but we can safeguard against cracks developing by grinding the transition between seem and base metal smooth.
all sharp angels will help a crack to form and if you accidentally made a ditch between the seem and base metal you must fill this in or it has a high chance of develop a crack in the future.
Think like this force lines will go in the outermost skin of the metal, everywhere they can flow unrestricted is good.
This is true on the side that you can not see as well, so if you have not fused the metal completely it is possible that I crack will develop from within. (this is one of the reasons we X-ray critical areas)
Btw using TIG you can tell when you have melted the metal all the way through by looking at your puddle.
it will seem to start spinning when you have melted the material all the way through.
One more, when you have finished your weld back up a little before turning it off.
(if you just stop you will get a pipe = a small hole that goes straight through)
TIG set the slope down to at least two seconds and when turning of you reverse your direction an let it slope out going in reverse (it will look like a small tail if done correctly).
MIG/MAG some do have the function (crater fill) if you have it use it. (just stop when finishing and the machine will fix it for you)
But you will probably not have this function (I don't like it anyways since I learned to do it without)
When ending your seem.
when you have about 1cm left go a little faster and when ending quickly do U-turn and go back almost the whole centimetre and stop, they U-turn and backtracking must be done very fast or it will look like shit and still have a pipe.
The easier way is when you stop you just give it two fast tacks right where you ended (must be done as fast as possible)
Try on some scrap until you feel sure about it.
MMA (stick) only way I know is to backtrack a little. (not using that a whole lot)
I could turn this into a book, but I believe this will help a few anyway.
Otherwise ask and I will answer")
Best regards H
we start with the big NR.1
Always and I mean Always prep the surface to perfection.
You want the paint off and just clean degreased metal where you want to weld and at least one centimetre of clean metal both sides of your weld. (everything that have a snowballs chance in hell getting into your weld will get into your weld and contaminate)
No matter what you are welding with you want to do it in a still environment (wind is your enemy)
O2 is your nemesis when welding.
Bolt as many things in as possible that will help holding the frame in place and it will probably fit back on afterwards.
Brace the frame in critical areas to reduce warpage (take a piece of rebar and tack it on to act as an brace while welding and remove later)
I have yet to work on a motorcycle frame so I don't know where you would want to put your rebar bracing.
Use the method that you can handle best.
TIG will get you the best quality welds IF you can handle it well enough.
And since TIG is the thing I am using now I will give some hints here as well.
The number one mistake all new welders do with TIG is that they are going to slow.
Low heat (amperes) and going slow.
This will over heat the material and you will start to lose all the good stuff in the alloy.
and you will ending up putting more heat into the metal and that will lead to more warpage.
Want you want to do is going fast, insanely fast and at high amps.
For a corner joint using no filler on stainless steel 1mm I use 75amps for an example.
This will fuse the material fast and the heat will not have time to spread through the material keeping HAZ to a minimum (heat affected zone).
This is true for all the welding methods, the faster you can go the better results you will get.
But we are not finished yet are we?
No because after welding we want to do some things to further strengthen the bond and release some tension.
(especially true on thin gauge sheet metal and MIG/MAG)
Now what have happened when we fused the materials together?
First we superheated the metal and it expanded, then it fused together what will happened next?
It cools and contract and since the fuse was made when hot it will be under tension.
We can say that all welds shrink the material or wants to shrink.
This is what causes warpage.
what can we do to fix this?
We could heat threat the entire frame but that's not something we can do ourselves and it is a complicated and expensive process.
But we can beat the metal into submission, taking a hammer and beating (only on the seem itself) we will expand the metal little and relive some tension.
Now what more can we do?
We do not want to put any more heat into the frame than necessary but we can safeguard against cracks developing by grinding the transition between seem and base metal smooth.
all sharp angels will help a crack to form and if you accidentally made a ditch between the seem and base metal you must fill this in or it has a high chance of develop a crack in the future.
Think like this force lines will go in the outermost skin of the metal, everywhere they can flow unrestricted is good.
This is true on the side that you can not see as well, so if you have not fused the metal completely it is possible that I crack will develop from within. (this is one of the reasons we X-ray critical areas)
Btw using TIG you can tell when you have melted the metal all the way through by looking at your puddle.
it will seem to start spinning when you have melted the material all the way through.
One more, when you have finished your weld back up a little before turning it off.
(if you just stop you will get a pipe = a small hole that goes straight through)
TIG set the slope down to at least two seconds and when turning of you reverse your direction an let it slope out going in reverse (it will look like a small tail if done correctly).
MIG/MAG some do have the function (crater fill) if you have it use it. (just stop when finishing and the machine will fix it for you)
But you will probably not have this function (I don't like it anyways since I learned to do it without)
When ending your seem.
when you have about 1cm left go a little faster and when ending quickly do U-turn and go back almost the whole centimetre and stop, they U-turn and backtracking must be done very fast or it will look like shit and still have a pipe.
The easier way is when you stop you just give it two fast tacks right where you ended (must be done as fast as possible)
Try on some scrap until you feel sure about it.
MMA (stick) only way I know is to backtrack a little. (not using that a whole lot)
I could turn this into a book, but I believe this will help a few anyway.
Otherwise ask and I will answer
Best regards H
Kawasaki kz750 E1 1980
Kawasaki GPZ 900R A1 1984
Kawasaki GPZ 900R A1 1984
The following user(s) said Thank You: kaw-a-holic, jcw
Please Log in or Create an account to join the conversation.
- jcw
-
- Offline
- User
-
Registered
- Posts: 6
- Thanks: 3
Re: frame bracing
05 Sep 2014 20:53
I use an everlast as well. DC only but works well and even has pulse if I need it.
Here's some of my practice tube joints. Did about 50 of these joints to practice.
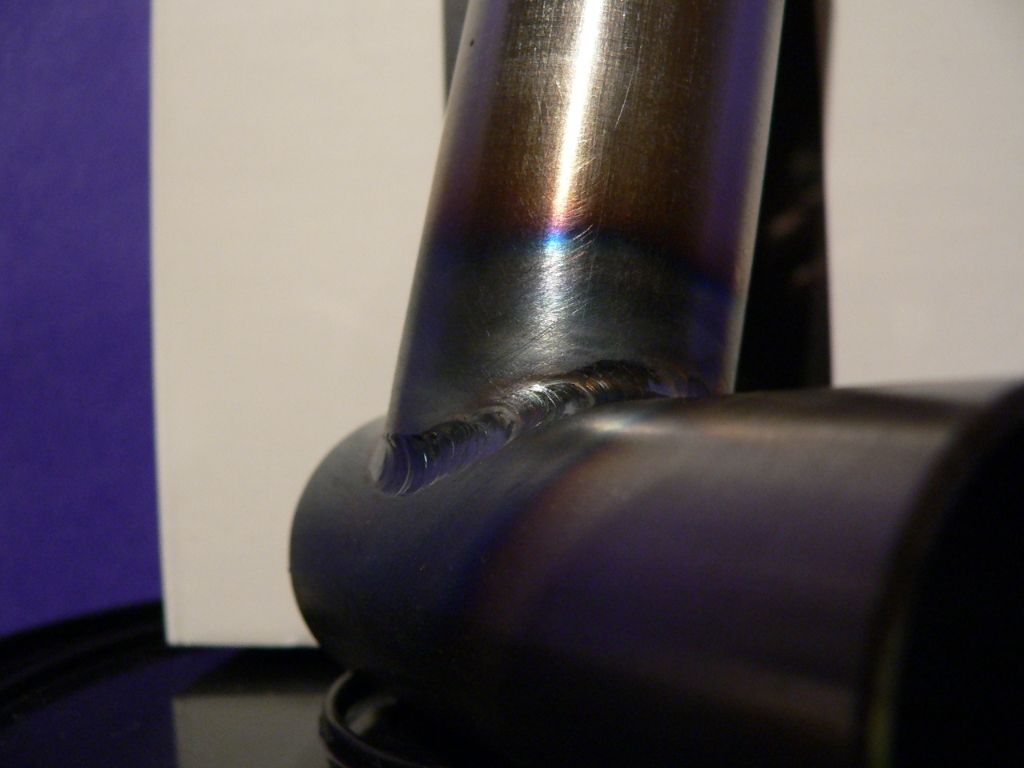
And here's the bracing on the Yamaha I'm working on
I've got a 79kz1000 as well. but the Yamaha was a bucket of bolts and I wanted to start on that one.
Here's some of my practice tube joints. Did about 50 of these joints to practice.

And here's the bracing on the Yamaha I'm working on

I've got a 79kz1000 as well. but the Yamaha was a bucket of bolts and I wanted to start on that one.
Please Log in or Create an account to join the conversation.
Moderators: Street Fighter LTD