
Gauge Information
- Rick H.
-
 Topic Author
- Offline
- User
-

Registered
- Posts: 840
- Thanks: 241
Gauge Information
26 Nov 2019 06:42 - 26 Nov 2019 06:43
Hi All: I would like to remove my tach and speedo and send them out for restoration. Besides the faceplates being somewhat faded out, the interior of the glass is quite dirty especially on the speedometer. Can anyone give me the lowdown on how to remove these from the gauge panel without damaging anything? I have the cover loose on the speedometer, but I don't think it will come off with the tripmeter knob in place, but I could be wrong on that. I haven't removed the directionals or headlamp yet because I am not sure how to go at this. My gauges have what looks like some aftermarket chrome dress up rings around the gauge that to be honest I don't care for and would like to get rid of them if I can. Last question, according to the service manual, which has almost no information on this procedure, if you position the tach and/or speedo in anyother position but "up" some dampening oil will leak out of a reservoir and ruin the gauge. How do you ship them to avoid this? Drive them yourself to the repair point?
Rick H.
1977 Kawasaki KZ-1000A1
1977 Kawasaki KZ-1000A1
Last edit: 26 Nov 2019 06:43 by Rick H..
Please Log in or Create an account to join the conversation.
- martin_csr
-

- Offline
- User
-
Registered
- Posts: 8016
- Thanks: 1645
Re: Gauge Information
26 Nov 2019 07:11 - 26 Nov 2019 07:31
Wouldn't the restorer know how to disassemble the meters & stuff? As for the tripmeter knob, you probably have to remove the crimp ring to separate the housing from the bottom, then use needle nose pliers to hold the trip meter shaft while unscrewing the knob, turning it opposite from the normal reset direction.
The speedo in this how-to has the tripmeter knob thru the side.
Restoring meters >> pg 1
Restoring meters >> pg 2
The speedo in this how-to has the tripmeter knob thru the side.
Restoring meters >> pg 1
Restoring meters >> pg 2
Last edit: 26 Nov 2019 07:31 by martin_csr.
Please Log in or Create an account to join the conversation.
- 650ed
-

- Offline
- User
-
Registered
- Posts: 15337
- Thanks: 2833
Re: Gauge Information
26 Nov 2019 07:40 - 26 Nov 2019 07:41
Contact the folks below. Tell them what you want and send the gauges. Don't disassemble the gauges more than the folks below tell you to. Ed
zresto.com/
zresto.com/
1977 KZ650-C1 Original Owner - Stock (with additional invisible FIAMM horn)
Last edit: 26 Nov 2019 07:41 by 650ed.
Please Log in or Create an account to join the conversation.
- SWest
-

- Offline
- Sustaining Member
-

Registered
- 10 22 2014
- Posts: 23677
- Thanks: 2974
Re: Gauge Information
26 Nov 2019 07:43 - 26 Nov 2019 07:49
You shouldn't have to remove the trip meter knob. There are two nuts holding the speedo on the bracket. If you find you have to remove it turn it backward. It's a fine thread so it takes a while.
Steve
Steve
Z1b1000 1975 Z1b
kzrider.com/forum/11-projects/598262-kz-...-will-it-live#672882
kzrider.com/forum/2-engine/597654-poser?start=240#704229
kzrider.com/forum/11-projects/598262-kz-...-will-it-live#672882
kzrider.com/forum/2-engine/597654-poser?start=240#704229
Last edit: 26 Nov 2019 07:49 by SWest.
Please Log in or Create an account to join the conversation.
- hardrockminer
-

- Offline
- Sustaining Member
-
Registered
- Posts: 3123
- Thanks: 1222
Re: Gauge Information
26 Nov 2019 09:07
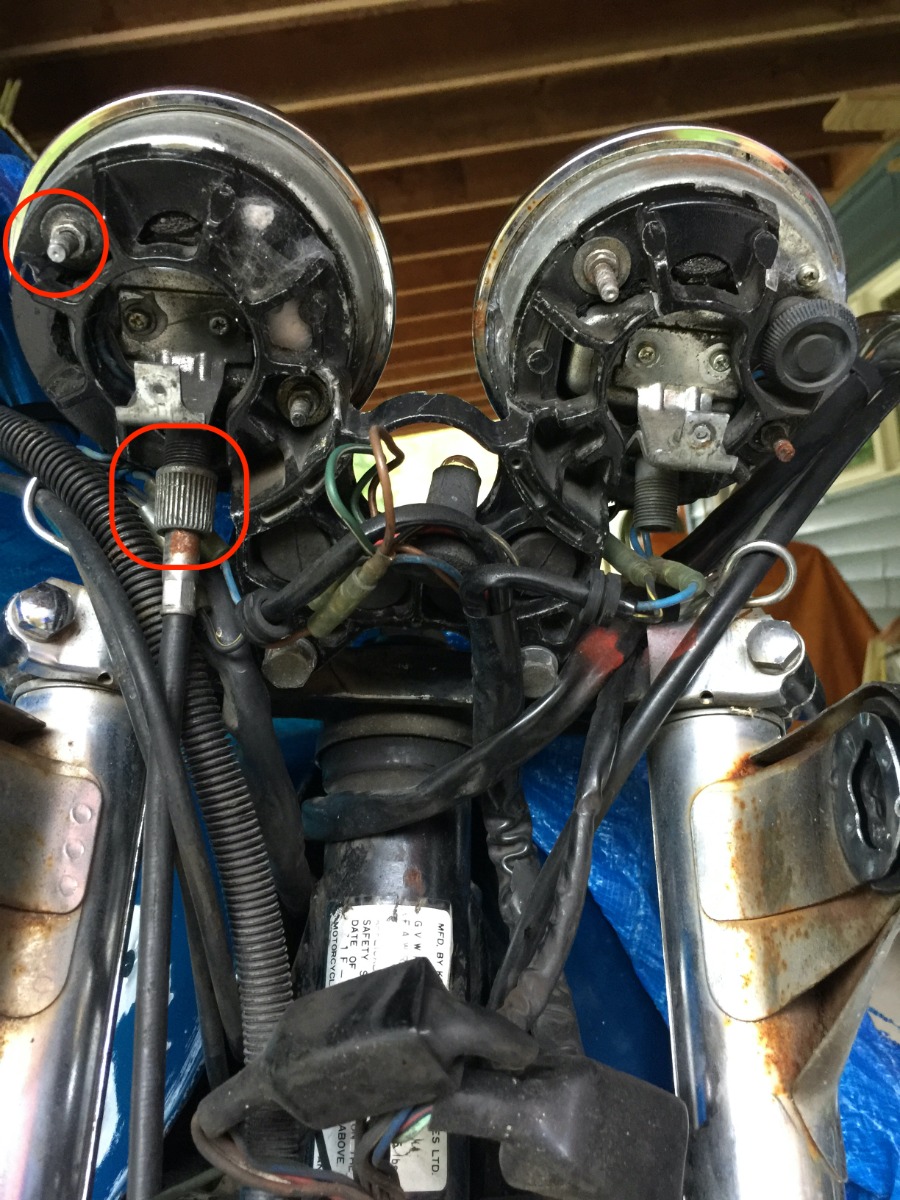
To remove your gauges you need to first remove your headlight and headlight shell. On the bottom of the lower gauge cover you will see a small JIS screw. Remove the screw and you can now remove the lower cover. Disconnect your cables. You will then see two nuts holding the gauge to the gauge bracket. Remove both nuts on each gauge. You can now remove the gauge from the bracket by pulling it upwards. It is a tight fit due to the bracket on the bottom of the gauge that holds the lower cover onto the gauge. Be careful to avoid damaging the threads on your cable attachment.
First photo below shows one of the tach the gauge nuts. It also shows the disconnect for your tach cable. Speedo has similar nuts holding the gauge to the gauge bracket.
Second photo is some restored gauges that I sent to Bob at ZResto. He does fine work.
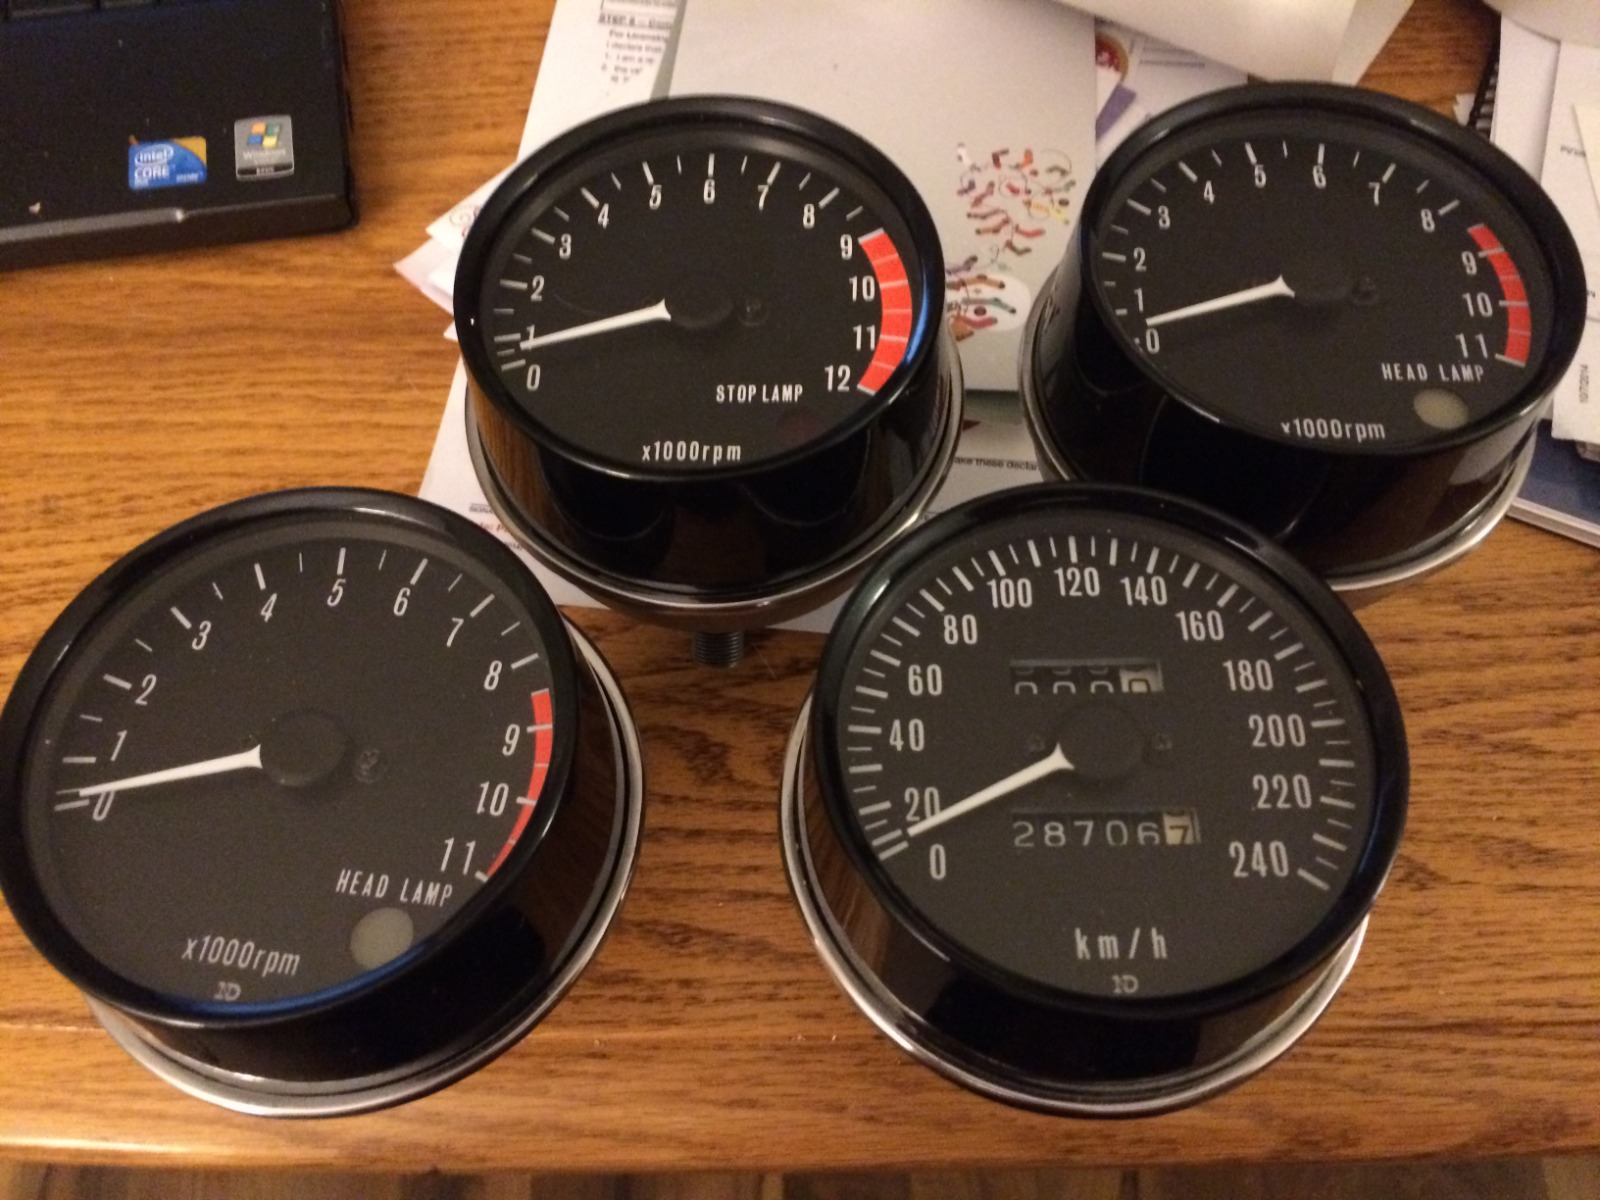
First photo below shows one of the tach the gauge nuts. It also shows the disconnect for your tach cable. Speedo has similar nuts holding the gauge to the gauge bracket.
Second photo is some restored gauges that I sent to Bob at ZResto. He does fine work.
I have several restored bikes along with a 2006 Goldwing with a sidecar.
The following user(s) said Thank You: sf4t7
Please Log in or Create an account to join the conversation.
- Rick H.
-
Topic Author
- Offline
- User
-
Registered
- Posts: 840
- Thanks: 241
Re: Gauge Information
26 Nov 2019 17:30
Thanks for the help guys. It clears this little task up quite a bit. So I do have to take the headlamp assembly out to get to the dismount nuts. My gauges have these after market(?) chrome top covers on them and they are dead tight against the vertical warning light panel and I was at a roadblock on how to loosen things up to get the gauges off. As tight as things are on mine I didn't know if the bottom cover would come off the speedometer and clear the trip meter reset knob similar to the one in the picture. I guess it must come off once the headlamp is out of the way. I have already talked to ZResto about doing these gauges for me.
Rick H.
Rick H.
Rick H.
1977 Kawasaki KZ-1000A1
1977 Kawasaki KZ-1000A1
Please Log in or Create an account to join the conversation.
- slmjim+Z1BEBE
-

- Offline
- User
-
Registered
- Enjoy Life! IT HAS AN EXPIRATION DATE!
- Posts: 1397
- Thanks: 888
Re: Gauge Information
27 Nov 2019 07:29
+1 on the ZRESTO recommendation.
Good Ridin'
slmjim & Z1BEBE
Good Ridin'
slmjim & Z1BEBE
A biker looks at your engine and chrome.
A Rider looks at your odometer and tags.
1973 ('72 builds) Z1 x2
1974 Z1-A x2
1975 Z1-B x2
1993 CB 750 Nighthawk x2
2009 ST1300A
www.kawasaki-z-classik.com
A Forum tightly focused on all things Z1 and Z2.
A Rider looks at your odometer and tags.
1973 ('72 builds) Z1 x2
1974 Z1-A x2
1975 Z1-B x2
1993 CB 750 Nighthawk x2
2009 ST1300A
www.kawasaki-z-classik.com
A Forum tightly focused on all things Z1 and Z2.
The following user(s) said Thank You: Rick H.
Please Log in or Create an account to join the conversation.
- Rick H.
-
Topic Author
- Offline
- User
-
Registered
- Posts: 840
- Thanks: 241
Re: Gauge Information
27 Nov 2019 07:57
Is it true that if these gauges are left upside down on laying on their side that oil will leak out of them and they will be kaput? If so, how do you send them in for restoration?
Rick H.
Rick H.
Rick H.
1977 Kawasaki KZ-1000A1
1977 Kawasaki KZ-1000A1
Please Log in or Create an account to join the conversation.
- hardrockminer
-
- Offline
- Sustaining Member
-
Registered
- Posts: 3123
- Thanks: 1222
Re: Gauge Information
27 Nov 2019 10:09
When you pack them just make sure they are right side up. ZResto will send them back that way. Don't worry too much about them being upside down for a few days as they will not leak fast enough to lose their charge. But if you plan to store them....be sure they are right side up.
I have several restored bikes along with a 2006 Goldwing with a sidecar.
Please Log in or Create an account to join the conversation.
- Rick H.
-
Topic Author
- Offline
- User
-
Registered
- Posts: 840
- Thanks: 241
Re: Gauge Information
27 Nov 2019 10:34
Okay, thanks for the help and information...
Rick H.
Rick H.
Rick H.
1977 Kawasaki KZ-1000A1
1977 Kawasaki KZ-1000A1
Please Log in or Create an account to join the conversation.
Moderators: Street Fighter LTD