
Muggy Weld Carb Repair
- DoctoRot
-
 Topic Author
- Offline
- Sustaining Member
-

Registered
- Oh, the usual... I bowl, I drive around...
- Posts: 2621
- Thanks: 784
Muggy Weld Carb Repair
24 May 2021 10:24 - 24 May 2021 11:04
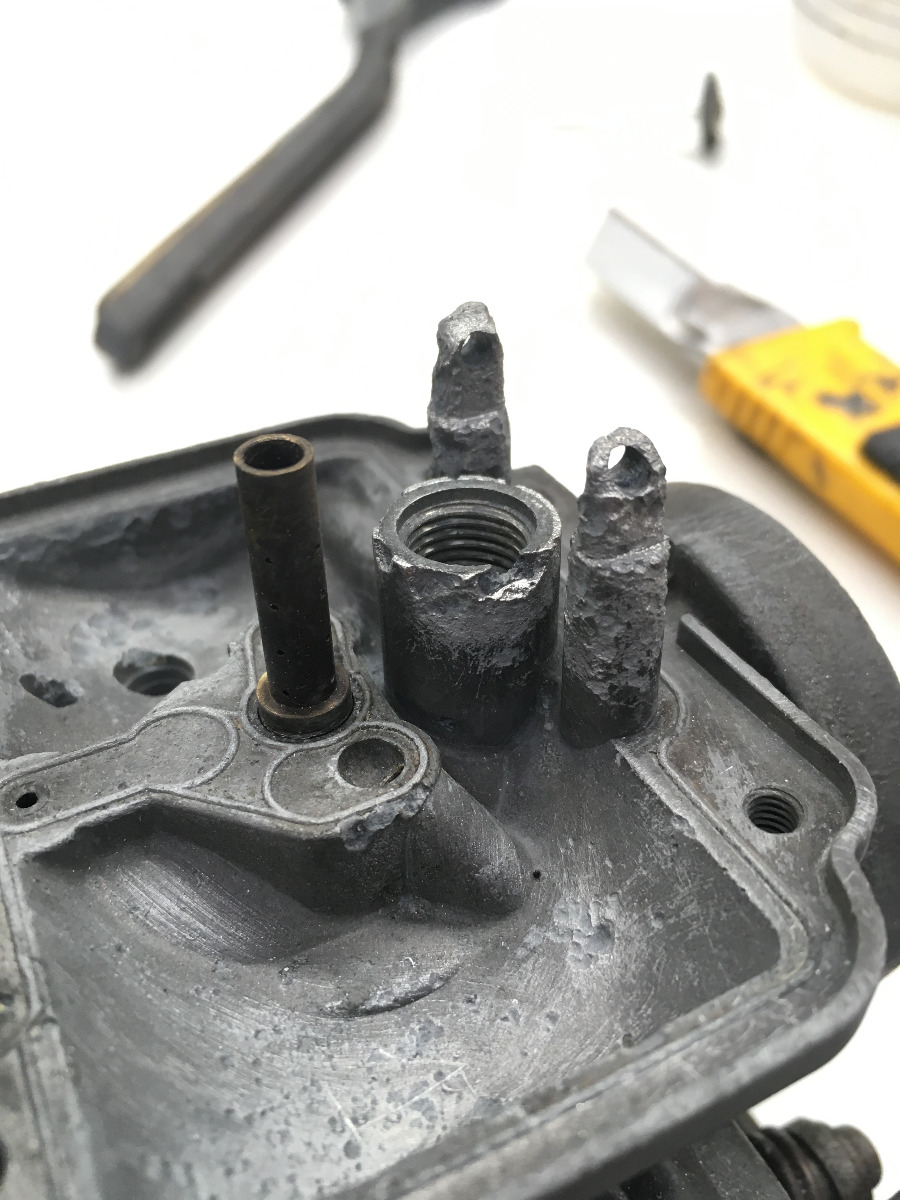
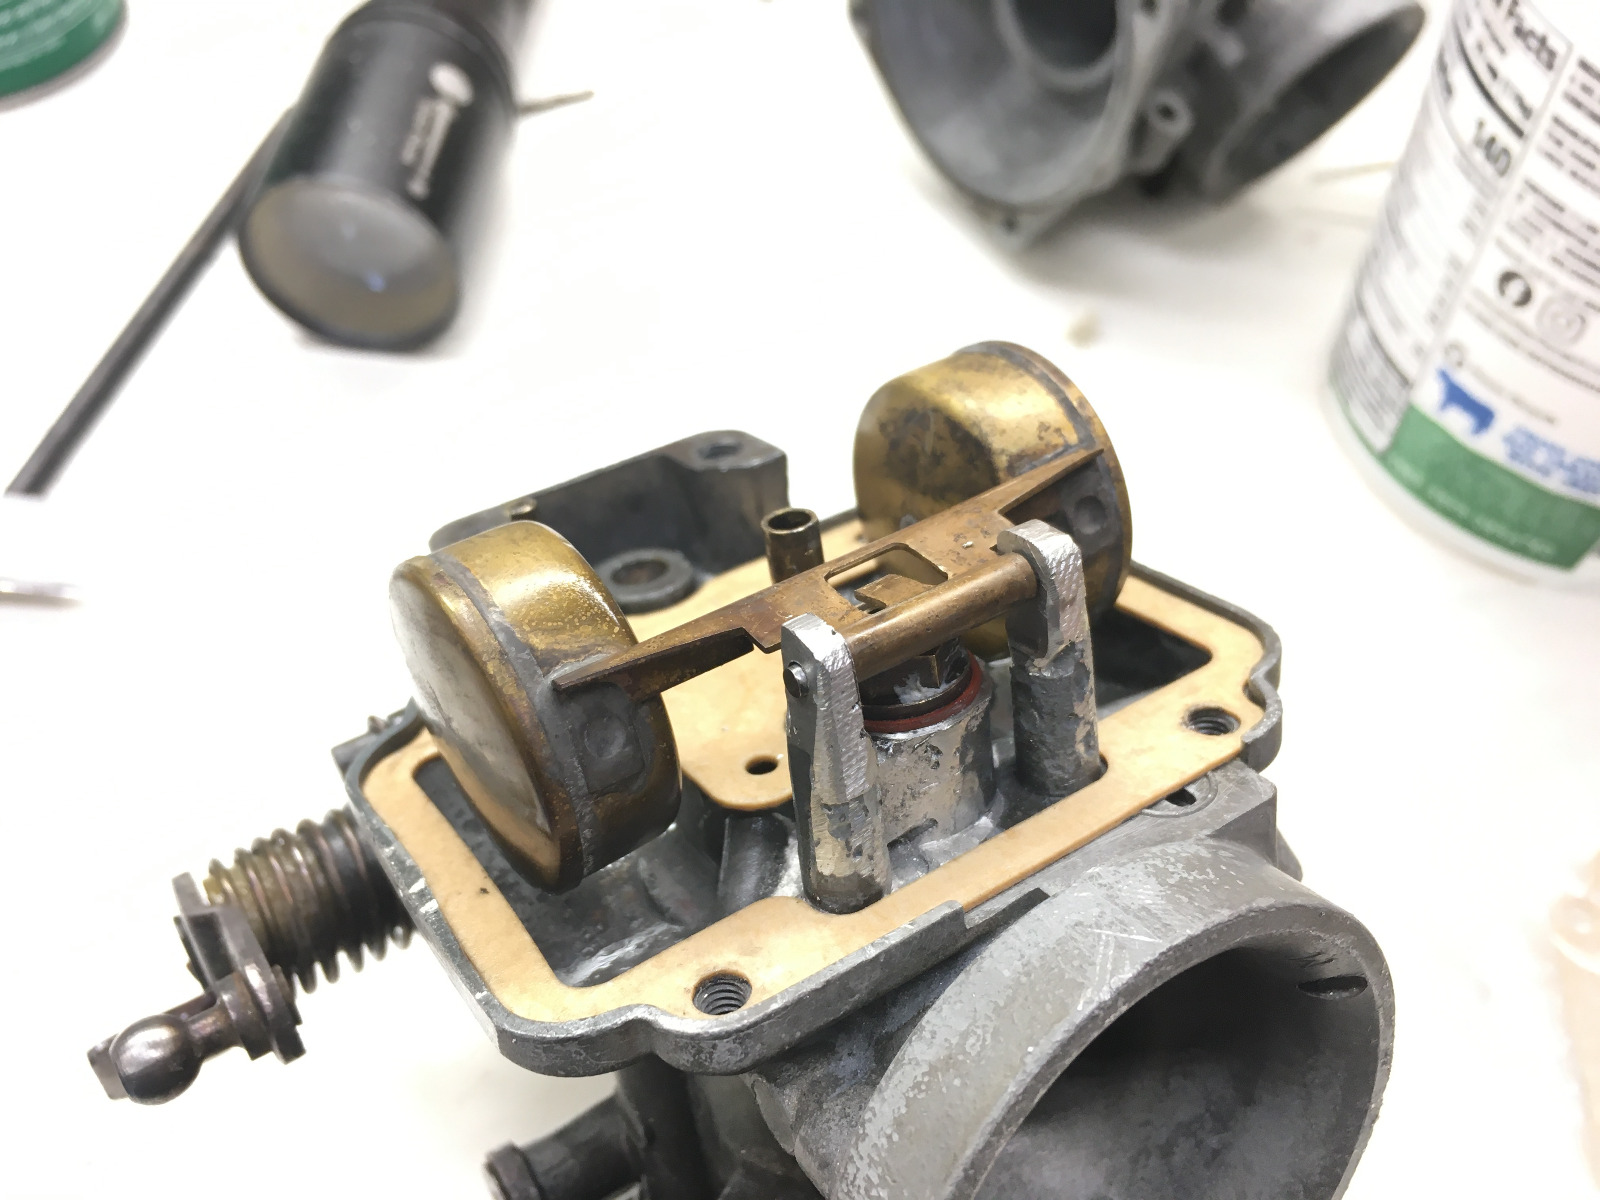
I had a BS38 carb that sat for a long time with water in it disolving the float towers and seat for the needle valve. Other than this the rack was in great condition - in fact it is the first set up carbs I have personally encountered that did not have the pilot plugs drilled out yet. If the needle valve sealing surface wasn't damaged I probably would have left the towers alone, but since i was in there anyway...
Not wanting to shell out for a new rack I decided to give Muggy Weld - Superalloy 1 a try.
This a low melting solder and is intended for use on pot metal such as these carbs.
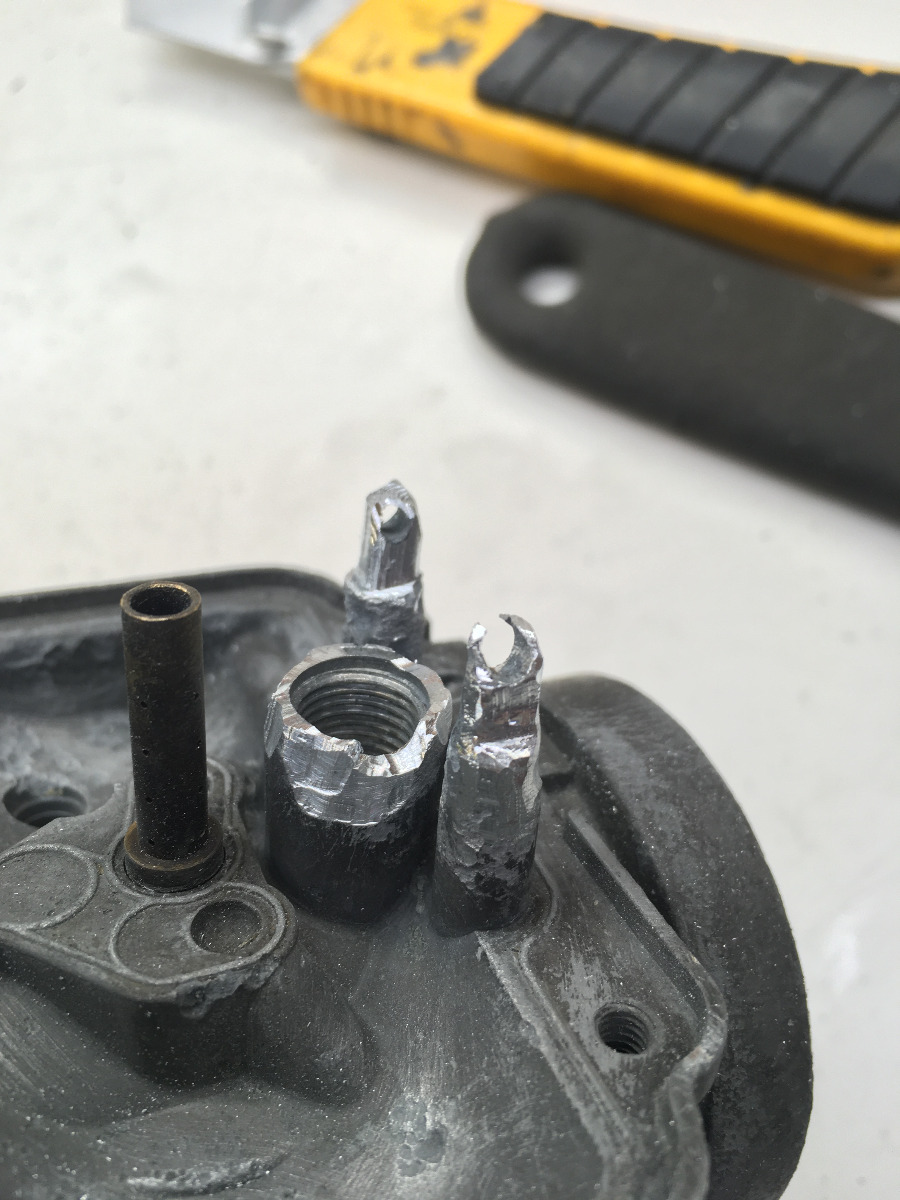
The metal must be VERY clean. I used a small burr for aluminum in a dremel to grind back all oxidization and pitting. Its imperative the base metal is clean to get a good bond.
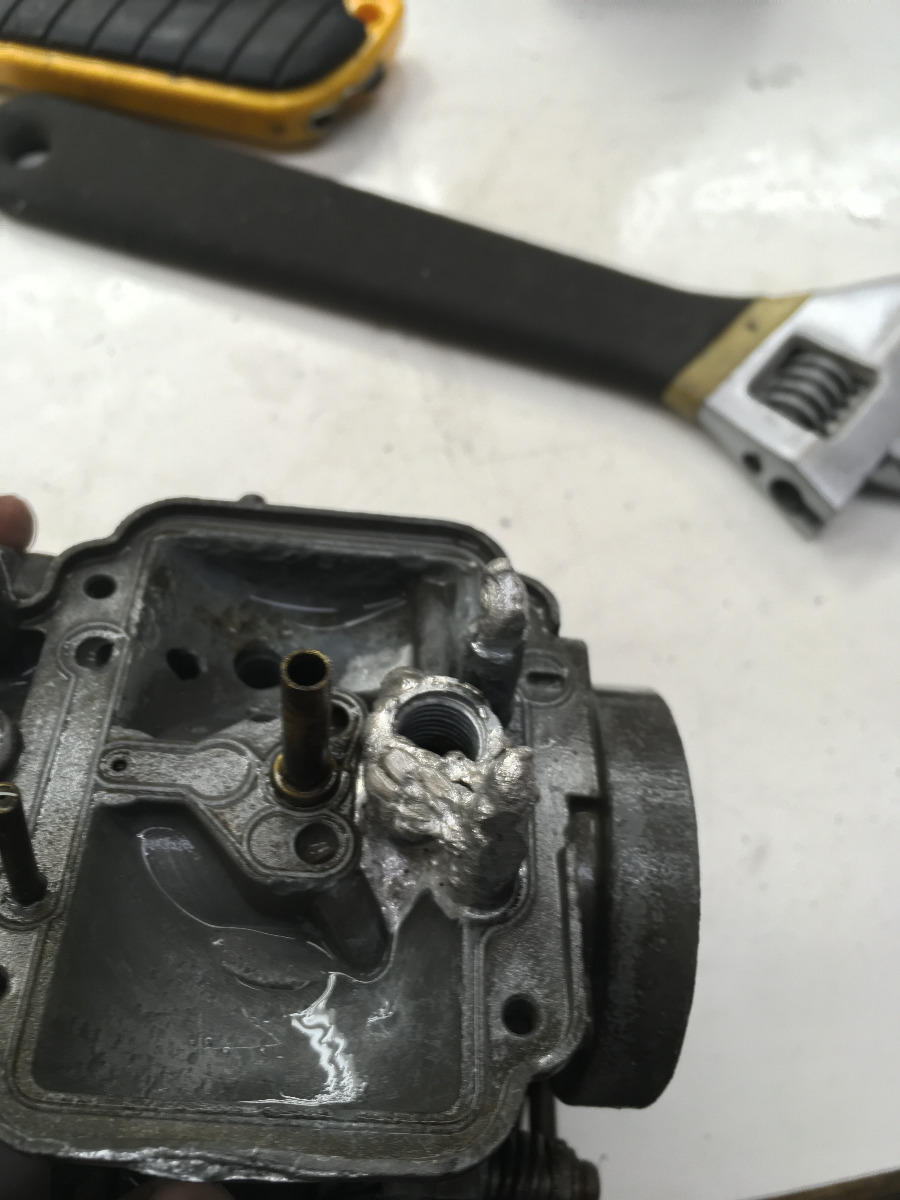
This is where things got a little tricky. I did not have a spare carb to practice on so initially i followed the muggy weld directions. However this was a mistake. The directions i saw were prescribing the solder be used like a solder - using capillary action to wick into seams. This resulted in depositing too much solder as it kept flowing out as i tried to build it up. This was not what i needed as I had to build up material to remove it. Instead of providing widespread indirect heat to allow the solder to flow as per the instructions, i instead focused the heat in localized areas, quickly flashing the area so as not too overheat it. As soon as the flux turns brown you have hit the correct temp. Then with no flame i allowed the solder to touch the area to build up and it quickly melted. A couple quick blips with the torch to ensure the solder melted to the root material and its good to go. Needless to say, I got way too much solder on there because of the learning curve.
I used a standard handheld propane torch, but one of those small soldering torches probably would have worked great.
While the carb was still hot from solder I sprayed it with a hose which removed all the flux deposits leaving shiny metal. Then came the process refining it back to something usable. I carefully ground it back using a burr in the Dremel to rough it out and then a series of files to refine the shape. I had to go back with the solder a couple times before i had enough built up. I used the other carb as a reference to mark the tower holes and drill them. I also re-tapped the valve needle hole M10-1.00

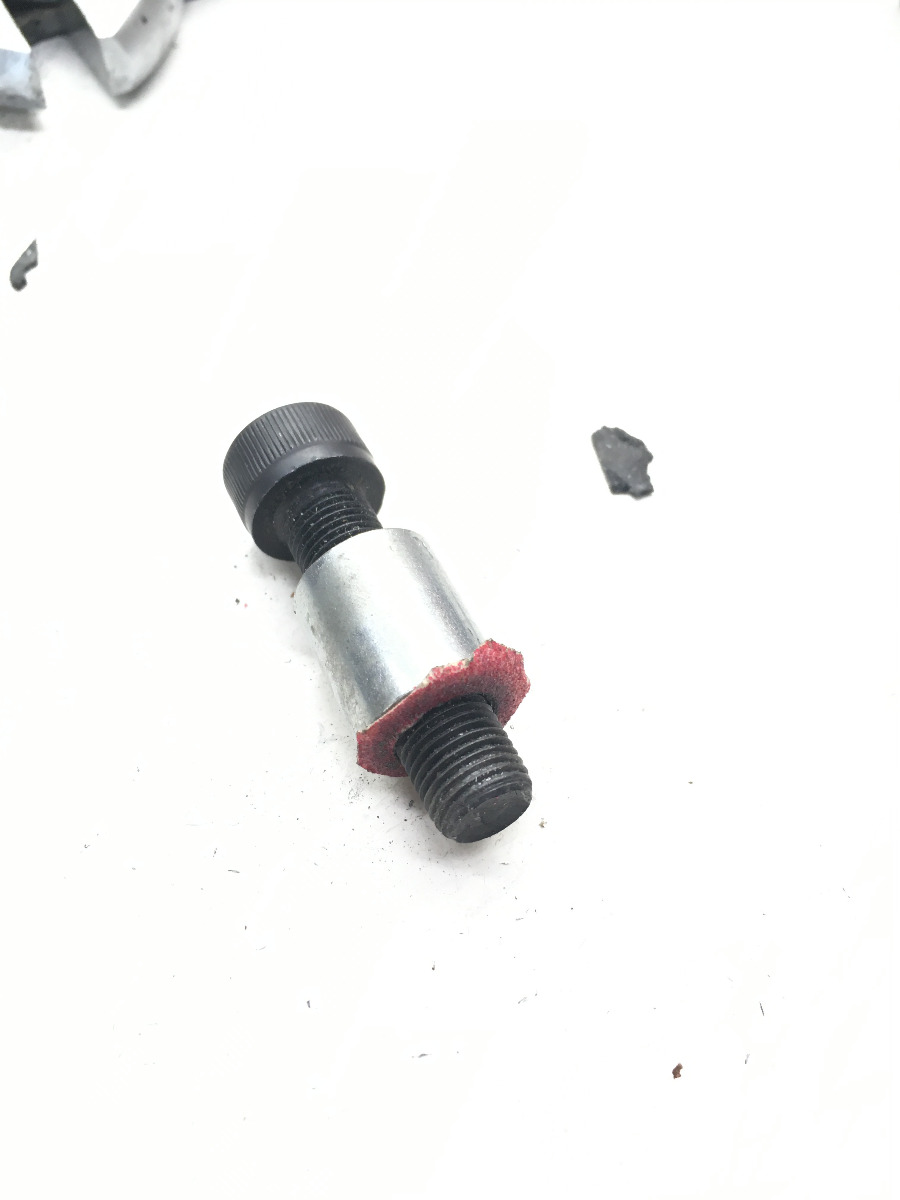
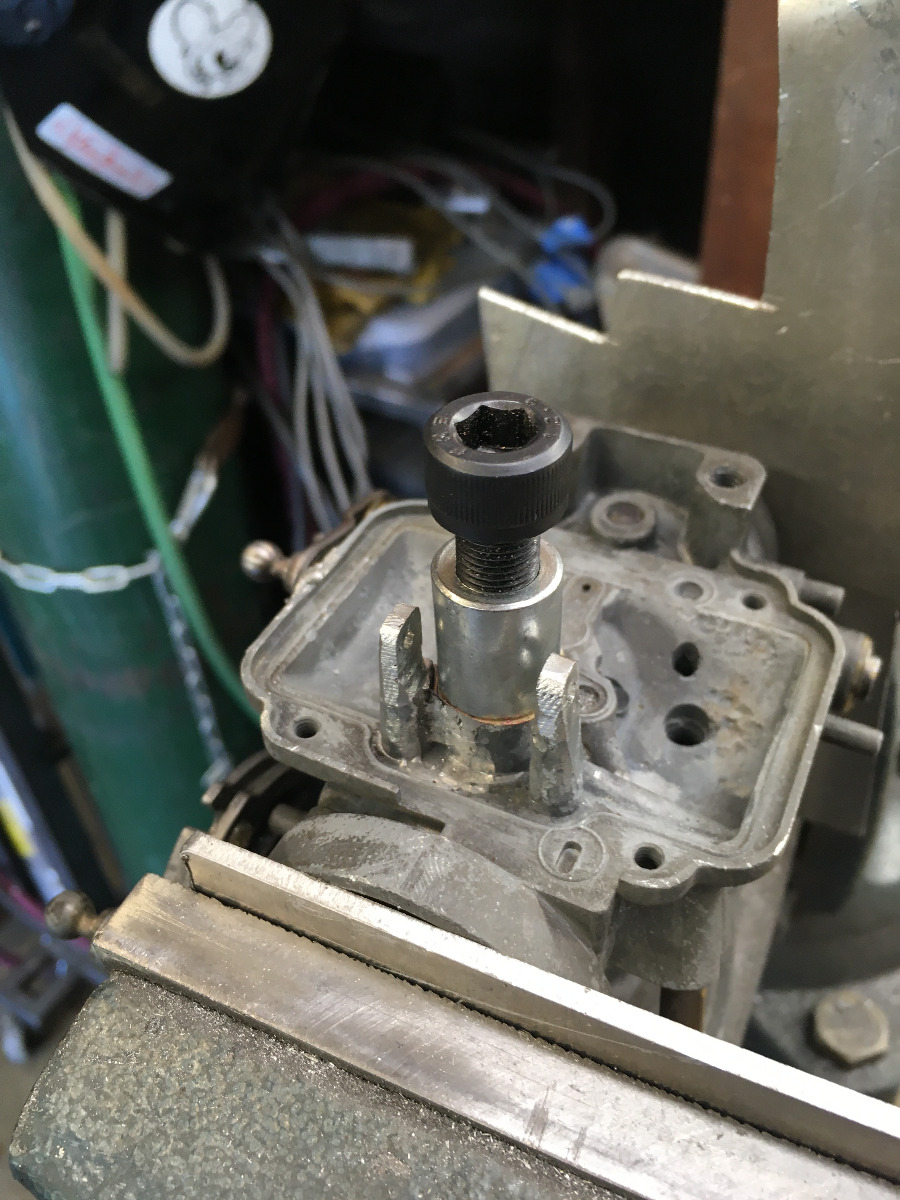
To make sure this carb didn't leak down the road I needed a good seal on the boss. I drilled out a bushing to fit on a m10-1.00 bolt. I then cut a small piece of sandpaper to fit the face of the bushing. Using a Sharpie to blacken the sealing face I then screwed in the bolt and turned the bushing with sandpaper on the boss face. This showed me any high spots which I took down further with a needle file. Once it was relatively uniform i spun the bushing repeatedly until there was no high spots - similar to lapping a valve.

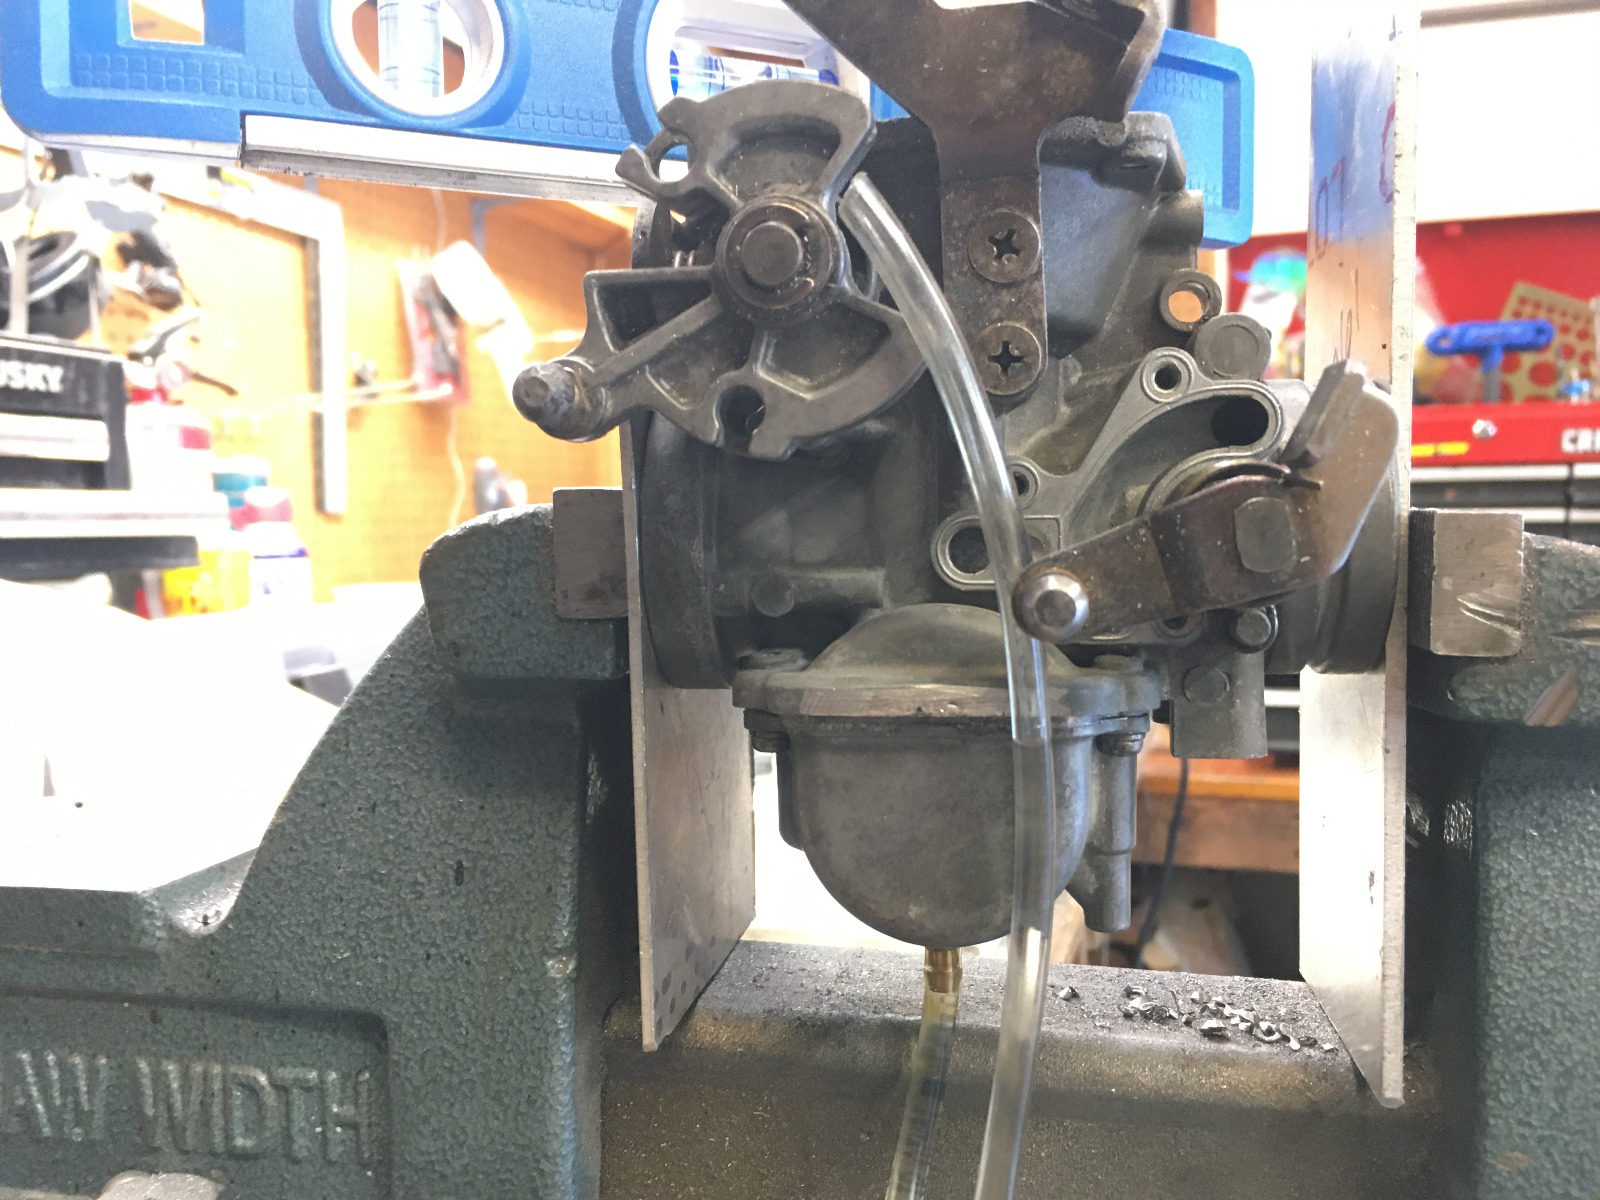
The result is a fully functional carb. I was able to set the float height and I let it sit over night - No leaks! All in all it took me about 2 hours, it was rather tedious and i would rate this repair as "advanced" however it required zero special tools beyond what I already had.
Not wanting to shell out for a new rack I decided to give Muggy Weld - Superalloy 1 a try.
This a low melting solder and is intended for use on pot metal such as these carbs.
The metal must be VERY clean. I used a small burr for aluminum in a dremel to grind back all oxidization and pitting. Its imperative the base metal is clean to get a good bond.
This is where things got a little tricky. I did not have a spare carb to practice on so initially i followed the muggy weld directions. However this was a mistake. The directions i saw were prescribing the solder be used like a solder - using capillary action to wick into seams. This resulted in depositing too much solder as it kept flowing out as i tried to build it up. This was not what i needed as I had to build up material to remove it. Instead of providing widespread indirect heat to allow the solder to flow as per the instructions, i instead focused the heat in localized areas, quickly flashing the area so as not too overheat it. As soon as the flux turns brown you have hit the correct temp. Then with no flame i allowed the solder to touch the area to build up and it quickly melted. A couple quick blips with the torch to ensure the solder melted to the root material and its good to go. Needless to say, I got way too much solder on there because of the learning curve.
I used a standard handheld propane torch, but one of those small soldering torches probably would have worked great.
While the carb was still hot from solder I sprayed it with a hose which removed all the flux deposits leaving shiny metal. Then came the process refining it back to something usable. I carefully ground it back using a burr in the Dremel to rough it out and then a series of files to refine the shape. I had to go back with the solder a couple times before i had enough built up. I used the other carb as a reference to mark the tower holes and drill them. I also re-tapped the valve needle hole M10-1.00
To make sure this carb didn't leak down the road I needed a good seal on the boss. I drilled out a bushing to fit on a m10-1.00 bolt. I then cut a small piece of sandpaper to fit the face of the bushing. Using a Sharpie to blacken the sealing face I then screwed in the bolt and turned the bushing with sandpaper on the boss face. This showed me any high spots which I took down further with a needle file. Once it was relatively uniform i spun the bushing repeatedly until there was no high spots - similar to lapping a valve.
The result is a fully functional carb. I was able to set the float height and I let it sit over night - No leaks! All in all it took me about 2 hours, it was rather tedious and i would rate this repair as "advanced" however it required zero special tools beyond what I already had.
Last edit: 24 May 2021 11:04 by DoctoRot.
The following user(s) said Thank You: rstnick, slmjim+Z1BEBE, DOHC, TexasKZ, SWest, Scirocco, Mc Tavish, BobZ
Please Log in or Create an account to join the conversation.
- SWest
-

- Offline
- Sustaining Member
-
Registered
- 10 22 2014
- Posts: 23724
- Thanks: 3013
Re: Muggy Weld Carb Repair
24 May 2021 11:12
Excellent work as always.

Steve
Steve
Z1b1000 1975 Z1b
kzrider.com/forum/11-projects/598262-kz-...-will-it-live#672882
kzrider.com/forum/2-engine/597654-poser?start=240#704229
kzrider.com/forum/11-projects/598262-kz-...-will-it-live#672882
kzrider.com/forum/2-engine/597654-poser?start=240#704229
The following user(s) said Thank You: DoctoRot
Please Log in or Create an account to join the conversation.
- gd4now
-
- Offline
- User
-

Registered
- Denco where did you go?
- Posts: 1684
- Thanks: 678
Re: Muggy Weld Carb Repair
24 May 2021 11:30 - 24 May 2021 11:30
I agree very nice work for a solution to what many would appear is a non-fixable problem. I was not familiar with the Muggy Weld product/process and visited their site to learn more. Interesting stuff. Thanks for sharing your experience with it.
1977 KZ650 B1
Pods and Denco header
OLD KAW OWNERS SMILE ALOT
Pods and Denco header
OLD KAW OWNERS SMILE ALOT
Last edit: 24 May 2021 11:30 by gd4now.
The following user(s) said Thank You: DoctoRot
Please Log in or Create an account to join the conversation.
- Mc Tavish
-

- Offline
- User
-
Registered
- Posts: 101
- Thanks: 35
The following user(s) said Thank You: DoctoRot
Please Log in or Create an account to join the conversation.
- slmjim+Z1BEBE
-

- Offline
- User
-
Registered
- Enjoy Life! IT HAS AN EXPIRATION DATE!
- Posts: 1490
- Thanks: 982
Re: Muggy Weld Carb Repair
25 May 2021 04:26
Thanks for sharing your process and introducing the product. That's some really great recovery development! Gives hope that some of those carb bodies where the float towers have been broken off or otherwise damaged can be resurrected. We're adding Muggy Weld to our experiments-to-be-done list.
Good Ridin'
slmjim & Z1BEBE
Good Ridin'
slmjim & Z1BEBE
A biker looks at your engine and chrome.
A Rider looks at your odometer and tags.
1973 ('72 builds) Z1 x2
1974 Z1-A x2
1975 Z1-B x2
1993 CB 750 Nighthawk x2
2009 ST1300A
www.kawasaki-z-classik.com
A Forum tightly focused on all things Z1 and Z2.
A Rider looks at your odometer and tags.
1973 ('72 builds) Z1 x2
1974 Z1-A x2
1975 Z1-B x2
1993 CB 750 Nighthawk x2
2009 ST1300A
www.kawasaki-z-classik.com
A Forum tightly focused on all things Z1 and Z2.
The following user(s) said Thank You: DoctoRot
Please Log in or Create an account to join the conversation.
- scubaanders
-
- Offline
- Sustaining Member
-
Registered
- Posts: 555
- Thanks: 238
Re: Muggy Weld Carb Repair
26 May 2021 07:30
Well done sir!
Got to look in to that stuff

/A
Got to look in to that stuff
/A
Gpz750R1 1982
Gpz750A1 1983
Gpz1100A2 1984
FZ750 1985
Gpz900R -91
Gpz750A1 1983
Gpz1100A2 1984
FZ750 1985
Gpz900R -91
Please Log in or Create an account to join the conversation.
Moderators: Street Fighter LTD