- Posts: 1485
- Thank you received: 385
KZ1000P Valve adjustment
- ThatGPzGuy
-
 Topic Author
- Offline
- Sustaining Member
- More Sparky than Speed Racer
What a PITA. I have the Motion Pro Tool and I am able to get to the 1 and 4 intake and exhaust valves. The Inside ones are pretty tough.
I also noticed this:

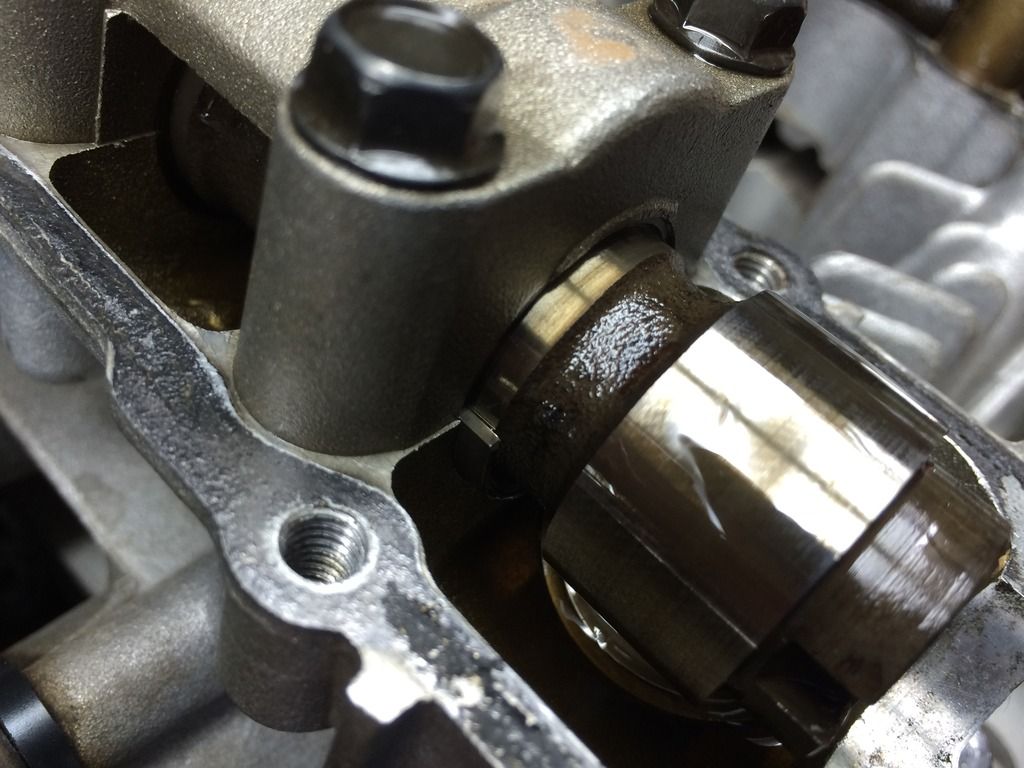
Looks like the cam bearing has slipped to the right? Or is this normal?
If I have to repair this I might as well pull the cams. At least is would be easier to check the shims...
Jim
North GA
2016 Yamaha FJR1300ES
1982 GPz750 R1
1974 Kawasaki H1
1976 Kawasaki KZ400
1979 Yamaha XS650 cafe'
2001 KZ1000P
2001 Yamaha YZ426
1981 Honda XR200 stroked in an '89 CR125 chassis
1965 Mustang
1967 Triumph GT6
1976 Bronco
"If you didn't build it, it's not really yours"
Please Log in or Create an account to join the conversation.
- jackleberry
-

- Offline
- User
- Posts: 394
- Thank you received: 56
ThatGPzGuy wrote: Hey Gang, doing the right thing and checking the valves on my '01 KZP.
What a PITA. I have the Motion Pro Tool and I am able to get to the 1 and 4 intake and exhaust valves. The Inside ones are pretty tough.
I also noticed this:

Looks like the cam bearing has slipped to the right? Or is this normal?
If I have to repair this I might as well pull the cams. At least is would be easier to check the shims...
That's not normal. You need to fix it. Hopefully the bearing isn't damaged. Yeah that motion pro tool is a joke. I just take off the cam caps. If you zip tie the camchain to the camshaft sprockets you can do it without messing up the cam timing. Taker it slow and be careful, those bolts are easy to strip. Don't torque them any tighter than 80 inch/lbs.
1997 KZ1000P (P16)
2001 KZ1000P (P20)
Please Log in or Create an account to join the conversation.
- SWest
-

- Offline
- Sustaining Member
- 10 22 2014
- Posts: 23131
- Thank you received: 2795
I salute you for doing this sir.
Steve
Please Log in or Create an account to join the conversation.
- ThatGPzGuy
-
 Topic Author
- Offline
- Sustaining Member
- More Sparky than Speed Racer
- Posts: 1485
- Thank you received: 385

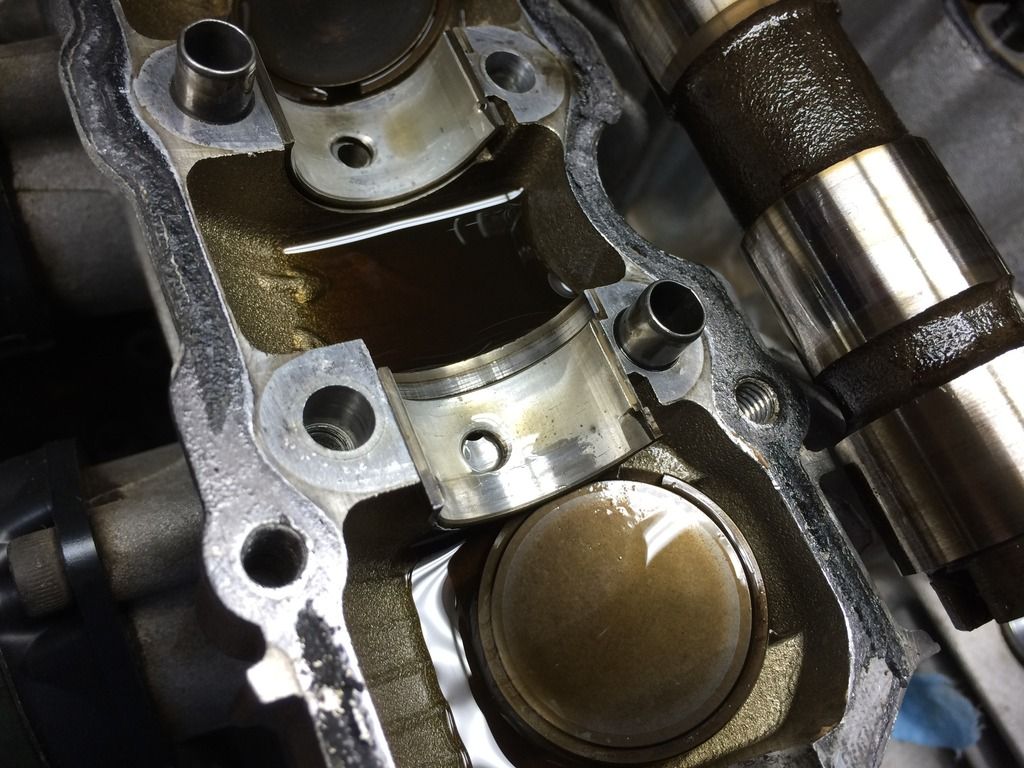
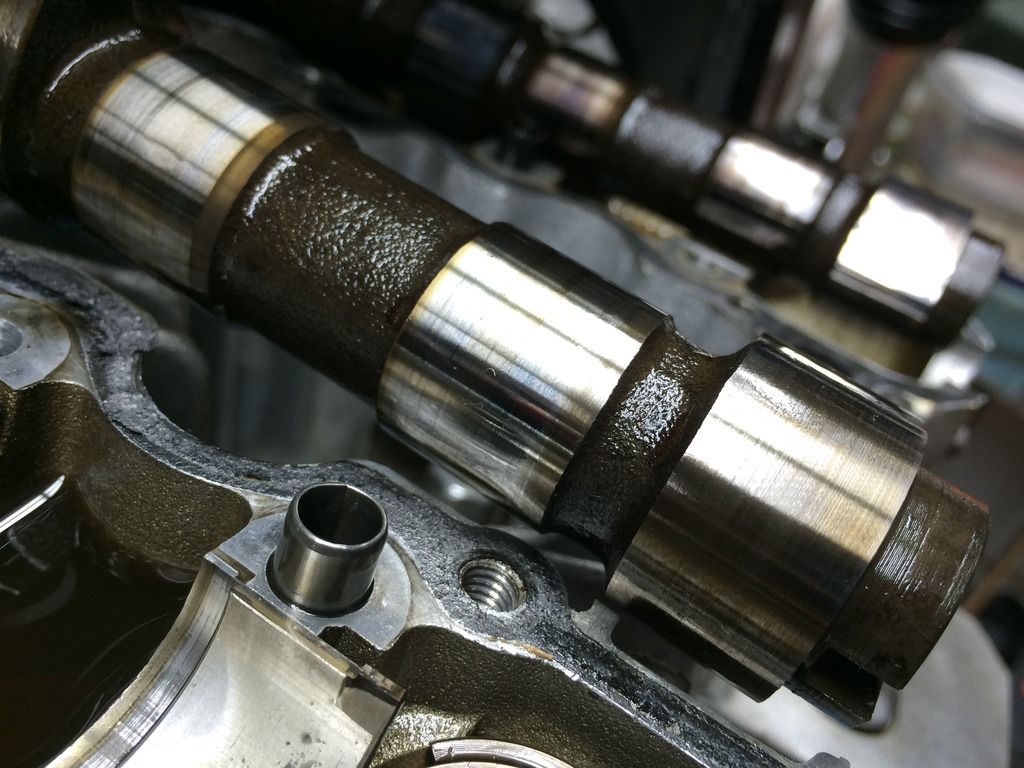
I don't see any damage to the journal:

Weird. I don't know how this can happen unless it was installed that way.
Jim
North GA
2016 Yamaha FJR1300ES
1982 GPz750 R1
1974 Kawasaki H1
1976 Kawasaki KZ400
1979 Yamaha XS650 cafe'
2001 KZ1000P
2001 Yamaha YZ426
1981 Honda XR200 stroked in an '89 CR125 chassis
1965 Mustang
1967 Triumph GT6
1976 Bronco
"If you didn't build it, it's not really yours"
Please Log in or Create an account to join the conversation.
- SWest
-

- Offline
- Sustaining Member
- 10 22 2014
- Posts: 23131
- Thank you received: 2795
Steve
Please Log in or Create an account to join the conversation.
- ThatGPzGuy
-
 Topic Author
- Offline
- Sustaining Member
- More Sparky than Speed Racer
- Posts: 1485
- Thank you received: 385
Should run much better when I am done.
Jim
North GA
2016 Yamaha FJR1300ES
1982 GPz750 R1
1974 Kawasaki H1
1976 Kawasaki KZ400
1979 Yamaha XS650 cafe'
2001 KZ1000P
2001 Yamaha YZ426
1981 Honda XR200 stroked in an '89 CR125 chassis
1965 Mustang
1967 Triumph GT6
1976 Bronco
"If you didn't build it, it's not really yours"
Please Log in or Create an account to join the conversation.
- daveo
-

- Offline
- Premium Member
- Posts: 2851
- Thank you received: 707
ThatGPzGuy wrote: On the valves. Four were too tight (2 ex and 2 in) and the other four were within spec.
Should run much better when I am done.
Finished with mine two days ago, and had one shim thickness change (250 to 255), on one exhaust valve. The rest were great after 5000 miles. I am amazed at the significant improvement in engine performance and smoothness after such a small change like this, and the carb (re)sync that followed.
1982 KZ1100-A2
Please Log in or Create an account to join the conversation.
- jackleberry
-

- Offline
- User
- Posts: 394
- Thank you received: 56
daveo wrote:
ThatGPzGuy wrote: On the valves. Four were too tight (2 ex and 2 in) and the other four were within spec.
Should run much better when I am done.
Finished with mine two days ago, and had one shim thickness change (250 to 255), on one exhaust valve. The rest were great after 5000 miles. I am amazed at the significant improvement in engine performance and smoothness after such a small change like this, and the carb (re)sync that followed.
And now you can see why everybody recommends doing the valves before dicking with the carbs
1997 KZ1000P (P16)
2001 KZ1000P (P20)
Please Log in or Create an account to join the conversation.
- jackleberry
-

- Offline
- User
- Posts: 394
- Thank you received: 56
ThatGPzGuy wrote: On the valves. Four were too tight (2 ex and 2 in) and the other four were within spec.
Should run much better when I am done.
So what did you do to lock that bearing back in place? In the picture, it does look like it has worn unevenly due to having shifted...
1997 KZ1000P (P16)
2001 KZ1000P (P20)
Please Log in or Create an account to join the conversation.
- SWest
-

- Offline
- Sustaining Member
- 10 22 2014
- Posts: 23131
- Thank you received: 2795
Steve
Please Log in or Create an account to join the conversation.
- ThatGPzGuy
-
 Topic Author
- Offline
- Sustaining Member
- More Sparky than Speed Racer
- Posts: 1485
- Thank you received: 385
jackleberry wrote:
ThatGPzGuy wrote: On the valves. Four were too tight (2 ex and 2 in) and the other four were within spec.
Should run much better when I am done.
So what did you do to lock that bearing back in place? In the picture, it does look like it has worn unevenly due to having shifted...
I have not done anything yet. What would you recommend? Replace them all?
Jim
North GA
2016 Yamaha FJR1300ES
1982 GPz750 R1
1974 Kawasaki H1
1976 Kawasaki KZ400
1979 Yamaha XS650 cafe'
2001 KZ1000P
2001 Yamaha YZ426
1981 Honda XR200 stroked in an '89 CR125 chassis
1965 Mustang
1967 Triumph GT6
1976 Bronco
"If you didn't build it, it's not really yours"
Please Log in or Create an account to join the conversation.
- daveo
-

- Offline
- Premium Member
- Posts: 2851
- Thank you received: 707
ThatGPzGuy wrote:
jackleberry wrote:
ThatGPzGuy wrote: On the valves. Four were too tight (2 ex and 2 in) and the other four were within spec.
Should run much better when I am done.
So what did you do to lock that bearing back in place? In the picture, it does look like it has worn unevenly due to having shifted...
I have not done anything yet. What would you recommend? Replace them all?
Not that I'm any kind of expert, or may have worthy advice to take...but I would just replace that pair of bearings and leave it at that.
It doesn't appear that the cam bearing journal was damaged at all, but if that bearing were slightly further over, we'd be discussing where to get a good motor. My guess is that it was an assembly mistake, and has not shifted since...how would or could it?
1982 KZ1100-A2
Please Log in or Create an account to join the conversation.
