
KZ650 Sleeper Build (KZ1000 engine transplant)
- Injected
-
 Topic Author
- Offline
- User
-

Registered
- Posts: 1690
- Thanks: 1197
Re: KZ650 Sleeper Build (KZ1000 engine transplant)
20 Dec 2023 20:07
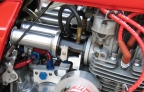
Got my regulator harnesses wired up and ready to install.
1978 KZ650B2 w 1197cc Z1 engine
1977 KZ650B1 w 750cc Spectre engine
1979 KZ650C3 w 831cc Hot Rod engine
1978 KZ650C2 w 762cc DFI project
1977 KZ650C1 stock restoration project
1978 KZ650B2 modified project
1978 KZ650B2 Injected Drag 831cc
1980 Z1 Custom Frame Drag 1327cc
1981 Z50R Honda tow bike
1977 KZ650B1 w 750cc Spectre engine
1979 KZ650C3 w 831cc Hot Rod engine
1978 KZ650C2 w 762cc DFI project
1977 KZ650C1 stock restoration project
1978 KZ650B2 modified project
1978 KZ650B2 Injected Drag 831cc
1980 Z1 Custom Frame Drag 1327cc
1981 Z50R Honda tow bike
The following user(s) said Thank You: Wookie58
Please Log in or Create an account to join the conversation.
- Injected
-
Topic Author
- Offline
- User
-
Registered
- Posts: 1690
- Thanks: 1197
Re: KZ650 Sleeper Build (KZ1000 engine transplant)
05 Jan 2024 11:57 - 05 Jan 2024 11:58
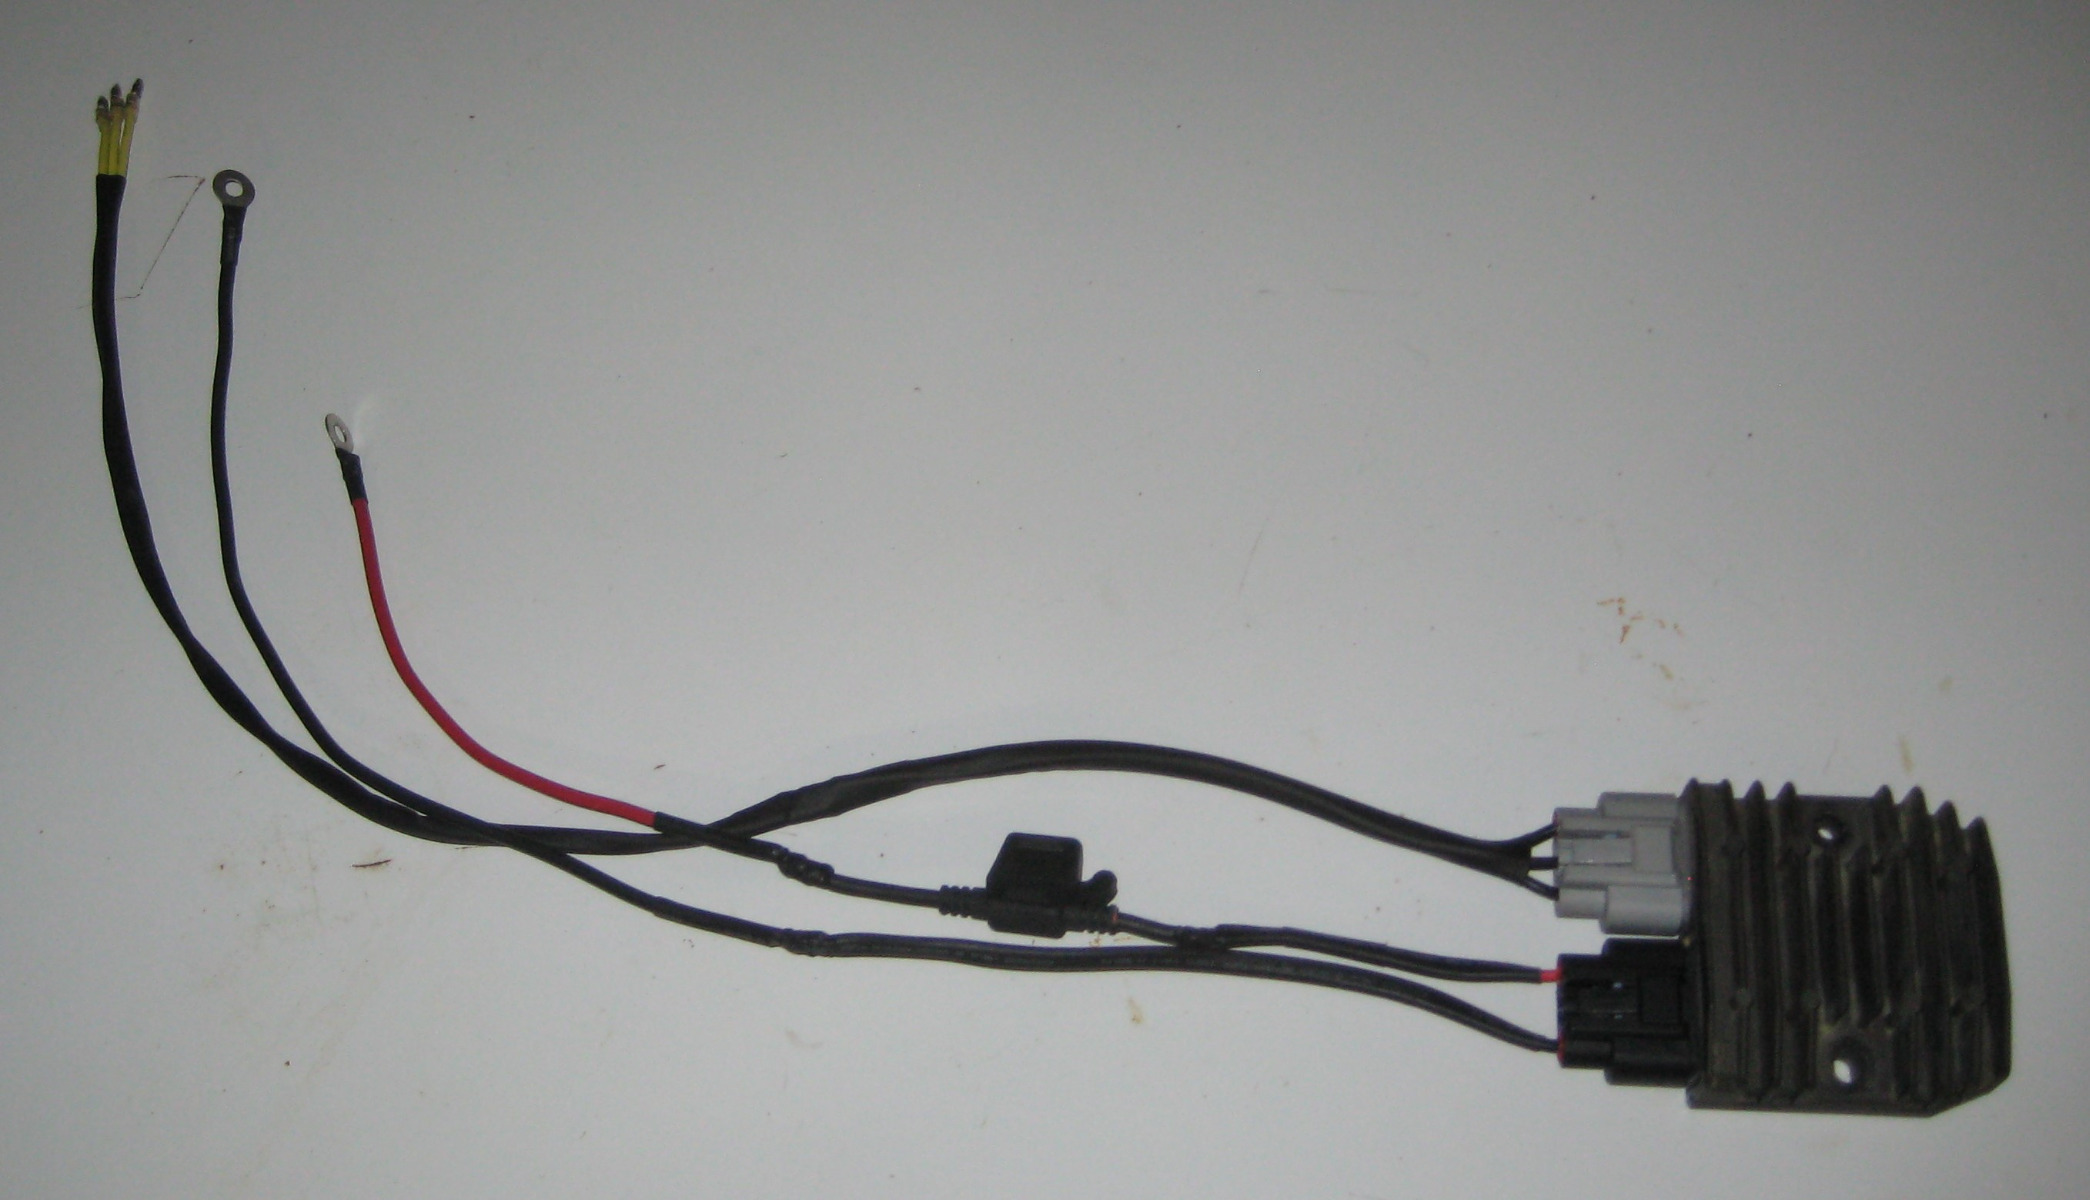
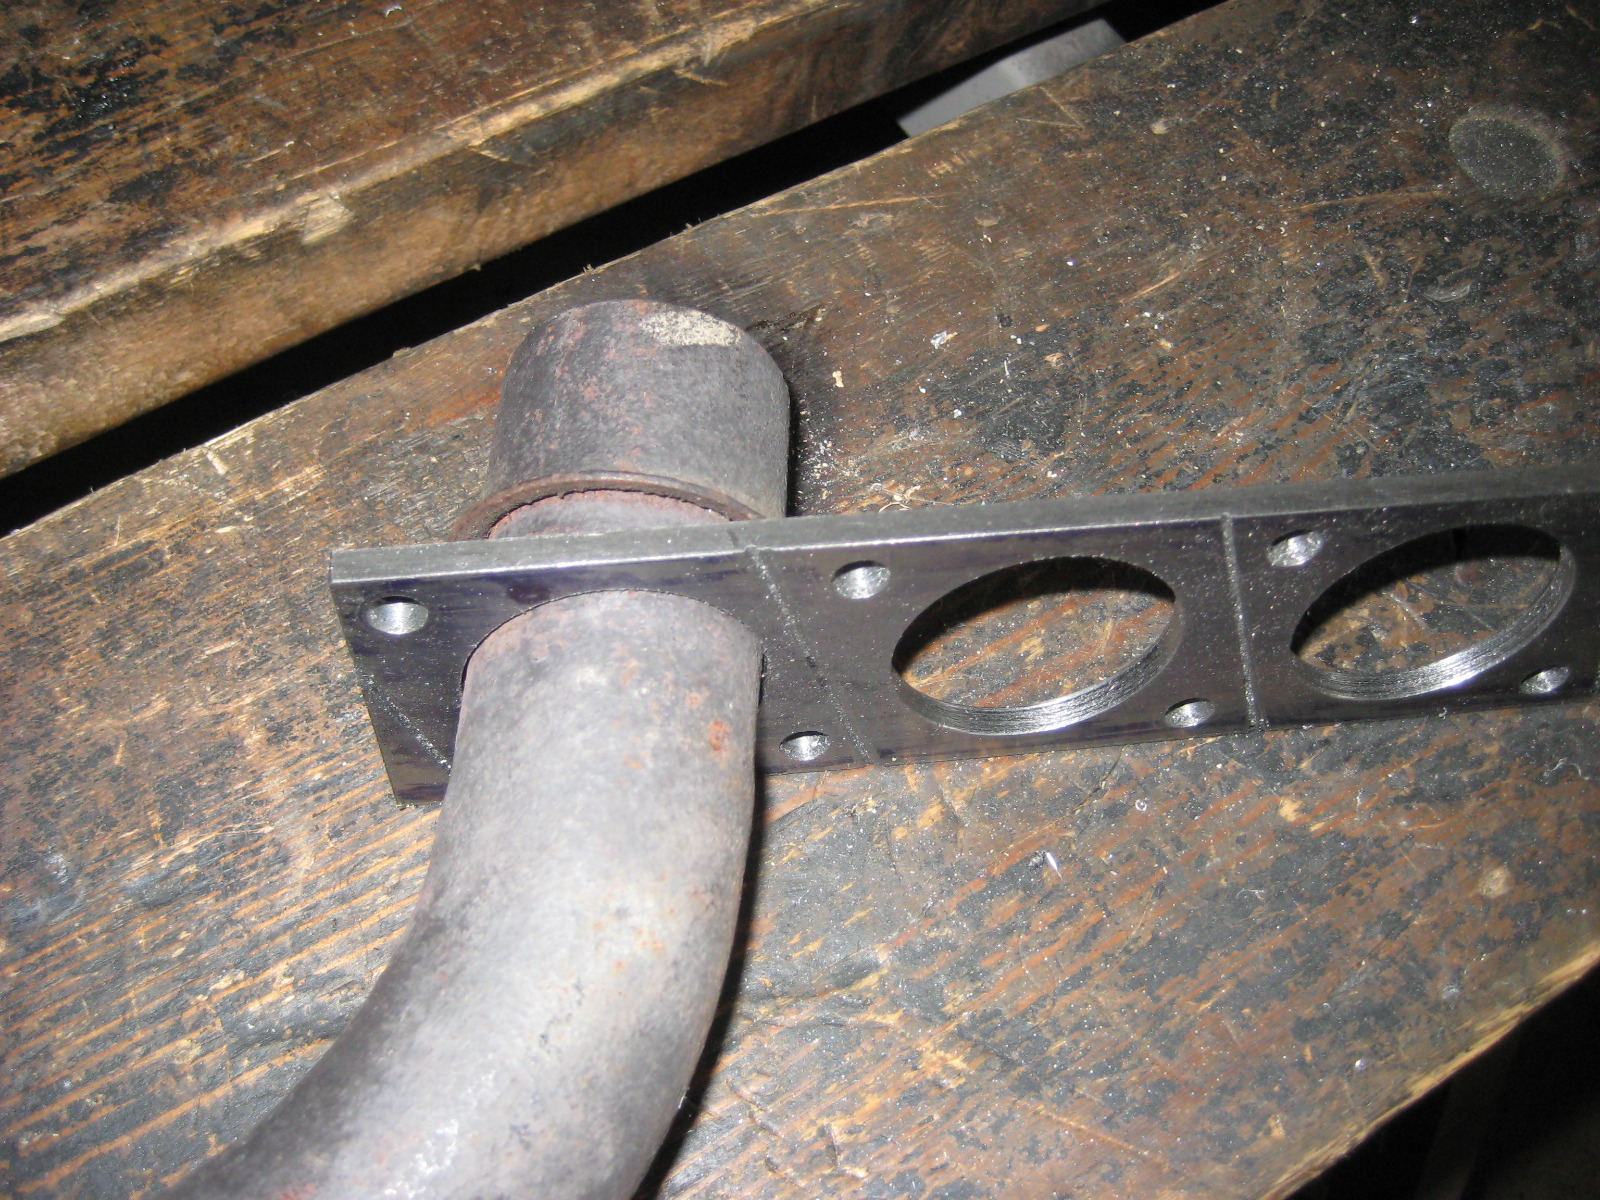
Got started on making the exhaust flanges today but did not get very far when I discovered I needed to buy the next bigger size of hole saw.
I have all the hole positions center drilled and the cut off angles marked so I can easily pick up on the machining when I get the right hole saw in my hands.
I also made up some limit buttons to be welded on the head pipes behind the flanges so they won't slip off and down when installing/removing. Will fill up the centers with weld.
I found I have to fabricate a shim band to set the correct depth mimicking the stock split collars, the yellow band in the pic below :
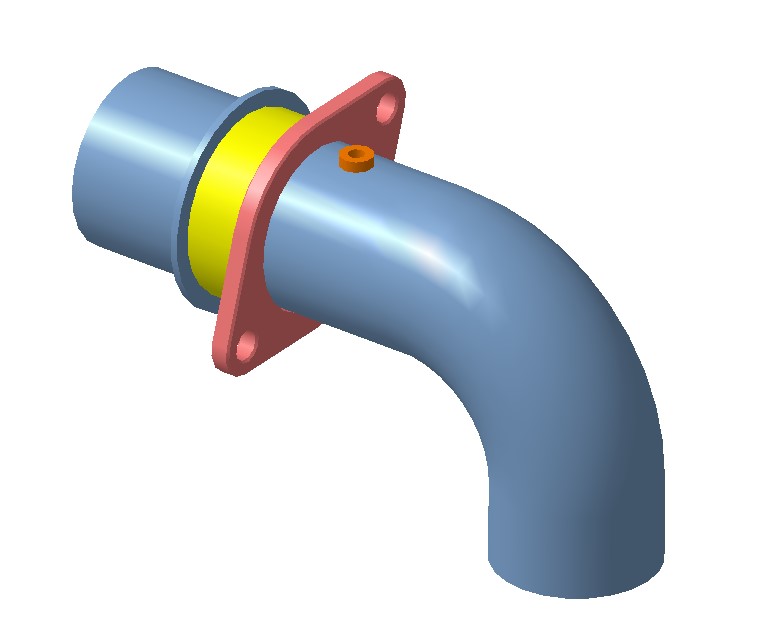
Its just a strip of .10" thick sheet steel that will be welded on to make the flanges sit at the correct height from the exhaust port.
I have all the hole positions center drilled and the cut off angles marked so I can easily pick up on the machining when I get the right hole saw in my hands.
I also made up some limit buttons to be welded on the head pipes behind the flanges so they won't slip off and down when installing/removing. Will fill up the centers with weld.
I found I have to fabricate a shim band to set the correct depth mimicking the stock split collars, the yellow band in the pic below :
Its just a strip of .10" thick sheet steel that will be welded on to make the flanges sit at the correct height from the exhaust port.
1978 KZ650B2 w 1197cc Z1 engine
1977 KZ650B1 w 750cc Spectre engine
1979 KZ650C3 w 831cc Hot Rod engine
1978 KZ650C2 w 762cc DFI project
1977 KZ650C1 stock restoration project
1978 KZ650B2 modified project
1978 KZ650B2 Injected Drag 831cc
1980 Z1 Custom Frame Drag 1327cc
1981 Z50R Honda tow bike
1977 KZ650B1 w 750cc Spectre engine
1979 KZ650C3 w 831cc Hot Rod engine
1978 KZ650C2 w 762cc DFI project
1977 KZ650C1 stock restoration project
1978 KZ650B2 modified project
1978 KZ650B2 Injected Drag 831cc
1980 Z1 Custom Frame Drag 1327cc
1981 Z50R Honda tow bike
Last edit: 05 Jan 2024 11:58 by Injected. Reason: info
The following user(s) said Thank You: howardhb
Please Log in or Create an account to join the conversation.
- Wookie58
-

- Offline
- Moderator
-

Registered
- Posts: 6431
- Thanks: 4070
Re: KZ650 Sleeper Build (KZ1000 engine transplant)
05 Jan 2024 12:26 - 05 Jan 2024 12:30
I cut my flange holes on my mini-lathe (which I know you have) using a "four jaw" none self centring chuck (was a bit of an ass to centre up initially)

1982 KZ1000 Ltd
www.kzrider.com/forum/11-projects/617631...-82-begins?start=192
kzrider.com/filebase-alias?view=download...d-fault-diagnosis&ca
www.kzrider.com/forum/11-projects/617631...-82-begins?start=192
kzrider.com/filebase-alias?view=download...d-fault-diagnosis&ca
Last edit: 05 Jan 2024 12:30 by Wookie58.
The following user(s) said Thank You: Injected, howardhb
Please Log in or Create an account to join the conversation.
- zed1015
-

- Offline
- User
-
Registered
- Posts: 3289
- Thanks: 1989
Re: KZ650 Sleeper Build (KZ1000 engine transplant)
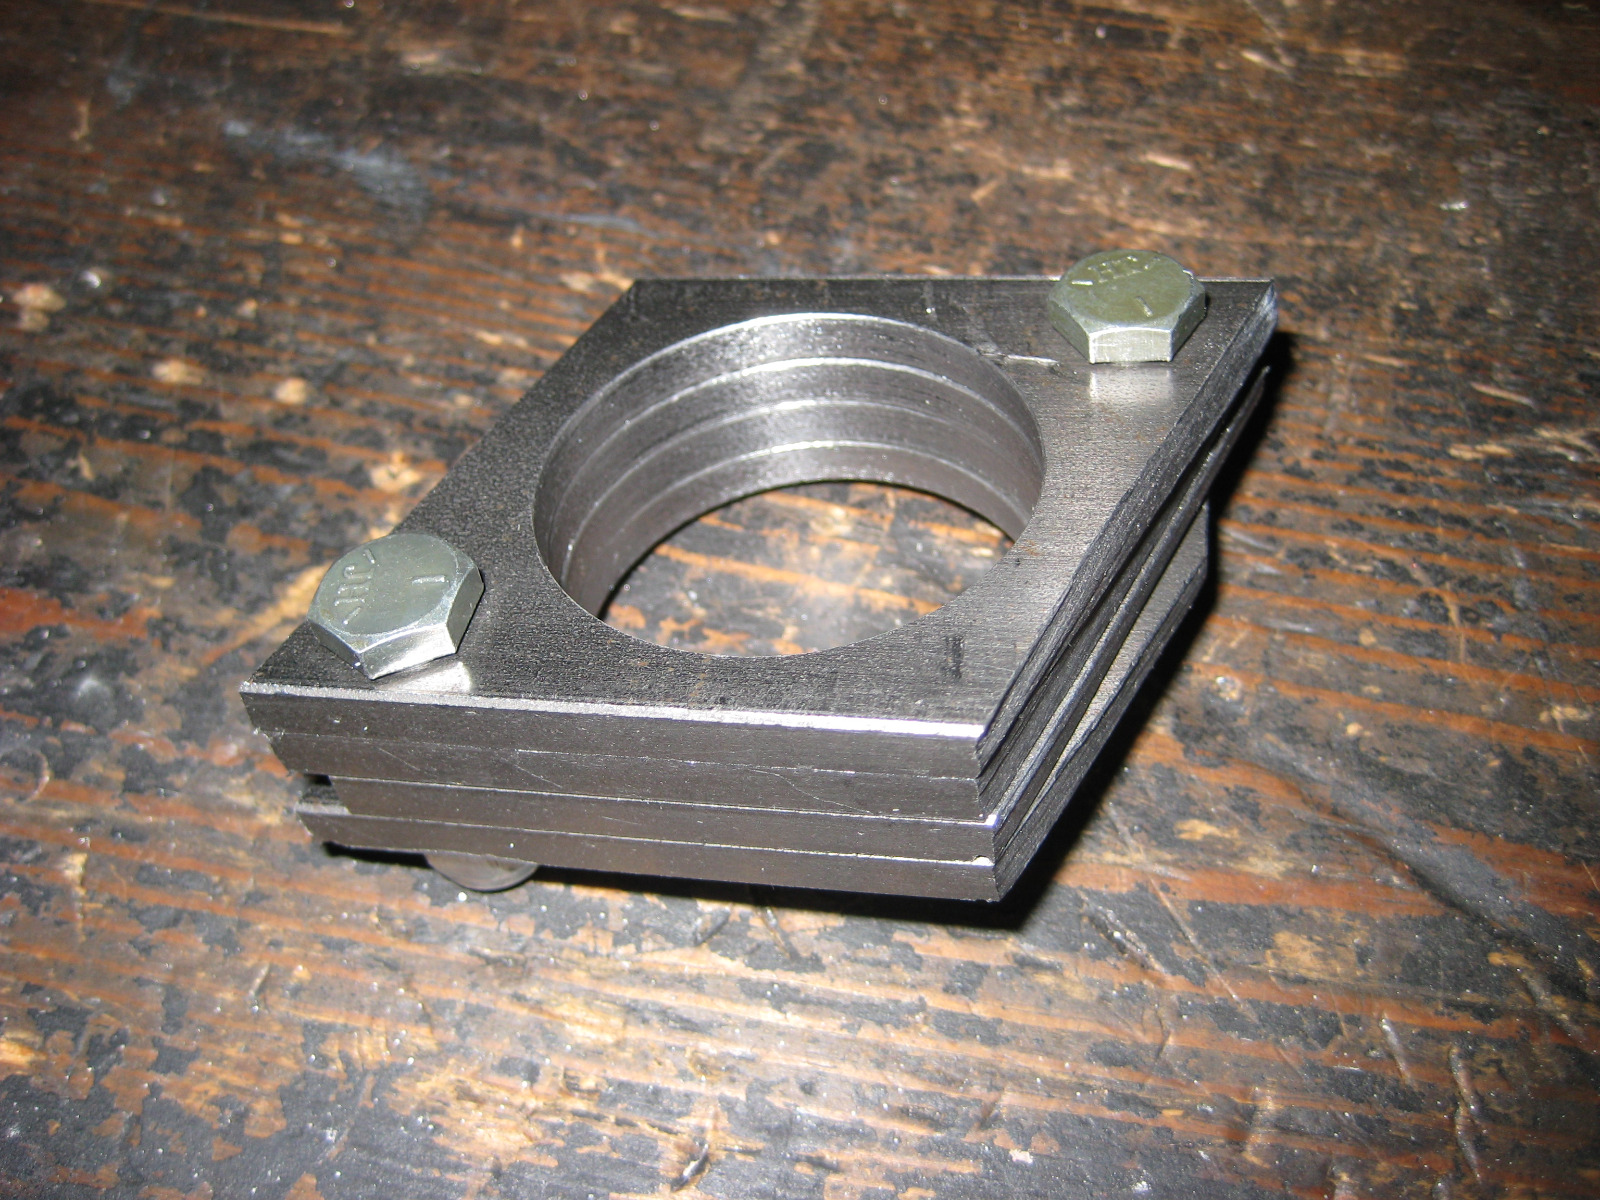
05 Jan 2024 12:45 - 05 Jan 2024 12:57Same here but left the spigots one piece to bolt to the head direct and included an internal step for the headers slip inside and sit against so they can be either welded on or held in with springs.I cut my flange holes on my mini-lathe (which I know you have) using a "four jaw" none self centring chuck (was a bit of an ass to centre up initially)
[
AIR CORRECTOR JETS FOR VM CARBS AND ETHANOL RESISTANT VITON CHOKE PLUNGER SEAL REPLACMENT FOR ALL CLASSIC AND MODERN MOTORCYCLE CARBURETTORS
www.kzrider.com/forum/23-for-sale/611992...lide-mikunis?start=1
www.kzrider.com/forum/23-for-sale/611992...lide-mikunis?start=1
Last edit: 05 Jan 2024 12:57 by zed1015.
The following user(s) said Thank You: Injected, howardhb
Please Log in or Create an account to join the conversation.
- Injected
-
Topic Author
- Offline
- User
-
Registered
- Posts: 1690
- Thanks: 1197
Re: KZ650 Sleeper Build (KZ1000 engine transplant)
05 Jan 2024 13:20 - 05 Jan 2024 14:00
Using a 4 jaw on the lathe would have been easier but unfortunately I don't own one. The hole saw is about $10 but your pictures tell me I should look for a used 4 jaw chuck to fit on my lathe.
I am trying to reuse these head pipe ends off some cheap header that was thrown in with the used engine purchase.
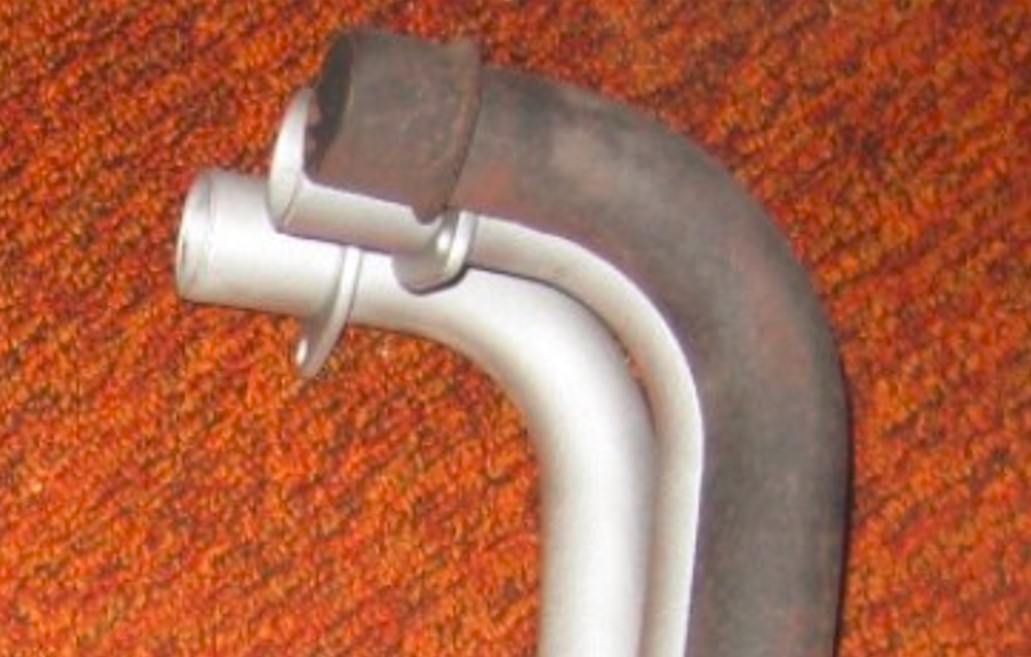
That pipe used the stock exhaust split collars and pipe holders (both items I don't have)
The pipes once assembled and welded will resemble a MAC system.
The head is set up for M6 studs which is fine for a street bike as I don't plan to take it apart that often.
I am trying to reuse these head pipe ends off some cheap header that was thrown in with the used engine purchase.
That pipe used the stock exhaust split collars and pipe holders (both items I don't have)
The pipes once assembled and welded will resemble a MAC system.
The head is set up for M6 studs which is fine for a street bike as I don't plan to take it apart that often.
1978 KZ650B2 w 1197cc Z1 engine
1977 KZ650B1 w 750cc Spectre engine
1979 KZ650C3 w 831cc Hot Rod engine
1978 KZ650C2 w 762cc DFI project
1977 KZ650C1 stock restoration project
1978 KZ650B2 modified project
1978 KZ650B2 Injected Drag 831cc
1980 Z1 Custom Frame Drag 1327cc
1981 Z50R Honda tow bike
1977 KZ650B1 w 750cc Spectre engine
1979 KZ650C3 w 831cc Hot Rod engine
1978 KZ650C2 w 762cc DFI project
1977 KZ650C1 stock restoration project
1978 KZ650B2 modified project
1978 KZ650B2 Injected Drag 831cc
1980 Z1 Custom Frame Drag 1327cc
1981 Z50R Honda tow bike
Last edit: 05 Jan 2024 14:00 by Injected. Reason: sp
The following user(s) said Thank You: Wookie58
Please Log in or Create an account to join the conversation.
- Injected
-
Topic Author
- Offline
- User
-
Registered
- Posts: 1690
- Thanks: 1197
Re: KZ650 Sleeper Build (KZ1000 engine transplant)
08 Jan 2024 10:18
Sprung for premium hole saw which was $12 on sale. Dragged out my belt driven drill press as my tiny mill was not strong enough without bogging.
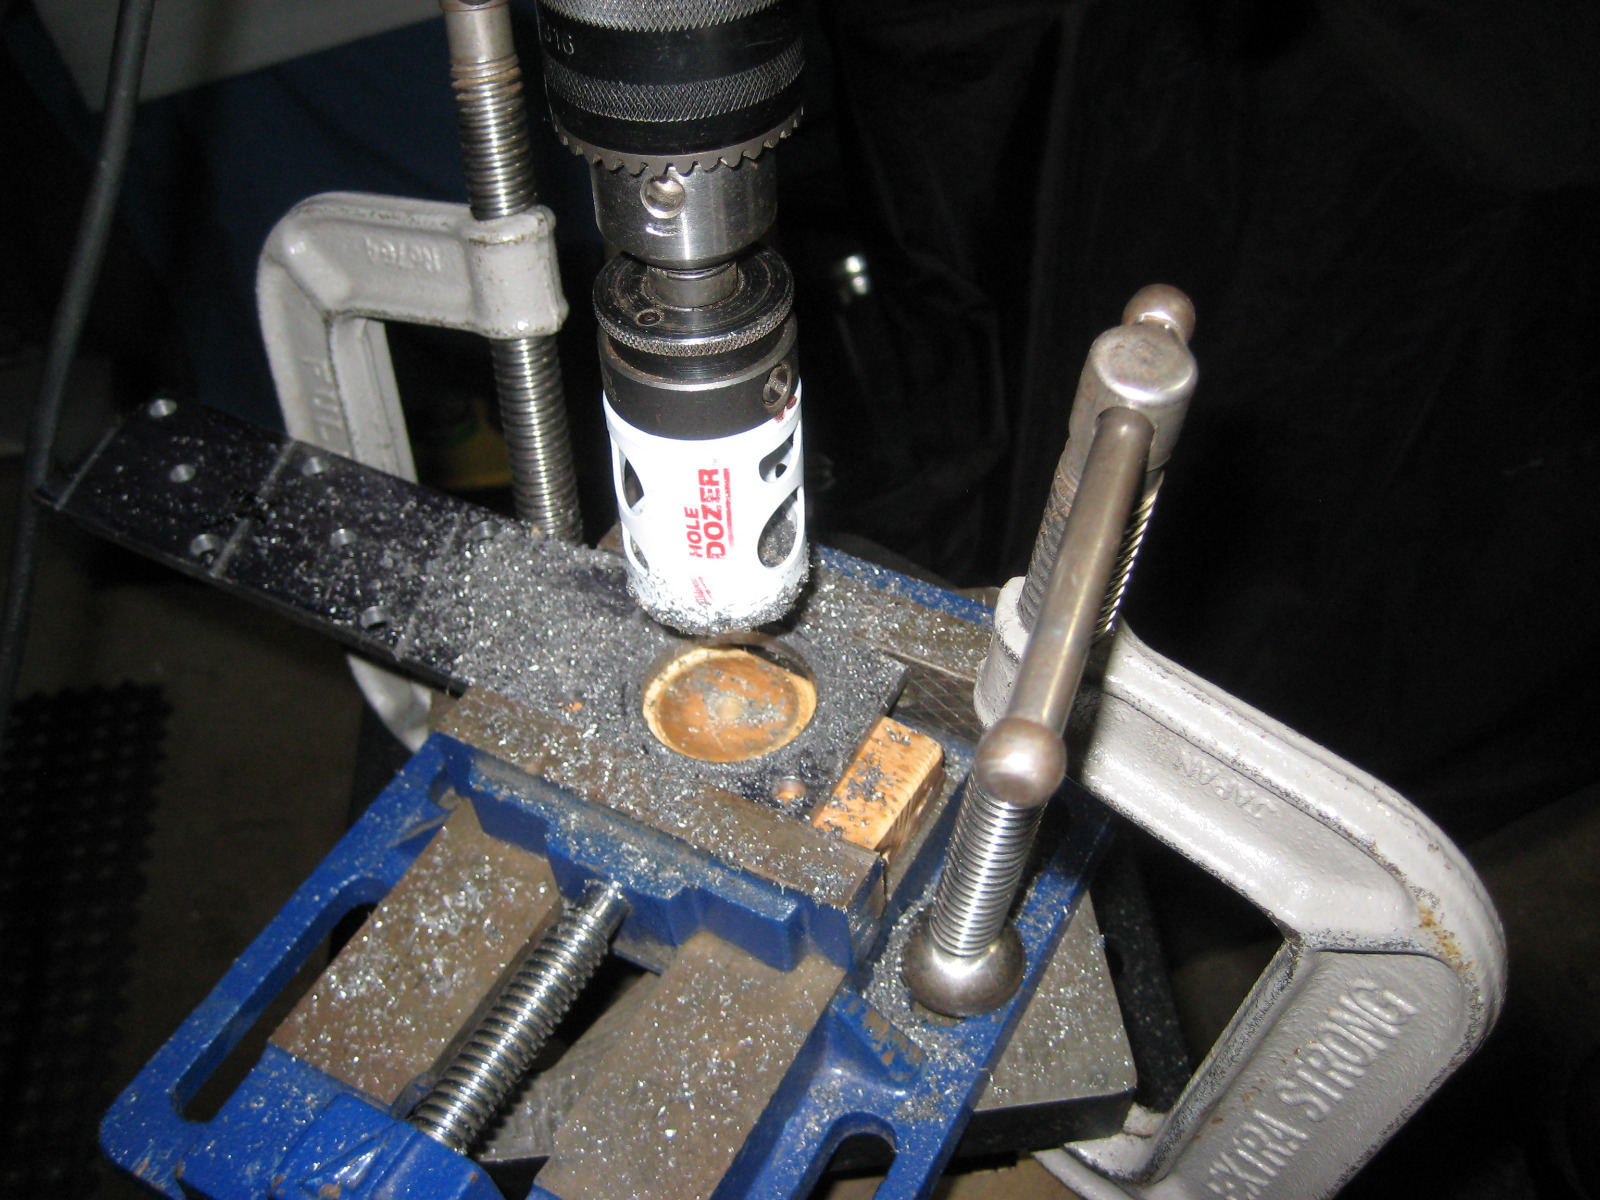
The bit cut pretty good, was aiming for 1.53" and it cut 1.54" so that will be fine without any other work. Should not be an issue finishing the rest of the holes today.
The bit cut pretty good, was aiming for 1.53" and it cut 1.54" so that will be fine without any other work. Should not be an issue finishing the rest of the holes today.
1978 KZ650B2 w 1197cc Z1 engine
1977 KZ650B1 w 750cc Spectre engine
1979 KZ650C3 w 831cc Hot Rod engine
1978 KZ650C2 w 762cc DFI project
1977 KZ650C1 stock restoration project
1978 KZ650B2 modified project
1978 KZ650B2 Injected Drag 831cc
1980 Z1 Custom Frame Drag 1327cc
1981 Z50R Honda tow bike
1977 KZ650B1 w 750cc Spectre engine
1979 KZ650C3 w 831cc Hot Rod engine
1978 KZ650C2 w 762cc DFI project
1977 KZ650C1 stock restoration project
1978 KZ650B2 modified project
1978 KZ650B2 Injected Drag 831cc
1980 Z1 Custom Frame Drag 1327cc
1981 Z50R Honda tow bike
The following user(s) said Thank You: howardhb
Please Log in or Create an account to join the conversation.
- Injected
-
Topic Author
- Offline
- User
-
Registered
- Posts: 1690
- Thanks: 1197
Re: KZ650 Sleeper Build (KZ1000 engine transplant)
08 Jan 2024 12:26
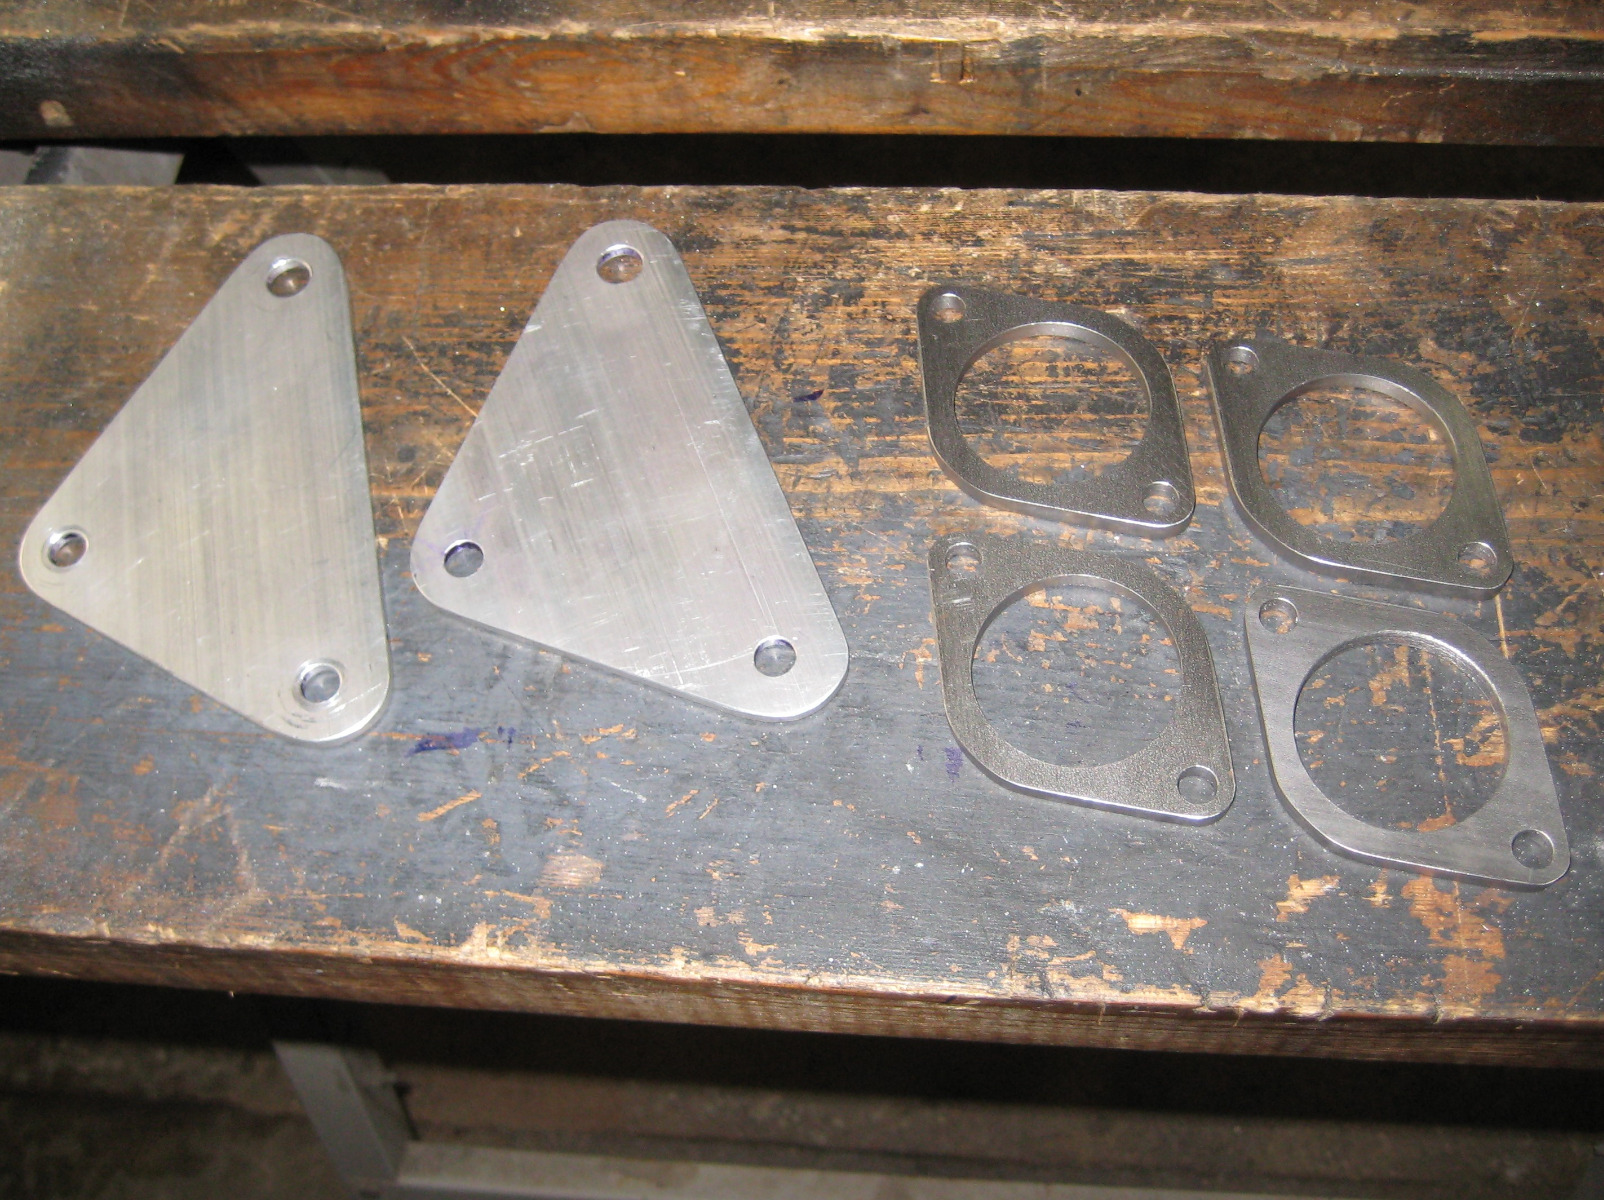
Finished drilling these flanges a little while ago.
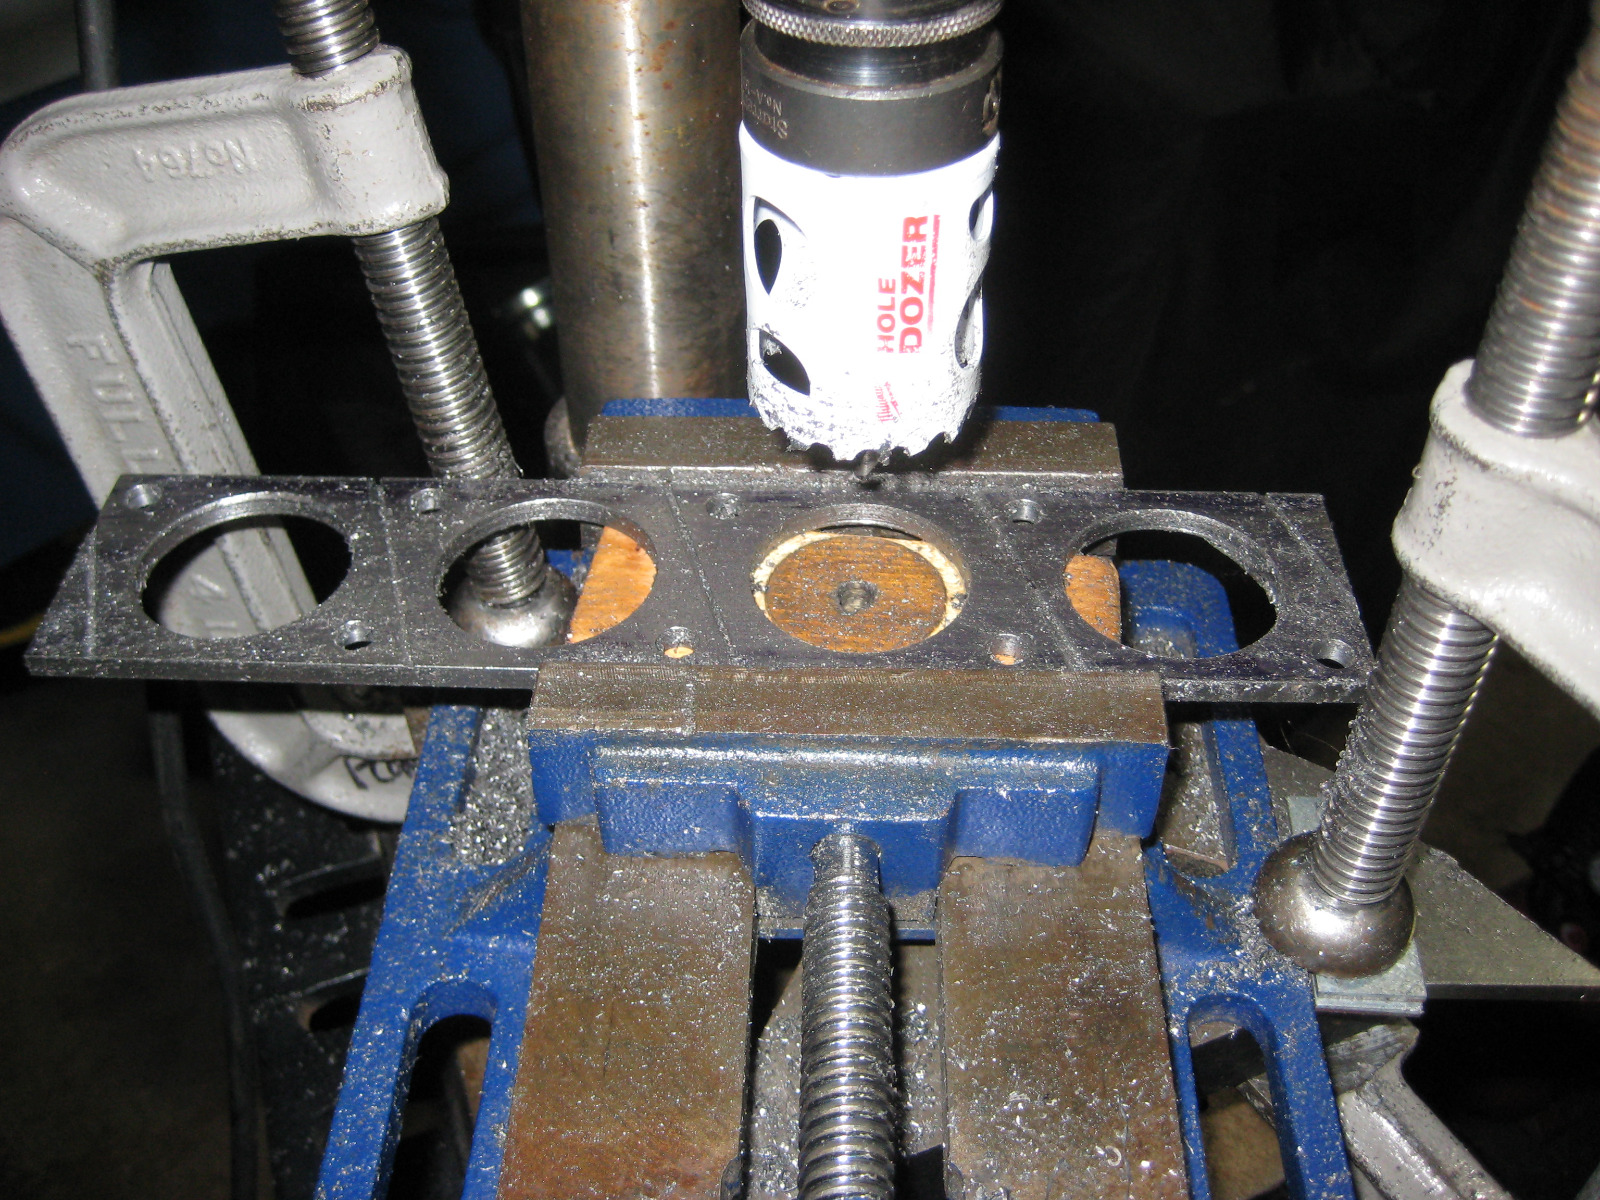
Now just have to cut them to size, mill flat edges, then shape the radii on the belt sander.
Now just have to cut them to size, mill flat edges, then shape the radii on the belt sander.
1978 KZ650B2 w 1197cc Z1 engine
1977 KZ650B1 w 750cc Spectre engine
1979 KZ650C3 w 831cc Hot Rod engine
1978 KZ650C2 w 762cc DFI project
1977 KZ650C1 stock restoration project
1978 KZ650B2 modified project
1978 KZ650B2 Injected Drag 831cc
1980 Z1 Custom Frame Drag 1327cc
1981 Z50R Honda tow bike
1977 KZ650B1 w 750cc Spectre engine
1979 KZ650C3 w 831cc Hot Rod engine
1978 KZ650C2 w 762cc DFI project
1977 KZ650C1 stock restoration project
1978 KZ650B2 modified project
1978 KZ650B2 Injected Drag 831cc
1980 Z1 Custom Frame Drag 1327cc
1981 Z50R Honda tow bike
The following user(s) said Thank You: howardhb, Kelly E
Please Log in or Create an account to join the conversation.
- Injected
-
Topic Author
- Offline
- User
-
Registered
- Posts: 1690
- Thanks: 1197
Re: KZ650 Sleeper Build (KZ1000 engine transplant)
10 Jan 2024 09:34
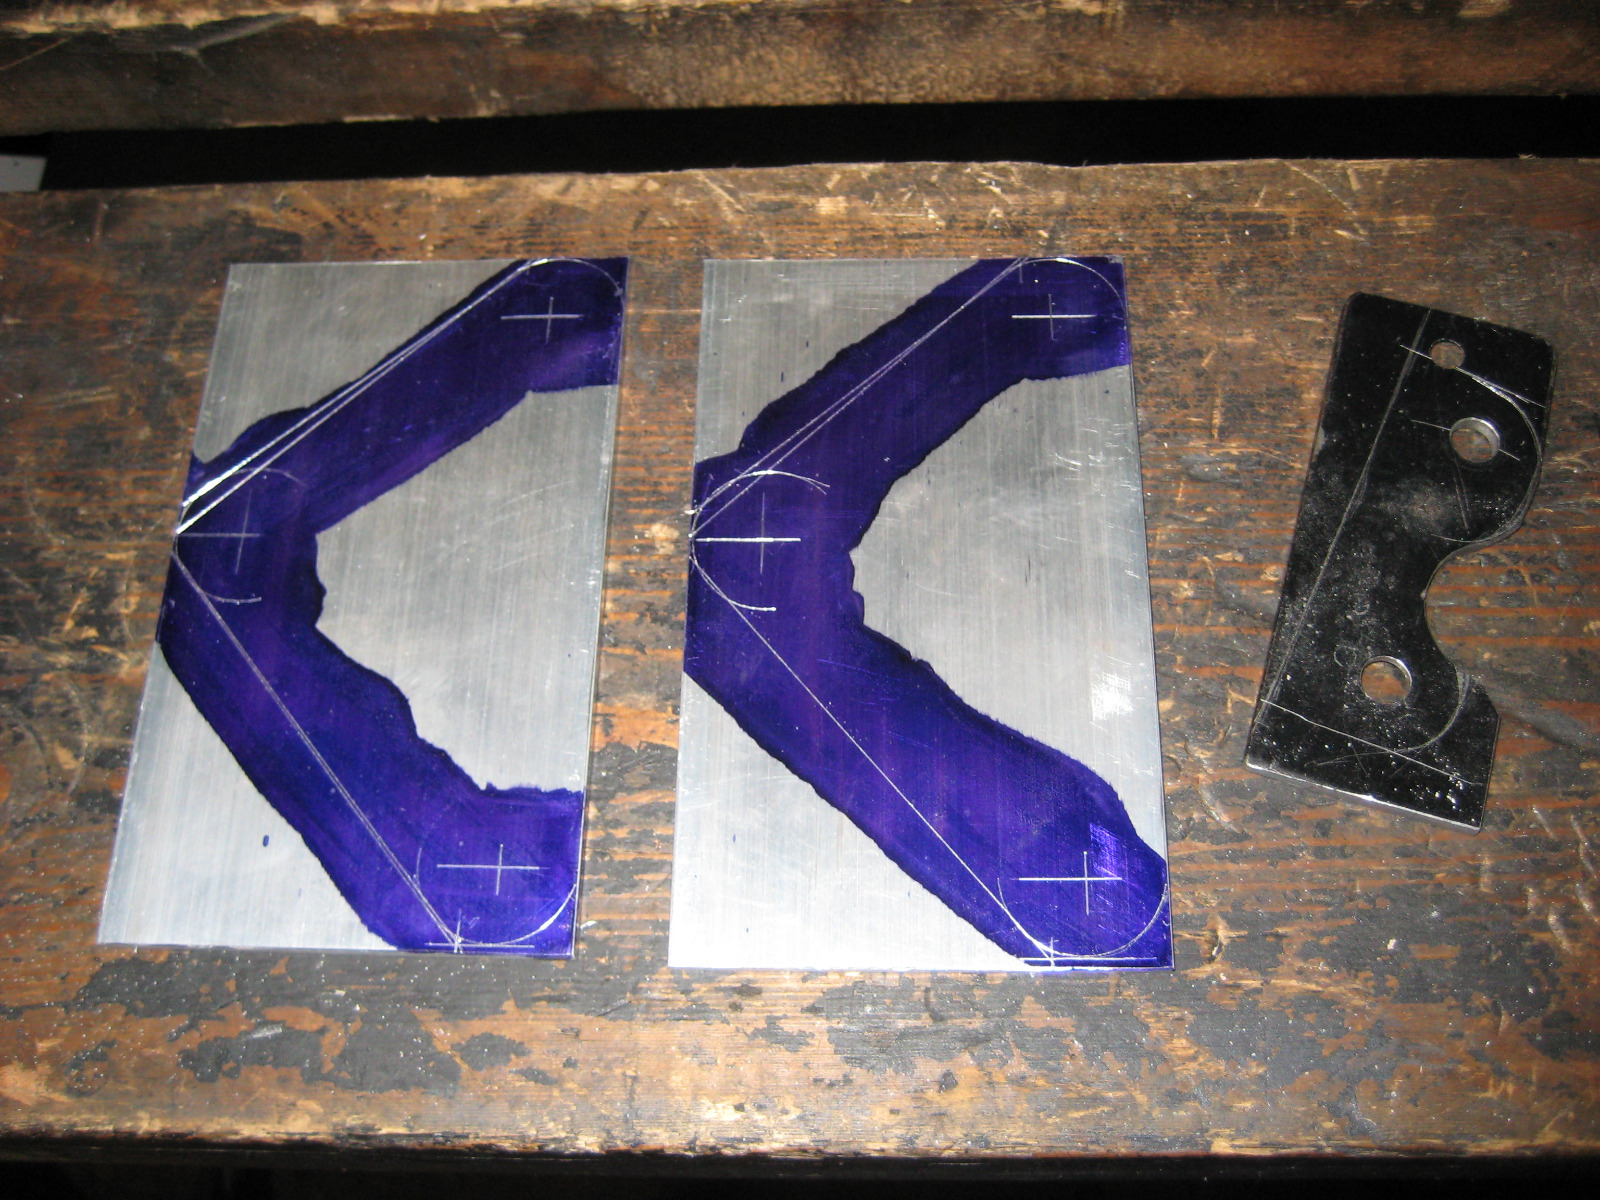
I got the flanges cut off by hand with a hack saw (Popeye arm) then I stacked them up so I can mill the cut edges flat.
Once the milling is done I will move on to grinding the radii.
I wrapped 1/4" bolts with copper shim stock to keep the ganged pieces from moving around.
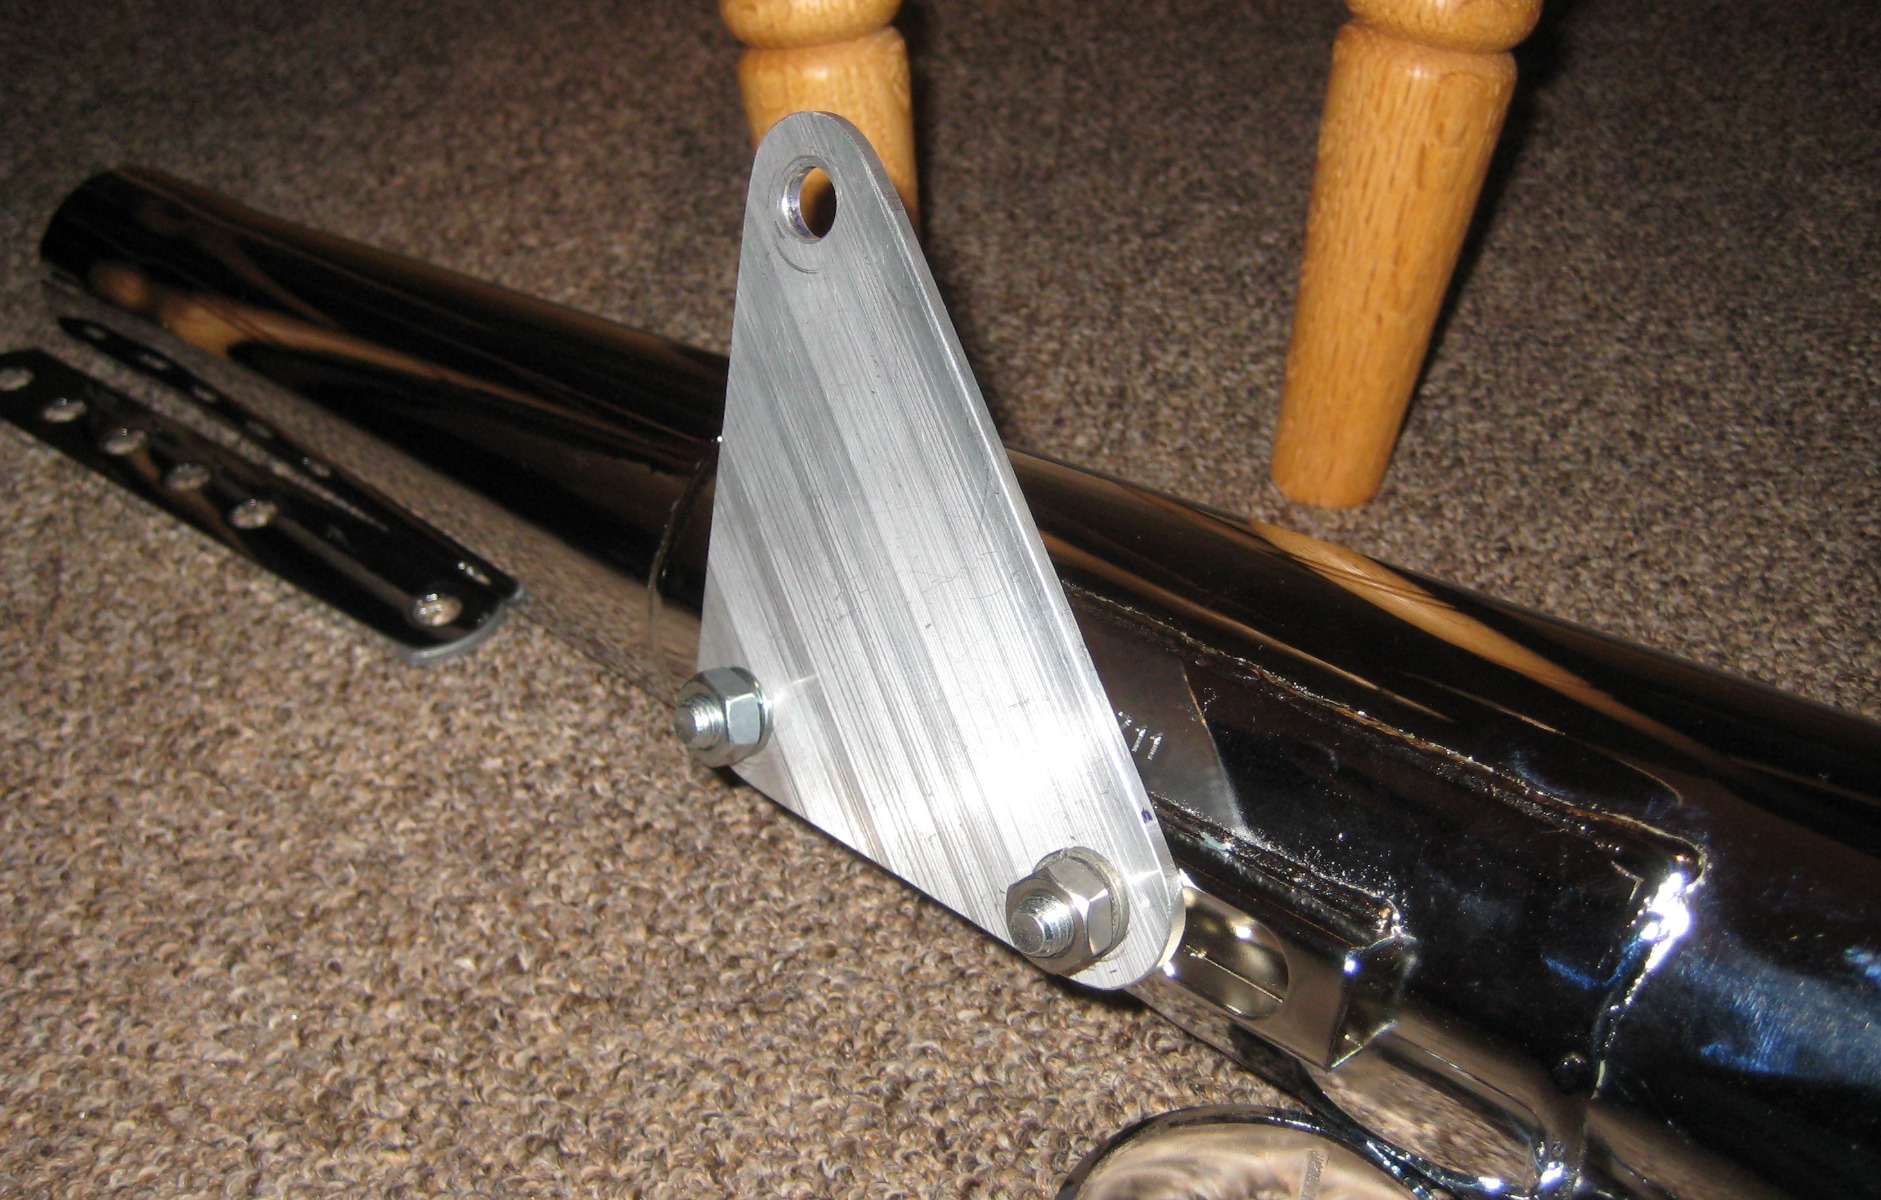
I also laid out for some aluminum muffler mount brackets and a rear brake tab to convert a B frame to a C frame (for another project)
Once the milling is done I will move on to grinding the radii.
I wrapped 1/4" bolts with copper shim stock to keep the ganged pieces from moving around.
I also laid out for some aluminum muffler mount brackets and a rear brake tab to convert a B frame to a C frame (for another project)
1978 KZ650B2 w 1197cc Z1 engine
1977 KZ650B1 w 750cc Spectre engine
1979 KZ650C3 w 831cc Hot Rod engine
1978 KZ650C2 w 762cc DFI project
1977 KZ650C1 stock restoration project
1978 KZ650B2 modified project
1978 KZ650B2 Injected Drag 831cc
1980 Z1 Custom Frame Drag 1327cc
1981 Z50R Honda tow bike
1977 KZ650B1 w 750cc Spectre engine
1979 KZ650C3 w 831cc Hot Rod engine
1978 KZ650C2 w 762cc DFI project
1977 KZ650C1 stock restoration project
1978 KZ650B2 modified project
1978 KZ650B2 Injected Drag 831cc
1980 Z1 Custom Frame Drag 1327cc
1981 Z50R Honda tow bike
The following user(s) said Thank You: howardhb
Please Log in or Create an account to join the conversation.
- Injected
-
Topic Author
- Offline
- User
-
Registered
- Posts: 1690
- Thanks: 1197
Re: KZ650 Sleeper Build (KZ1000 engine transplant)
16 Jan 2024 09:39 - 16 Jan 2024 09:42
Even though it was freezing in the garage today I was able to belt sand the radii on the exhaust flanges and muffler mount brackets.
Progress is slow because of the unheated shop circumstances.
Progress is slow because of the unheated shop circumstances.
1978 KZ650B2 w 1197cc Z1 engine
1977 KZ650B1 w 750cc Spectre engine
1979 KZ650C3 w 831cc Hot Rod engine
1978 KZ650C2 w 762cc DFI project
1977 KZ650C1 stock restoration project
1978 KZ650B2 modified project
1978 KZ650B2 Injected Drag 831cc
1980 Z1 Custom Frame Drag 1327cc
1981 Z50R Honda tow bike
1977 KZ650B1 w 750cc Spectre engine
1979 KZ650C3 w 831cc Hot Rod engine
1978 KZ650C2 w 762cc DFI project
1977 KZ650C1 stock restoration project
1978 KZ650B2 modified project
1978 KZ650B2 Injected Drag 831cc
1980 Z1 Custom Frame Drag 1327cc
1981 Z50R Honda tow bike
Last edit: 16 Jan 2024 09:42 by Injected. Reason: info
The following user(s) said Thank You: howardhb, Wookie58
Please Log in or Create an account to join the conversation.
- Injected
-
Topic Author
- Offline
- User
-
Registered
- Posts: 1690
- Thanks: 1197
Re: KZ650 Sleeper Build (KZ1000 engine transplant)
18 Jan 2024 10:58 - 18 Jan 2024 11:02
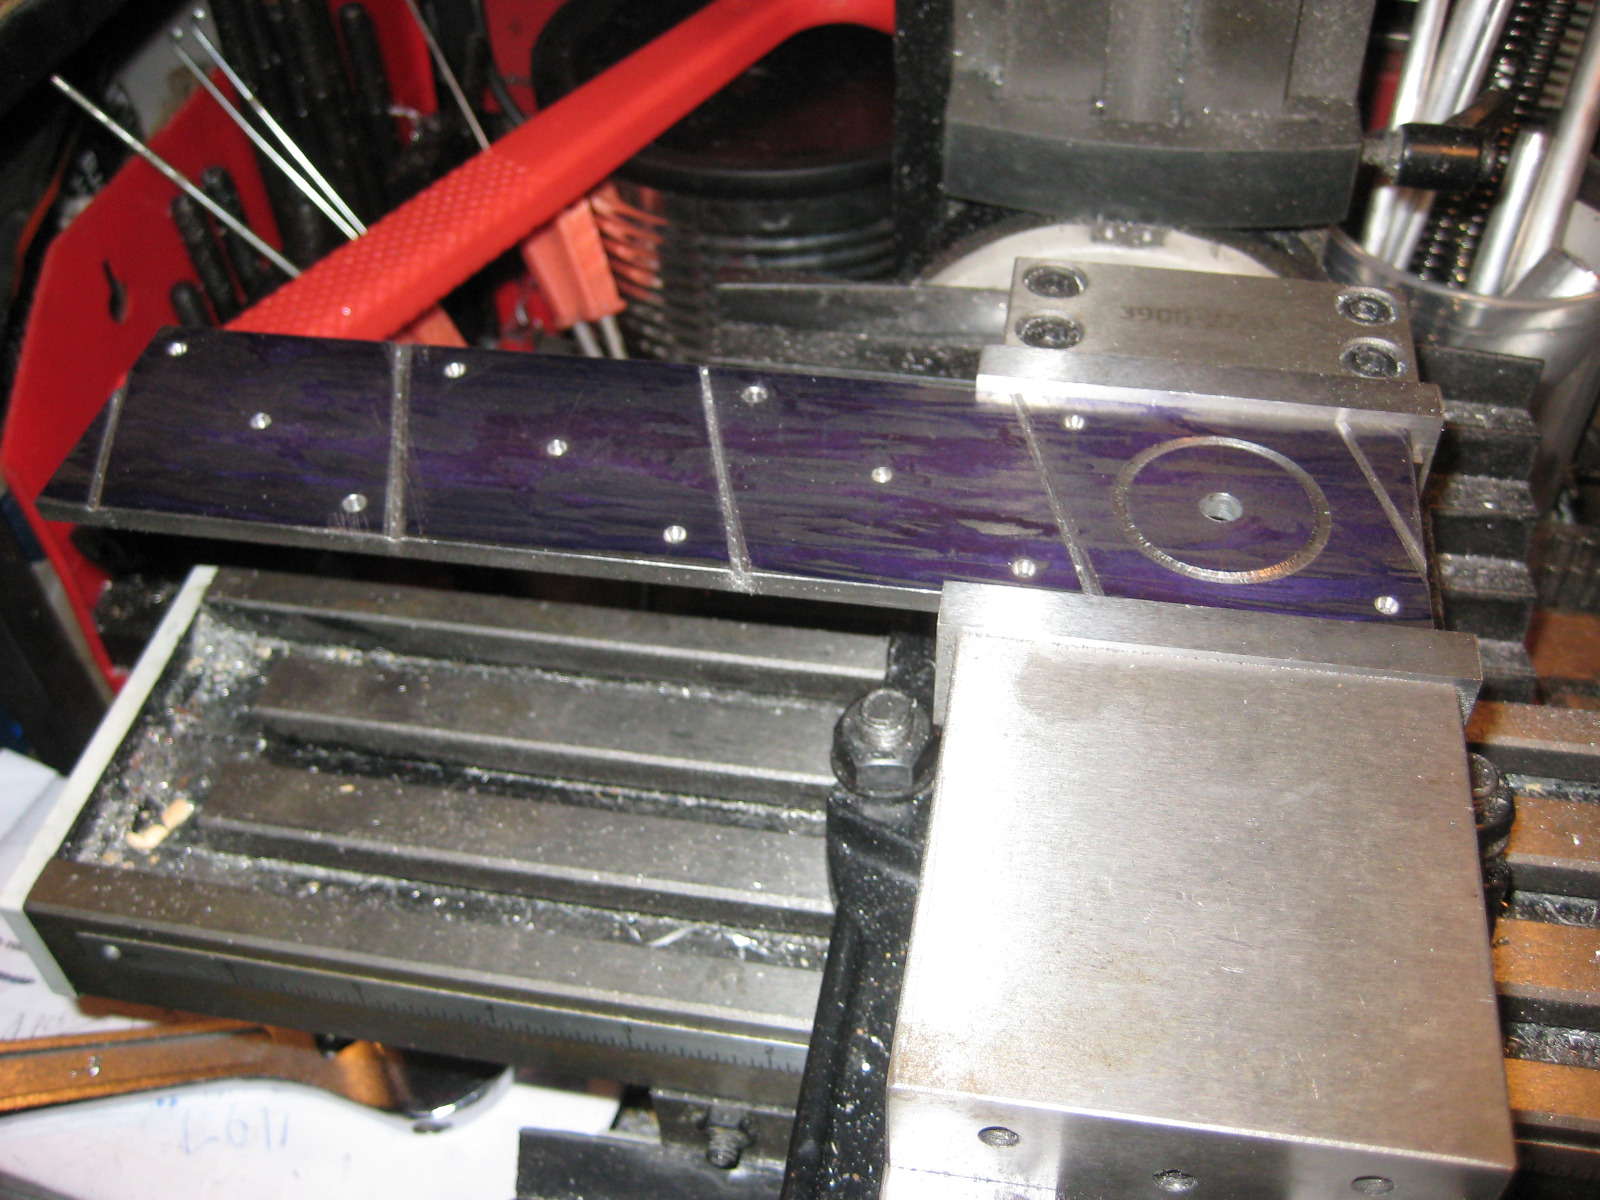
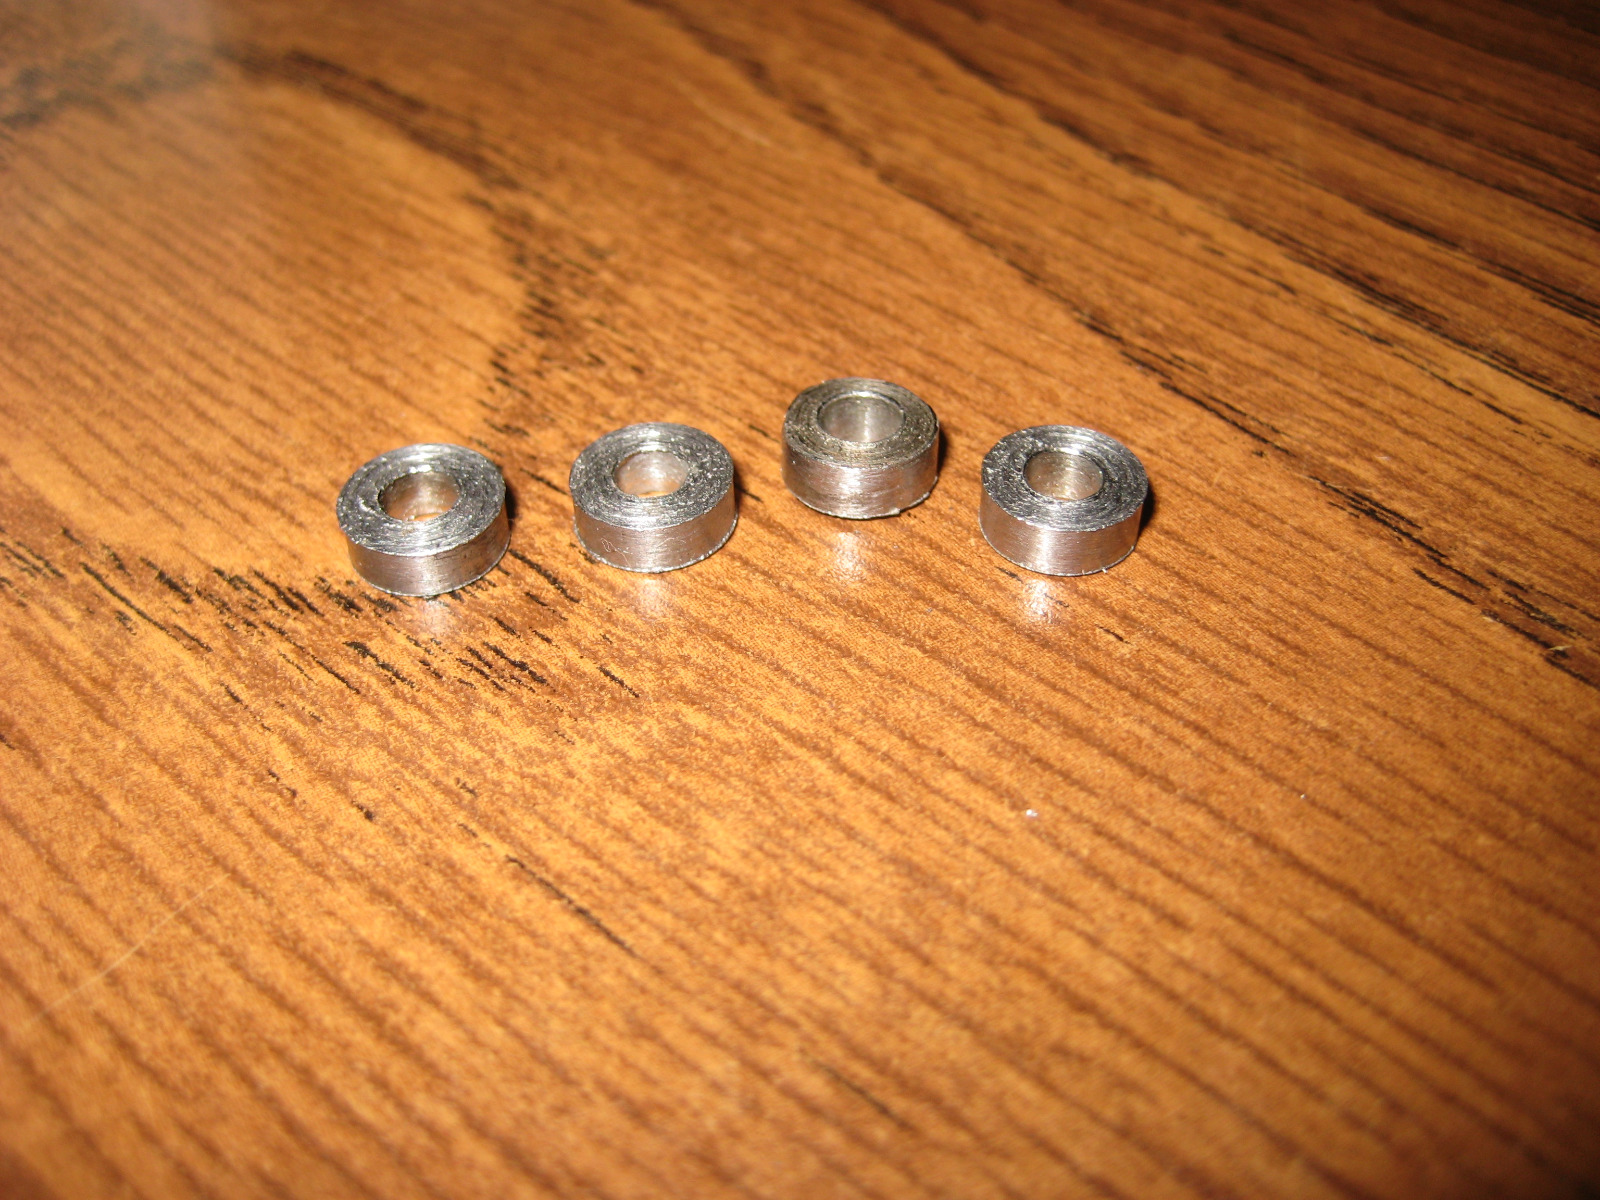
Made these depth shims to be welded onto the down pipes to set the flanges at the correct height.
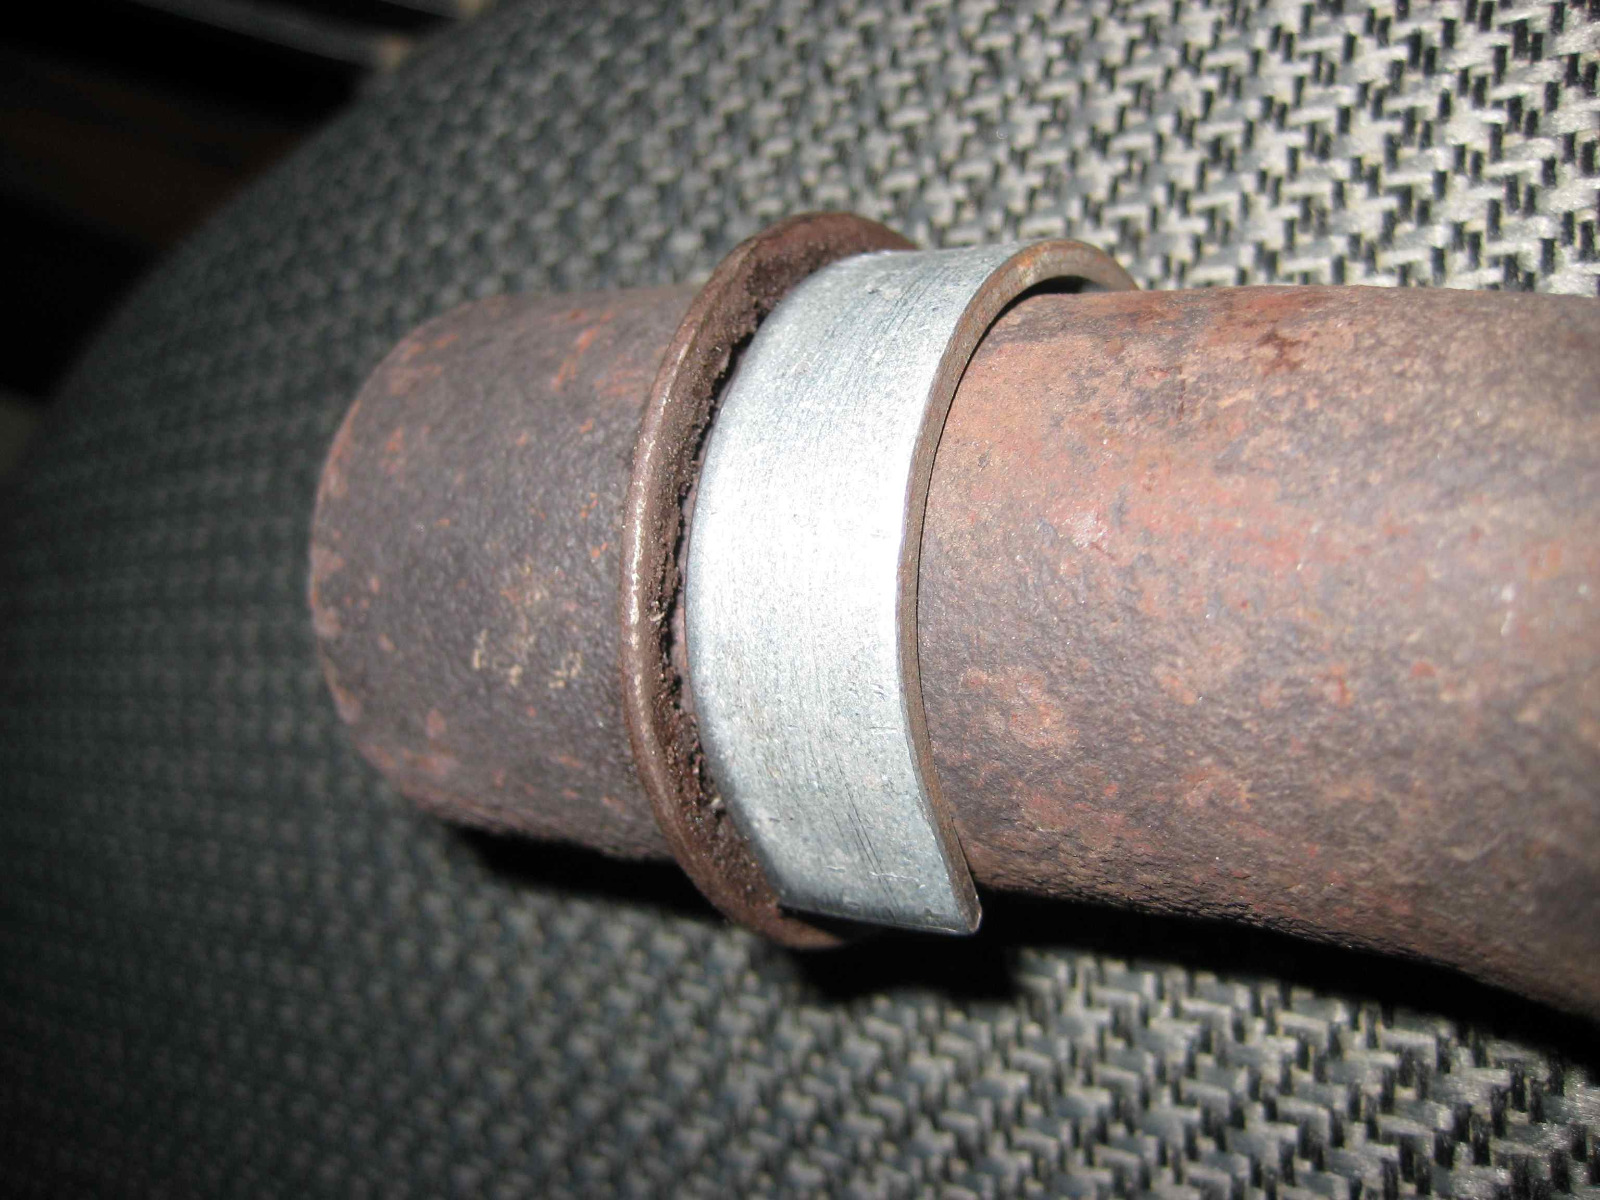
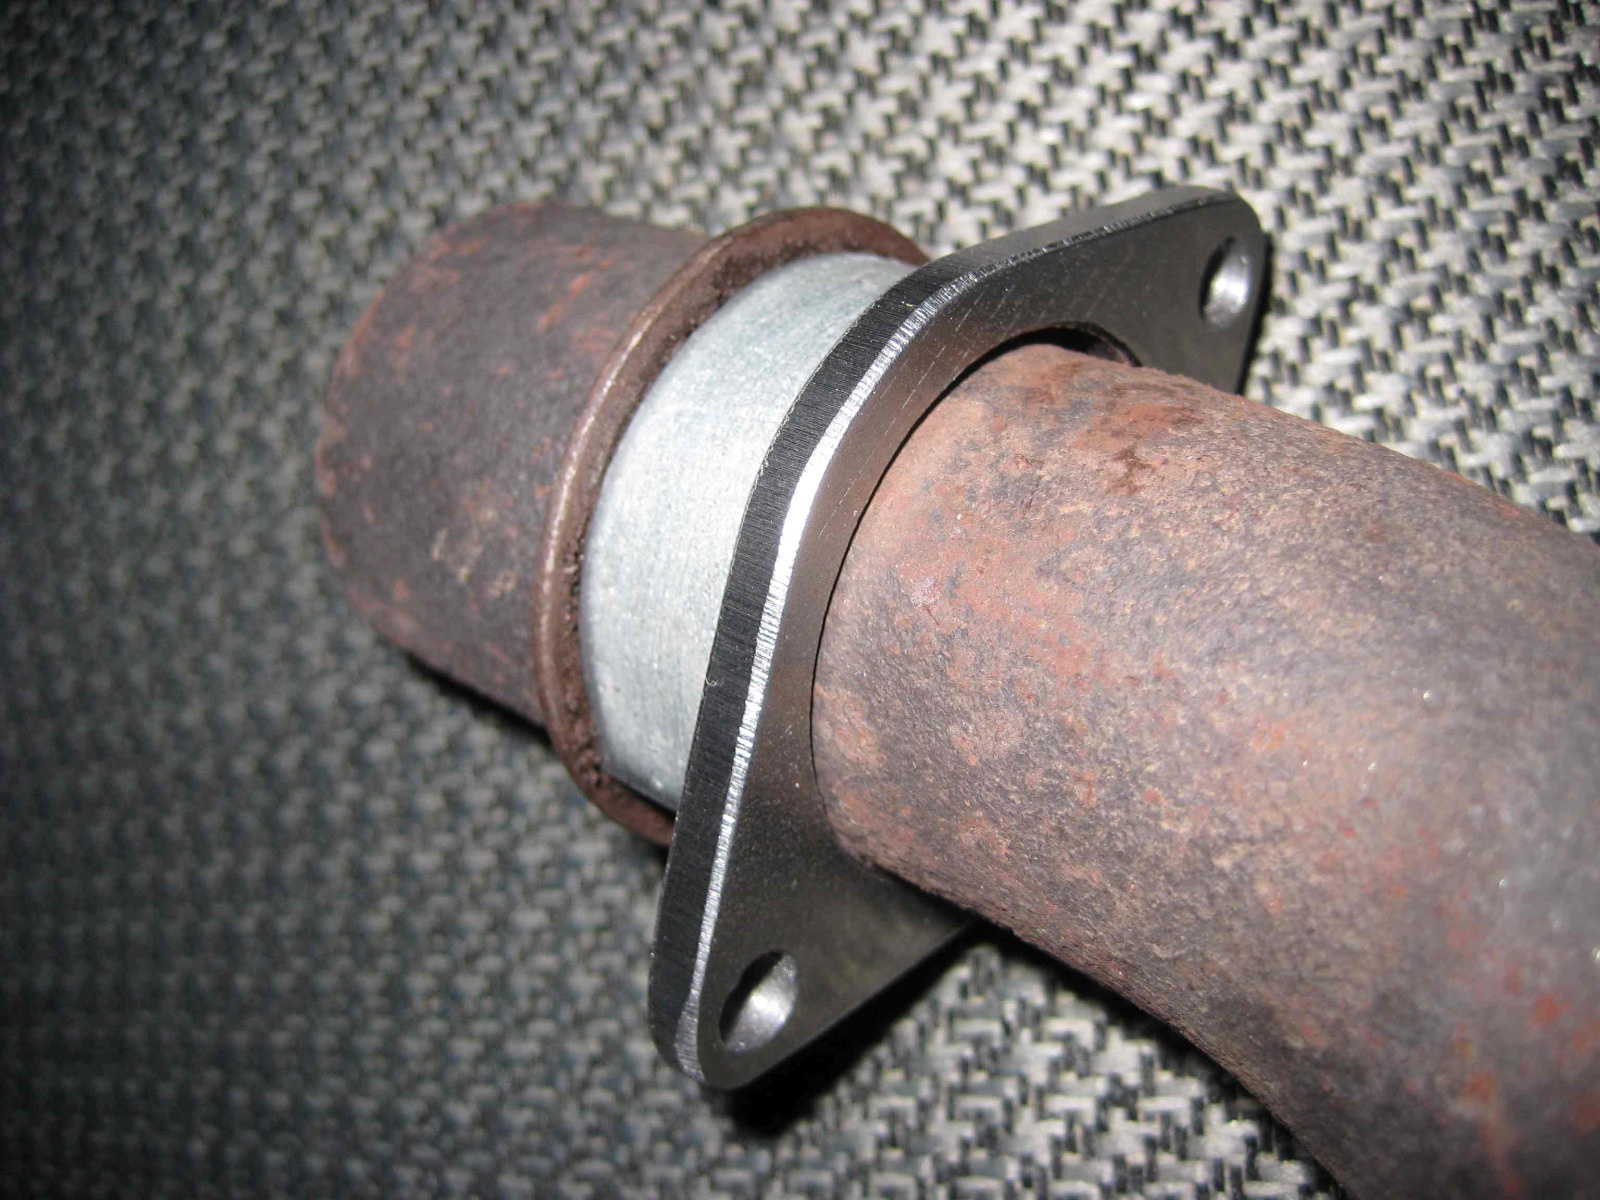
These serve the same purpose as the stock split shims. Still need to clean up the down pipes as they have a combination of old paint and rust on them.
These serve the same purpose as the stock split shims. Still need to clean up the down pipes as they have a combination of old paint and rust on them.
1978 KZ650B2 w 1197cc Z1 engine
1977 KZ650B1 w 750cc Spectre engine
1979 KZ650C3 w 831cc Hot Rod engine
1978 KZ650C2 w 762cc DFI project
1977 KZ650C1 stock restoration project
1978 KZ650B2 modified project
1978 KZ650B2 Injected Drag 831cc
1980 Z1 Custom Frame Drag 1327cc
1981 Z50R Honda tow bike
1977 KZ650B1 w 750cc Spectre engine
1979 KZ650C3 w 831cc Hot Rod engine
1978 KZ650C2 w 762cc DFI project
1977 KZ650C1 stock restoration project
1978 KZ650B2 modified project
1978 KZ650B2 Injected Drag 831cc
1980 Z1 Custom Frame Drag 1327cc
1981 Z50R Honda tow bike
Last edit: 18 Jan 2024 11:02 by Injected. Reason: info
The following user(s) said Thank You: howardhb, Wookie58
Please Log in or Create an account to join the conversation.
- Injected
-
Topic Author
- Offline
- User
-
Registered
- Posts: 1690
- Thanks: 1197
Re: KZ650 Sleeper Build (KZ1000 engine transplant)
19 Jan 2024 18:01 - 19 Jan 2024 18:02
Checked the fit of the head pipe onto the head today, looks OK to me (shown without gasket)

Those studs/nuts are just to get it welded, ordered some SS studs and lock nuts for the final assembly.
Those studs/nuts are just to get it welded, ordered some SS studs and lock nuts for the final assembly.
1978 KZ650B2 w 1197cc Z1 engine
1977 KZ650B1 w 750cc Spectre engine
1979 KZ650C3 w 831cc Hot Rod engine
1978 KZ650C2 w 762cc DFI project
1977 KZ650C1 stock restoration project
1978 KZ650B2 modified project
1978 KZ650B2 Injected Drag 831cc
1980 Z1 Custom Frame Drag 1327cc
1981 Z50R Honda tow bike
1977 KZ650B1 w 750cc Spectre engine
1979 KZ650C3 w 831cc Hot Rod engine
1978 KZ650C2 w 762cc DFI project
1977 KZ650C1 stock restoration project
1978 KZ650B2 modified project
1978 KZ650B2 Injected Drag 831cc
1980 Z1 Custom Frame Drag 1327cc
1981 Z50R Honda tow bike
Last edit: 19 Jan 2024 18:02 by Injected. Reason: sp
The following user(s) said Thank You: howardhb, Wookie58
Please Log in or Create an account to join the conversation.
- Injected
-
Topic Author
- Offline
- User
-
Registered
- Posts: 1690
- Thanks: 1197
Re: KZ650 Sleeper Build (KZ1000 engine transplant)
30 Jan 2024 07:18 - 30 Jan 2024 07:20
Did some assembly welding on the exhaust last night.
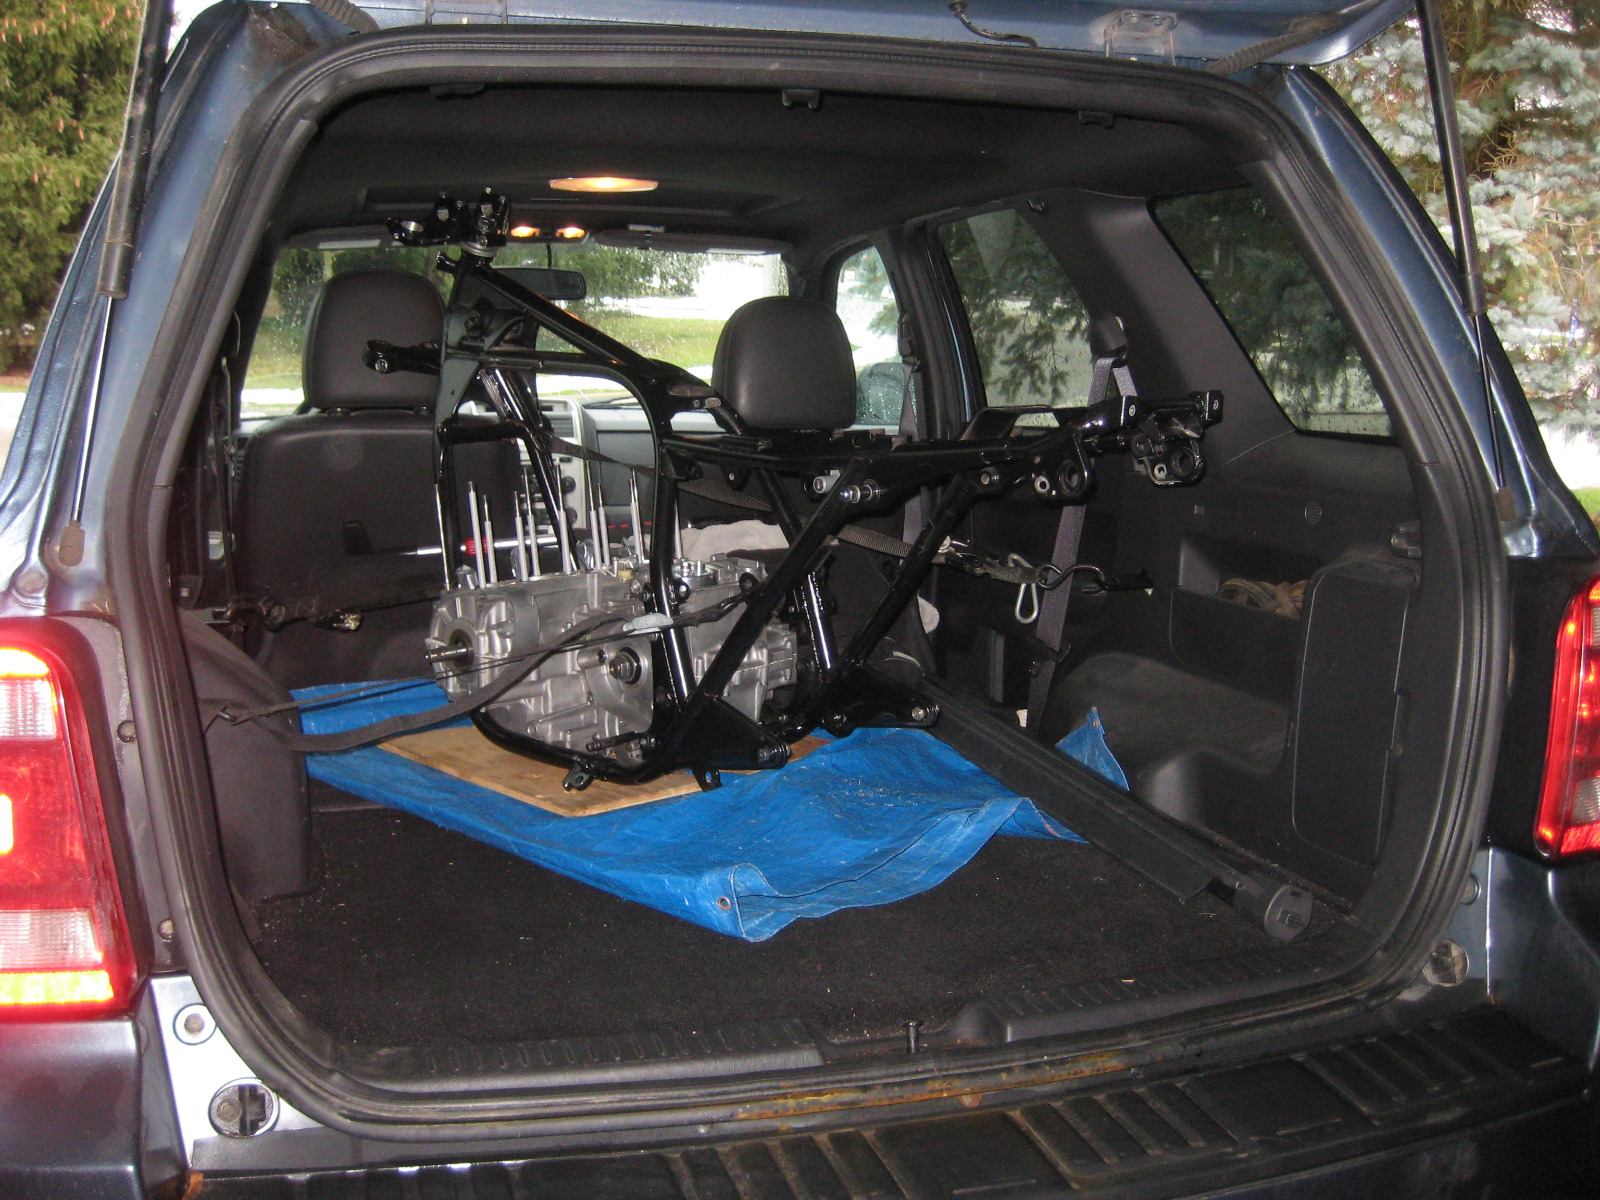

I don't have a welder so I took it to a friends house, he is out in the country and works mostly on ATV's so he does not own a hydraulic motorcycle lift.
At first we thought we could get it up on his welding table but that 8 foot table is attached to a wall workbench style so you can only access one side at a time. Decided doing it on the floor would be best as he has a heated cement floor. Once we blocked it up on the bottom it was discovered we could only work on one side at a time anyways.
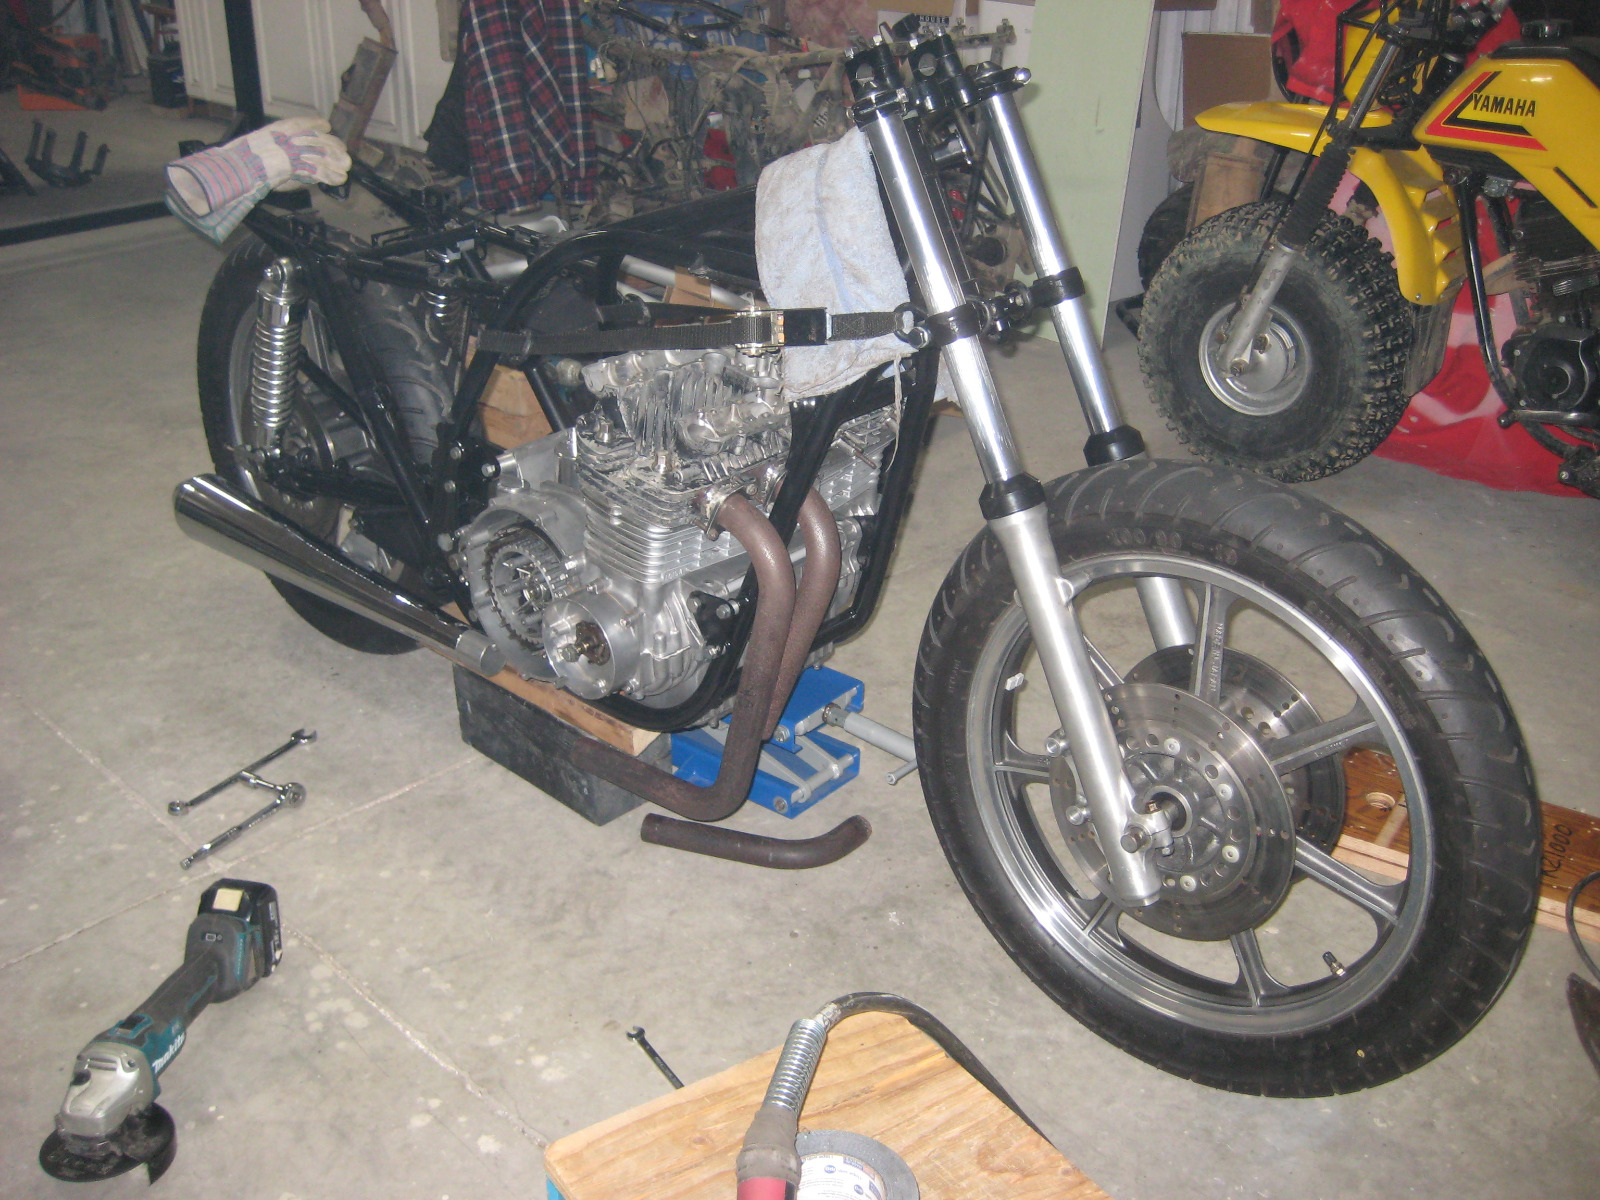
The head pipes are cut off a 1000 header, so two pipes are short and two longer by about 1 inch. We quickly found out the pipes were hanging down about 1" too far on the shorter pipe and more on the longer pipe. We ended up sectioning the longer pipe and have it on the inside cylinder. We are going to pie cut the inside top of the outer pipe and pull the open end into the collector to correct the down angle (angle seen from the side)
That is as far as we got last night and I am returning tonight to hopefully finish it.
I don't have a welder so I took it to a friends house, he is out in the country and works mostly on ATV's so he does not own a hydraulic motorcycle lift.
At first we thought we could get it up on his welding table but that 8 foot table is attached to a wall workbench style so you can only access one side at a time. Decided doing it on the floor would be best as he has a heated cement floor. Once we blocked it up on the bottom it was discovered we could only work on one side at a time anyways.
The head pipes are cut off a 1000 header, so two pipes are short and two longer by about 1 inch. We quickly found out the pipes were hanging down about 1" too far on the shorter pipe and more on the longer pipe. We ended up sectioning the longer pipe and have it on the inside cylinder. We are going to pie cut the inside top of the outer pipe and pull the open end into the collector to correct the down angle (angle seen from the side)
That is as far as we got last night and I am returning tonight to hopefully finish it.
1978 KZ650B2 w 1197cc Z1 engine
1977 KZ650B1 w 750cc Spectre engine
1979 KZ650C3 w 831cc Hot Rod engine
1978 KZ650C2 w 762cc DFI project
1977 KZ650C1 stock restoration project
1978 KZ650B2 modified project
1978 KZ650B2 Injected Drag 831cc
1980 Z1 Custom Frame Drag 1327cc
1981 Z50R Honda tow bike
1977 KZ650B1 w 750cc Spectre engine
1979 KZ650C3 w 831cc Hot Rod engine
1978 KZ650C2 w 762cc DFI project
1977 KZ650C1 stock restoration project
1978 KZ650B2 modified project
1978 KZ650B2 Injected Drag 831cc
1980 Z1 Custom Frame Drag 1327cc
1981 Z50R Honda tow bike
Last edit: 30 Jan 2024 07:20 by Injected. Reason: sp
The following user(s) said Thank You: Nessism, chopper1963, howardhb
Please Log in or Create an account to join the conversation.
Moderators: Street Fighter LTD