
And finally, Wookie's 82 begins !
- Wookie58
-
 Topic Author
- Offline
- Moderator
- Posts: 4847
- Thanks: 2934
Re: And finally, Wookie's 82 begins !
25 Oct 2023 00:51Whereabouts are you thinking Rolf ? it has spring joints between the headers and collector and also the collector and the intermediate pipeLooks good! if it was my project i vould add some exhaust springs and hooks holding the end in place just for adding some cool race look
1982 KZ1000 Ltd
www.kzrider.com/forum/11-projects/617631...-82-begins?start=192
kzrider.com/filebase-alias?view=download...d-fault-diagnosis&ca
www.kzrider.com/forum/11-projects/617631...-82-begins?start=192
kzrider.com/filebase-alias?view=download...d-fault-diagnosis&ca
Please Log in or Create an account to join the conversation.
- Wookie58
-
Topic Author
- Offline
- Moderator
- Posts: 4847
- Thanks: 2934
Re: And finally, Wookie's 82 begins !
25 Oct 2023 00:56
Now the exhaust is done I have started with the hydraulic clutch conversion and speed sensor, will post pics when I have something to show you but I am hopeful I can contain it all within the original cover

1982 KZ1000 Ltd
www.kzrider.com/forum/11-projects/617631...-82-begins?start=192
kzrider.com/filebase-alias?view=download...d-fault-diagnosis&ca
www.kzrider.com/forum/11-projects/617631...-82-begins?start=192
kzrider.com/filebase-alias?view=download...d-fault-diagnosis&ca
Please Log in or Create an account to join the conversation.
- Rolf1976_KZ900
-

- Offline
- Sustaining Member
- Posts: 469
- Thanks: 236
Re: And finally, Wookie's 82 begins !
25 Oct 2023 03:08Whereabouts are you thinking Rolf ? it has spring joints between the headers and collector and also the collector and the intermediate pipeLooks good! if it was my project i vould add some exhaust springs and hooks holding the end in place just for adding some cool race look
Not sure what i was thinking ha ha but i made a photoshop how i think it will look ,but maybe not so cool afterall.Dont laugh !
Please Log in or Create an account to join the conversation.
- Wookie58
-
Topic Author
- Offline
- Moderator
- Posts: 4847
- Thanks: 2934
Re: And finally, Wookie's 82 begins !
25 Oct 2023 03:15
Not sure on that one Rolf

1982 KZ1000 Ltd
www.kzrider.com/forum/11-projects/617631...-82-begins?start=192
kzrider.com/filebase-alias?view=download...d-fault-diagnosis&ca
www.kzrider.com/forum/11-projects/617631...-82-begins?start=192
kzrider.com/filebase-alias?view=download...d-fault-diagnosis&ca
Please Log in or Create an account to join the conversation.
- Rolf1976_KZ900
-
- Offline
- Sustaining Member
- Posts: 469
- Thanks: 236
Re: And finally, Wookie's 82 begins !
25 Oct 2023 03:19
I agree did not turn out how i thaught

The following user(s) said Thank You: Wookie58
Please Log in or Create an account to join the conversation.
- Wookie58
-
Topic Author
- Offline
- Moderator
- Posts: 4847
- Thanks: 2934
Re: And finally, Wookie's 82 begins !
04 Nov 2023 12:10
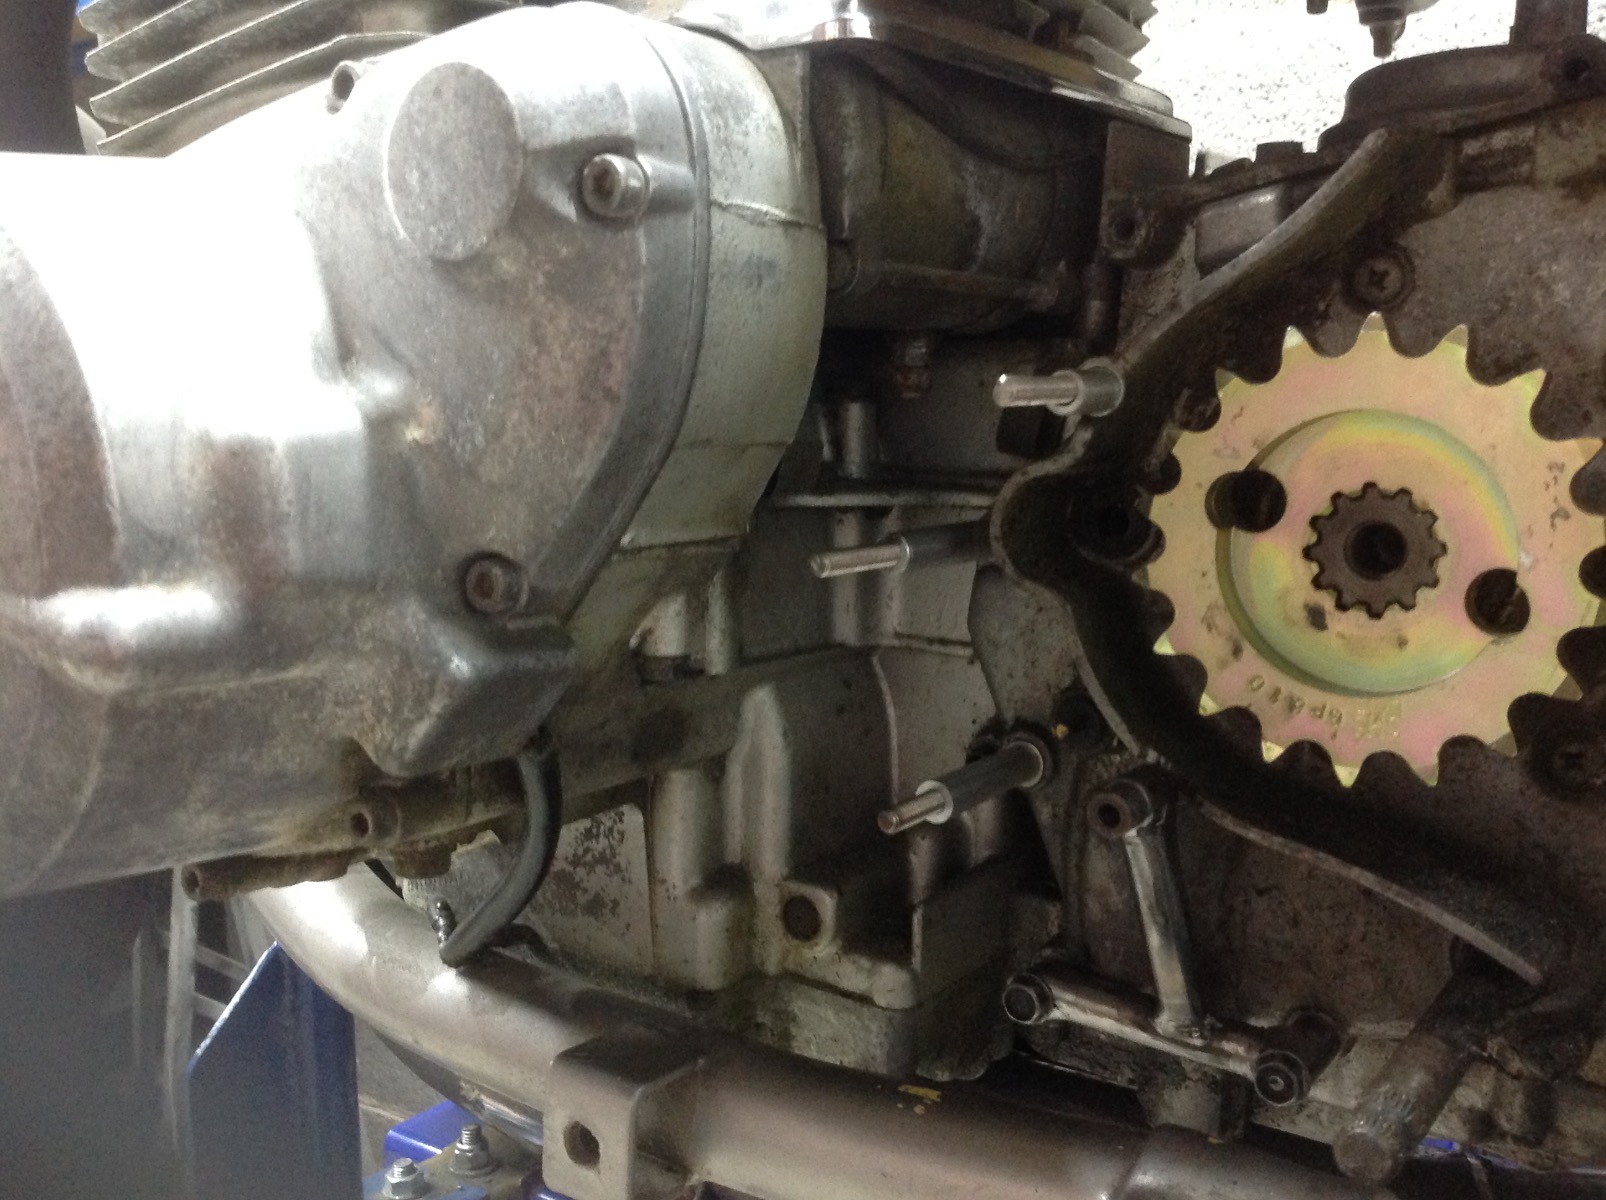
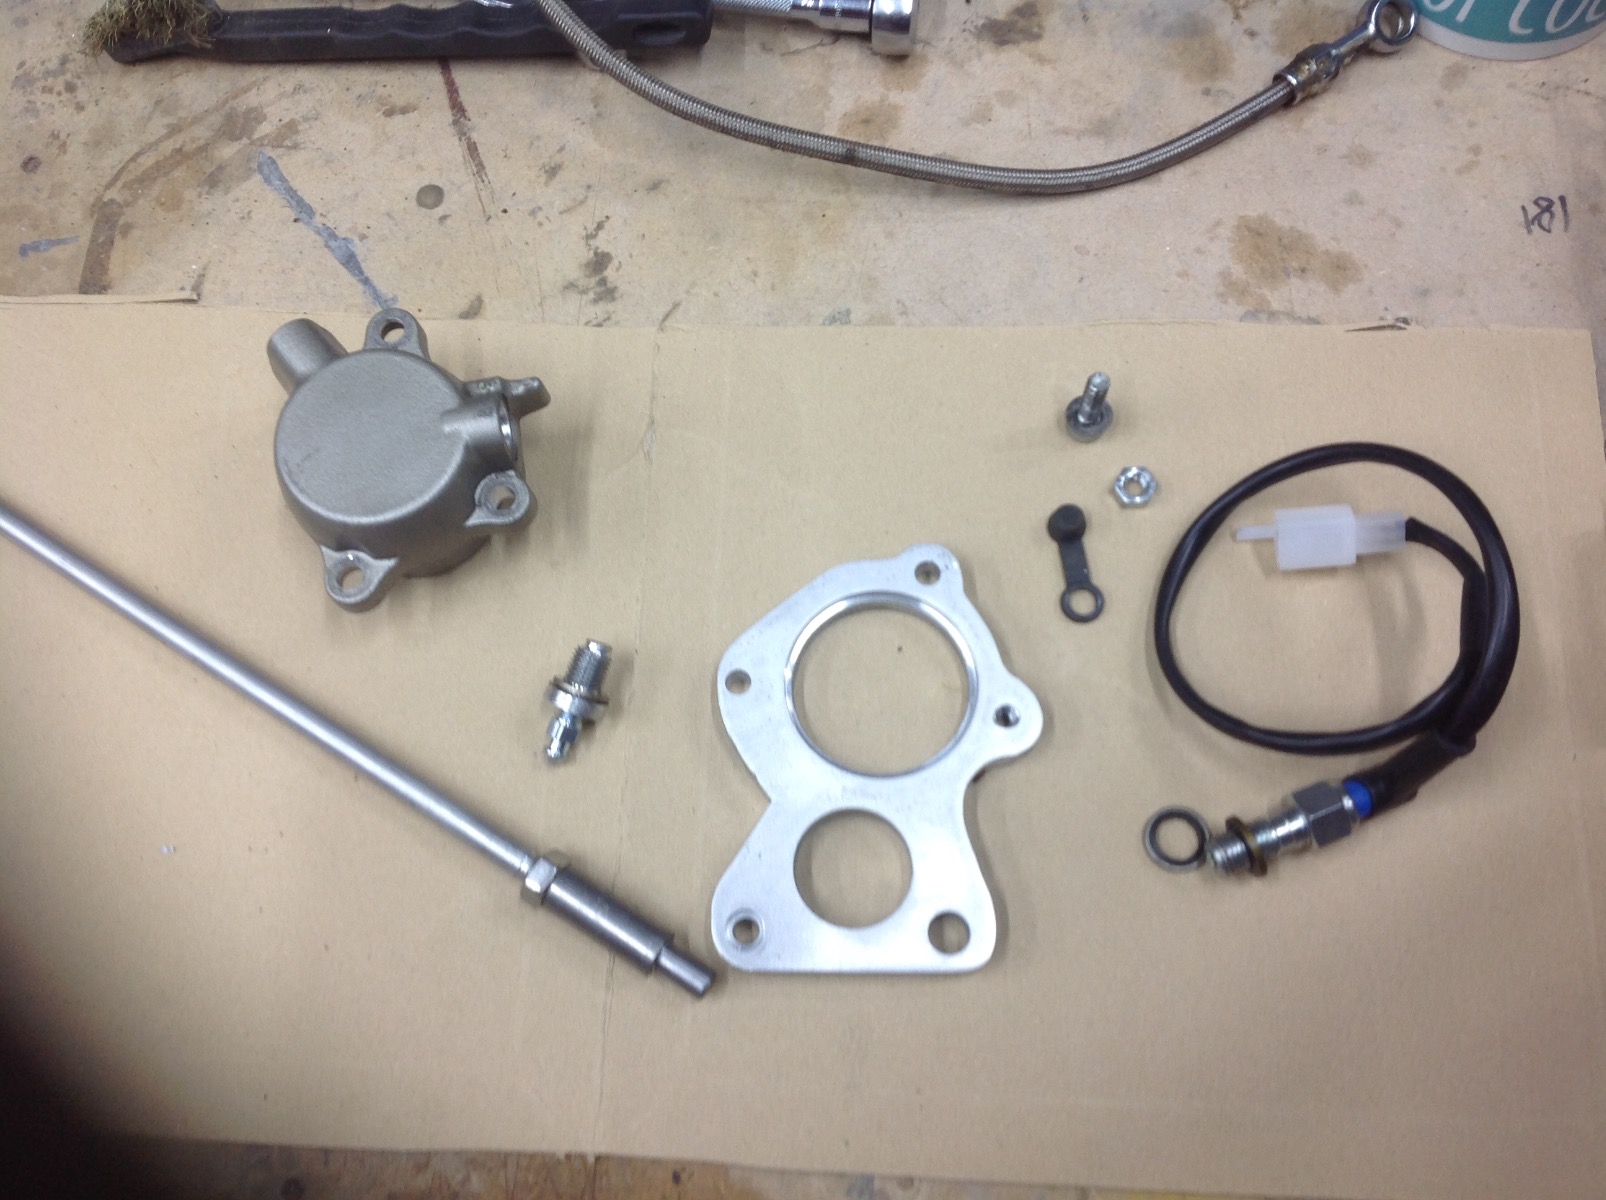
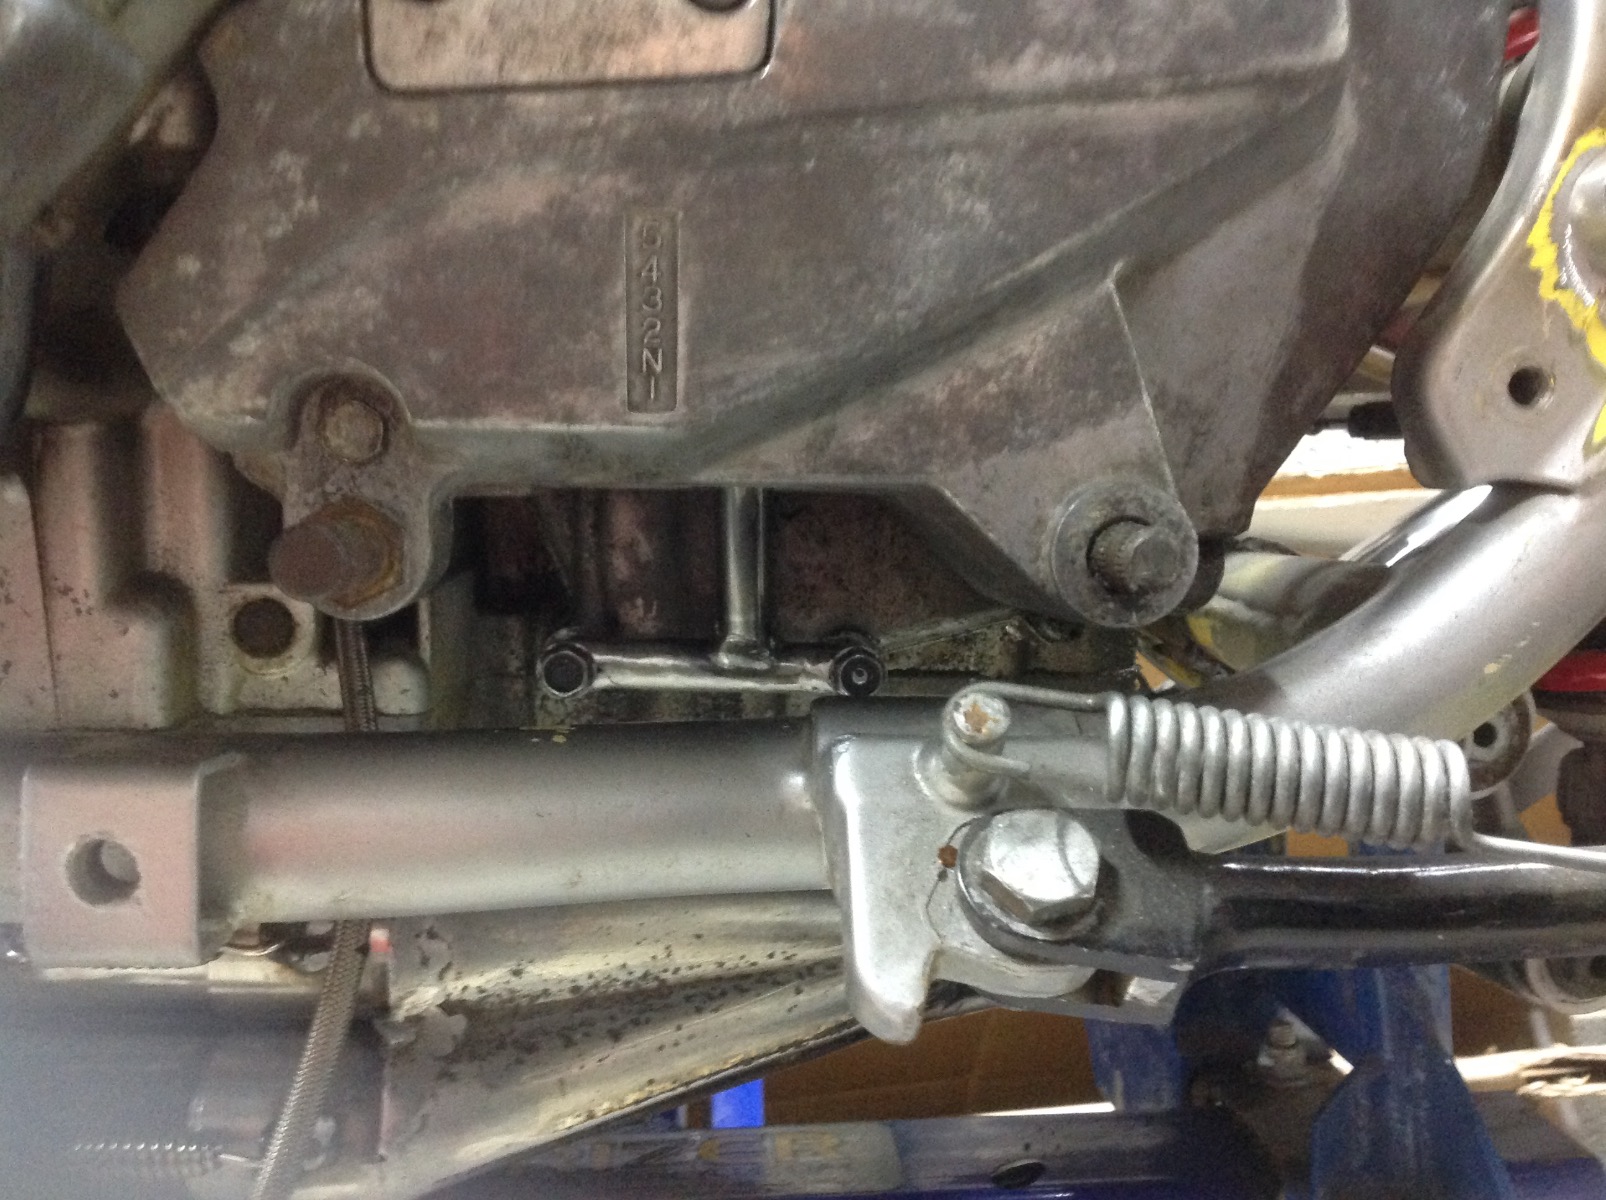
I have been moving right along with the Hydraulic clutch conversion (I know you guys have mixed feelings on this) A while back I picked up a slave cylinder from a CBF1000 Honda (it's a nice compact unit at the right price) I was expecting this to be a PITA but when I hung the cylinder on the end of the pushrods I found that if I clocked it 180 degree's two of the three mounting holes ligned up with two of the trans cover screws
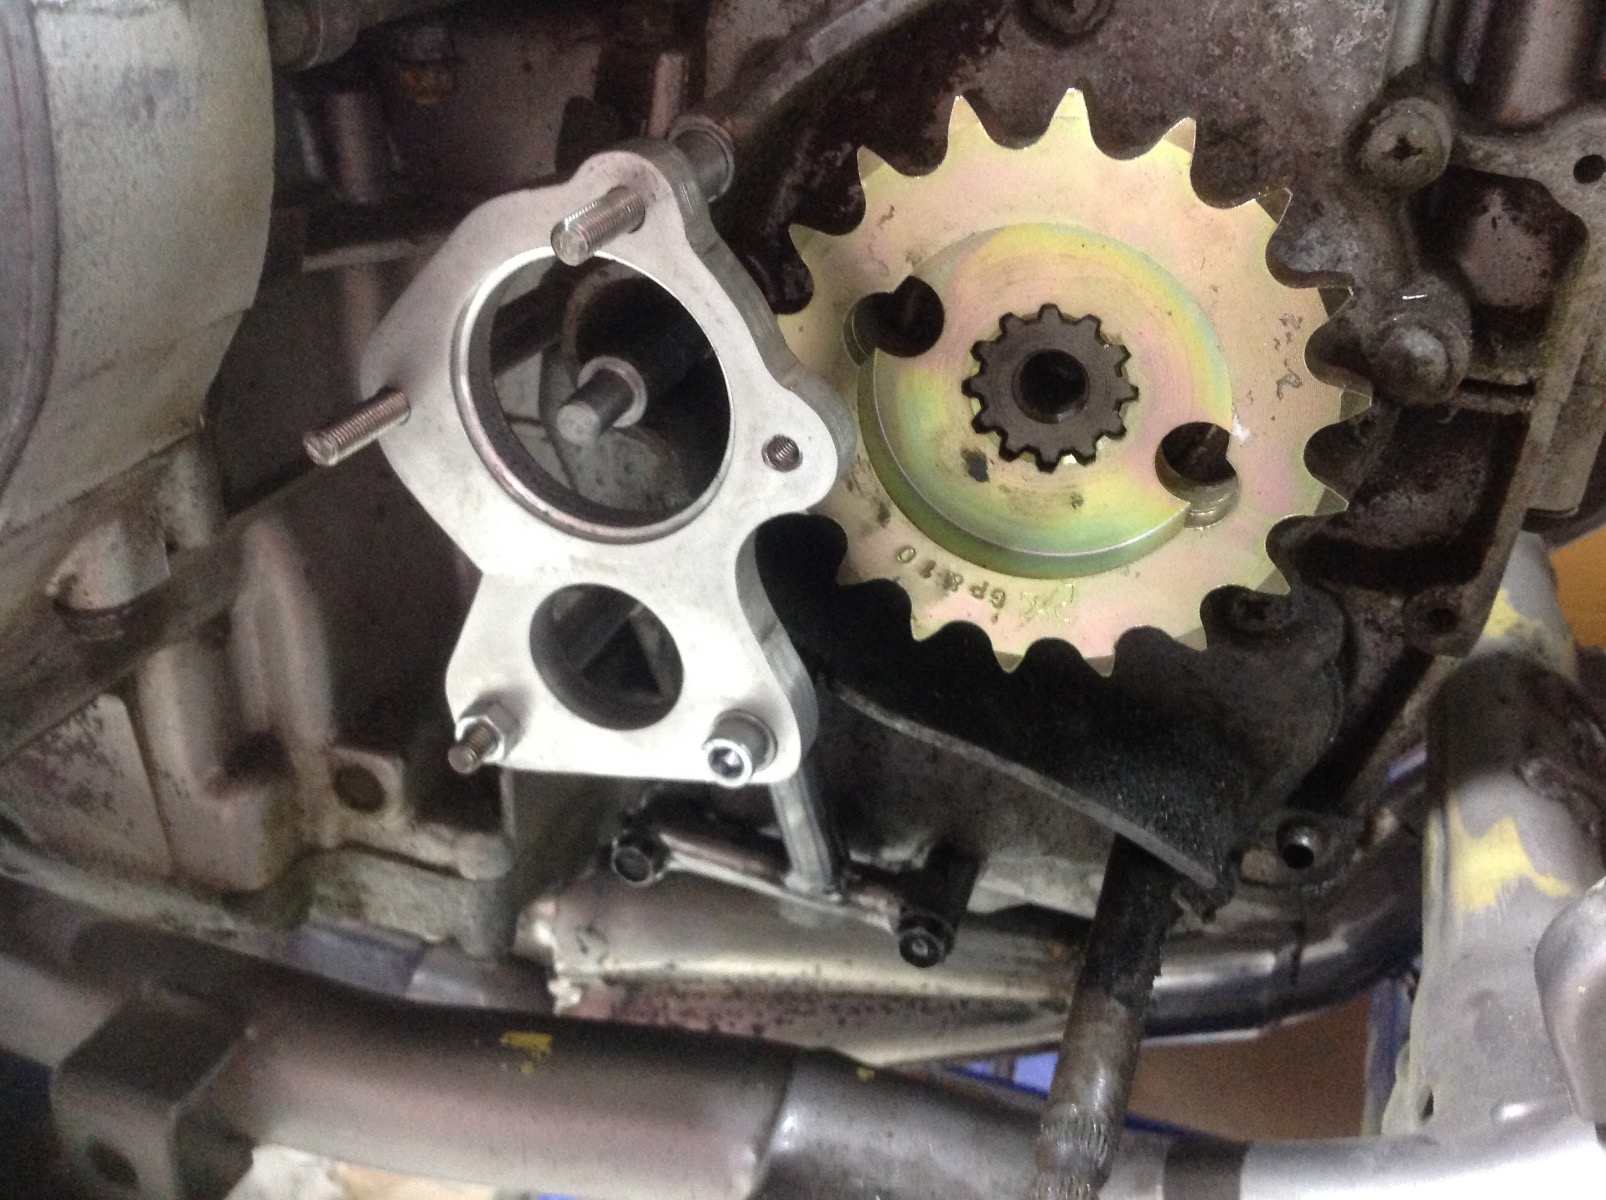
 so I removed the JIS screws and replaced them with studs and "stand off" spacers. I then replaced another trans cover screw with a stud and spacer for the lower left corner of the carrier. Nothing lined up with the lower right corner of the carrier so I had to get creative and make a support bracket (there is a lot of force on the carrier so it needs to be rigid. This took care of the mounting but presented a new challenge, the bleed nipple was now at the bottom and the inlet at the top
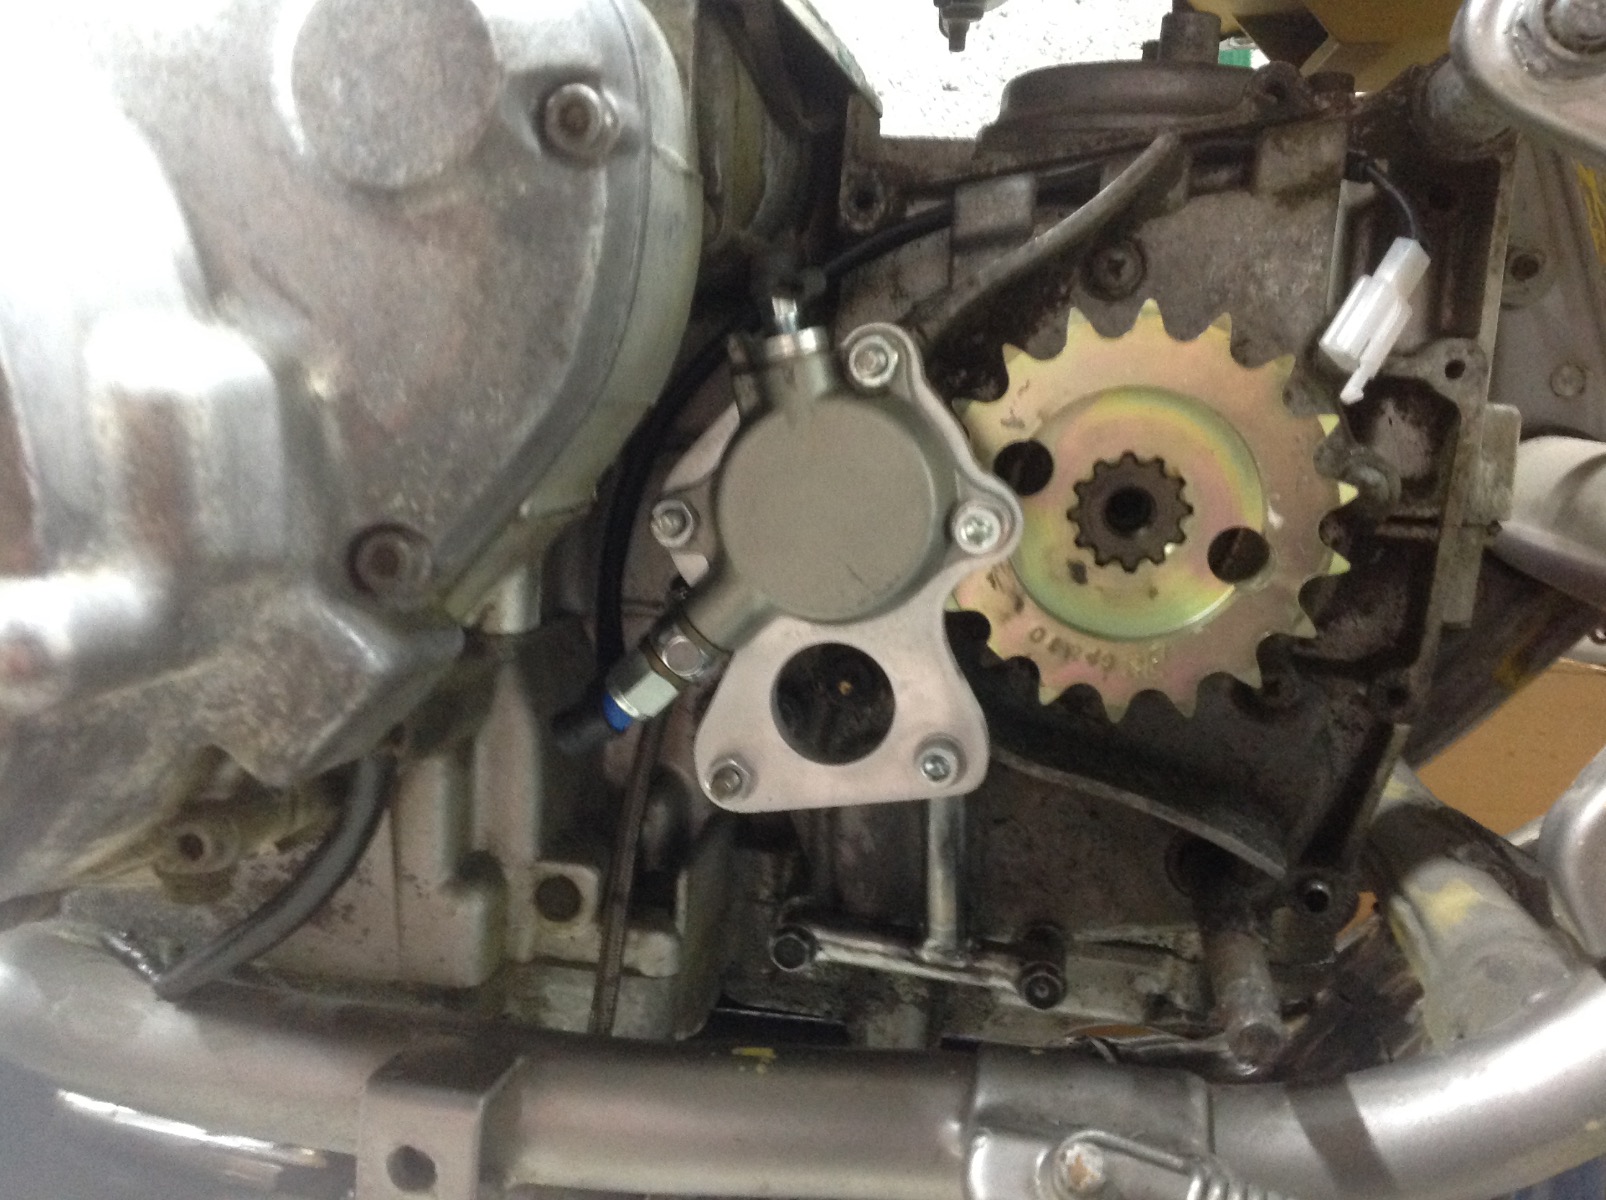
 I have drilled out the original bleed port from 8mm to 10mm so that the inlet is now at the bottom (I have managed to squeeze in a pressure switch/bolt so less wires at the handlebars. For the bleed nipple I have made an adaptor to step down from 10mm to a 7mm nipple and the adaptor includes a bleed port so it will function correctly. Best of all in keeping with my plan to keep the bike looking "factory" this all fits under the original sprocket cover (outriggers etc look cool on the right bike but not the look I am going for)
Bearing in mind the challenges others have had with doing this I have made the pushrods adjustable so I can dial in the "free play" so hopefully should work as intended. If not I still have the original sprocket cover so can go back to cable (I have removed some material for clearance and slotted the bottom to fit around the lower support bracket in the cover I am using that I picked up cheap as a spare for doing this mod)
I have drilled out the original bleed port from 8mm to 10mm so that the inlet is now at the bottom (I have managed to squeeze in a pressure switch/bolt so less wires at the handlebars. For the bleed nipple I have made an adaptor to step down from 10mm to a 7mm nipple and the adaptor includes a bleed port so it will function correctly. Best of all in keeping with my plan to keep the bike looking "factory" this all fits under the original sprocket cover (outriggers etc look cool on the right bike but not the look I am going for)
Bearing in mind the challenges others have had with doing this I have made the pushrods adjustable so I can dial in the "free play" so hopefully should work as intended. If not I still have the original sprocket cover so can go back to cable (I have removed some material for clearance and slotted the bottom to fit around the lower support bracket in the cover I am using that I picked up cheap as a spare for doing this mod)

1982 KZ1000 Ltd
www.kzrider.com/forum/11-projects/617631...-82-begins?start=192
kzrider.com/filebase-alias?view=download...d-fault-diagnosis&ca
www.kzrider.com/forum/11-projects/617631...-82-begins?start=192
kzrider.com/filebase-alias?view=download...d-fault-diagnosis&ca
The following user(s) said Thank You: ThatGPzGuy, sf4t7, howardhb, Kelly E, Rolf1976_KZ900, Quofan
Please Log in or Create an account to join the conversation.
- sf4t7
-

- Offline
- Sustaining Member
- Posts: 753
- Thanks: 564
Re: And finally, Wookie's 82 begins !
04 Nov 2023 12:58
Almost looks like a business opportunity

Scotty
1974 Z1A
Yoshimura 987
welded Z1 crank
Andrews 1X Cams
Delkevic 4 into 1
Superbike bars
530 conversion
1974 Z1A
Yoshimura 987
welded Z1 crank
Andrews 1X Cams
Delkevic 4 into 1
Superbike bars
530 conversion
The following user(s) said Thank You: Wookie58
Please Log in or Create an account to join the conversation.
- Wookie58
-
Topic Author
- Offline
- Moderator
- Posts: 4847
- Thanks: 2934
Re: And finally, Wookie's 82 begins !
05 Nov 2023 11:13 - 05 Nov 2023 11:13
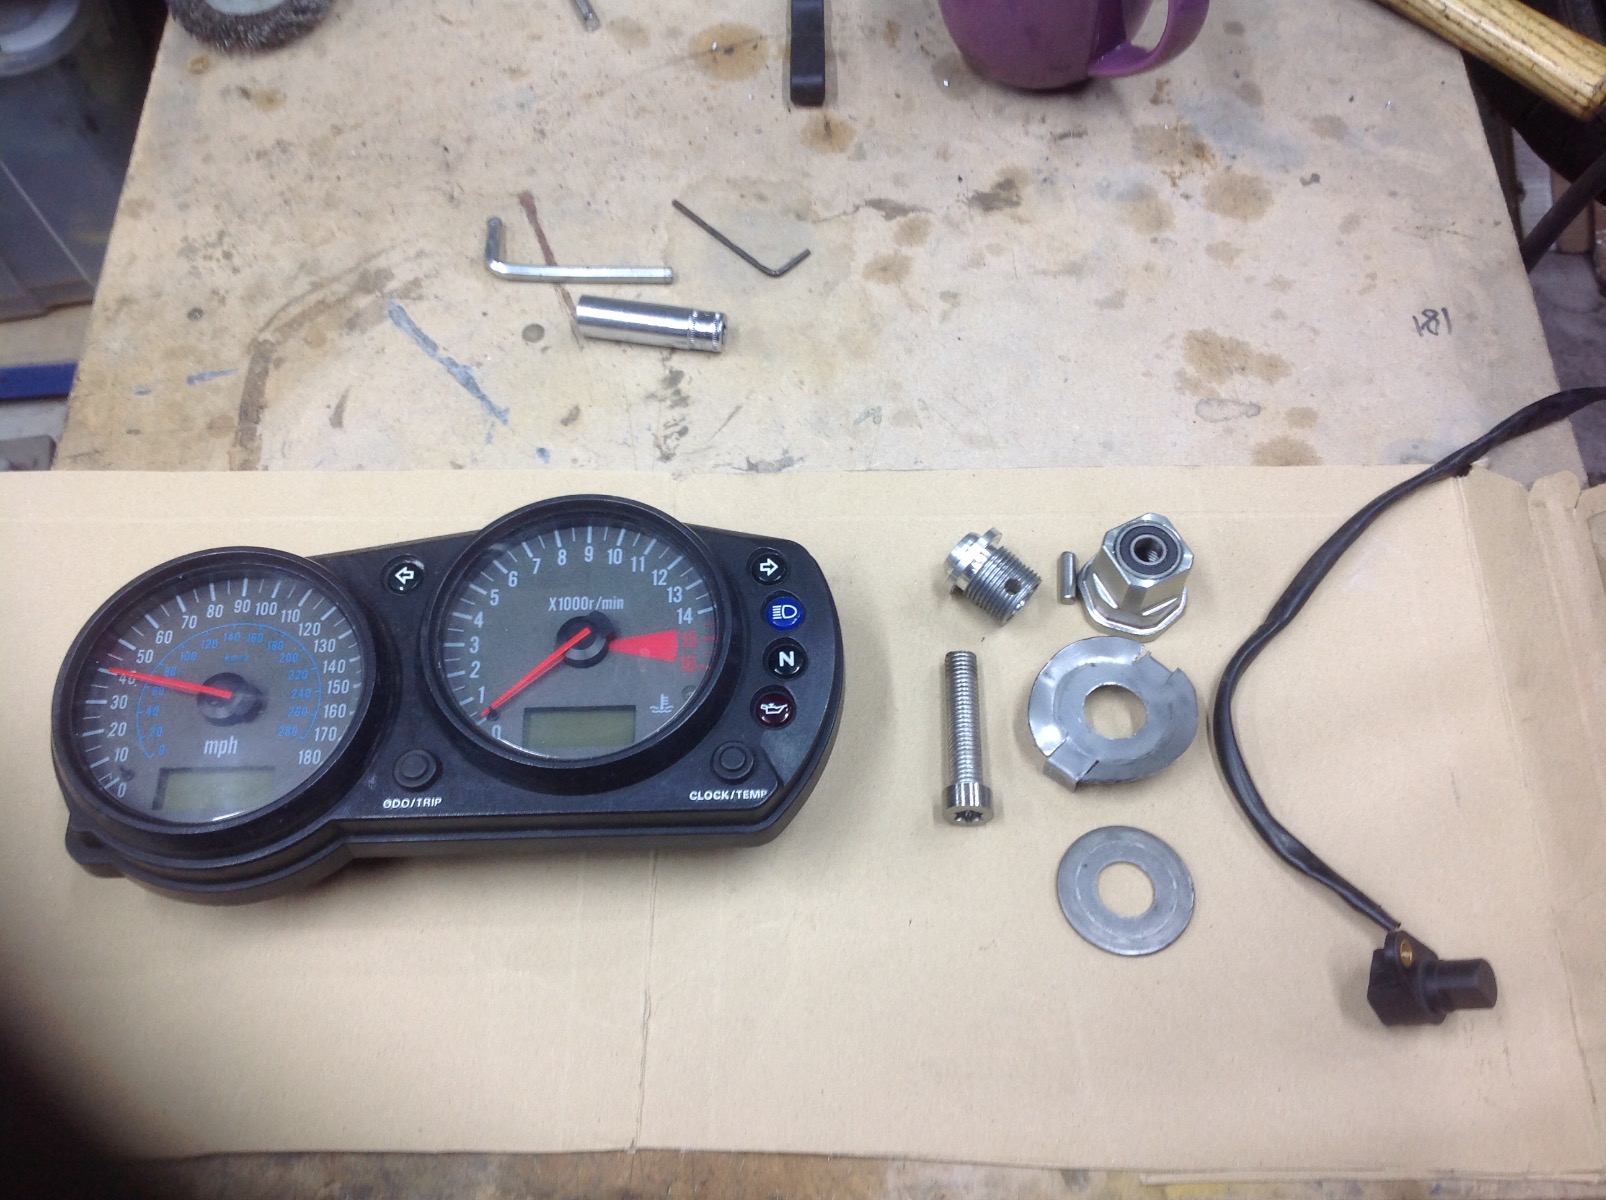
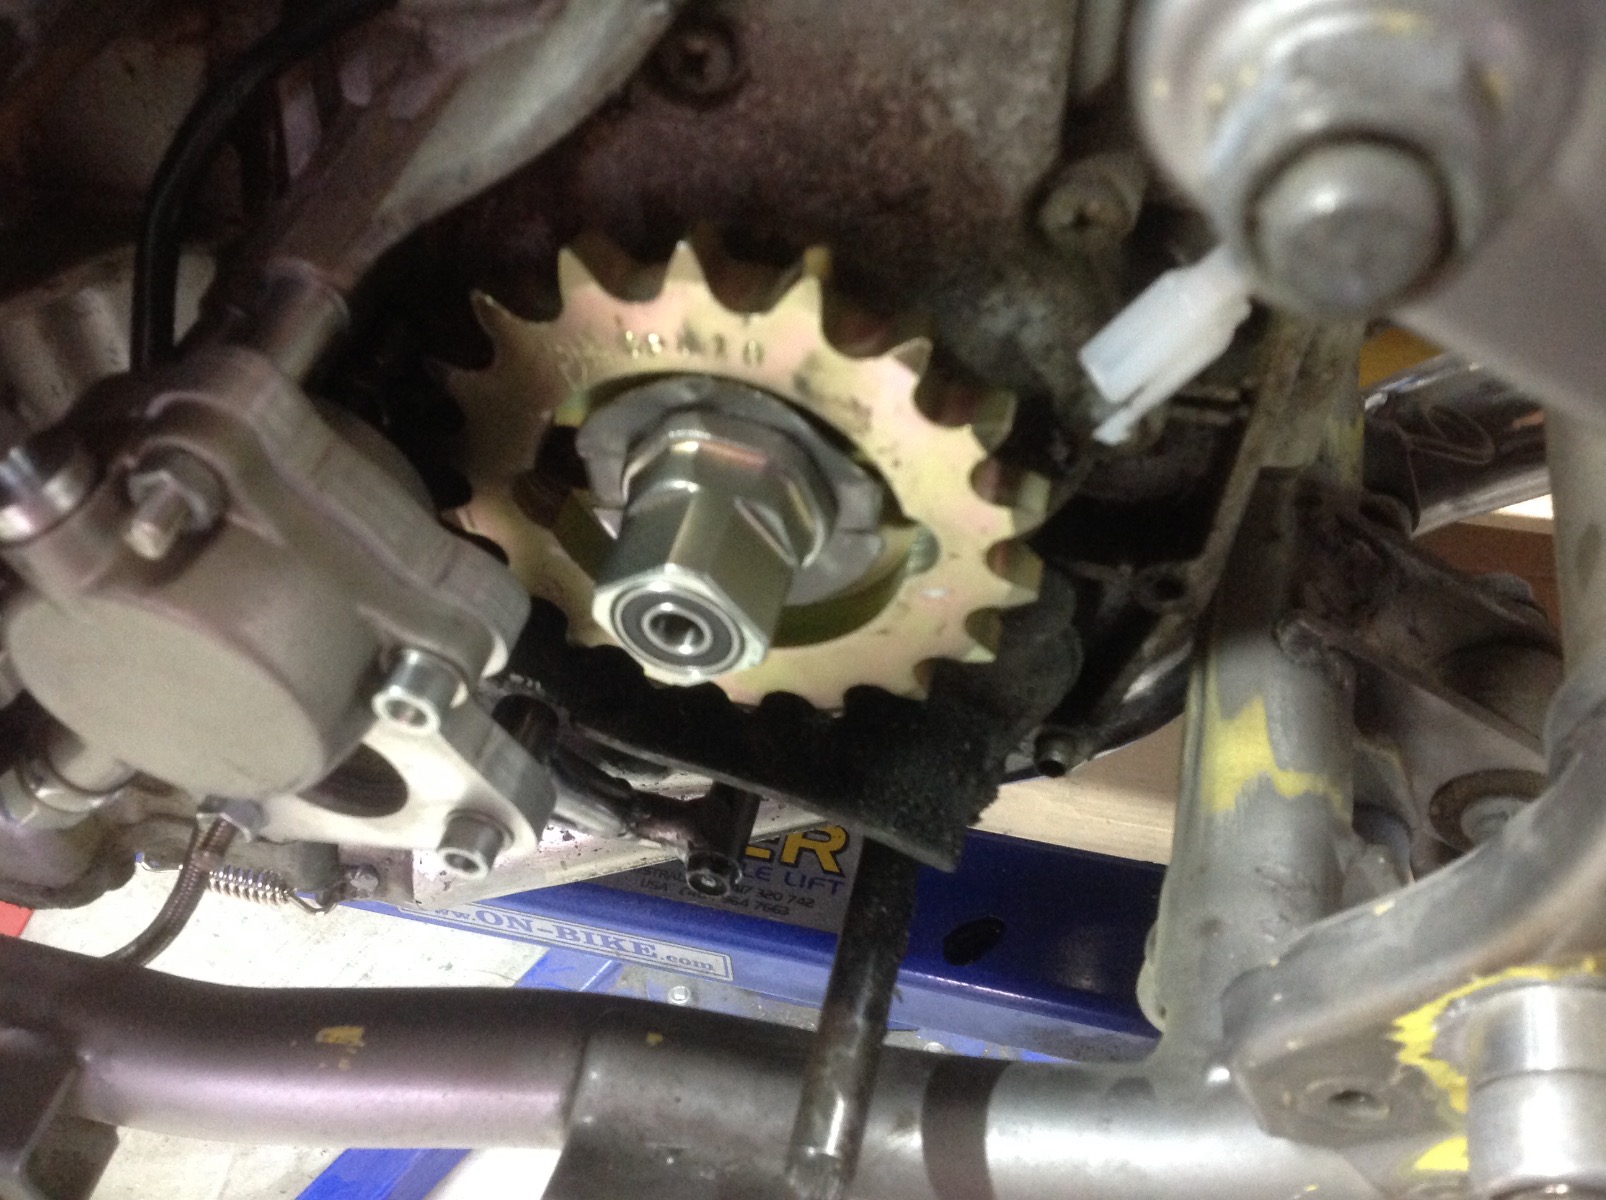
I have made some headway with the speed sensor today. I am using ZX6R instruments (compact but don't look too modern for the bike) so I wanted to use the OEM sensor set up and wiring plugs. ( picked up a damaged loom for cheap
) but this is where the challenge was - my "K" uses a bolt for the gearbox sprocket whereas the ZX6R uses a "nut" which encompasses the speedo trigger
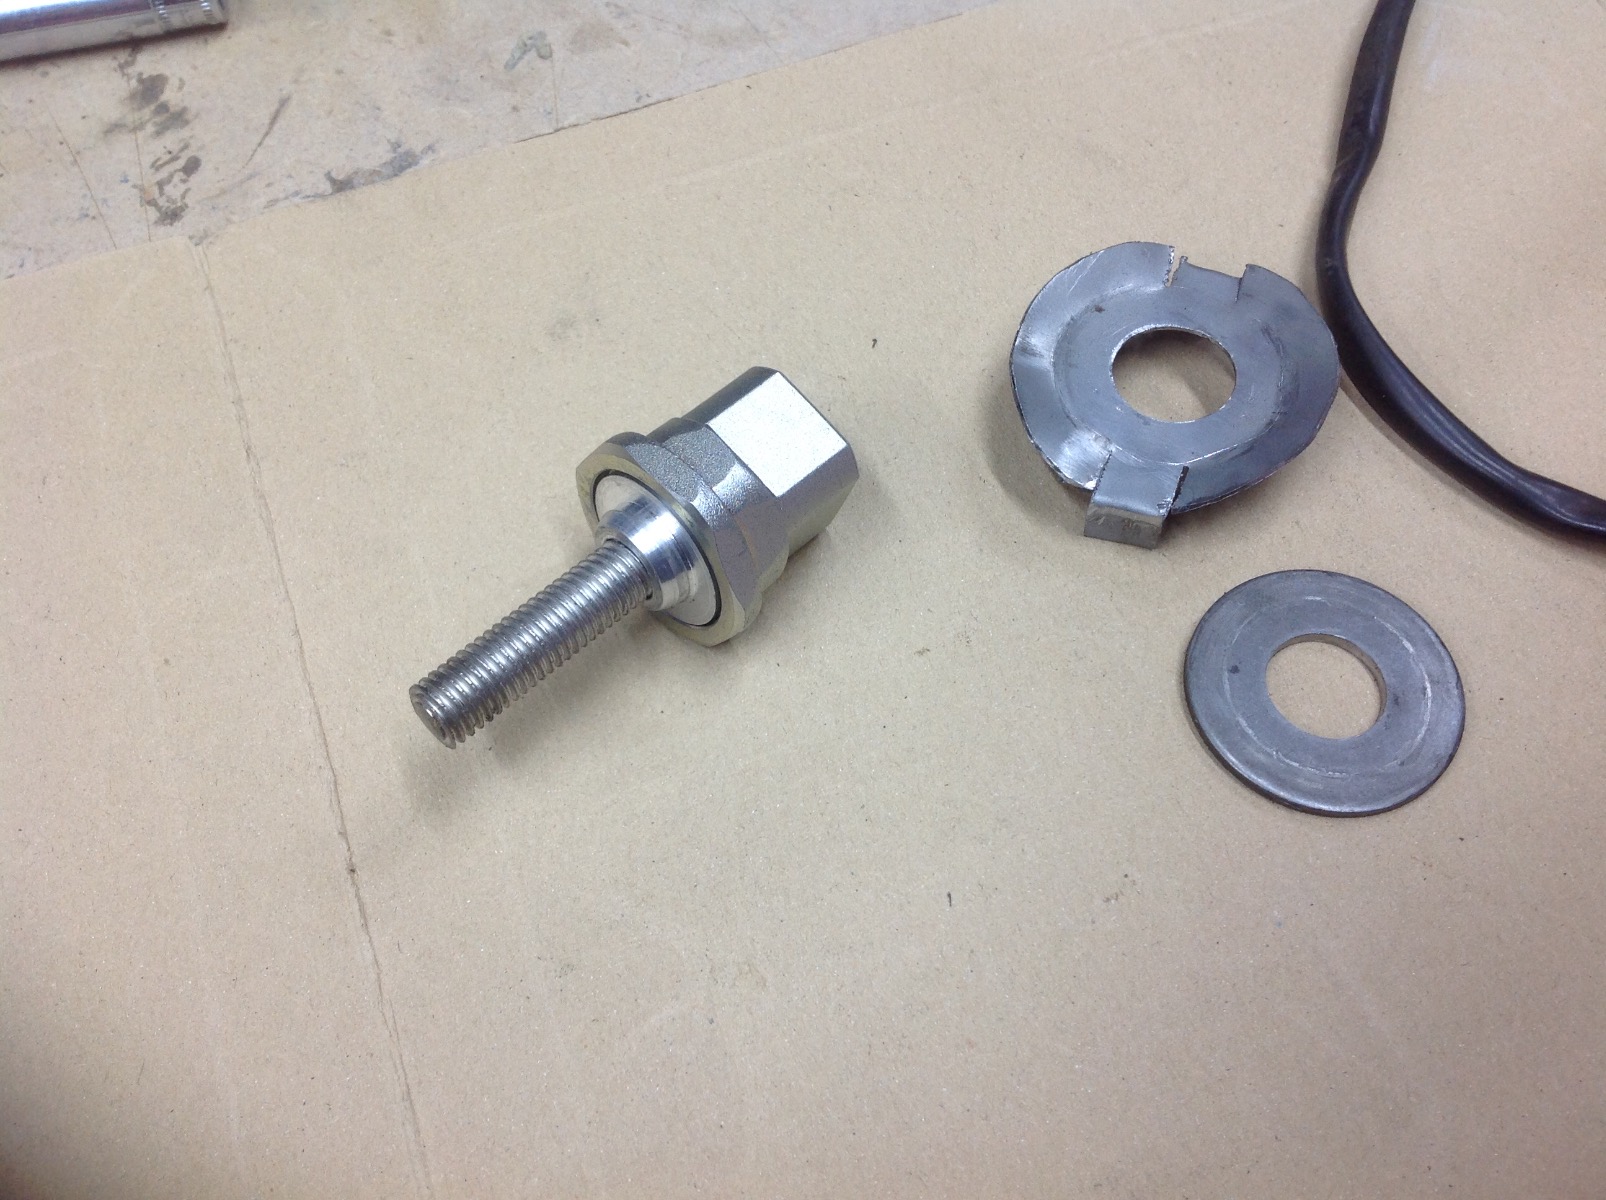
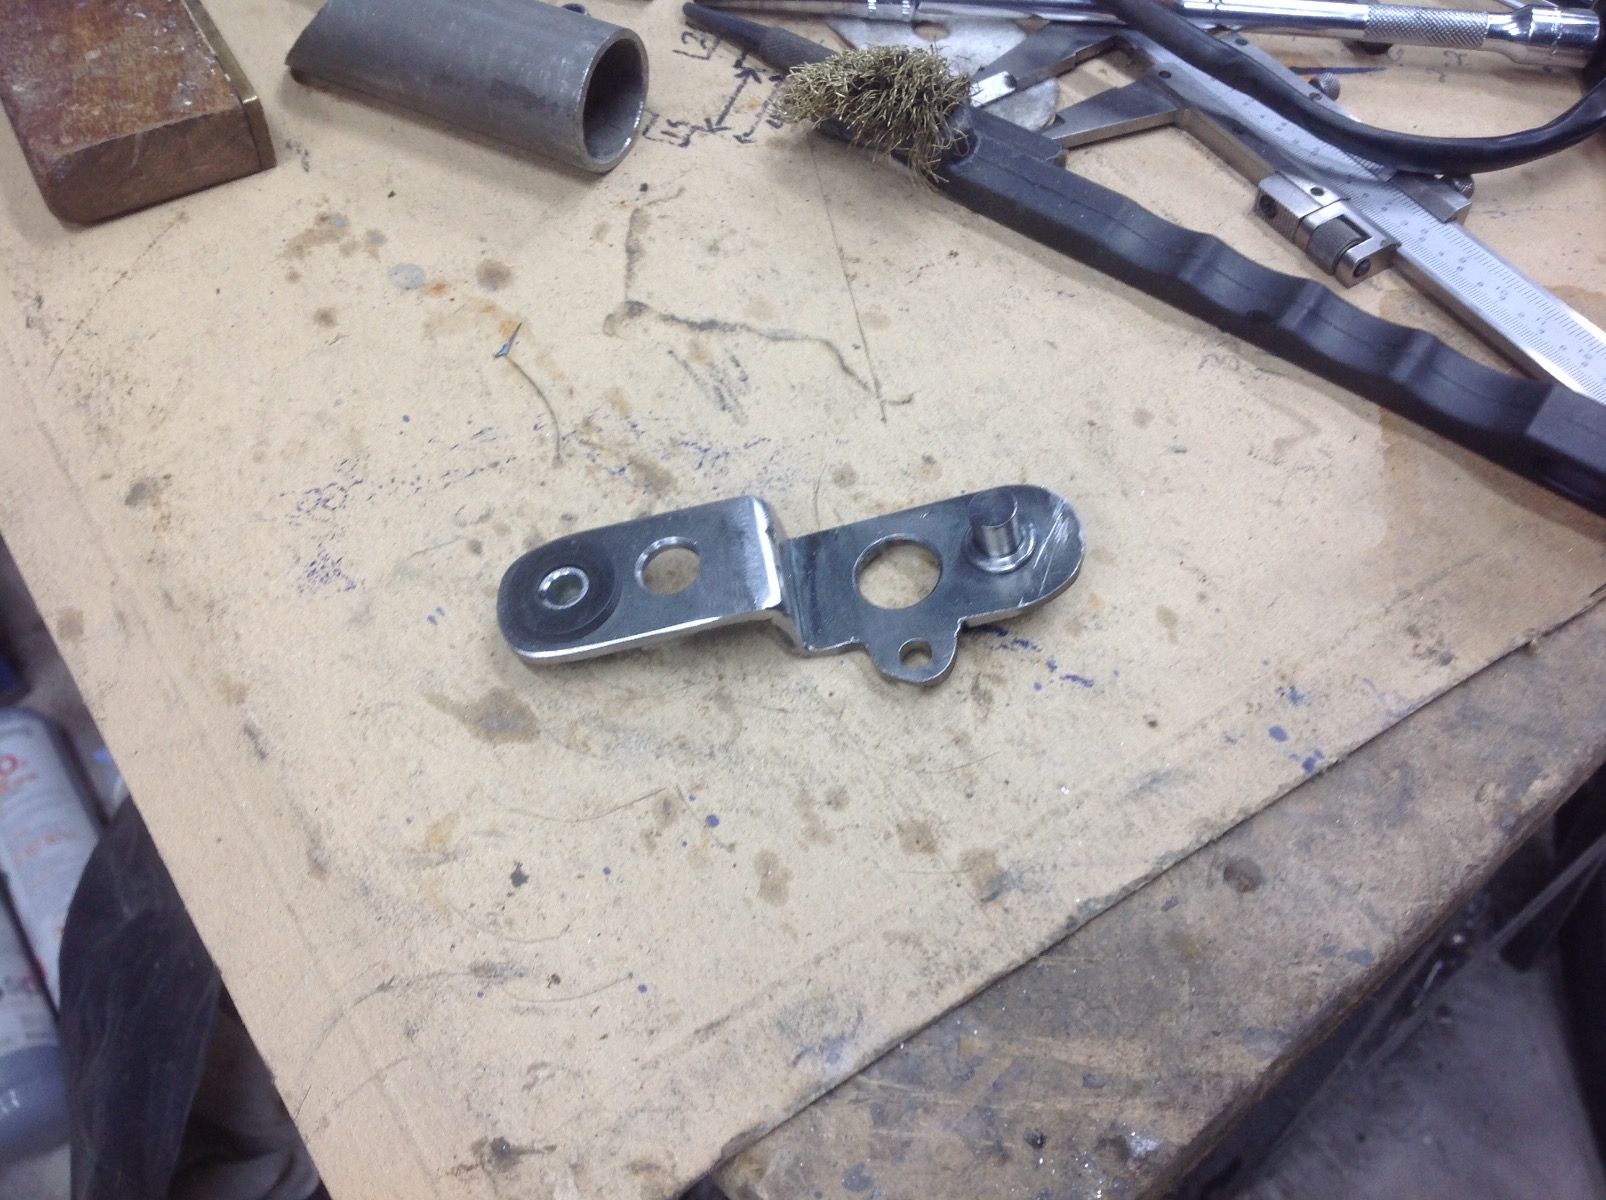
I have put a lot of thought into how to overcome this and below is my solution - a hub that is held in place by the bolt and a custom tab washer for the nut. I needed to find a way to "lock" the bolt which is recessed so I have fitted a "cross pin" through the hub which is locked in place by the nut so it's impossible for the bolt to come loose (I hope) I have used a A2 stainless Torx bolt with the head turned down (T50 torx is rated at 109 ft/lbs so shouldn't round out at 58 ft/lbs)
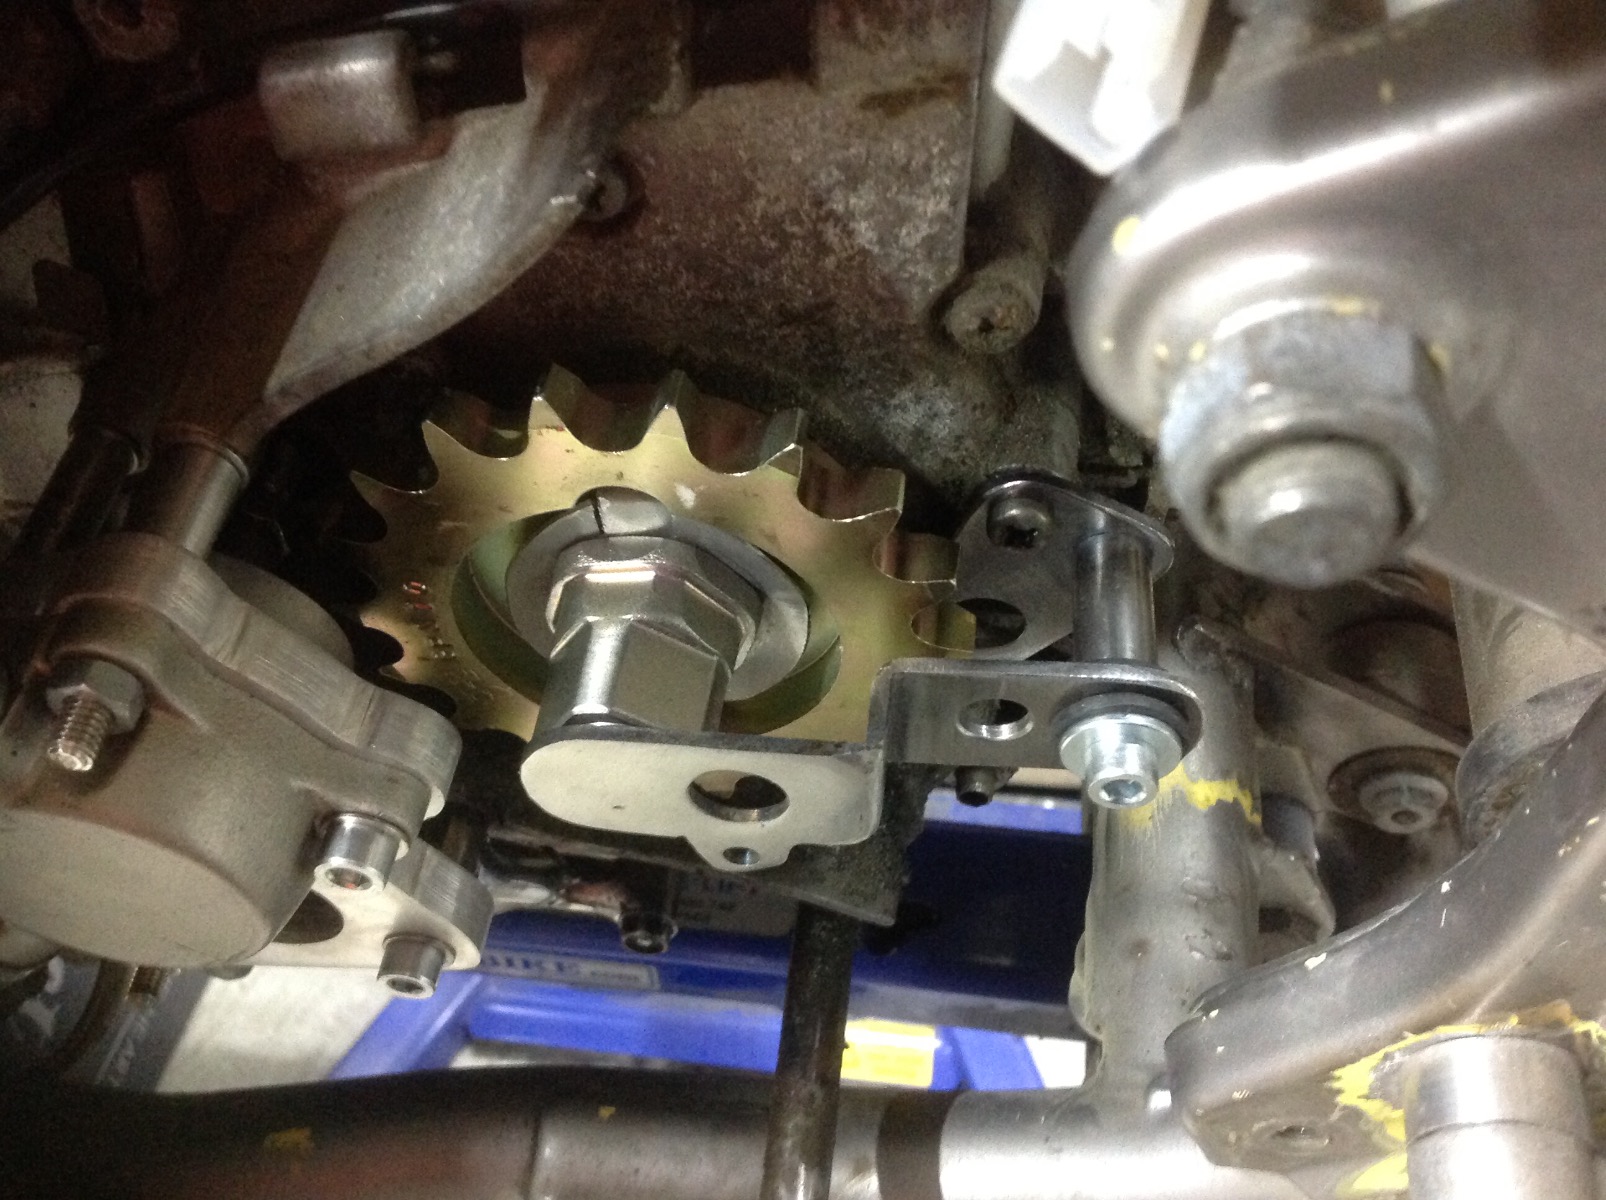
I have also fitted a bearing in the nut to carry the end of the sensor mounting bracket and maintain a constant "air gap" ( mount still under development) between the rotor and sensor - only time will tell if it all works out
I have also fitted a bearing in the nut to carry the end of the sensor mounting bracket and maintain a constant "air gap" ( mount still under development) between the rotor and sensor - only time will tell if it all works out
1982 KZ1000 Ltd
www.kzrider.com/forum/11-projects/617631...-82-begins?start=192
kzrider.com/filebase-alias?view=download...d-fault-diagnosis&ca
www.kzrider.com/forum/11-projects/617631...-82-begins?start=192
kzrider.com/filebase-alias?view=download...d-fault-diagnosis&ca
Last edit: 05 Nov 2023 11:13 by Wookie58.
The following user(s) said Thank You: ThatGPzGuy, howardhb, Rolf1976_KZ900
Please Log in or Create an account to join the conversation.
- Wookie58
-
Topic Author
- Offline
- Moderator
- Posts: 4847
- Thanks: 2934
Re: And finally, Wookie's 82 begins !
10 Nov 2023 10:36 - 10 Nov 2023 10:39
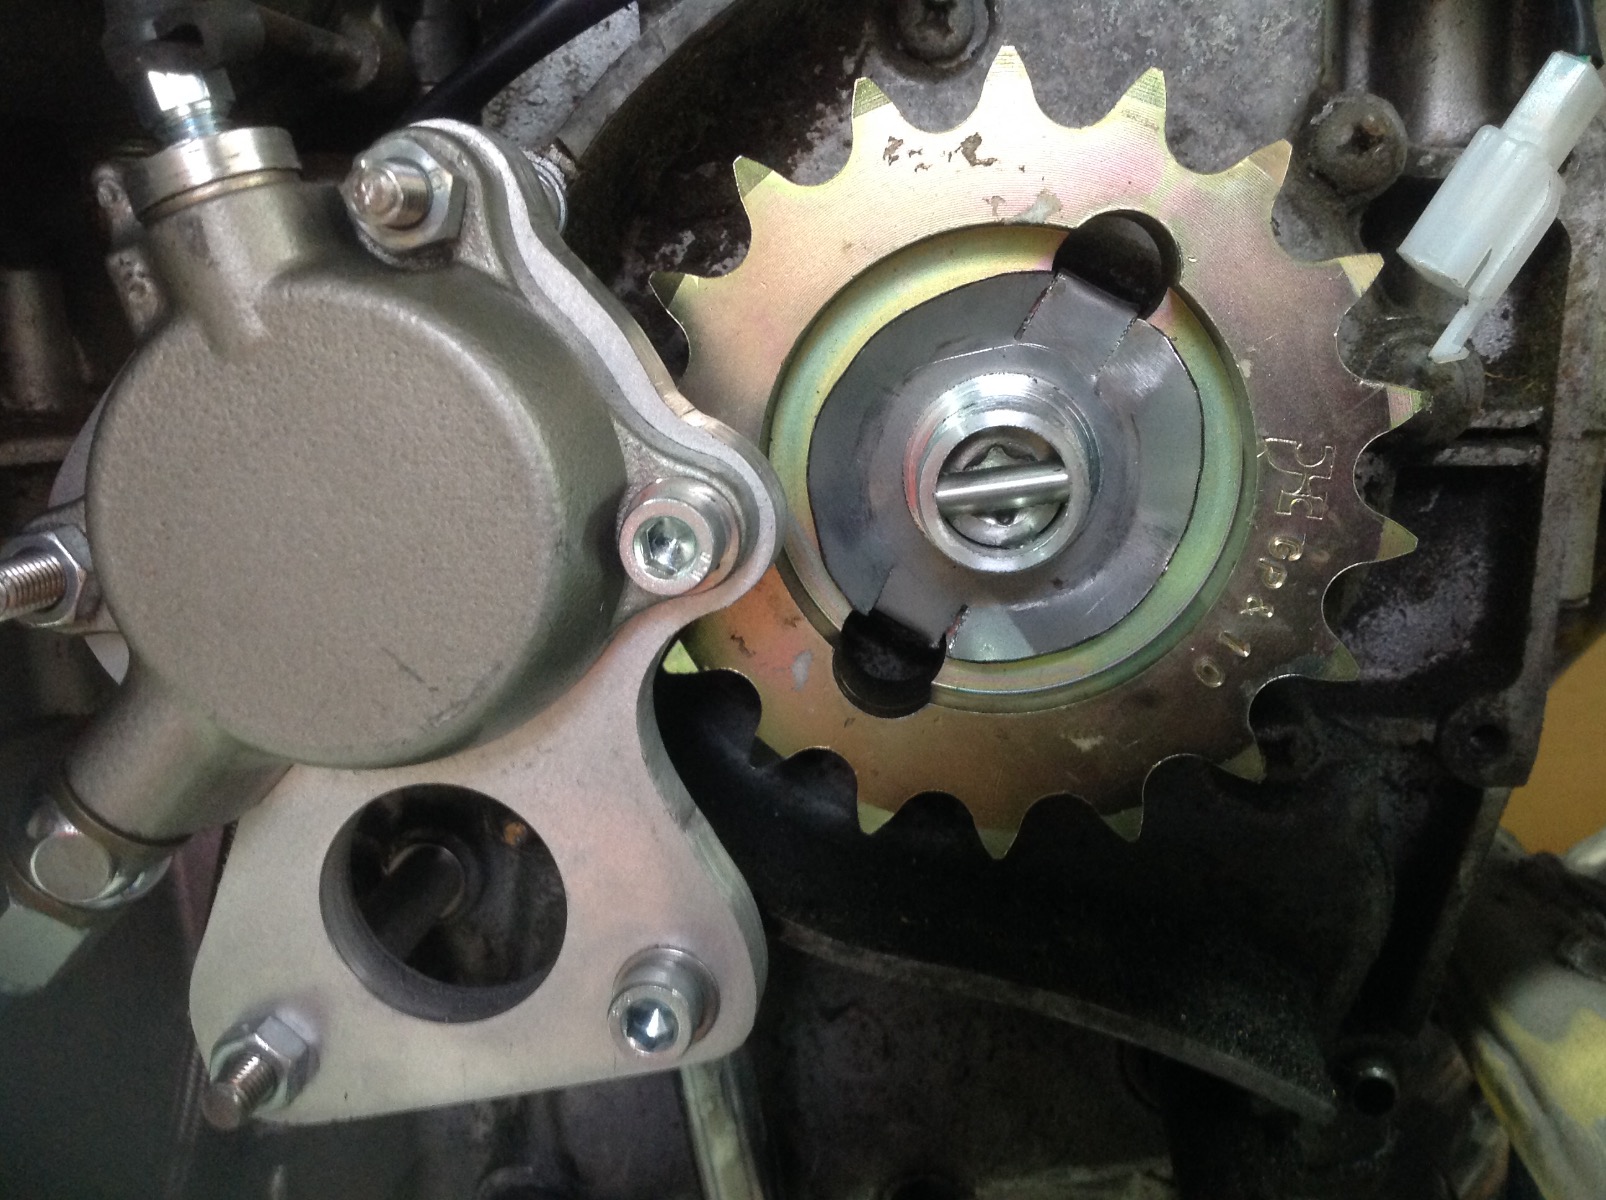
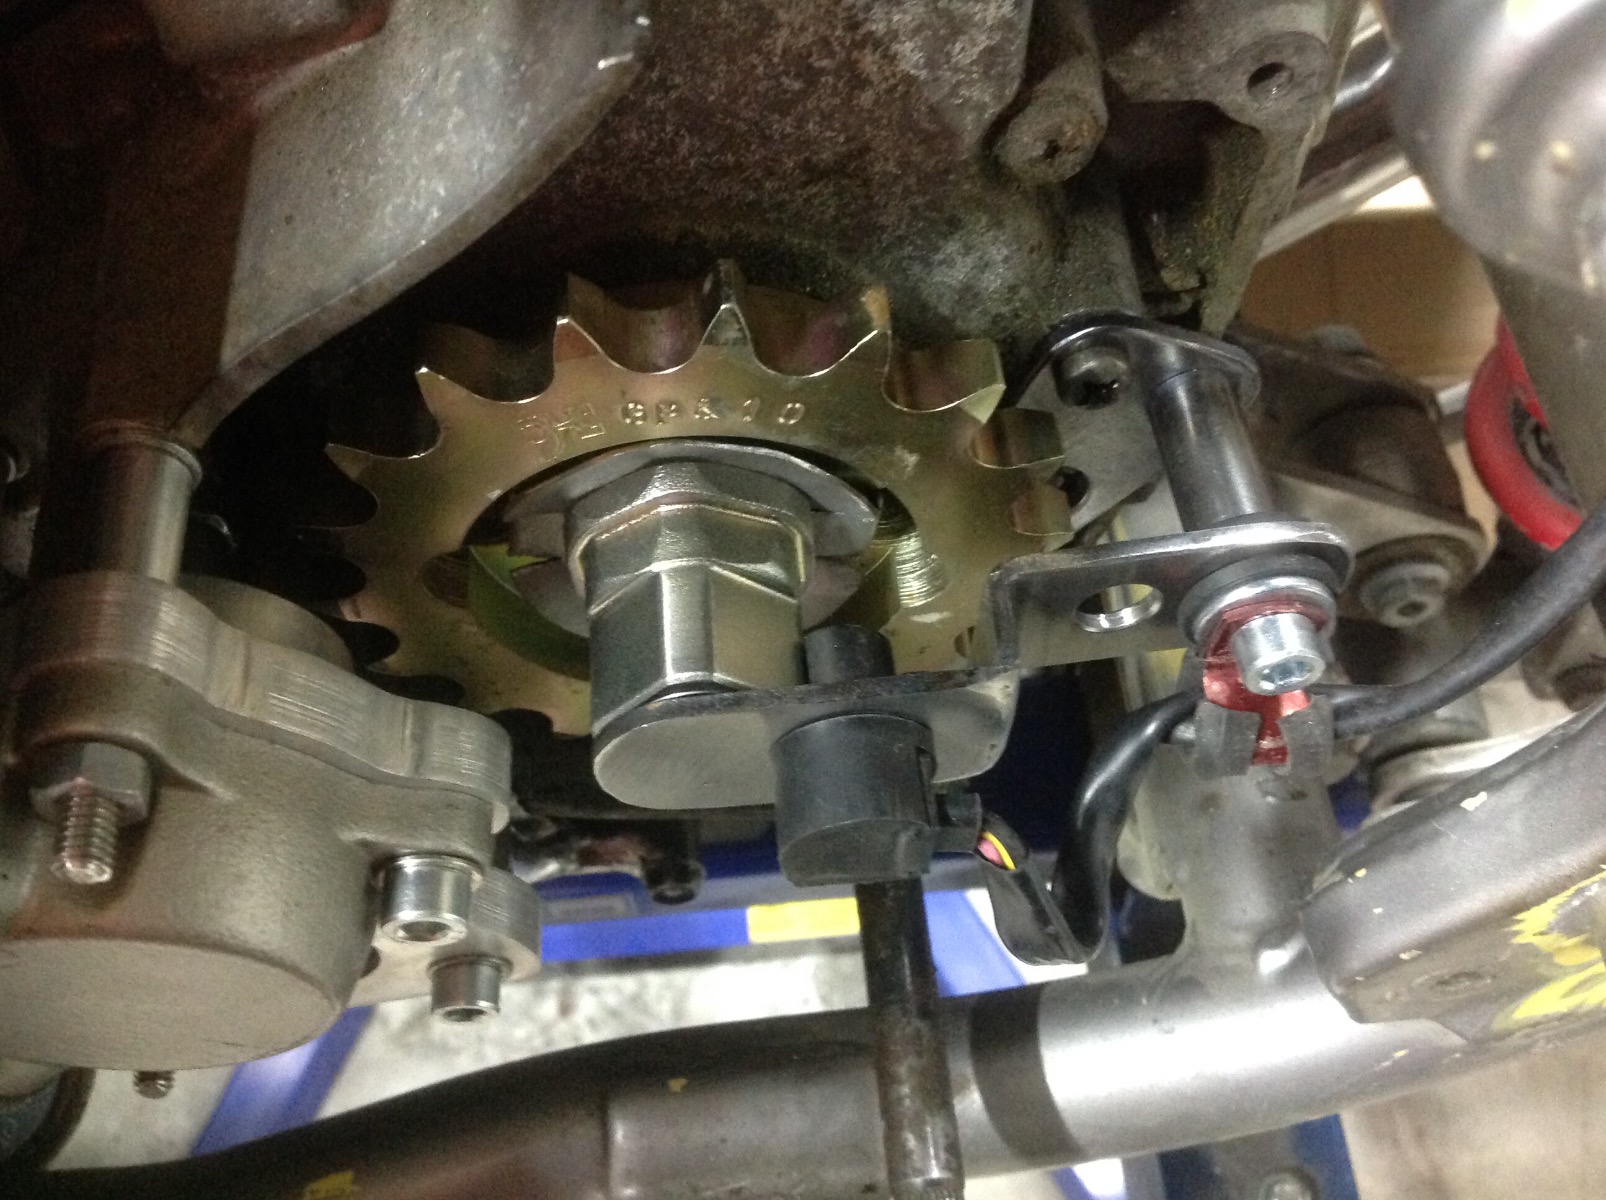
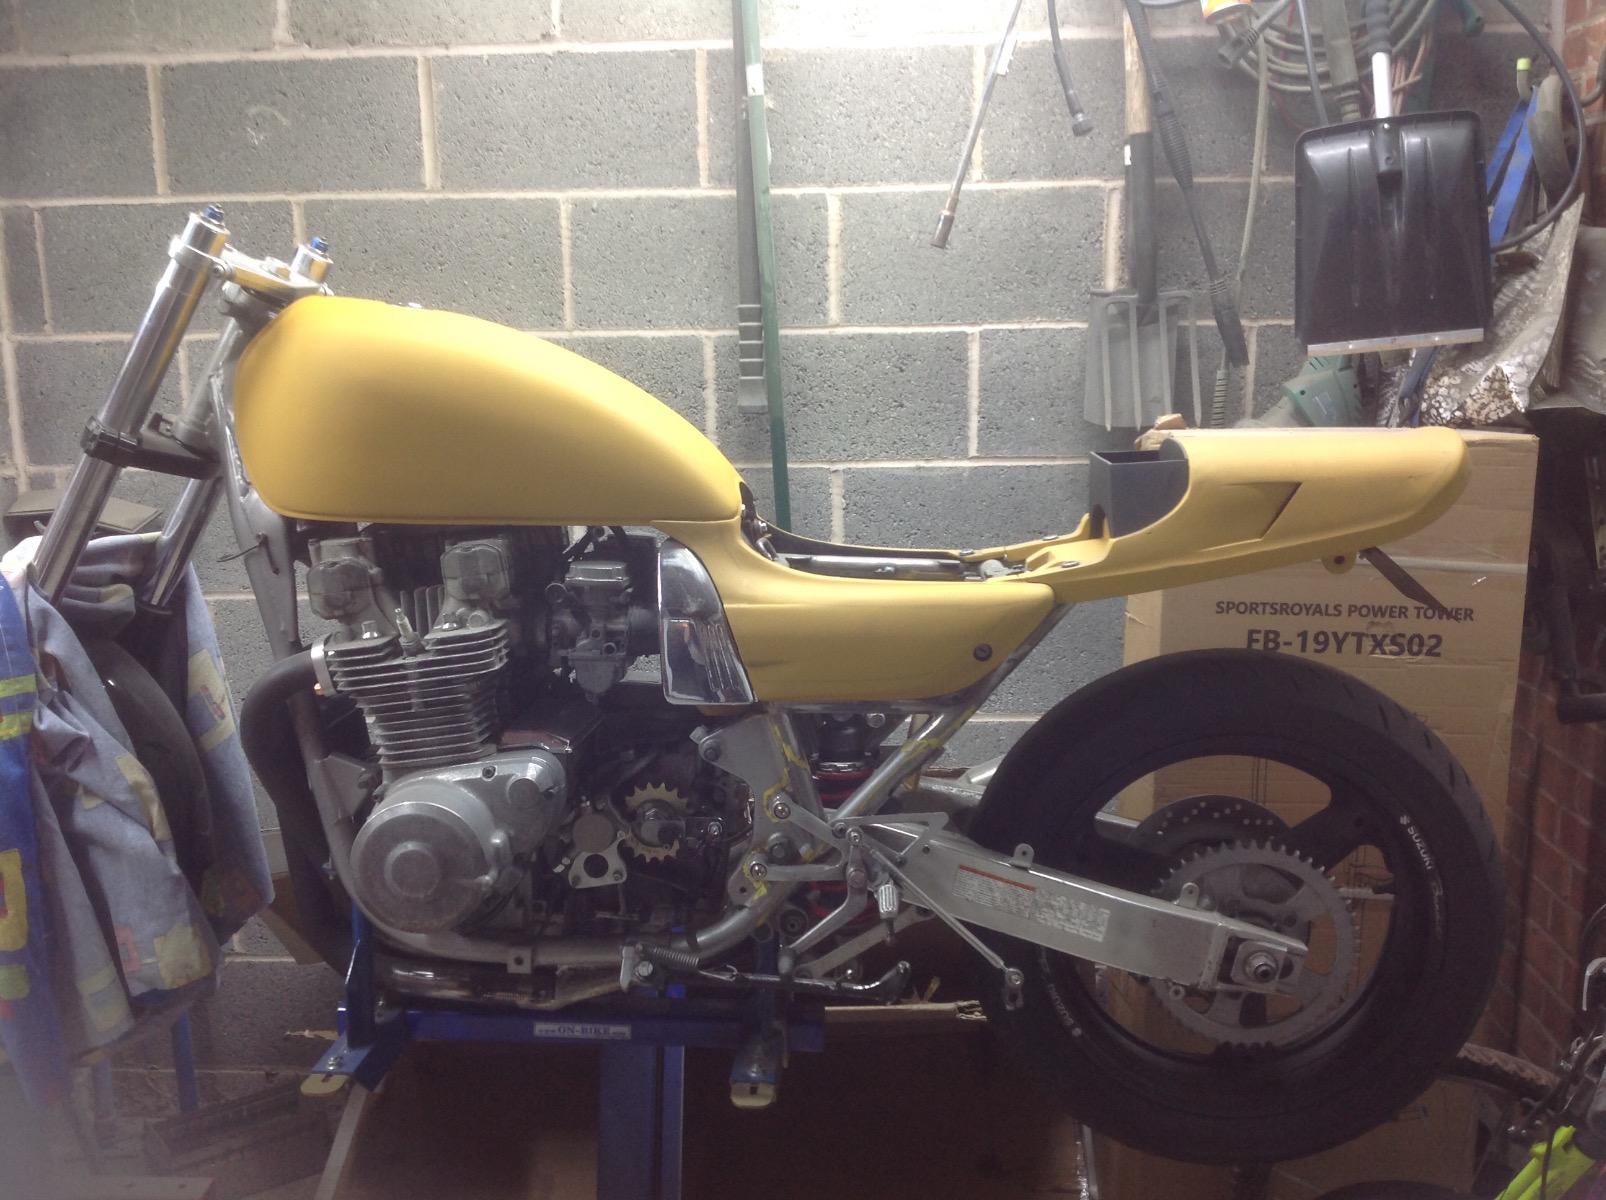
I have managed to get a few hours on the bike during the week and finished up the speed sender, the anchor point is rubber mounted to absorb any runout in the output shaft so hopefully the support bearing won't "break out" which is always a risk when you attach something "fixed" to something that rotates !!. Hopefully since the whole system is OEM ZX6R it should work without issue. I also have a device called a "speedo healer" ( cheesy I know !!) the connects between the sensor and the speedo which allows me to dial in the gearing and tyre size so the calibration should be "on the money" (important in the UK as there are speed cameras everywhere !!!!) Mrs Wookie has plans for me tomorrow but I should be able to make a start on the tank come Sunday
I've been skirting around this job as my "what's the worst .that can happen" mantra doesn't really apply with this job as if I get it badly wrong the tank will be an ornament
1982 KZ1000 Ltd
www.kzrider.com/forum/11-projects/617631...-82-begins?start=192
kzrider.com/filebase-alias?view=download...d-fault-diagnosis&ca
www.kzrider.com/forum/11-projects/617631...-82-begins?start=192
kzrider.com/filebase-alias?view=download...d-fault-diagnosis&ca
Last edit: 10 Nov 2023 10:39 by Wookie58.
The following user(s) said Thank You: howardhb, Quofan
Please Log in or Create an account to join the conversation.
- Wookie58
-
Topic Author
- Offline
- Moderator
- Posts: 4847
- Thanks: 2934
Re: And finally, Wookie's 82 begins !
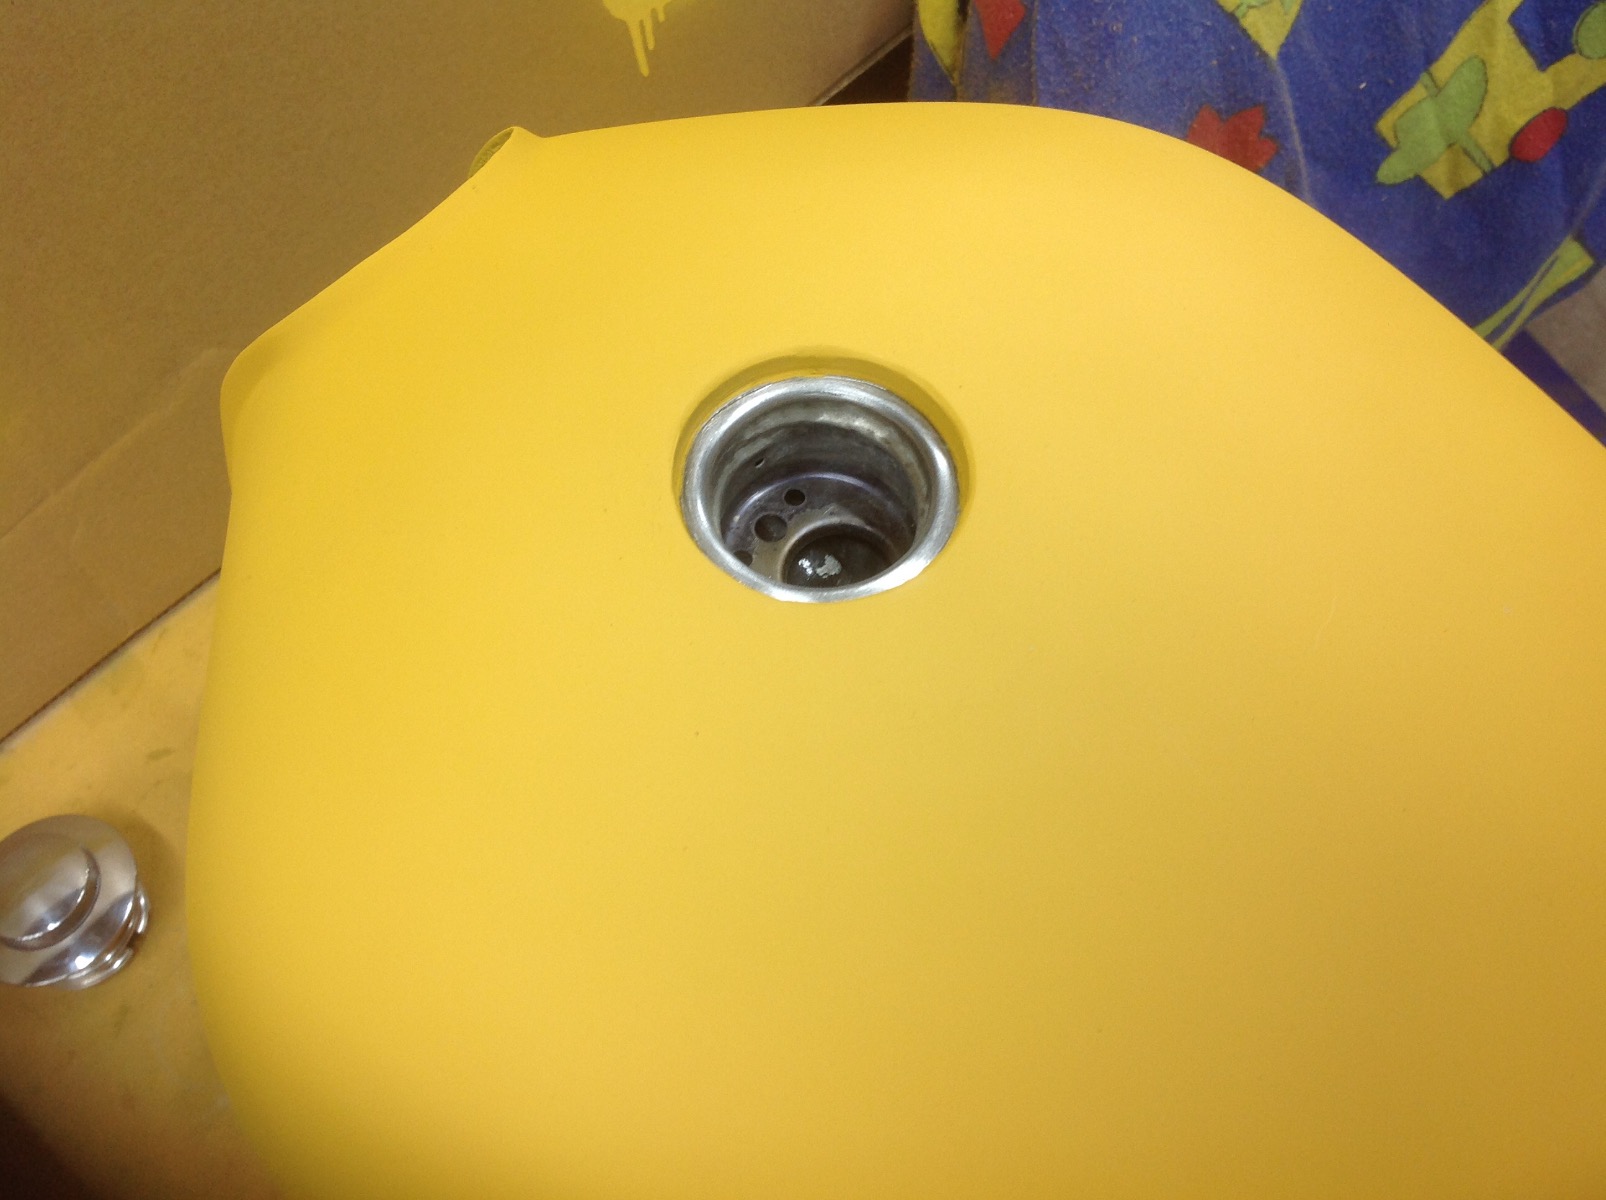
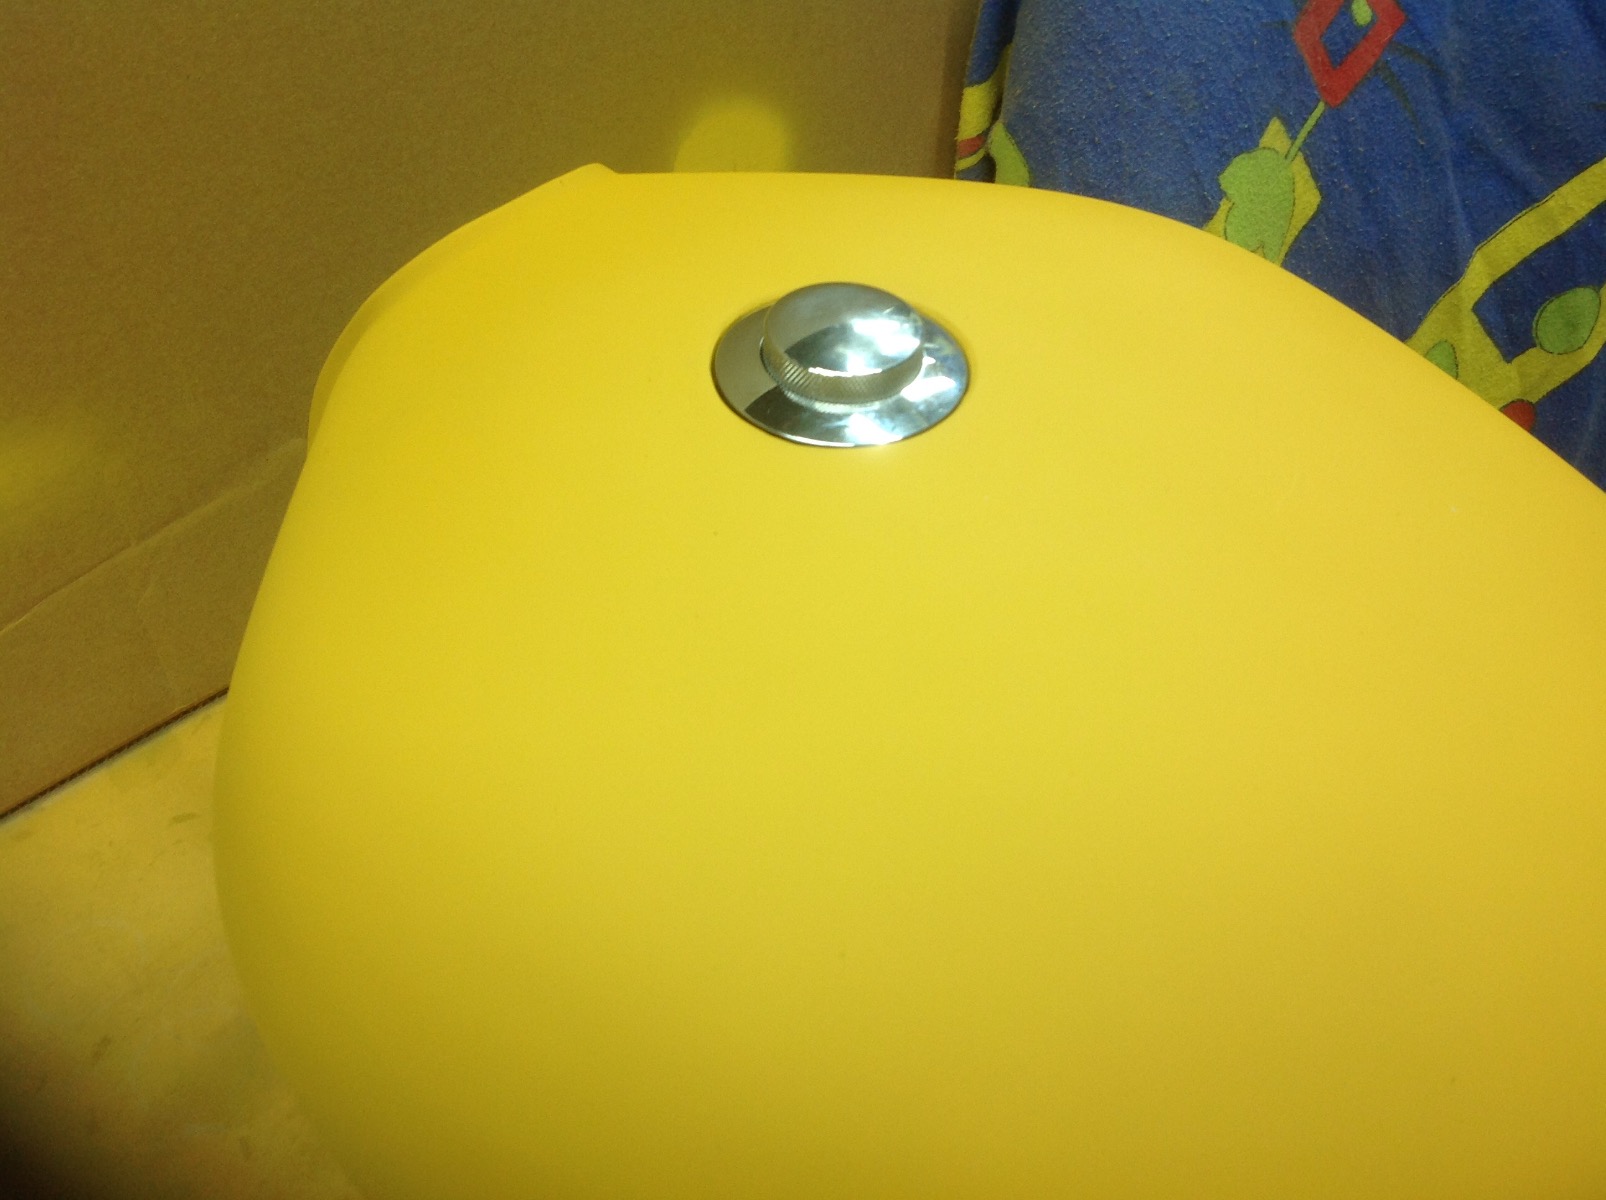
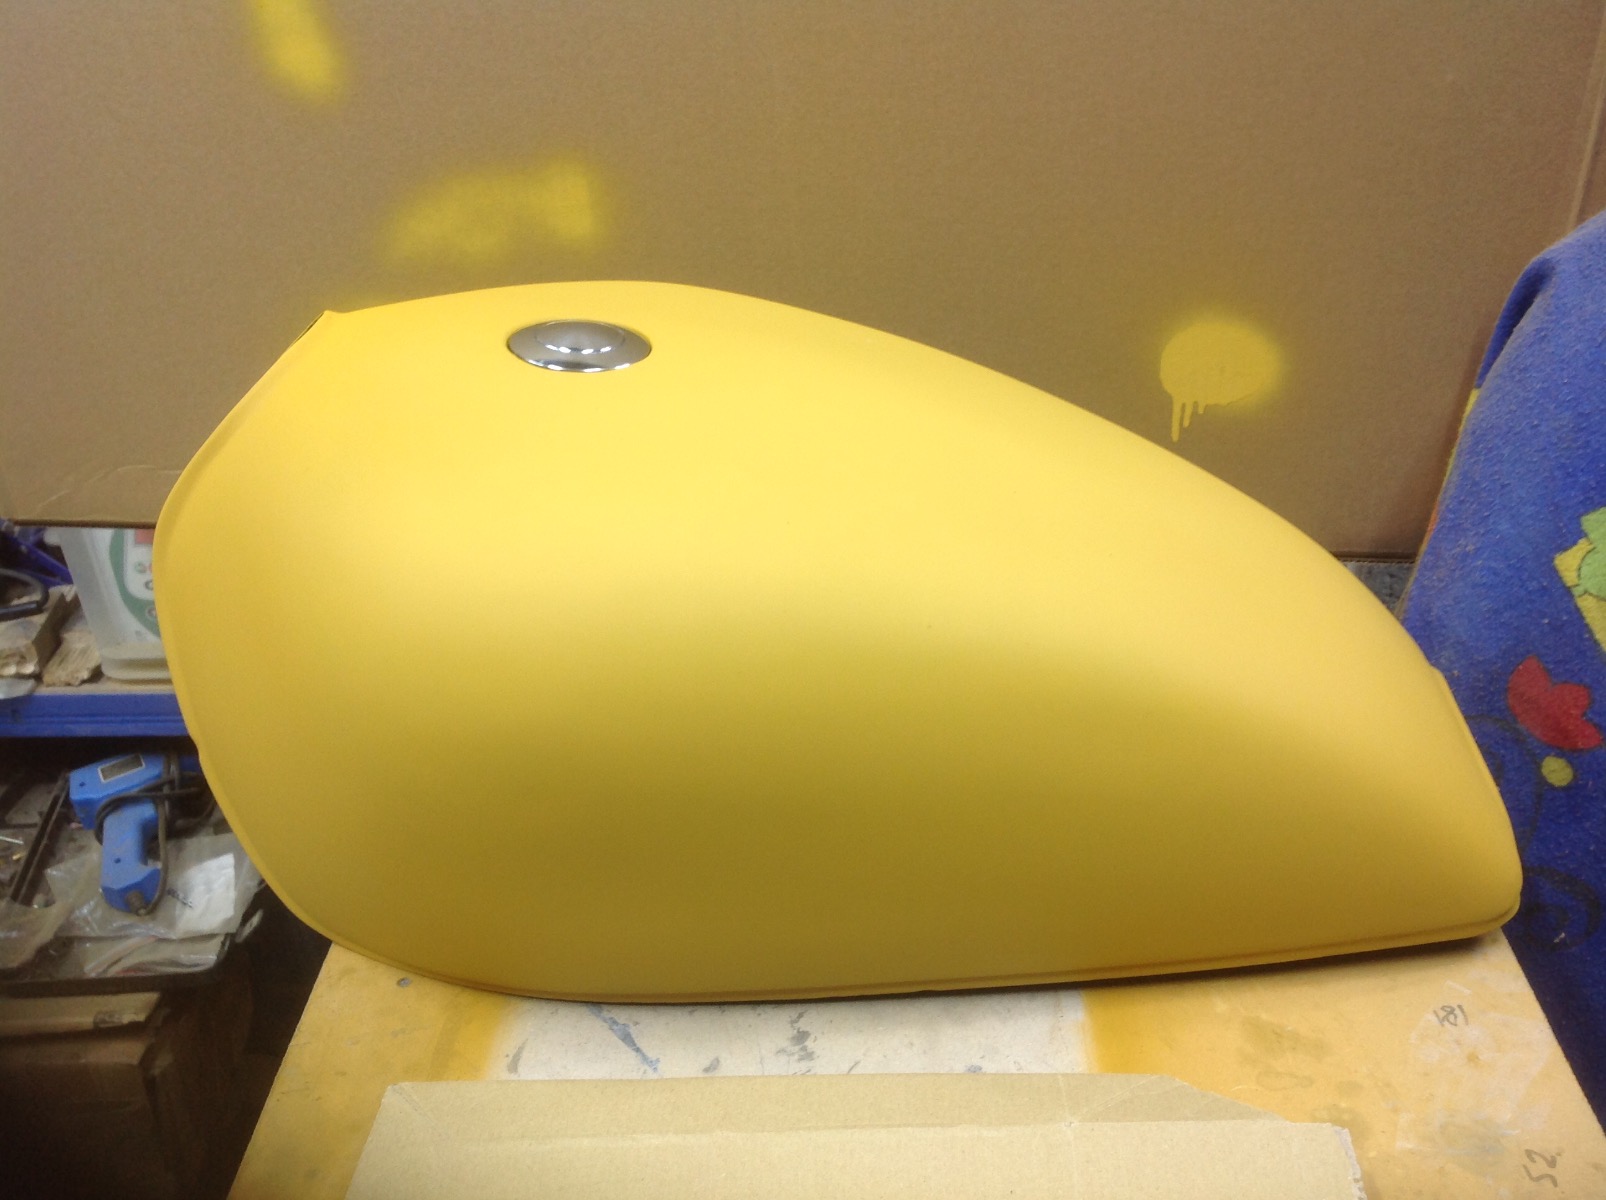
19 Nov 2023 10:06 - 19 Nov 2023 10:06
Well I had avoiding attacking the gas tank as long as I could (I wasn't excited about the idea of welding on a 40 year old gas tank that was in good shape but "needs must") I have used a flush fit screw in "pop up" cap from a Harley. I then used a piece of 63mm tube with some flat sheet metal welded to the bottom to create the recess then cut a hole to weld in the "tank insert" I got from a Chopper shop. Now that it's all in I am really happy with the results. Happy to be moving forward
1982 KZ1000 Ltd
www.kzrider.com/forum/11-projects/617631...-82-begins?start=192
kzrider.com/filebase-alias?view=download...d-fault-diagnosis&ca
www.kzrider.com/forum/11-projects/617631...-82-begins?start=192
kzrider.com/filebase-alias?view=download...d-fault-diagnosis&ca
Last edit: 19 Nov 2023 10:06 by Wookie58.
The following user(s) said Thank You: ThatGPzGuy, howardhb, Stereordinary, MLMG, Rolf1976_KZ900, Quofan
Please Log in or Create an account to join the conversation.
- Injected
-
- Offline
- User
- Posts: 1232
- Thanks: 741
Re: And finally, Wookie's 82 begins !
19 Nov 2023 10:40
Your doing some great work on this one, that speed sensor mount looks like it took a bit to get done.
Should look cool when its done.
Should look cool when its done.
1978 KZ650B2 w 1197cc Z1 engine
1977 KZ650B1 w 750cc Spectre engine
1979 KZ650C3 w 831cc Hot Rod engine
1978 KZ650C2 w 762cc DFI project
1977 KZ650C1 stock restoration project
1978 KZ650B2 modified project
1978 KZ650B2 Injected Drag 831cc
1980 Z1 Custom Frame Drag 1327cc
1981 Z50R Honda tow bike
1977 KZ650B1 w 750cc Spectre engine
1979 KZ650C3 w 831cc Hot Rod engine
1978 KZ650C2 w 762cc DFI project
1977 KZ650C1 stock restoration project
1978 KZ650B2 modified project
1978 KZ650B2 Injected Drag 831cc
1980 Z1 Custom Frame Drag 1327cc
1981 Z50R Honda tow bike
The following user(s) said Thank You: Wookie58
Please Log in or Create an account to join the conversation.
- Stereordinary
-

- Offline
- User
- Posts: 390
- Thanks: 144
Re: And finally, Wookie's 82 begins !
19 Nov 2023 21:10
This is gonna look ridonculously cool when it's all done.
A breeze from the west.
‘90 ZR550 Zephyr
‘90 ZR550 Zephyr
The following user(s) said Thank You: Wookie58
Please Log in or Create an account to join the conversation.