
KZ650 cafe-racer
- gazzz
-
 Topic Author
- Offline
- Sustaining Member
-

Registered
- Posts: 563
- Thanks: 319
Re: KZ650 cafe-racer
21 Jun 2021 13:32
Sorted another small pile of parts for the Kawasaki KZ650 project.First in the list is eight Honda flange cap nuts (high type). As long as bolts, nuts or other fasteners fit the application and my design, I do not care much about if they were made by Honda or Kawasaki or Yamaha.
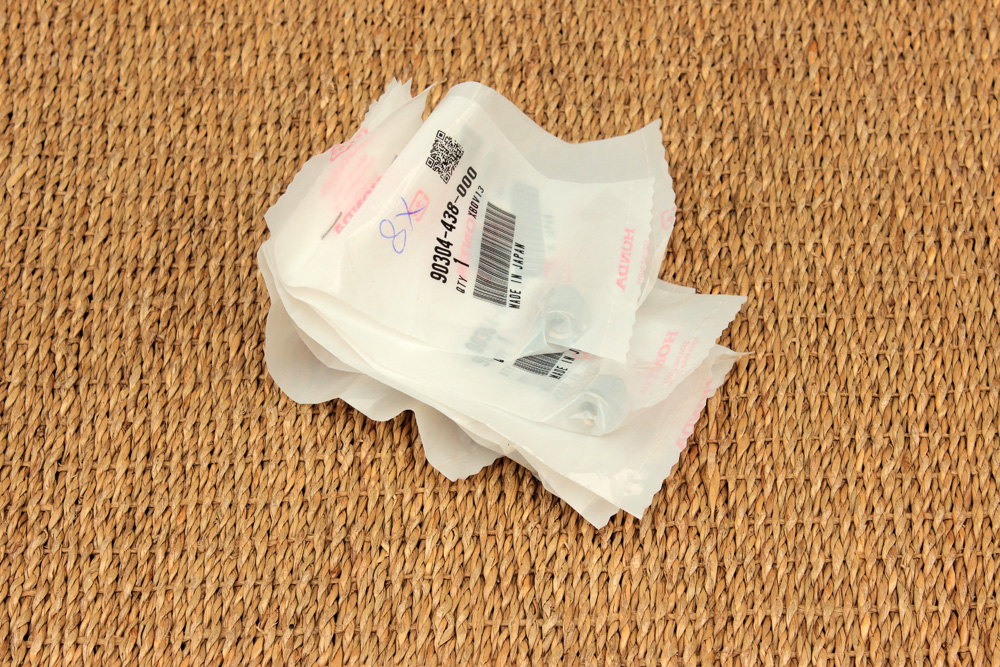
I prefer flanged cap nuts for exhaust headers, they keep exhaust suds protected from water and mud. These M6 nuts were used to mount exhaust headers in several Honda motorcycles. They are chrome plated and in my opinion perfectly fit early type KZ650 exhaust header holders.
I prefer flanged cap nuts for exhaust headers, they keep exhaust suds protected from water and mud. These M6 nuts were used to mount exhaust headers in several Honda motorcycles. They are chrome plated and in my opinion perfectly fit early type KZ650 exhaust header holders.
Kawasaki KZ650 cafe-racer: in progress
Kawasaki Zephyr 750 (810ccm, 4in4, spoked wheels)
Honda CB815 "Eight Fifteen" cafe-racer
Yamaha XJ "Eight Ball" cafe-racer
www.gazzz-garage.com
Kawasaki Zephyr 750 (810ccm, 4in4, spoked wheels)
Honda CB815 "Eight Fifteen" cafe-racer
Yamaha XJ "Eight Ball" cafe-racer
www.gazzz-garage.com
Please Log in or Create an account to join the conversation.
- gazzz
-
Topic Author
- Offline
- Sustaining Member
-
Registered
- Posts: 563
- Thanks: 319
Re: KZ650 cafe-racer
21 Jun 2021 13:35
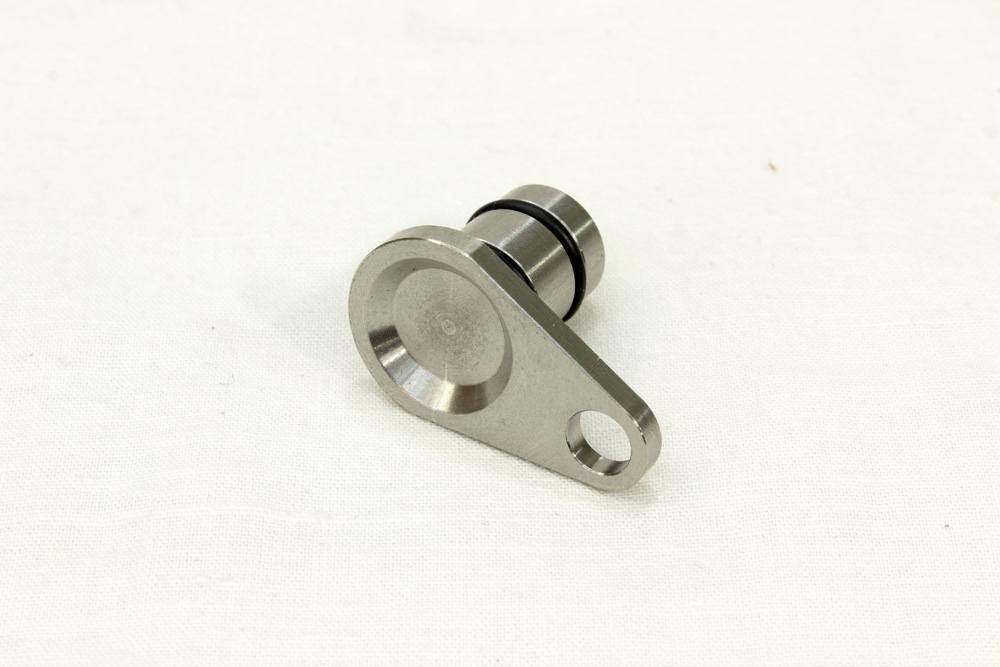
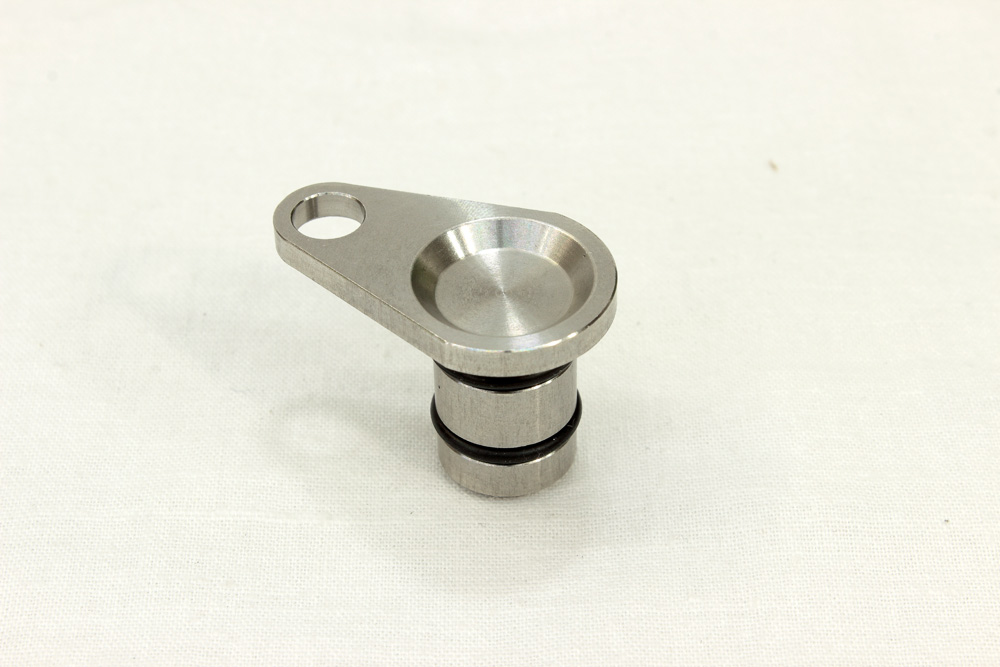
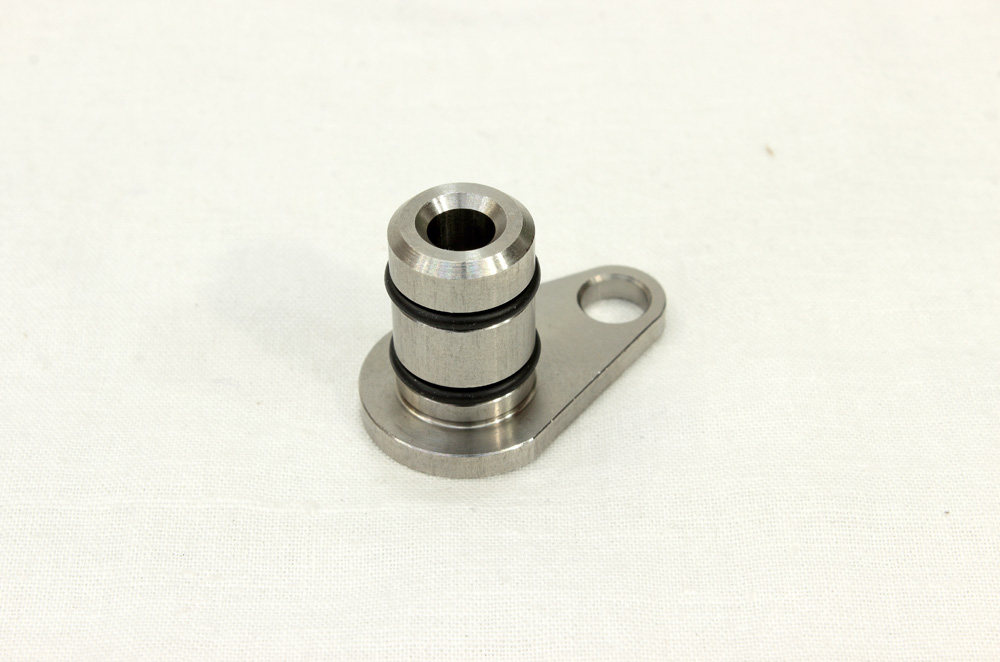
Next is the PMC plug for the cylinder head tachometer port. I had to plug that port and I might have made the plug of my own design. However, I was already overloaded with work and simple calculations (time to make drawings, buy raw materials, visit lathe/milling shop plus payment for turner work) showed me that in such circumstances the option to buy PMC ready solution will be cheaper. It is made of stainless steel and it is neatly made little thing. I am pretty impressed by its high quality and design: it is equipped with two O-rings, it is additionally lightened ( by means of hollow body and recess in the front end) and each edge of part is chamfered.
Kawasaki KZ650 cafe-racer: in progress
Kawasaki Zephyr 750 (810ccm, 4in4, spoked wheels)
Honda CB815 "Eight Fifteen" cafe-racer
Yamaha XJ "Eight Ball" cafe-racer
www.gazzz-garage.com
Kawasaki Zephyr 750 (810ccm, 4in4, spoked wheels)
Honda CB815 "Eight Fifteen" cafe-racer
Yamaha XJ "Eight Ball" cafe-racer
www.gazzz-garage.com
Please Log in or Create an account to join the conversation.
- gazzz
-
Topic Author
- Offline
- Sustaining Member
-
Registered
- Posts: 563
- Thanks: 319
Re: KZ650 cafe-racer
21 Jun 2021 13:39
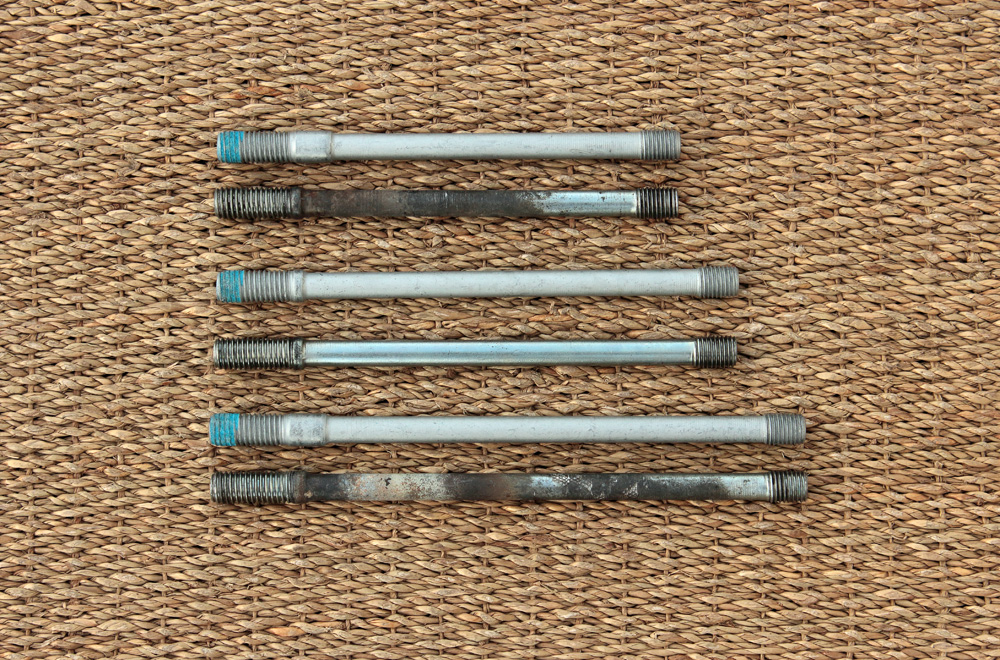
Exhaust nuts and PMC plug are followed by an assortment of bolts. Some of them are for engine covers, like little chrome plated m6 fellows, or for starter motor and secondary shaft cover like their zinc plated brothers. And again, Honda provided me with bolts that according to my plan have to be slightly longer than original Kawasaki bolts. There are too much of them to post them all.
Kawasaki KZ650 cafe-racer: in progress
Kawasaki Zephyr 750 (810ccm, 4in4, spoked wheels)
Honda CB815 "Eight Fifteen" cafe-racer
Yamaha XJ "Eight Ball" cafe-racer
www.gazzz-garage.com
Kawasaki Zephyr 750 (810ccm, 4in4, spoked wheels)
Honda CB815 "Eight Fifteen" cafe-racer
Yamaha XJ "Eight Ball" cafe-racer
www.gazzz-garage.com
Please Log in or Create an account to join the conversation.
- gazzz
-
Topic Author
- Offline
- Sustaining Member
-
Registered
- Posts: 563
- Thanks: 319
Re: KZ650 cafe-racer
21 Jun 2021 13:42
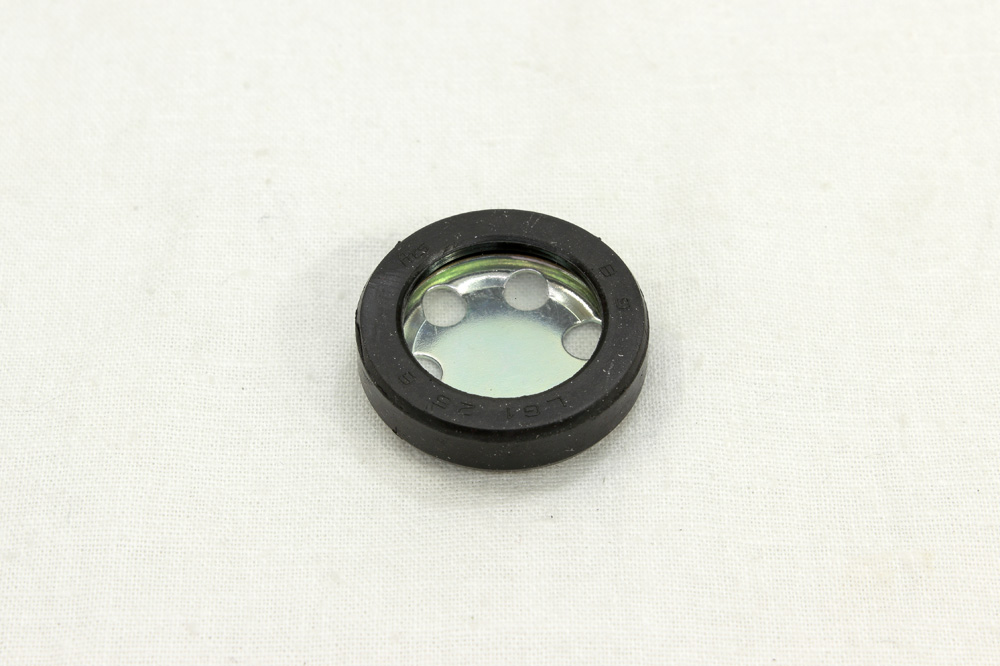
I already mentioned new sight glass for oil level.
And OEM tank rubbers could come handy one day. As well as this PMC overflow hose set.
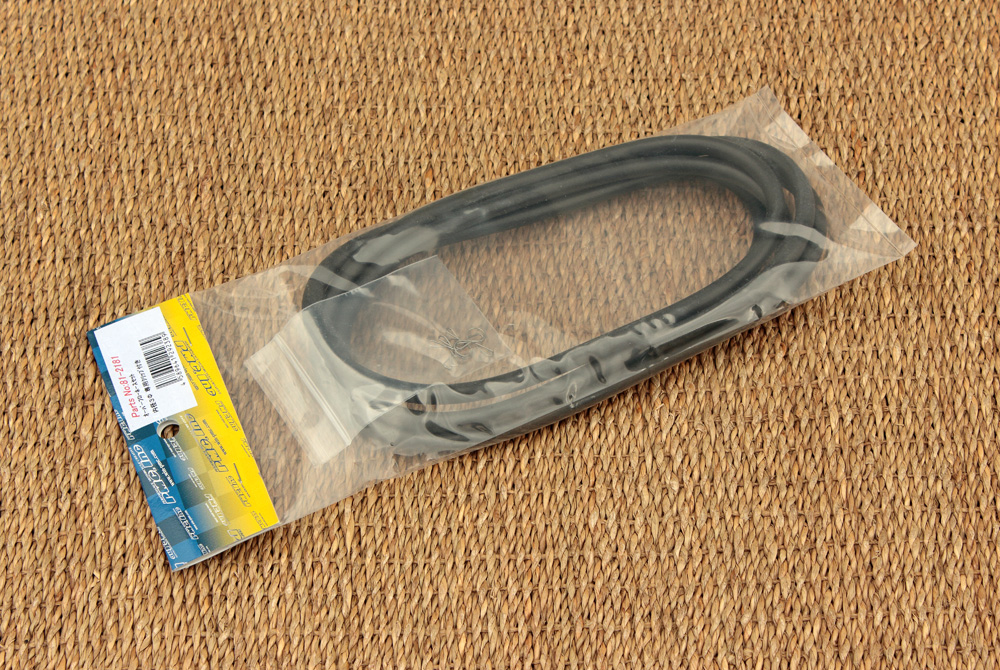
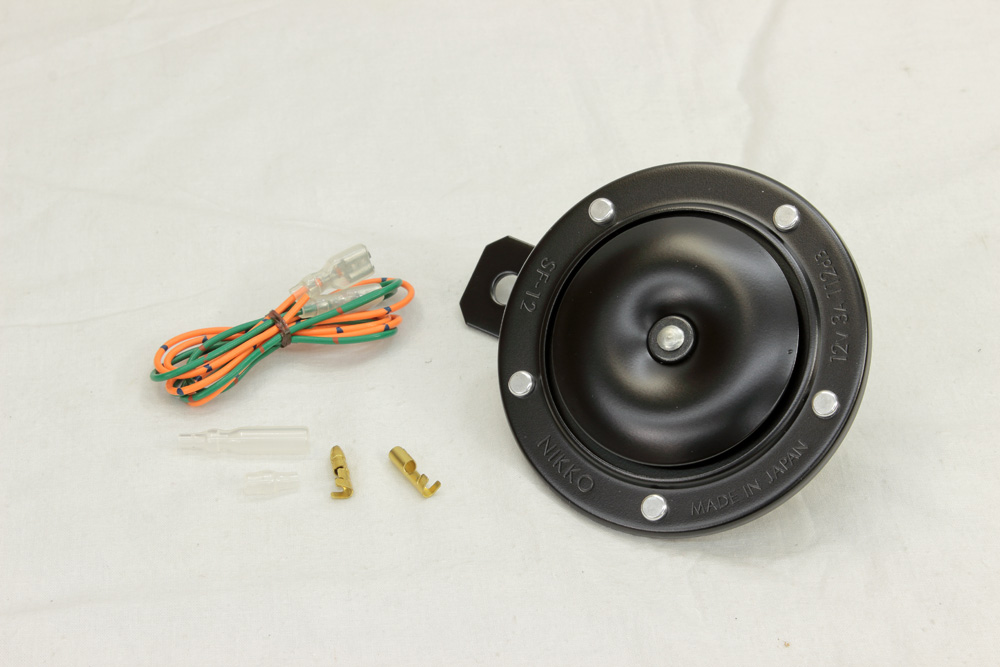
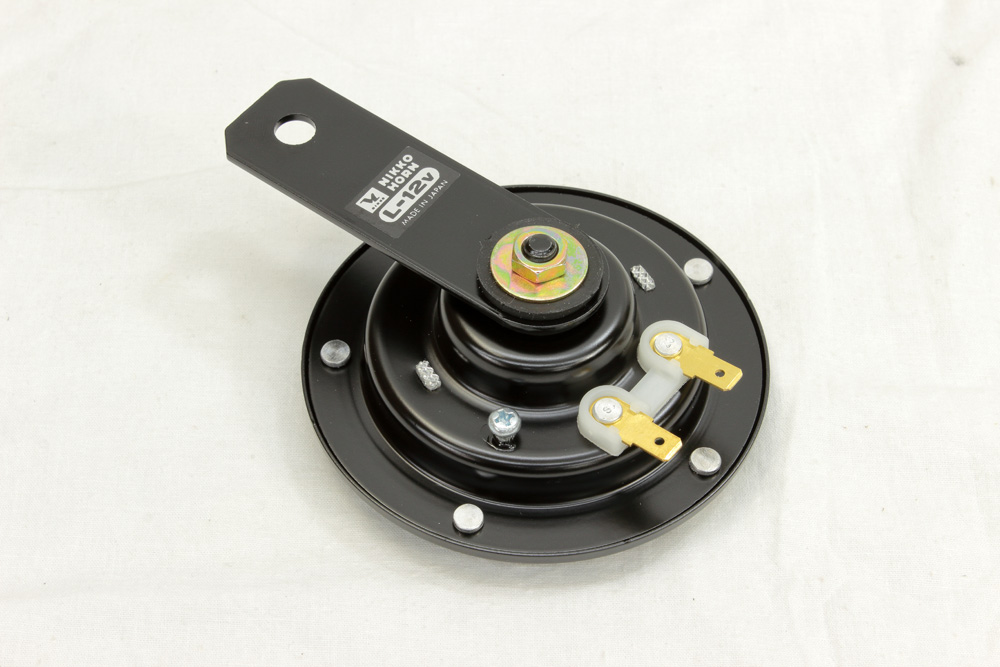
And here we come to the parts that do not necessarily end up in the KZ650 project. Like this PMC Z1 “initial type horn”. Horn nicely made and loud but I’ll have to find a place for it since it’s pretty big.
And OEM tank rubbers could come handy one day. As well as this PMC overflow hose set.
And here we come to the parts that do not necessarily end up in the KZ650 project. Like this PMC Z1 “initial type horn”. Horn nicely made and loud but I’ll have to find a place for it since it’s pretty big.
Kawasaki KZ650 cafe-racer: in progress
Kawasaki Zephyr 750 (810ccm, 4in4, spoked wheels)
Honda CB815 "Eight Fifteen" cafe-racer
Yamaha XJ "Eight Ball" cafe-racer
www.gazzz-garage.com
Kawasaki Zephyr 750 (810ccm, 4in4, spoked wheels)
Honda CB815 "Eight Fifteen" cafe-racer
Yamaha XJ "Eight Ball" cafe-racer
www.gazzz-garage.com
Please Log in or Create an account to join the conversation.
- Mikaw
-
- Offline
- Sustaining Member
-
Registered
- Posts: 4825
- Thanks: 1852
Re: KZ650 cafe-racer
21 Jun 2021 15:09
If tha horn had a chrome 8mm nut instead of the rivet in the center it would be a perfect pattern

1976 KZ 900 A4
kzrider.com/forum/11-projects/613548-1976-kz-900-a4
1976 KZ 900 B1 LTD
1978 KZ 1000 B2 LTD
1980 KZ 750 E1
Kowledge Speaks, But Wisdom Listens.
Jimi Hendrix.
1976 KZ 900 B1 LTD
1978 KZ 1000 B2 LTD
1980 KZ 750 E1
Kowledge Speaks, But Wisdom Listens.
Jimi Hendrix.
The following user(s) said Thank You: gazzz
Please Log in or Create an account to join the conversation.
- gazzz
-
Topic Author
- Offline
- Sustaining Member
-
Registered
- Posts: 563
- Thanks: 319
Re: KZ650 cafe-racer
22 Jun 2021 13:01 - 22 Jun 2021 13:04
Mikaw: I just was curious to see if it is any good.
Meanwhile, here is the next portion of info. Let's call it the beginning of the "special tools section".
So, it is time to prepare the engine for assembling, which means not only some work to be done, but also applying existing and producing some new special tools.
Usually when I prepare parts for glass beads blasting I close blind threaded holes to avoid the headache of removing media from them. And whenever I do not screw bolt into the hole before glass beads blasting, I am instantly reminded why I have to do so by the glass beads that are stuck in thread. Just blowing them out does not always work, so it’s time for a couple of special tools. First of them I use for thread cleaning.
Why does one need a special tool for internal threads cleaning when threading taps are available? My opinion is that it’s inappropriate to use threading tap (even taper tap or second tap) for cleaning threads, especially in aluminum, because tap may (and usually does) remove not only debris but the very metal too. It makes thread no good. So for mechanical cleaning I keep some amount of “modified” bolts of different sizes and thread pitches. This exact modification is not my invention, but a lore of mechanics I picked during the years of working on motorcycles: a couple of axial grooves have to be cut (with cut-off wheel) right through the threaded part of the bolt. Then threads in areas of the groove have to be treated with a small file. Here is example of M6 Allen bolt modified in aforementioned way:
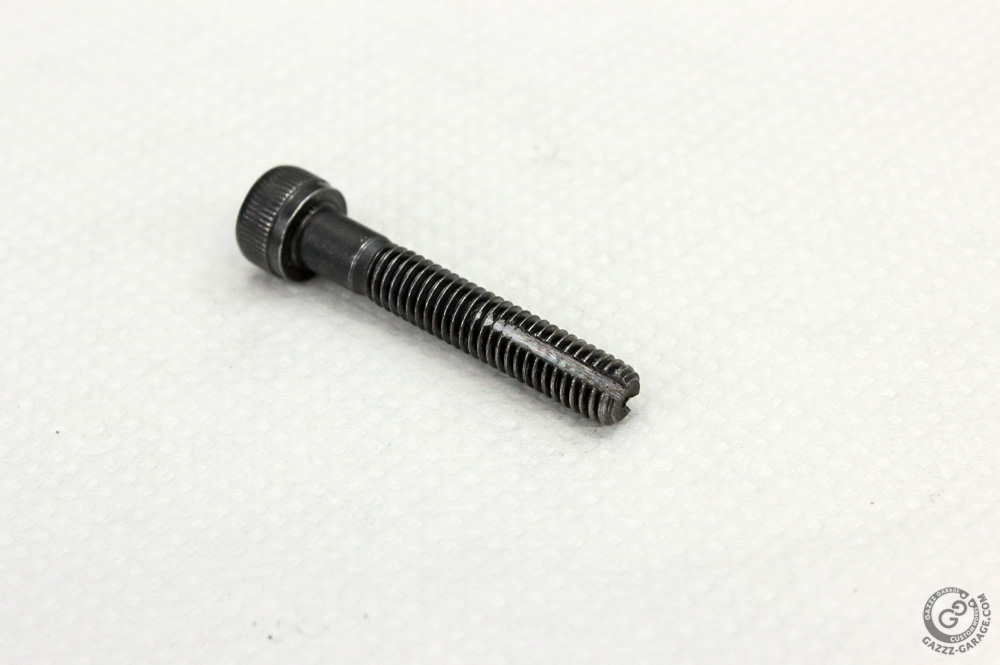
When a bolt like this is screwed into the threaded hole it no longer presses debris and oxidation around itself, but scrubs them into the groves. Yes, it may take longer to clean threaded holes with such a tool, but in combination with carburetor cleaner (or whatever cleaner you like to use) it leaves clean and (what is most significant) undamaged threaded holes.
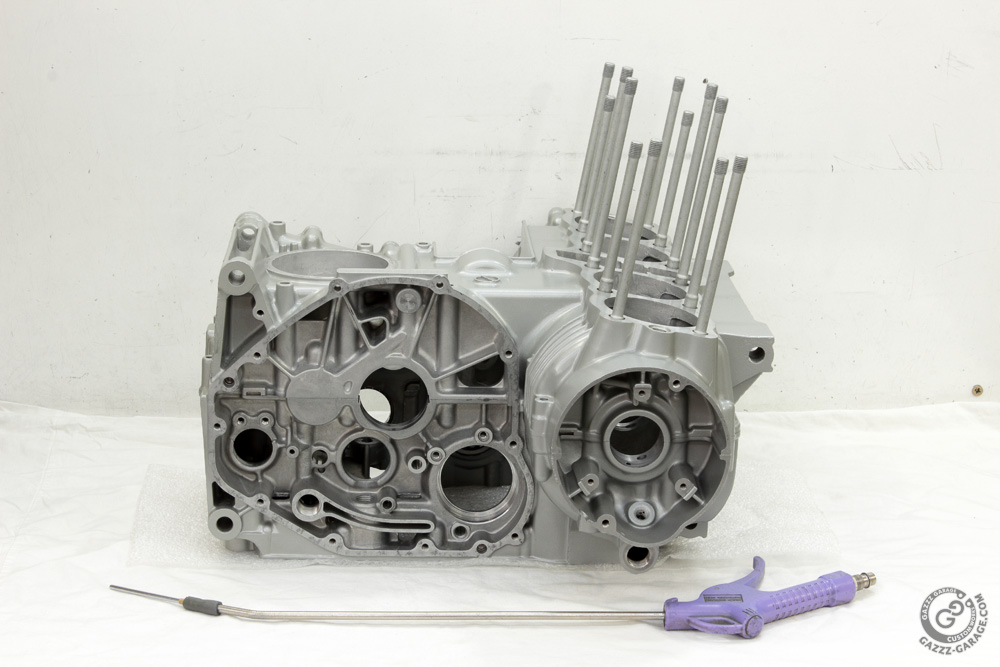
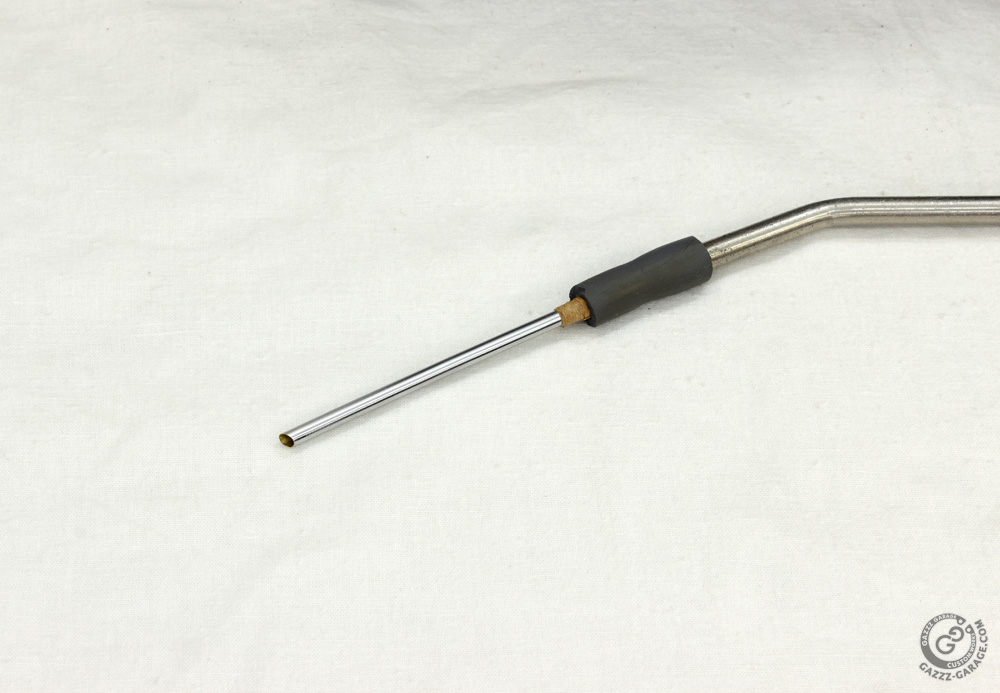
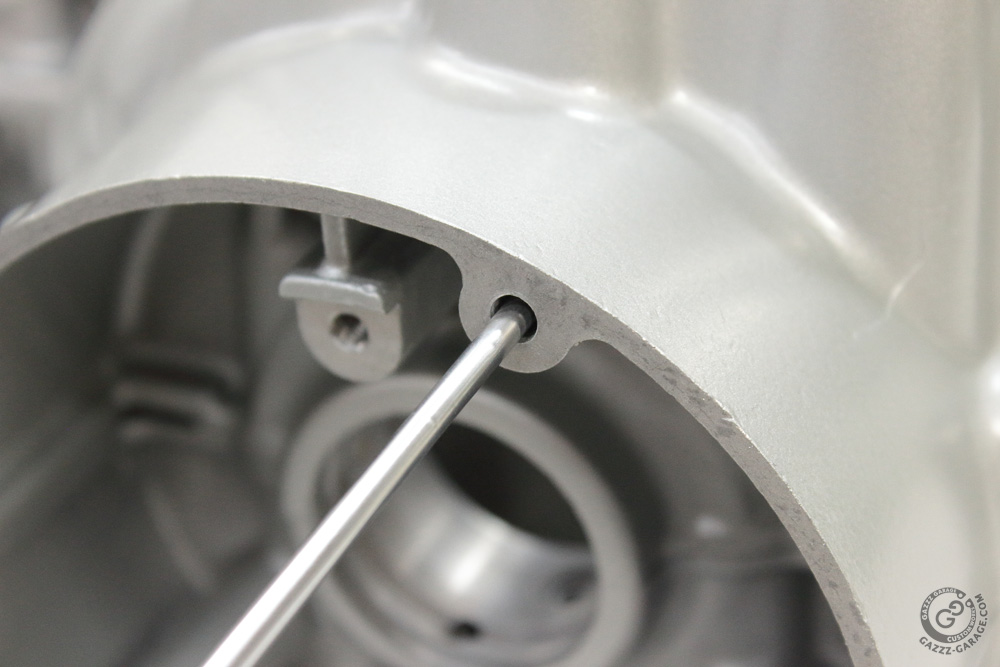
All threads of the Kawasaki KZ650 engine were cleaned with “special” bolts before glass beads blasting and painting. However, since I didn’t screw bolts into the alternator and ignition covers’ mount holes, I had to use it once more along with a section of remote control antenna (mounted to the nozzle of air gun).
Meanwhile, here is the next portion of info. Let's call it the beginning of the "special tools section".
So, it is time to prepare the engine for assembling, which means not only some work to be done, but also applying existing and producing some new special tools.
Usually when I prepare parts for glass beads blasting I close blind threaded holes to avoid the headache of removing media from them. And whenever I do not screw bolt into the hole before glass beads blasting, I am instantly reminded why I have to do so by the glass beads that are stuck in thread. Just blowing them out does not always work, so it’s time for a couple of special tools. First of them I use for thread cleaning.
Why does one need a special tool for internal threads cleaning when threading taps are available? My opinion is that it’s inappropriate to use threading tap (even taper tap or second tap) for cleaning threads, especially in aluminum, because tap may (and usually does) remove not only debris but the very metal too. It makes thread no good. So for mechanical cleaning I keep some amount of “modified” bolts of different sizes and thread pitches. This exact modification is not my invention, but a lore of mechanics I picked during the years of working on motorcycles: a couple of axial grooves have to be cut (with cut-off wheel) right through the threaded part of the bolt. Then threads in areas of the groove have to be treated with a small file. Here is example of M6 Allen bolt modified in aforementioned way:
When a bolt like this is screwed into the threaded hole it no longer presses debris and oxidation around itself, but scrubs them into the groves. Yes, it may take longer to clean threaded holes with such a tool, but in combination with carburetor cleaner (or whatever cleaner you like to use) it leaves clean and (what is most significant) undamaged threaded holes.
All threads of the Kawasaki KZ650 engine were cleaned with “special” bolts before glass beads blasting and painting. However, since I didn’t screw bolts into the alternator and ignition covers’ mount holes, I had to use it once more along with a section of remote control antenna (mounted to the nozzle of air gun).
Kawasaki KZ650 cafe-racer: in progress
Kawasaki Zephyr 750 (810ccm, 4in4, spoked wheels)
Honda CB815 "Eight Fifteen" cafe-racer
Yamaha XJ "Eight Ball" cafe-racer
www.gazzz-garage.com
Kawasaki Zephyr 750 (810ccm, 4in4, spoked wheels)
Honda CB815 "Eight Fifteen" cafe-racer
Yamaha XJ "Eight Ball" cafe-racer
www.gazzz-garage.com
Last edit: 22 Jun 2021 13:04 by gazzz.
Please Log in or Create an account to join the conversation.
- gazzz
-
Topic Author
- Offline
- Sustaining Member
-
Registered
- Posts: 563
- Thanks: 319
Re: KZ650 cafe-racer
22 Jun 2021 13:04
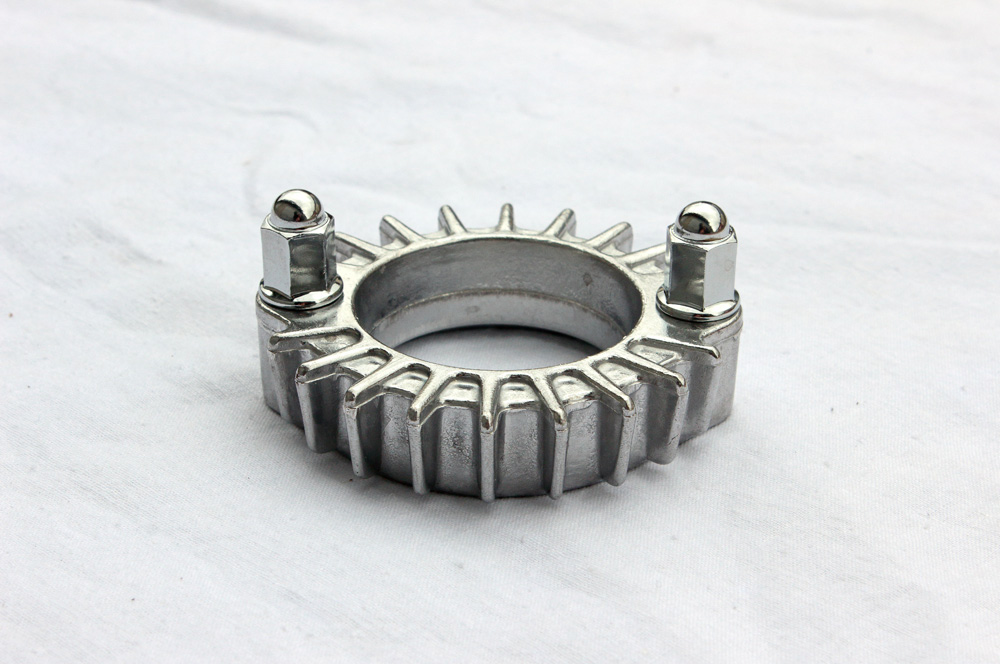
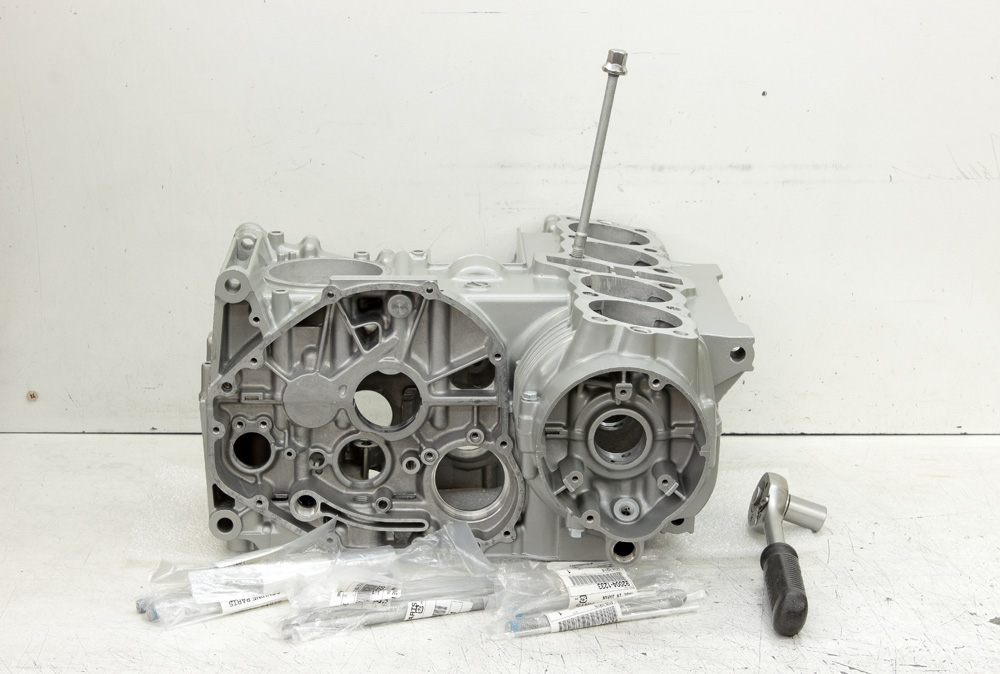
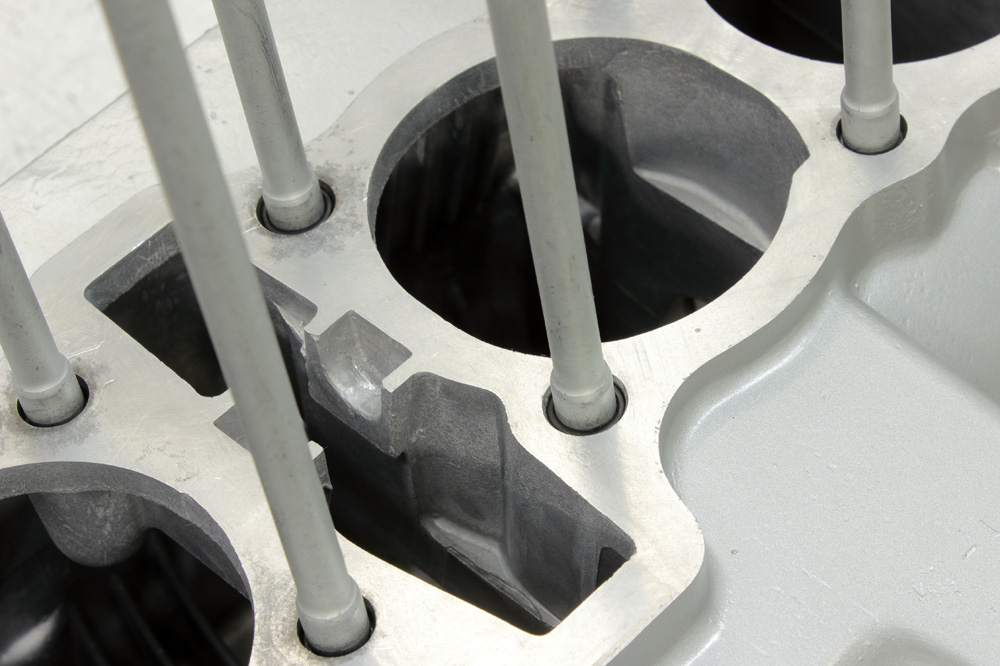
As I finished cleaning the last threads, I had to install cylinder head studs. As one may remember, I bought a set of new OEM Kawasaki studs for the Kawasaki ZR7 which has studs of identical to KZ650 cylinder head studs length. And talking about cylinder head stud length: you may see indications like 10×133 in parts lists beside stud part number. The digit 10 is simple, it stands for M10 thread (1.25 pitch), however the digit 133 stands not for total length of stud, but for the length of its part which protrudes above the surface of the crankcase when stud is installed. Very useful information when one wishes to check if studs are correctly installed.
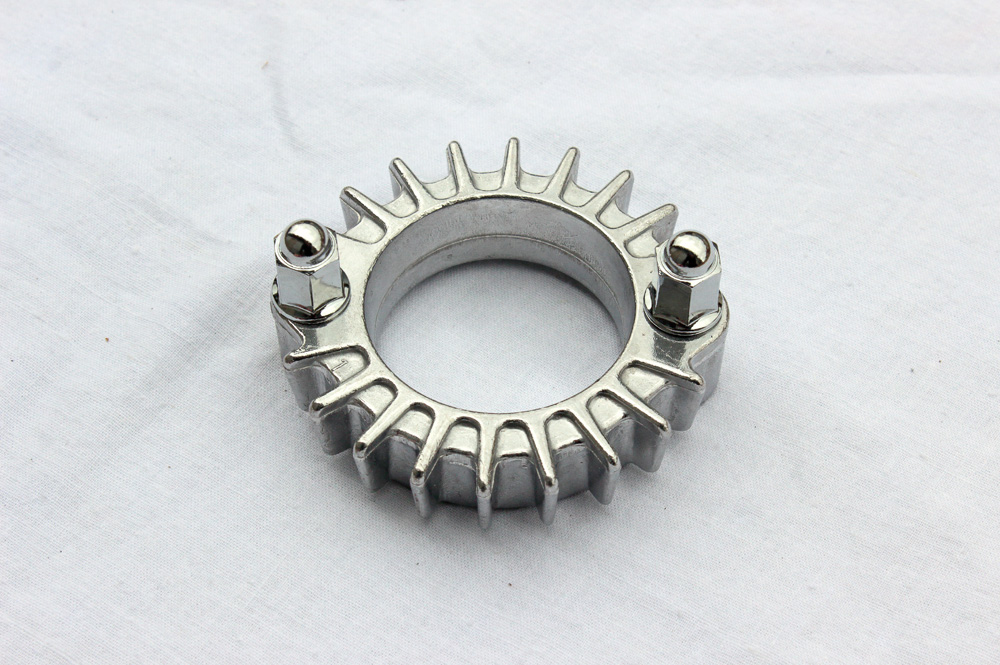
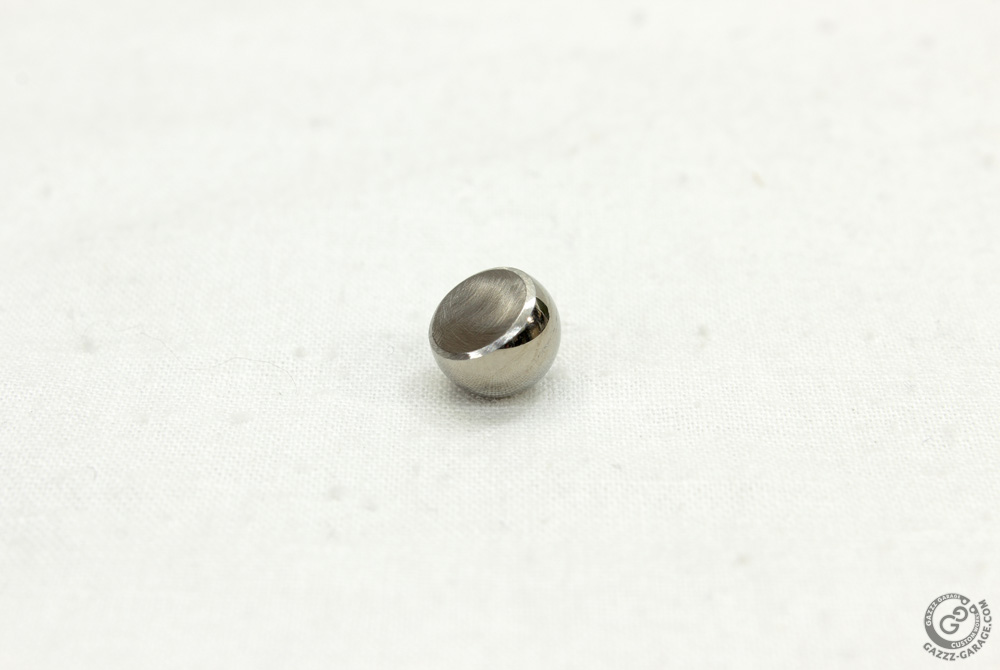
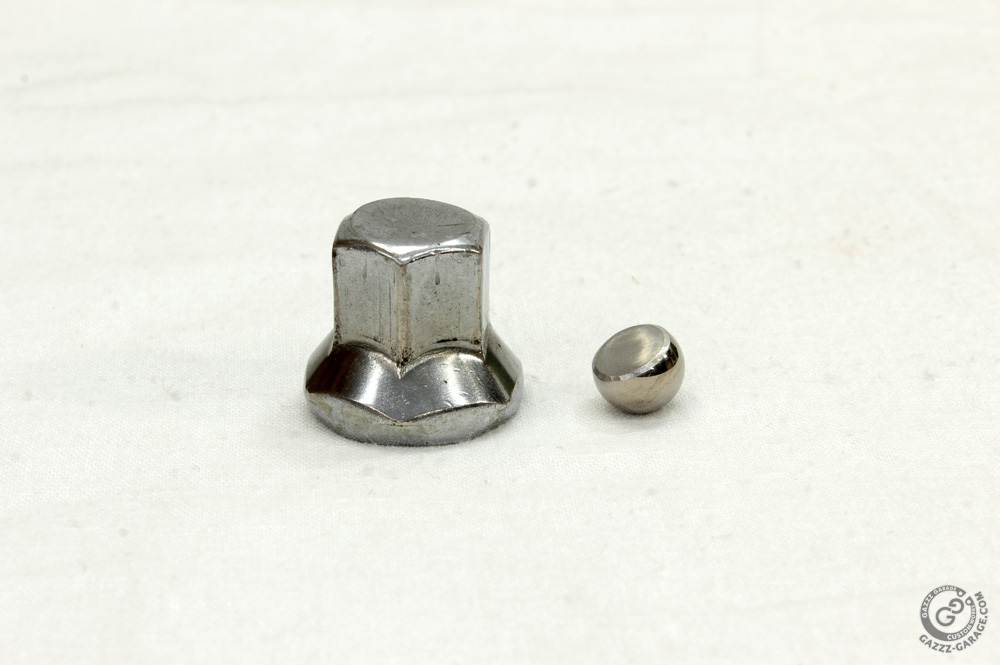
As for the special tool for cylinder head studs installation, receipt of non-OEM one is well known: original high cylinder head nut and bearing ball of suitable diameter. But there is a way to make it more reliable and here is my receipt of a special tool for installation of cylinder head studs. First, the ball has to go freely into the nut, but it has to be close to the internal diameter of the nut thread. So I found a ball of 8.7mm diameter and it fits the original KZ650 cylinder head nut perfectly. Then I grinded off about 1/3 of ball just like this:
For one thing, with one side of the ball flattened I solved the issue of the ball extruding the dome of the nut. For another, it allowed me to screw nut with a ball for an additional two turns deeper. Better for nut, better for stud, better for process of stud installation since all torque now could be utilized solely on stud rotation, not on the nut dome extrusion and it is distributed on more threads.
Kawasaki KZ650 cafe-racer: in progress
Kawasaki Zephyr 750 (810ccm, 4in4, spoked wheels)
Honda CB815 "Eight Fifteen" cafe-racer
Yamaha XJ "Eight Ball" cafe-racer
www.gazzz-garage.com
Kawasaki Zephyr 750 (810ccm, 4in4, spoked wheels)
Honda CB815 "Eight Fifteen" cafe-racer
Yamaha XJ "Eight Ball" cafe-racer
www.gazzz-garage.com
The following user(s) said Thank You: ThatGPzGuy, Scirocco
Please Log in or Create an account to join the conversation.
- gazzz
-
Topic Author
- Offline
- Sustaining Member
-
Registered
- Posts: 563
- Thanks: 319
Re: KZ650 cafe-racer
22 Jun 2021 13:06
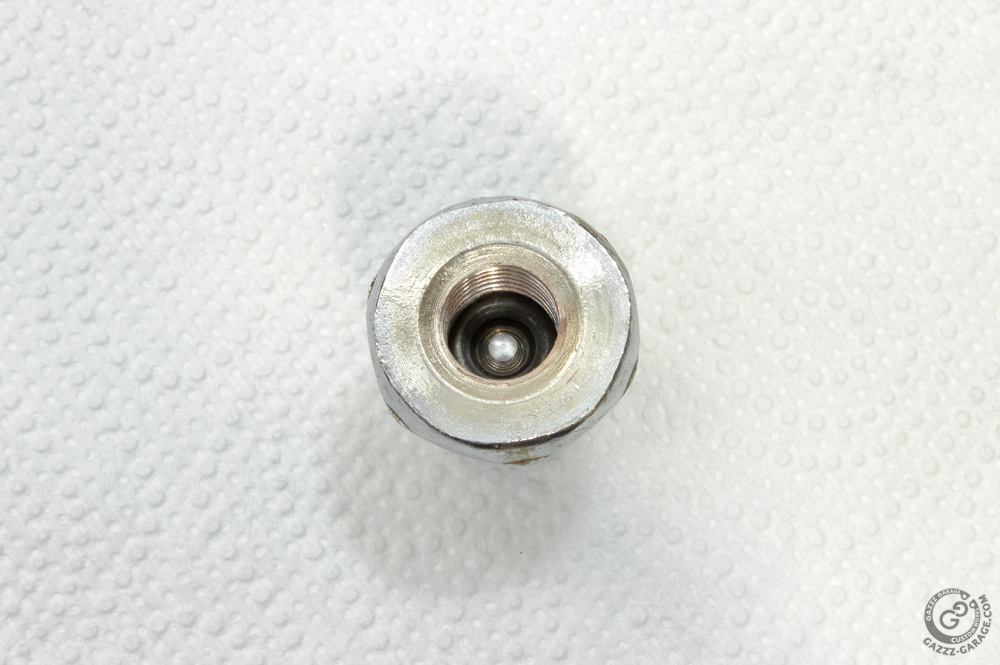
One may say that there may be an issue of installing the ball with a flat side downward into the nut. But I could say that there is no such issue as long as one may put a dub of grease (or a little piece of double sided tape) on the end of a suitable stick or Allen key. And once the ball is placed in the nut, just don’t forget to fix it there with a suitable O-ring. Improved special tool for cylinder studs (or other studs) installation is ready! Hope these little inventions of mine will serve you well.
With the new tool installation of cylinder head studs went without issues. One by one all the studs were secured in the crankcase.
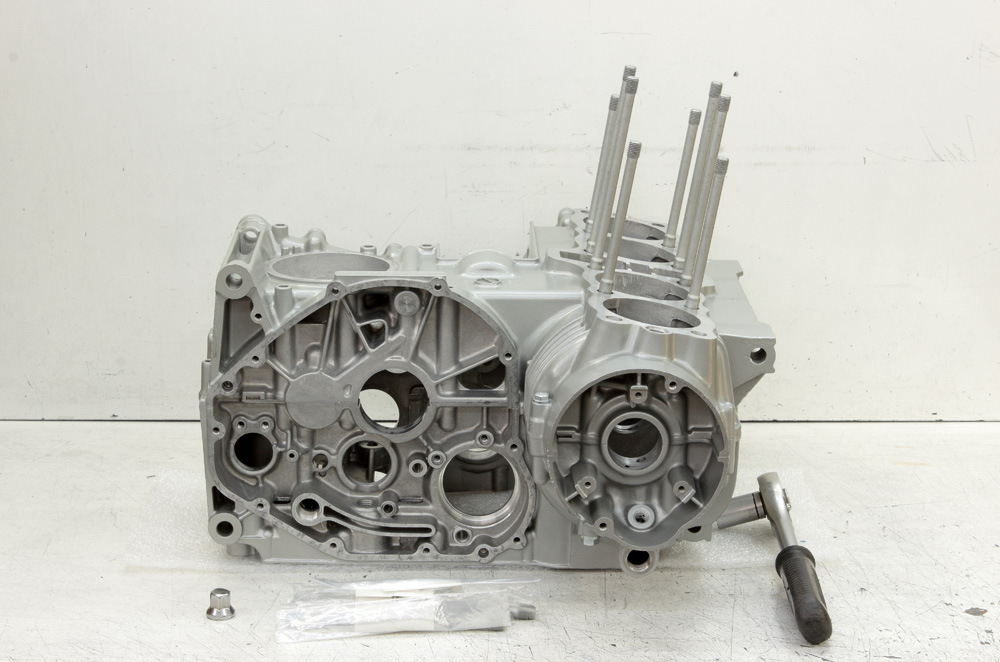
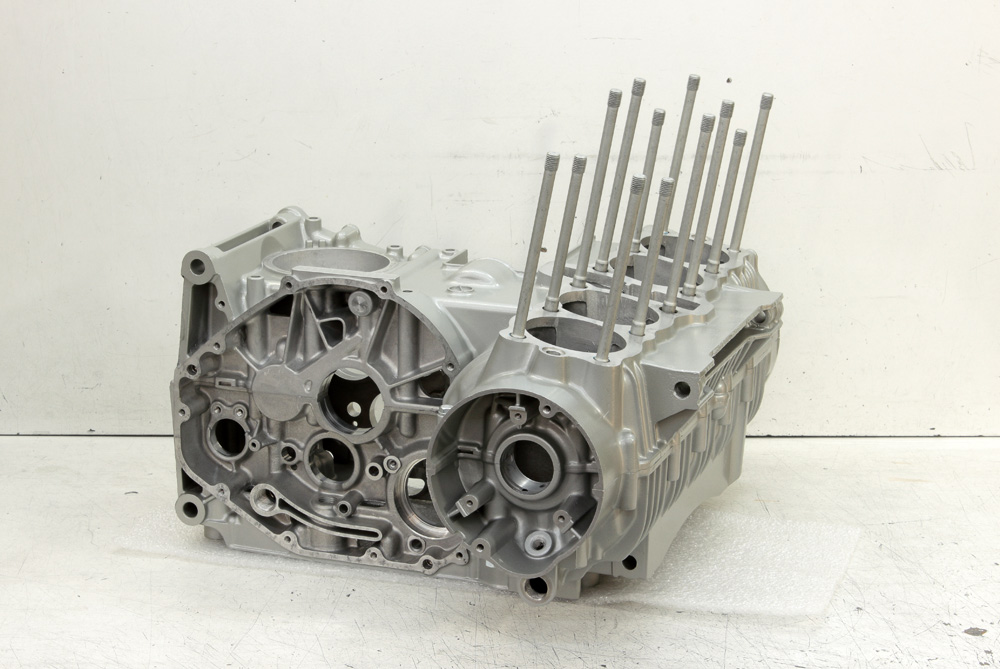
With the new tool installation of cylinder head studs went without issues. One by one all the studs were secured in the crankcase.
Kawasaki KZ650 cafe-racer: in progress
Kawasaki Zephyr 750 (810ccm, 4in4, spoked wheels)
Honda CB815 "Eight Fifteen" cafe-racer
Yamaha XJ "Eight Ball" cafe-racer
www.gazzz-garage.com
Kawasaki Zephyr 750 (810ccm, 4in4, spoked wheels)
Honda CB815 "Eight Fifteen" cafe-racer
Yamaha XJ "Eight Ball" cafe-racer
www.gazzz-garage.com
The following user(s) said Thank You: Scirocco
Please Log in or Create an account to join the conversation.
- gazzz
-
Topic Author
- Offline
- Sustaining Member
-
Registered
- Posts: 563
- Thanks: 319
Re: KZ650 cafe-racer
22 Jun 2021 13:07
After this I blew out remains of OEM applied thread locked form grooves around studs and installed two new OEM O-ring around two of them.
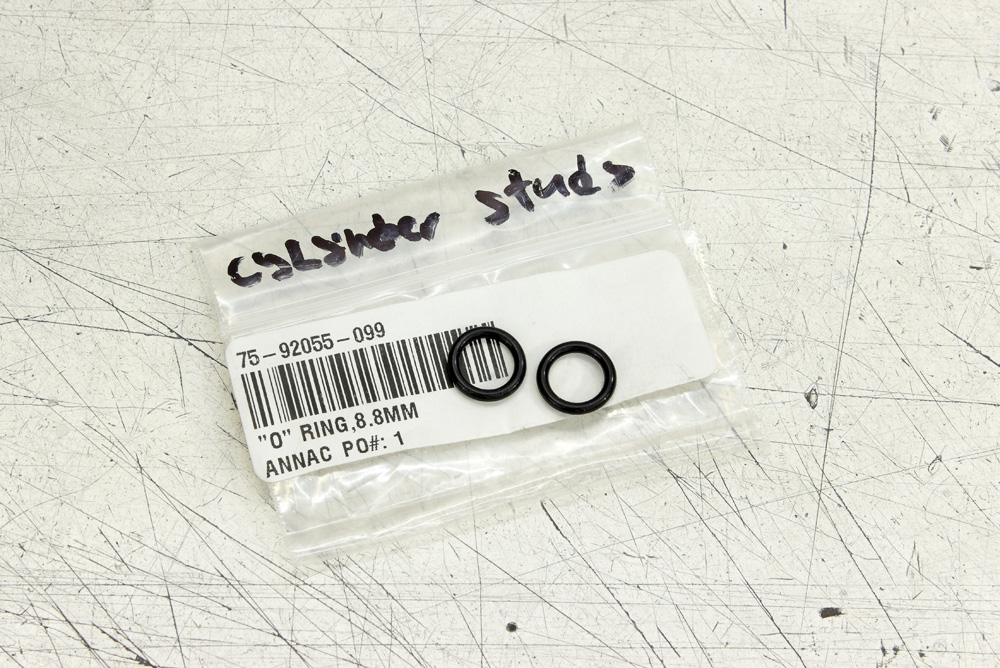
Tool for O-ring installation couldn’t even be called special, just pure life-hack: in fact it was a former ice cream stick. Mighty useful little things they are: round and flat ones of different configurations.
Tool for O-ring installation couldn’t even be called special, just pure life-hack: in fact it was a former ice cream stick. Mighty useful little things they are: round and flat ones of different configurations.
Kawasaki KZ650 cafe-racer: in progress
Kawasaki Zephyr 750 (810ccm, 4in4, spoked wheels)
Honda CB815 "Eight Fifteen" cafe-racer
Yamaha XJ "Eight Ball" cafe-racer
www.gazzz-garage.com
Kawasaki Zephyr 750 (810ccm, 4in4, spoked wheels)
Honda CB815 "Eight Fifteen" cafe-racer
Yamaha XJ "Eight Ball" cafe-racer
www.gazzz-garage.com
The following user(s) said Thank You: katit
Please Log in or Create an account to join the conversation.
- 750 R1
-
- Offline
- User
-

Registered
- Posts: 1150
- Thanks: 390
The following user(s) said Thank You: gazzz
Please Log in or Create an account to join the conversation.
- gazzz
-
Topic Author
- Offline
- Sustaining Member
-
Registered
- Posts: 563
- Thanks: 319
Re: KZ650 cafe-racer
24 Jun 2021 14:20
Thanks!
Last three days I spent dismantling three BMW R35 engines (one of them actually was an EMW R35) in search of parts I could reuse for the BMW project. Well, not much good news, but at least it will be start. Meanwhile, today by 17:00 the temperature inside of my garage was 35C (95F). Outside it was worse.
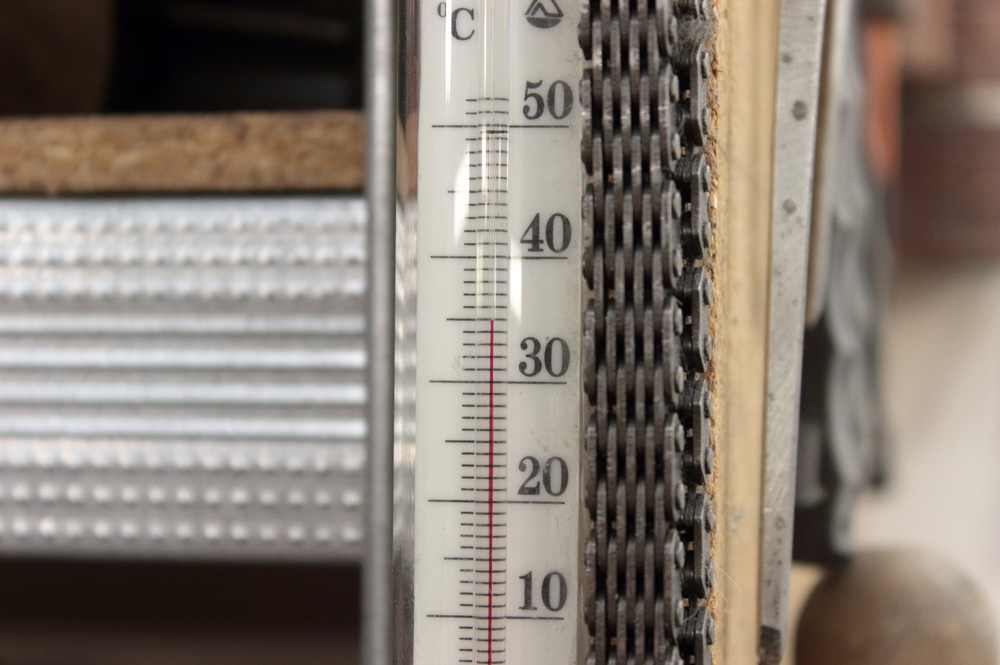
Last three days I spent dismantling three BMW R35 engines (one of them actually was an EMW R35) in search of parts I could reuse for the BMW project. Well, not much good news, but at least it will be start. Meanwhile, today by 17:00 the temperature inside of my garage was 35C (95F). Outside it was worse.
Kawasaki KZ650 cafe-racer: in progress
Kawasaki Zephyr 750 (810ccm, 4in4, spoked wheels)
Honda CB815 "Eight Fifteen" cafe-racer
Yamaha XJ "Eight Ball" cafe-racer
www.gazzz-garage.com
Kawasaki Zephyr 750 (810ccm, 4in4, spoked wheels)
Honda CB815 "Eight Fifteen" cafe-racer
Yamaha XJ "Eight Ball" cafe-racer
www.gazzz-garage.com
Please Log in or Create an account to join the conversation.
- Skidmark
-
- Offline
- User
-
Registered
- Posts: 1087
- Thanks: 312
Re: KZ650 cafe-racer
24 Jun 2021 15:33
So every 5C = 1 cam chain link.

Retired gearhead
'81 KZ-750 E2
'87 Suzuki Savage 650 Street Tracker (lost in the shop fire)
'81 KZ-750 E2
'87 Suzuki Savage 650 Street Tracker (lost in the shop fire)
The following user(s) said Thank You: gazzz
Please Log in or Create an account to join the conversation.
Moderators: Street Fighter LTD