
KZ1100A Top End Refresh
- CCrosswait
-
 Topic Author
- Offline
- Sustaining Member
-

Registered
- Posts: 89
- Thanks: 22
KZ1100A Top End Refresh
21 Sep 2017 19:30
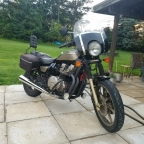
I bought my 81 KZ1100A earlier this spring. This is my first KZ and I've been having a grand ol' time zipping around her. Since the speedo only goes to 85 mph I've no idea about her top speed but she's able to go faster than I am willing to.
From day one the bike's leaked oil from around the block. I could not exactly pin point where so I've decided to do a complete gasket and seal refresh of the top end. This is my first time tearing into an engine but I've got the factory service manual and a Clymer manual so at least I'll have something to read if I screw this up.
I'll post more as the build progresses and will try to remember to take pictures. If anyone has any tips, I'm all 'ears'.
2019 Indian FTR1200S
2018 Triumph Rocket 3
1981 Kawasaki KZ1100A1
1977 Yamaha RD400
1980 Honda Express II
2018 Triumph Rocket 3
1981 Kawasaki KZ1100A1
1977 Yamaha RD400
1980 Honda Express II
Please Log in or Create an account to join the conversation.
- 650ed
-

- Offline
- User
-

Registered
- Posts: 15334
- Thanks: 2830
Re: KZ1100A Top End Refresh
21 Sep 2017 19:42 - 21 Sep 2017 19:43
First - take more time to pinpoint the oil leak. It could be something very simple like a cam end plug that doesn't require the head to be pulled.
Also, keep in mind that the cross-head screws on the Kawasaki are not Phillips, they are Japanese Industrial Standard (JIS) and using a Phillips screwdriver will damage them. See the links below for more info. Ed
www.kzrider.com/forum/10-new-members/606715-new-here#768867
www.kzrider.com/forum/10-new-members/606715-new-here#768868
1977 KZ650-C1 Original Owner - Stock (with additional invisible FIAMM horn)
Last edit: 21 Sep 2017 19:43 by 650ed.
Please Log in or Create an account to join the conversation.
- Nessism
-

- Offline
- Sustaining Member
-
Registered
- Posts: 8076
- Thanks: 3461
Re: KZ1100A Top End Refresh
22 Sep 2017 05:28
If you decide for sure to do the gaskets getting OEM Kawasaki gaskets is the safe bet. Aftermarket gaskets vary in quality from passable to criminally bad.
Anytime the head is removed it's strongly advised to pull the cylinder as well and replace the base gasket.
The valve stem seals should be replaced as a matter of course, and consider new rings too. The extra cost is fairly nominal when you consider the time involved for the whole job. A bottle brush hone job in the cylinders will be needed before new rings are installed of course.
Good luck
Ed
Carb O-ring Kits : www.kzrider.com/forum/14-vendor-forum/62...rburetor-o-ring-kits
www.kzrider.com/forum/faq-wiki/618026-new-owner-things-to-know
1981 KZ750E2
www.kzrider.com/forum/11-projects/604901...z750e-project-thread
Carb O-ring Kits : www.kzrider.com/forum/14-vendor-forum/62...rburetor-o-ring-kits
www.kzrider.com/forum/faq-wiki/618026-new-owner-things-to-know
1981 KZ750E2
www.kzrider.com/forum/11-projects/604901...z750e-project-thread
Please Log in or Create an account to join the conversation.
- tthunderdan
-
- Away
- User
-
Registered
- Posts: 120
- Thanks: 16
Re: KZ1100A Top End Refresh
22 Sep 2017 07:24
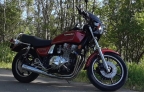
that bike looks exactly like my 83 kz1100...i need to do some gasket replacements on an 83 spectre 1100 so I will be watching...
Dan from Slippery Rock PA,
83kz1100a
83spectre 1100
75 Yamaha DT400
75 Yamaha DT175
80 Yamaha MX80
81 Suzuki TS100
83kz1100a
83spectre 1100
75 Yamaha DT400
75 Yamaha DT175
80 Yamaha MX80
81 Suzuki TS100
Please Log in or Create an account to join the conversation.
- CCrosswait
-
Topic Author
- Offline
- Sustaining Member
-
Registered
- Posts: 89
- Thanks: 22
Re: KZ1100A Top End Refresh
22 Sep 2017 20:18
Thanks for the quick and useful responses. You all are awesome. I've got a set of JIS drivers on the way from eBay.
There does not appear to be any leaks from the end caps. Oil is pooling on the front left side fins after a ride (bike parked on side stand). Fresh oil also shows up on the starter clutch cover and there are several spots of dried grime around the head nuts, reed cover, and around the exhaust.
While removing the intake boots I noticed what looks like radial cracks. Am I right? I suspect these could allow an air leak and lean condition. I have noticed some backfiring on deceleration and have read that a lean mix can cause such backfiring but would love to hear from you all. See attached images.
The cam cover came off easy (as it should). I think the PO didn't own a torque wrench because three of the bolts were barely hand tight. Maybe that has been contributing to the leaks?:blink:
Just for practice I check the cam shim gaps and have one that is too small. 0.05mm would not go on the #4 intake. So that means I'll get to practice my shim removal technique on the rebuild!
The head and cylinders come off tomorrow.
2019 Indian FTR1200S
2018 Triumph Rocket 3
1981 Kawasaki KZ1100A1
1977 Yamaha RD400
1980 Honda Express II
2018 Triumph Rocket 3
1981 Kawasaki KZ1100A1
1977 Yamaha RD400
1980 Honda Express II
Please Log in or Create an account to join the conversation.
- 650ed
-
- Offline
- User
-
Registered
- Posts: 15334
- Thanks: 2830
Re: KZ1100A Top End Refresh
23 Sep 2017 05:08
No doubt about it - those carb holders need to be replaced. Ed
1977 KZ650-C1 Original Owner - Stock (with additional invisible FIAMM horn)
Please Log in or Create an account to join the conversation.
- SWest
-

- Offline
- Sustaining Member
-
Registered
- 10 22 2014
- Posts: 23687
- Thanks: 3000
Re: KZ1100A Top End Refresh
23 Sep 2017 06:44 - 23 Sep 2017 06:45
Is that where the bolt was loose over #1 cylinder? Looks like exhaust leaking into the cam area from the exhaust port. Yeah those boots are NASTY.:blink:
Steve
Steve
Z1b1000 1975 Z1b
kzrider.com/forum/11-projects/598262-kz-...-will-it-live#672882
kzrider.com/forum/2-engine/597654-poser?start=240#704229
kzrider.com/forum/11-projects/598262-kz-...-will-it-live#672882
kzrider.com/forum/2-engine/597654-poser?start=240#704229
Last edit: 23 Sep 2017 06:45 by SWest.
Please Log in or Create an account to join the conversation.
- CCrosswait
-
Topic Author
- Offline
- Sustaining Member
-
Registered
- Posts: 89
- Thanks: 22
Re: KZ1100A Top End Refresh
23 Sep 2017 08:57
Bolts were loose around the center hump of the cam cover.
The #3 cylinder had 2 exhaust gaskets the rest had 1. Which is correct?
I plan on lapping the valves while I have the head off and swapping out the oil seals.
The #3 cylinder had 2 exhaust gaskets the rest had 1. Which is correct?
I plan on lapping the valves while I have the head off and swapping out the oil seals.
2019 Indian FTR1200S
2018 Triumph Rocket 3
1981 Kawasaki KZ1100A1
1977 Yamaha RD400
1980 Honda Express II
2018 Triumph Rocket 3
1981 Kawasaki KZ1100A1
1977 Yamaha RD400
1980 Honda Express II
Please Log in or Create an account to join the conversation.
- CCrosswait
-
Topic Author
- Offline
- Sustaining Member
-
Registered
- Posts: 89
- Thanks: 22
Re: KZ1100A Top End Refresh
23 Sep 2017 16:20
So I think I've pinpointed one of the leak points. After pulling the head I saw oil buildup along the top fin of the cylinder block at the front of the engine. The o-rings at the corners are flat and hard as rocks and do not appear to be sealing anymore.
I about fell out of my chair when I saw the cost of the replacement O-rings, at $7.50 ea. :ohmy: Four new ones are on the way.
The block came out rather easily. Tomorrow I'll lap the valves and clean the head.
I about fell out of my chair when I saw the cost of the replacement O-rings, at $7.50 ea. :ohmy: Four new ones are on the way.
The block came out rather easily. Tomorrow I'll lap the valves and clean the head.
2019 Indian FTR1200S
2018 Triumph Rocket 3
1981 Kawasaki KZ1100A1
1977 Yamaha RD400
1980 Honda Express II
2018 Triumph Rocket 3
1981 Kawasaki KZ1100A1
1977 Yamaha RD400
1980 Honda Express II
Please Log in or Create an account to join the conversation.
- SWest
-
- Offline
- Sustaining Member
-
Registered
- 10 22 2014
- Posts: 23687
- Thanks: 3000
Re: KZ1100A Top End Refresh
23 Sep 2017 17:47
Check for excessive rock in the guides.
Steve
Steve
Z1b1000 1975 Z1b
kzrider.com/forum/11-projects/598262-kz-...-will-it-live#672882
kzrider.com/forum/2-engine/597654-poser?start=240#704229
kzrider.com/forum/11-projects/598262-kz-...-will-it-live#672882
kzrider.com/forum/2-engine/597654-poser?start=240#704229
Please Log in or Create an account to join the conversation.
- CCrosswait
-
Topic Author
- Offline
- Sustaining Member
-
Registered
- Posts: 89
- Thanks: 22
Re: KZ1100A Top End Refresh
24 Sep 2017 15:34
Lapping the valves was univentful. I wish I would have stared on the intake valves. They are larger, had a cleaner surface, and sealed much better to the plunger than the exhaust. Starting with the easier valves would've allowed me to get my rythm. But that's knowledge of hindsight.
Instead I started with the exhaust valves. My tip hear is make sure the valve face is perfectly clean and wipe off any lubricant or solvent. I had a few instances of the plunger sealing to the valve but sliding on the surface instead of spinning the valve. I also had more than a few instances of the plunger not sealing at all.
The lapping appeared to work well. The valves all have a nice clean sealing surface.
I also swapped out the old oil seals. They were rather hard and needed to go.
The back of the valves had some buildup but most of it came off with a brass wire brush.
I could not detect and slop in the valve seat. I pushed the valves slightly open and attempted to wiggle it. They all seamed to stay right in place.
Anyone have a good was of removing gunk from the head and block? I've been using a pick and in all the nooks and crannies and between the fins. Once I have scrapped at all the grime in an area I used Purple Power to lift the grease. I have to wipe all the nooks and crannies after rinsing the Purple Power to remove everything from the surface.
This process is generally effective but it takes forever! I usually have to do the entire process twice.
2019 Indian FTR1200S
2018 Triumph Rocket 3
1981 Kawasaki KZ1100A1
1977 Yamaha RD400
1980 Honda Express II
2018 Triumph Rocket 3
1981 Kawasaki KZ1100A1
1977 Yamaha RD400
1980 Honda Express II
Please Log in or Create an account to join the conversation.
- daveo
-
- Offline
- Premium Member
-

Registered
- Posts: 3119
- Thanks: 877
Re: KZ1100A Top End Refresh
24 Sep 2017 17:36
Think about replacing the carb manifold bolts with stainless steel, and carefully chase the threads with a tap to remove corrosion.
Also, it may be an ideal time for you to replace a few o-rings while the carbs are off. Along with the new one for the tensioner unit, there are a couple beneath the oil pressure sending unit, and others.
A great website for schematics and part numbers:
www.cmsnl.com/kawasaki-kz1100a2-shaft-19...t/62094.html#results
www.cmsnl.com/kawasaki-kz1100a2-shaft-19...t/62097.html#results .
")
Also, it may be an ideal time for you to replace a few o-rings while the carbs are off. Along with the new one for the tensioner unit, there are a couple beneath the oil pressure sending unit, and others.
A great website for schematics and part numbers:
www.cmsnl.com/kawasaki-kz1100a2-shaft-19...t/62094.html#results
www.cmsnl.com/kawasaki-kz1100a2-shaft-19...t/62097.html#results .
1982 KZ1100-A2 Sleeper 😎
Please Log in or Create an account to join the conversation.
Moderators: Street Fighter LTD