
Retroactive KZ750E Project Thread
- Nessism
-
 Topic Author
- Offline
- Sustaining Member
- Posts: 7626
- Thanks: 2988
Re: Retroactive KZ750E Project Thread
13 Jan 2017 10:11 - 04 Aug 2017 07:40
And speaking of plated parts...
Used a "copy cad" zinc plating kit from Caswell's Plating. I've got a power supply now instead of using a battery for power but you get the idea...
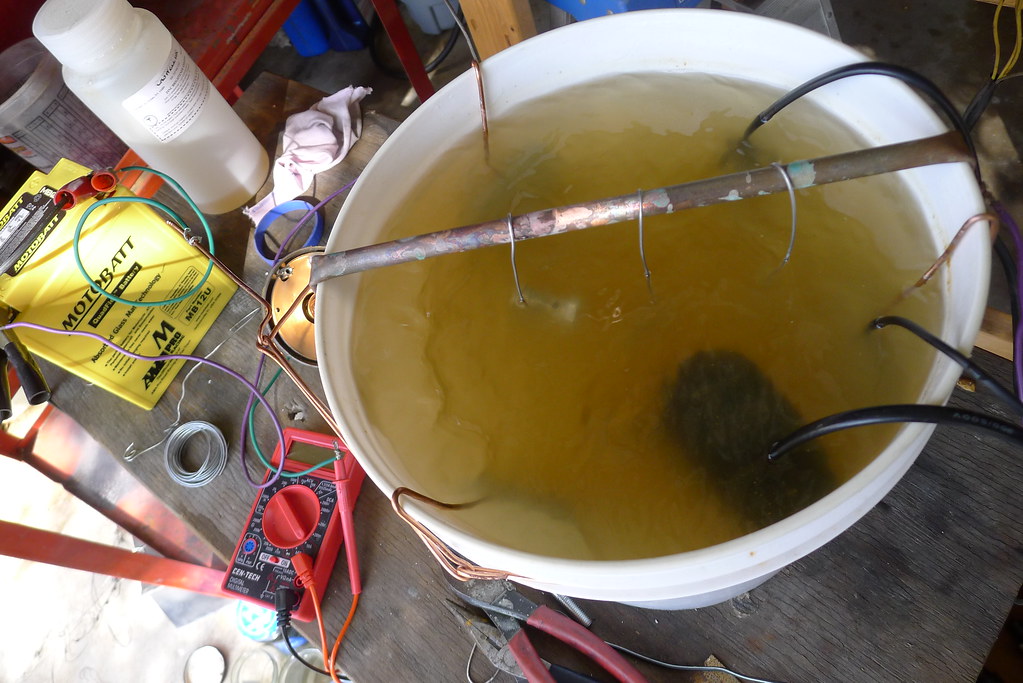

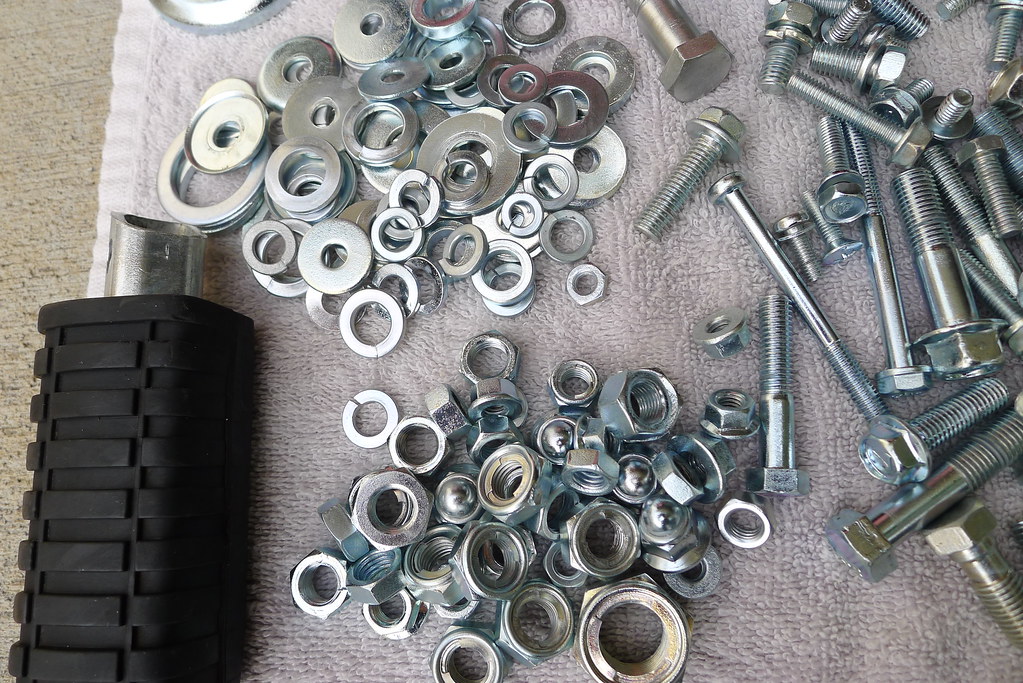
Used a "copy cad" zinc plating kit from Caswell's Plating. I've got a power supply now instead of using a battery for power but you get the idea...
Ed
Carb O-ring Kits : www.kzrider.com/forum/3-carburetor/61807...-o-ring-kits?start=0
www.kzrider.com/forum/faq-wiki/618026-new-owner-things-to-know
1981 KZ750E2
www.kzrider.com/forum/11-projects/604901...z750e-project-thread
Carb O-ring Kits : www.kzrider.com/forum/3-carburetor/61807...-o-ring-kits?start=0
www.kzrider.com/forum/faq-wiki/618026-new-owner-things-to-know
1981 KZ750E2
www.kzrider.com/forum/11-projects/604901...z750e-project-thread
Last edit: 04 Aug 2017 07:40 by Nessism.
The following user(s) said Thank You: jayrodoh, Greybeard
Please Log in or Create an account to join the conversation.
- Nessism
-
Topic Author
- Offline
- Sustaining Member
- Posts: 7626
- Thanks: 2988
Re: Retroactive KZ750E Project Thread
13 Jan 2017 10:15 - 04 Aug 2017 07:43
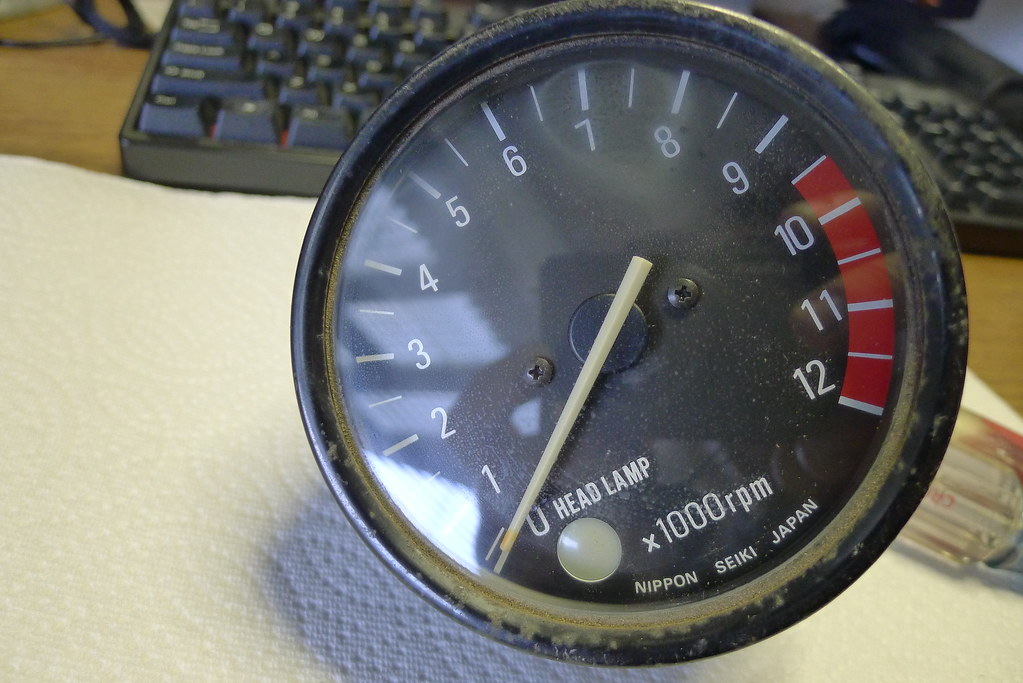
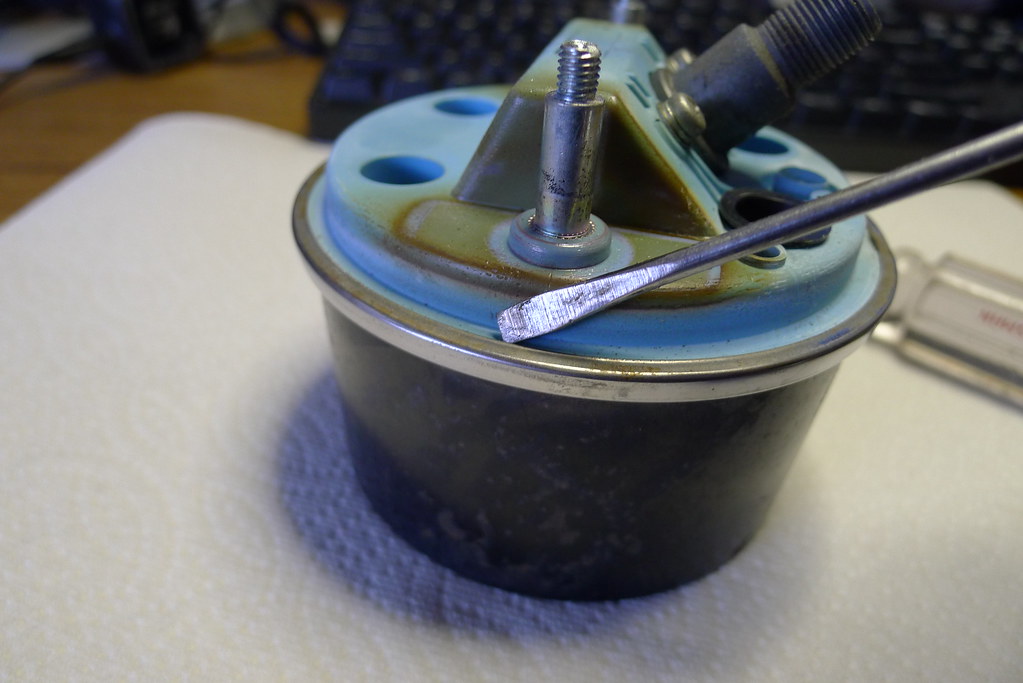
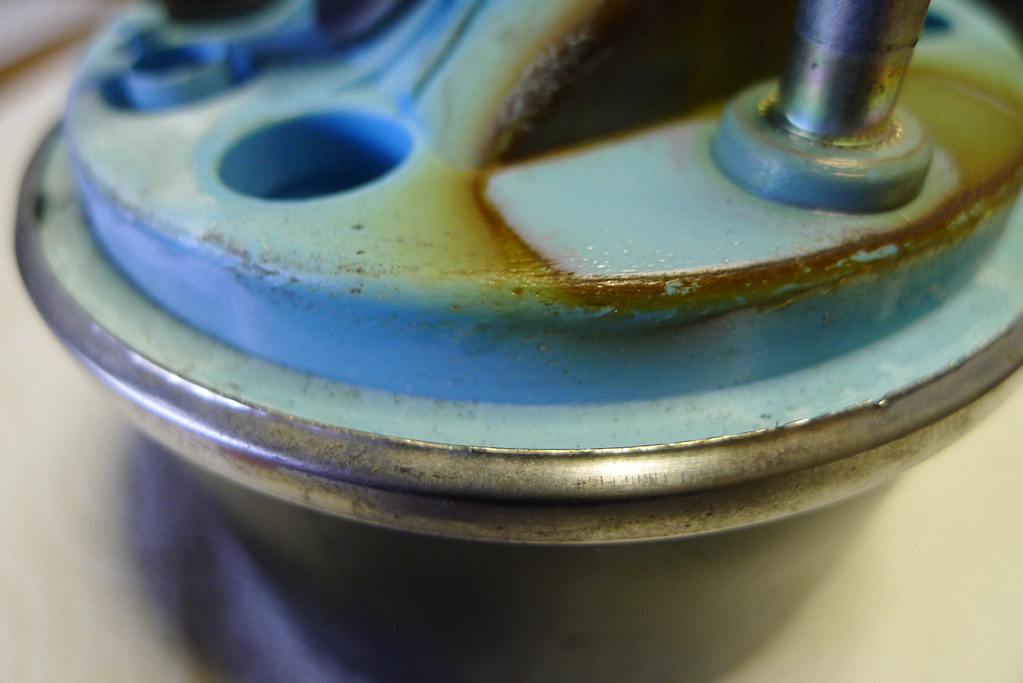
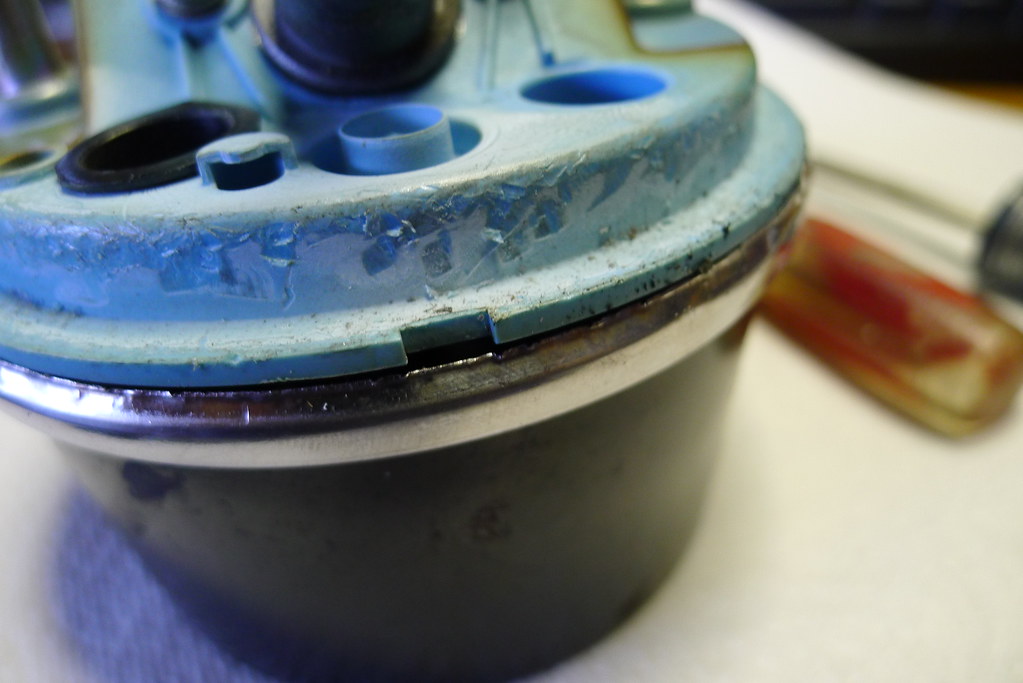
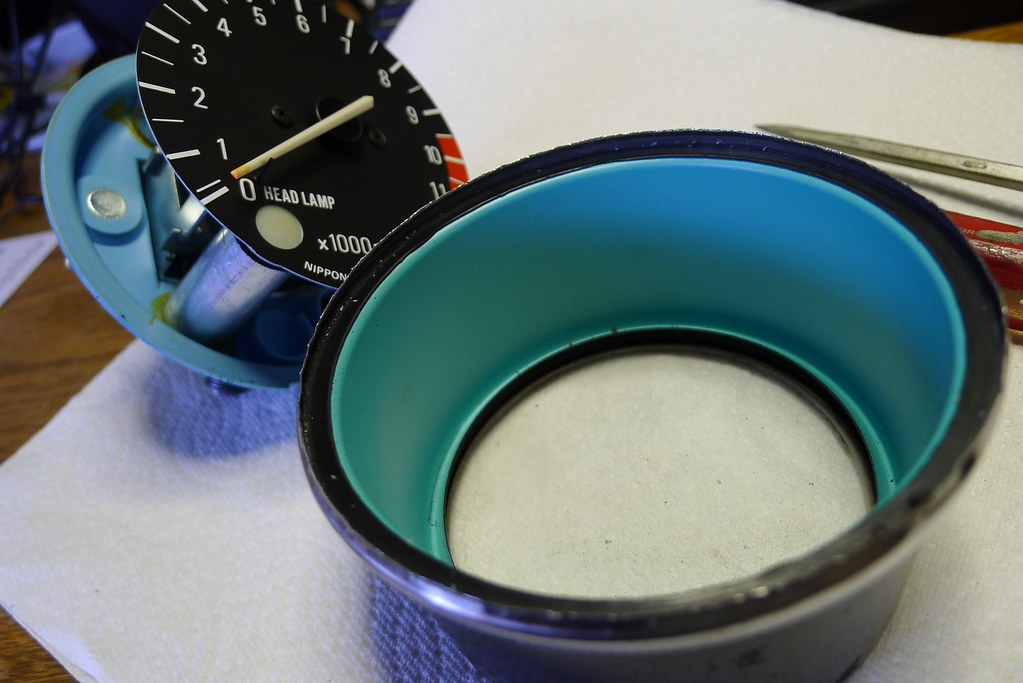
Working on the gauges. Condensation behind the glass and corrosion on the outside bezel. Gently pried off the sealing ring and took the units apart. Going to bead blast the housing and repaint next.

Ed
Carb O-ring Kits : www.kzrider.com/forum/3-carburetor/61807...-o-ring-kits?start=0
www.kzrider.com/forum/faq-wiki/618026-new-owner-things-to-know
1981 KZ750E2
www.kzrider.com/forum/11-projects/604901...z750e-project-thread
Carb O-ring Kits : www.kzrider.com/forum/3-carburetor/61807...-o-ring-kits?start=0
www.kzrider.com/forum/faq-wiki/618026-new-owner-things-to-know
1981 KZ750E2
www.kzrider.com/forum/11-projects/604901...z750e-project-thread
Last edit: 04 Aug 2017 07:43 by Nessism.
Please Log in or Create an account to join the conversation.
- Nessism
-
Topic Author
- Offline
- Sustaining Member
- Posts: 7626
- Thanks: 2988
Re: Retroactive KZ750E Project Thread
13 Jan 2017 10:17 - 04 Aug 2017 07:44
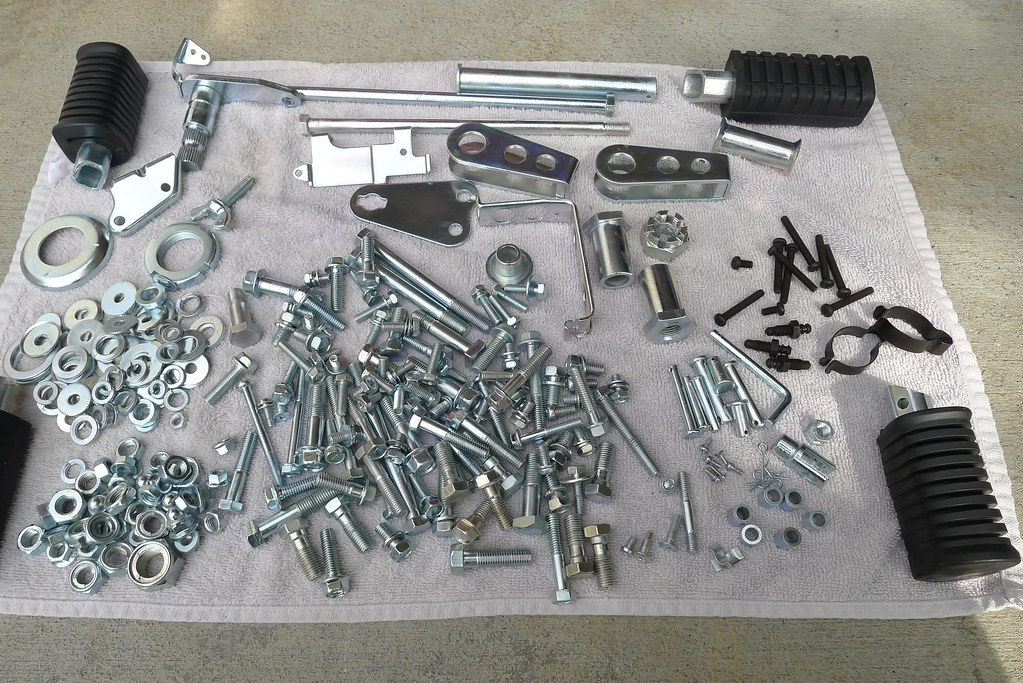
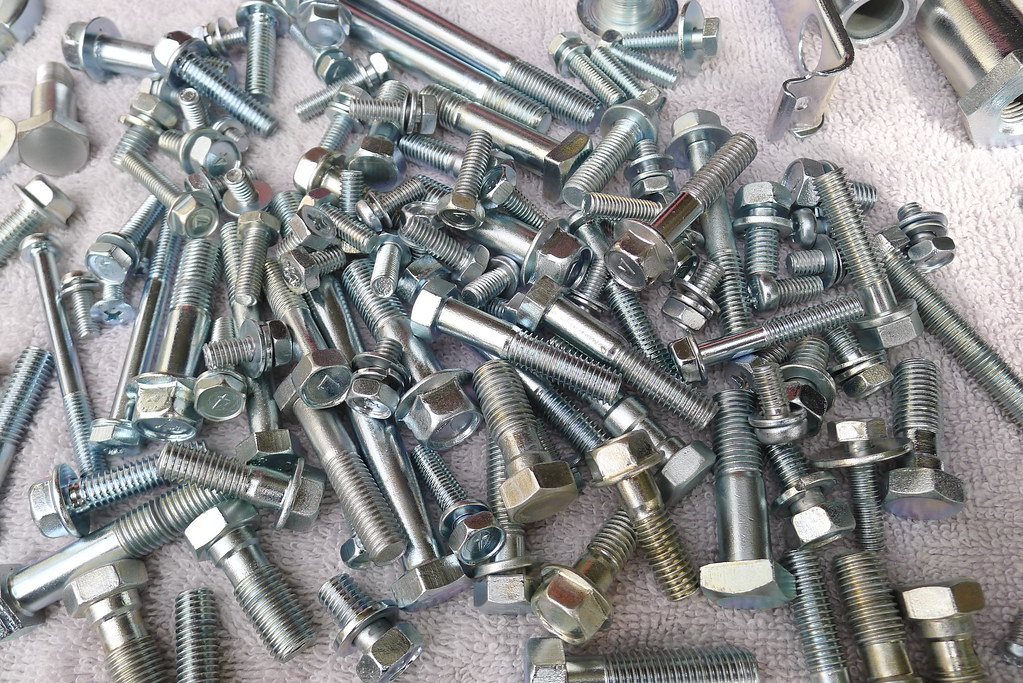
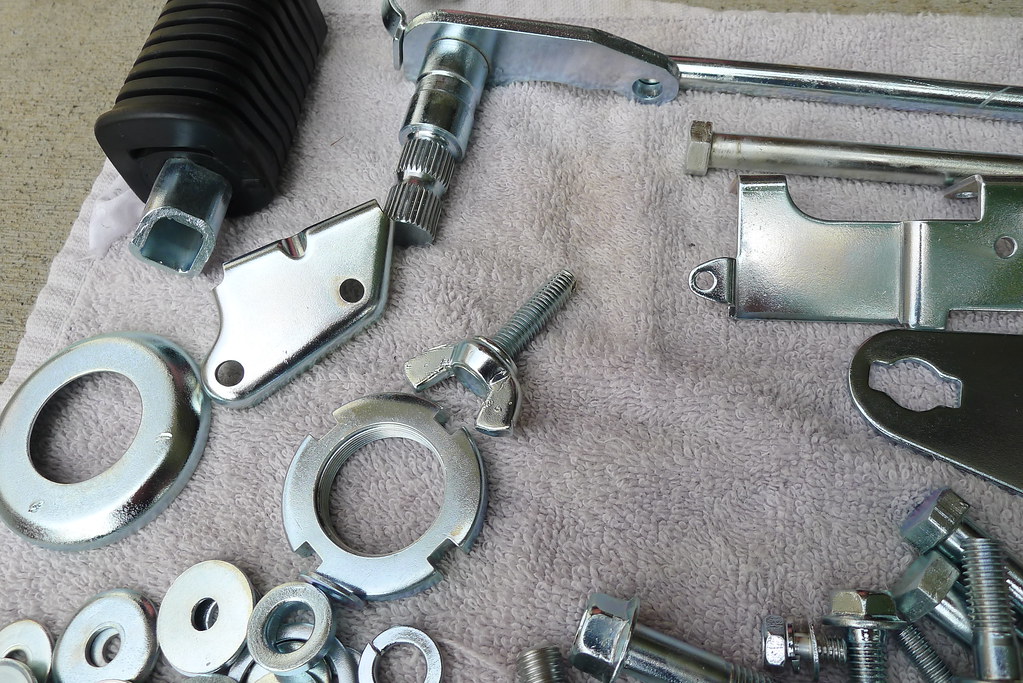
Also cleaned up and clear coated the fork sliders and footpeg brackets. Bead blasted off the corrosion and rubbed them down with gray scotchbrite before shooting the clear.


Ed
Carb O-ring Kits : www.kzrider.com/forum/3-carburetor/61807...-o-ring-kits?start=0
www.kzrider.com/forum/faq-wiki/618026-new-owner-things-to-know
1981 KZ750E2
www.kzrider.com/forum/11-projects/604901...z750e-project-thread
Carb O-ring Kits : www.kzrider.com/forum/3-carburetor/61807...-o-ring-kits?start=0
www.kzrider.com/forum/faq-wiki/618026-new-owner-things-to-know
1981 KZ750E2
www.kzrider.com/forum/11-projects/604901...z750e-project-thread
Last edit: 04 Aug 2017 07:44 by Nessism.
Please Log in or Create an account to join the conversation.
- Nessism
-
Topic Author
- Offline
- Sustaining Member
- Posts: 7626
- Thanks: 2988
Re: Retroactive KZ750E Project Thread
13 Jan 2017 10:21 - 04 Aug 2017 07:46
Forks got new seals, Sonic springs, Racetech emulators, and of course new oil.
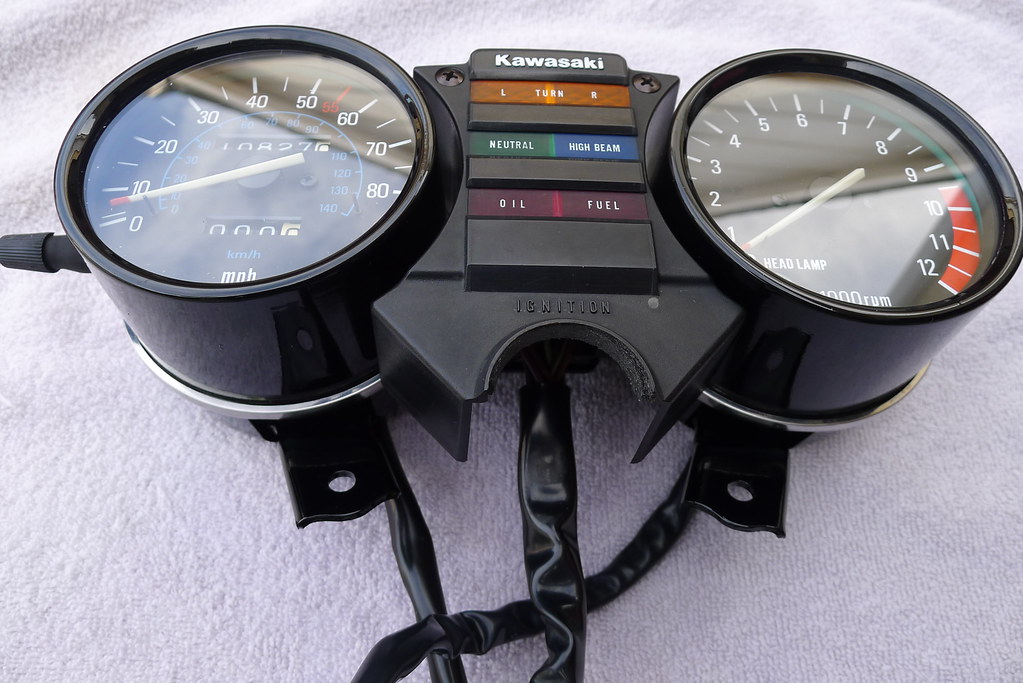
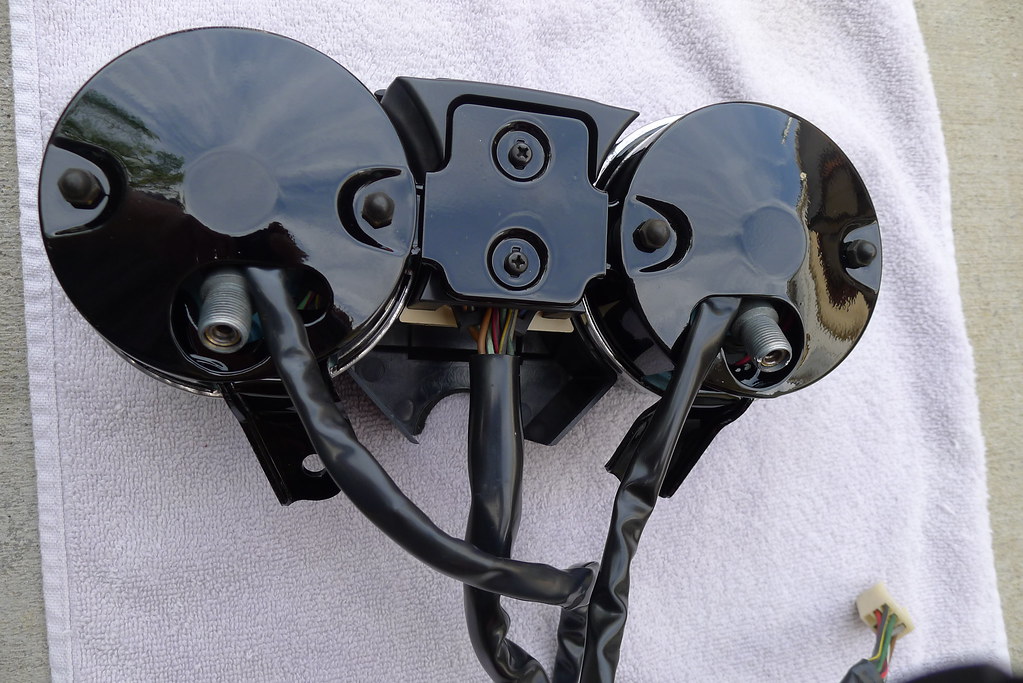
"Clocks" (for you UK guys) turned out nice.


"Clocks" (for you UK guys) turned out nice.
Ed
Carb O-ring Kits : www.kzrider.com/forum/3-carburetor/61807...-o-ring-kits?start=0
www.kzrider.com/forum/faq-wiki/618026-new-owner-things-to-know
1981 KZ750E2
www.kzrider.com/forum/11-projects/604901...z750e-project-thread
Carb O-ring Kits : www.kzrider.com/forum/3-carburetor/61807...-o-ring-kits?start=0
www.kzrider.com/forum/faq-wiki/618026-new-owner-things-to-know
1981 KZ750E2
www.kzrider.com/forum/11-projects/604901...z750e-project-thread
Last edit: 04 Aug 2017 07:46 by Nessism.
Please Log in or Create an account to join the conversation.
- Nessism
-
Topic Author
- Offline
- Sustaining Member
- Posts: 7626
- Thanks: 2988
Re: Retroactive KZ750E Project Thread
13 Jan 2017 10:23 - 04 Aug 2017 07:47
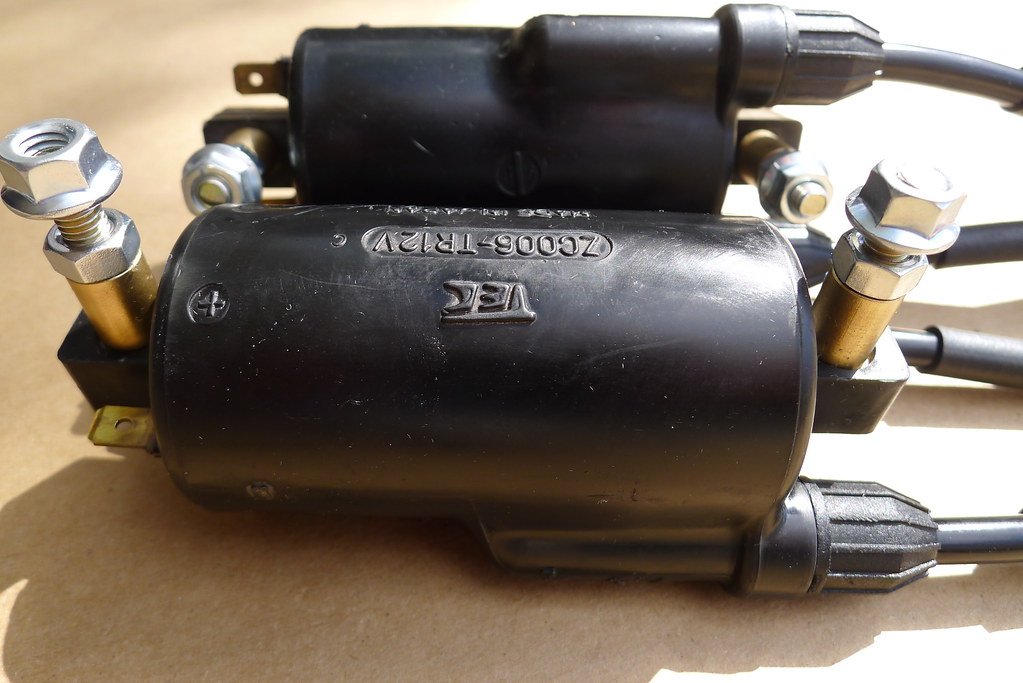
Put new wires in the coils. Was able to pull the exterior protective shield tubing off the old wires and install them on the new wires. Installed new plug caps too. Went with NGK's from Z1. Not OEM but that's okay for this project.

Ed
Carb O-ring Kits : www.kzrider.com/forum/3-carburetor/61807...-o-ring-kits?start=0
www.kzrider.com/forum/faq-wiki/618026-new-owner-things-to-know
1981 KZ750E2
www.kzrider.com/forum/11-projects/604901...z750e-project-thread
Carb O-ring Kits : www.kzrider.com/forum/3-carburetor/61807...-o-ring-kits?start=0
www.kzrider.com/forum/faq-wiki/618026-new-owner-things-to-know
1981 KZ750E2
www.kzrider.com/forum/11-projects/604901...z750e-project-thread
Last edit: 04 Aug 2017 07:47 by Nessism.
The following user(s) said Thank You: Mir
Please Log in or Create an account to join the conversation.
- Nessism
-
Topic Author
- Offline
- Sustaining Member
- Posts: 7626
- Thanks: 2988
Re: Retroactive KZ750E Project Thread
13 Jan 2017 10:26 - 04 Aug 2017 07:53
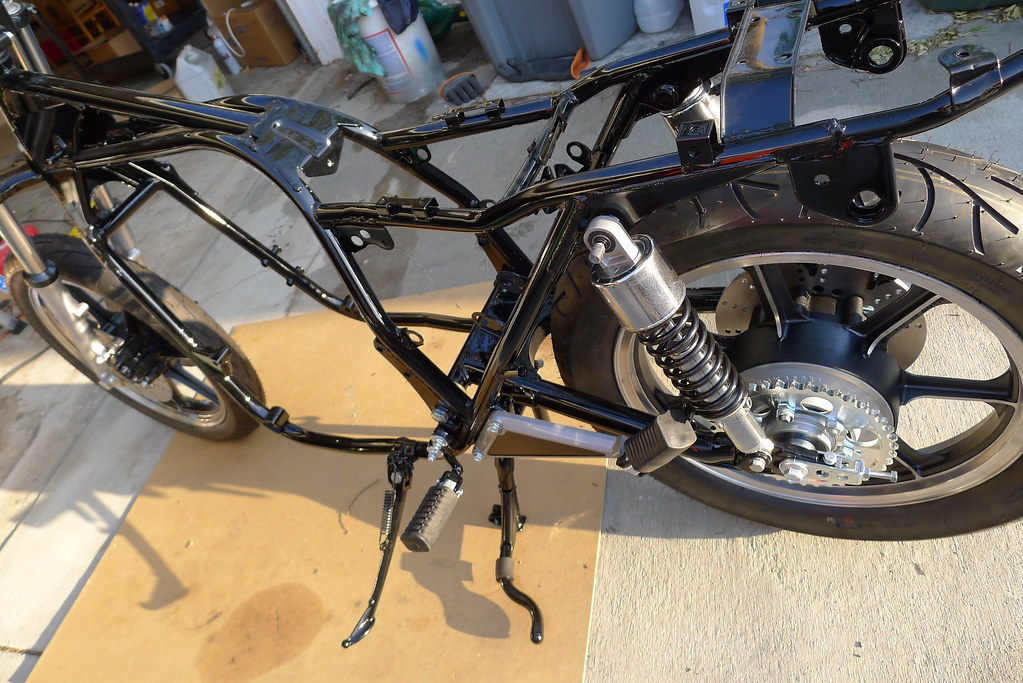
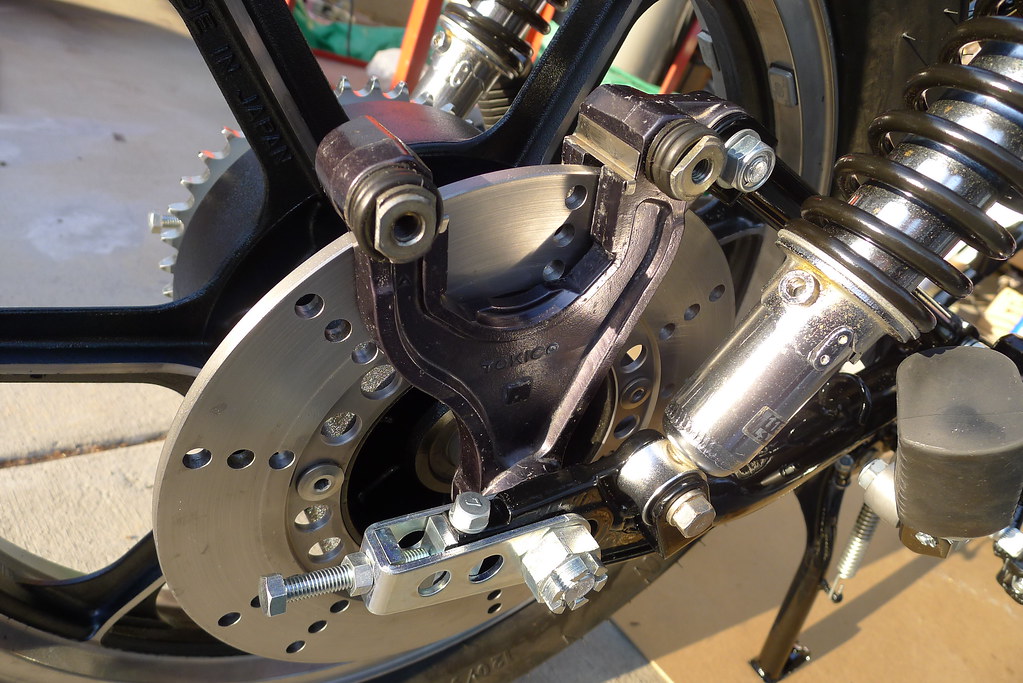
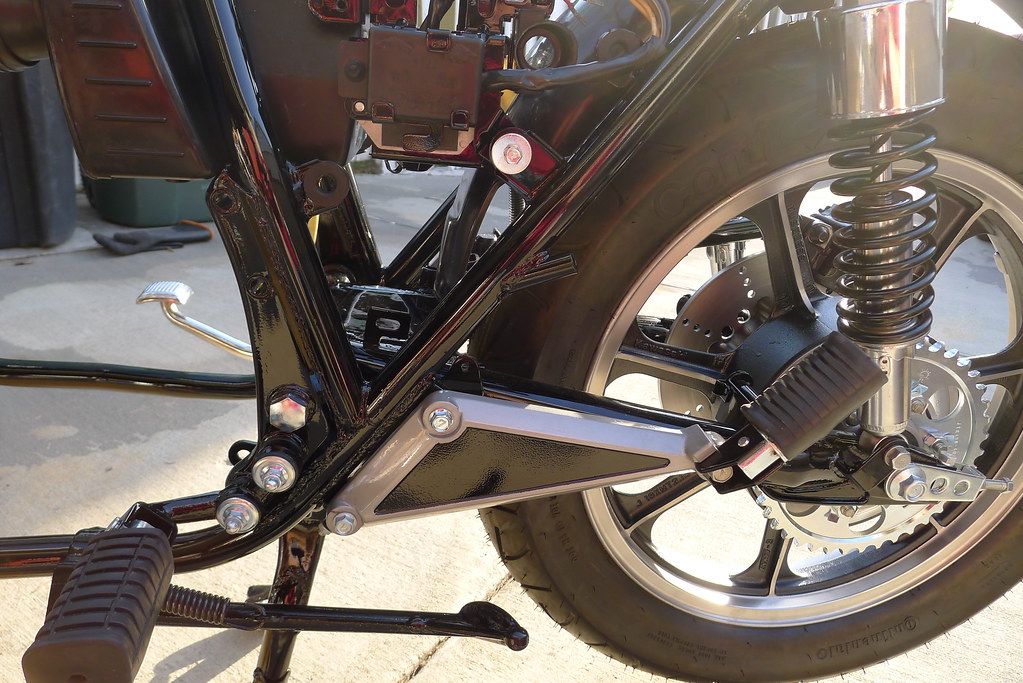
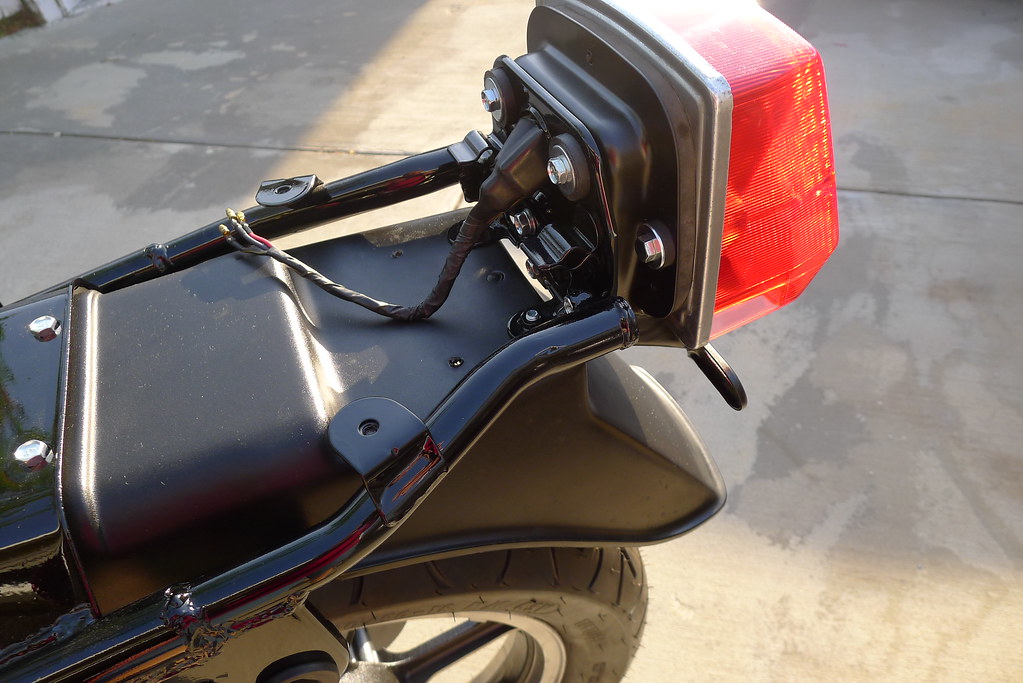
Rolling chassis...
[img]https://farm5.staticflickr.com/4292/35441854834_563af4f84b_b.jpg[/img [img]https://farm5.staticflickr.com/4300/35469902153_ff7d27861a_b.jpg[/img]
[img]https://farm5.staticflickr.com/4292/35441854834_563af4f84b_b.jpg[/img [img]https://farm5.staticflickr.com/4300/35469902153_ff7d27861a_b.jpg[/img]
Ed
Carb O-ring Kits : www.kzrider.com/forum/3-carburetor/61807...-o-ring-kits?start=0
www.kzrider.com/forum/faq-wiki/618026-new-owner-things-to-know
1981 KZ750E2
www.kzrider.com/forum/11-projects/604901...z750e-project-thread
Carb O-ring Kits : www.kzrider.com/forum/3-carburetor/61807...-o-ring-kits?start=0
www.kzrider.com/forum/faq-wiki/618026-new-owner-things-to-know
1981 KZ750E2
www.kzrider.com/forum/11-projects/604901...z750e-project-thread
Last edit: 04 Aug 2017 07:53 by Nessism.
The following user(s) said Thank You: Mir
Please Log in or Create an account to join the conversation.
- Nessism
-
Topic Author
- Offline
- Sustaining Member
- Posts: 7626
- Thanks: 2988
Re: Retroactive KZ750E Project Thread
13 Jan 2017 10:27 - 04 Aug 2017 07:55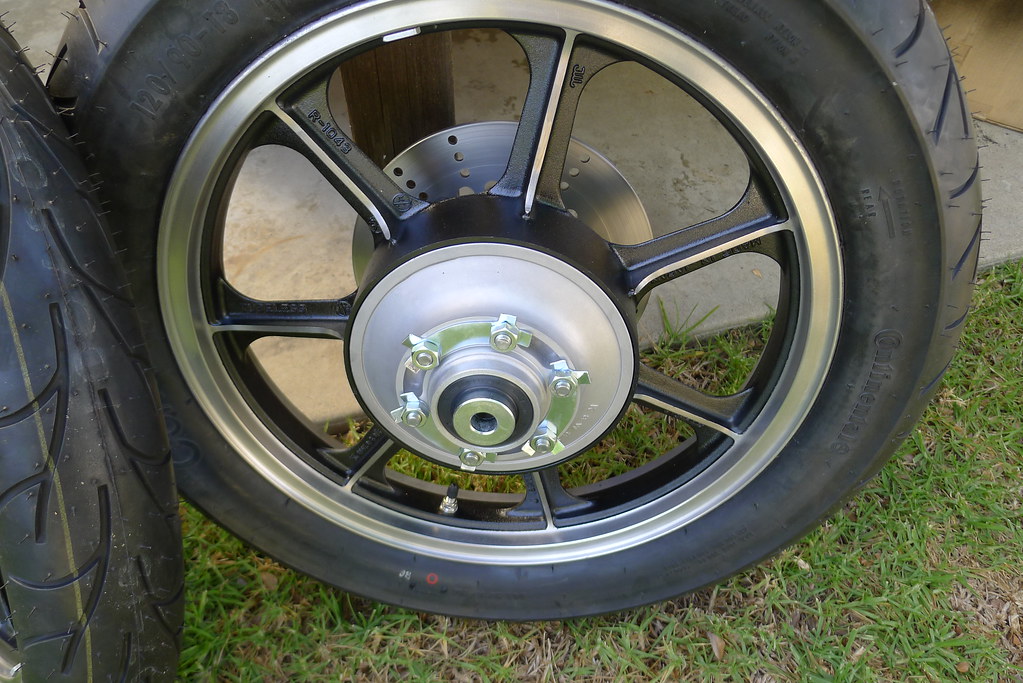

Ed
Carb O-ring Kits : www.kzrider.com/forum/3-carburetor/61807...-o-ring-kits?start=0
www.kzrider.com/forum/faq-wiki/618026-new-owner-things-to-know
1981 KZ750E2
www.kzrider.com/forum/11-projects/604901...z750e-project-thread
Carb O-ring Kits : www.kzrider.com/forum/3-carburetor/61807...-o-ring-kits?start=0
www.kzrider.com/forum/faq-wiki/618026-new-owner-things-to-know
1981 KZ750E2
www.kzrider.com/forum/11-projects/604901...z750e-project-thread
Last edit: 04 Aug 2017 07:55 by Nessism.
Please Log in or Create an account to join the conversation.
- Nessism
-
Topic Author
- Offline
- Sustaining Member
- Posts: 7626
- Thanks: 2988
Re: Retroactive KZ750E Project Thread
13 Jan 2017 10:29 - 04 Aug 2017 07:57
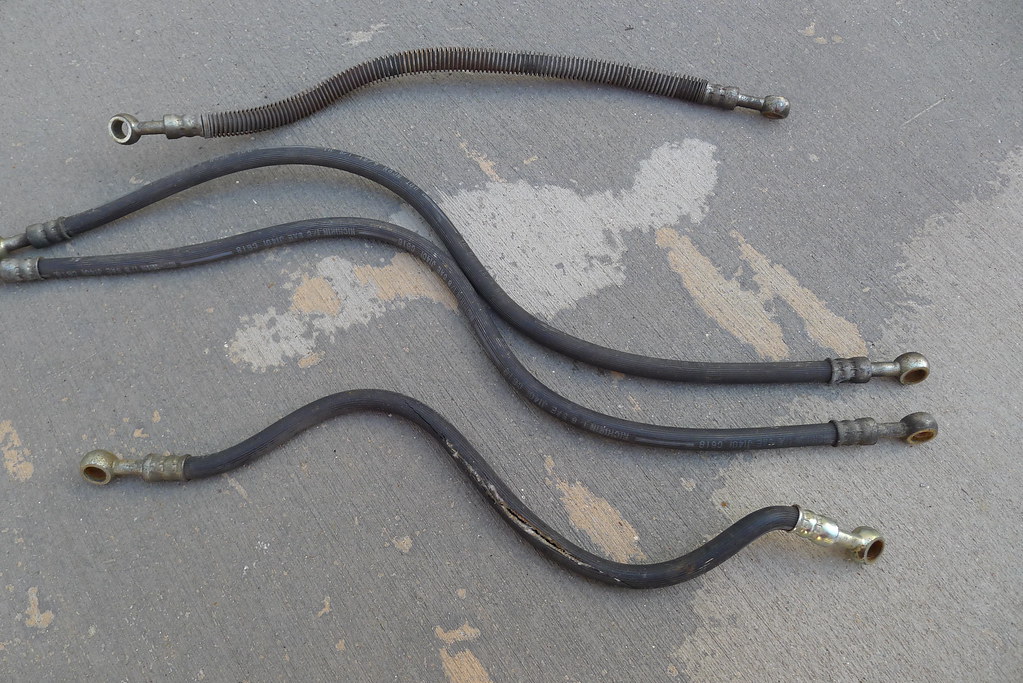
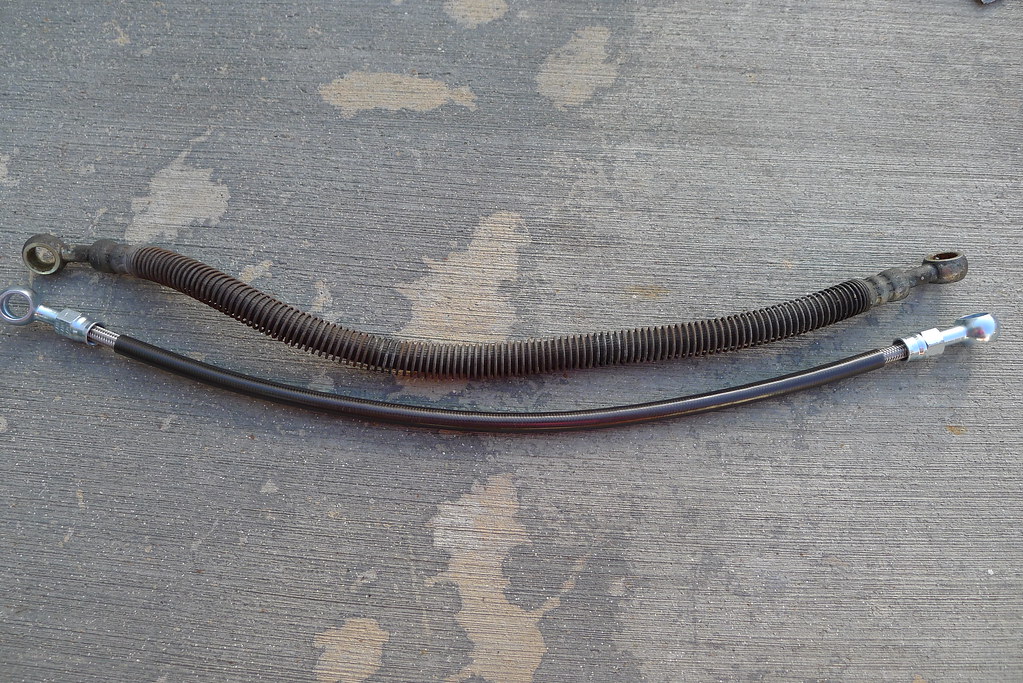
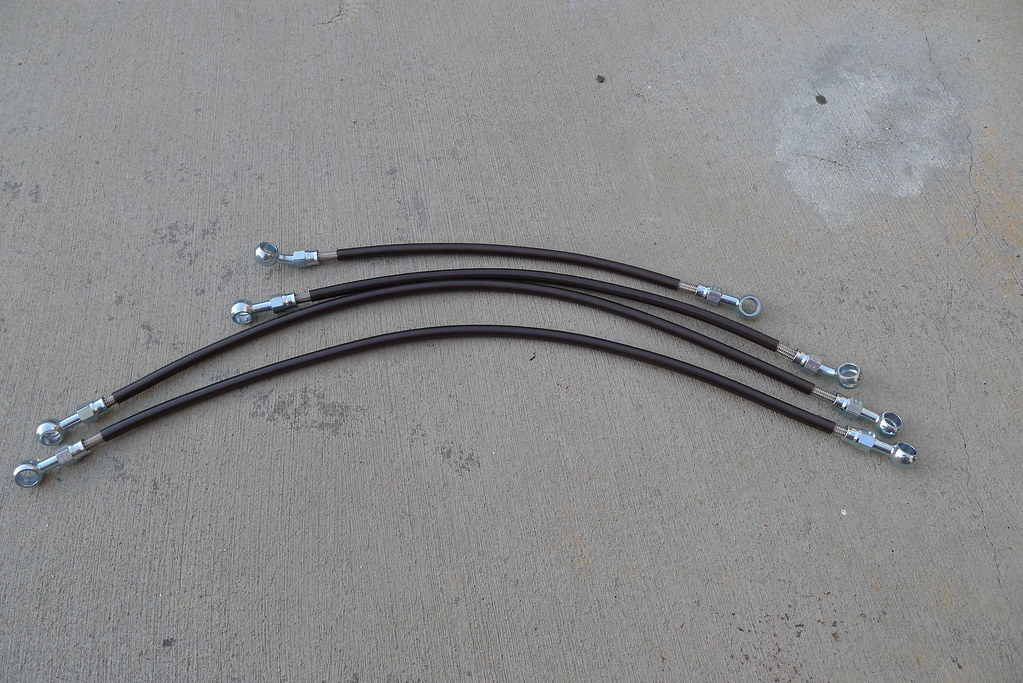
Put the brake lines together today. Earl's Speed-Seal. Took some photos in anticipation of making a tutorial. We all know how much everyone likes photos around here...
Old lines...

New Earl's parts...


Tools...

Old lines...
New Earl's parts...
Tools...
Ed
Carb O-ring Kits : www.kzrider.com/forum/3-carburetor/61807...-o-ring-kits?start=0
www.kzrider.com/forum/faq-wiki/618026-new-owner-things-to-know
1981 KZ750E2
www.kzrider.com/forum/11-projects/604901...z750e-project-thread
Carb O-ring Kits : www.kzrider.com/forum/3-carburetor/61807...-o-ring-kits?start=0
www.kzrider.com/forum/faq-wiki/618026-new-owner-things-to-know
1981 KZ750E2
www.kzrider.com/forum/11-projects/604901...z750e-project-thread
Last edit: 04 Aug 2017 07:57 by Nessism.
Please Log in or Create an account to join the conversation.
- Nessism
-
Topic Author
- Offline
- Sustaining Member
- Posts: 7626
- Thanks: 2988
Re: Retroactive KZ750E Project Thread
13 Jan 2017 10:32 - 04 Aug 2017 08:47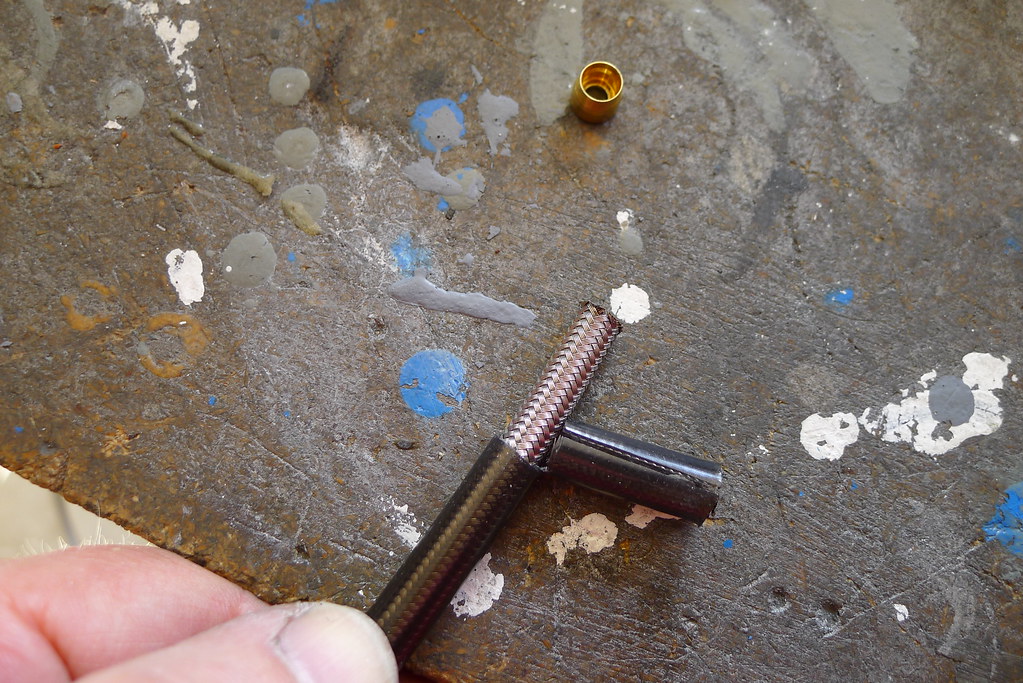


Ed
Carb O-ring Kits : www.kzrider.com/forum/3-carburetor/61807...-o-ring-kits?start=0
www.kzrider.com/forum/faq-wiki/618026-new-owner-things-to-know
1981 KZ750E2
www.kzrider.com/forum/11-projects/604901...z750e-project-thread
Carb O-ring Kits : www.kzrider.com/forum/3-carburetor/61807...-o-ring-kits?start=0
www.kzrider.com/forum/faq-wiki/618026-new-owner-things-to-know
1981 KZ750E2
www.kzrider.com/forum/11-projects/604901...z750e-project-thread
Last edit: 04 Aug 2017 08:47 by Nessism.
Please Log in or Create an account to join the conversation.
- Nessism
-
Topic Author
- Offline
- Sustaining Member
- Posts: 7626
- Thanks: 2988
Re: Retroactive KZ750E Project Thread
13 Jan 2017 10:34 - 04 Aug 2017 08:49
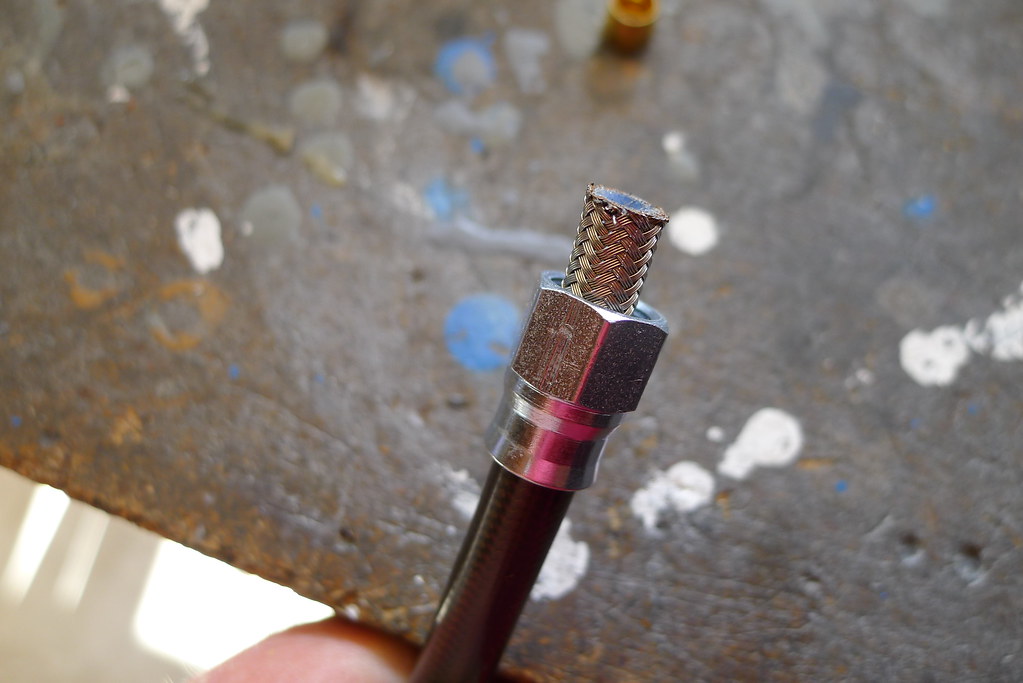
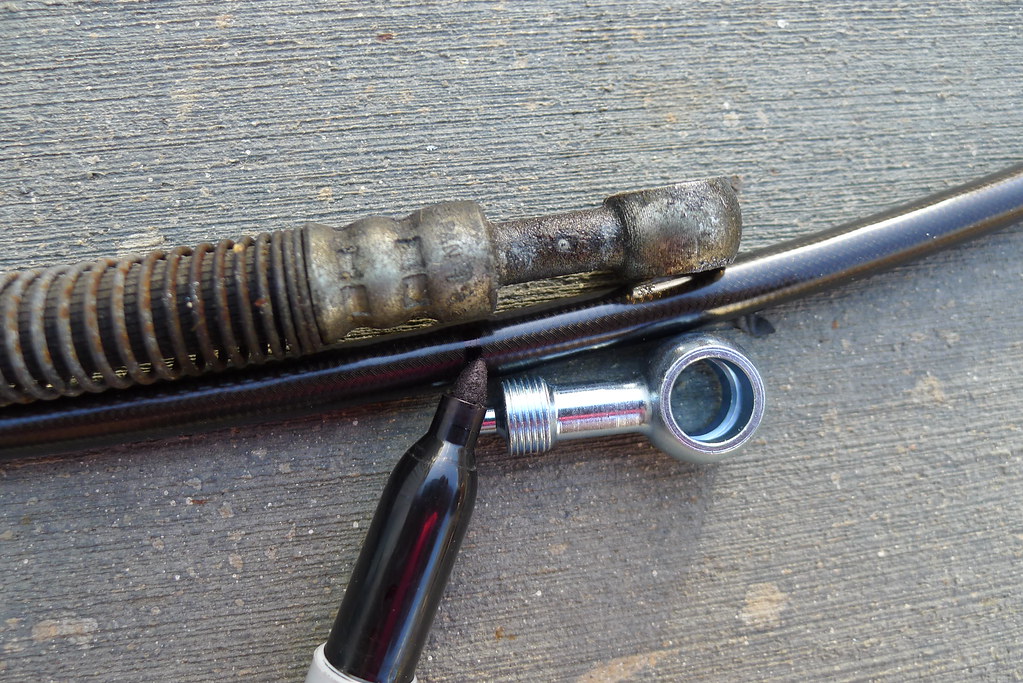
Look down inside the ferrule and make sure the inner teflon liner is fully seated down to the step inside the ferrule.


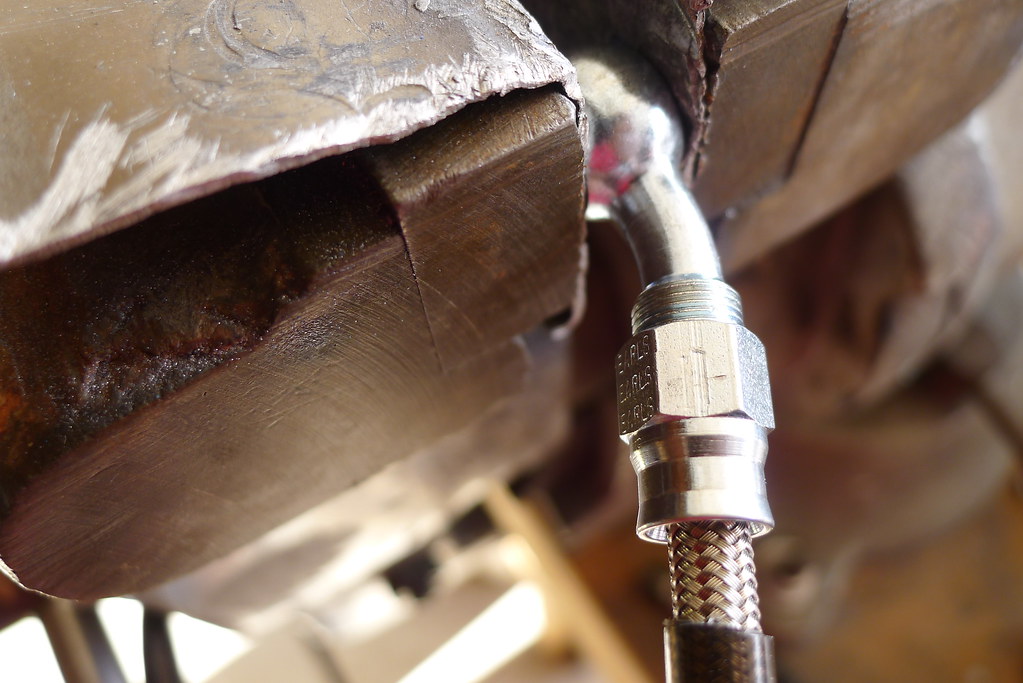
Shove the hose on firmly while tightening the nut. Tighten almost all the way, but stop just short so the hose end can be clocked with the other.
Shove the hose on firmly while tightening the nut. Tighten almost all the way, but stop just short so the hose end can be clocked with the other.
Ed
Carb O-ring Kits : www.kzrider.com/forum/3-carburetor/61807...-o-ring-kits?start=0
www.kzrider.com/forum/faq-wiki/618026-new-owner-things-to-know
1981 KZ750E2
www.kzrider.com/forum/11-projects/604901...z750e-project-thread
Carb O-ring Kits : www.kzrider.com/forum/3-carburetor/61807...-o-ring-kits?start=0
www.kzrider.com/forum/faq-wiki/618026-new-owner-things-to-know
1981 KZ750E2
www.kzrider.com/forum/11-projects/604901...z750e-project-thread
Last edit: 04 Aug 2017 08:49 by Nessism.
Please Log in or Create an account to join the conversation.
- Nessism
-
Topic Author
- Offline
- Sustaining Member
- Posts: 7626
- Thanks: 2988
Re: Retroactive KZ750E Project Thread
13 Jan 2017 10:35 - 04 Aug 2017 08:51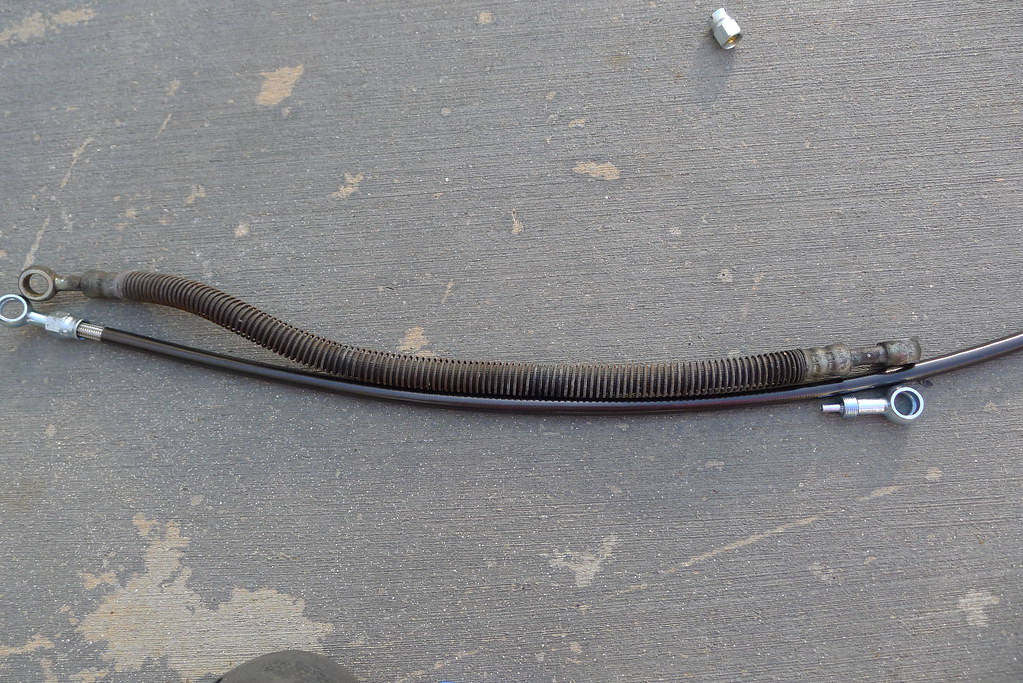
Ed
Carb O-ring Kits : www.kzrider.com/forum/3-carburetor/61807...-o-ring-kits?start=0
www.kzrider.com/forum/faq-wiki/618026-new-owner-things-to-know
1981 KZ750E2
www.kzrider.com/forum/11-projects/604901...z750e-project-thread
Carb O-ring Kits : www.kzrider.com/forum/3-carburetor/61807...-o-ring-kits?start=0
www.kzrider.com/forum/faq-wiki/618026-new-owner-things-to-know
1981 KZ750E2
www.kzrider.com/forum/11-projects/604901...z750e-project-thread
Last edit: 04 Aug 2017 08:51 by Nessism.
Please Log in or Create an account to join the conversation.
- Nessism
-
Topic Author
- Offline
- Sustaining Member
- Posts: 7626
- Thanks: 2988
Re: Retroactive KZ750E Project Thread
13 Jan 2017 10:36 - 04 Aug 2017 08:57
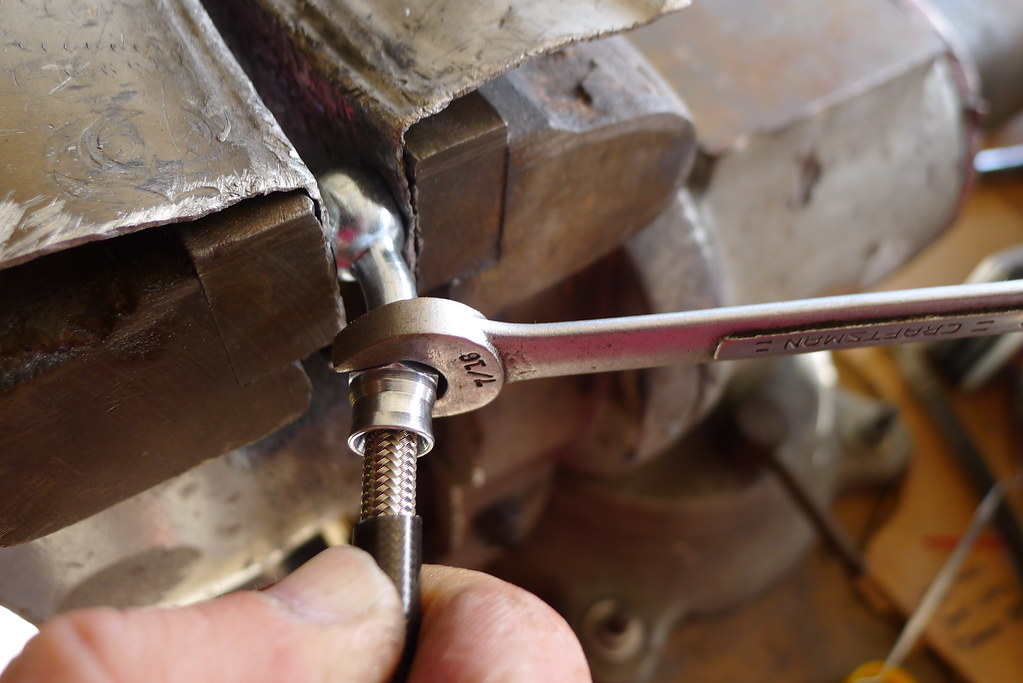
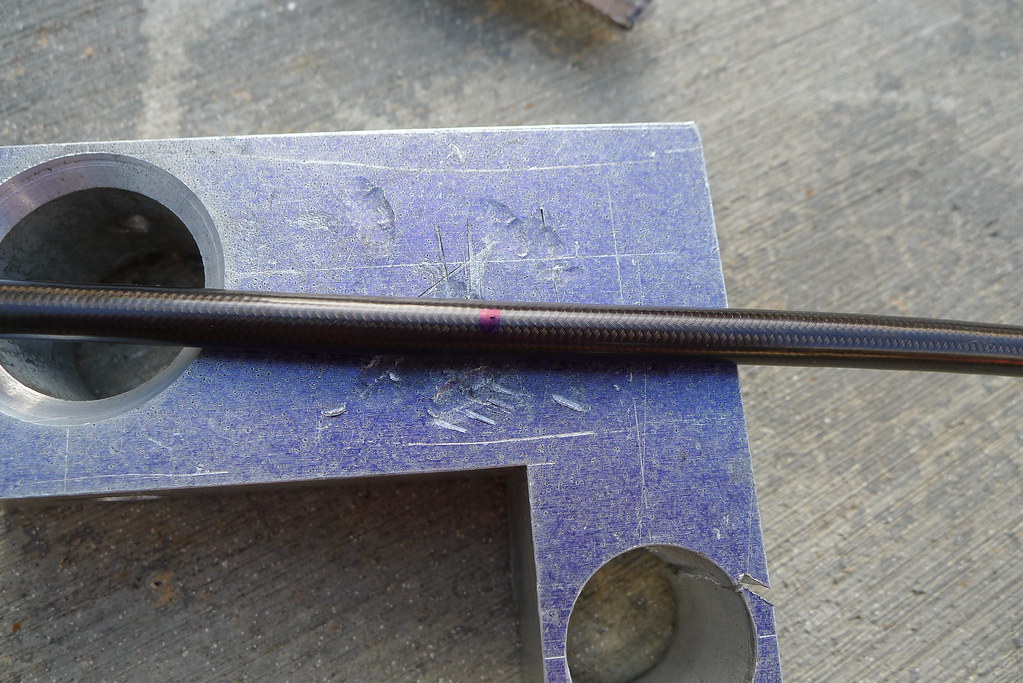
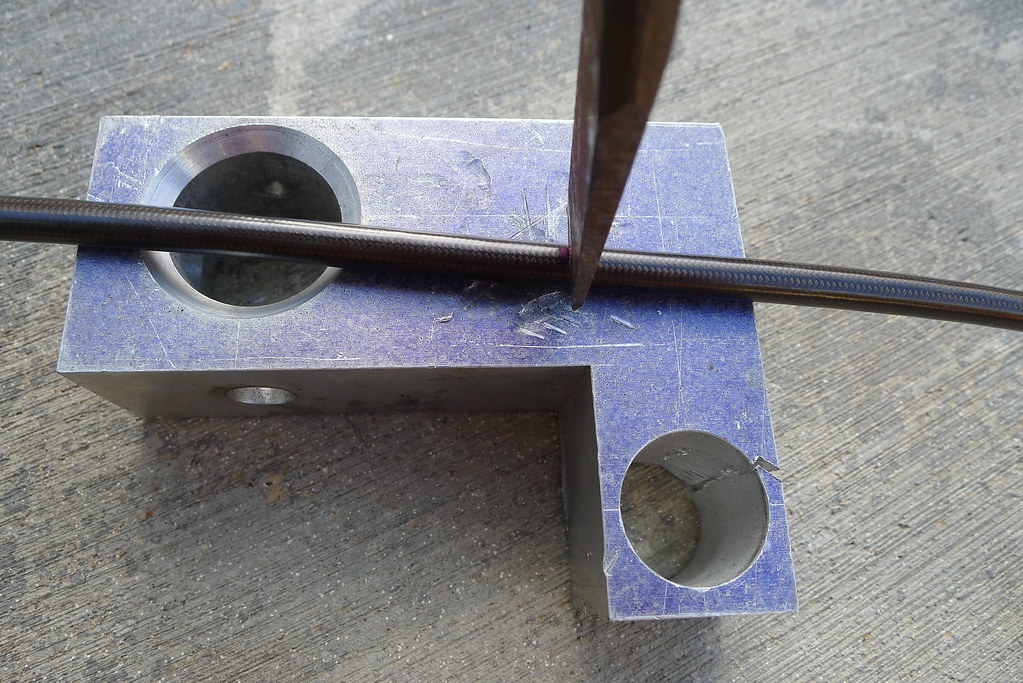
Whack the chisel with the mini sledge...

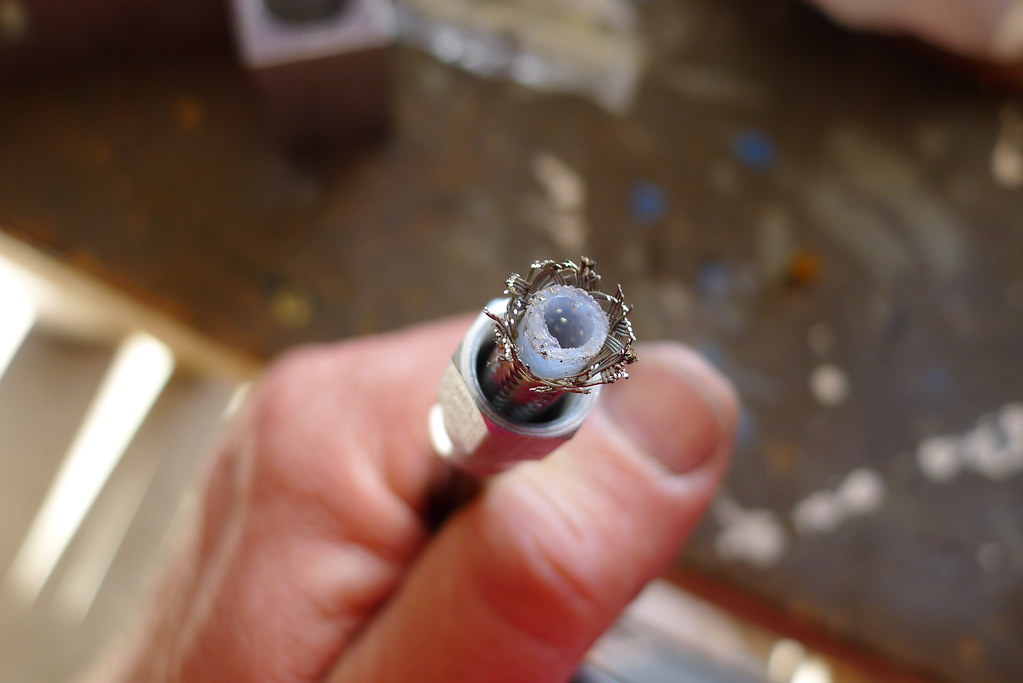
Check clocking of the hose ends by pressing one on the table and looking at the other. On this hose they are 90 degrees from each other.
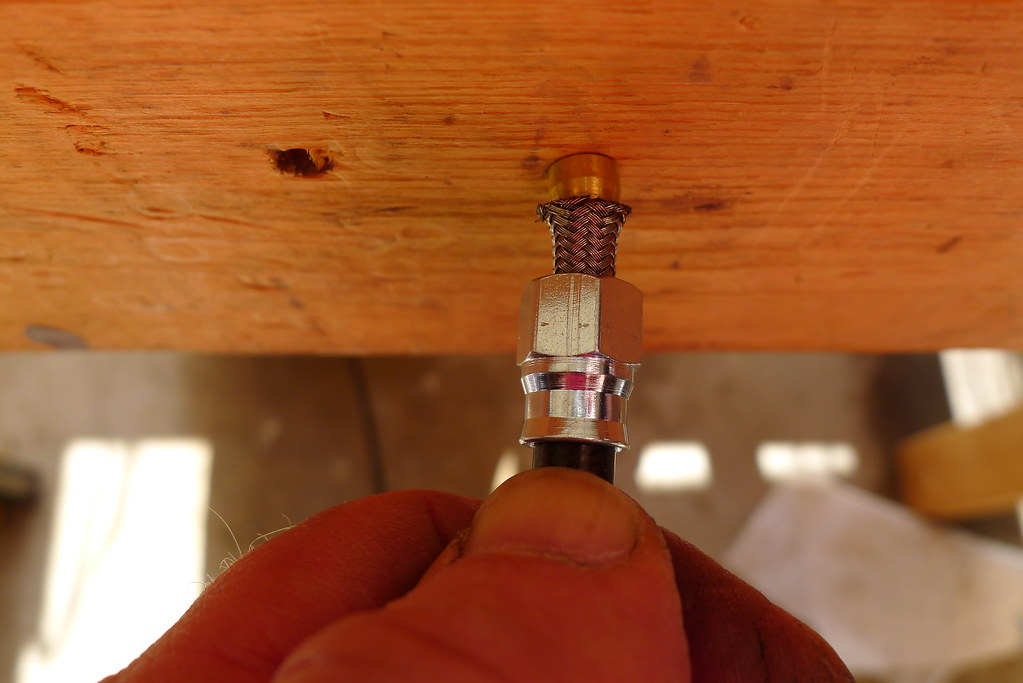
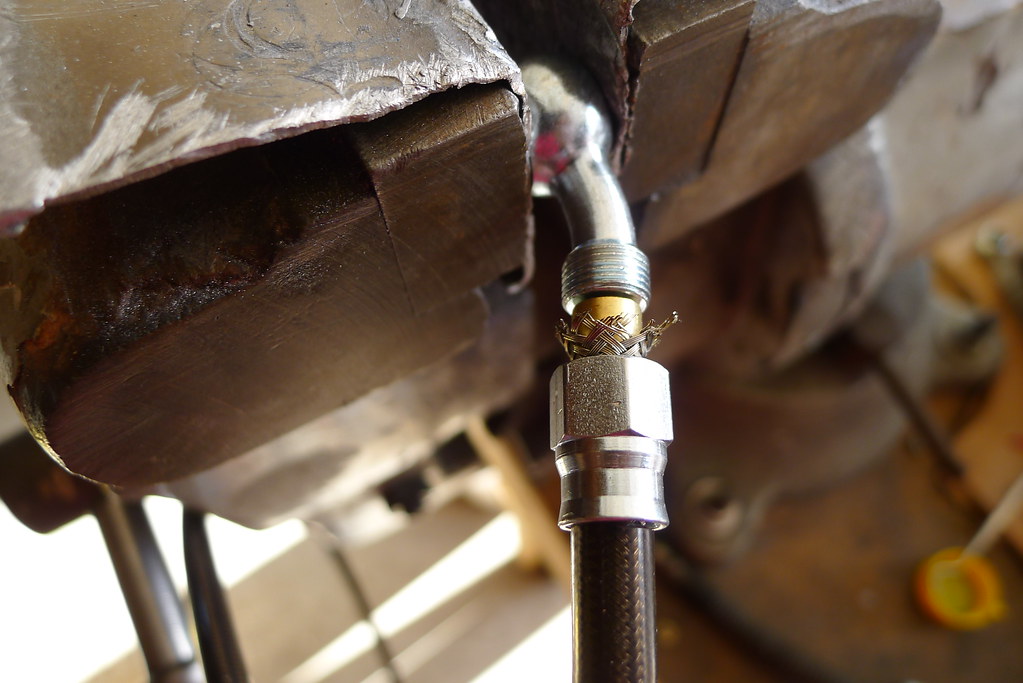
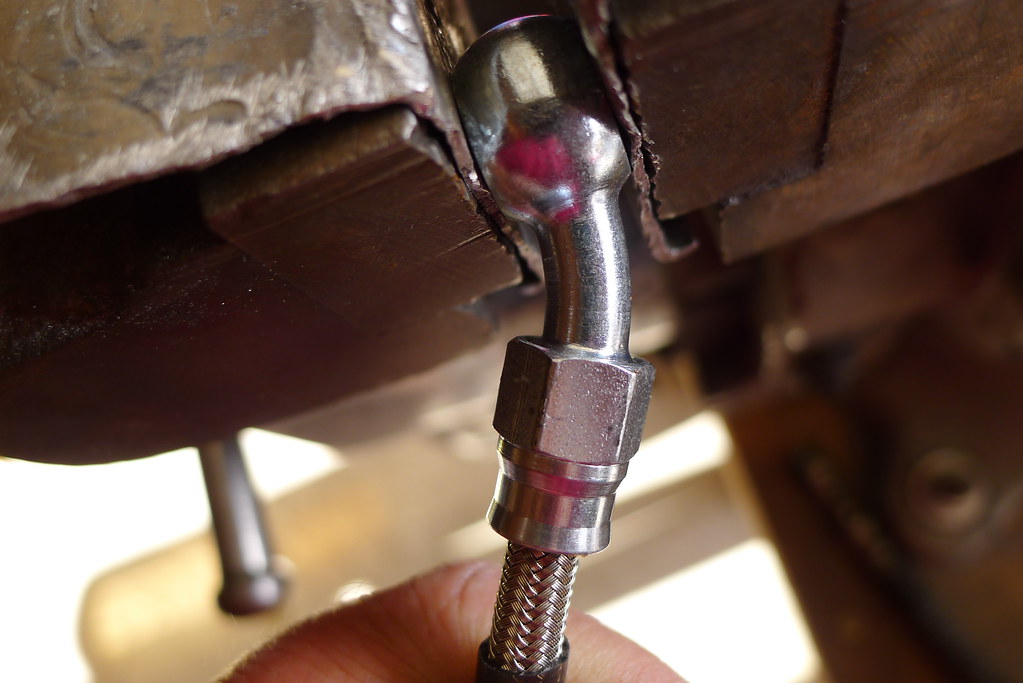
Install the other hose end, clock the position carefully, and you are done. I used non adjustable hose ends but they work out fine. You just need to be careful to stop a little short of fully tight so you can get the clocking right.
Repeat everything three more times and...
Some heat shrink tubing can be used to cover up where the vinyl coating was removed. Next time...

Check clocking of the hose ends by pressing one on the table and looking at the other. On this hose they are 90 degrees from each other.
Install the other hose end, clock the position carefully, and you are done. I used non adjustable hose ends but they work out fine. You just need to be careful to stop a little short of fully tight so you can get the clocking right.
Repeat everything three more times and...
Some heat shrink tubing can be used to cover up where the vinyl coating was removed. Next time...
Ed
Carb O-ring Kits : www.kzrider.com/forum/3-carburetor/61807...-o-ring-kits?start=0
www.kzrider.com/forum/faq-wiki/618026-new-owner-things-to-know
1981 KZ750E2
www.kzrider.com/forum/11-projects/604901...z750e-project-thread
Carb O-ring Kits : www.kzrider.com/forum/3-carburetor/61807...-o-ring-kits?start=0
www.kzrider.com/forum/faq-wiki/618026-new-owner-things-to-know
1981 KZ750E2
www.kzrider.com/forum/11-projects/604901...z750e-project-thread
Last edit: 04 Aug 2017 08:57 by Nessism.
The following user(s) said Thank You: Mir
Please Log in or Create an account to join the conversation.