Another KZP Project - APARTMENT build!
- stratman
-

- Offline
- Sustaining Member
-

Registered
- Posts: 88
- Thanks: 37
Re: Next stop...
11 Jan 2017 13:33
Thanks for the update, Ed. This is the most entertaining project thread I've come across. Keep up the great work.
Barry
Barry
1981 KZ650 CSR
The following user(s) said Thank You: Ed_in_Miami
Please Log in or Create an account to join the conversation.
- 750 R1
-

- Offline
- User
-

Registered
- Posts: 1150
- Thanks: 389
The following user(s) said Thank You: Ed_in_Miami
Please Log in or Create an account to join the conversation.
- Bozo
-

- Offline
- Sustaining Member
-

Registered
- Ride it like u stole it
- Posts: 607
- Thanks: 119
Re: Another KZP Project - APARTMENT build!
11 Jan 2017 20:35 - 11 Jan 2017 21:01Just started reading the whole thread with interest, sorry for my lateness, I had to chuckle when I read this bit because I did the same on my GPZ head, luckily I only needed one valve because once I heard the click I knew what happened. The moral of the story if doing valves without the chain do one cam at a time and remove it once finished.Ed_in_Miami wrote: Hello Folks,
I'm writing this update to share a major goof up I recently committed, which I have to say paints me, given my experience as a professional mechanic, and the fact that i should know better...
I hope that by sharing this experience, someone will be able to pick up this information and avoid committing the same stupid mistake in the future.
Anyhow... if you have been following my thread, you will know that I recently attempted a valve refresh job on my fleabay head. Everything went smoothly, valve train disassembly, surface preparation, valve lapping, seal installation, etc.
Where I messed up was at the time of checking my valve clearances.
While manually turning my exhaust cam I did not notice that my intake valve on cyl #1 was at full extension. The exhaust valve opposite to it extended itself as I was turning the exhaust valve, right into the intake valve, proceeding to bend it. Not a major bend, but just enough to ruin the sear, and certainly ruin my day...


Moral of the story... either turn your cams simultaneously, install and check one at a time, or just look around the head to avoid that this stupid crap doesnt happen to you... :whistle:
On to fleabay for a new INTAKE VALVE!!


I will soon have a stretch of a month of so, where I will be able to dedicate time to my project. School, work, and general obligations have certainly taken my free time, but I'm itching to get back into the swing of things.
Until then...
Ed
Nessism, re: base gasket, I had the same thing happen to me as well on the Z1R, the gasket just melted (like yours), I'm sure it wasn't Athena though.
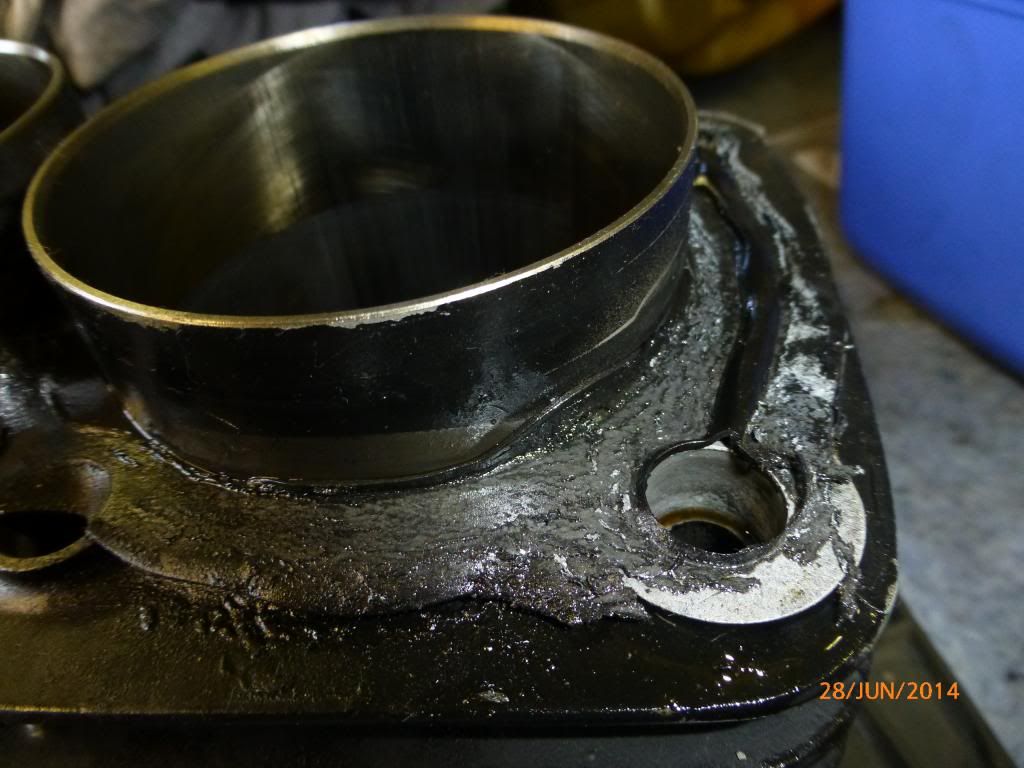
Speaking of Athena, some time ago they produced a steel head gasket for the 1100 which I used on the Z1R (same as the wafer car head gaskets) it was brilliant, never had trouble with it, tried to get one since but I couldn't find one.
First Permanent ride the Z1R since Dec1977 (220,000km) as of June 2015
Second permanent bike 1989 FJ1200 dyno'd 140RWH, great bike.
Third ride is now the Frankenstein 1981 GPZ1100B1, 1983 fully recon motor fitted LOVE THIS BIKE
Forth my work bike FJ1200 1989 (same type as FJ above)
Second permanent bike 1989 FJ1200 dyno'd 140RWH, great bike.
Third ride is now the Frankenstein 1981 GPZ1100B1, 1983 fully recon motor fitted LOVE THIS BIKE
Forth my work bike FJ1200 1989 (same type as FJ above)
Last edit: 11 Jan 2017 21:01 by Bozo. Reason: Correction and added photo
Please Log in or Create an account to join the conversation.
- 750 R1
-

- Offline
- User
-

Registered
- Posts: 1150
- Thanks: 389
Re: Another KZP Project - APARTMENT build!
11 Jan 2017 22:11Bozo wrote:Just started reading the whole thread with interest, sorry for my lateness, I had to chuckle when I read this bit because I did the same on my GPZ head, luckily I only needed one valve because once I heard the click I knew what happened. The moral of the story if doing valves without the chain do one cam at a time and remove it once finished.Ed_in_Miami wrote: Hello Folks,
I'm writing this update to share a major goof up I recently committed, which I have to say paints me, given my experience as a professional mechanic, and the fact that i should know better...
I hope that by sharing this experience, someone will be able to pick up this information and avoid committing the same stupid mistake in the future.
Anyhow... if you have been following my thread, you will know that I recently attempted a valve refresh job on my fleabay head. Everything went smoothly, valve train disassembly, surface preparation, valve lapping, seal installation, etc.
Where I messed up was at the time of checking my valve clearances.
While manually turning my exhaust cam I did not notice that my intake valve on cyl #1 was at full extension. The exhaust valve opposite to it extended itself as I was turning the exhaust valve, right into the intake valve, proceeding to bend it. Not a major bend, but just enough to ruin the sear, and certainly ruin my day...


Moral of the story... either turn your cams simultaneously, install and check one at a time, or just look around the head to avoid that this stupid crap doesnt happen to you... :whistle:
On to fleabay for a new INTAKE VALVE!!


I will soon have a stretch of a month of so, where I will be able to dedicate time to my project. School, work, and general obligations have certainly taken my free time, but I'm itching to get back into the swing of things.
Until then...
Ed
Nessism, re: base gasket, I had the same thing happen to me as well on the Z1R, the gasket just melted (like yours), I'm sure it wasn't Athena though.

Speaking of Athena, some time ago they produced a steel head gasket for the 1100 which I used on the Z1R (same as the wafer car head gaskets) it was brilliant, never had trouble with it, tried to get one since but I couldn't find one.
Bozo, try Cometic MLS {multi layer steel} head gaskets, you need an extremely smooth, flat finish on the head so getting the head decked is advisable, they can be sourced in different thicknesses too...
The following user(s) said Thank You: Bozo
Please Log in or Create an account to join the conversation.
- Ed_in_Miami
-
 Topic Author
- Offline
- User
-

Registered
- Posts: 259
- Thanks: 46
Re: Another KZP Project - APARTMENT build!
02 May 2017 12:08 - 02 May 2017 12:10
Hi guys,
I thought i'd add another update since I swinged by the site to check up on projects and gather some inspiration.
I have been busy with School and life and haven't noticed how long it has been since my last update.
Since I have not been able to do anything with the frame due to my situation, I thought I spend some time doing my wheels. Here's the progress:
Time to dismount the old tires
Breaking the bead and working the tire irons
Clean 'er up:
This is my build:
kzrider.com/forum/11-projects/600312-ano...rtment-build?start=0
There are many more like it, but this one is mine... news to come!
kzrider.com/forum/11-projects/600312-ano...rtment-build?start=0
There are many more like it, but this one is mine... news to come!
Last edit: 02 May 2017 12:10 by Ed_in_Miami.
The following user(s) said Thank You: GPz550D1
Please Log in or Create an account to join the conversation.
- Ed_in_Miami
-
 Topic Author
- Offline
- User
-

Registered
- Posts: 259
- Thanks: 46
Re: Another KZP Project - APARTMENT build!
02 May 2017 12:08
Polishing station setup:
After sanding and paint removal:
Taped up:
Primed:
Color added:
Final product. Needs a bit of touchup, but I'm very happy with the result...
After sanding and paint removal:
Taped up:
Primed:
Color added:
Final product. Needs a bit of touchup, but I'm very happy with the result...
This is my build:
kzrider.com/forum/11-projects/600312-ano...rtment-build?start=0
There are many more like it, but this one is mine... news to come!
kzrider.com/forum/11-projects/600312-ano...rtment-build?start=0
There are many more like it, but this one is mine... news to come!
Please Log in or Create an account to join the conversation.
- Ed_in_Miami
-
 Topic Author
- Offline
- User
-

Registered
- Posts: 259
- Thanks: 46
Re: Quarterly update!
29 Jun 2017 07:17
Finally have some time to dedicate to my project. Looking forward to frame preparation this weekend.
My balcony and car trunk look like hell and the wife has been giving me an earful, so I s'pose I better get a move on...
So in the meantime.. some housekeeping items...
Mounting those pesky tires... never doing that again... such a pain in the ass...
Deciding whether i should go w/ a 41 or 35 teeth.
Opting for the smaller sprocket as there are barely any hills in Florida and I'm not a fan of buzzy vibes at highway speed. What do you guys think?
This is my build:
kzrider.com/forum/11-projects/600312-ano...rtment-build?start=0
There are many more like it, but this one is mine... news to come!
kzrider.com/forum/11-projects/600312-ano...rtment-build?start=0
There are many more like it, but this one is mine... news to come!
Please Log in or Create an account to join the conversation.
- Ed_in_Miami
-
 Topic Author
- Offline
- User
-

Registered
- Posts: 259
- Thanks: 46
Re: Another KZP Project - APARTMENT build!
29 Jun 2017 07:17
This is my build:
kzrider.com/forum/11-projects/600312-ano...rtment-build?start=0
There are many more like it, but this one is mine... news to come!
kzrider.com/forum/11-projects/600312-ano...rtment-build?start=0
There are many more like it, but this one is mine... news to come!
The following user(s) said Thank You: GPz550D1
Please Log in or Create an account to join the conversation.
- Ed_in_Miami
-
 Topic Author
- Offline
- User
-

Registered
- Posts: 259
- Thanks: 46
Re: Another KZP Project - APARTMENT build!
29 Jun 2017 07:17 - 25 Aug 2017 09:19
This is my build:
kzrider.com/forum/11-projects/600312-ano...rtment-build?start=0
There are many more like it, but this one is mine... news to come!
kzrider.com/forum/11-projects/600312-ano...rtment-build?start=0
There are many more like it, but this one is mine... news to come!
Last edit: 25 Aug 2017 09:19 by Ed_in_Miami.
Please Log in or Create an account to join the conversation.
- 9er rider
-
- Offline
- Sustaining Member
-

Registered
- Keep a cool tool
- Posts: 575
- Thanks: 87
Re: Another KZP Project - APARTMENT build!
29 Jun 2017 07:47
I built a stand with wheels for a 900 motor. Im considering a glass top and lamp until I get another rolling frame together for it.
76 kz 900 1075 76 kz 900 a4 78 kz 1000 ltd
Please Log in or Create an account to join the conversation.
- Ed_in_Miami
-
 Topic Author
- Offline
- User
-

Registered
- Posts: 259
- Thanks: 46
Re: Another KZP Project - APARTMENT build!
29 Jun 2017 08:02
I love the shape of these motors. They are decorative for sure.
I'm selling my J frame still (from the donor bike), but unfortunately has no papers.
Guy bought it from a police auction and then passed away. Got it from the estate...
I'm selling my J frame still (from the donor bike), but unfortunately has no papers.
Guy bought it from a police auction and then passed away. Got it from the estate...
This is my build:
kzrider.com/forum/11-projects/600312-ano...rtment-build?start=0
There are many more like it, but this one is mine... news to come!
kzrider.com/forum/11-projects/600312-ano...rtment-build?start=0
There are many more like it, but this one is mine... news to come!
Please Log in or Create an account to join the conversation.
- Ed_in_Miami
-
 Topic Author
- Offline
- User
-

Registered
- Posts: 259
- Thanks: 46
Re: Another KZP Project - APARTMENT build!
03 Jul 2017 07:24 - 25 Aug 2017 09:16
Awright then, the dreaded day has come where I decided to do my frame.
I knew this was going to be a s**t-job from the beginning, but it had to be done...
Since this was not the type of work that can be done at an apartment (or flat for you brits), I had to ask a friend of mine, so that he could loan me his backyard for a day for the sandblasting.
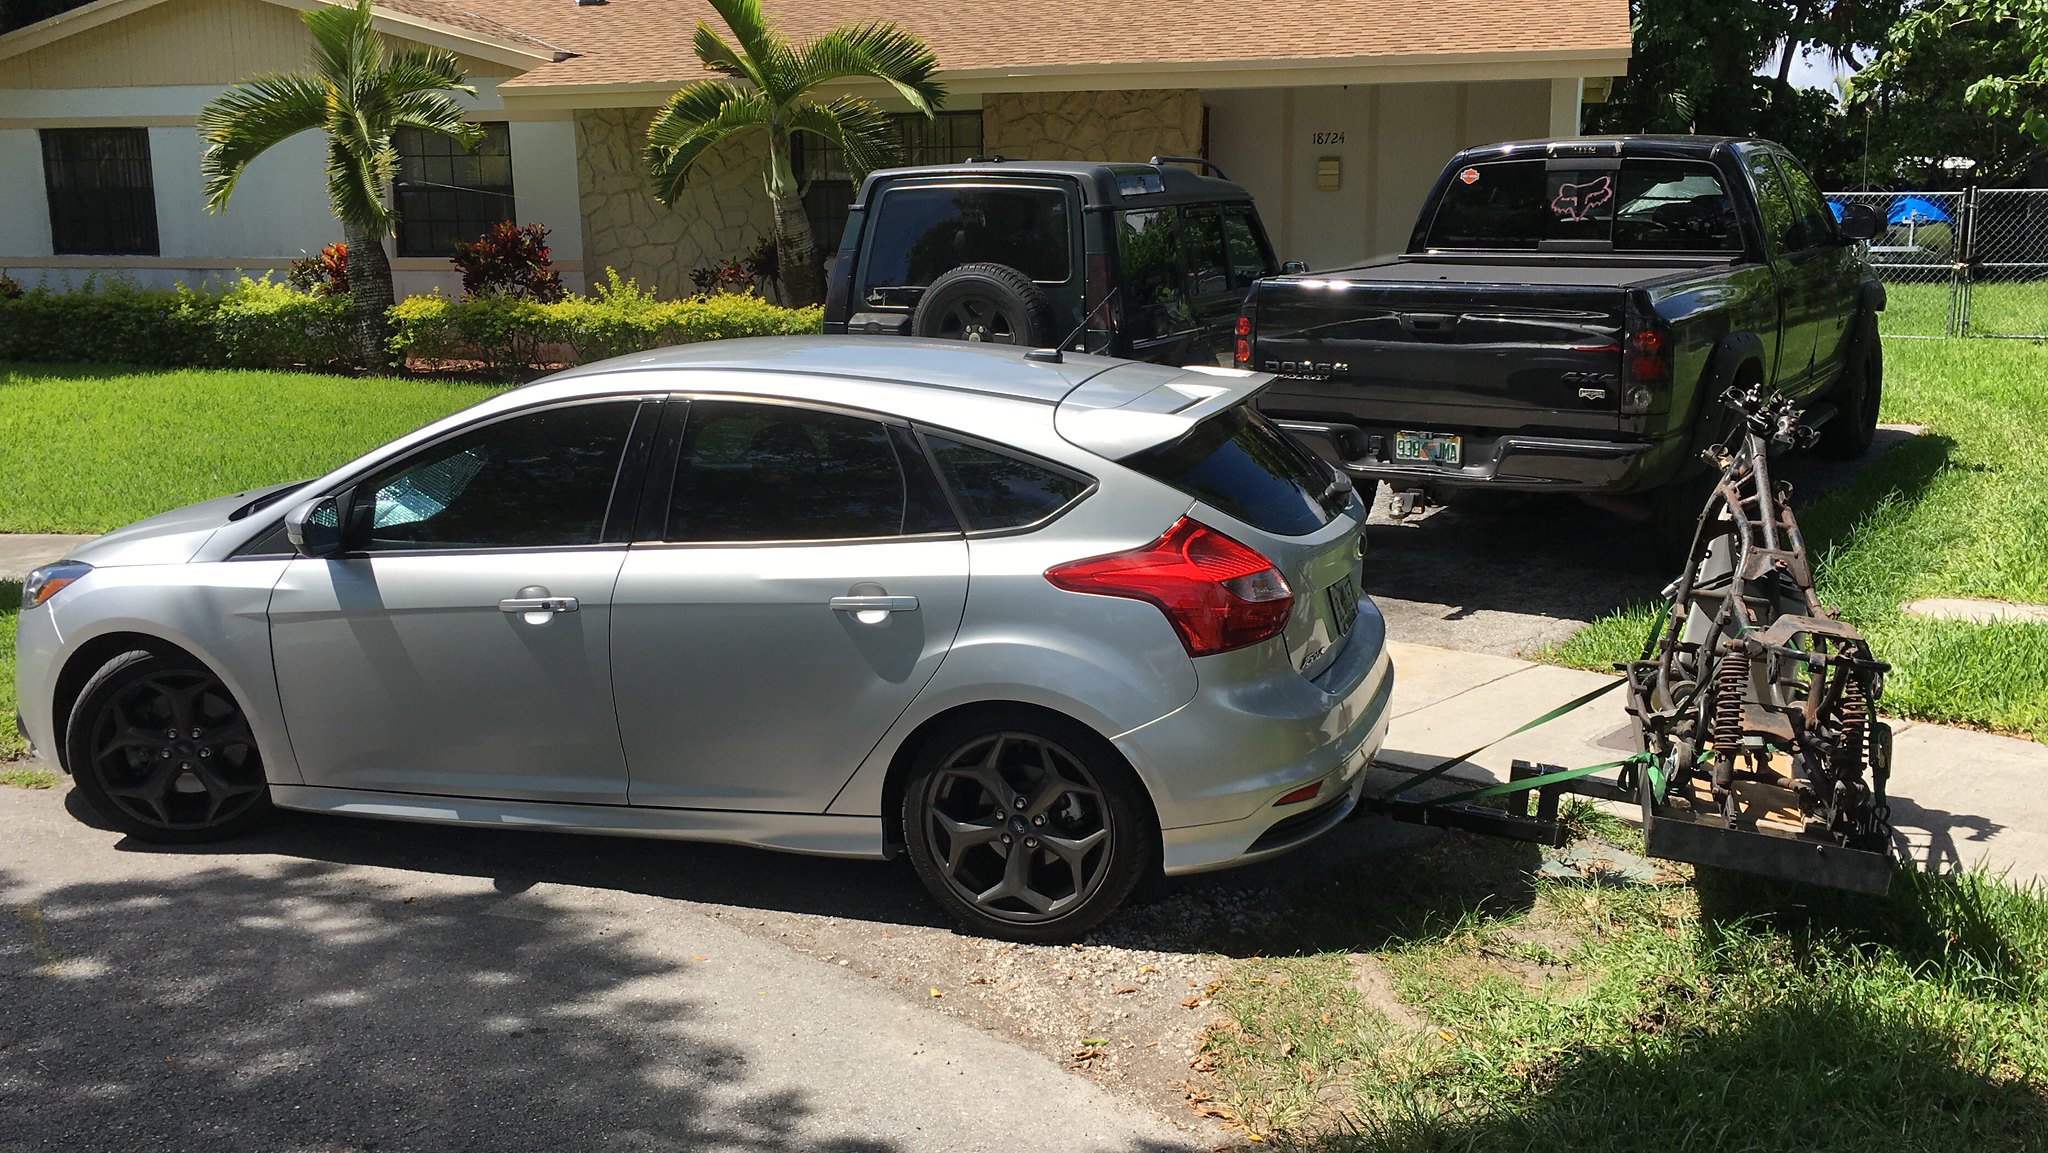
But first I had to get there...
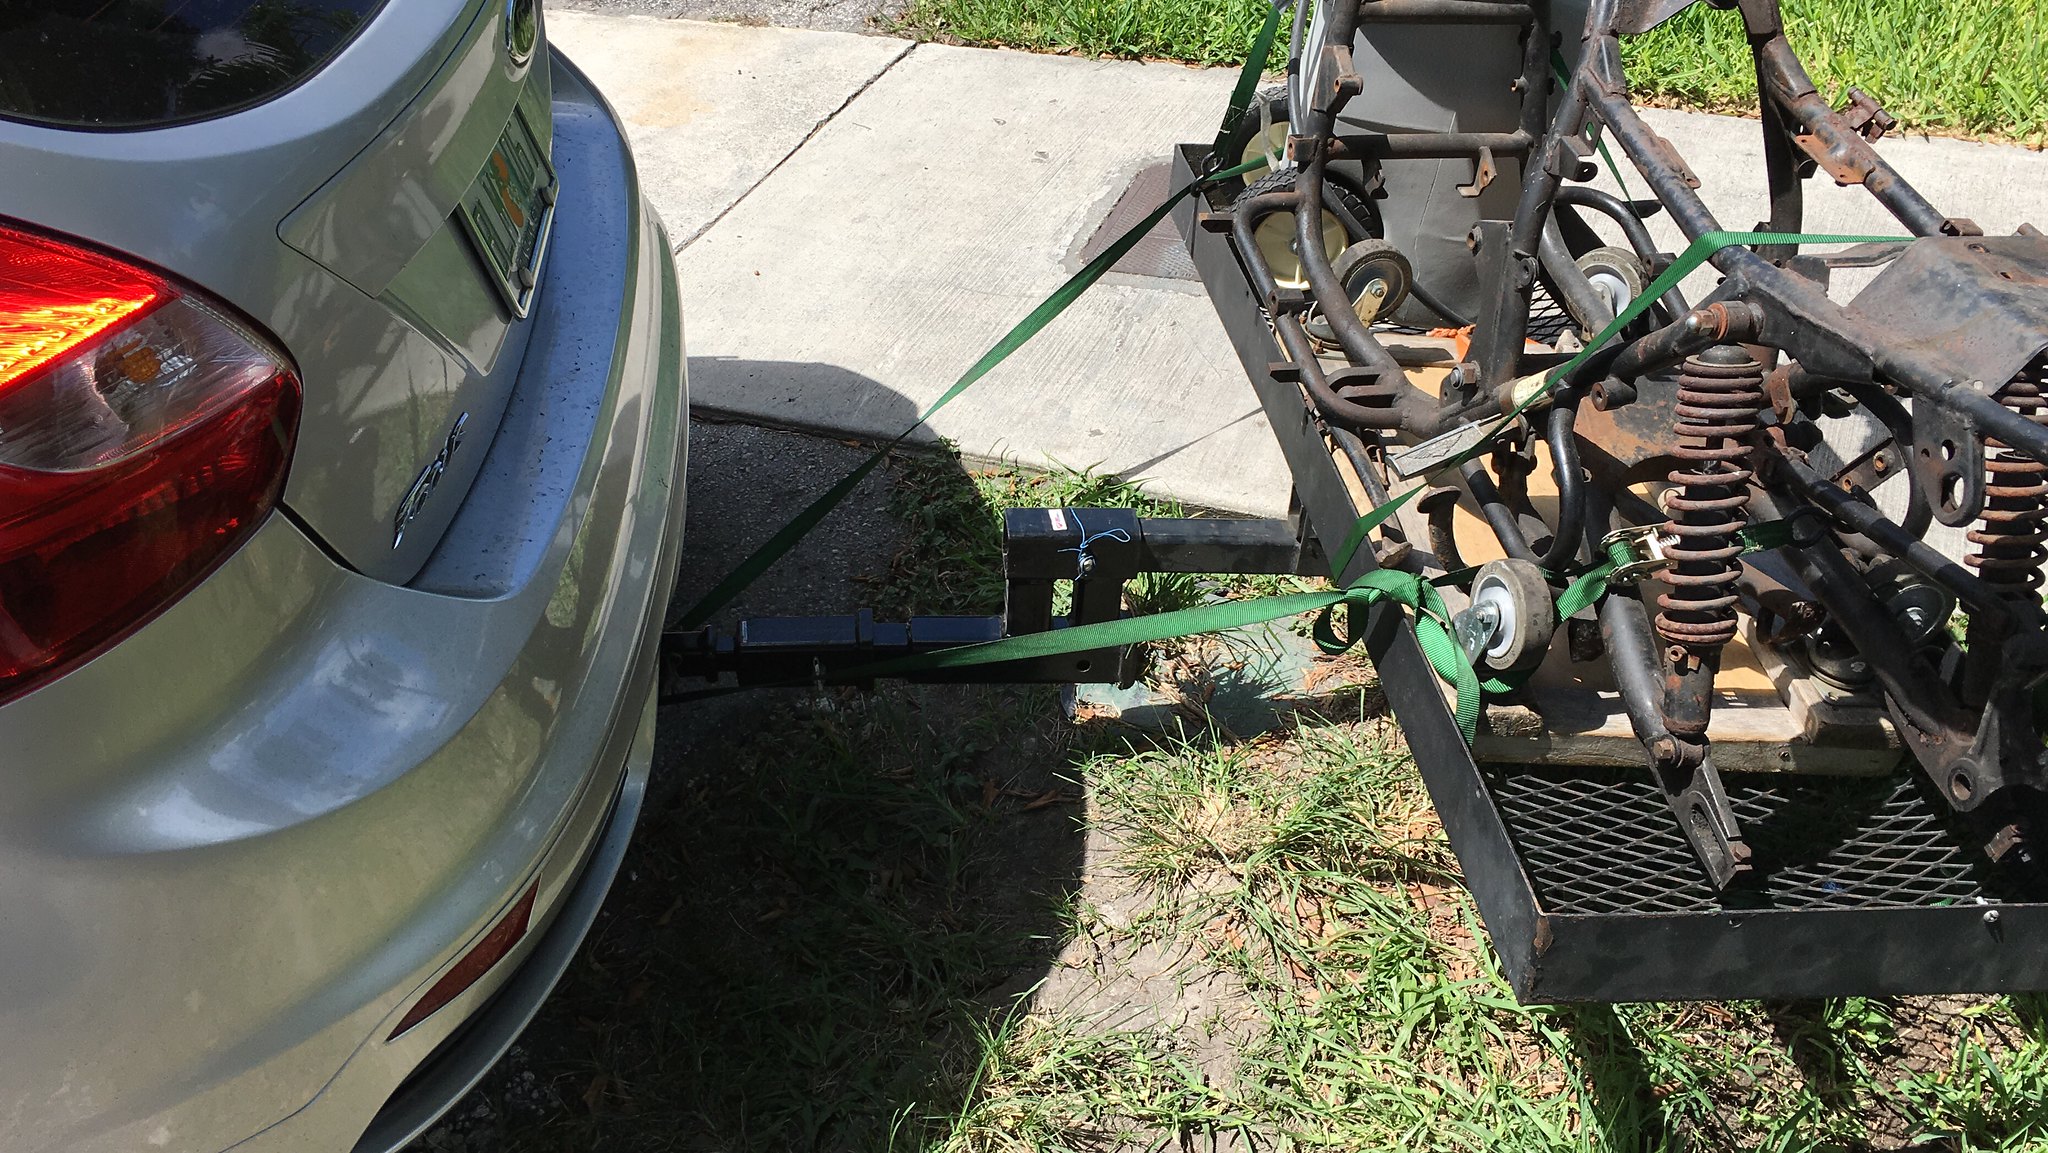
My Focus ST was not happy with me... I know this may be over-tasking my poor car, but I did not want to borrow the wife's Jeep. Last time I did, I brought it back with a couple of scratches, and I haven't heard the end of it yet....
At the lowest, this whole rig was about 4 inches from the ground, but it never dragged on the way to my buddy's (26 miles each way).
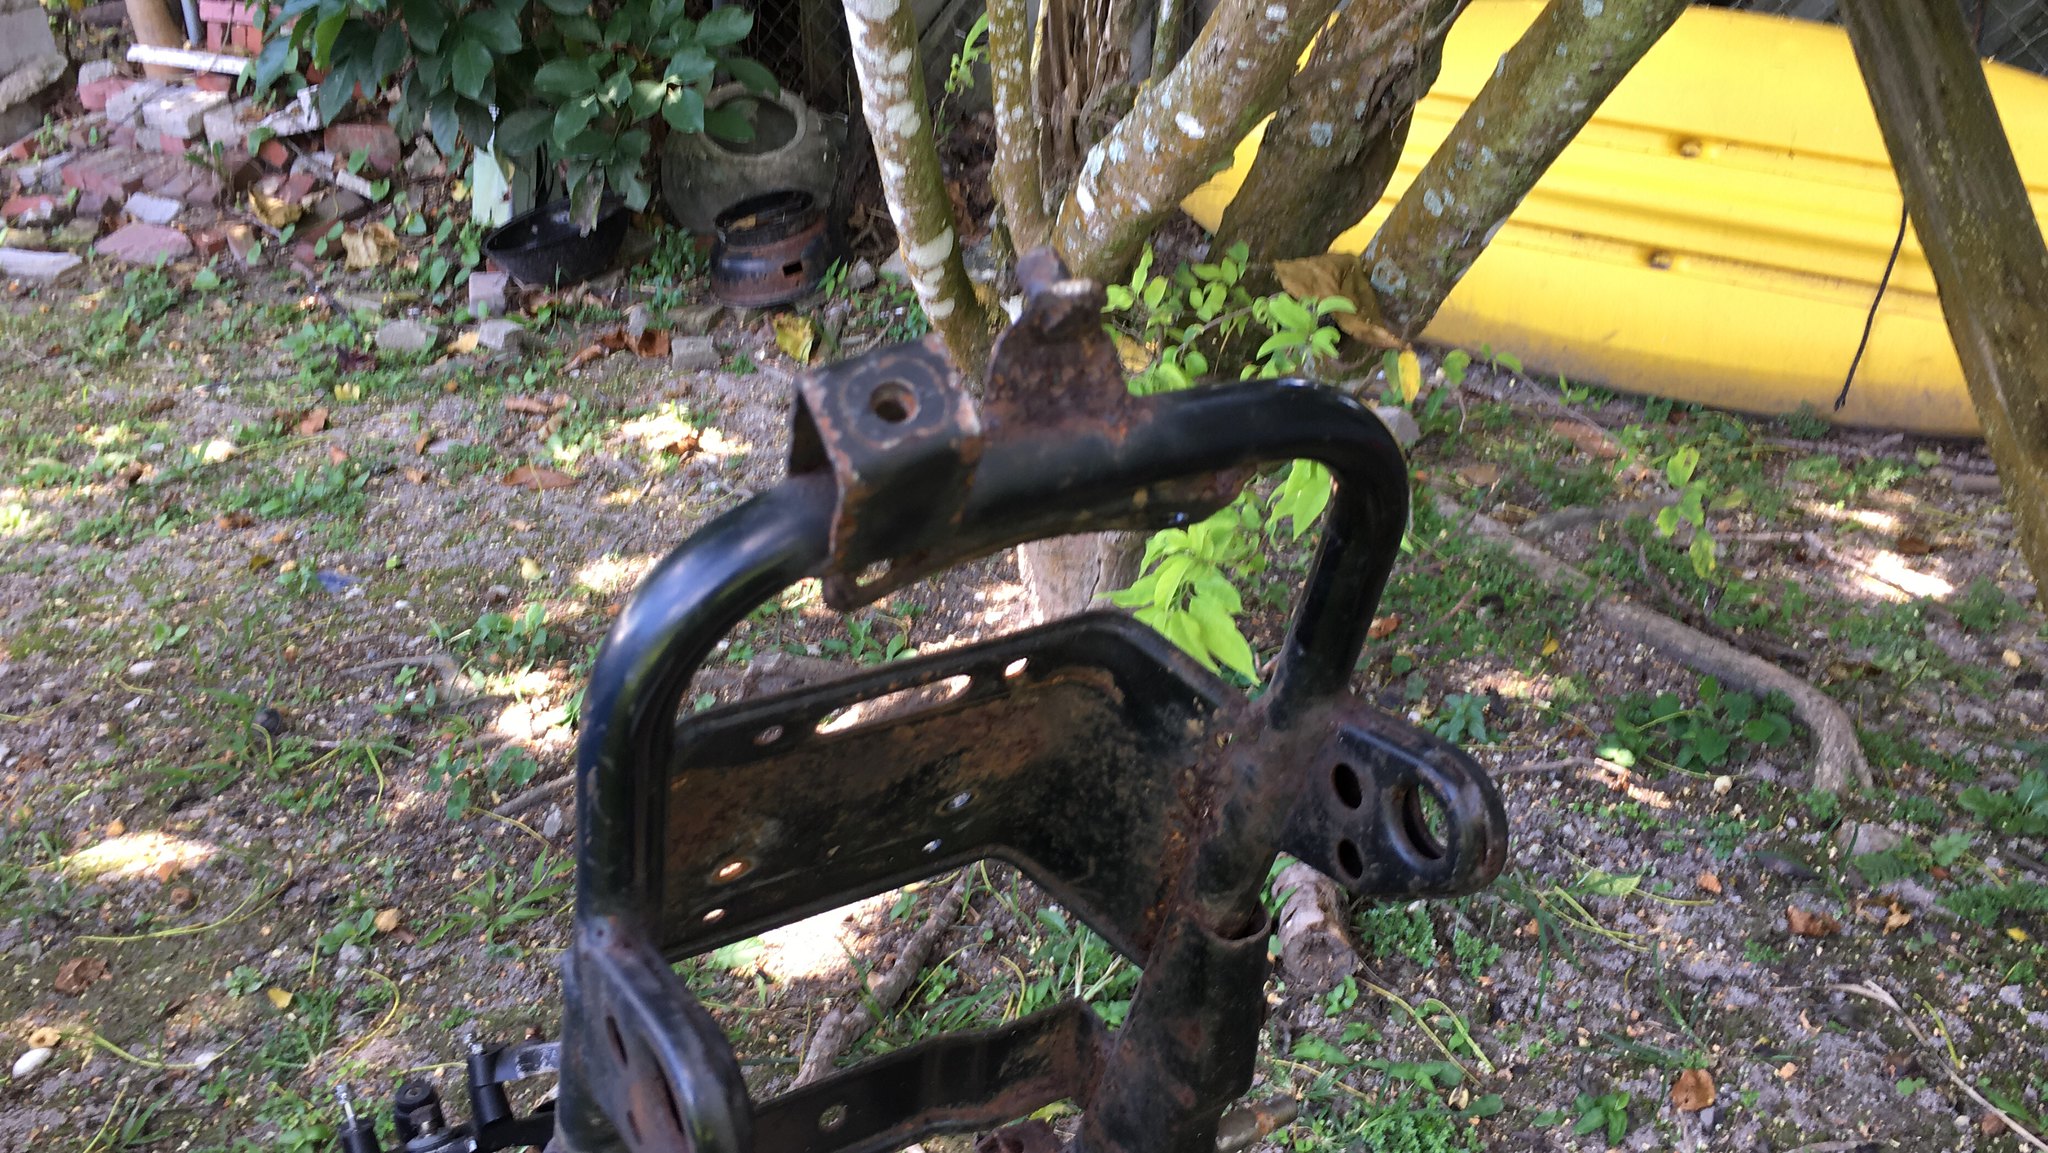
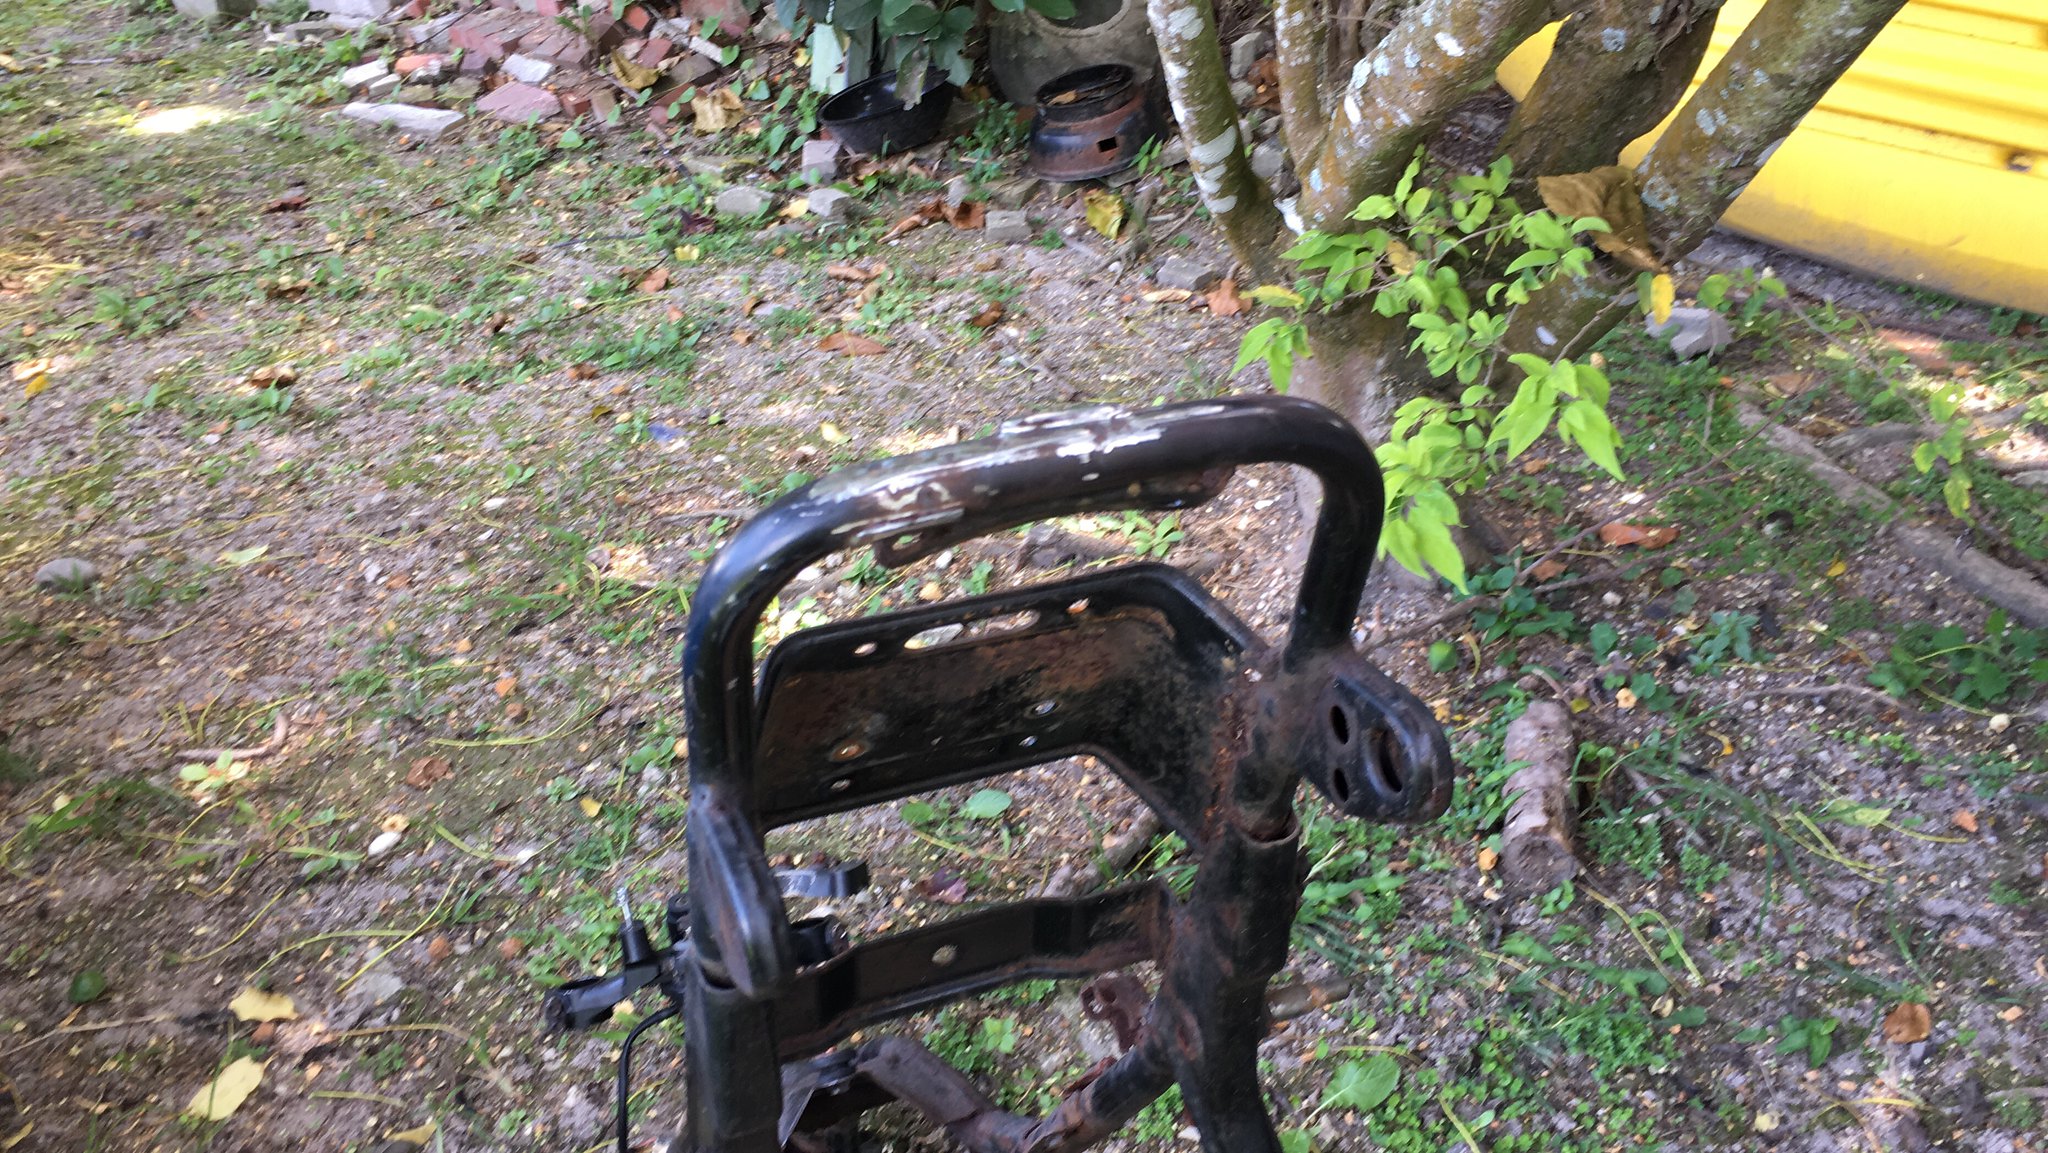
Took the opportunity to put my grinder to work. Needed to remove these unsightly tabs since I won't be installing a radio box any time in the future...
Now you see them....
Now you don't!
This is my build:
kzrider.com/forum/11-projects/600312-ano...rtment-build?start=0
There are many more like it, but this one is mine... news to come!
kzrider.com/forum/11-projects/600312-ano...rtment-build?start=0
There are many more like it, but this one is mine... news to come!
Last edit: 25 Aug 2017 09:16 by Ed_in_Miami.
Please Log in or Create an account to join the conversation.
Moderators: Street Fighter LTD


