
Kz440 Redemption
- undiablo
-

- Offline
- User
-

Registered
- Posts: 434
- Thanks: 64
Re: Kz440 Redemption
12 Jun 2015 08:51
Good work!
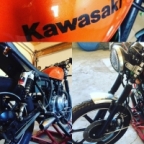
Kawasaki KZ 750/4 LTD 1981
Kawasaki KLR 650 2011
Argentina - Buenos Aires
Kawasaki KLR 650 2011
Argentina - Buenos Aires
Please Log in or Create an account to join the conversation.
- Jbosh
-
 Topic Author
- Offline
- User
-
Registered
- 1982 Kz440 ltd D4
- Posts: 142
- Thanks: 5
Re: Kz440 Redemption
16 Jun 2015 20:26
Okay, things have been too wet or windy to paint after priming everything. I got a head start on the seat pan. Air relief holes are drilled and I test fit the foam and I think I'm happy with the comfort. Problem is, ideally I'd like to have the seat on a hinge. Here's a pic of the old ones. I recall something like a t handle clamp of sorts and wondered if that would work to secure the seat to the frame? Do any of you know how brat seats are normally attached to a frame?
With the perspective foam (1 camping mat and a yoga mat)
Attachment image-10.jpg not found
With the perspective foam (1 camping mat and a yoga mat)
Attachment image-11.jpg not found
As long as I get to learn something, I'm happy!
Please Log in or Create an account to join the conversation.
- Jbosh
-
Topic Author
- Offline
- User
-
Registered
- 1982 Kz440 ltd D4
- Posts: 142
- Thanks: 5
Re: Kz440 Redemption
20 Jun 2015 22:43 - 21 Jun 2015 06:17
The rims have seen their first coat of gloss black. I am really liking how they are turning out so far! I am trying to pull dents for the second time on the fuel tank. The whole tank as been stripped down but I can't seem to bond these 2 1/2" ardox nails to the tank via JB weld in order to pull them! I used wax and grease remover too. I dunno. I figure this really should not be as difficult as it has been. The knee wells are so close. Once those dents are pulled then the final knee end shaping can be wrapped up. I think I am going to bite the bullet and soda blast the engine to clean it off too. Engine degreaser isn't cutting it. Yeah, it's a really dirty engine... Atleast this old bike is seeing some love as best as I can. Once I figure out the seat pan mounts to the frame, the frame is ready to be gloss blacked as well! It's these little things...
Pics to come
Pics to come
As long as I get to learn something, I'm happy!
Last edit: 21 Jun 2015 06:17 by Jbosh. Reason: Typos
Please Log in or Create an account to join the conversation.
- davido
-
- Offline
- User
-
Registered
- Posts: 1578
- Thanks: 291
Re: Kz440 Redemption
21 Jun 2015 00:18 - 21 Jun 2015 09:21
The engine is out! First one! Any tips on how to seal the openings so cleaner and junk doesn't get into the engine?
For sealing the carb inlets, I used 8mm MDF. I used the inet rubbers as a stencil, drew around them and cut out the MDF. I drilled bolt holes to match the originals and mounted these with a small bead of silicone using the original bolts.
For the exhaust ports,I stuffed each port with a plastic bag then filled up the opening with silicone.I also did this for the started motor hole
and for the crankcase breather.I just used a piece of wood,shaped and rounded to wedge in with some plummers white tape wrapped around it.
I degreased the engine,went over it with paint stripper then took it up to my local petrol sation and attacked it with the power washer.
It came up very well with no sign of water getting through. If I do it again though,I would coat the exhaust port openings with grease first to stop the silicone sealing to the alloy. It was a pig to get out.
Good luck with yours
P.S.Heres a link to some photos ,you can get the idea;
www.kzrider.com/forum/11-projects/594313-csr1000-project-build
www.kzrider.com/forum/11-projects/594313-csr1000-project-build
CB550 (1978)
CB500/4 (1972)*
KZ1000CSR (1981)
XT 600E (1999)
TDM900 (2003)
CB550 (1978)
CB500/4 (1972)*
KZ1000CSR (1981)
XT 600E (1999)
TDM900 (2003)
Last edit: 21 Jun 2015 09:21 by davido.
The following user(s) said Thank You: Jbosh
Please Log in or Create an account to join the conversation.
- Jbosh
-
Topic Author
- Offline
- User
-
Registered
- 1982 Kz440 ltd D4
- Posts: 142
- Thanks: 5
Re: Kz440 Redemption
21 Jun 2015 14:22
Tada! First coat!
Attachment image-12.jpg not found
As long as I get to learn something, I'm happy!
Please Log in or Create an account to join the conversation.
- Jbosh
-
Topic Author
- Offline
- User
-
Registered
- 1982 Kz440 ltd D4
- Posts: 142
- Thanks: 5
Re: Kz440 Redemption
22 Jun 2015 16:55 - 22 Jun 2015 16:59
Most of the mid size elements have hereby been revived paint wise. The gloss black is looking good! The rims turned out awesome and after it has fully cured in a week, it will be time for the new rubber! I feel like a doof but I had assumed that JB Weld epoxy was similar in metal bonding ability to their classic 2 part grey metal epoxy. Yeah the other stuff is general use. Lesson learned. Dents will now be pulled in the tank thanks to getting it right this time and the nail heads actually bonding to the tank. The dents are just a wee bit too deep for bondo. Soon though! Frame and tank will be bondoed at the same time.
The triple tree top and belt guard:
Rear swing arm and centre stand:
Question for the masses: Do you recommend clear coating the components that have been gloss blacked thus far? I have clear for the tank only at present. If so, what product?
The triple tree top and belt guard:
Attachment image-13.jpg not found
Rear swing arm and centre stand:
Attachment image-14.jpg not found
Question for the masses: Do you recommend clear coating the components that have been gloss blacked thus far? I have clear for the tank only at present. If so, what product?
As long as I get to learn something, I'm happy!
Last edit: 22 Jun 2015 16:59 by Jbosh. Reason: Typo
Please Log in or Create an account to join the conversation.
- Jbosh
-
Topic Author
- Offline
- User
-
Registered
- 1982 Kz440 ltd D4
- Posts: 142
- Thanks: 5
Re: Kz440 Redemption
22 Jun 2015 17:33
Davido, thanks for sharing that link to your build thread! I see what you did there seal wise and I like it! Great idea and very simple. The electronics tray will be getting attention this evening but that there seal idea will have my mind on it for the next few days. Thanks for helping out this Canuck!
As long as I get to learn something, I'm happy!
Please Log in or Create an account to join the conversation.
- Jbosh
-
Topic Author
- Offline
- User
-
Registered
- 1982 Kz440 ltd D4
- Posts: 142
- Thanks: 5
Re: Kz440 Redemption
22 Jun 2015 21:32
Electronics and map tray stencil
1.5" deep tray with plans for an attached battery box in the forward section. Still working out how things will function but hey, what else do you do while waiting to pull dents from the tank! Well... there's lots haha. I'm thinking of attaching to the old airbox anchor holes, the cross bar in the seat frame, and just ahead of the rear loop. Now to figure out the seat hinge, lock, and how to seal things from the elements under the seat...
Some days this feels like more than an evening hobby. Good thing my wife to be is on board!
Attachment image-15.jpg not found
Attachment image-16.jpg not found
1.5" deep tray with plans for an attached battery box in the forward section. Still working out how things will function but hey, what else do you do while waiting to pull dents from the tank! Well... there's lots haha. I'm thinking of attaching to the old airbox anchor holes, the cross bar in the seat frame, and just ahead of the rear loop. Now to figure out the seat hinge, lock, and how to seal things from the elements under the seat...
Some days this feels like more than an evening hobby. Good thing my wife to be is on board!
As long as I get to learn something, I'm happy!
Please Log in or Create an account to join the conversation.
- Jbosh
-
Topic Author
- Offline
- User
-
Registered
- 1982 Kz440 ltd D4
- Posts: 142
- Thanks: 5
Re: Kz440 Redemption
23 Jun 2015 21:49 - 23 Jun 2015 21:52
I am taking a second look at the clearance from the back tire to the bottom of the electronics tray rear by the rear hoop. I may have to raise that small rear box so it is flush with the top of the frame aka bottom of the seat. Hmmm... It's about 15mm less clearance than the previous fender was to the rear wheel. The new shocks are 10mm longer than the old.
As long as I get to learn something, I'm happy!
Last edit: 23 Jun 2015 21:52 by Jbosh.
Please Log in or Create an account to join the conversation.
- Drafter89
-

- Offline
- User
-
Registered
- Posts: 88
- Thanks: 0
Re: Kz440 Redemption
24 Jun 2015 09:24What did you use as padding now? perspective foam, camping mat, and a yoga mat? What is perspective foam lol? Reason im asking is because Im trying to get ideas for my seat as well.Jbosh wrote: With the perspective foam (1 camping mat and a yoga mat)
Attachment image-11.jpg not found
Thanks
78 KZ 400 C1-Daily Driver
New Albany,IN
New Albany,IN
Please Log in or Create an account to join the conversation.
- Jbosh
-
Topic Author
- Offline
- User
-
Registered
- 1982 Kz440 ltd D4
- Posts: 142
- Thanks: 5
Re: Kz440 Redemption
24 Jun 2015 16:38
Drafter, I said perspective because it is what I am anticipating but I haven't finalized quite yet. What I have schemed and setup in the pic I shared has 4 layers of 6mm camping foam with one layer of 5mm yoga mat on top. I understand that 3.1cm of seat foam isn't tons lol. The whole thing will have to be sealed all around somehow and not just glued from the bottom up. I'll do my best to document how mine turns out!
As long as I get to learn something, I'm happy!
Please Log in or Create an account to join the conversation.
- Drafter89
-
- Offline
- User
-
Registered
- Posts: 88
- Thanks: 0
Re: Kz440 Redemption
25 Jun 2015 06:16Oh haha. thats what I figured. I will be trying this out. Thanks a ton! Wonder If you could use some kind of spray adhesive on them to make them stick and seal together?Jbosh wrote: Drafter, I said perspective because it is what I am anticipating but I haven't finalized quite yet. What I have schemed and setup in the pic I shared has 4 layers of 6mm camping foam with one layer of 5mm yoga mat on top. I understand that 3.1cm of seat foam isn't tons lol. The whole thing will have to be sealed all around somehow and not just glued from the bottom up. I'll do my best to document how mine turns out!
78 KZ 400 C1-Daily Driver
New Albany,IN
New Albany,IN
Please Log in or Create an account to join the conversation.
Moderators: Street Fighter LTD