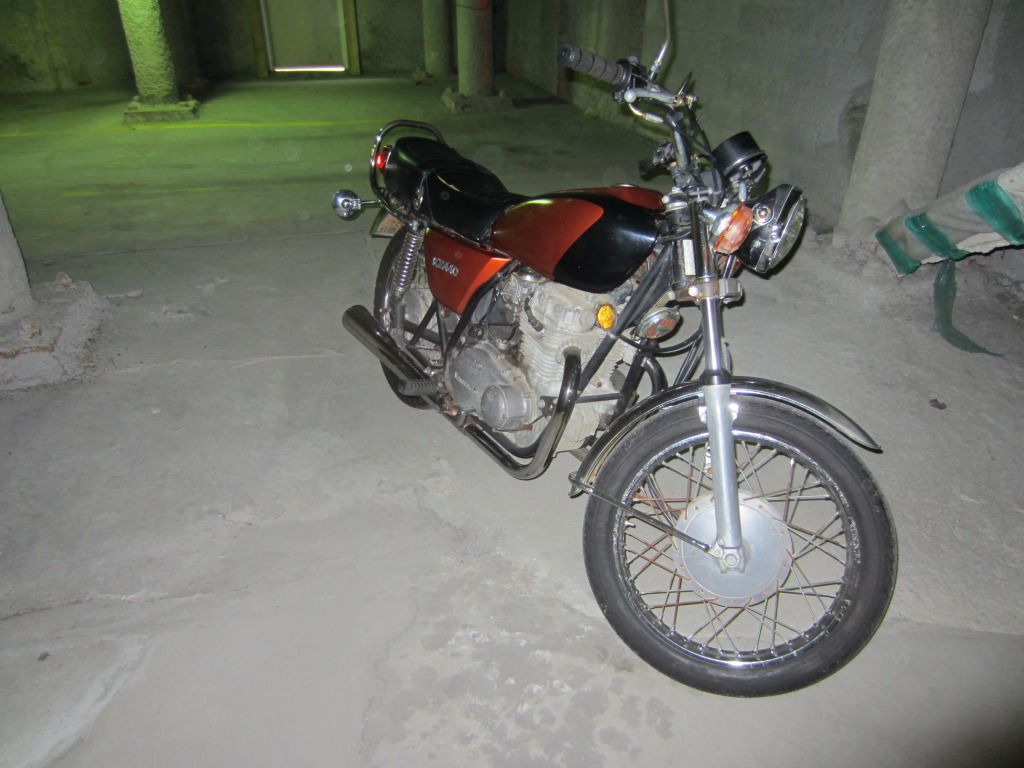
Brat-ish build: '81 KZ-440B
- tjgonz
-

- Offline
- User
-

Registered
- Posts: 43
- Thanks: 1
Re: $270 build! '81 KZ-440B
07 Oct 2012 03:52
Maybe Ive gotten lucky but my bike runs primo with pods..Ive tried the cheap standard pods but these seem to work best for me. Keep in mind my bike was jetted accordingly for them & Im running universal shorty mufflers + baffles in straight pipes. It can be done, just takes some experimenting. Cheers!
Please Log in or Create an account to join the conversation.
- Patton
-

- Offline
- KZr Legend
-

Registered
- Posts: 18567
- Thanks: 2103
Re: $270 build! '81 KZ-440B
07 Oct 2012 08:57tjgonz wrote: Maybe Ive gotten lucky but my bike runs primo with pods..Ive tried the cheap standard pods but these seem to work best for me. Keep in mind my bike was jetted accordingly for them & Im running universal shorty mufflers + baffles in straight pipes. It can be done, just takes some experimenting. Cheers!
What bike?
What carbs?
Good Fortune!
1973 Z1
KZ900 LTD
KZ900 LTD
Please Log in or Create an account to join the conversation.
- 650ed
-

- Offline
- User
-

Registered
- Posts: 15334
- Thanks: 2830
Re: $270 build! '81 KZ-440B
07 Oct 2012 12:17
When replacing my seals I removed the bottom allen bolts on mine with the forks still on the bike. Ed
1977 KZ650-C1 Original Owner - Stock (with additional invisible FIAMM horn)
Please Log in or Create an account to join the conversation.
- Patton
-

- Offline
- KZr Legend
-

Registered
- Posts: 18567
- Thanks: 2103
Re: $270 build! '81 KZ-440B
07 Oct 2012 12:41 - 07 Oct 2012 23:08Yes, it's a good idea to first attempt removing the allen bolts before loosening the fork caps -- because the assembly is still maintaining spring pressure on internal parts which helps hold them in position and not as easily rotated when the allen bolt is turned.650ed wrote: When replacing my seals I removed the bottom allen bolts on mine with the forks still on the bike. Ed
Good Fortune!
1973 Z1
KZ900 LTD
KZ900 LTD
Last edit: 07 Oct 2012 23:08 by Patton.
Please Log in or Create an account to join the conversation.
- jbeebe1
-
 Topic Author
- Offline
- User
-

Registered
- Posts: 140
- Thanks: 5
Re: $270 build! '81 KZ-440B
07 Oct 2012 17:16tjgonz wrote: Maybe Ive gotten lucky but my bike runs primo with pods..Ive tried the cheap standard pods but these seem to work best for me. Keep in mind my bike was jetted accordingly for them & Im running universal shorty mufflers + baffles in straight pipes. It can be done, just takes some experimenting. Cheers!
x2 on what size jets, which carbs, what bike? Straight exhaust, meaning not a 2 to 1 setup? This is a pretty intense subject around here, so if you have a success story, let it be known!
79 Honda 400 Hondamatic
79 Honda CB650
81 Honda CX500
81 Honda Passport C70
others coming in and out all the time!
79 Honda CB650
81 Honda CX500
81 Honda Passport C70
others coming in and out all the time!
Please Log in or Create an account to join the conversation.
- jbeebe1
-
 Topic Author
- Offline
- User
-

Registered
- Posts: 140
- Thanks: 5
Re: $270 build! '81 KZ-440B
13 Oct 2012 14:12
I chopped the front fender down and painted it black. the pic is before the paint mocking up. I cut off the end and used it as a template to get the right curve. Before and after pics:
template:
template:
79 Honda 400 Hondamatic
79 Honda CB650
81 Honda CX500
81 Honda Passport C70
others coming in and out all the time!
79 Honda CB650
81 Honda CX500
81 Honda Passport C70
others coming in and out all the time!
Please Log in or Create an account to join the conversation.
- jbeebe1
-
 Topic Author
- Offline
- User
-

Registered
- Posts: 140
- Thanks: 5
Re: $270 build! '81 KZ-440B
13 Oct 2012 14:13 - 13 Oct 2012 14:15
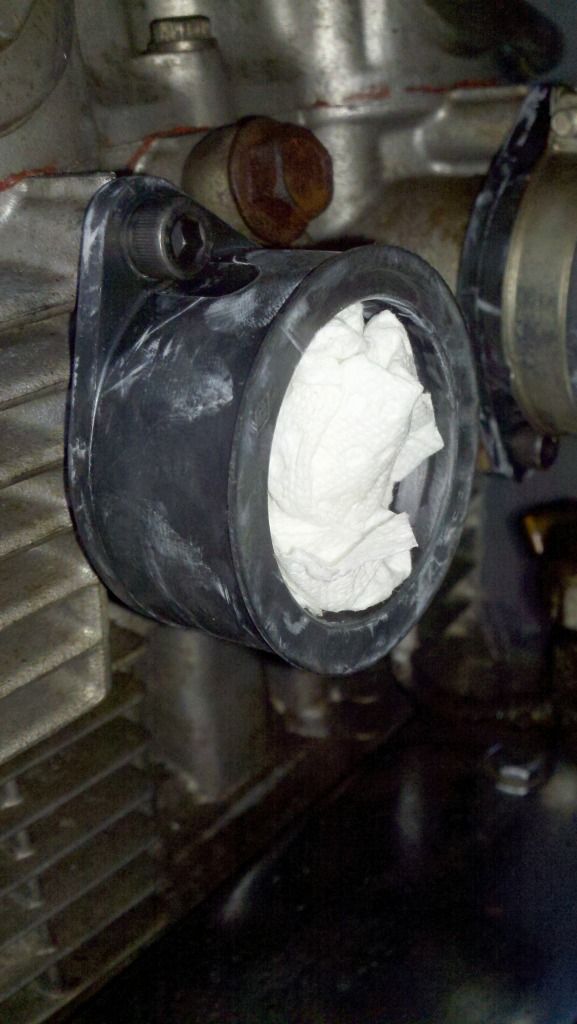
Well I got the "carb passage plugs" in the mail and trimmed it down with a razor to take the place of the plastic cap. Hopefully it stays in there and doesn't work itself out (maybe some superglue?).
I also put the carbs back in. She started right up but still runs rough. Issues:
-Leaks fuel out of drain lines when the screws are tight. I ordered new o-rings for the drain screws, as I put the wrong ones on from the rebuild kit. All those o-rings and none of them are labeled or anything.
-Still runs rough. Spiking rpm's when idling and lack of power and bogged down when running. I ordered new carb holders as mine are still cracked. Could it be my pilot screws? When i removed them i'm not sure if they are back in exactly where they were originally. Do i turn them down more or out more? Once it warmed up it starts up perfectly and idles ok, but no power, feels bogged down.
-I rebuild the petcock but it still doesn't work. PRI is off, and ON and RES just let if flow even when the engine is off. I rebuild the petcock and the vac line is clear. Could i have installed something wrong in it? what could be wrong?
-It doesn't like shifting into second. It has trouble getting into second from first, it just stays in neutral unless i really jam the lever up a few times with my foot. I adjusted the clutch before the bike was running, i'll try it again i guess. Could it be the clutch plates themselves? Just to verify, i turn the screw all the way in until it has no drag, turn it out until it's hard to turn, then back in a 1/4 turn. is that right? I read somewhere that for a kz the manual states the opposite of the correct turn direction.
As she sits now:
79 Honda 400 Hondamatic
79 Honda CB650
81 Honda CX500
81 Honda Passport C70
others coming in and out all the time!
79 Honda CB650
81 Honda CX500
81 Honda Passport C70
others coming in and out all the time!
Last edit: 13 Oct 2012 14:15 by jbeebe1.
Please Log in or Create an account to join the conversation.
- Patton
-

- Offline
- KZr Legend
-

Registered
- Posts: 18567
- Thanks: 2103
Re: $270 build! '81 KZ-440B
13 Oct 2012 14:54Would be skeptical about longevity of super glue in this application.jbeebe1 wrote: ...carb passage plugs...superglue?...
runs rough...
-Leaks fuel out of drain lines when the screws are tight. I ordered new o-rings for the drain screws.
-Still runs rough. Spiking rpm's when idling and lack of power and bogged down when running. I ordered new carb holders as mine are still cracked. Could it be my pilot screws? When i removed them i'm not sure if they are back in exactly where they were originally. Do i turn them down more or out more? Once it warmed up it starts up perfectly and idles ok, but no power, feels bogged down.
-I rebuild the petcock but it still doesn't work. PRI is off, and ON and RES just let if flow even when the engine is off. I rebuild the petcock and the vac line is clear. Could i have installed something wrong in it? what could be wrong?
-It doesn't like shifting into second. It has trouble getting into second from first, it just stays in neutral unless i really jam the lever up a few times with my foot. I adjusted the clutch before the bike was running, i'll try it again i guess. Could it be the clutch plates themselves? Just to verify, i turn the screw all the way in until it has no drag, turn it out until it's hard to turn, then back in a 1/4 turn. is that right? I read somewhere that for a kz the manual states the opposite of the correct turn direction.
With drain screw tight, nipple serves as exit for overflow circuit.
Cracked carb holders usually result in air leaks.
Suspect assembly error when fitting gasket in petcock.
Rear wheel must be rolling to spin the countershaft sprocket fast enough to permit shift up into 2nd gear.
Clutch push-rod adjustment:
Likely need to resolve both the carb overflow issues and the cracked carb holder issues before being able to achieve decent carb tuning.
Good Fortune!
1973 Z1
KZ900 LTD
KZ900 LTD
Please Log in or Create an account to join the conversation.
- jbeebe1
-
 Topic Author
- Offline
- User
-

Registered
- Posts: 140
- Thanks: 5
Re: $270 build! '81 KZ-440B
13 Oct 2012 18:15Patton wrote: Likely need to resolve both the carb overflow issues and the cracked carb holder issues before being able to achieve decent carb tuning.
Thanks Patton for another great reply.
I was driving it when i had trouble shifting into 2nd, not just sitting still.
Also, with a fresh rebuild including the valve needles that hang on the floats, is the only culprit for the overflow problem the float level/height?
79 Honda 400 Hondamatic
79 Honda CB650
81 Honda CX500
81 Honda Passport C70
others coming in and out all the time!
79 Honda CB650
81 Honda CX500
81 Honda Passport C70
others coming in and out all the time!
Please Log in or Create an account to join the conversation.
- jbeebe1
-
 Topic Author
- Offline
- User
-

Registered
- Posts: 140
- Thanks: 5
Re: $270 build! '81 KZ-440B
17 Oct 2012 17:32
I just checked the float levels and both sides are a tiny bit high, but nothing drastic. So next time i pull the carbs I'm going to bed the float tang towards the valve a little.
Also, the left cylinder is much more hot than the right. The exhaust is burning after 1 minute of idling vs the other side which is still cool. does this automatically mean that that side is too rich?
I pulled both plugs after idling it for a few minutes a both tips were ashy black with carbon. I know it isn't completely accurate without doing a "plug chop", but still.
Once warmed up, it'll sit and idle fine right at 1k rpm, but once i try to take off it still bogs. I'm just waiting for the carb holders to come in, then i'll replace them and tear the carbs apart again and re-clean everything, polish the brass needle valve seats, and adjust the float levels a little bit and then see where i'm at. I also only turned the pilot screws out 2 turns when i reassembled them. i just realized the book calls for 2 and 3/4 turns, so i'll adjust that as well.
I'll update next week when I do that stuff, i have a wedding this weekend back in Philly. (i'm in cleveland now.)
79 Honda 400 Hondamatic
79 Honda CB650
81 Honda CX500
81 Honda Passport C70
others coming in and out all the time!
79 Honda CB650
81 Honda CX500
81 Honda Passport C70
others coming in and out all the time!
Please Log in or Create an account to join the conversation.
- jbeebe1
-
 Topic Author
- Offline
- User
-

Registered
- Posts: 140
- Thanks: 5
Re: $270 build! '81 KZ-440B
24 Oct 2012 18:32
I just got back from Philly yesterday and had a goody bag of stuff from powersportsplus.com waiting for me.
Carb Boots, Drain Screw O-Rings, and a new battery strap.
Today I replaced the carb boots. At first the plan was to take out the airbox and get the screws with an impact driver. Well after 30 minutes of trying to get the airbox out I abandoned that idea.
I ended up heating them up with a torch and using vice-grips to crank them loose. I also hit them twice over the last 24 hours with PB-Blaster. This worked. I replaced the machine screws with allen-cap bolts. The size, M6x18 was a little hard to find at your average hardware store. I had to go to a store specializing in fasteners to get them.
Next up is to tear down the carbs (again) and clean them up, adjust float heights, and clean the needle valve seat with brass polish.
79 Honda 400 Hondamatic
79 Honda CB650
81 Honda CX500
81 Honda Passport C70
others coming in and out all the time!
79 Honda CB650
81 Honda CX500
81 Honda Passport C70
others coming in and out all the time!
Please Log in or Create an account to join the conversation.
- jbeebe1
-
 Topic Author
- Offline
- User
-

Registered
- Posts: 140
- Thanks: 5
Re: $270 build! '81 KZ-440B
24 Oct 2012 21:50
Finished up with the carbs:
Those valves will slide in and out easier than a quarterback on prom night.
Those valves will slide in and out easier than a quarterback on prom night.
79 Honda 400 Hondamatic
79 Honda CB650
81 Honda CX500
81 Honda Passport C70
others coming in and out all the time!
79 Honda CB650
81 Honda CX500
81 Honda Passport C70
others coming in and out all the time!
Please Log in or Create an account to join the conversation.
Moderators: Street Fighter LTD


