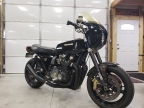
Doctorot's '78 KZ1000 build
- DoctoRot
-
 Topic Author
- Offline
- Sustaining Member
-

Registered
- Oh, the usual... I bowl, I drive around...
- Posts: 2611
- Thanks: 775
Re: Doctorot's '78 KZ1000 build
04 Mar 2019 23:50
i can find plenty of flat oil coolers with big fittings, but i would like one that is curved. I cant find a curved one with fittings larger than -8AN fittings.
Please Log in or Create an account to join the conversation.
- 531blackbanshee
-

- Offline
- Vendor
-

Vendors
- Posts: 7444
- Thanks: 796
Re: Doctorot's '78 KZ1000 build
05 Mar 2019 13:10 - 05 Mar 2019 13:11
am i crazy for thinking a couple of wooden bucks with the right curve could be used to press a straight oil cooler into a curved oil cooler?
with enough surface contact to keep from bending the fins,maybe a layer of felt on each side.:dry: or a thin piece of 1/4 inch plywood on each side to protect the fins?
yeah prolly crazy who would buy an oil cooler just to bend it up ???:whistle:
leon
with enough surface contact to keep from bending the fins,maybe a layer of felt on each side.:dry: or a thin piece of 1/4 inch plywood on each side to protect the fins?
yeah prolly crazy who would buy an oil cooler just to bend it up ???:whistle:
leon
skiatook,oklahoma 1980 z1r,1978 kz 1000 z1r x 3,
1976 kz 900 x 3
i make what i can,and save the rest!
billybiltit.blogspot.com/
www.kzrider.com/forum/5-chassis/325862-triple-tree-custom-work
kzrider.com/forum/5-chassis/294594-frame-bracing?limitstart=0
1976 kz 900 x 3
i make what i can,and save the rest!
billybiltit.blogspot.com/
www.kzrider.com/forum/5-chassis/325862-triple-tree-custom-work
kzrider.com/forum/5-chassis/294594-frame-bracing?limitstart=0
Last edit: 05 Mar 2019 13:11 by 531blackbanshee.
Please Log in or Create an account to join the conversation.
- DoctoRot
-
 Topic Author
- Offline
- Sustaining Member
-

Registered
- Oh, the usual... I bowl, I drive around...
- Posts: 2611
- Thanks: 775
Re: Doctorot's '78 KZ1000 build
05 Mar 2019 23:36 - 05 Mar 2019 23:37
haha. that actually sounds like it might work. I dont need a ton of bend in it just a little.... for style.
Last edit: 05 Mar 2019 23:37 by DoctoRot.
The following user(s) said Thank You: 531blackbanshee
Please Log in or Create an account to join the conversation.
- Kofla
-

- Offline
- User
-

Registered
- Posts: 112
- Thanks: 88
Re: Doctorot's '78 KZ1000 build
13 Aug 2019 20:10DoctoRot wrote: Lots of small things have been finished,including all the wiring in the front. Two things of note; One, I made some spools for the rear stand after knocking the bike off the stand. Luckily it fell into me and no damage was done but it damn near gave me a heart attack. With the spools and the stand it is VERY sturdy and cannot slip off as it did before. Two, I wasn't happy with the foot of the kickstand I made so I cut it off and remade it, the shoulder bolt also took some machining to get the spring to clear it. I made the stainless ball from scratch on the lathe for a throwback to the original kickstand. I think I might still need to add a tang on it to make it easier to kick out.
The only things left are:
Replace a few bolts with ARP to match
install clutch cable
install left footpeg/linkage
finish wiring.
6 YEARS LATER AND ITS ALMOST DONE
I have the same rear stand, and was wondering how to install spools to my 78 KZ1000.
1978 Kawasaki KZ1000 LTD
2010 Kawasaki Ninja ZX-14
2010 Kawasaki Ninja ZX-14
Please Log in or Create an account to join the conversation.
- DoctoRot
-
 Topic Author
- Offline
- Sustaining Member
-

Registered
- Oh, the usual... I bowl, I drive around...
- Posts: 2611
- Thanks: 775
Re: Doctorot's '78 KZ1000 build
06 Sep 2019 16:45 - 06 Sep 2019 16:46
I finally pulled my finger out and brought the bike to JP at Jp's Custom Seats in Los Angeles. The guy is a master, and super cool. With the increase in horsepower and braking abilities my original seat was not up to the job. With the old seat if I whacked the throttle wide open I could slide all the way back which would move the COG back and make power wheelies way too easy, and terrifying. This new seat is much more sculpted to hold me in place. I had him do a bunch of materials and lines to help break up the mass of the thicker seat. The small strip around the pleats is “grabber” vinyl and is quite tacky. It should help with hanging off the bike. Gonna put it through the paces this weekend
Attachment 1.jpeg not found
Attachment 2.jpeg not found
Last edit: 06 Sep 2019 16:46 by DoctoRot.
Please Log in or Create an account to join the conversation.
- TexasKZ
-

- Offline
- Platinum Member
-

Registered
- Posts: 8139
- Thanks: 2646
Re: Doctorot's '78 KZ1000 build
06 Sep 2019 17:01
Very nice. I look forward to the ride report.
1982 KZ1000 LTD parts donor
1981 KZ1000 LTD awaiting resurrection
2000 ZRX1100 not ridden enough
www.kzrider.com/11-projects/620336-anoth...uild-thread?start=24
1981 KZ1000 LTD awaiting resurrection
2000 ZRX1100 not ridden enough
www.kzrider.com/11-projects/620336-anoth...uild-thread?start=24
Please Log in or Create an account to join the conversation.
- bluej58
-

- Offline
- Sustaining Member
-

Registered
- The chrome don't get you home
- Posts: 2474
- Thanks: 507
Re: Doctorot's '78 KZ1000 build
06 Sep 2019 17:13
Yea real nice!
Be careful have fun
Be careful have fun
78 KZ1000 A2A
Please Log in or Create an account to join the conversation.
- DoctoRot
-
 Topic Author
- Offline
- Sustaining Member
-

Registered
- Oh, the usual... I bowl, I drive around...
- Posts: 2611
- Thanks: 775
Re: Doctorot's '78 KZ1000 build
17 May 2021 21:17 - 17 May 2021 22:14
10 year anniversary of tearing this bike down the first time. I have been working on a slew of updates over the winter.
The wires from the HID unit were getting fatigued and mostly broken from having the inverter crammed in the headlight bucket. I swapped for an LED bulb. Its amazing how far this tech has come in 10 years. When I was first researching lighting I was turned off from the LED bulbs because they looked horrible. I don't mind this, its super bright and 1/3 the cost of replacing the HID.
the ZRX forks were fully gone trough by Matt Wiley from Racetech VIntage, now sporting new springs, gold compression valve, gold rebound valve - with HFR, and new seals and bushings. I also took the time to paint the lowers with 2K spray max black gloss. I thought the bike handled well before but I am truly impressed how this transformed the front end. It feels so much more planted at high speed and hard acceleration out of turns is vastly improved. 10/10 would recommend.
Goldilocks handlebars: Superbike bars too high, Tarrozi clip-ons too low, These new woodcraft clip-ons are nearly perfect with more rise and pull back. The riding position is more comfortable, and I love the way they look.
The new clip-ons required new brake lines. I had to change to a splitter to fit the MC on the handle bars as well. I took the opportunity to black out everything. Custom ordered from Graystone Systems - highly recommend these guys - good prices and fast turnaround.
The tach started having issues reading the pulses so I sent it back to Speedhut and they made good on their lifetime warranty. they upgraded the chip board to their new design.
I fabricated a new front axle, increasing diameter from 17 to 20mm. I remade the spacers, and nut with aircraft grade 7075 aluminum, The other end has a 316 stainless nut i machined and welded to a hollow GSXR axle. including bearings the assembly weighs 8oz. less than previous. Making this axle is something I wanted to do for a while. I'm not a pro machinist so this took me 30+ hours of machine time with a couple screw-ups along the way. However it forced me to get better indicating parts using a 4-jaw chuck on the lathe. I love stuff like this.
I melted my regulator and got a new one from Ricks Electronics that is specifically for lithium batteries. I also relocated it from in the tail to behind the carbs to get more airflow.
Lots of little things here and there to spruce it up - Painting the rusting exhaust collars, swapping bolts, new clutch cable, cleaned up the wiring loom, it goes on....
Riding this bike never fails to put a big stupid smile on my face - its gonna be a fun summer!
Last edit: 17 May 2021 22:14 by DoctoRot.
The following user(s) said Thank You: Dragbike_Mike
Please Log in or Create an account to join the conversation.
- Bama704
-

- Offline
- User
-

Registered
- Posts: 202
- Thanks: 29
Re: Doctorot's '78 KZ1000 build
18 May 2021 05:26
Very nice subtle changes! I will have to look into those handle bars for sure.
This bike is one of my favorites.
This bike is one of my favorites.
1977 KZ900
Carbs are late model 1975 28mm
Carbs are late model 1975 28mm
Please Log in or Create an account to join the conversation.
- TexasKZ
-

- Offline
- Platinum Member
-

Registered
- Posts: 8139
- Thanks: 2646
Re: Doctorot's '78 KZ1000 build
18 May 2021 05:42
Nice updates.
Wow! Has it really been ten years? Seems like yesterday........
Wow! Has it really been ten years? Seems like yesterday........
1982 KZ1000 LTD parts donor
1981 KZ1000 LTD awaiting resurrection
2000 ZRX1100 not ridden enough
www.kzrider.com/11-projects/620336-anoth...uild-thread?start=24
1981 KZ1000 LTD awaiting resurrection
2000 ZRX1100 not ridden enough
www.kzrider.com/11-projects/620336-anoth...uild-thread?start=24
Please Log in or Create an account to join the conversation.
- Skidmark
-

- Offline
- User
-

Registered
- Posts: 1087
- Thanks: 312
Re: Doctorot's '78 KZ1000 build
18 May 2021 07:40
I found the Woodcraft clip ons with a 3" rise turned out to be a great fit on my KZ750. Since I am using a CBR600RR front end, which had clip ons originally, the new Woodcrafts brought the bars up to a more comfortable height. I am very happy with the fitment and quality of their product.
Retired gearhead
'81 KZ-750 E2
'87 Suzuki Savage 650 Street Tracker (lost in the shop fire)
'81 KZ-750 E2
'87 Suzuki Savage 650 Street Tracker (lost in the shop fire)
Please Log in or Create an account to join the conversation.
- DoctoRot
-
 Topic Author
- Offline
- Sustaining Member
-

Registered
- Oh, the usual... I bowl, I drive around...
- Posts: 2611
- Thanks: 775
Re: Doctorot's '78 KZ1000 build
15 Sep 2021 16:21
After 10 years and completely draining it a couple times the Ballistic Battery I was using finally crapped the bed. Unfortunately Ballistic is out of business and even more unfortunately all replacement batteries I wanted were bigger than the battery box I made previously. So since I had to re-make the battery box to accomodate the new battery I decided to re-make the entire tray and clean up the wiring while I was at it. I'm currently in a very small garage with no real fabrication tools available, but luckily I have cool friends and a buddy (Carbon Fiber Yoda) offered to help me make the tray and battery box out of carbon fiber.
I went with an EarthX battery because they have a 3 year warranty and are some of the only batteries for power-sports that have an integrated battery management system. I drew the new battery box in CAD and designed it with 3% of taper to aid in removal of carbon positive. Carbon Yoda then 3D printed it, and then covered the plug with Teflon tape. I used the old battery tray as a plug and filled in the holes with cardboard before coating with packing tape.
We did a wet layup on the outside of the parts and vacuum bagged them both. The battery box is crazy light - 2oz! While i was at it I also replaced the OEM starter relay with a more modern Suzuki relay with integrated main fuse and power output. I re-made the RFID key mount and the fuse mount for that - this really cleaned the wiring up. I ended up painting the outside of the battery box black because carbon fiber bling is not wanted.
I love having this storage area under the seat; I use it to run errands because i can store small stuff. Its also great for storing a sweater/warmer clothes if im going to be out all day/night
The following user(s) said Thank You: Dragbike_Mike
Please Log in or Create an account to join the conversation.
Moderators: Street Fighter LTD
