
KZombie
- Irish-Kawi
-
- Offline
- User
-

Registered
- Posts: 498
- Thanks: 37
Re: KZombie
23 Apr 2016 18:35
Hey Wrench,
I gotta say you have an art for telling a story and I always enjoy reading an update here, love the style and journey you take us on every time, please keep it up its a treat!! Great job on all the progress and looks like it's coming together pretty darned quick soon for ya, congrats!
If you have the $$$ for media that is definitely the way to go, but at least in my house cash is king so it's a balancing act between punishing the body for certain tasks or punishing the bank account. Ether way you will get er done and will look killer")
Thanks again for sharing and the killer reads,
Brett
I gotta say you have an art for telling a story and I always enjoy reading an update here, love the style and journey you take us on every time, please keep it up its a treat!! Great job on all the progress and looks like it's coming together pretty darned quick soon for ya, congrats!
If you have the $$$ for media that is definitely the way to go, but at least in my house cash is king so it's a balancing act between punishing the body for certain tasks or punishing the bank account. Ether way you will get er done and will look killer
Thanks again for sharing and the killer reads,
Brett
All the gear all the time!
1985 Kawasaki GPz 750 (ZX750-A3) 15,000 original miles www.kzrider.com/forum/11-projects/601230...z750-refresh-project
Father - Husband - Bourbonr - Rider
1985 Kawasaki GPz 750 (ZX750-A3) 15,000 original miles www.kzrider.com/forum/11-projects/601230...z750-refresh-project
Father - Husband - Bourbonr - Rider
The following user(s) said Thank You: wrenchmonkey
Please Log in or Create an account to join the conversation.
- wrenchmonkey
-
 Topic Author
- Offline
- User
-
Registered
- Posts: 568
- Thanks: 75
Re: KZombie
24 Apr 2016 06:07
G'day Brett !
Thanks man. I try to relate the story so it's fun. After all, that is why we do it; right?
I think your sentiment - Punish the body or punish the wallet - should be a signature! :laugh: Truer words have never been spoken.
Thanks man. I try to relate the story so it's fun. After all, that is why we do it; right?
I think your sentiment - Punish the body or punish the wallet - should be a signature! :laugh: Truer words have never been spoken.
Please Log in or Create an account to join the conversation.
- Irish-Kawi
-
- Offline
- User
-
Registered
- Posts: 498
- Thanks: 37
Re: KZombie
24 Apr 2016 09:42wrenchmonkey wrote: G'day Brett !
Thanks man. I try to relate the story so it's fun. After all, that is why we do it; right?
I think your sentiment - Punish the body or punish the wallet - should be a signature! :laugh: Truer words have never been spoken.
Hahahaha well I just go based off my limited experience and based on the abuse I've put my body through over time some might say I could be considered a masochist cuz I always keep choosing that punish the body option

Brett
All the gear all the time!
1985 Kawasaki GPz 750 (ZX750-A3) 15,000 original miles www.kzrider.com/forum/11-projects/601230...z750-refresh-project
Father - Husband - Bourbonr - Rider
1985 Kawasaki GPz 750 (ZX750-A3) 15,000 original miles www.kzrider.com/forum/11-projects/601230...z750-refresh-project
Father - Husband - Bourbonr - Rider
Please Log in or Create an account to join the conversation.
- wrenchmonkey
-
Topic Author
- Offline
- User
-
Registered
- Posts: 568
- Thanks: 75
Re: KZombie
30 Apr 2016 06:56
No pictures this time but I do have lots for later.
Quick question:
Can I buy a replacement steering lock key?
I have read in searches here that the lock cylinder cannot be removed without the key and KZombie didn't come with any keys.
I've looked everywhere on it but don't see any numbers to indicate the key's cut.
Quick question:
Can I buy a replacement steering lock key?
I have read in searches here that the lock cylinder cannot be removed without the key and KZombie didn't come with any keys.
I've looked everywhere on it but don't see any numbers to indicate the key's cut.
Please Log in or Create an account to join the conversation.
- 650ed
-

- Offline
- User
-
Registered
- Posts: 15334
- Thanks: 2830
Re: KZombie
30 Apr 2016 07:01
My KZ650 uses the same key for the ignition, steering lock, and seat lock. If your bike has the original seat lock and steering lock you should be able to use the same key for both. My seat lock has a 3 digit code next to the keyhole that can be used to make a key. Ed
1977 KZ650-C1 Original Owner - Stock (with additional invisible FIAMM horn)
The following user(s) said Thank You: wrenchmonkey
Please Log in or Create an account to join the conversation.
- rstnick
-

- Offline
- Premium Member
-

Registered
- Posts: 4613
- Thanks: 525
Re: KZombie
30 Apr 2016 07:11 - 30 Apr 2016 07:12
I think the '79 650s will have a key code in the Z5001 to Z6000 range.
The key # may be on the side or back of the ignition switch or seat lock.
Nice work on the 650 so far.
")
The key # may be on the side or back of the ignition switch or seat lock.
Nice work on the 650 so far.
Rob
CANADA
Need a key for your Kawasaki? PM me
1978 KZ650 C2, 130K kms, Delkevic ex, EI, CVK32, PMC easy clutch, ATK fork brace, steering damper, braced swingarm, ZRX shocks, 18" Z1R front wheel.
2000 ZRX1100
2011 Ninja 250R - Wife's
2005 z750s
1978 KZ1000 project
1983 KZ1000R2 Project
CANADA
Need a key for your Kawasaki? PM me
1978 KZ650 C2, 130K kms, Delkevic ex, EI, CVK32, PMC easy clutch, ATK fork brace, steering damper, braced swingarm, ZRX shocks, 18" Z1R front wheel.
2000 ZRX1100
2011 Ninja 250R - Wife's
2005 z750s
1978 KZ1000 project
1983 KZ1000R2 Project
Last edit: 30 Apr 2016 07:12 by rstnick.
The following user(s) said Thank You: wrenchmonkey
Please Log in or Create an account to join the conversation.
- davido
-

- Offline
- User
-
Registered
- Posts: 1578
- Thanks: 291
Re: KZombie
30 Apr 2016 08:12
I went through this a couple of weeks ago.Posted here;
www.kzrider.com/forum/4-electrical/602051-csr1000-key-question
Long story short, A good locksmith should be able to sort you out.
www.kzrider.com/forum/4-electrical/602051-csr1000-key-question
Long story short, A good locksmith should be able to sort you out.
www.kzrider.com/forum/11-projects/594313-csr1000-project-build
CB550 (1978)
CB500/4 (1972)*
KZ1000CSR (1981)
XT 600E (1999)
TDM900 (2003)
CB550 (1978)
CB500/4 (1972)*
KZ1000CSR (1981)
XT 600E (1999)
TDM900 (2003)
Please Log in or Create an account to join the conversation.
- wrenchmonkey
-
Topic Author
- Offline
- User
-
Registered
- Posts: 568
- Thanks: 75
Re: KZombie
30 Apr 2016 08:19
I bought an ignition and seat lock set with matching keys a while back but i think i probably still have the original seat lock in a box somewhere. I'll hunt it down.
I just looked at that steering lock and thought it was so tiny that it was different from ignition key.
Thanks guys!
Progress on the bike has been slow lately due to us moving & my cylinder heads (2 of them) still in machine shop. On the plus side, my new garage is bigger & i have actual workbenches now; no more grunting on the concrete floor for my old knees!")
I just looked at that steering lock and thought it was so tiny that it was different from ignition key.
Thanks guys!
Progress on the bike has been slow lately due to us moving & my cylinder heads (2 of them) still in machine shop. On the plus side, my new garage is bigger & i have actual workbenches now; no more grunting on the concrete floor for my old knees!
Please Log in or Create an account to join the conversation.
- wrenchmonkey
-
Topic Author
- Offline
- User
-
Registered
- Posts: 568
- Thanks: 75
Re: KZombie
30 Apr 2016 17:02
Wow! How time flies, when you're having fun and while you were having all that fun, I was stuck in life-moving agony. Yup. Since we last spoke at length, the better half decided she wanted to move. So, in between all the rest of daily life I hadda find the time to pack up all our schtuff into the truck and haul it down the road a ways.
Alas, I'm bitchin' when in fact I am happy about it. I don't know if you noticed in any of the recent pictures but whenever I have been working on the KZombie (or any of the Kaw's), I've been doing it all on the garage floor. Our last house had a garage conversion done to it before we got it and so there was no drive-in garage. Just a garage-sized room. Thus, the space became a big, hairy unorganized storage Twilight Zone - like where schitt goes in and is never seen from again. Until I yell "Hey Hun? Where's the (insert something you can't do without right this moment).
Whatever. Moving is part of life and I moved all our life to a more comfortable space that included for me a double car garage with an actual garage door and all to become my play zone. Lots of room for all the bikes and even a couple of workbenches. Well, just one workbench so far but another is coming soon. A mobile one no less.
Ok. Back on track. All my lovely or ignored Kaws are safe in their new space. So it's 2 days ago and I'm still waiting on that dang machinist to finish the cylinder head work. KZombie's mostly dismantled engine sitting lonely on the garage floor, reminds me daily I'm a putz and shoulda' taken the head somewhere else maybe. So I call the machine shop and ask Wut up G? Any wurd on my motorcycle's two cylinder heads? They tell me I have to come in and see "the motorcycle guy". Uh oh. :ohmy: That can't be good. So yesterday after moving the last of the required furniture, I take a quick trip over to the machine shop...
Remember about, um? feels like a month ago but prolly more like 2 weeks, I took KZombie's head in (Hey! my KZombie has no head! Definitely not cool for a Zombie!) and after the gave it a bath, he discovered the valves were bent. Well, some of the valves were bent. So I drew back and punted, finding another complete cylinder head online and took it in. "Here man. Here's another whole head, already been ultrasonically cleaned and everything. Use this one instead. But it turns out after the machinist looked into it, that my original head was in better shape (lower mileage/hours, less wear on the guides and seats). So he asked me to make an executive decision - wait longer to re-do the last head after I get new valve guides etc or he could put KZombie's original head together in a couple of days. I already took him new Viton valve seals and between the two heads he had a complete set of valves. So that happened. A couple more days doesn't include weekends of course but soon....soon.
So what's a lad to do? Idle hands and all being the devil's playground... I decided to clean up all the parts laying all over the place at the old garage:
I packed up all the parts that were carefully laid out to remind my lame brain where and how they went back together and chunked'em all into a big tub. No rhyme, no reason. Just get the stuff consolidated in my new garage.
Today:
3:30am... :dry:
4:00am... :huh:
4:30am... :S
Screw this. I'm not sleeping anyway. Obviously, I needa' do something. Stumbled through the dark like a church mouse to the coffee maker and then out to the garage in my PJ's. Swig o' the java and spark up a cigarette and started cleaning up the wheels. That's something I can do half asleep. No brains required. Just elbow grease.
The wheels were pretty oxidized from their careful aging process in that field and while scrubbing down the bike a week ago did wonders, it didn't solve the oxidation:
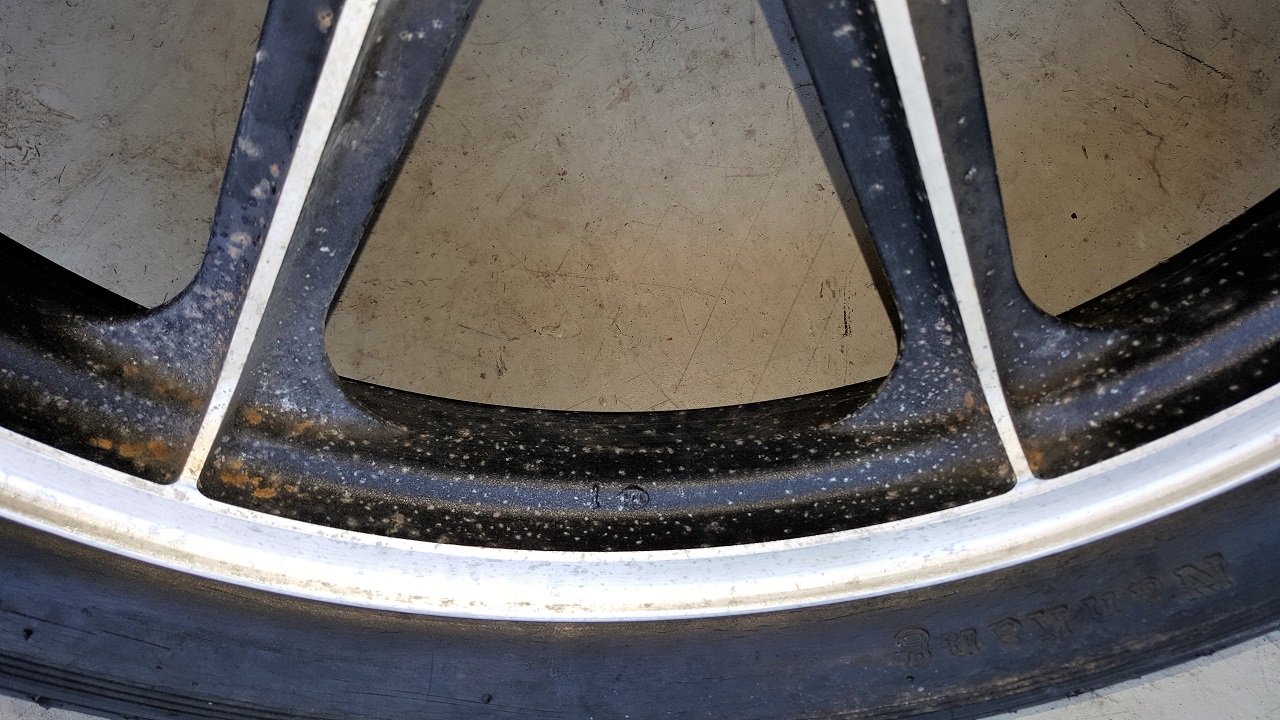
So I scrubbed away at the wheels and it made a great difference in their appearance. Here you can see left side scrubbed down with wire brushes and right side ignored more:
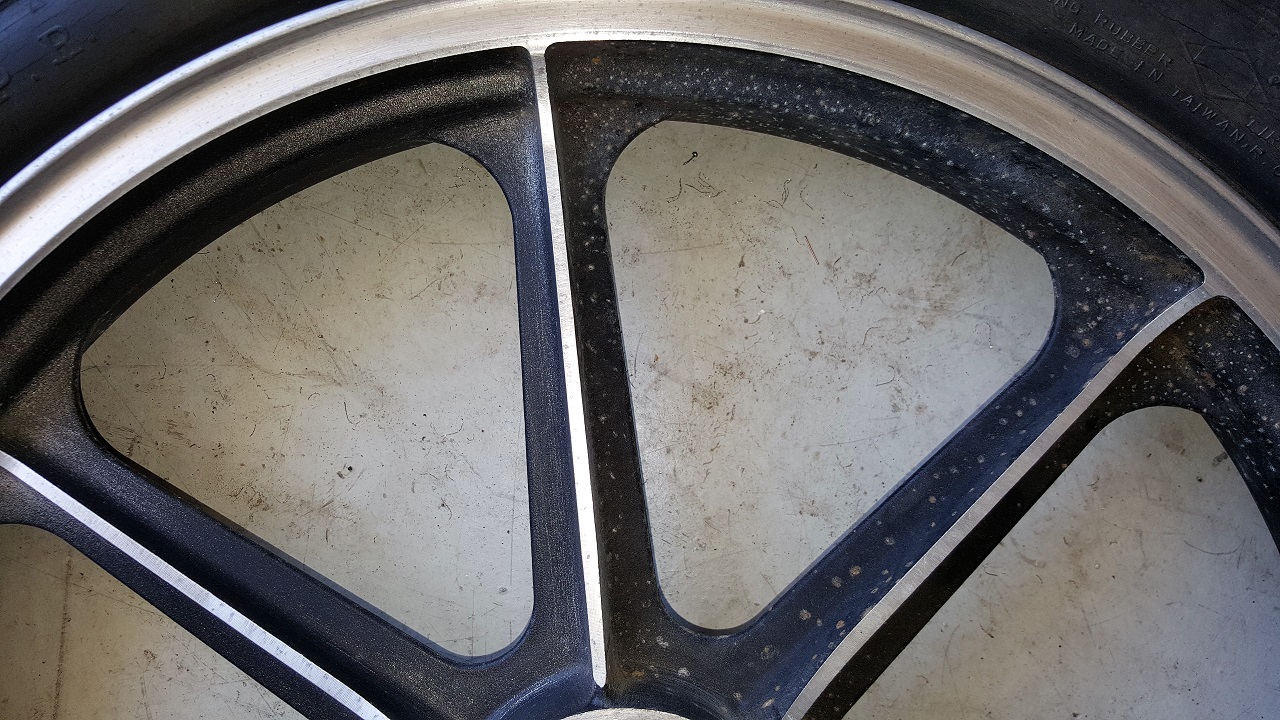
By the time the sun had risen, I had managed to scrub up both wheels. Funny how the front wheel looks almost presentable, yet the rear wheel lost almost all of it's paint:

I'm going to repaint them of course. The decision is to use a slightly metallic black paint which will look pretty much like the front wheel does above. The frame is going to be painted the same eventually.
I cranked up another cup of joe and looked around for something else to do and I remembered that the front forks I ordered to replace KZombies rusted ones, had been delivered the day I was moving all the bikes! Fire up another smoke and setup the new workbench for something fun! Oh Joy!
Masochist. The definition in the dictionary is wrong! It doesn't include anything like this:
How long do you have to stare at those pages before they start to make sense? Another cup of java...
I set to it. It took me all day to swap out all the parts from four forks into two useable units:
This was the ticket to remove the top plugs. Vrrzzzz! Off!
I built-up some adapters to hold an 8mm allen wrench that I cut down with my angle grinder:
This removed the bottom allen bolt nearly painlessly, once I also concocted this up:
That contraption is a 1/2" drive ratchet with a few extensions, a 9/16" socket and a #6 screw extractor. The screw extractor idea came from another member on this site who suggested it as "worked for me".
and .... it worked for me too!
I had identified all the parts as belonging to the new doner set or the original set because the doner pair were from another KZ650 model. The lower forks had a slightly different mounting position for the front fender, which meant I had to keep KZombie's original lowers and swap-in the doner upper tubes BUT given that bottom of the internal piston rides against the lower while the top rides inside the upper, I made the delusion, erm, I mean decision, that I needed to keep the pistons (Not what the FSM calls this part) with the upper tubes, but use the lower segments from the original lower tubes. Yeah. I made it rocket science when it probably doesn't matter one dang bit but Hey! I was only operating on half a pot of coffee by that point so it made sense to me.
End result:
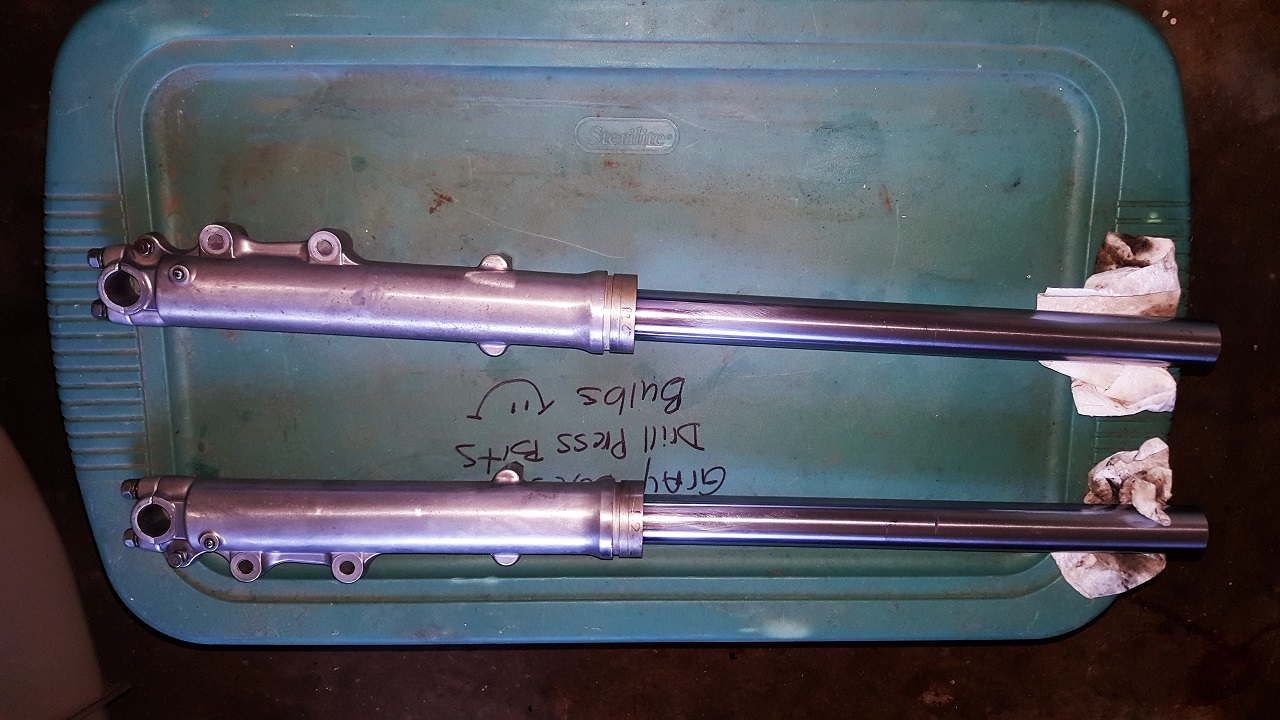
This was about 4:30pm. I had soaked through a whole roll of paper towels and only had to refill the forks with 190cc of SAE 15 fork oil and then I could zip the top plugs in and install the seal and dust cover. Now where did I put that fork oil? Oh yeah. That's right. I'm a moron and forgot to buy that inconsequential component to this puzzle. :blush: I drove all over town at 4:45pm to any automotive supply store and discovered something - MOTORcycles are not considered AUTOmotive. At least none of the popular auto parts stores here carry fork oil and ... Waco Motorsports closes in 3, 2, 1... :pinch:
Yup. Another fine job by your Treasury man in action. Another phase of work sitting almost complete. But, Hey! That motorsports shop opens again in ... 3 days so.. Fricken, fracken, friction.
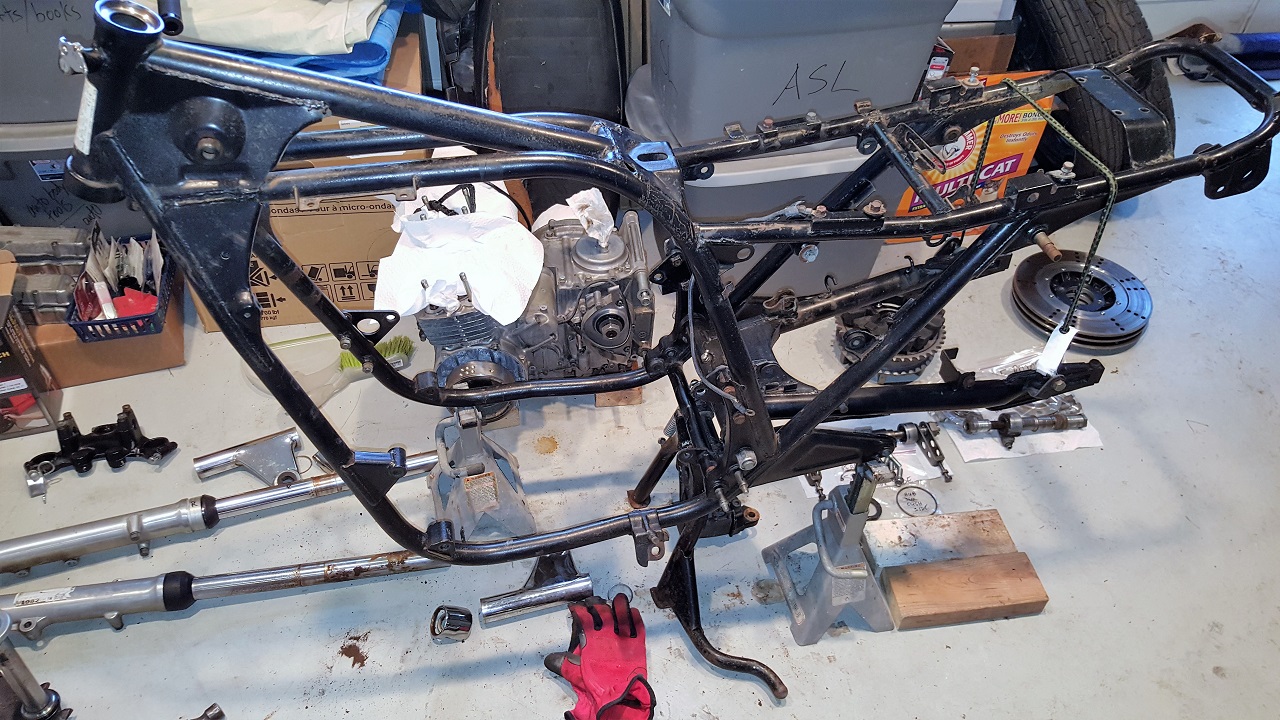
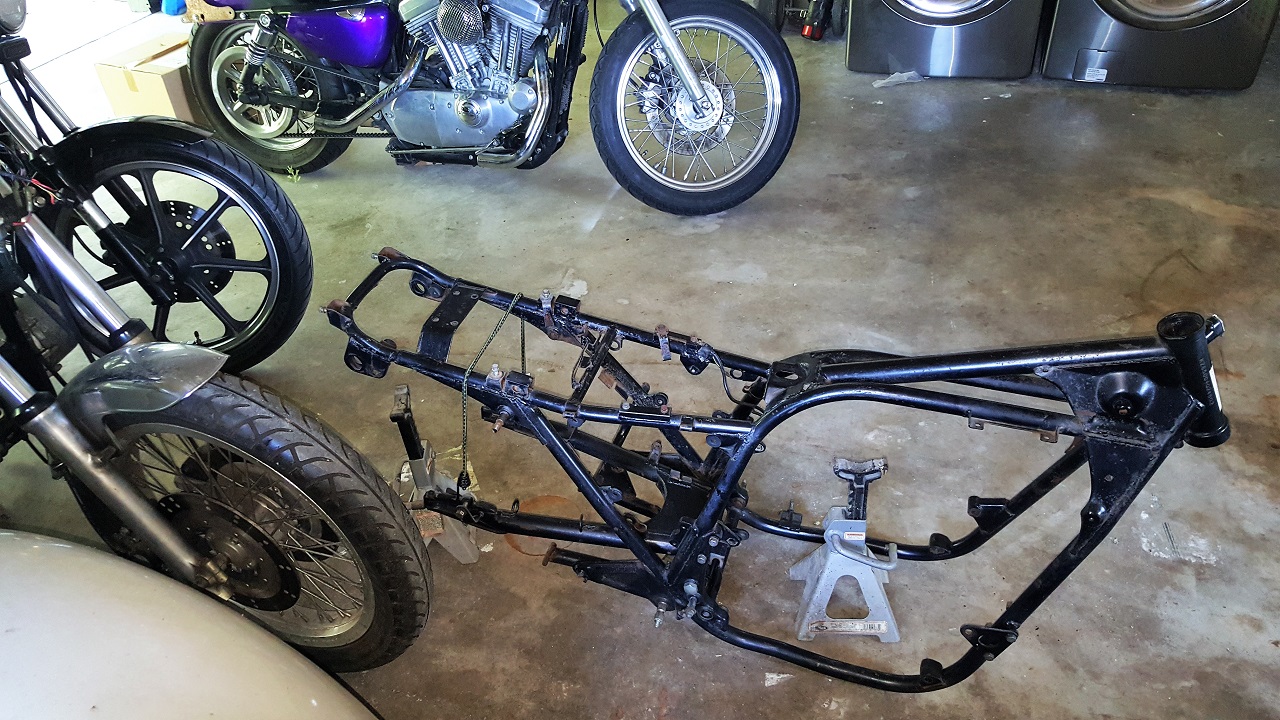
Dearly beheaded, we gather here to mourn a wonderful headless, forkless, wheel-less, awesome machine:
Alas, I'm bitchin' when in fact I am happy about it. I don't know if you noticed in any of the recent pictures but whenever I have been working on the KZombie (or any of the Kaw's), I've been doing it all on the garage floor. Our last house had a garage conversion done to it before we got it and so there was no drive-in garage. Just a garage-sized room. Thus, the space became a big, hairy unorganized storage Twilight Zone - like where schitt goes in and is never seen from again. Until I yell "Hey Hun? Where's the (insert something you can't do without right this moment).
Whatever. Moving is part of life and I moved all our life to a more comfortable space that included for me a double car garage with an actual garage door and all to become my play zone. Lots of room for all the bikes and even a couple of workbenches. Well, just one workbench so far but another is coming soon. A mobile one no less.
Ok. Back on track. All my lovely or ignored Kaws are safe in their new space. So it's 2 days ago and I'm still waiting on that dang machinist to finish the cylinder head work. KZombie's mostly dismantled engine sitting lonely on the garage floor, reminds me daily I'm a putz and shoulda' taken the head somewhere else maybe. So I call the machine shop and ask Wut up G? Any wurd on my motorcycle's two cylinder heads? They tell me I have to come in and see "the motorcycle guy". Uh oh. :ohmy: That can't be good. So yesterday after moving the last of the required furniture, I take a quick trip over to the machine shop...
Remember about, um? feels like a month ago but prolly more like 2 weeks, I took KZombie's head in (Hey! my KZombie has no head! Definitely not cool for a Zombie!) and after the gave it a bath, he discovered the valves were bent. Well, some of the valves were bent. So I drew back and punted, finding another complete cylinder head online and took it in. "Here man. Here's another whole head, already been ultrasonically cleaned and everything. Use this one instead. But it turns out after the machinist looked into it, that my original head was in better shape (lower mileage/hours, less wear on the guides and seats). So he asked me to make an executive decision - wait longer to re-do the last head after I get new valve guides etc or he could put KZombie's original head together in a couple of days. I already took him new Viton valve seals and between the two heads he had a complete set of valves. So that happened. A couple more days doesn't include weekends of course but soon....soon.
So what's a lad to do? Idle hands and all being the devil's playground... I decided to clean up all the parts laying all over the place at the old garage:
I packed up all the parts that were carefully laid out to remind my lame brain where and how they went back together and chunked'em all into a big tub. No rhyme, no reason. Just get the stuff consolidated in my new garage.
Today:
3:30am... :dry:
4:00am... :huh:
4:30am... :S
Screw this. I'm not sleeping anyway. Obviously, I needa' do something. Stumbled through the dark like a church mouse to the coffee maker and then out to the garage in my PJ's. Swig o' the java and spark up a cigarette and started cleaning up the wheels. That's something I can do half asleep. No brains required. Just elbow grease.
The wheels were pretty oxidized from their careful aging process in that field and while scrubbing down the bike a week ago did wonders, it didn't solve the oxidation:
So I scrubbed away at the wheels and it made a great difference in their appearance. Here you can see left side scrubbed down with wire brushes and right side ignored more:
By the time the sun had risen, I had managed to scrub up both wheels. Funny how the front wheel looks almost presentable, yet the rear wheel lost almost all of it's paint:
I'm going to repaint them of course. The decision is to use a slightly metallic black paint which will look pretty much like the front wheel does above. The frame is going to be painted the same eventually.
I cranked up another cup of joe and looked around for something else to do and I remembered that the front forks I ordered to replace KZombies rusted ones, had been delivered the day I was moving all the bikes! Fire up another smoke and setup the new workbench for something fun! Oh Joy!
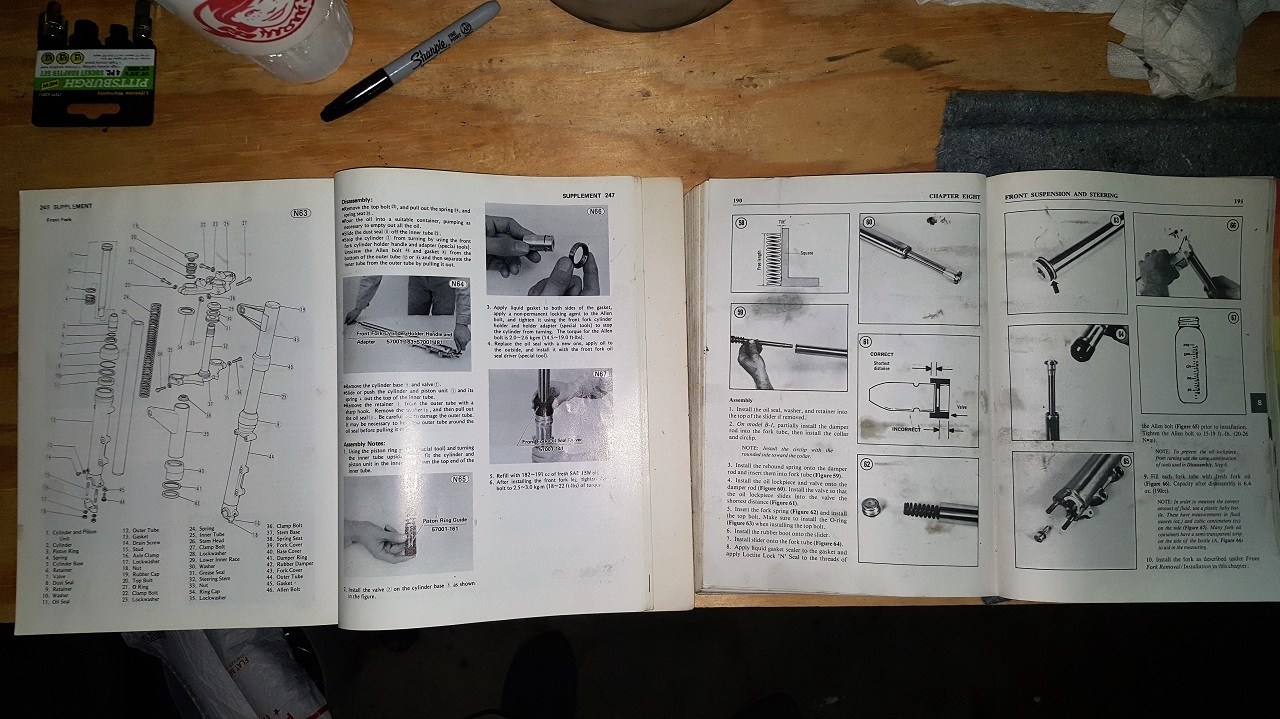
Masochist. The definition in the dictionary is wrong! It doesn't include anything like this:
How long do you have to stare at those pages before they start to make sense? Another cup of java...
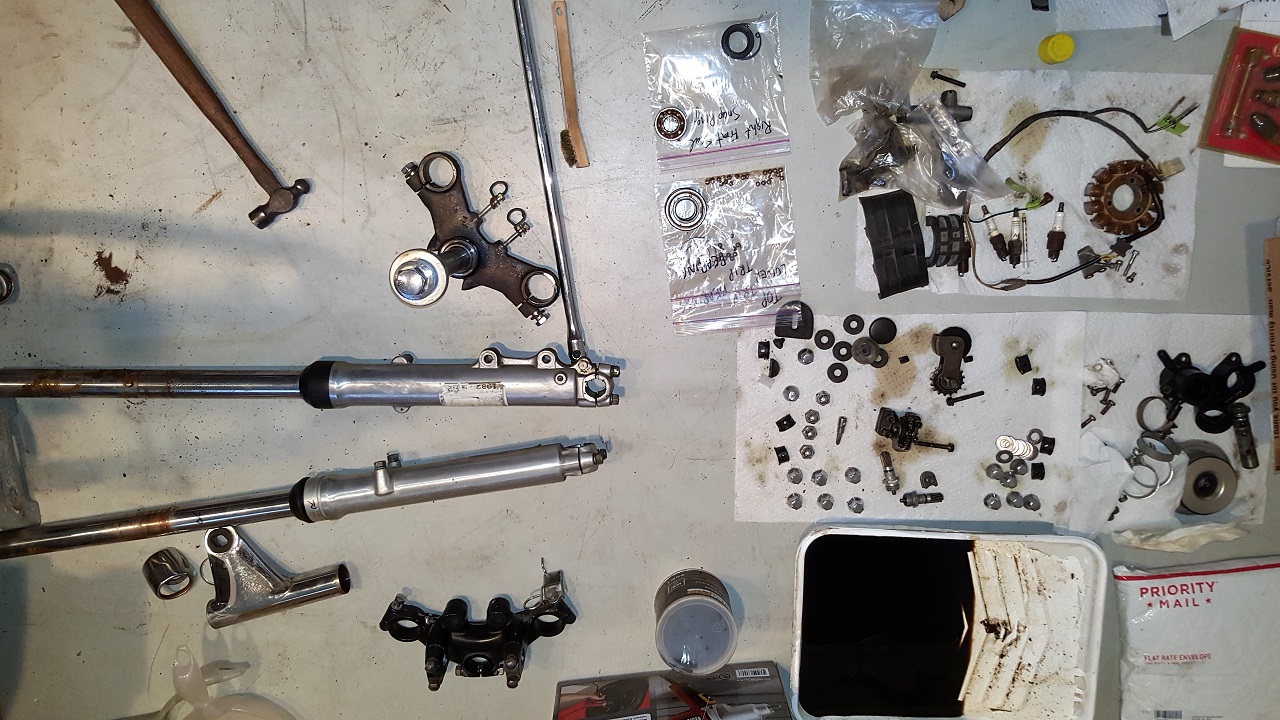
I set to it. It took me all day to swap out all the parts from four forks into two useable units:
This was the ticket to remove the top plugs. Vrrzzzz! Off!
I built-up some adapters to hold an 8mm allen wrench that I cut down with my angle grinder:
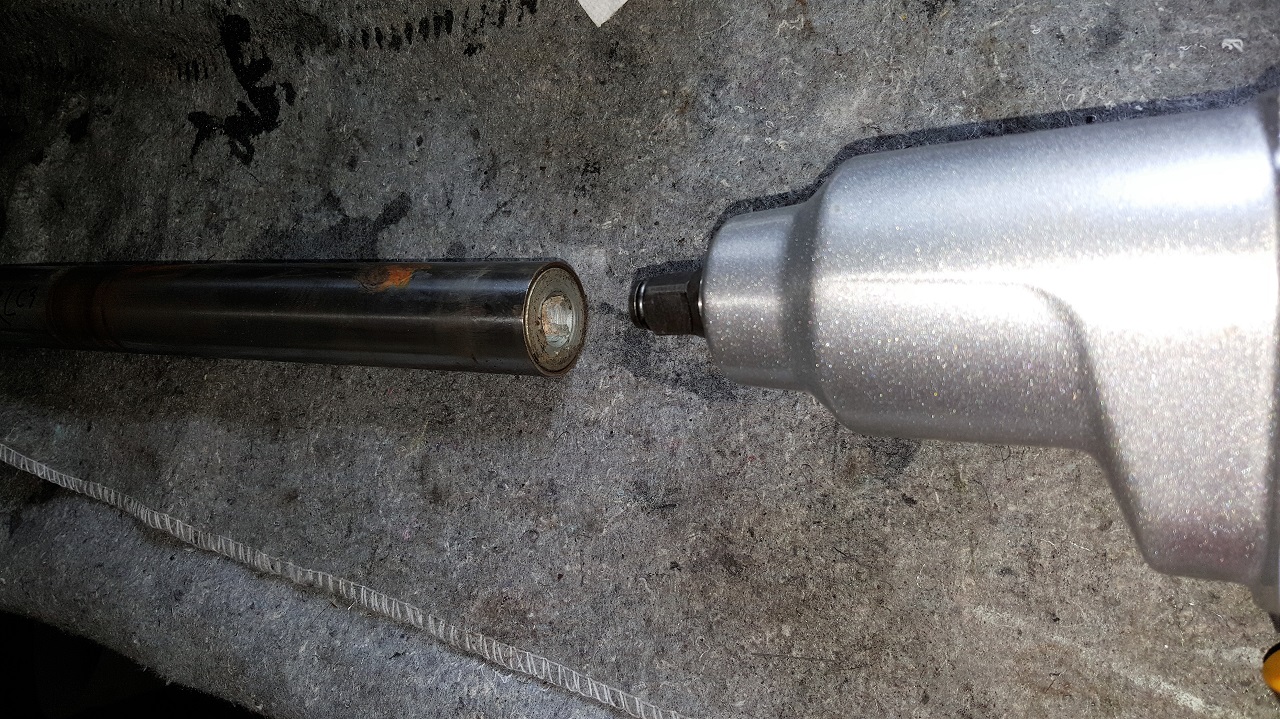
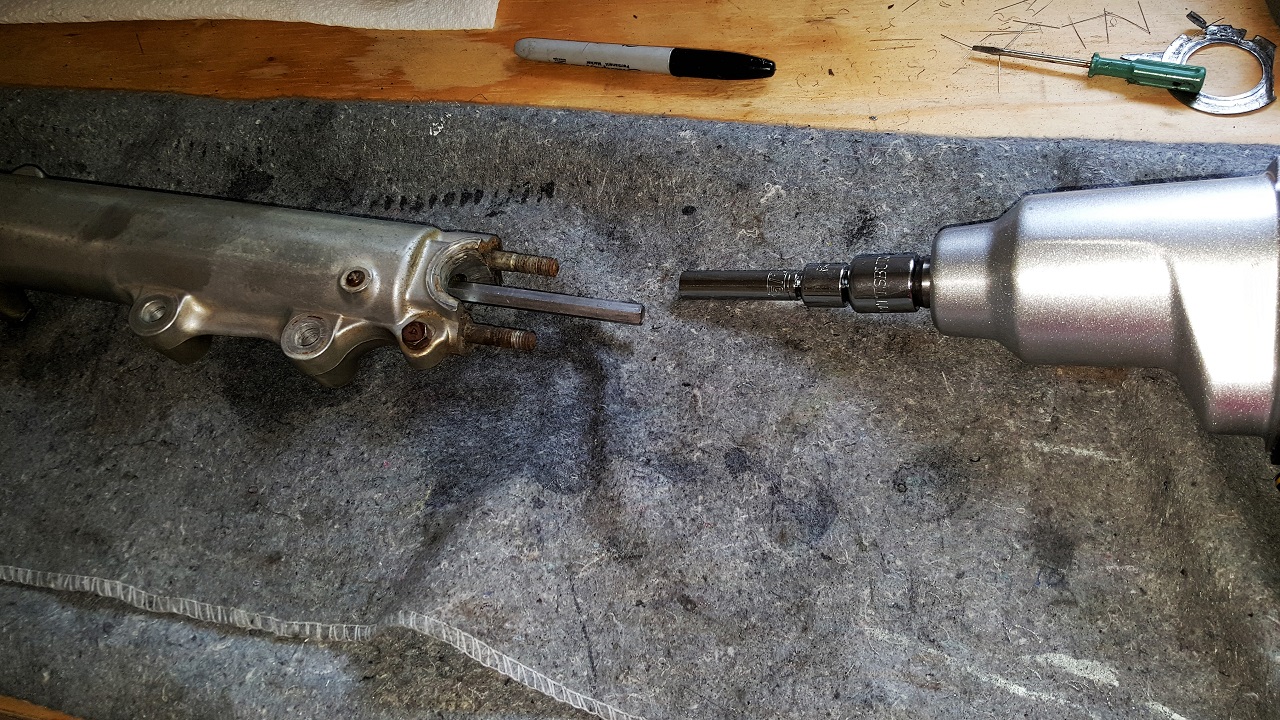
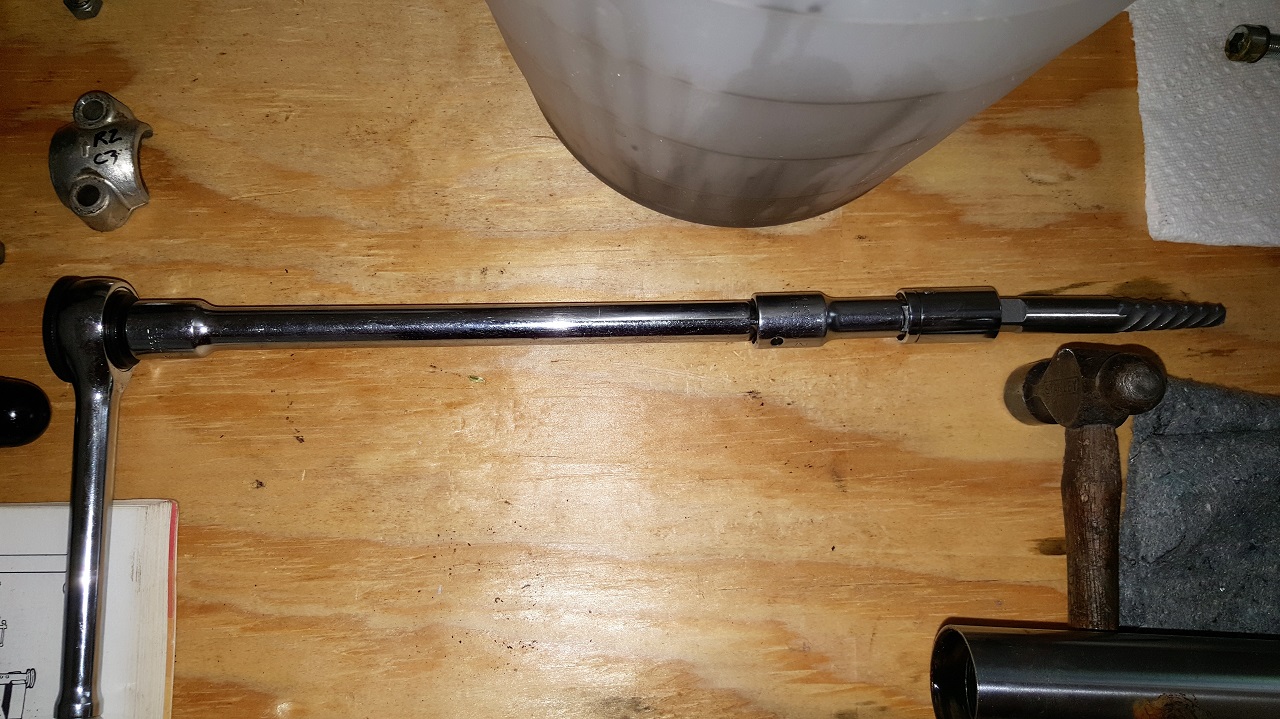
This removed the bottom allen bolt nearly painlessly, once I also concocted this up:
That contraption is a 1/2" drive ratchet with a few extensions, a 9/16" socket and a #6 screw extractor. The screw extractor idea came from another member on this site who suggested it as "worked for me".
and .... it worked for me too!
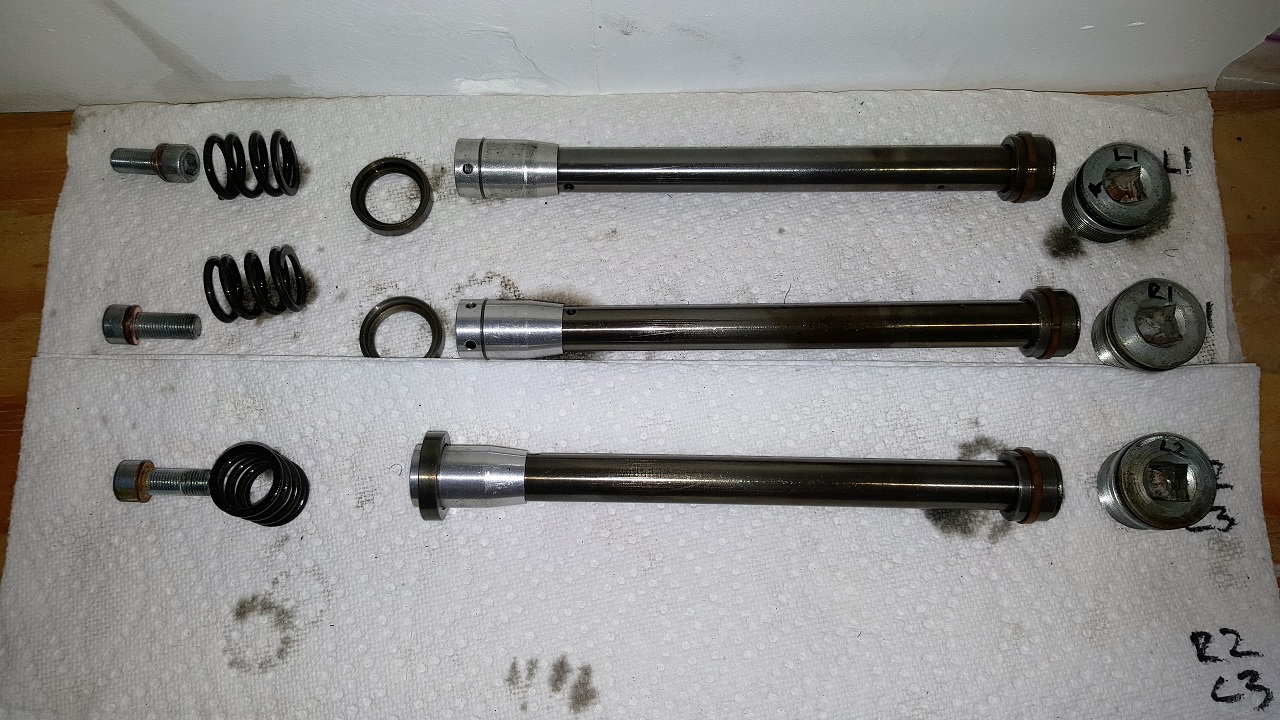
I had identified all the parts as belonging to the new doner set or the original set because the doner pair were from another KZ650 model. The lower forks had a slightly different mounting position for the front fender, which meant I had to keep KZombie's original lowers and swap-in the doner upper tubes BUT given that bottom of the internal piston rides against the lower while the top rides inside the upper, I made the delusion, erm, I mean decision, that I needed to keep the pistons (Not what the FSM calls this part) with the upper tubes, but use the lower segments from the original lower tubes. Yeah. I made it rocket science when it probably doesn't matter one dang bit but Hey! I was only operating on half a pot of coffee by that point so it made sense to me.
End result:
This was about 4:30pm. I had soaked through a whole roll of paper towels and only had to refill the forks with 190cc of SAE 15 fork oil and then I could zip the top plugs in and install the seal and dust cover. Now where did I put that fork oil? Oh yeah. That's right. I'm a moron and forgot to buy that inconsequential component to this puzzle. :blush: I drove all over town at 4:45pm to any automotive supply store and discovered something - MOTORcycles are not considered AUTOmotive. At least none of the popular auto parts stores here carry fork oil and ... Waco Motorsports closes in 3, 2, 1... :pinch:
Yup. Another fine job by your Treasury man in action. Another phase of work sitting almost complete. But, Hey! That motorsports shop opens again in ... 3 days so.. Fricken, fracken, friction.
Dearly beheaded, we gather here to mourn a wonderful headless, forkless, wheel-less, awesome machine:
Please Log in or Create an account to join the conversation.
- SWest
-

- Offline
- Sustaining Member
-

Registered
- 10 22 2014
- Posts: 23688
- Thanks: 3000
Re: KZombie
30 Apr 2016 19:15
Better to wait on the fork oil. You'll need to pump it and fill the lowers. If you fill the top they won't compress. Hydraulic oil works in a pinch and they have it at a AP store.
Steve
Steve
Z1b1000 1975 Z1b
kzrider.com/forum/11-projects/598262-kz-...-will-it-live#672882
kzrider.com/forum/2-engine/597654-poser?start=240#704229
kzrider.com/forum/11-projects/598262-kz-...-will-it-live#672882
kzrider.com/forum/2-engine/597654-poser?start=240#704229
Please Log in or Create an account to join the conversation.
- wrenchmonkey
-
Topic Author
- Offline
- User
-
Registered
- Posts: 568
- Thanks: 75
Re: KZombie
01 May 2016 20:06
Hey Steve!
Seriously man? I can't just pour it into the top of the cylinder? I am so totally PO'd to learn this. I had two manuals on the bench through the whole process and didn't know this. The FSM only says to fill it with ... and the Clymer too but it had a picture on the page showing a guy just pouring the fork oil down into the upper tube. They even mention how a baby bottle is useful because it actually measures fluid in the range of 190cc. LOL
So this means I have to use like hypo syringe and inject 190cc into that teeeeeny screw hole by the axle end? Dayum. This sure wasn't intuitive in any way shape or form.
Please Log in or Create an account to join the conversation.
- wrenchmonkey
-
Topic Author
- Offline
- User
-
Registered
- Posts: 568
- Thanks: 75
Re: KZombie
01 May 2016 20:13
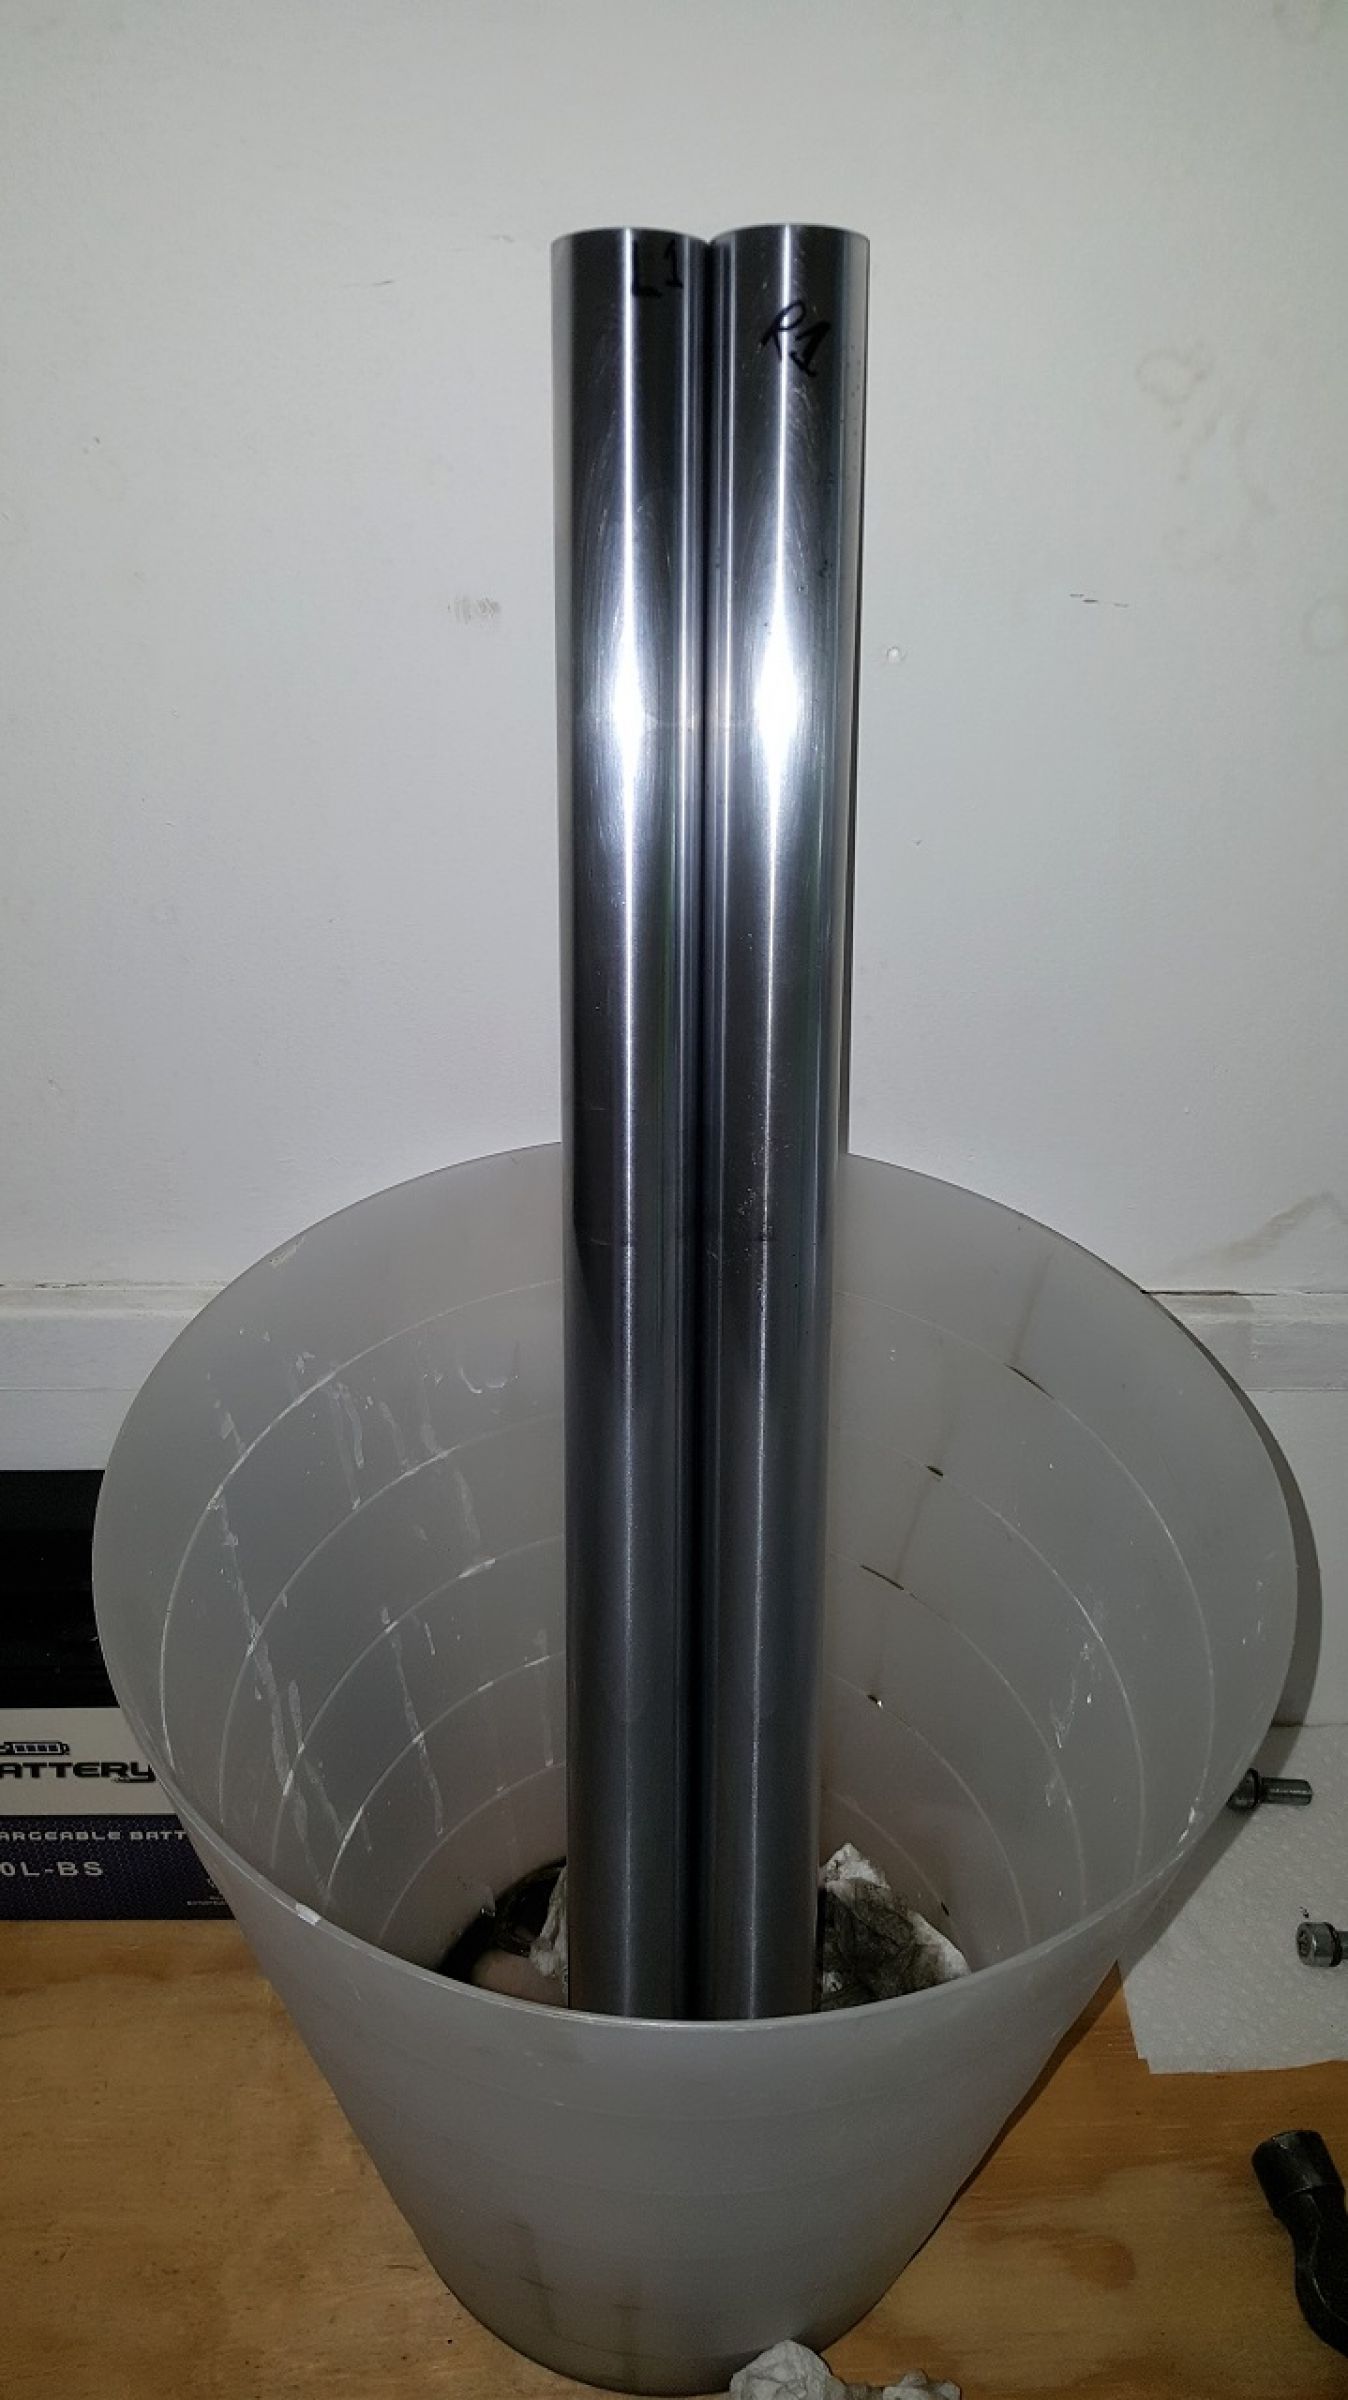
On the brighter side. I got to spend a couple of hours in the garage this evening and decided to prep the fork lowers for painting. Originally, I was thinking of painting them gloss black, like my 550a's forks are. I kinda' dig that look. So I set to scuffin' them up with 120 to ease-out the deeper scratches and moved up through 400 grit but then I couldn't stop myself and just kept going through to 1000 grit and finished with some buffing:
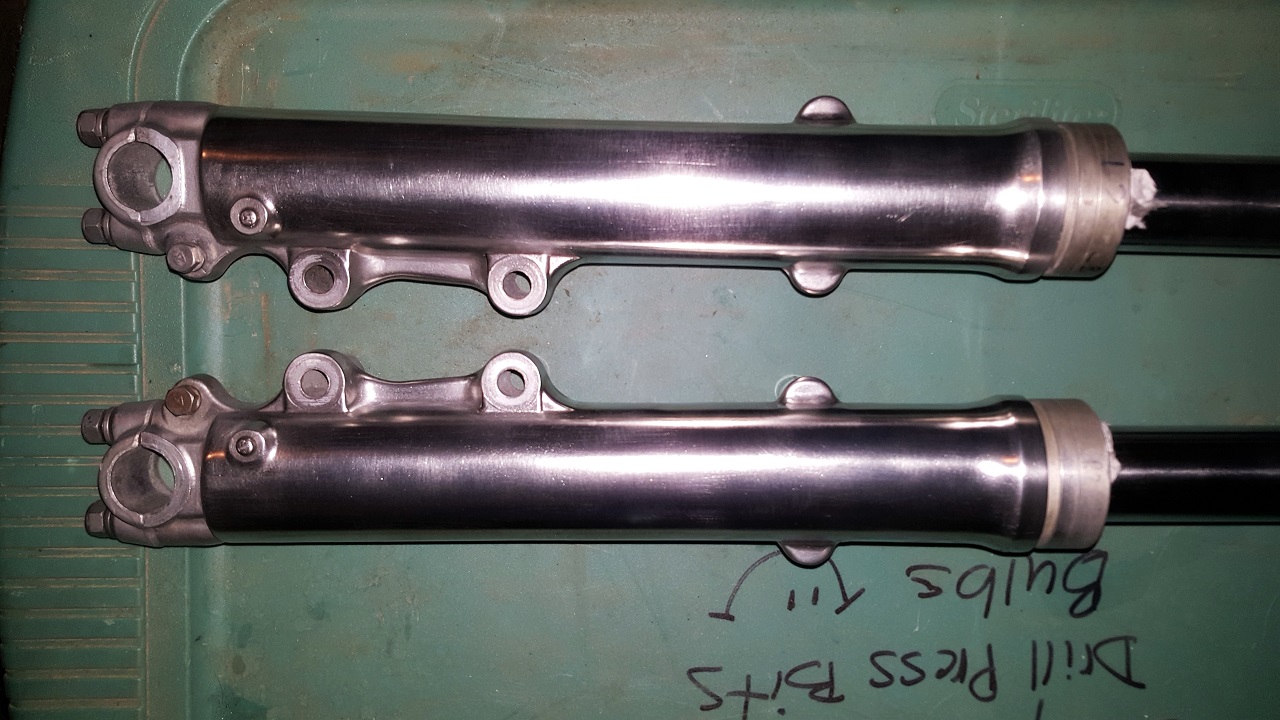
Still needs a wee bit more attention to remove the fine scratches but it was getting dark and I still don't have sufficient lighting over my new workbench so I couldn't see how I was doing during the buffing.
Guess, I've changed my mind though. I'm going to stick with the polished forks now. I still like shiny metal a wee bit more than the sporty look of the painted fork lowers on the 550a.
Please Log in or Create an account to join the conversation.
Moderators: Street Fighter LTD