Welcome, Guest
Username: Password: Remember me

TOPIC:

1981 KZ1000 J-to-K build 28 Aug 2016 19:22 #740300

  • Shdwdrgn
  • Shdwdrgn's Avatar Topic Author
  • Offline
  • User
  • Posts: 611
  • Thank you received: 24
Honestly I would NOT try to take apart the rear shocks. Stuff like that is frequently a press-fit one-shot deal and I don't think I would trust its safety if there wasn't a clear intended path for end-users to disassemble it.

As for the gasket material, see this thread, we had a bit of a discussion on the subject after I had already assembled mine, so I'm taking a chance and seeing if my brand holds up. Since you haven't even cracked yours yet, go with the recommended threebond.
kzrider.com/forum/2-engine/603471-complete-gasket-set
1981 KZ1000-JK1
She's a beautiful mess, and I've made her all mine

Please Log in or Create an account to join the conversation.

1981 KZ1000 J-to-K build 04 Sep 2016 18:14 #741108

  • Shdwdrgn
  • Shdwdrgn's Avatar Topic Author
  • Offline
  • User
  • Posts: 611
  • Thank you received: 24
Some small progress so far this weekend... Got in the new seal and got the cover plate over the gear change mechanism. Got in the last motor mount bolt and got the airbox back in place with the new rubber elbow to the oil breather. Spent the rest of today working on the valve head. Man what a lot of carbon build-up around the valves and inside the exhaust ports! I think it's a good bet this was why there was some sign of exhaust valve leakage, but because of the sandblasting I still need to pull out the valves for complete clean-up, so I might as well lapp them anyway.

So I have all the carbon cleaned out, the oil and grease has been fairly well removed, and the thickest layers of build-up have been scraped down. I spent a couple hours with the sandblaster so far cleaning the top and bottom, but tomorrow I'll try to get into the fins along the sides. Not planning on painting it this weekend, but hopefully can get it mostly cleaned up tomorrow and try to get the valves out.
1981 KZ1000-JK1
She's a beautiful mess, and I've made her all mine

Please Log in or Create an account to join the conversation.

1981 KZ1000 J-to-K build 05 Sep 2016 19:45 #741245

  • Shdwdrgn
  • Shdwdrgn's Avatar Topic Author
  • Offline
  • User
  • Posts: 611
  • Thank you received: 24
Made up my own little tool and popped out the valves today. I was expecting an E-clip, so the first one took a bit to figure out the clamshell pieces. Overall the valves look good, but there is definitely some carbon build-up on the seats, so definitely need to grab a lapping kit. Maybe while I'm at the parts store I can find something that will remove all the carbon.

The head itself is actually pretty close to done. Most of the surface area is clean, but there's some stubborn spots where the grease got baked on. The brake cleaner isn't removing the rest, so I just have to work it down with the sandblaster. I can probably finish cleaning and lapping in a day, then lay down some tape and get it painted. Then I just have to do some reading on getting the chain and cams back in alignment.
1981 KZ1000-JK1
She's a beautiful mess, and I've made her all mine

Please Log in or Create an account to join the conversation.

1981 KZ1000 J-to-K build 11 Sep 2016 21:23 #741918

  • Shdwdrgn
  • Shdwdrgn's Avatar Topic Author
  • Offline
  • User
  • Posts: 611
  • Thank you received: 24
Still only had one afternoon to work on the head again this weekend, and I think I need at least another day to finish it. Got more of the larger bits of carbon loose today, and the valve seats look pretty shiny now. Should be ready to do the lapping, when I get a chance.

I spent most of the day sandblasting. Got the other left cover (I think this covers the alternator?) cleaned up and painted. I started cleaning one cover, then realized it was the one from the original engine where the intermediate starter gear had torn out of the hole, so I grabbed the other one and started working on it. One odd thing I found, someone had screwed in about 1/4 inch of heli-coil in one of the mounting holes. No idea why, that it a through-hole for a bolt to pass through, but they hadn't drilled out the mounting hole so everything looks fine on it. I'll get one of the wire coils cleaned up and put back into the cover, then the left side of the engine will be sealed up.

I finished cleaning a good amount of the head after that. Mostly complete on the intake side, and I've gotten a good initial scrub across the top. I'm about out of sand again, so I'll have to grab another bag this week. Next weekend I plan to work on the exhaust side before completing the top. And I imagine it's going to take some time to tape off all the machined surfaces, but then I should be ready for paint.

Temps dropped to 39 overnight, then back up to 91 during the day. Fall is coming fast, just a bit more work to get everything painted that needs it.
1981 KZ1000-JK1
She's a beautiful mess, and I've made her all mine

Please Log in or Create an account to join the conversation.

1981 KZ1000 J-to-K build 18 Sep 2016 16:16 #742767

  • Shdwdrgn
  • Shdwdrgn's Avatar Topic Author
  • Offline
  • User
  • Posts: 611
  • Thank you received: 24
Progress is going slow on the head, but there IS progress. I have the majority of the head cleaned up now. The worst areas are in between the fins, but even most of that has been cleaned up now.

I had planned on working on it all weekend, but yesterday I ran out of sand and had to go get more. Then the tip broke on the sandblaster gun, so I called it quits. Nobody around here sells sandblaster parts, but the Harbor Freight just down the street is opening soon. In the meantime, I found a brass hose adapter that has the 1/4" NPT threads and a 3/8" hole through the center. That seems to be working great, so I was up and running again today for a few hours until the sun came around and the glare off the glass made me pack it up again.

Slowly but surely getting there. I'll tackle it again next weekend, but I also need to spend a day putting new plastic on the greenhouse roof before the cold weather sets in. At least the greenhouse won't be an overwhelming project like last year -- everything is built, I just need to cut and staple on some new plastic.
1981 KZ1000-JK1
She's a beautiful mess, and I've made her all mine

Please Log in or Create an account to join the conversation.

1981 KZ1000 J-to-K build 24 Sep 2016 17:47 #743439

  • Shdwdrgn
  • Shdwdrgn's Avatar Topic Author
  • Offline
  • User
  • Posts: 611
  • Thank you received: 24
Getting so so close... I finished cleaning up the fines on both ends today, and have gone back to cleaning up spots. Lot of little places that just don't want to come clean easily, but I think I pretty much have everything around the sides cleaned up "good enough"... I won't get it perfect, but there's a lot of places that are pretty well clean and won't actually be seen. This piece is taking so long that I've lost any patience for perfection. Tomorrow I need to go over the top side once more, do a final check for anything that might still be easily seen, then get the primer and paint shot on it.
1981 KZ1000-JK1
She's a beautiful mess, and I've made her all mine

Please Log in or Create an account to join the conversation.

1981 KZ1000 J-to-K build 24 Sep 2016 18:49 #743441

  • SWest
  • SWest's Avatar
  • Offline
  • Sustaining Member
  • 10 22 2014
  • Posts: 22452
  • Thank you received: 2629
I hope you didn't get the valve seats with the blaster.
Steve

Please Log in or Create an account to join the conversation.

1981 KZ1000 J-to-K build 24 Sep 2016 18:57 #743442

  • Shdwdrgn
  • Shdwdrgn's Avatar Topic Author
  • Offline
  • User
  • Posts: 611
  • Thank you received: 24
Oh I did, but my sandblaster is like the smallest gun that Harbor Freight sells. It doesn't have much power, which is why this is taking so long. I hit the chambers just enough to give them a scrub after scraping the carbon, but the valve seats are still bright and shiny. Plus they'll be getting lapped after I finish baking the paint.
1981 KZ1000-JK1
She's a beautiful mess, and I've made her all mine

Please Log in or Create an account to join the conversation.

1981 KZ1000 J-to-K build 24 Sep 2016 19:01 #743444

  • SWest
  • SWest's Avatar
  • Offline
  • Sustaining Member
  • 10 22 2014
  • Posts: 22452
  • Thank you received: 2629
You might have to have the seats ground. If so, put in valve guides too.
Steve

Please Log in or Create an account to join the conversation.

1981 KZ1000 J-to-K build 25 Sep 2016 16:39 #743534

  • Shdwdrgn
  • Shdwdrgn's Avatar Topic Author
  • Offline
  • User
  • Posts: 611
  • Thank you received: 24
What's it been, a month now that I've been working on this head? :sick: 
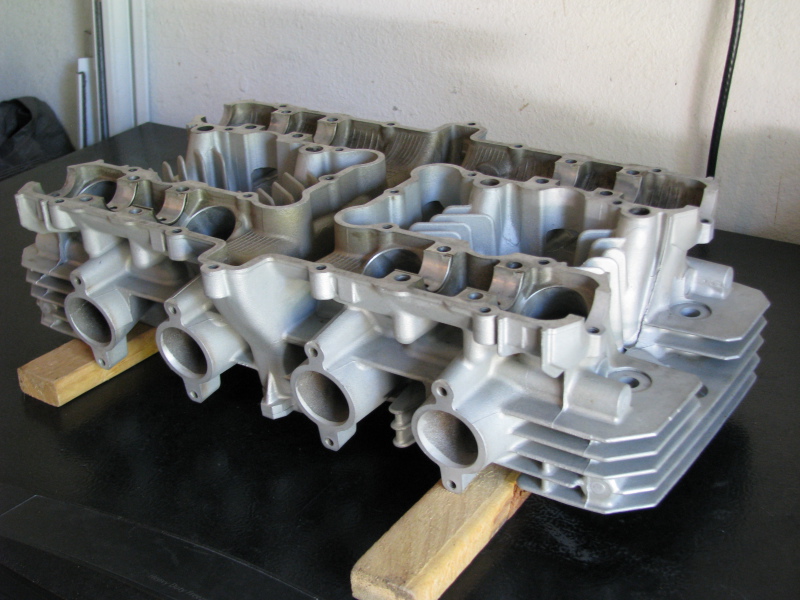
I finally got it finished and painted!


Figuring out how to paint it all in one shot was fun. I ended up setting a sawhorse in the yard and stacking a couple of short 4x4's on top. The base of the head fit on the 4x4 without overlapping the area I needed to paint, so I could lay in the grass and paint from the bottom or the top. The hardest part was blasting through all through-holes along the sides, trying to get good coverage without getting so much paint on the front surface that it started to run. It all went well, and the piece is now sitting in the garage for the next few days until I get a chance to bake it.

I've been making a point of avoiding the cam bearings, but I think there's some wear on them so I'm just going to say screw it and find a set of replacements. I can still finish up the valves and get the head mounted on the engine while I'm waiting.

Oh, and Steve, I checked over the surfaces again -- I didn't hit the valve seats hard enough to even remove the gunk from the surface of them, I had to clean that off by hand, so I think they'll be fine. The lapping compound should do more to the surfaces than what the sandblaster did.
1981 KZ1000-JK1
She's a beautiful mess, and I've made her all mine

Please Log in or Create an account to join the conversation.

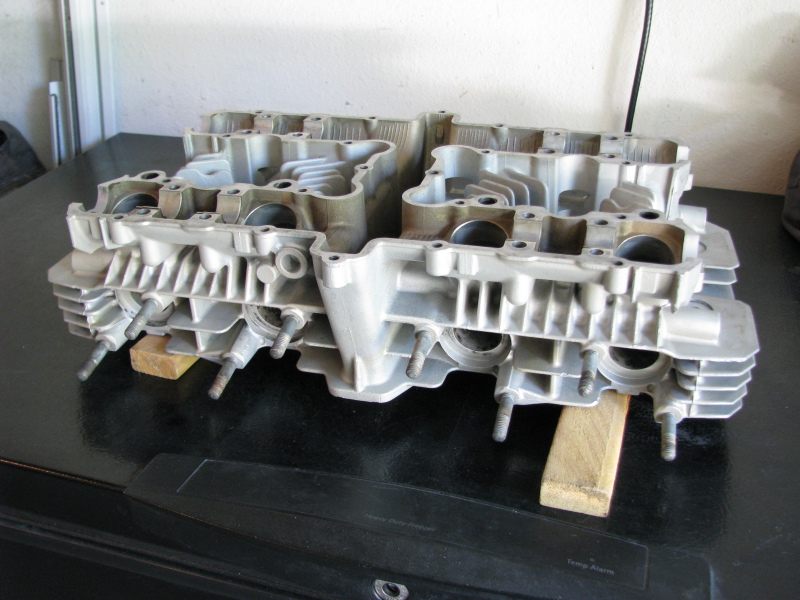
1981 KZ1000 J-to-K build 25 Sep 2016 17:30 #743540

  • SWest
  • SWest's Avatar
  • Offline
  • Sustaining Member
  • 10 22 2014
  • Posts: 22452
  • Thank you received: 2629
Got a set of cam bearings from Z1E. I think it was $135. I figured, why not? They're only 40 years old. :lol:
Steve

Please Log in or Create an account to join the conversation.

1981 KZ1000 J-to-K build 17 Oct 2016 12:27 #745445

  • aquaholic
  • aquaholic's Avatar
  • Offline
  • User
  • 1981 KZ1000 J1
  • Posts: 179
  • Thank you received: 36
OK Hurricane Matthew is gone and finally got the yard cleaned up. Only 1 hurricane in 10 years of living here is OK by me. I got the engine broken down, thanks to your advice and write up. When you sandblasted the engine crankcase halves, did you protect the internal bearing areas at all or did you just concentrate on blasting the outside. I was expecting to see some bearings in there for the crankshaft lol. I wanted your opinion before I start blasting. I also have an idea about disassembling the rear shocks that I have to experiment a bit with and see what happens. Let me know how you're making out and what you did (if anything) to protect those internal bearing faces. Do you have snow yet lol 83 here today. Be well and thanks again.

Please Log in or Create an account to join the conversation.

Powered by Kunena Forum