Welcome, Guest
Username: Password: Remember me

TOPIC:

'76 KZ900 (ZRX1200R) Build 27 Jan 2014 04:31 #620197

  • NakedFun
  • NakedFun's Avatar Topic Author
  • Offline
  • User
  • Posts: 1095
  • Thank you received: 99
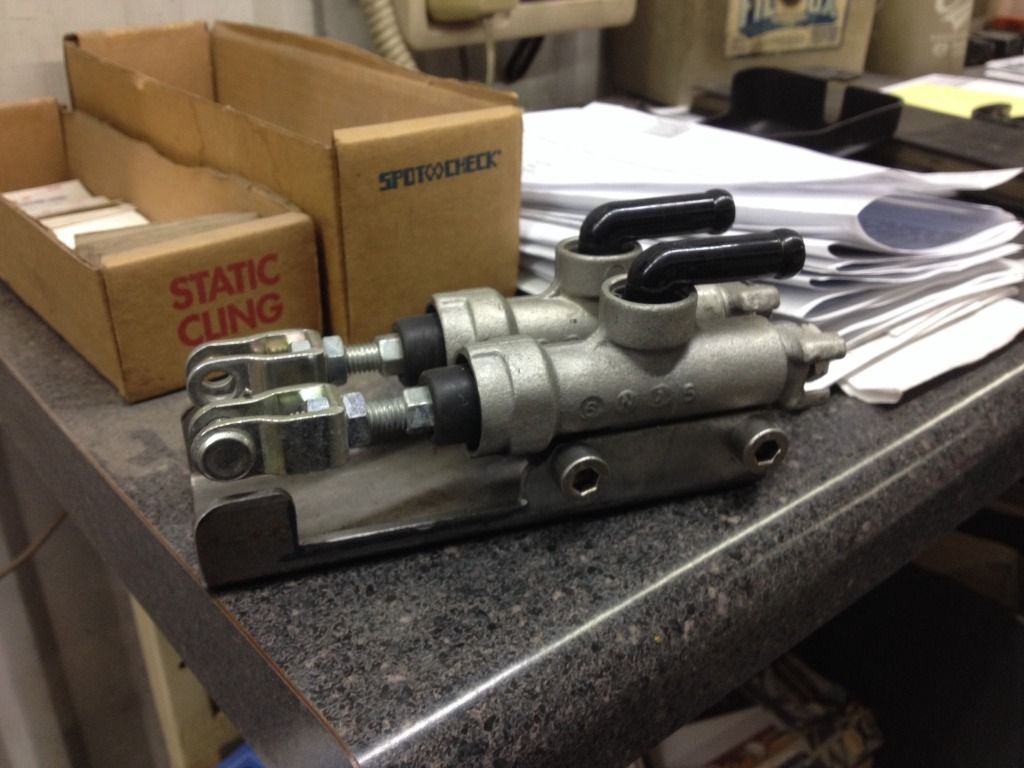
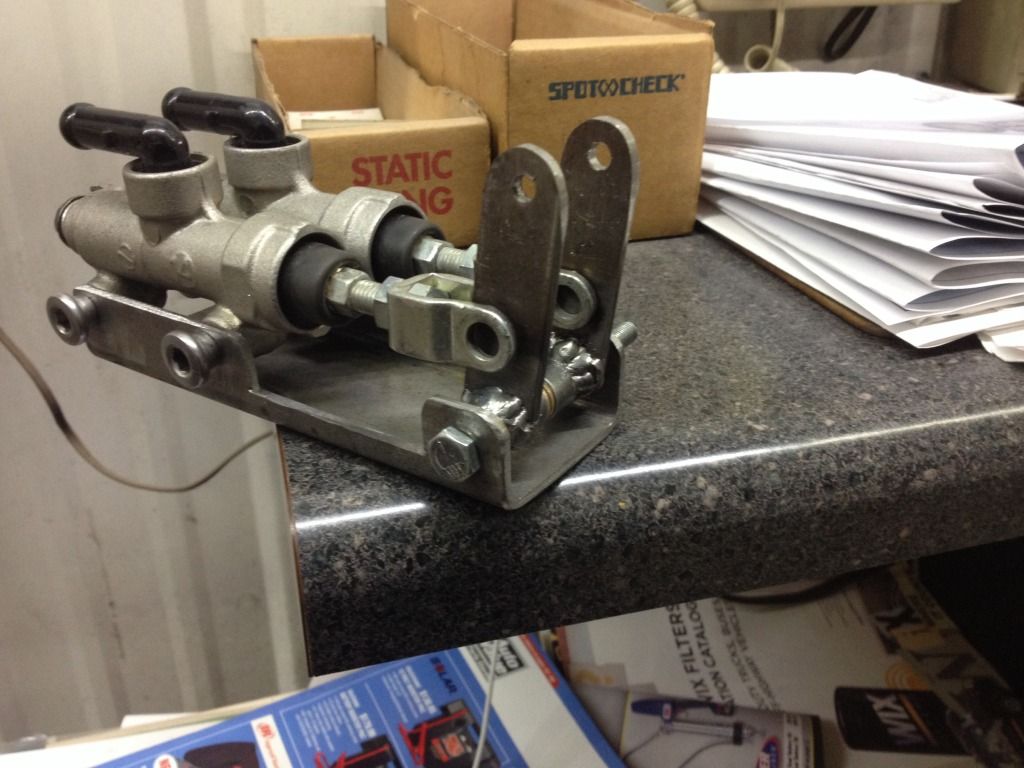
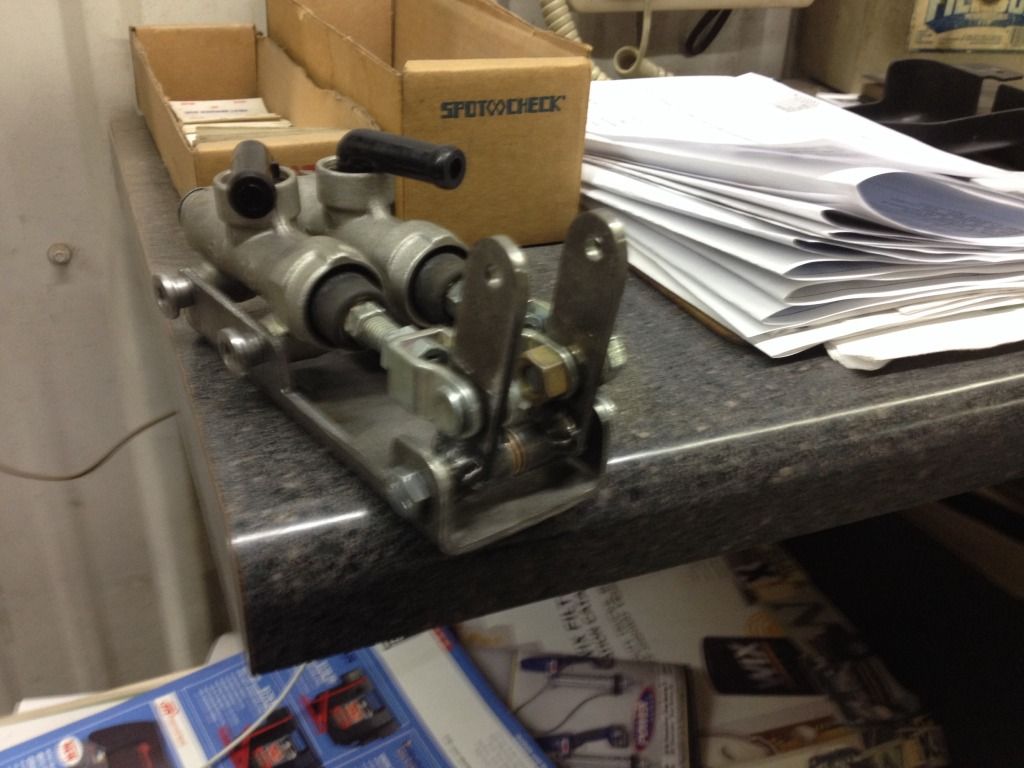
Yes you did...... :laugh: I am running inverted front levers from a BMW R71 from WWII time period also from a Chinese copy of that bike called the CJ750. Theses are for (internal handle bar) cable operated front brakes and clutch. My bike is converted to hydraulic clutch and of course hydraulic front brakes. So I built these to do that.

Cory
2008 Kawasaki Concours 14
1999 Kawasaki ZRX1100
1976 Kawasaki KZ900

Please Log in or Create an account to join the conversation.

'76 KZ900 (ZRX1200R) Build 27 Jan 2014 04:47 #620198

  • TexasKZ
  • TexasKZ's Avatar
  • Offline
  • Platinum Member
  • Posts: 7240
  • Thank you received: 2076
I'd vote for a new line. One less place for a leak to happen, smoother fluid flow, cooler looking.

NakedFun wrote: So Saturday was a lesson in 10 lbs of crap in a 5 lbs bag.... First off, I decided to create my dual remote mount.


The levers were a PITA to weld. I don't have access to TIG, so I have to MIG the 3/4" x .125" lever to a 1/2" - 16ga DOM tubing. They were so small, that I had to clamp the grounding clamp in the vise and then use the grounding clamp to hold the lever for welding. The welds look ugly, but have great penetration which is what I was looking for especially since my front brakes and clutch will depend on it..... I'll clean them up, but forgive my weld appearance this time around.... The pivots work great and smooth with the bronze bushings.

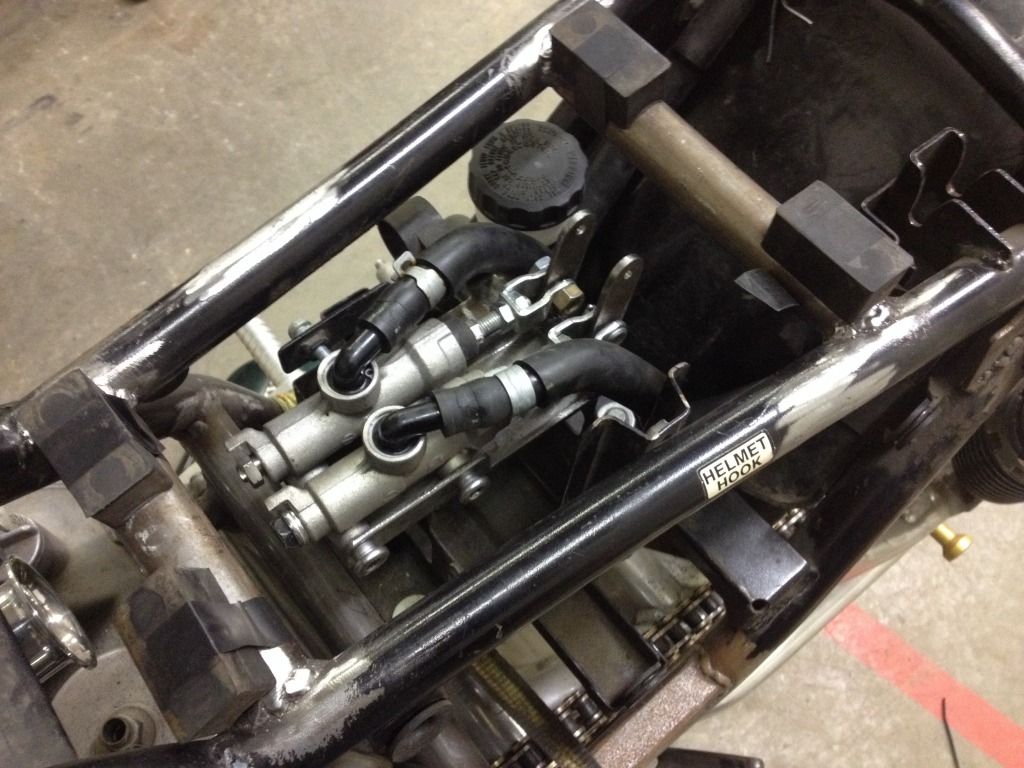
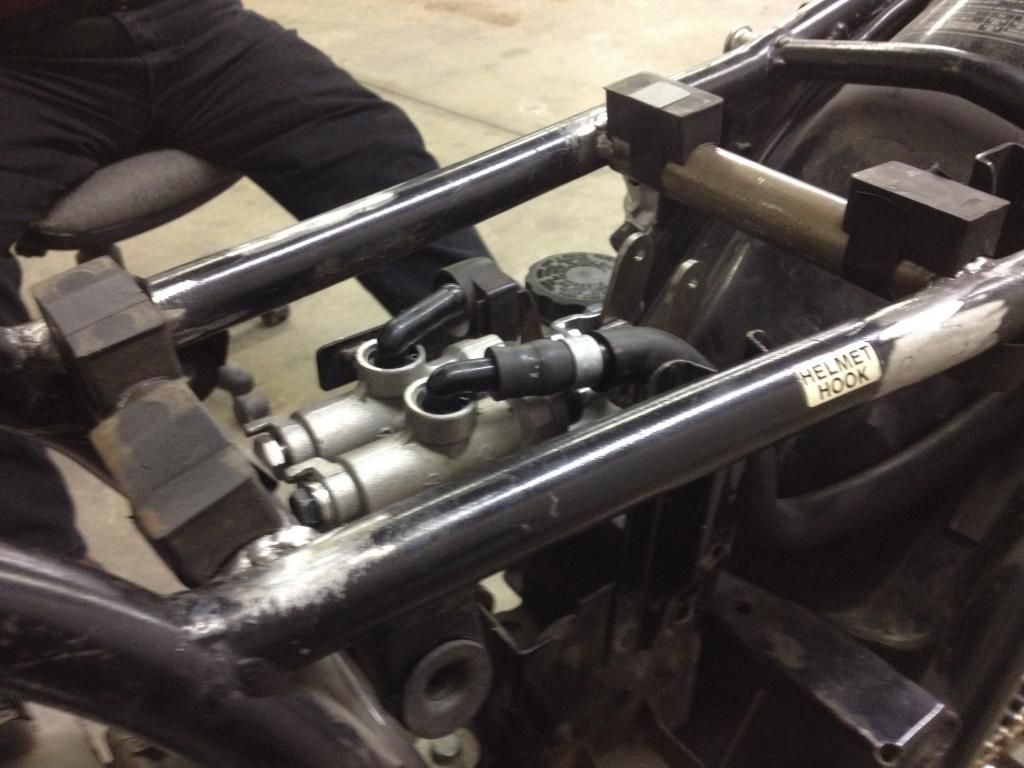
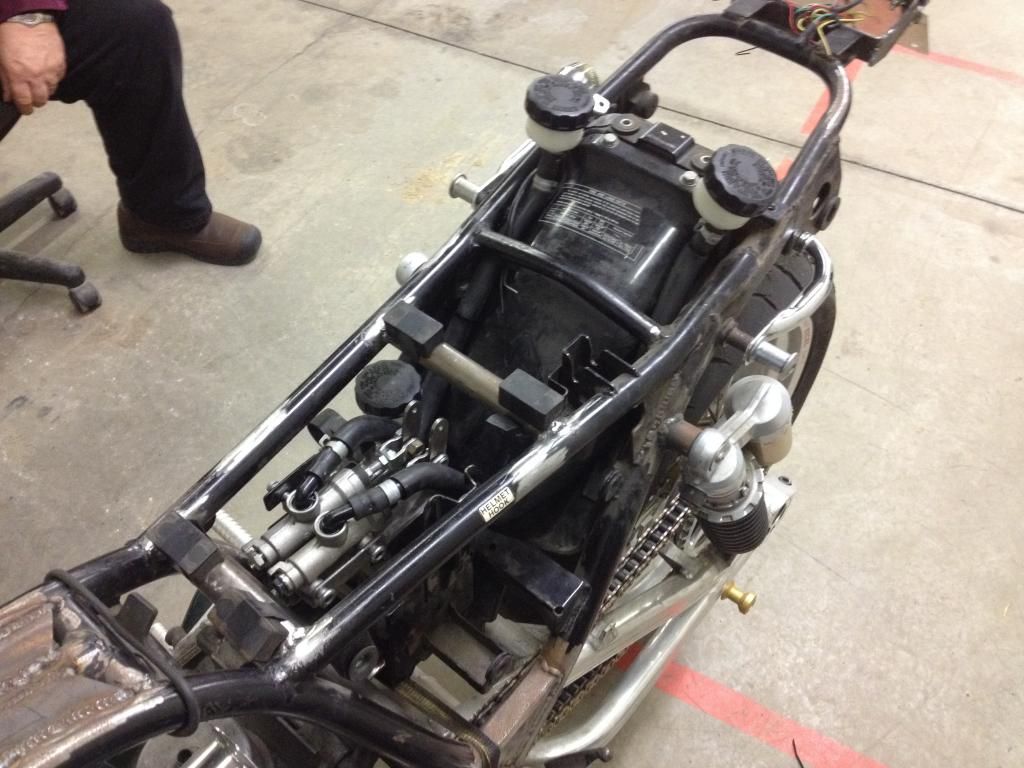
So now it is time to figure out where it would fit.... With the coils in place, it had to go directly behind them. This worked, however I then noticed there would be no way to pull the valve cover with it in that position, so you would have to remove it to do valve shimming. So it ends up the final resting place is under the seat, above the battery box.


The cables I will order will just follow the back bone of the bike and connect under the seat. The one down side is the custom HEL brake lines I ordered from Dave. The one now has to be ordered in a 20" longer custom length or put a junction under the tank and run a second line to the master. Thoughts? Extend the line or order new custom length?

Cory

1982 KZ1000 LTD parts donor
1981 KZ1000 LTD awaiting resurrection
2000 ZRX1100 not ridden enough

Please Log in or Create an account to join the conversation.

'76 KZ900 (ZRX1200R) Build 27 Jan 2014 06:29 #620217

  • NakedFun
  • NakedFun's Avatar Topic Author
  • Offline
  • User
  • Posts: 1095
  • Thank you received: 99
Currently working on sourcing one from my HEL guy on ZRXOA. Also having the master fitting changed to a 90 degree fitting.

Cory
2008 Kawasaki Concours 14
1999 Kawasaki ZRX1100
1976 Kawasaki KZ900

Please Log in or Create an account to join the conversation.

'76 KZ900 (ZRX1200R) Build 27 Jan 2014 10:07 #620239

  • CrazyDuck
  • CrazyDuck's Avatar
  • Offline
  • User
  • Posts: 64
  • Thank you received: 6
This build is still making me drool.
I had a hard enough finding room for one reservoir under my 900 seat much less three. :blink:

Attachment IMG_1178.jpg not found

1976 KZ900
1974 TX500
1978 TT500
2007 Aprilia SXV
Attachments:

Please Log in or Create an account to join the conversation.

'76 KZ900 (ZRX1200R) Build 27 Jan 2014 10:30 #620243

  • NakedFun
  • NakedFun's Avatar Topic Author
  • Offline
  • User
  • Posts: 1095
  • Thank you received: 99
Well, the rear bakre cup is already mounted easy peazy.... The two others will be mounted just below my seat pan, so that they are high enough to gravity bleed to the masters. The other plan may be a shared cup with a line split-er for both. Should work fine. Can't imagine one large cup wouldn't be able to supply the amount for both.

Cory
2008 Kawasaki Concours 14
1999 Kawasaki ZRX1100
1976 Kawasaki KZ900

Please Log in or Create an account to join the conversation.

'76 KZ900 (ZRX1200R) Build 03 Feb 2014 19:01 #621031

  • NakedFun
  • NakedFun's Avatar Topic Author
  • Offline
  • User
  • Posts: 1095
  • Thank you received: 99
So my cables came in and they are perfect! 80-83 Suzuki GS1100E clutch cables. Working on adapting the 1" inverted levers that need to be adapted to the 7/8" clip ons....

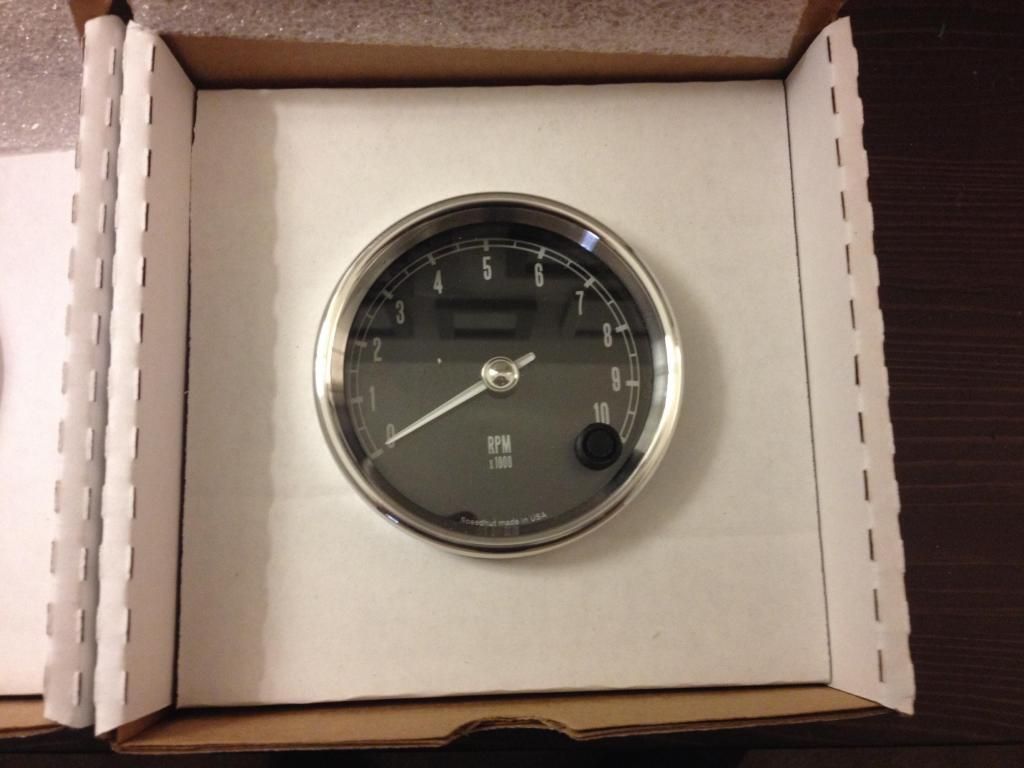
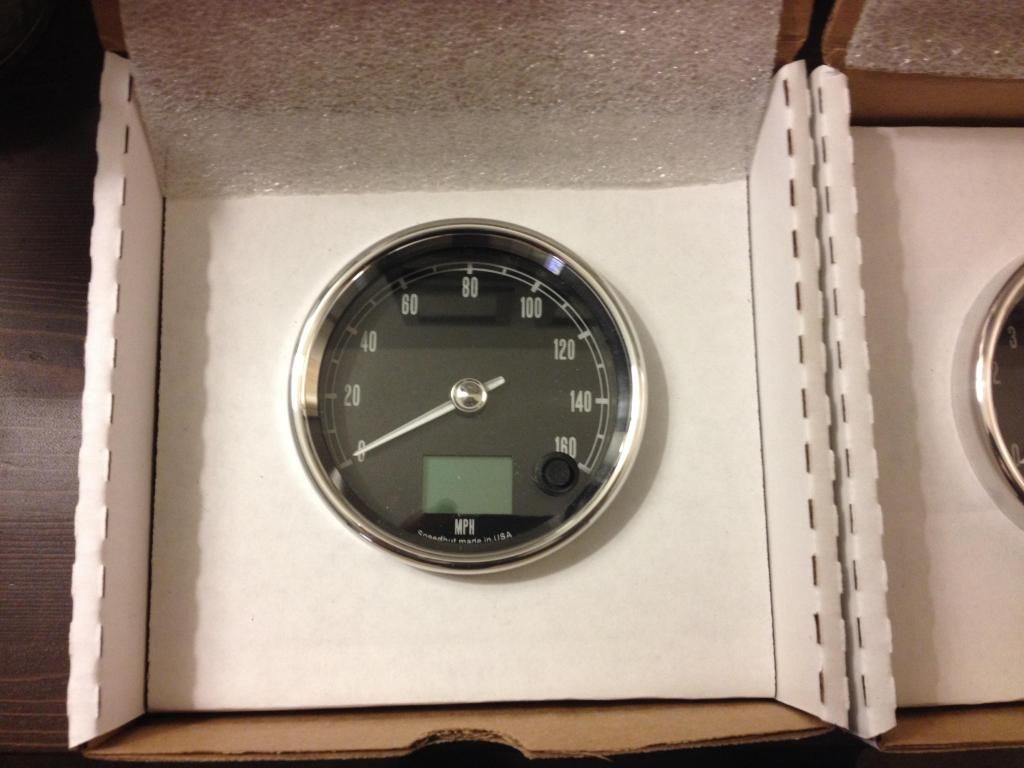
Anyway my custom gauges showed up.....


Working on buying a Harley indicator light setup for the indicators......

Cory
2008 Kawasaki Concours 14
1999 Kawasaki ZRX1100
1976 Kawasaki KZ900

Please Log in or Create an account to join the conversation.

Last edit: by NakedFun.

'76 KZ900 (ZRX1200R) Build 04 Feb 2014 00:15 #621046

  • Hollywoodmx
  • Hollywoodmx's Avatar
  • Offline
  • User
  • Posts: 562
  • Thank you received: 16

NakedFun wrote: So I have a question to pose to the machining/engineering/thinkin' portion of the board. It comes down to bolted joint design. I am thinking about my securing method of the brake rotors and my cush drive basket to the wheel hubs. My original design requires the use of Flat Head Allen cap screws utiling an 82 degree counter sunk recess in the cush drive basket and brake rotor mounting holes. This would allow flush or very low profile securing for clearance and let me work with the 5/16"-18 fastener bosses on the hubs.

Now engienering practive teaches that button heads and countersunk/flat head Allen fasteners are not to be used in critical joint applications. However, ASTM F835 which specifically addresses this fastener type in its mechanical properties specifcally calls out for use in shear type applications is its designed purpose. Specifically fasteners of this type will have the properties of 145,000 psi Min Tensile and a C39 Min Rockwell specifications for diameters of 1/2" or less. There is no Min Yield or Min Proof for this type of fastener, most likely to the the head design....though i have not found the ACTUAL reason for this.

Does this seem feasible to use them for mounting of my brake rotors and cush drive basket to the wheel hubs? I have clearance issues that I need to deal with. I don't want to cause an unsafe situation. My only other option is to redrill the front hub using a jig and re-use the stock ZRX brake hardware.

Thoughts? Am I nuts?

Cory


I have a similar issue on my other build..

I'm switching to nuts or recessed Alan bolts on the cush vs studs and bolts to gain the little clearance I need. Just going to use lock tight. I'm not worried.

Also most dirt bikes use alan bolts for mounting the sprocket and the rear wheels on dirt bikes see some strenuous loads off road.

We should be good.
- 82 GPz1100injection
- 77 Kz1075 Supercharged
- 81 Yamaha TR-1
- 81 Yamaha xv920
Calgary
Attachments:

Please Log in or Create an account to join the conversation.

Last edit: by Hollywoodmx.

'76 KZ900 (ZRX1200R) Build 04 Feb 2014 06:48 #621062

  • 531blackbanshee
  • 531blackbanshee's Avatar
  • Offline
  • Vendor
  • Posts: 7447
  • Thank you received: 797
saweet gauges where did you get them?

leon
skiatook,oklahoma 1980 z1r,1978 kz 1000 z1r x 3,
1976 kz 900 x 3
i make what i can,and save the rest!

billybiltit.blogspot.com/

www.kzrider.com/forum/5-chassis/325862-triple-tree-custom-work

kzrider.com/forum/5-chassis/294594-frame-bracing?limitstart=0

Please Log in or Create an account to join the conversation.

'76 KZ900 (ZRX1200R) Build 04 Feb 2014 07:31 #621071

  • NakedFun
  • NakedFun's Avatar Topic Author
  • Offline
  • User
  • Posts: 1095
  • Thank you received: 99

531blackbanshee wrote: saweet gauges where did you get them?

leon


www.speedhut.com

American made, lifetime warranty, fully customizable, and very adaptable. Also pretty reasonable on cost.

Cory
2008 Kawasaki Concours 14
1999 Kawasaki ZRX1100
1976 Kawasaki KZ900

Please Log in or Create an account to join the conversation.

'76 KZ900 (ZRX1200R) Build 04 Feb 2014 12:51 #621104

  • DoctoRot
  • DoctoRot's Avatar
  • Offline
  • Sustaining Member
  • Oh, the usual... I bowl, I drive around...
  • Posts: 2544
  • Thank you received: 664
i have the same gauges for my project. They are car gauges, and i was going to do a bit o work on them to seal them up. last thing you want is water to ruin your new gauges.

Please Log in or Create an account to join the conversation.

'76 KZ900 (ZRX1200R) Build 04 Feb 2014 12:58 #621105

  • NakedFun
  • NakedFun's Avatar Topic Author
  • Offline
  • User
  • Posts: 1095
  • Thank you received: 99
You can actually have them seal up the face and bezel for free but requesting it at the time of order. As far as the back of the gauge, I just ordered stainless steel poker table drink cups to turn into retaining gauge cups that seal the back. The face is fairly sealed with the rubber buttons....plus lifetime warranty which they will honor.... Not worried, but my bikes are stored inside anyway.

Cory
2008 Kawasaki Concours 14
1999 Kawasaki ZRX1100
1976 Kawasaki KZ900

Please Log in or Create an account to join the conversation.

'76 KZ900 (ZRX1200R) Build 04 Feb 2014 18:09 #621137

  • DoctoRot
  • DoctoRot's Avatar
  • Offline
  • Sustaining Member
  • Oh, the usual... I bowl, I drive around...
  • Posts: 2544
  • Thank you received: 664
hmm i might have to send them back and have them seal them up. I was going to put some desiccant in them as well before I permanently sealed them up. Did you read the fine print on the warranty? i'm betting it precludes water damage like most electronics.

Please Log in or Create an account to join the conversation.

Powered by Kunena Forum