
Search Results (Searched for: gs swing arm)
Replied by GrantKZ650 on topic '77 KZ650 Basket Case Full Build
04 Aug 2018 14:52 GrantKZ650
After everything was mocked up, we stripped it down and cleaned it up.
The frame was sent out for powdercoat. We rebuilt the head and added a Wiseco KZ700 piston kit.
The seat foam was wrapped and stitched by a local leather worker
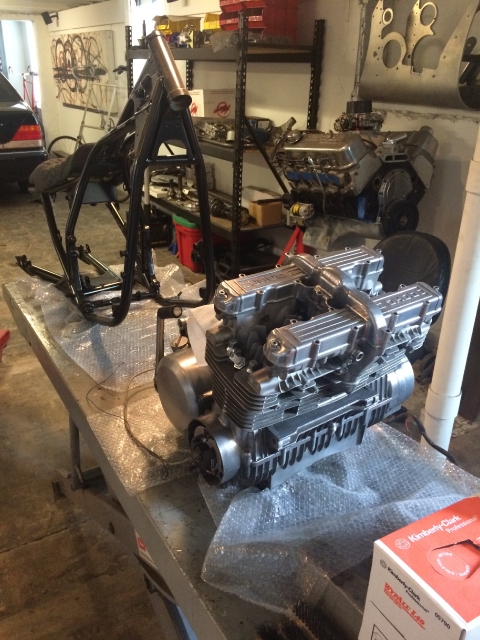
All new swingarm bushings and tapered roller bearings in the neck
The frame was sent out for powdercoat. We rebuilt the head and added a Wiseco KZ700 piston kit.
The seat foam was wrapped and stitched by a local leather worker
All new swingarm bushings and tapered roller bearings in the neck
Replied by hardrockminer on topic REAR WHEEL SLACK
31 Jul 2018 09:58
The axle fits in the swingarm and is fixed in place by the axle nut. There should be a spacer and maybe two on the axle. It sounds to me like something is missing.
The axle bearings carry no lateral load. Their sole purpose is to allow wheel rotation around the axle, which is fixed in place. Put your bike on the center stand with the rear wheel off the ground. Grasp the wheel and try to lift it upwards. If you can move the wheel relative to the axle then your bearings are worn. But if there is no movement then your bearings are fine.
The axle bearings carry no lateral load. Their sole purpose is to allow wheel rotation around the axle, which is fixed in place. Put your bike on the center stand with the rear wheel off the ground. Grasp the wheel and try to lift it upwards. If you can move the wheel relative to the axle then your bearings are worn. But if there is no movement then your bearings are fine.
Replied by Bozo on topic KZ1000 wheels on fitted to a GPZ900 unitrack?
21 Jul 2018 17:55 - 21 Jul 2018 17:56
The reason you don't have answer is probably because usually the refit is done the other way around i.e fitting a lighter wheel to the bike. I have a GPZ swingarm and GPZ900 wheel to my Z1R. It wasn't easy as the swingarm required a bit of sculpting to clear the brake setup.
The wheel was a different problem because I had to line up the sprocket with the wider wheel and keeping the wheel central, at the same time making sure the chain clears the frame.
I also found most of the time you can fit other wheels to different shafts by using different wheel bearings i.e if you have a smaller shaft try a bearing to match the wheel (outside diameter) and the inner diameter to match the shaft.
I assume you are using the GPZ900R motor.
If you don't get a clear answer and the wheel doesn't cost a fortune just give it a go.
I'll be interested in seeing the end result
loudhvx wrote: Sorry I meant an analog gauge. For harsh throttle transitions it's nice to be able to see how fast and far the afr swings without having to stare at the gauge. But since you can datalog, it won't be as critical. I found with some jetting the afr needle could swing as low 8 for a very brief moment. That tends to be a little too rich for cracking the throttle. I'm not sure you would see this with a digital readout, and I think it's harder to see how fast the afr recovers etc. by looking at some numbers showing up briefly.
Normally I aim for 12 at idle after it's warmed up.
Then I aim for about 14 to 14.3 at the leanest during steady cruise between 1/16 and 1/8 throttle. Normally the lean range will be off idle to about 3/16 throttle. By 1/4 or 3/8 all the way out to full, I like it to be back down to about 13. That is, when the throttle is held steady at any position above 1/4 or 3/8 when the RPMs come up to their max, the afr will steadily increase then hold at about 13, maybe up to 13.5 at the most.
In my experience, on the 550 with TK22 carbs, it's always been about precisely shimming the needle to get the cruise-to-power afr transition in the right place. Then setting the other things accordingly. Everything can have an effect on other things, so it's sometimes a compromise. There is also more than one way to get a proper jetting combination, since different tradeoffs can be made.
By ending up at 13, it means the mixture sweeps through the 12's as the RPMs increase. So as the RPMs increase the mixture sweeps through the afr's for best power. So with opening the throttle pretty good, I like to see the afr sweep drop down to 10 or 11, and then sweep up to about 13 or 13.5.
Different carbs/motors may prefer slightly different numbers. With pods, due to tubulence and crosswinds, I find you can't get the lean-cruise area as steady so it's safer to go a bit richer, like high 13's. The power range target is still the same.
Never heard twelves at idle, but I'll add that to the equation based on idle strength regardless of afr.
I'm running FCR35s. Biggest difference compared to most carbs is there is no vacuum diaphragm. Meaning when you twist the throttle, there's no load-relevant piston to limit incoming air according to load. It's all in the wrist. You cannot just go WOT abruptly. You have to do it gradually like the load sensitive piston typically compensates for on other carbs. The other thing is the accelerator pump. You can't accept afr after twisting the throttle. You have to wait for the pump-shot to burn up to view the true ratio at that throttle position.
I'm trying to focus on a steady throttle position, rpm, and load for jetting. While being consistent with the rate of acceleration while riding.
I think it's kind of an art learning to ride with these carbs, but supposedly the ultimate in performance (outside of injection) when you get it right.
Sorry I meant an analog gauge. For harsh throttle transitions it's nice to be able to see how fast and far the afr swings without having to stare at the gauge. But since you can datalog, it won't be as critical. I found with some jetting the afr needle could swing as low 8 for a very brief moment. That tends to be a little too rich for cracking the throttle. I'm not sure you would see this with a digital readout, and I think it's harder to see how fast the afr recovers etc. by looking at some numbers showing up briefly.
Normally I aim for 12 at idle after it's warmed up.
Then I aim for about 14 to 14.3 at the leanest during steady cruise between 1/16 and 1/8 throttle. Normally the lean range will be off idle to about 3/16 throttle. By 1/4 or 3/8 all the way out to full, I like it to be back down to about 13. That is, when the throttle is held steady at any position above 1/4 or 3/8 when the RPMs come up to their max, the afr will steadily increase then hold at about 13, maybe up to 13.5 at the most.
In my experience, on the 550 with TK22 carbs, it's always been about precisely shimming the needle to get the cruise-to-power afr transition in the right place. Then setting the other things accordingly. Everything can have an effect on other things, so it's sometimes a compromise. There is also more than one way to get a proper jetting combination, since different tradeoffs can be made.
By ending up at 13, it means the mixture sweeps through the 12's as the RPMs increase. So as the RPMs increase the mixture sweeps through the afr's for best power. So with opening the throttle pretty good, I like to see the afr sweep drop down to 10 or 11, and then sweep up to about 13 or 13.5.
Different carbs/motors may prefer slightly different numbers. With pods, due to tubulence and crosswinds, I find you can't get the lean-cruise area as steady so it's safer to go a bit richer, like high 13's. The power range target is still the same.
KZ1000 wheels on fitted to a GPZ900 unitrack? was created by rohalloran
18 Jul 2018 15:21
rohalloran
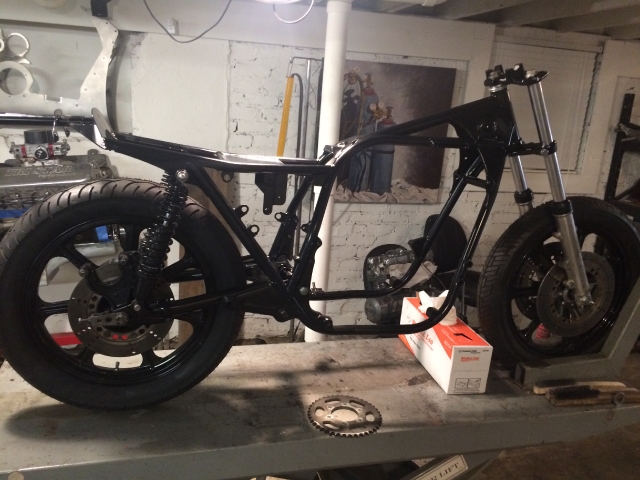
No eBay APP ID and/or Cert ID defined in Kunena configurationNo eBay APP ID and/or Cert ID defined in Kunena configurationDoes anyone know if an 18" mag wheel off a KZ1000 (Cop Bike) will fit onto forks /swingarm of a GPZ900. I am building a cafe racer that is Half Honda, Half Kawasaki and would like to fit these wheels if possible. They have a Lester look about them.
Here is what I currently have:
and the wheels in question are something similar to these:
Many thanks for any thoughts or feedback.
Here is what I currently have:
and the wheels in question are something similar to these:
Many thanks for any thoughts or feedback.
Hey guys just scored this barn find for only 350 was created by KZ650JAY
15 Jul 2018 21:51 - 15 Jul 2018 21:54
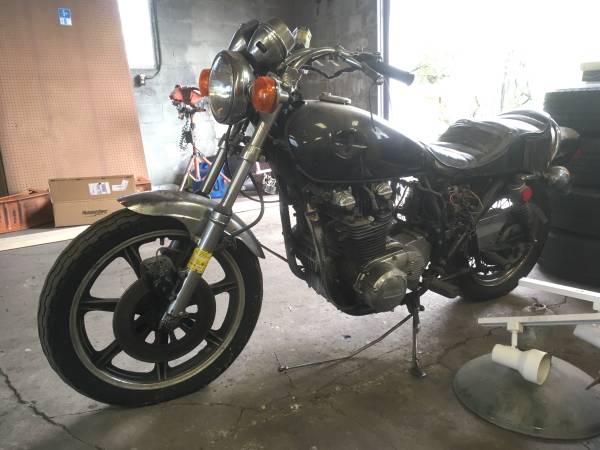
Hi, I'm Jay and finally got my hands on a great barn find 81 kz650 CSR H1 for only 350 bucks. The guys wife I got it from no longer wanted him riding so he let it go cheap since it could use tires and a chain. My plans are to make it a street tracker/ cafe racer style. The engine and transmission are in great condition though the bike has 21k. I plan to do some maintenance and ride it as is for summer and redo the styling come winter. I plan on replacing the tires, chain/sprockets, wheel bearings, steering stem bearings to taper bearings, swing arm bearings, fork seals and front/rear brakes.
I have been looking at the Pirelli Sport Demons tires and would like to know what you guys think of these tires for a kz650?
I have been looking at the Pirelli Sport Demons tires and would like to know what you guys think of these tires for a kz650?
Replied by Troubled1 on topic Looking for an active forum
24 Jun 2018 14:54
My brother dropped by last night with some more parts for the bike. In one of the boxes was a factory service manual for the bike. Finding where things go isn’t too bad but at least now with the manual I won’t put a part on only to have to take it off to put on another. The wiring harness was quite the experience and in still having issues on routing certain wires. Several containers of nuts and bolts also make it a chore figuring which ones go where.
When I picked it up it was a bare frame, engine, fork assembly, rear swing arms (2) carbs (2 sets) fiberglass body panels (thankfully the front fairing was together in a single unit with all gauges installed.
I’ll most likely repaint it and give it to my daughter in a couple years when she’s old enough to get her license.
KZ1000 Custom Project was created by TravisVisual
19 Jun 2018 08:37
TravisVisual
Hey Everyone,
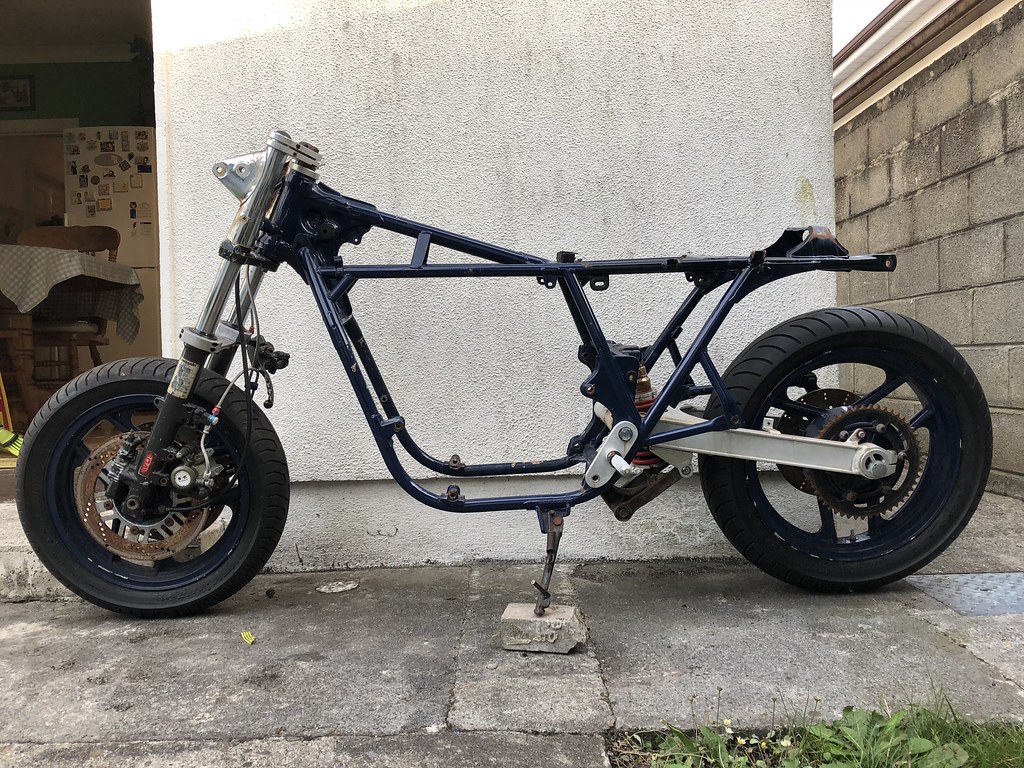
I was just given this KZ1000 with the suspension swap conversion. I believe its from a GSXR? Can anyone help identify what the swing arm and front forks/triple are from? The original owner has passed and I have no idea what was really done. Just know i have a full sub frame to weld/fab.
Thanks!
I was just given this KZ1000 with the suspension swap conversion. I believe its from a GSXR? Can anyone help identify what the swing arm and front forks/triple are from? The original owner has passed and I have no idea what was really done. Just know i have a full sub frame to weld/fab.
Thanks!
Attachment not found
Attachment not found
Attachment not found
Sic Em! The Kawasaki Detectives on this Guy! was created by z1kzonly
31 May 2018 11:20
Craigslist in Buffalo, NY. WTF? Mixed Batch of what the ??? parts! Calls it a 72 Z1 with a transferable registration. ( New York bikes were not titled until 1973) Z1A frame #'s (28,074) re-stamped into a 76 KZ900 frame. Looks like a 76 KZ900 engine. (might be a good engine?) Ruined a swing arm. Ruined a front LTD fender. Only thing good is the front Lester mag.
Call this guys # and give him a WTF?
buffalo.craigslist.org/mcy/d/1972-kawasaki-z1/6600086974.html
Call this guys # and give him a WTF?
buffalo.craigslist.org/mcy/d/1972-kawasaki-z1/6600086974.html
Displaying 671 - 680 out of 7255 results.