Body Work Painting
- Nessism
-
Topic Author
- Offline
- Sustaining Member
-

Registered
- Posts: 7986
- Thanks: 3350
Body Work Painting
25 Mar 2023 09:56 - 25 Mar 2023 10:07
I was recently looking through some of my older photos and thought I'd share some info about how I go about painting a bike's body work. I'm not professing to be an expert, I just thought I'd share some photos, and my approach, for those that haven't failed learned as much as me.
First step, is stripping the paint off the outside of the tank, including the inside at the frame tunnel. When doing this you will typically see all kinds of spider web rust, creeping under the old paint. To strip the paint, I use HD paint stripper. The good stuff that washes off with paint thinner, not water.
Next step, is derusting the tank, both inside and out. I like to use phosphoric acid, since it removes rust, and doesn't need to be neutralized. If you buy "metal prep", as sold by paint manufacturers, to be used before painting, it's phosphoric acid. Also, powder coaters use large dip tanks to prep parts, and one of the tanks is filled with phosphoric acid. This stuff is the "industrial standard" to prep metal before painting.
I then address any body work that needs to be done using body filler. Get the surface as perfect as you can.
At this point, the tank should have clean metal, and all major dents removed.
To seal the metal, I use epoxy primer. This stuff seals over all body work, and protects the metal. It is not a "filler", it's a sealer. Degrease using "wax and grease remover" before painting, of course.
Some guys follow the epoxy with a "fill primer" which is thick, and fills small imperfections, but I prefer to add an extra layer of epoxy, and try to avoid the filler, because that adds film build, which makes the bodywork more prone to chipping. "Glazing putty" can be used to fill minor imperfections (those too small to justify body mud.)
To flatten the primer, and prepare for base coat, I use a gray scotchbrite pad, or 600 grit sandpaper. Epoxy primers have what called a "critical recoat time", which means the top coat needs to go on pretty fast, typically 24-48 hours. Wait too long, and the paint layers don't bite into each other, and durability decreases.
Next is base coat. Three layers. Degrease the surface with paint "wax and grease remover" to be safe. The first paint layer goes on dry and thin, followed by two more full wet coats. No sanding on the base coat, because you can cut through, and when using pearls/metallics, you can skew the appearance by sanding.
3 layers of clear is next. I use urethane, because it's the most durable. After a day or so of drying, you can go back and color sand down the orange peel, and ready the surface for graphic stripes. At this point you can slow down; the surface will be sealed, and since you will be sanding the clear before the next step, the critical recoat times don't apply.
For graphic stripes, make sure to order fresh. 3M makes great pinstripes; they are sort of gummy, so they stretch well and lay down without lifting. Premade graphics, such as sold by Diabalo and similar, are water slide, or rub down, so take your time and get them placed properly. After placement, allow them to out-gas for a day or so before clearing.
Last step is another 2-3 layers of clear. Dust on the first coat, then follow with 2 more full "wet" coats. If you do it right, there shouldn't be need of color sanding and polishing, other than to remove dirt.
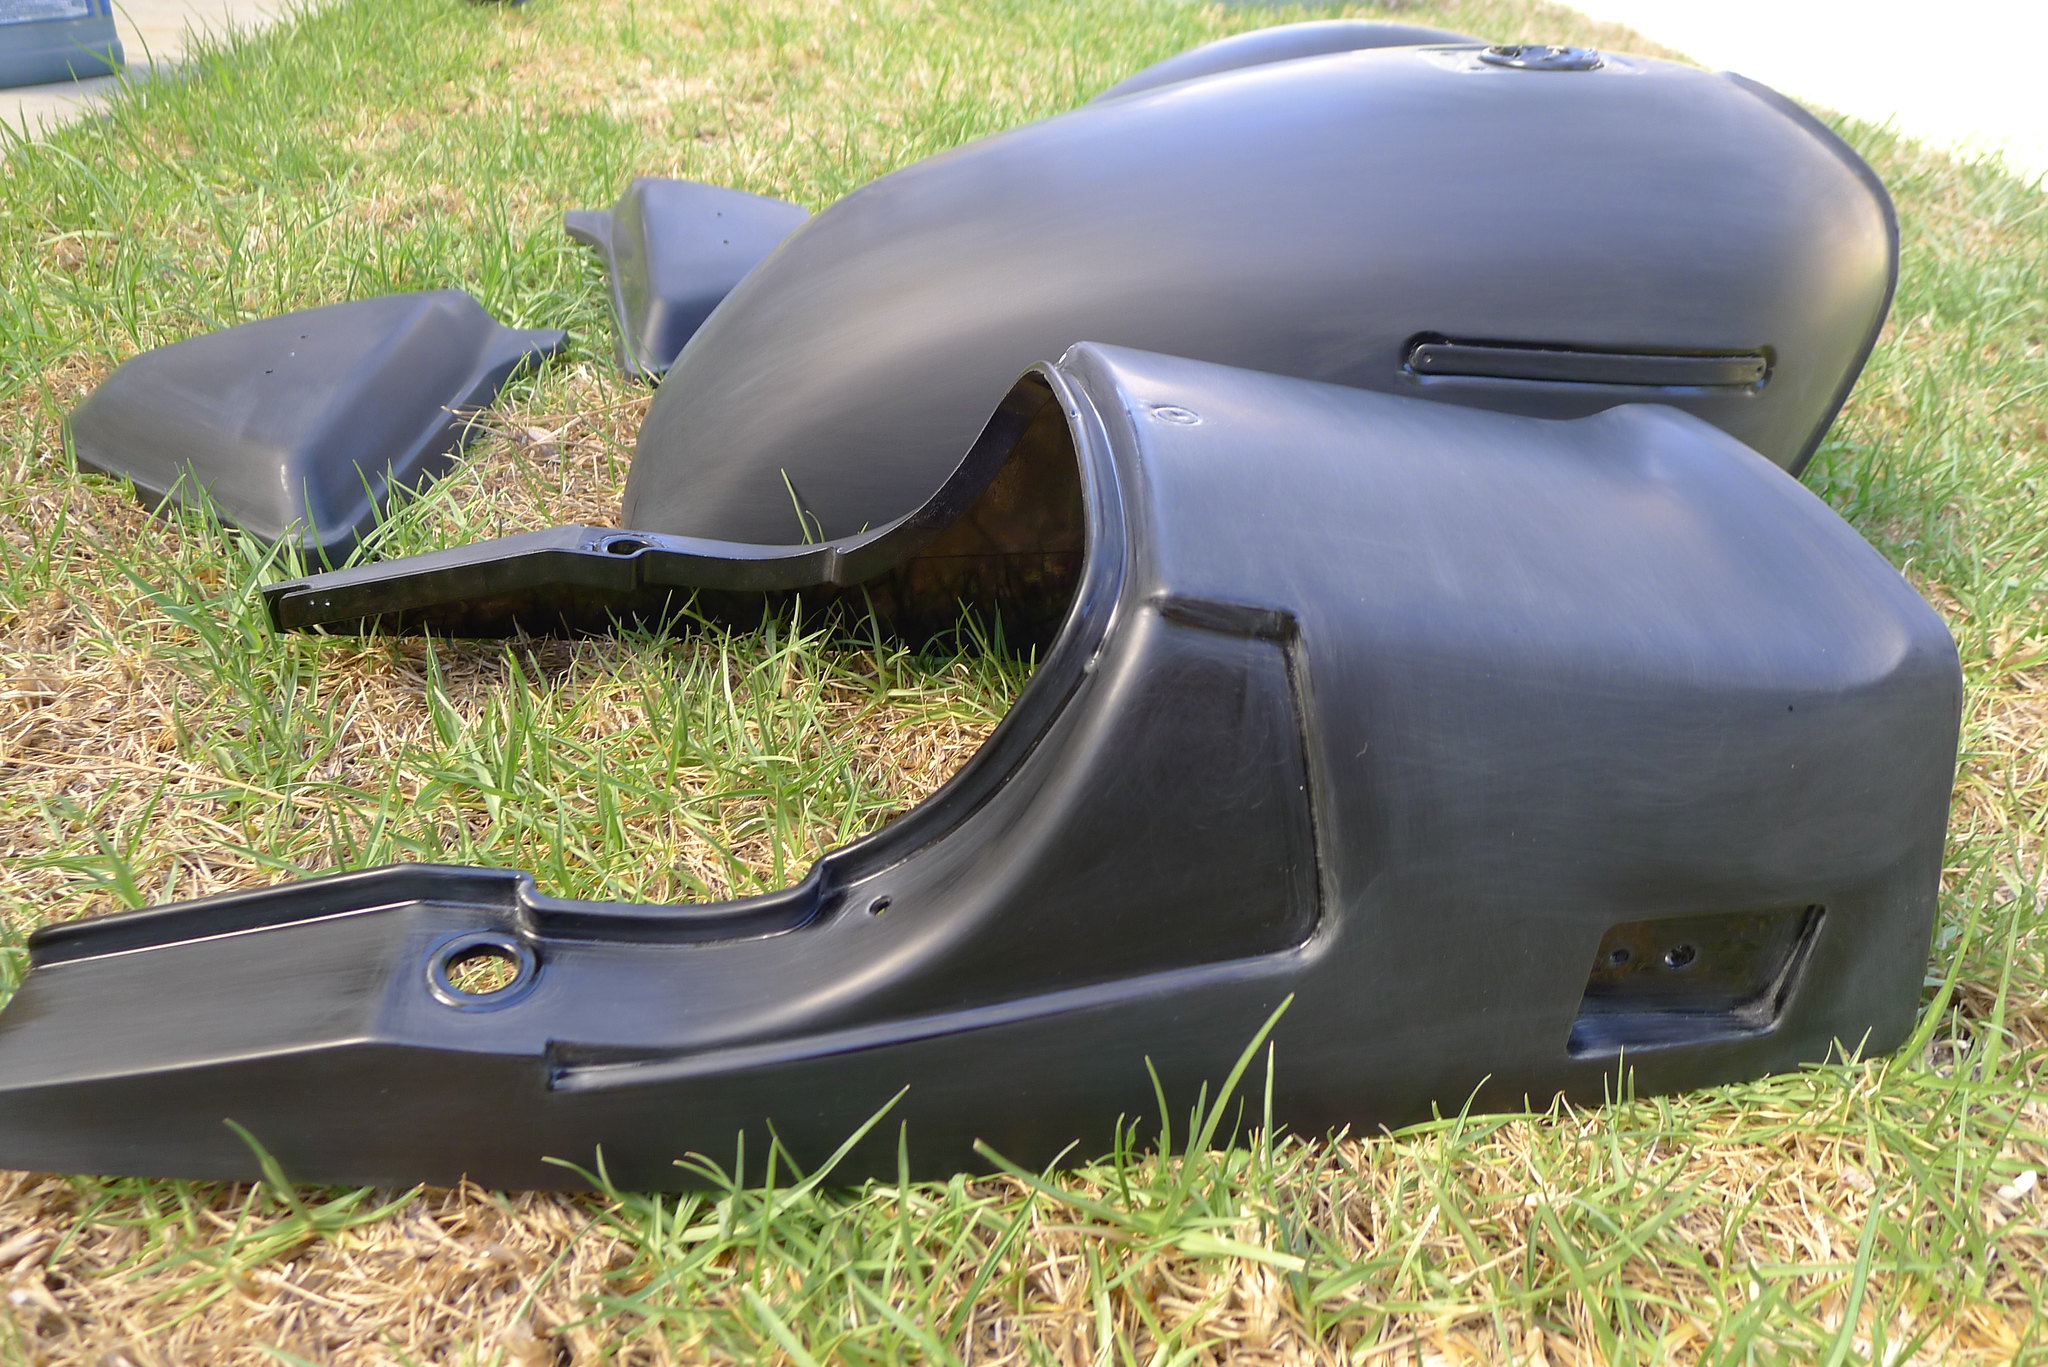
Bodywork done, epoxy primer applied, and color sanded flat...
Basecoat applied, clear sealer applied, and color sanded...
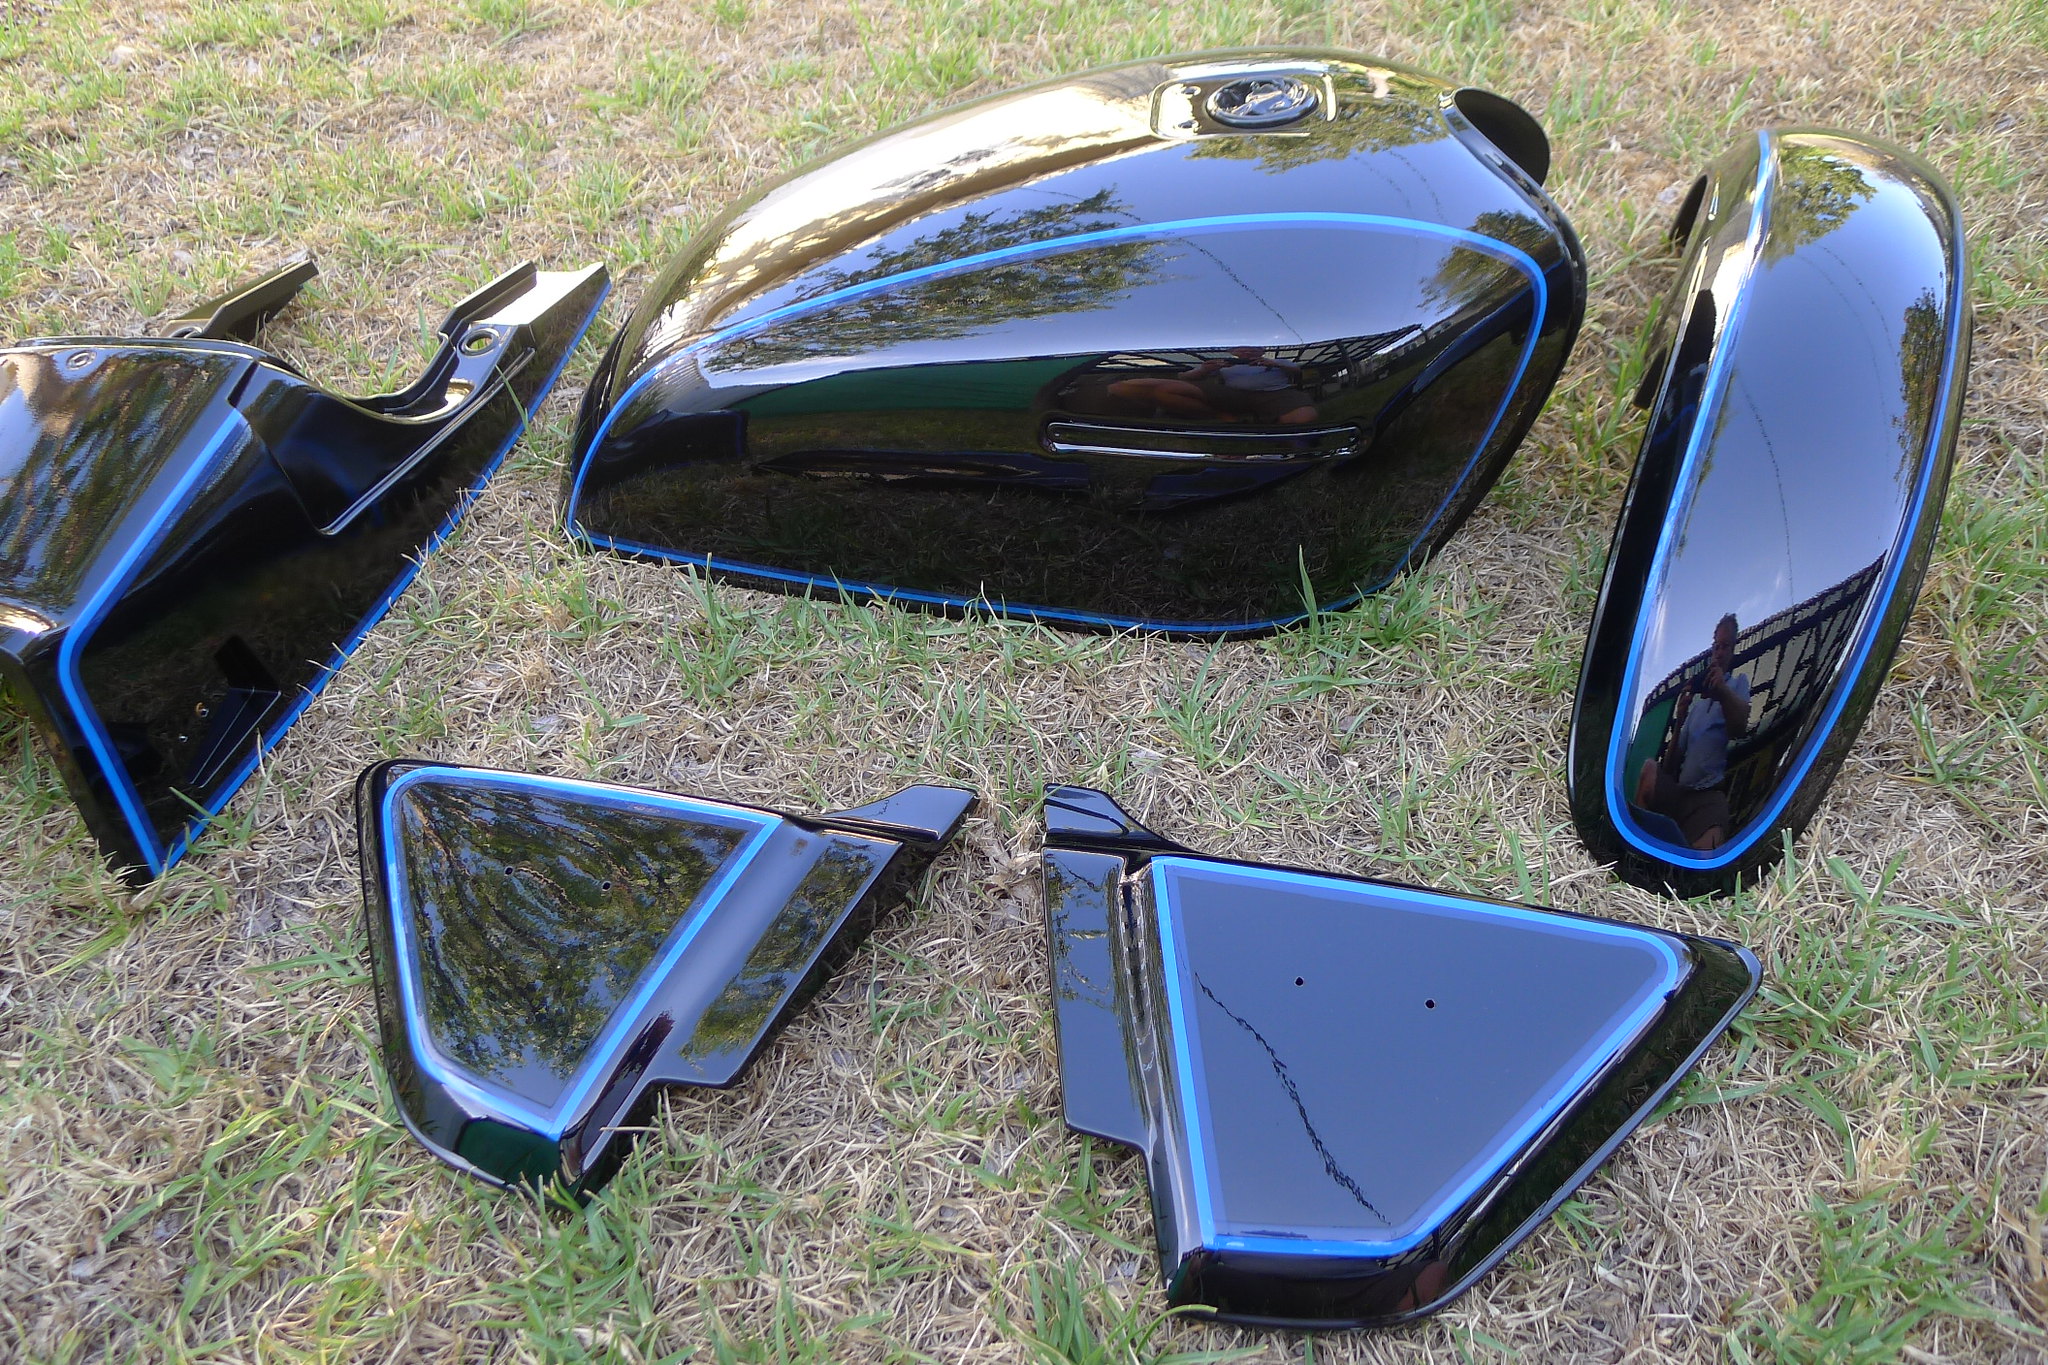
Stripes applied...
Final clear...
Ed
Carb O-ring Kits : www.kzrider.com/forum/3-carburetor/61807...-o-ring-kits?start=0
www.kzrider.com/forum/faq-wiki/618026-new-owner-things-to-know
1981 KZ750E2
www.kzrider.com/forum/11-projects/604901...z750e-project-thread
Carb O-ring Kits : www.kzrider.com/forum/3-carburetor/61807...-o-ring-kits?start=0
www.kzrider.com/forum/faq-wiki/618026-new-owner-things-to-know
1981 KZ750E2
www.kzrider.com/forum/11-projects/604901...z750e-project-thread
Last edit: 25 Mar 2023 10:07 by Nessism.
The following user(s) said Thank You: Injected, ronnieV, ThatGPzGuy, TexasKZ, Street Fighter LTD, sf4t7, SWest, Scirocco and 4 other people also said thanks.
Please Log in or Create an account to join the conversation.
- ronnieV
-

- Offline
- Sustaining Member
-

Registered
- Posts: 482
- Thanks: 563
Re: Body Work Painting
25 Mar 2023 10:10
Nice work,something I don't have the patience for.
77 ltd1000 80 ltd1000 78kz1000a ,02 red zrx 12r, 94 cb1000 big one ,03 valkyrie (my couch) 65 olds 442
The following user(s) said Thank You: Nessism
Please Log in or Create an account to join the conversation.
- Wookie58
-
- Offline
- Moderator
-

Registered
- Posts: 5738
- Thanks: 3542
Re: Body Work Painting
25 Mar 2023 10:12
Really nice work Ed
1982 KZ1000 Ltd
www.kzrider.com/forum/11-projects/617631...-82-begins?start=192
kzrider.com/filebase-alias?view=download...d-fault-diagnosis&ca
www.kzrider.com/forum/11-projects/617631...-82-begins?start=192
kzrider.com/filebase-alias?view=download...d-fault-diagnosis&ca
The following user(s) said Thank You: Nessism
Please Log in or Create an account to join the conversation.
- Nessism
-
Topic Author
- Offline
- Sustaining Member
-

Registered
- Posts: 7986
- Thanks: 3350
Re: Body Work Painting
25 Mar 2023 12:34Nice work,something I don't have the patience for.
Painting is FUN! A little sanding, a few sips of frothy beverage, a little more sanding, sip, sip, sip. Life is GOOD!
I have a super cool Sata minijet that's a pleasure to use. I also bought a Itawa (something or the other model) that's laying in wait for my next project. This one has a larger tip, so it should shoot thicker clears better. With the Sata, I need to thin the clear as much as possible, and that increases the tendency to create runs.
Here is something I painted a couple years back. Painting a frame, whether motorcycle or bicycle, requires careful thought to avoid overspray on adjacent tubes, which creates orange peel.

Ed
Carb O-ring Kits : www.kzrider.com/forum/3-carburetor/61807...-o-ring-kits?start=0
www.kzrider.com/forum/faq-wiki/618026-new-owner-things-to-know
1981 KZ750E2
www.kzrider.com/forum/11-projects/604901...z750e-project-thread
Carb O-ring Kits : www.kzrider.com/forum/3-carburetor/61807...-o-ring-kits?start=0
www.kzrider.com/forum/faq-wiki/618026-new-owner-things-to-know
1981 KZ750E2
www.kzrider.com/forum/11-projects/604901...z750e-project-thread
Please Log in or Create an account to join the conversation.
- Mikaw
-

- Offline
- Sustaining Member
-

Registered
- Posts: 4833
- Thanks: 1851
Re: Body Work Painting
25 Mar 2023 12:34
Thanks Ed. I find it amazing that a sanded/scuffed finish turns out smooth and shiny after clear is sprayed over it.
1976 KZ 900 A4
kzrider.com/forum/11-projects/613548-1976-kz-900-a4
1976 KZ 900 B1 LTD
1978 KZ 1000 B2 LTD
1980 KZ 750 E1
Kowledge Speaks, But Wisdom Listens.
Jimi Hendrix.
1976 KZ 900 B1 LTD
1978 KZ 1000 B2 LTD
1980 KZ 750 E1
Kowledge Speaks, But Wisdom Listens.
Jimi Hendrix.
Please Log in or Create an account to join the conversation.
- Injected
-

- Offline
- User
-

Registered
- Posts: 1449
- Thanks: 993
Re: Body Work Painting
25 Mar 2023 12:38
1978 KZ650B2 w 1197cc Z1 engine
1977 KZ650B1 w 750cc Spectre engine
1979 KZ650C3 w 831cc Hot Rod engine
1978 KZ650C2 w 762cc DFI project
1977 KZ650C1 stock restoration project
1978 KZ650B2 modified project
1978 KZ650B2 Injected Drag 831cc
1980 Z1 Custom Frame Drag 1327cc
1981 Z50R Honda tow bike
1977 KZ650B1 w 750cc Spectre engine
1979 KZ650C3 w 831cc Hot Rod engine
1978 KZ650C2 w 762cc DFI project
1977 KZ650C1 stock restoration project
1978 KZ650B2 modified project
1978 KZ650B2 Injected Drag 831cc
1980 Z1 Custom Frame Drag 1327cc
1981 Z50R Honda tow bike
The following user(s) said Thank You: Nessism, Warren3200gt
Please Log in or Create an account to join the conversation.
- Nessism
-
Topic Author
- Offline
- Sustaining Member
-

Registered
- Posts: 7986
- Thanks: 3350
Re: Body Work Painting
25 Mar 2023 12:56No need to guess!
Cliff notes summary...
Strip old paint
Bodywork
Epoxy primer/sealer
Base coat
Clear coat
Decals
More clear coat
Ed
Carb O-ring Kits : www.kzrider.com/forum/3-carburetor/61807...-o-ring-kits?start=0
www.kzrider.com/forum/faq-wiki/618026-new-owner-things-to-know
1981 KZ750E2
www.kzrider.com/forum/11-projects/604901...z750e-project-thread
Carb O-ring Kits : www.kzrider.com/forum/3-carburetor/61807...-o-ring-kits?start=0
www.kzrider.com/forum/faq-wiki/618026-new-owner-things-to-know
1981 KZ750E2
www.kzrider.com/forum/11-projects/604901...z750e-project-thread
Please Log in or Create an account to join the conversation.
- ronnieV
-

- Offline
- Sustaining Member
-

Registered
- Posts: 482
- Thanks: 563
Re: Body Work Painting
25 Mar 2023 12:57
Forgot sip sip
77 ltd1000 80 ltd1000 78kz1000a ,02 red zrx 12r, 94 cb1000 big one ,03 valkyrie (my couch) 65 olds 442
The following user(s) said Thank You: Nessism
Please Log in or Create an account to join the conversation.
- Warren3200gt
-

- Offline
- User
-

Registered
- Posts: 1698
- Thanks: 889
Re: Body Work Painting
25 Mar 2023 13:00 - 25 Mar 2023 13:03
But are you sure guys? I have it on good authority form reputable painters............
Ah no sorry I forgot that's **********.
Ah no sorry I forgot that's **********.
Last edit: 25 Mar 2023 13:03 by Warren3200gt.
Please Log in or Create an account to join the conversation.
- Nessism
-
Topic Author
- Offline
- Sustaining Member
-

Registered
- Posts: 7986
- Thanks: 3350
Re: Body Work Painting
25 Mar 2023 13:16
The bicycle frame uses painted on graphics. That's fun to paint...NOT. I created a stencil mask, air brushed the graphics on, then prayed for no bleed-through, under the mask. It can get stressful, because the base coat has a critical recoat time too, and fussing with painted on graphics can burn down the clock...
Ed
Carb O-ring Kits : www.kzrider.com/forum/3-carburetor/61807...-o-ring-kits?start=0
www.kzrider.com/forum/faq-wiki/618026-new-owner-things-to-know
1981 KZ750E2
www.kzrider.com/forum/11-projects/604901...z750e-project-thread
Carb O-ring Kits : www.kzrider.com/forum/3-carburetor/61807...-o-ring-kits?start=0
www.kzrider.com/forum/faq-wiki/618026-new-owner-things-to-know
1981 KZ750E2
www.kzrider.com/forum/11-projects/604901...z750e-project-thread
Please Log in or Create an account to join the conversation.
- Wheelhop
-

- Offline
- Sustaining Member
-

Registered
- Posts: 523
- Thanks: 306
Re: Body Work Painting
25 Mar 2023 14:47
Ed you need to move to middle of country so I can ship my carbs and body parts to you less expensively.
1978 KZ 1000B (73 tribute)
1977 KZ1000 project
1976 KZ 900
1976 KV 75
1976 Honda Elsinore MT250
1974 Z1 900 project
1971 Honda CT70
2000 ZRX 1100
1977 KZ1000 project
1976 KZ 900
1976 KV 75
1976 Honda Elsinore MT250
1974 Z1 900 project
1971 Honda CT70
2000 ZRX 1100
Please Log in or Create an account to join the conversation.
- Injected
-

- Offline
- User
-

Registered
- Posts: 1449
- Thanks: 993
Re: Body Work Painting
25 Mar 2023 18:35
Round tube frames are a pain, I flip them over and do the underside first as I am always forgetting to get to parts of them. That way I at least get one coat if I miss a spot when doing the top side tubes.
1978 KZ650B2 w 1197cc Z1 engine
1977 KZ650B1 w 750cc Spectre engine
1979 KZ650C3 w 831cc Hot Rod engine
1978 KZ650C2 w 762cc DFI project
1977 KZ650C1 stock restoration project
1978 KZ650B2 modified project
1978 KZ650B2 Injected Drag 831cc
1980 Z1 Custom Frame Drag 1327cc
1981 Z50R Honda tow bike
1977 KZ650B1 w 750cc Spectre engine
1979 KZ650C3 w 831cc Hot Rod engine
1978 KZ650C2 w 762cc DFI project
1977 KZ650C1 stock restoration project
1978 KZ650B2 modified project
1978 KZ650B2 Injected Drag 831cc
1980 Z1 Custom Frame Drag 1327cc
1981 Z50R Honda tow bike
Please Log in or Create an account to join the conversation.
Moderators: Street Fighter LTD


