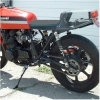
hit bump....seal went boom...
- cbrianroll
-
Topic Author
- Offline
- User
-

Registered
- Posts: 82
- Thanks: 6
hit bump....seal went boom...
26 Aug 2017 15:11
So I need to replace seals now and not having the best luck finding out what else to replace since I'm tearing them apart. First time for me replacing fork seals...any advice on what to replace and special tools needed would be appreciated, thanks.
1980 kz550ltd
Please Log in or Create an account to join the conversation.
- SWest
-

- Offline
- Sustaining Member
-

Registered
- 10 22 2014
- Posts: 23617
- Thanks: 2985
Re: hit bump....seal went boom...
26 Aug 2017 15:20
What bike?
Steve
Steve
Z1b1000 1975 Z1b
kzrider.com/forum/11-projects/598262-kz-...-will-it-live#672882
kzrider.com/forum/2-engine/597654-poser?start=240#704229
kzrider.com/forum/11-projects/598262-kz-...-will-it-live#672882
kzrider.com/forum/2-engine/597654-poser?start=240#704229
Please Log in or Create an account to join the conversation.
- cbrianroll
-
Topic Author
- Offline
- User
-

Registered
- Posts: 82
- Thanks: 6
Re: hit bump....seal went boom...
26 Aug 2017 16:03
Oops, that's embarrassing.....80 kz550ltd
1980 kz550ltd
Please Log in or Create an account to join the conversation.
- 650ed
-

- Offline
- User
-

Registered
- Posts: 15334
- Thanks: 2833
Re: hit bump....seal went boom...
27 Aug 2017 10:33
The model designation for the 1980 KZ550 LTD is KZ550-C1.
For a parts diagram with part numbers take a look at www.powersportswarehouse.com/p/Kawasaki#...0-C1-1980/080122D-10
For repair instructions take a look at the Kawasaki Service Manual that covers the KZ550-C1. It can be found at www.kzrider.com/modules/ServiceManuals/Kz400500550_79to83.pdf
Ed
For a parts diagram with part numbers take a look at www.powersportswarehouse.com/p/Kawasaki#...0-C1-1980/080122D-10
For repair instructions take a look at the Kawasaki Service Manual that covers the KZ550-C1. It can be found at www.kzrider.com/modules/ServiceManuals/Kz400500550_79to83.pdf
Ed
1977 KZ650-C1 Original Owner - Stock (with additional invisible FIAMM horn)
Please Log in or Create an account to join the conversation.
- jakedude
-

- Offline
- User
-

Registered
- Posts: 201
- Thanks: 30
Re: hit bump....seal went boom...
27 Aug 2017 10:52
I have changed the fork seals on several bikes. The job isn't difficult, but for me it has always been messy with fork oil everywhere. Wear clothes you don't care about.
Nothing lasts, nothing is finished, and nothing is perfect.
Please Log in or Create an account to join the conversation.
- cbrianroll
-
Topic Author
- Offline
- User
-

Registered
- Posts: 82
- Thanks: 6
Re: hit bump....seal went boom...
27 Aug 2017 17:18
Sorry for the late response guys, and thanks for the input. Doesn't seem like rocket science lol, just thought I read to replace something else since it's open and I can't find it...aarrgg!! And wondering if I can make a tool or if I gotta buy one. Busy weekend so all I've done is drain oil and pull spring. The exciting part was when my dog knock the bike over on me and now it's got a few little dents in the tank. Might be time to build a proper bike table.
1980 kz550ltd
Please Log in or Create an account to join the conversation.
- 650ed
-

- Offline
- User
-

Registered
- Posts: 15334
- Thanks: 2833
Re: hit bump....seal went boom...
27 Aug 2017 17:32
If you find that the holes in the top of the fork cylinders are round (like my KZ650-C1) rather than hexagonal you may want to make a tool to hold them if you plan to disassemble the forks. You can make a tool by super gluing a 9/16” OUTSIDE diameter vacuum cap to a 3/8” steel rod and putting other end of the rod through a big bolt to make a t-handle to give you a way to hold the rod. I put a clear tube on the rod before gluing on the cap to protect the fork top threads. The friction of the rubber vacuum cap will hold the fork cylinder, but you must apply much force while someone else uses an impact wrench to loosen the fork cylinder bolt. The images below show the tool I made.
As an alternative, you can buy a tool. Take a look at the center tool in the top row at www.racetech.com/page/id/70 . Ed
As an alternative, you can buy a tool. Take a look at the center tool in the top row at www.racetech.com/page/id/70 . Ed
1977 KZ650-C1 Original Owner - Stock (with additional invisible FIAMM horn)
Please Log in or Create an account to join the conversation.
- cbrianroll
-
Topic Author
- Offline
- User
-

Registered
- Posts: 82
- Thanks: 6
Re: hit bump....seal went boom...
27 Aug 2017 20:38
Awesome! Thanks much! Ordering parts tomorrow.
1980 kz550ltd
Please Log in or Create an account to join the conversation.
- martin_csr
-

- Offline
- User
-

Registered
- Posts: 7994
- Thanks: 1644
Re: hit bump....seal went boom...
28 Aug 2017 05:52 - 29 Aug 2017 04:54
Use a flashlight to look down inside the forks. The head of the damper rod (inner cylinder) might look like a 12-pt socket. If so, you might be able to fab a tool. some guys use a long bolt w a nut welded to the end. I used a LH threaded bolt/nuts w long ratchet extensions.
Use an 8mm hardened or brake caliper socket to remove the bottom allen bolts.
a cheap tool could twist & break or damage the head of the fastener.
To pull the seals, an off-the-shelf seal puller form the auto parts store should work fine. If you've never pulled a seal before, you have to hook the inner metal ring encased within the rubber --- otherwise, you'll just end up destroying the rubber. Work at the end of a table with a small scrap of wood or something to protect the tubes which are easily gouged.
Air pressure note: the max psi listed on the fork tube label is not the operating pressure. I don't know the exact spec for your bike, but it's probably in the 7.5 - 14.5 psi range or thereabouts. In case the seals blew from over-pressurization.
1981 KZ650-CSR. the KZ550 Ltd is probably similar.
Last edit: 29 Aug 2017 04:54 by martin_csr.
Please Log in or Create an account to join the conversation.
- loudhvx
-

- Offline
- KZr Legend
-

Registered
- Posts: 10863
- Thanks: 1622
Re: hit bump....seal went boom...
28 Aug 2017 07:35
Replace the upper bushing if it's worn. If the upper bushing is worn, it will shorten the life of the new seal. Some forks don't have a removable upper bushing, but some/most/all ? 550's did.
1981 KZ550 D1 gpz.
Kz550 valve train warning.
Other links.
Kz550 valve train warning.
Other links.
Please Log in or Create an account to join the conversation.
- cbrianroll
-
Topic Author
- Offline
- User
-

Registered
- Posts: 82
- Thanks: 6
Re: hit bump....seal went boom...
29 Aug 2017 11:25
Thanks guys, hust got it all cleaned, nothing looks bad on the metal parts. I think i had 8 lbs in it. Well see if I screw this up lol
1980 kz550ltd
Please Log in or Create an account to join the conversation.
Moderators: Street Fighter LTD


